ASTER Technology NVR-B9004EW NVR User Manual NVR IPCAM manual
Shenzhen ASTER Technology Co., Limited NVR NVR IPCAM manual
UserManual.wiki
>
ASTER Technology
>
NVR B9004EW User Manual
User Manual
Navigation menu
Upload a User Manual
Namespaces
Wiki Guide
HTML
PDF
Info
Views
User Manual
Discussion / Help
Navigation
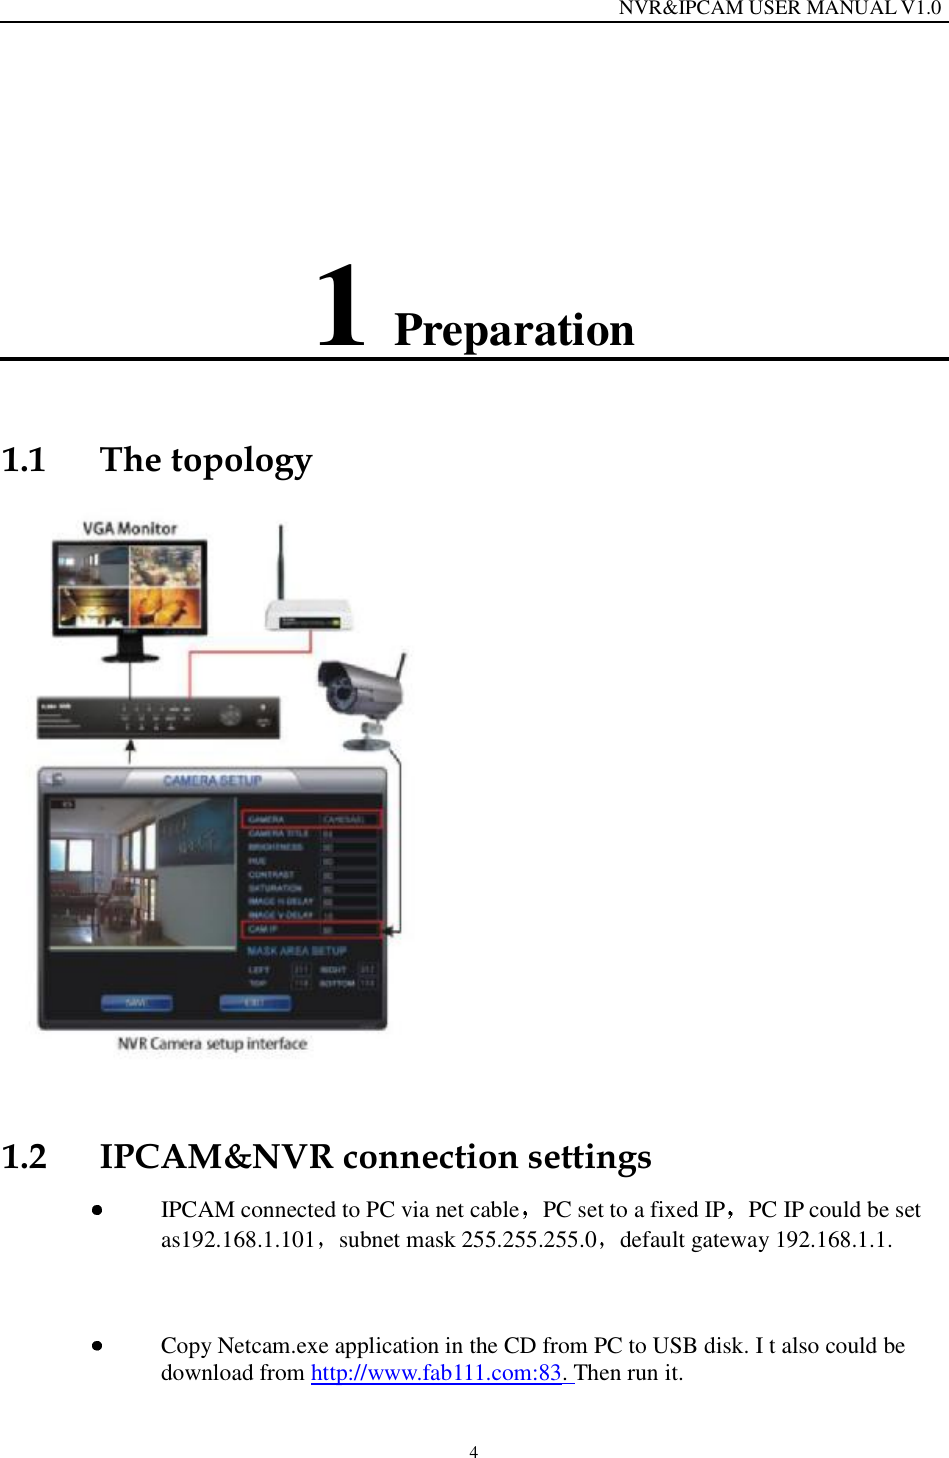
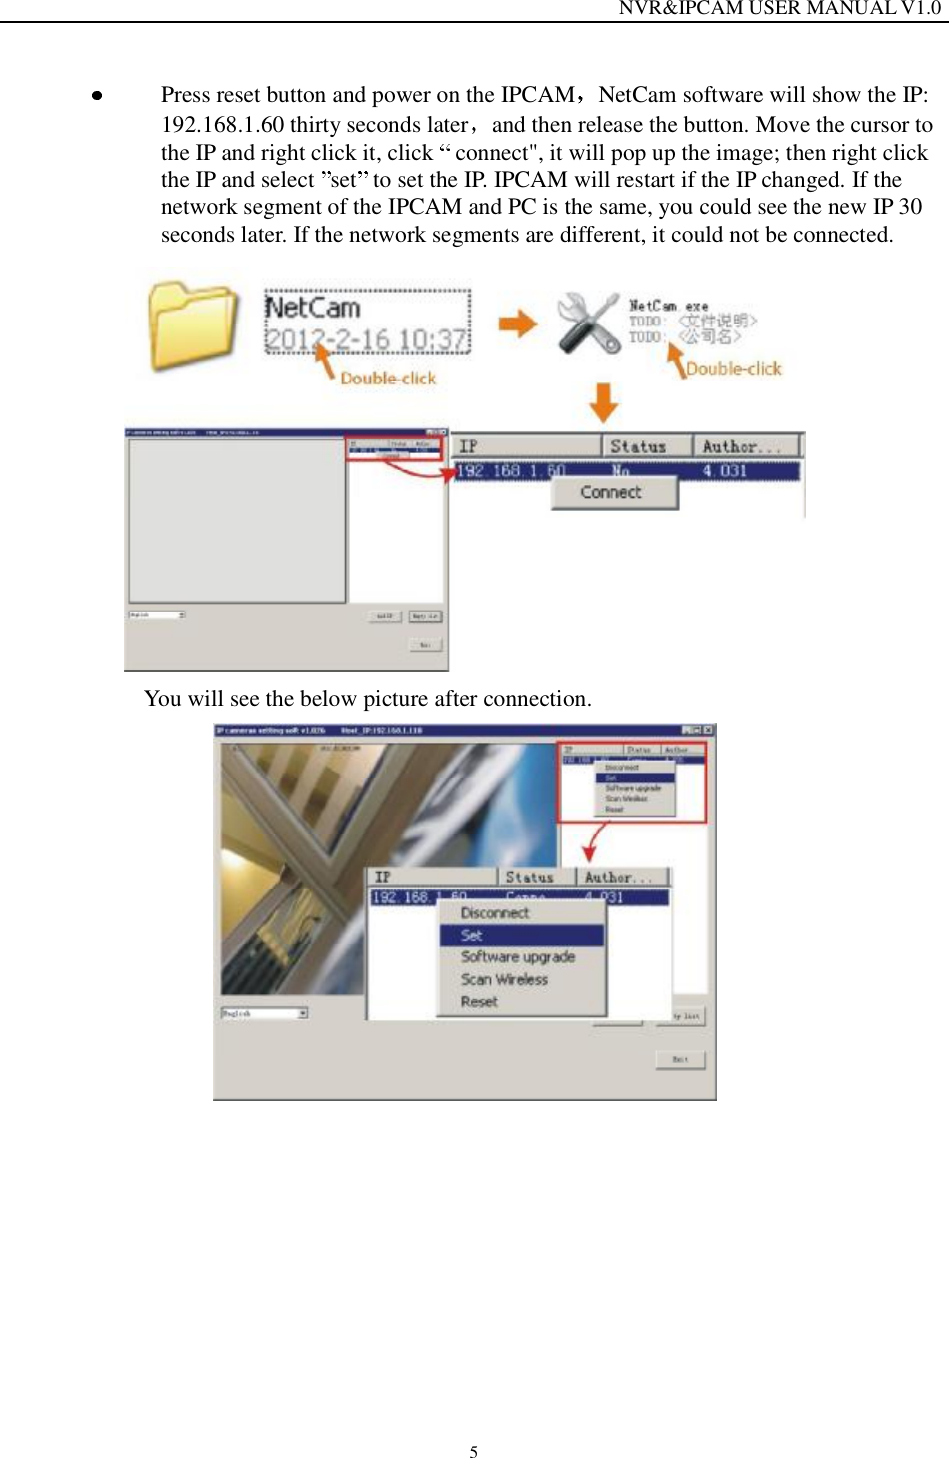
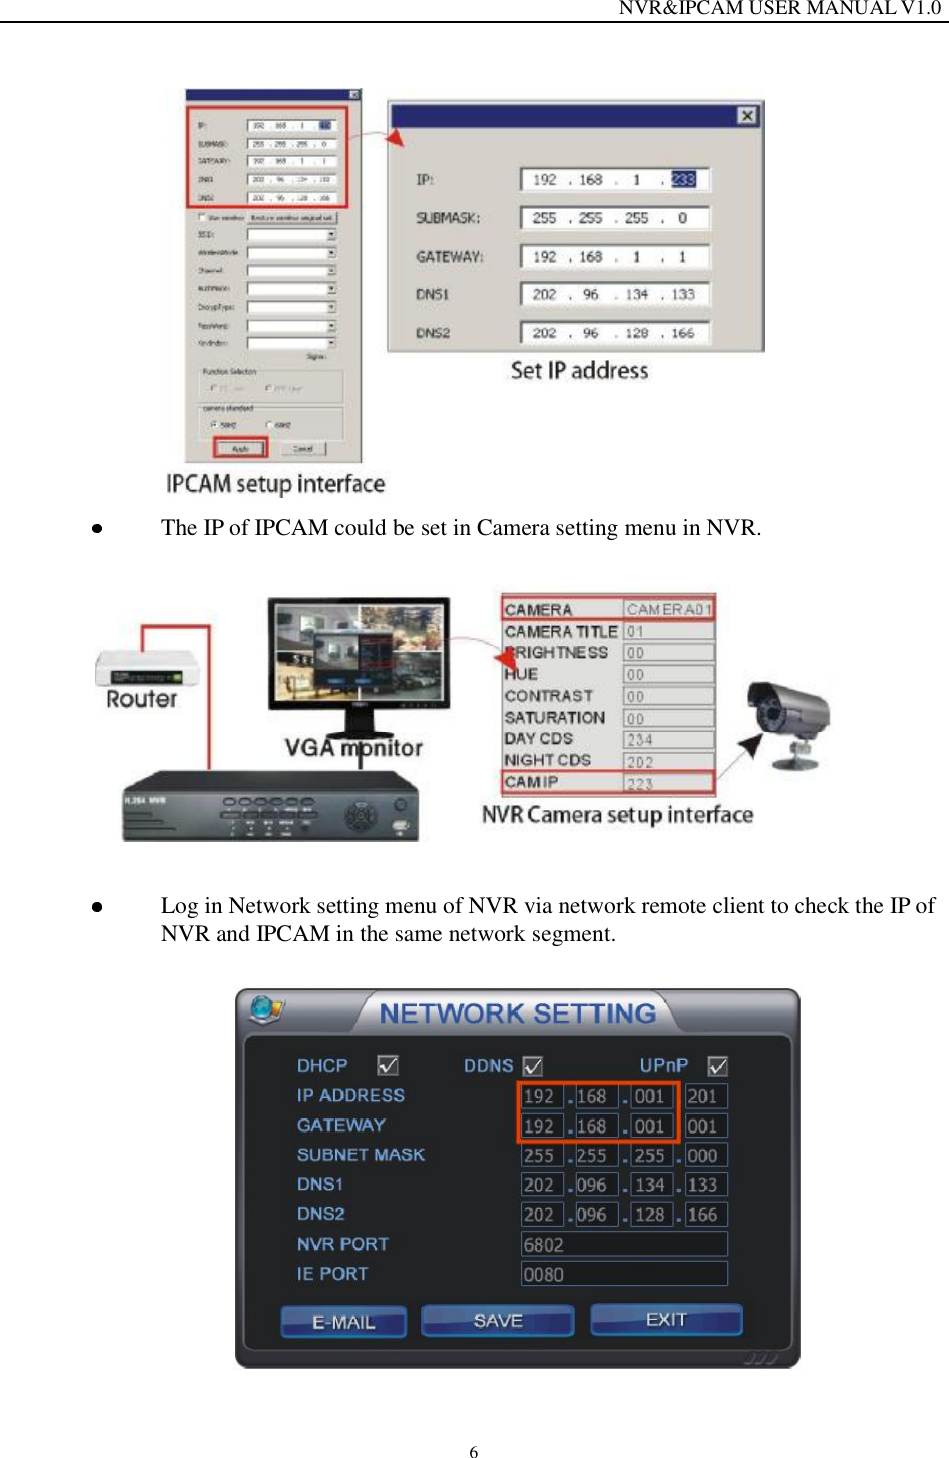

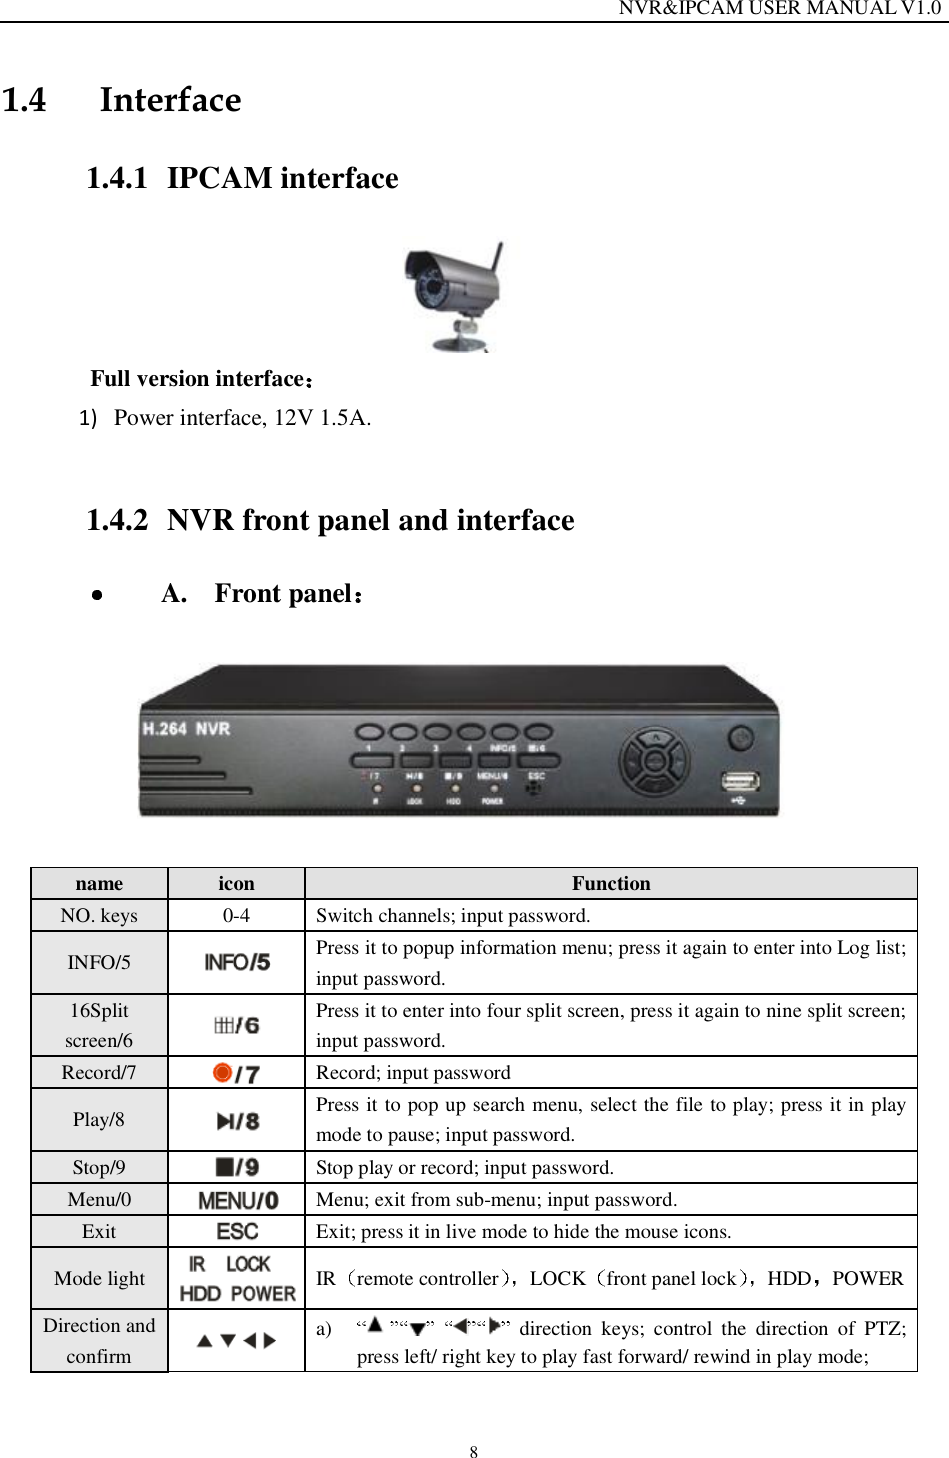


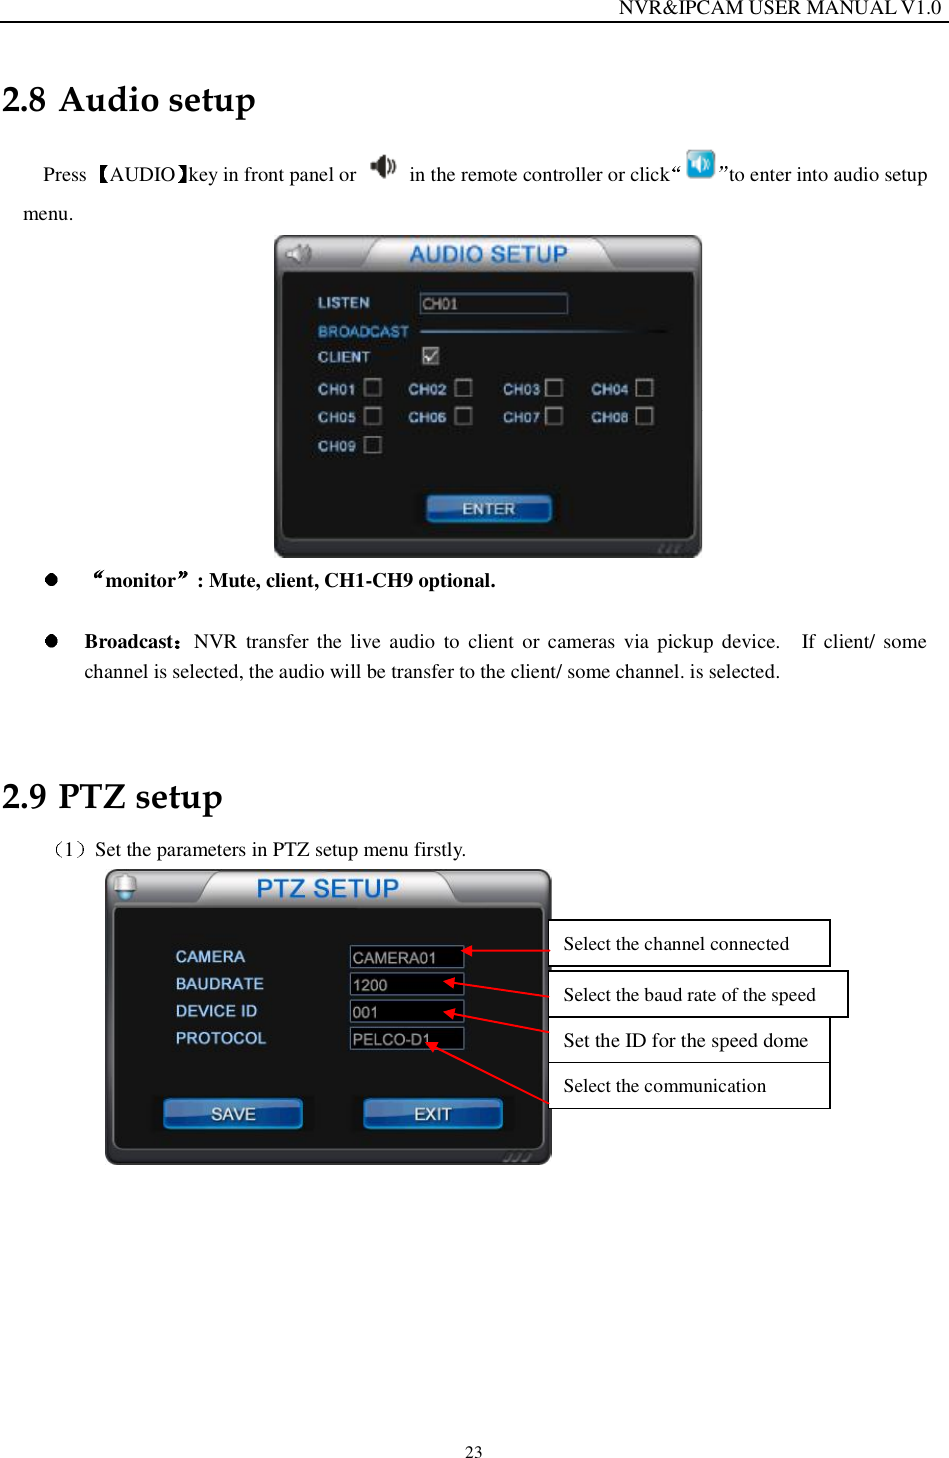
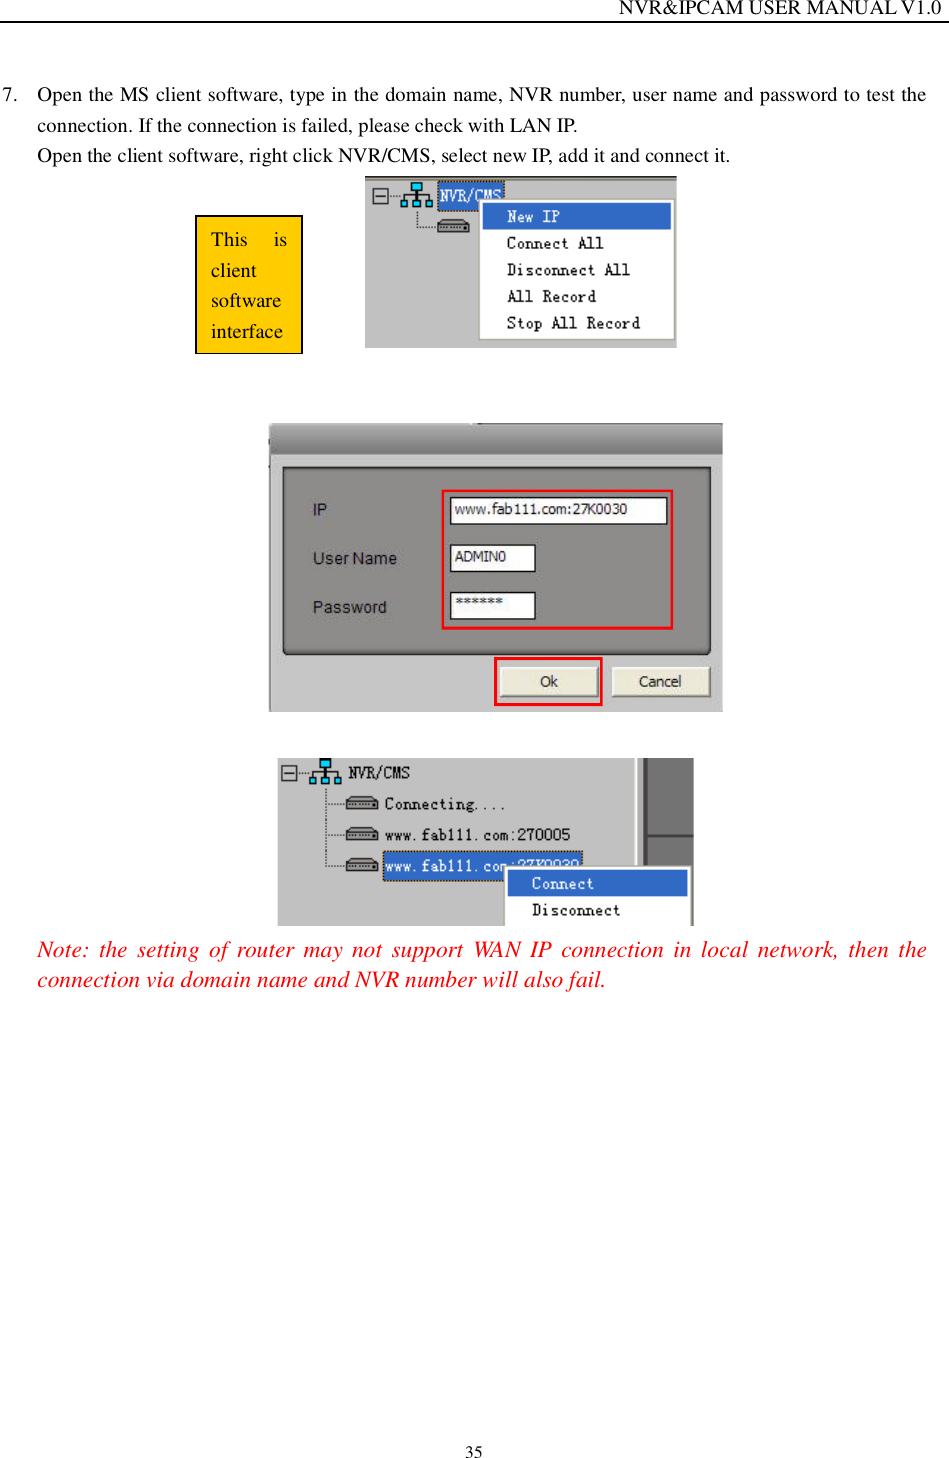
![NVR&IPCAM USER MANUAL V1.0 24 2After speed dome setup, please enter PTZ setup. Press the [PTZ] key or click to enter it. Then it will display "PTZ: CAM01 SPEED:16 DATA:00" in the screen. It means DVR is under PTZ status now. Press [PTZ] or [ESC] again to exit PTZ interface. When DVR is under PTZ status, it will display the mouse tool bar as below: Icons Name Description Direction key to move speed dome up, down, right and left. Rotate To make speed dome rotate automatically. Press it again to stop rotating. ¦±±³ Zoom in and zoom out preview To check the preset data already saved. Set To make preset setup. Close Shut off PTZ and exit PTZ interface. Modify parameters: You could use mouse or remote control to modify the preset data. Select the item which you want to modify by press [SPOT] key on remote control or click the item directly by mouse. Then modify the data by left/right click by mouse. Preset setup: Select the channel which is connect with speed dome](https://usermanual.wiki/ASTER-Technology/NVR-B9004EW/User-Guide-1889799-Page-24.png)