ATEN Technology IOGEAR GWA504 WIRELESS-G BROADBAND ROUTER User Manual GWA504 manual p65
ATEN Technology, Inc., dba IOGEAR WIRELESS-G BROADBAND ROUTER GWA504 manual p65
Contents
- 1. USER MANUAL 1
- 2. USER MANUAL 2
- 3. USER MNAUAL 3
- 4. USER MNAUAL 4
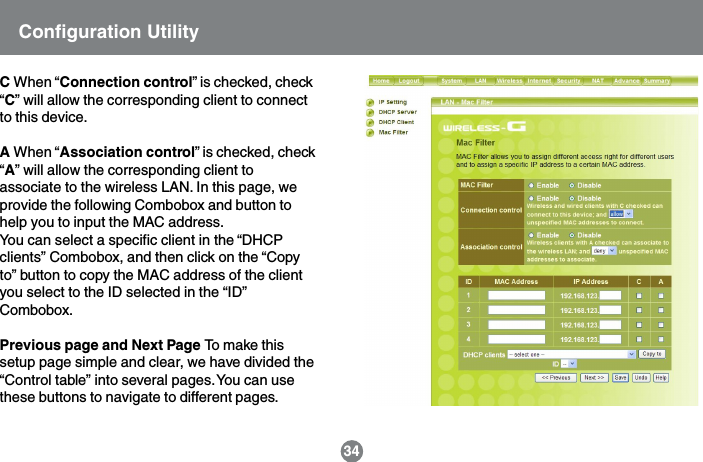
USER MANUAL 2