C and A HOOP-100 Hoop Camera User Manual rev 2
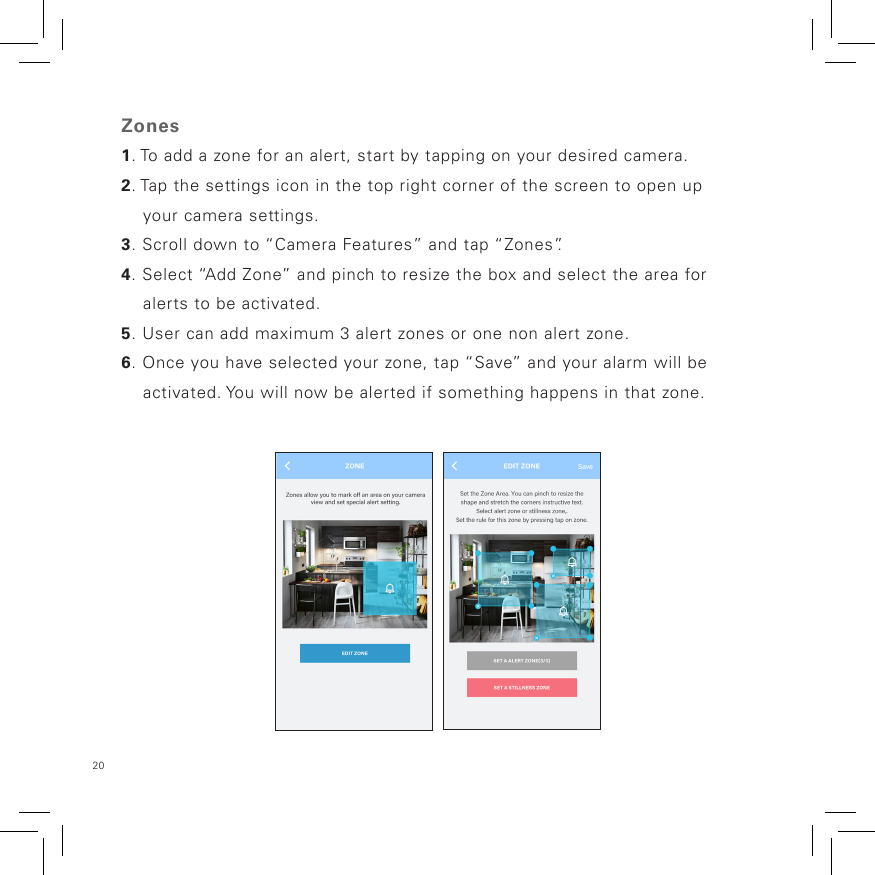
C&A; Marketing Inc. Hoop Camera Users Manual rev 2
UserManual.wiki
>
C and A
>
HOOP 100 User Manual
Users Manual rev 2.pdf
Navigation menu
Upload a User Manual
Namespaces
Wiki Guide
HTML
PDF
Info
Views
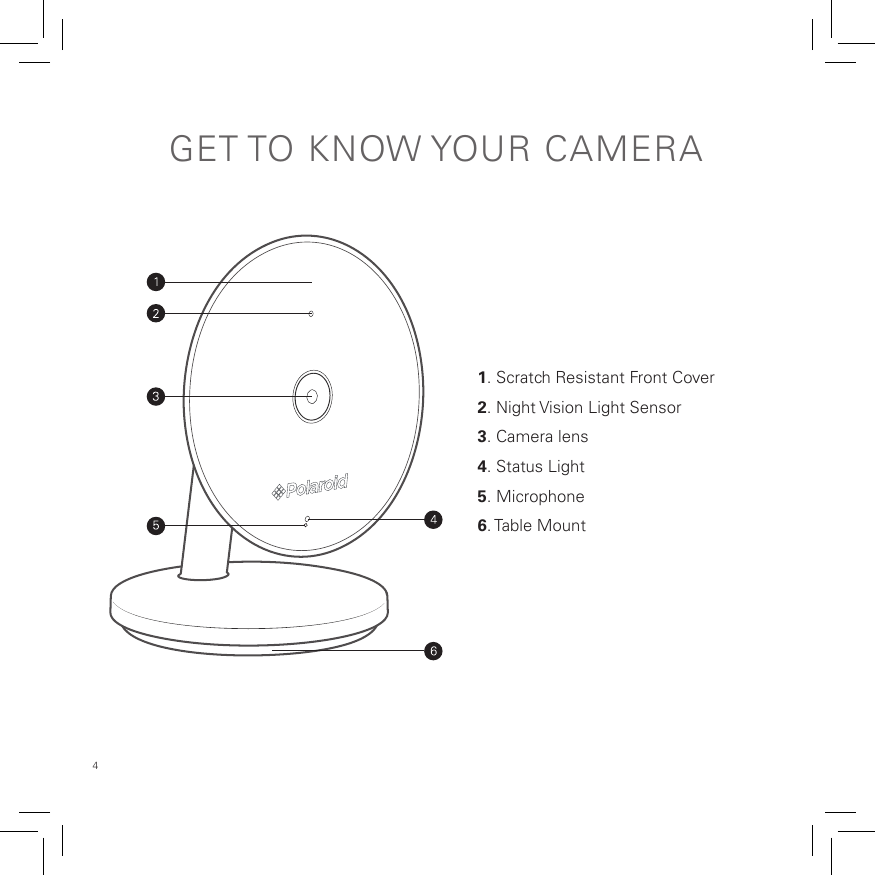
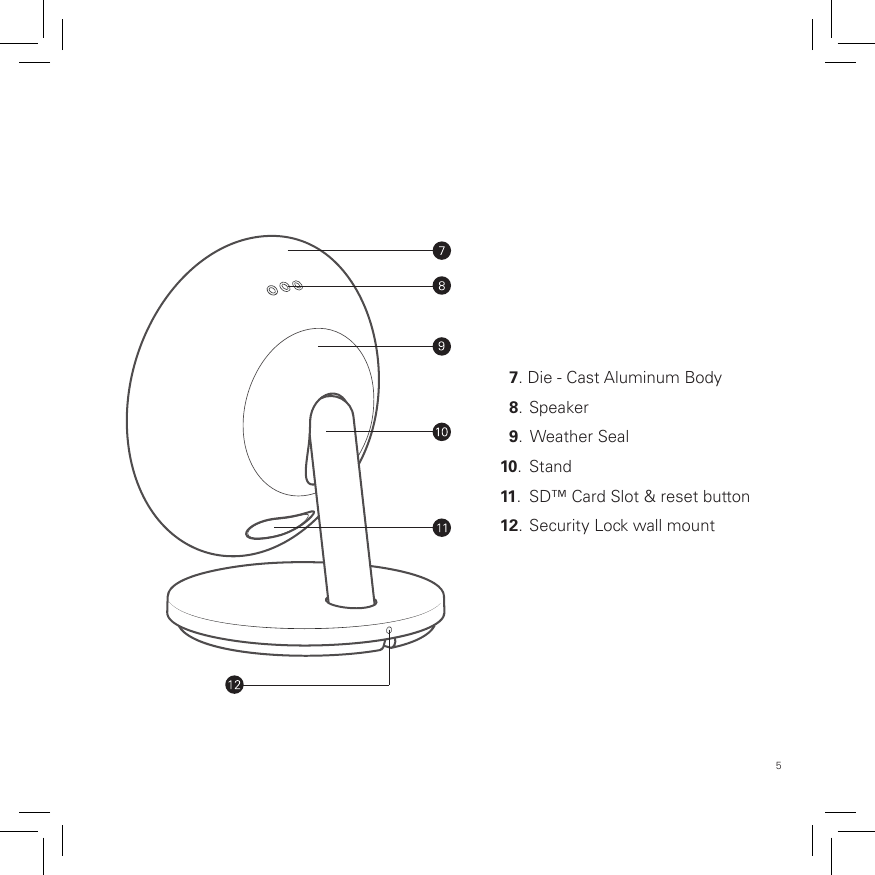
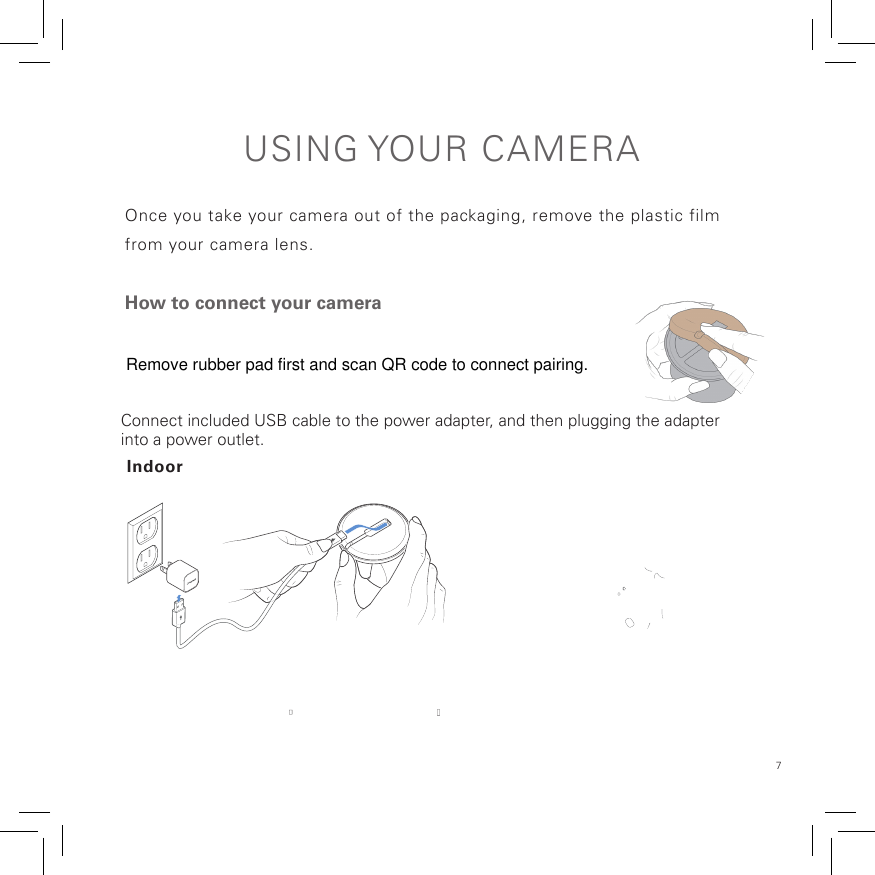
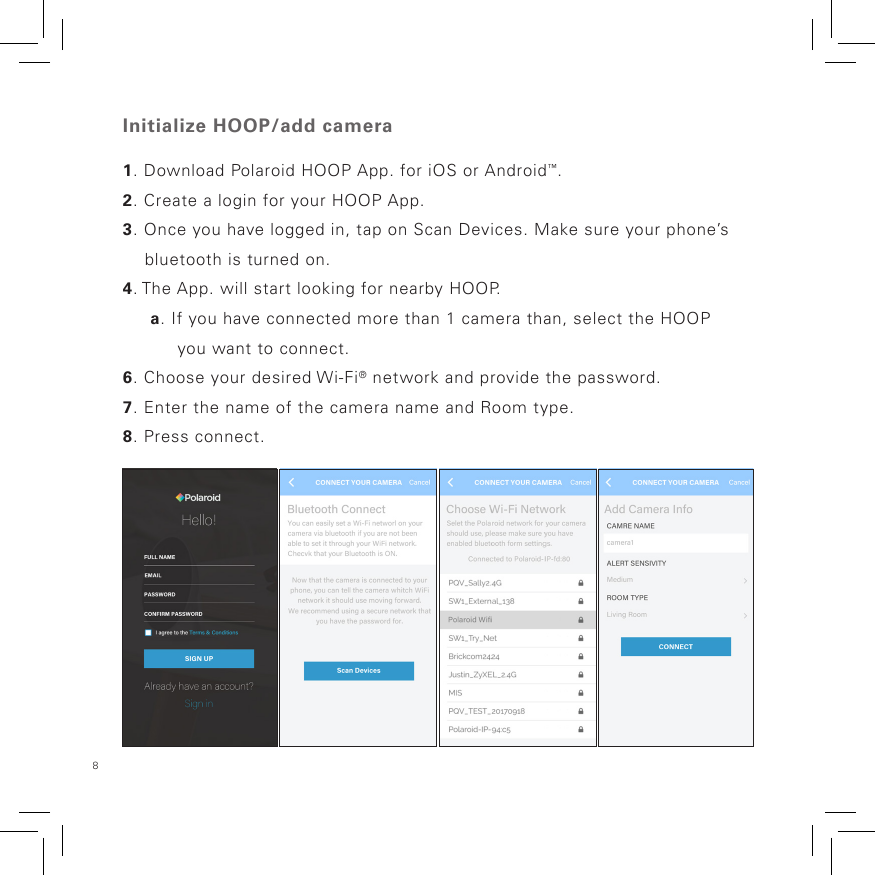
User Manual
Discussion / Help
Navigation


![14 Events1. Events are motion capture snapshots. To view your events, tap the alert icon (bell) in the bottom right corner of your screen.2. The Events page features two convenient ways to look through events: a. To view your events as grid press the grid option [image] b. To view your events as list press the list option [image]6. If someone has shared a camera with you, you can add the camera in the shared tab on the dashboard screen.](https://usermanual.wiki/C-and-A/HOOP-100/User-Guide-3736842-Page-14.png)