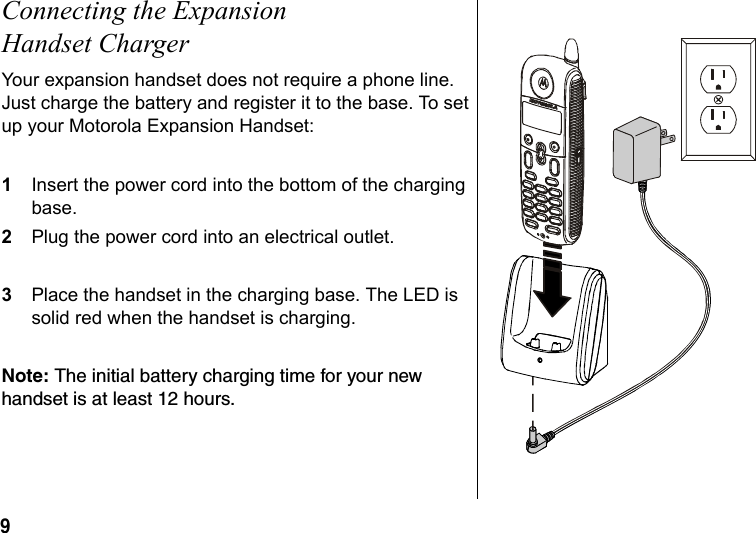
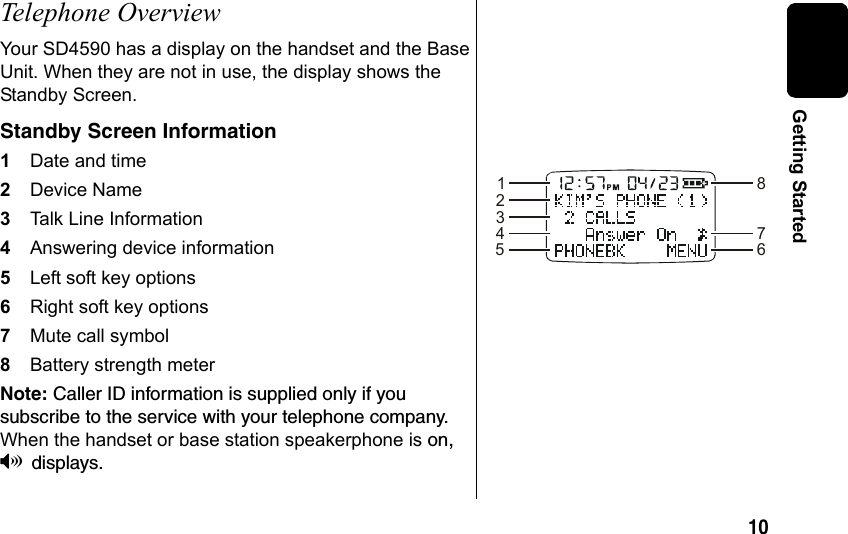
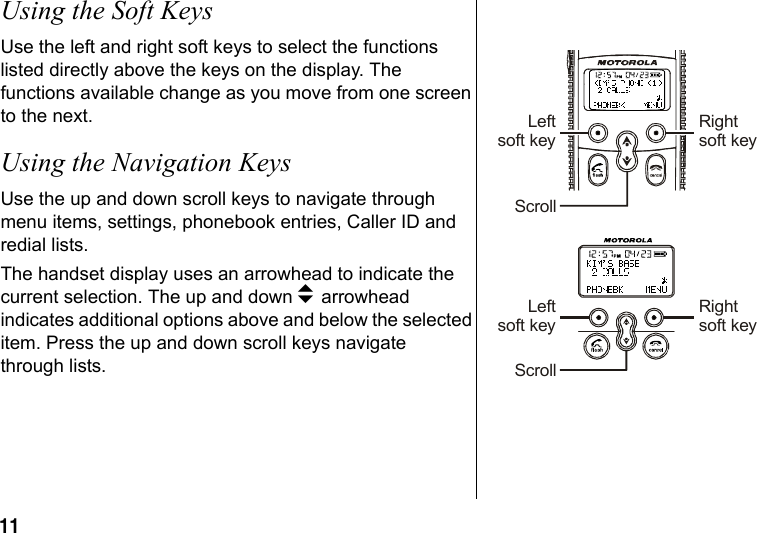
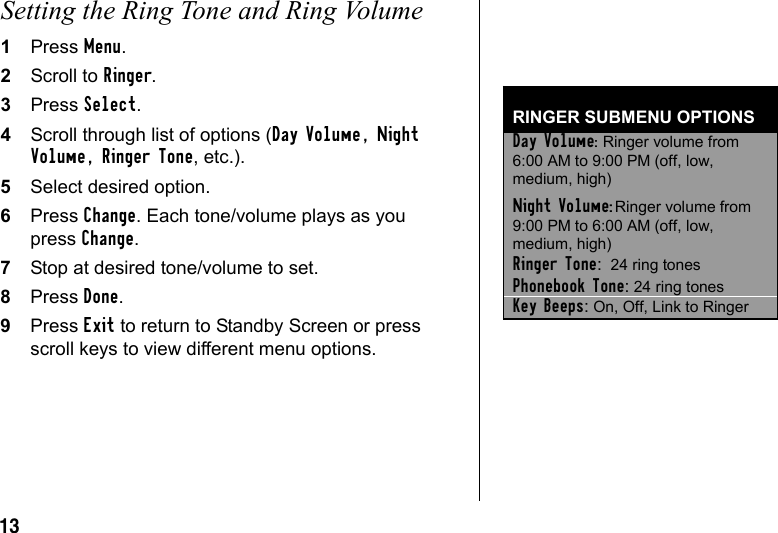
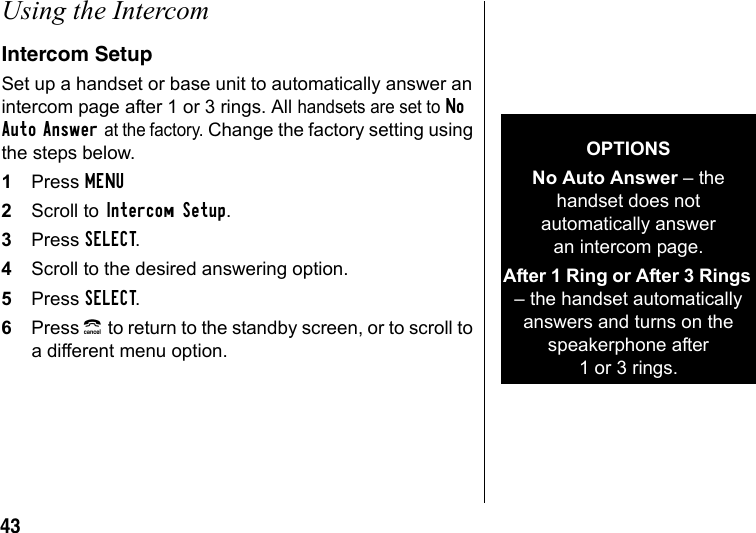
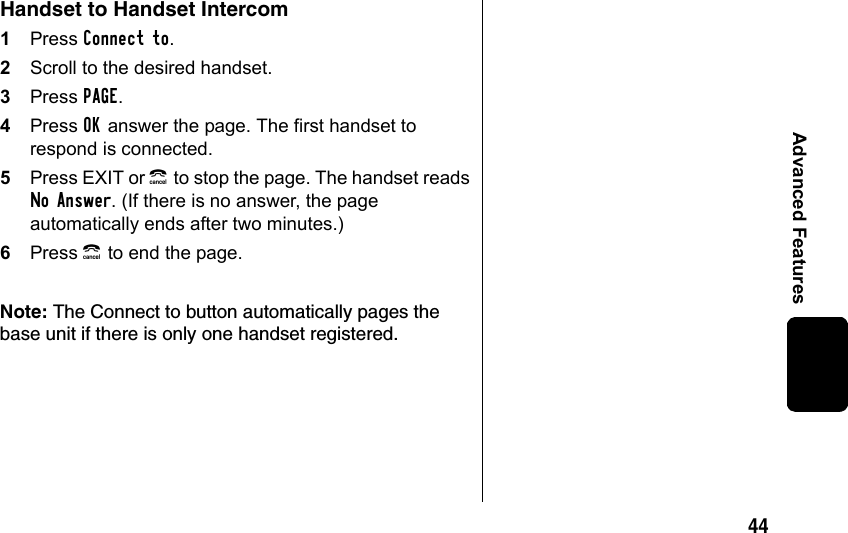
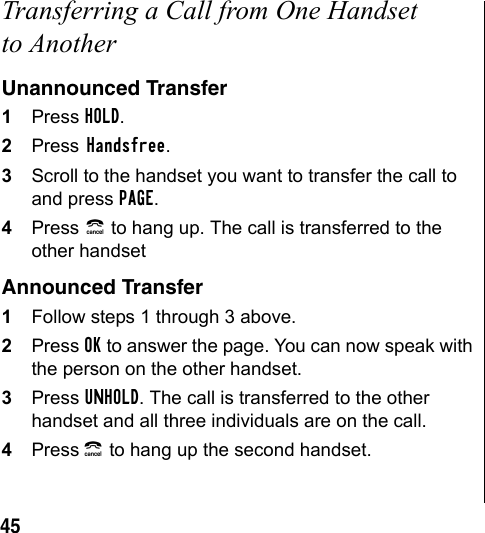
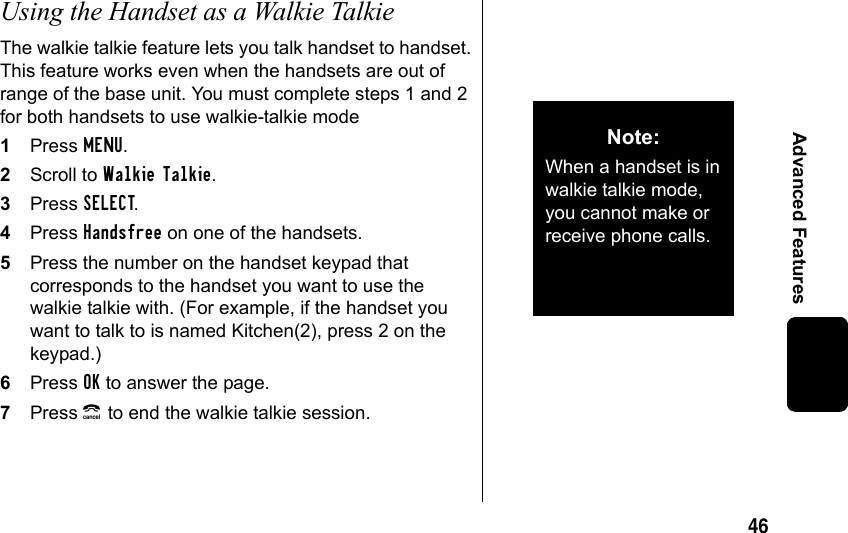
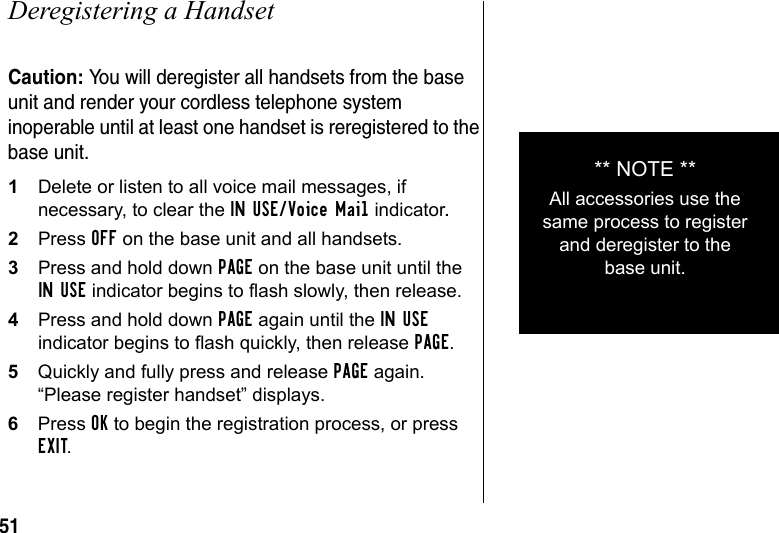
CCT Tech Advanced SD4581 2.4GHz FHSS Cordless Phone w/ CID & DAM User Manual SD4590 Book EN FC forPrint
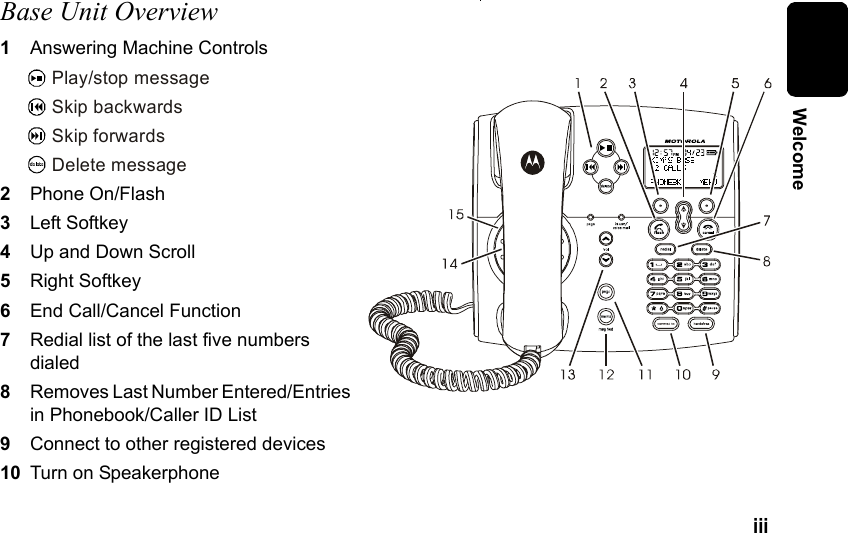
CCT Tech Advanced Products Limited 2.4GHz FHSS Cordless Phone w/ CID & DAM SD4590 Book EN FC forPrint
Contents
- 1. FCC Information
- 2. User Manual 1
- 3. User Manual 2
- 4. User Manual
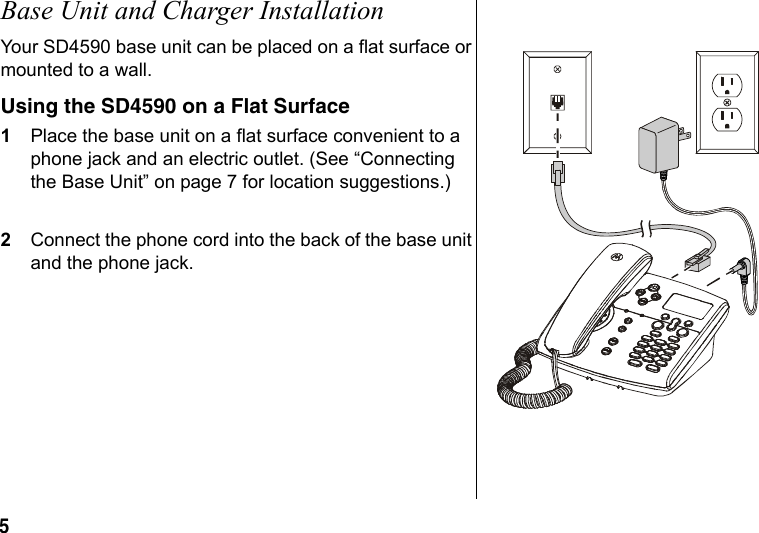
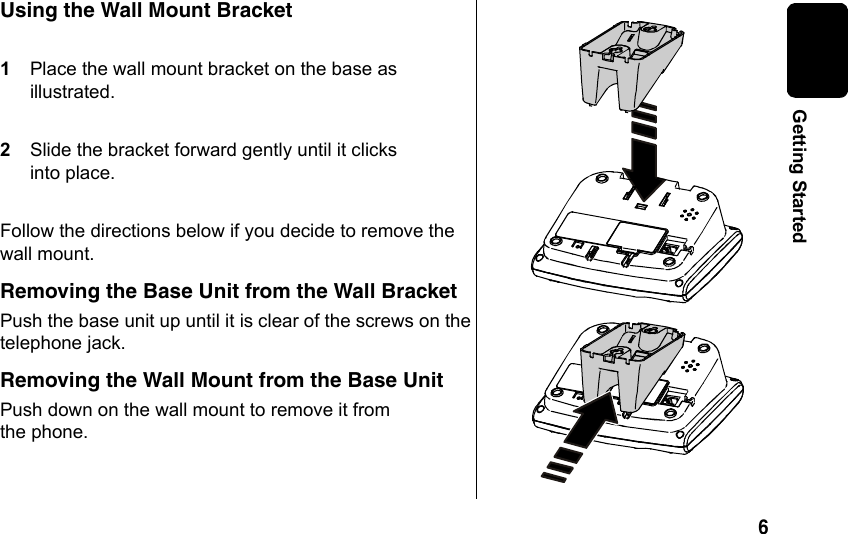
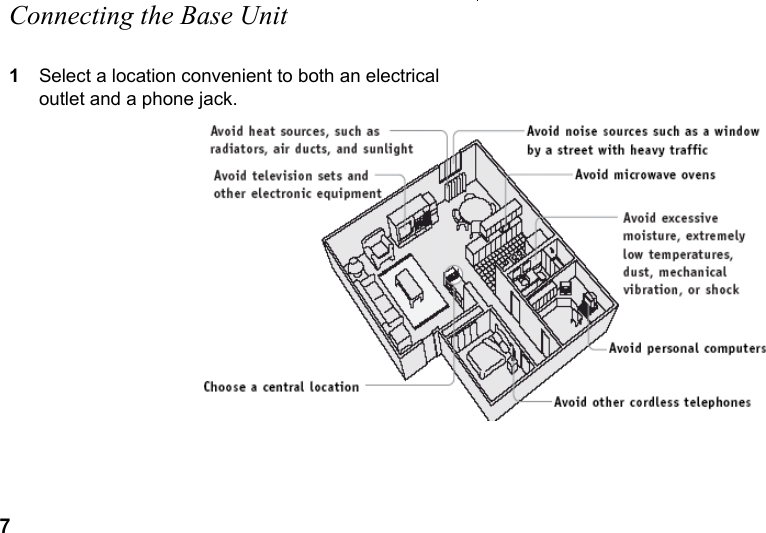
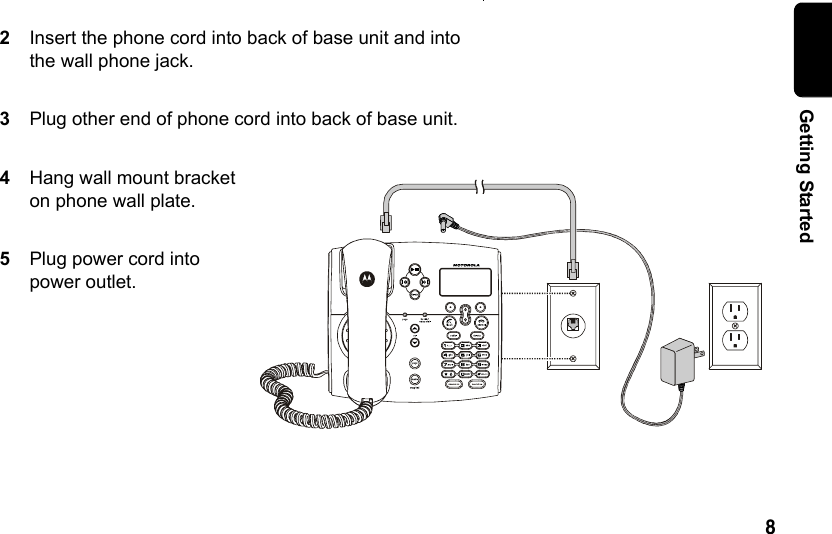
User Manual