DG Lab DG-150 MP Player User Manual
DG Lab Co., Ltd. MP Player Users Manual
UserManual.wiki
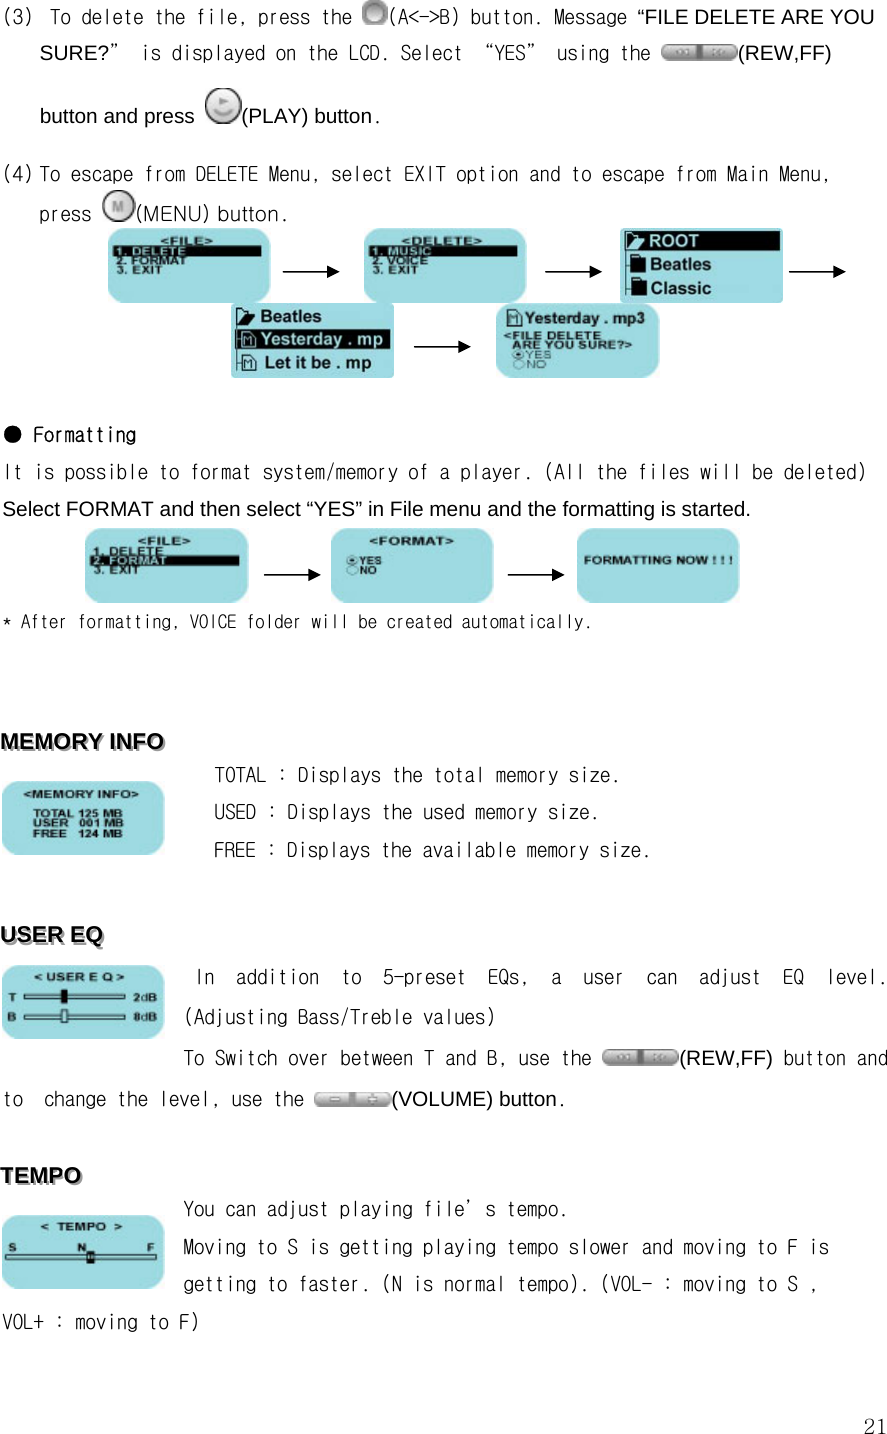
>
DG Lab
>
DG 150 User Manual
Users Manual
Navigation menu
Upload a User Manual
Namespaces
Wiki Guide
HTML
PDF
Info
Views
User Manual
Discussion / Help
Navigation


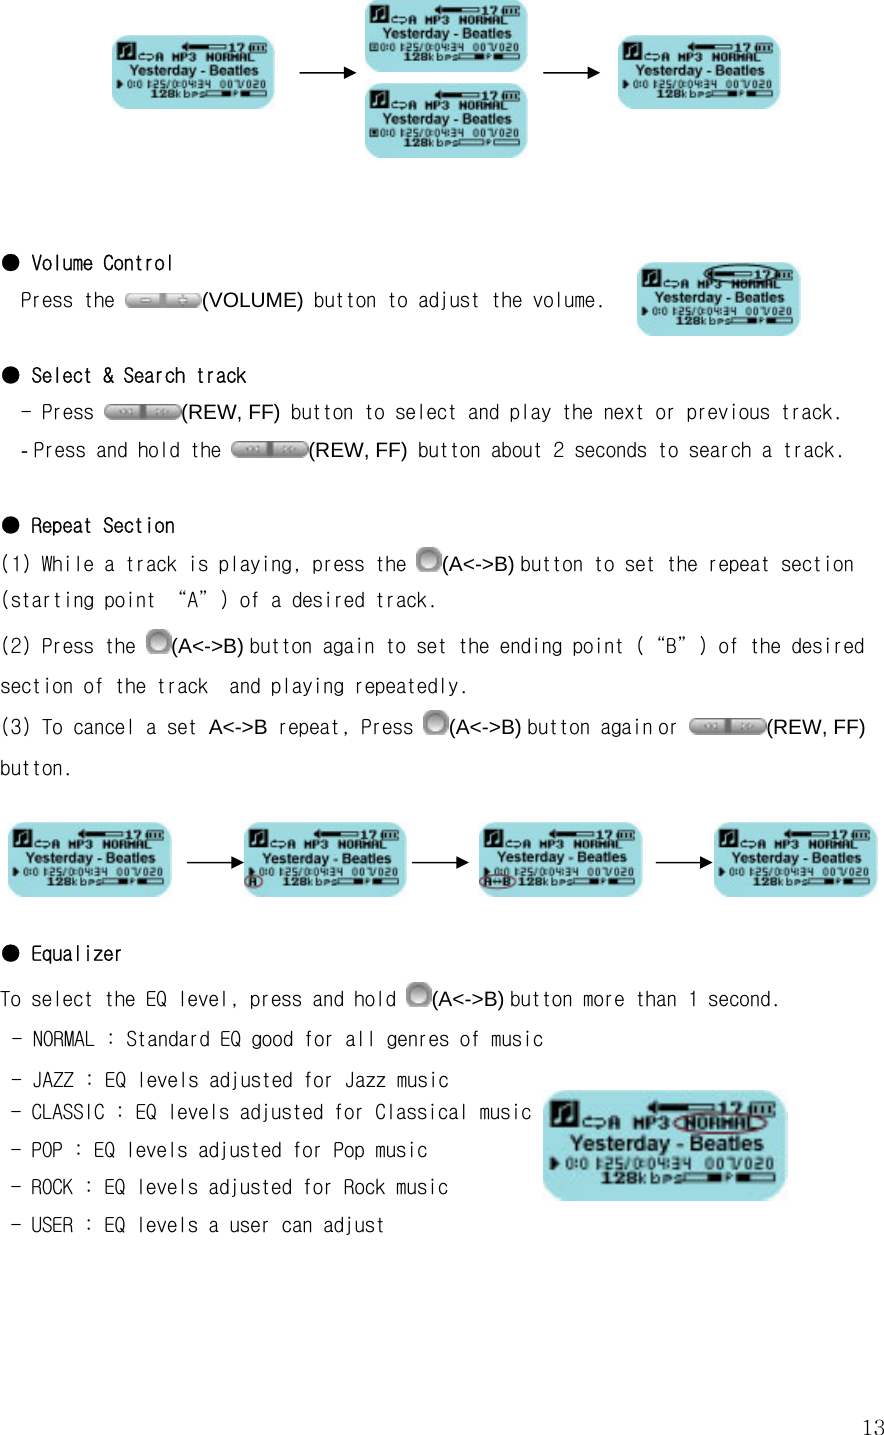
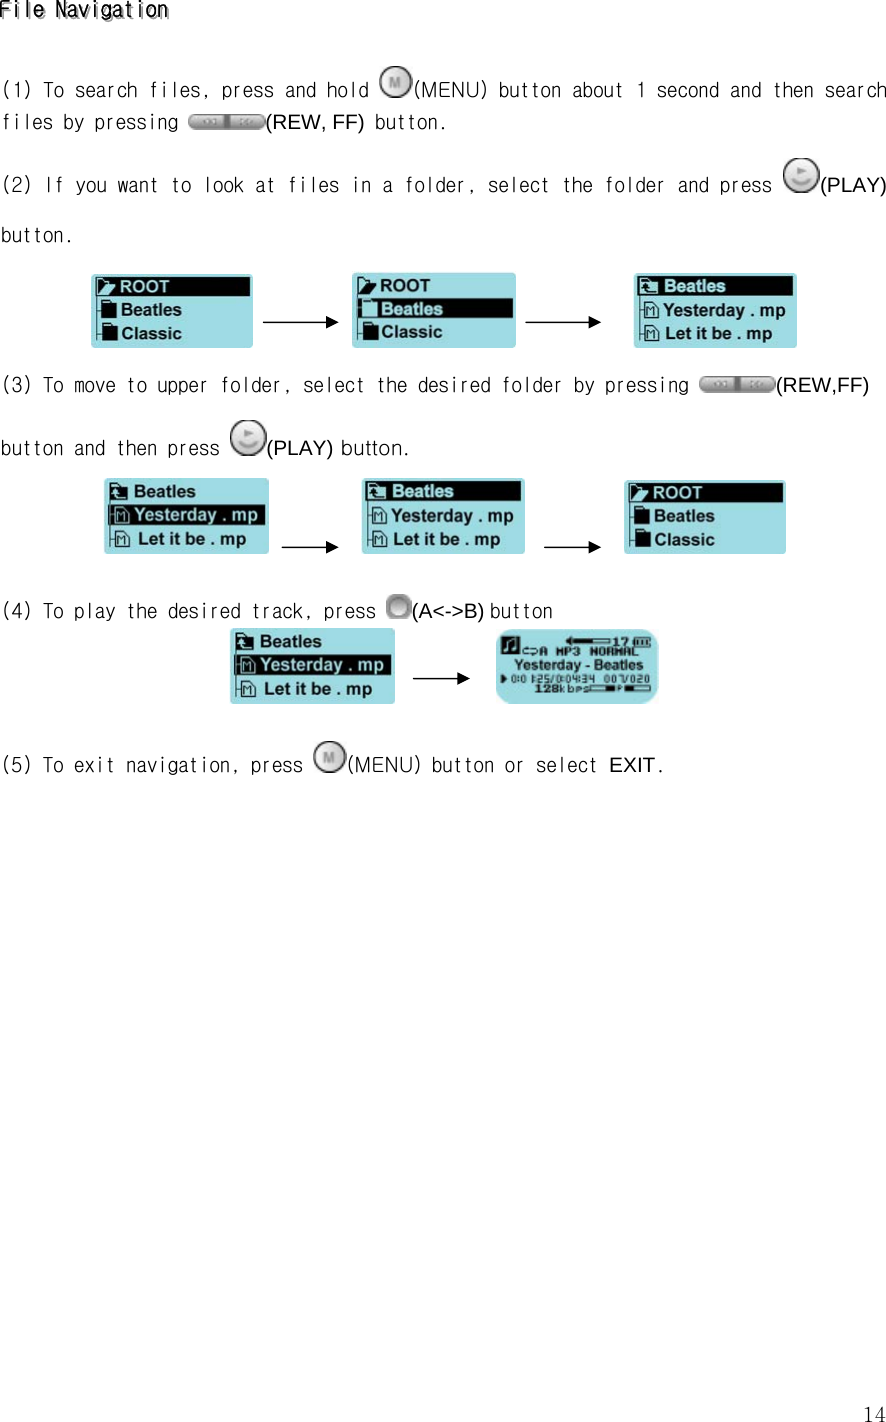

![16[Preset Tuning] ● Hold down the (A<->B) button more than 1 second. ● Tune in to a station you wish to preset using the (REW, FF) button. ● Press the (A<->B) button again more than 1 second and select the preset number using the (REW,FF) button. ● Press the (A<->B) button again more than 1 second to preset the station number. * Some stations may not be preset in place where transmitting sensitivity is bad. [Tuning in to a Preset Station] To play the preset station, press the (A<->B) button to enter the [MEMORY] Mode Press the (REW, FF) button to select the desired preset station number PPPlllaaayyybbbaaaccckkk ttthhheee VVVoooiiiccceee---rrreeecccooorrrdddeeeddd FFFiiillleeesss When in Main Menu, select “VOICE PLAY” icon and press the (PLAY) button. You can operate the functions - such as playing the files, volume control and move between tracks - the same way as in Playing the Track. Note) To change different repeat modes (one file repeatedly (), all files one time (), all files repeatedly ( )), press the (MENU) button more than 1 second.](https://usermanual.wiki/DG-Lab/DG-150/User-Guide-445867-Page-16.png)