EU3C SCND502E1234 PART 15 CLASS B COMPUTING PERIPHERAL User Manual
EU3C COMPANY LIMITED PART 15 CLASS B COMPUTING PERIPHERAL Users Manual
UserManual.wiki
>
EU3C
>
SCND502E1234 User Manual
Users Manual
Navigation menu
Upload a User Manual
Namespaces
Wiki Guide
HTML
PDF
Info
Views
User Manual
Discussion / Help
Navigation

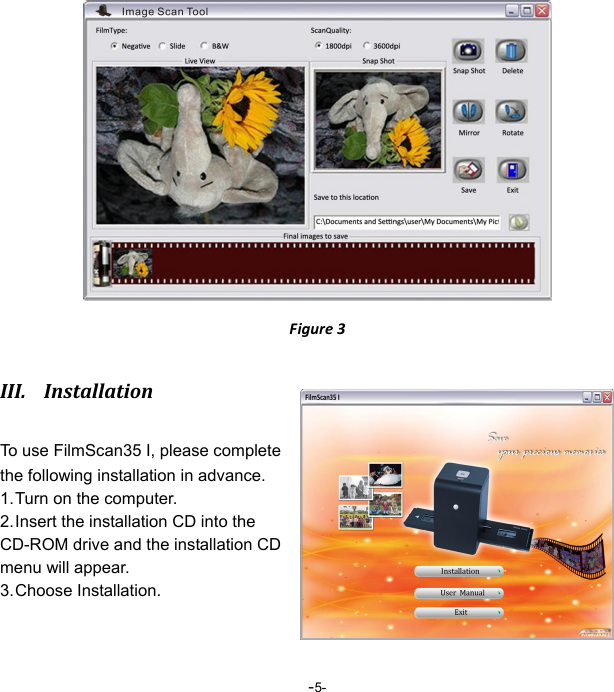
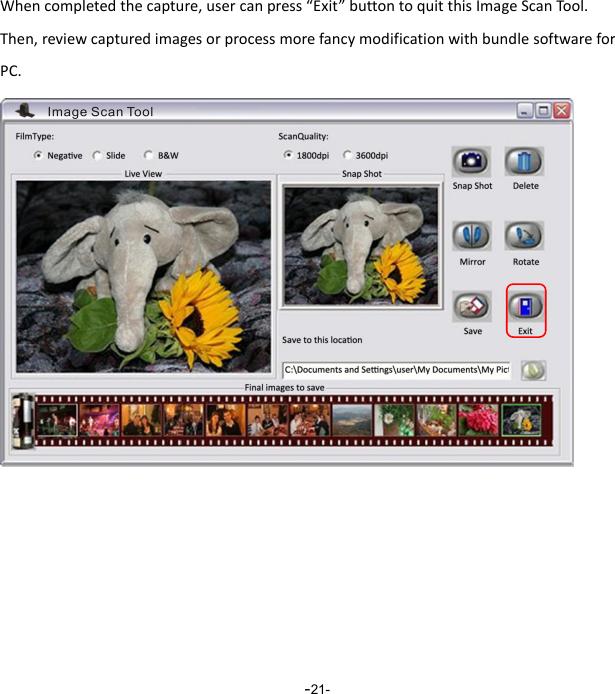
![-4-NOTE Toavoidmirrorimage,followtheserialnumbers(fromlefttoright)ontopoffilmwheninstallnegativefilmintoholder.Figure1 Iftheimageisupsidedown[seefig.2],theimagecanbecorrectedbycontinuously“Rotate”functioninImageScanToolaftercapture[seefig.3].Figure2](https://usermanual.wiki/EU3C/SCND502E1234/User-Guide-1436408-Page-5.png)