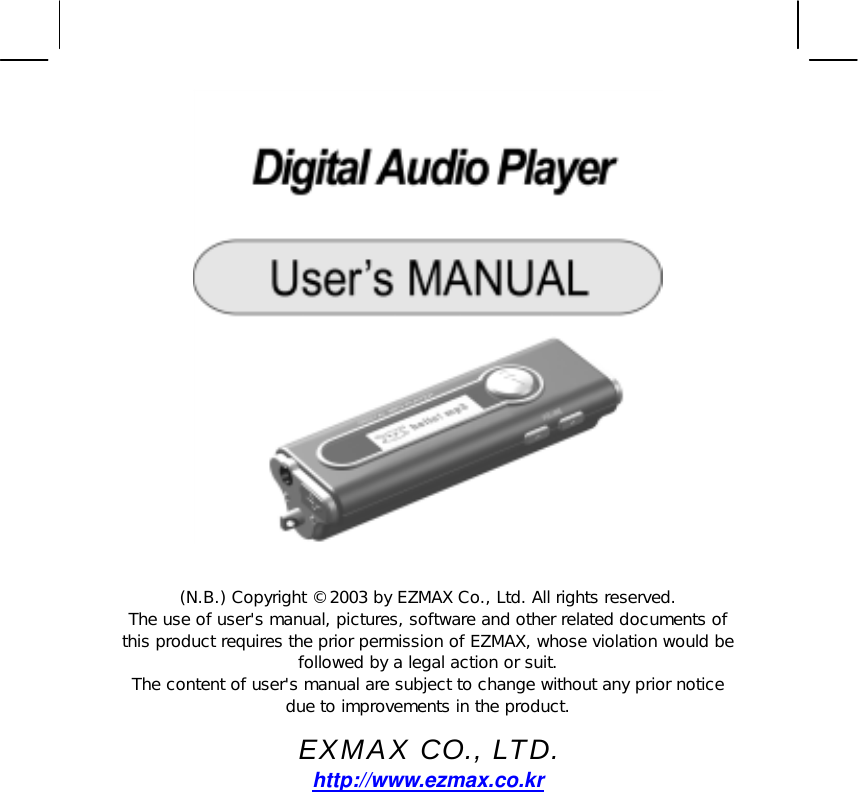
EZMAX EZMP-2000 Digital Audio Player User Manual
EZMAX Co.,Ltd. Digital Audio Player
UserManual.wiki
>
EZMAX
>
EZMP 2000 User Manual
User Manual
Navigation menu
Upload a User Manual
Namespaces
Wiki Guide
HTML
PDF
Info
Views
User Manual
Discussion / Help
Navigation

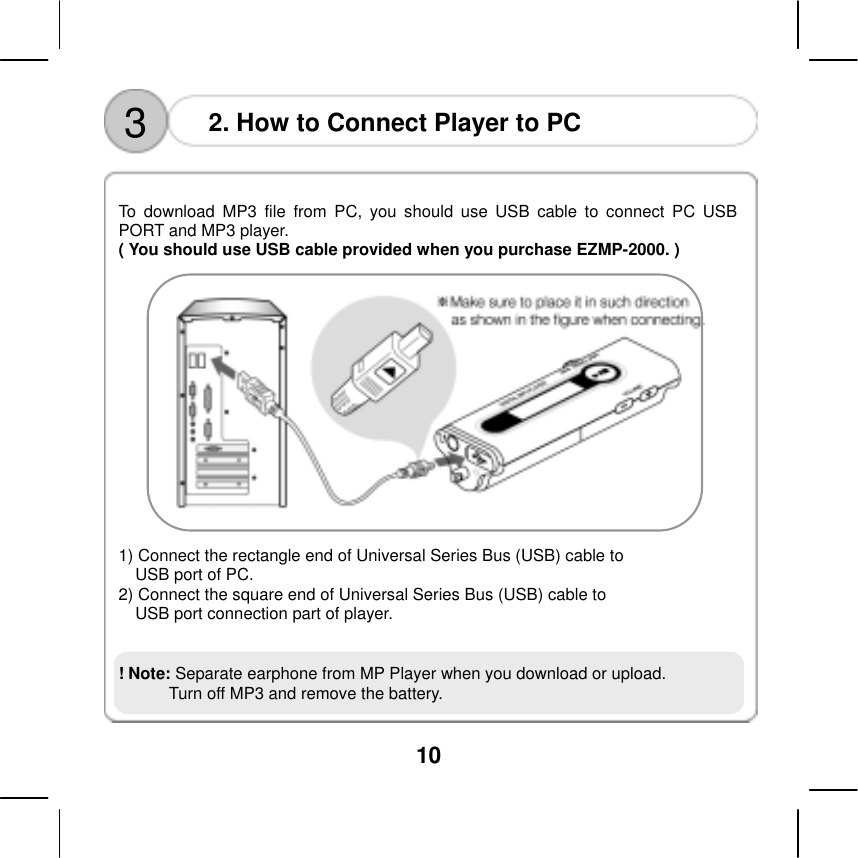
![12 4) When you press the "Finish" button after file is copied, installing USB driver is finished. 5) To check whether USB driver is properly set, double-click the "System" icon in [Start] - [Setting] - [Control Panel]. Click “Device Manager” Tab and click "+" of “Universal Series Bus (USB)” controller. 3 3. Install USB Driver !Note: When “EZMAX MP3 Player” appears, driver is successfully installed.](https://usermanual.wiki/EZMAX/EZMP-2000/User-Guide-345318-Page-14.png)
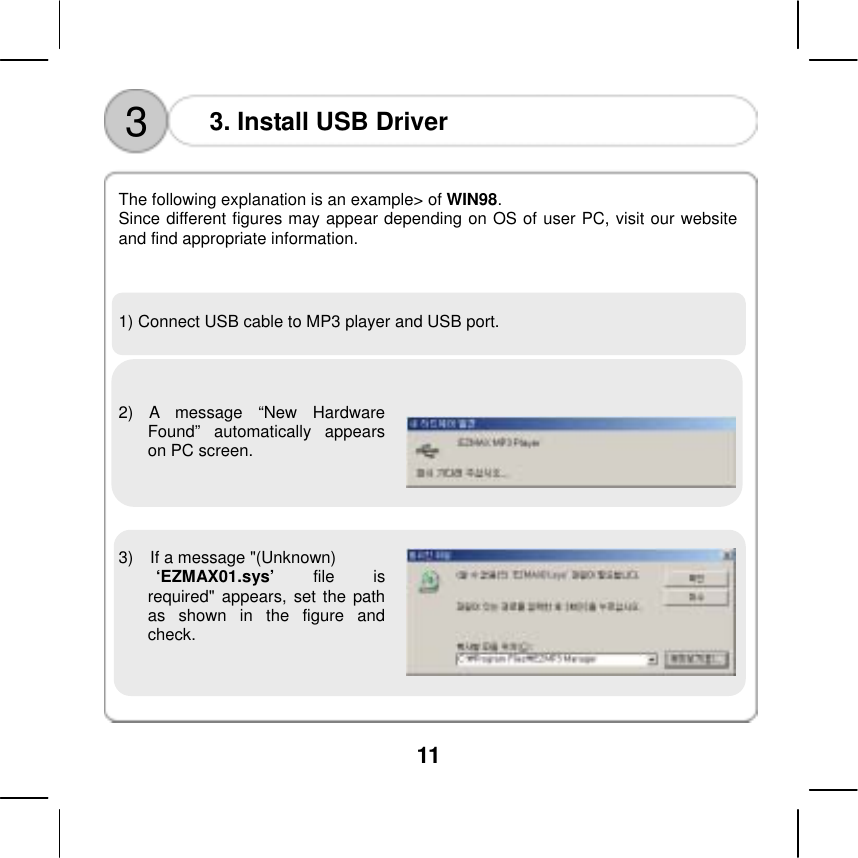
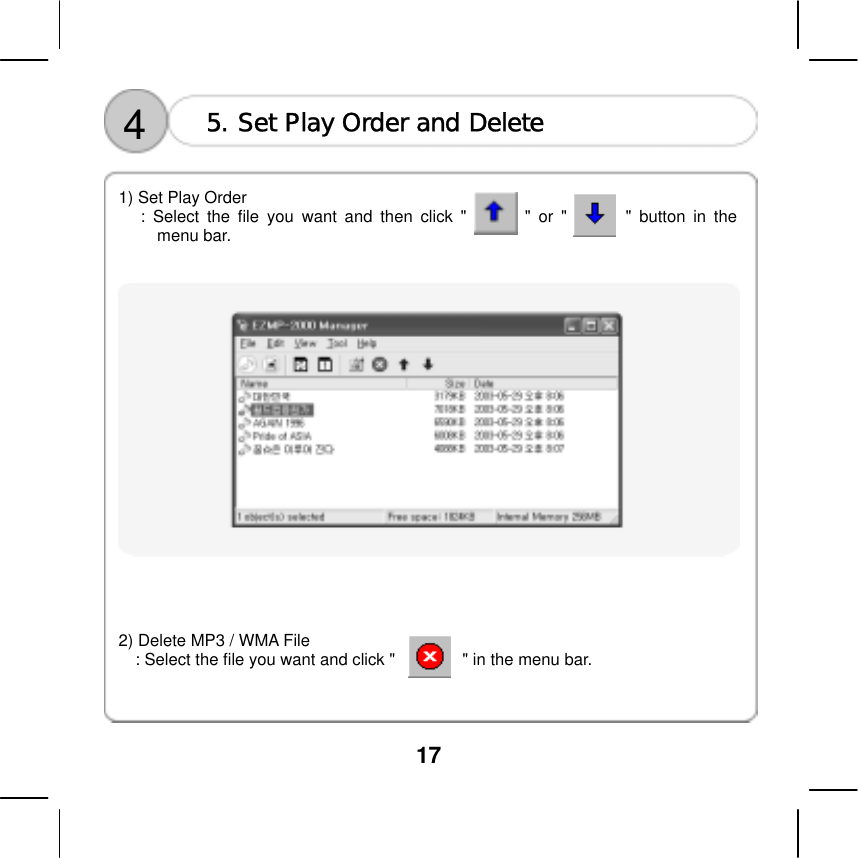
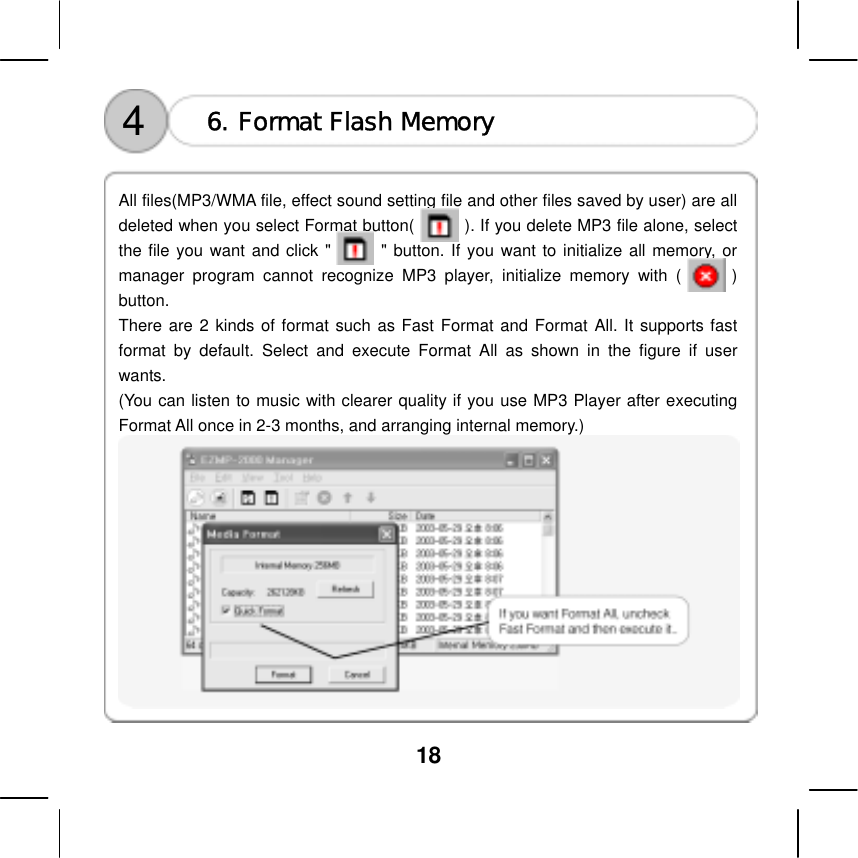
![13 4 1. Description of Manager Screen Click the [ezMAX] icon on the desktop or click [Start] [Program] [ezMAX] to execute program. When MP3 player is connected with USB connection cable, it automatically reads the memory and displays the files on the screen displaying the memory..](https://usermanual.wiki/EZMAX/EZMP-2000/User-Guide-345318-Page-15.png)
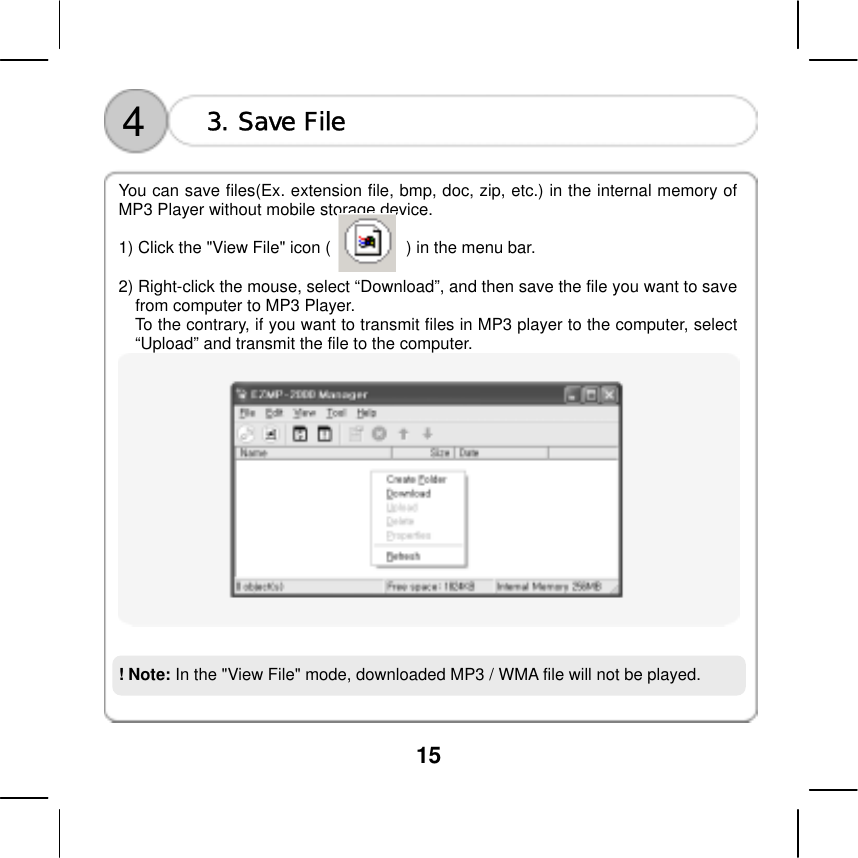
![14 4 2. Download(Transmit Music File from PC to MP3 Player) 1) Click the “View Music File” icon ( ) in the menu bar. 2) Select [File]→[Download] in the menu bar. 3) Find the directory where MP3 / WMA file is located and select the file you want. 4) Click the [Open] button to copy the file to the player. (Select it with a mouse and drag it to the manager window.) !Note: MP3 / WMA file downloaded from Music Mode is prohibited from being upload by law.](https://usermanual.wiki/EZMAX/EZMP-2000/User-Guide-345318-Page-16.png)
![19 5 1. Power ON / Play Power ON / Play( MP3, WMA ) If you press [POWER button] a little long, power will be turned on and automatically play music under the same as the environment where the previous music played(sound quality, music to be played, play mode, etc...). If you press [Power button] again in Pause status, Play[ ▶ ] will start. ! Note: Play(Power ON) does not work, if there is no song downloaded in the memory. ▶(PLAY) is displayed on the lower right of LCD in accordance with the mode selected by user so as to check the progress status.](https://usermanual.wiki/EZMAX/EZMP-2000/User-Guide-345318-Page-21.png)
![20 5 2. Power OFF / Pause Power OFF / Pause If you press [POWER button] a little long, power will be turned off. At this time, the environment is saved inside and will be applied when power is turned on in the next time. If you press [POWER button] while a file is played, it will become Pause ( ■ ) status. If you press [POWER button] again in Pause status, it will start playing [ ▶ ] again. ! Note: If there is no key operation for over 30 seconds in PAUSE status, power will be automatically turned off. ■(PAUSE) is displayed on the lower right of LCD in accordance with the mode selected by user so as to check the progress status.](https://usermanual.wiki/EZMAX/EZMP-2000/User-Guide-345318-Page-22.png)
![21 5 3. Volume Control 1) Volume Up Press [ + ] button to volume up while a file is in play(stop) status. 2) Volume Down Press [ - ] button to volume down while a file is in play(stop) status. ! Note: Volume consists of a total of 20 stages.](https://usermanual.wiki/EZMAX/EZMP-2000/User-Guide-345318-Page-23.png)
![22 5 4. Select Next/Previous Track(Fast Forward/Rewind) 1) Select Next Track (Fast Forward ) To select the next track, push it to [ ] direction while it is played. If you want to fast-forward, press [ ] a little long to select fast forward while it is played. At this time, effect sound you selected in Manager Program will come out. 2) Select Previous Track ( Rewind ) To select the previous track, push it as in the direction of [ ] while it is played. If you want rewind, press [ ] a little long to select rewind while it is played. At this time, the effect sound you selected in Manager Program will come out](https://usermanual.wiki/EZMAX/EZMP-2000/User-Guide-345318-Page-24.png)
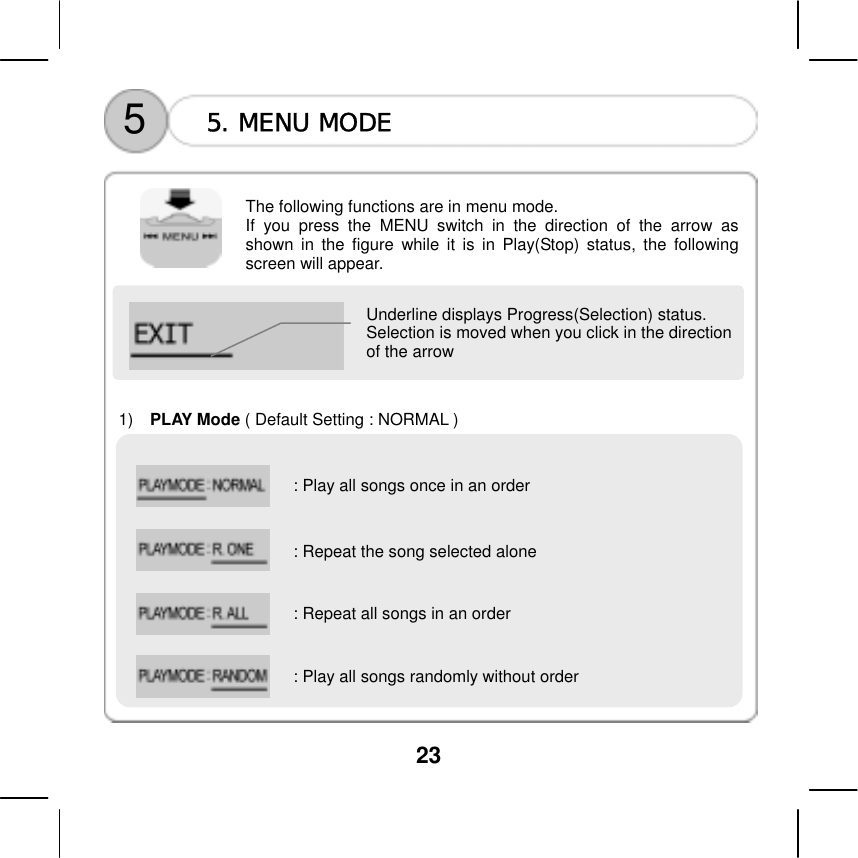
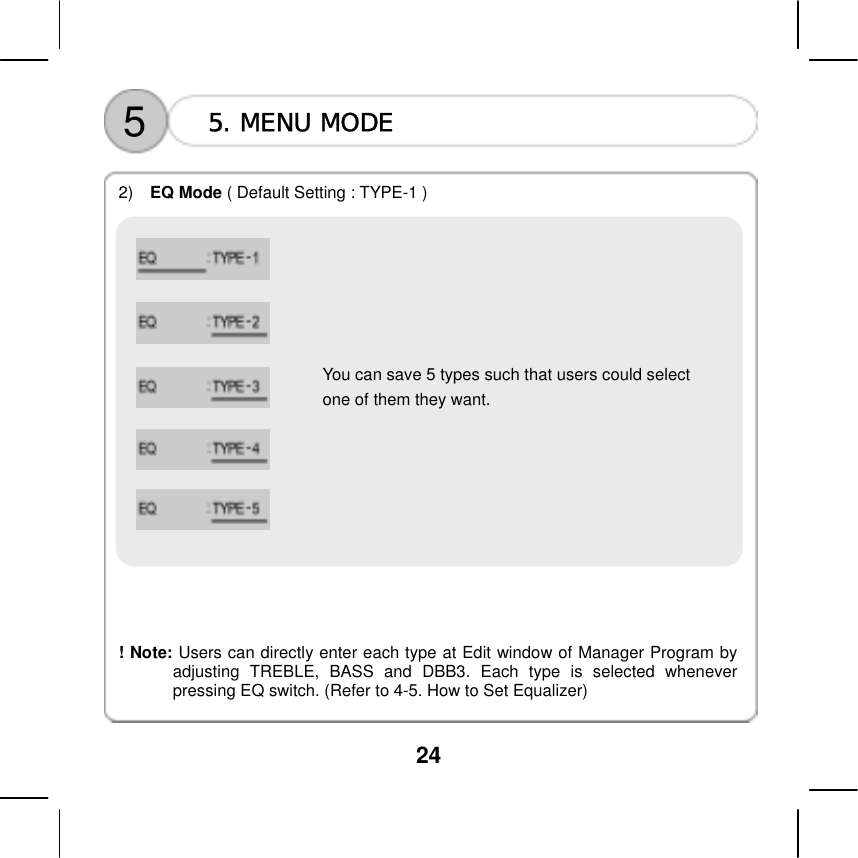
![27 5 5. MENU MODE 7) LIGHT Mode ( Default Setting : NORMAL ) 8) KEY-MODE Mode ( Default Setting : MUSIC ) : Light is turned on for 10 seconds and off, after the last Key is input : Light On/Off repeats itself at the interval of 1 second. : Always Light On : Always Light Off : Music Listening Mode : This mode supports block repetition. Press the menu switch [ , ] to designate thesection to repeat](https://usermanual.wiki/EZMAX/EZMP-2000/User-Guide-345318-Page-29.png)
![29 5 6. How to Insert Battery Open the battery cover and insert a “AAA” battery in accordance with its proper polarity [ + ], [ - ].](https://usermanual.wiki/EZMAX/EZMP-2000/User-Guide-345318-Page-31.png)