Fujitsu Mobile communications TU12-J01 TG03 User Manual
Fujitsu Mobile communications Limited TG03 Users Manual
UserManual.wiki
>
Fujitsu Mobile communications
>
TU12 J01 User Manual
TempConfidential_[Short-term confidential]T-01C(TG03) User Manual-English_201011
Navigation menu
Upload a User Manual
Namespaces
Wiki Guide
HTML
PDF
Info
Views
User Manual
Discussion / Help
Navigation
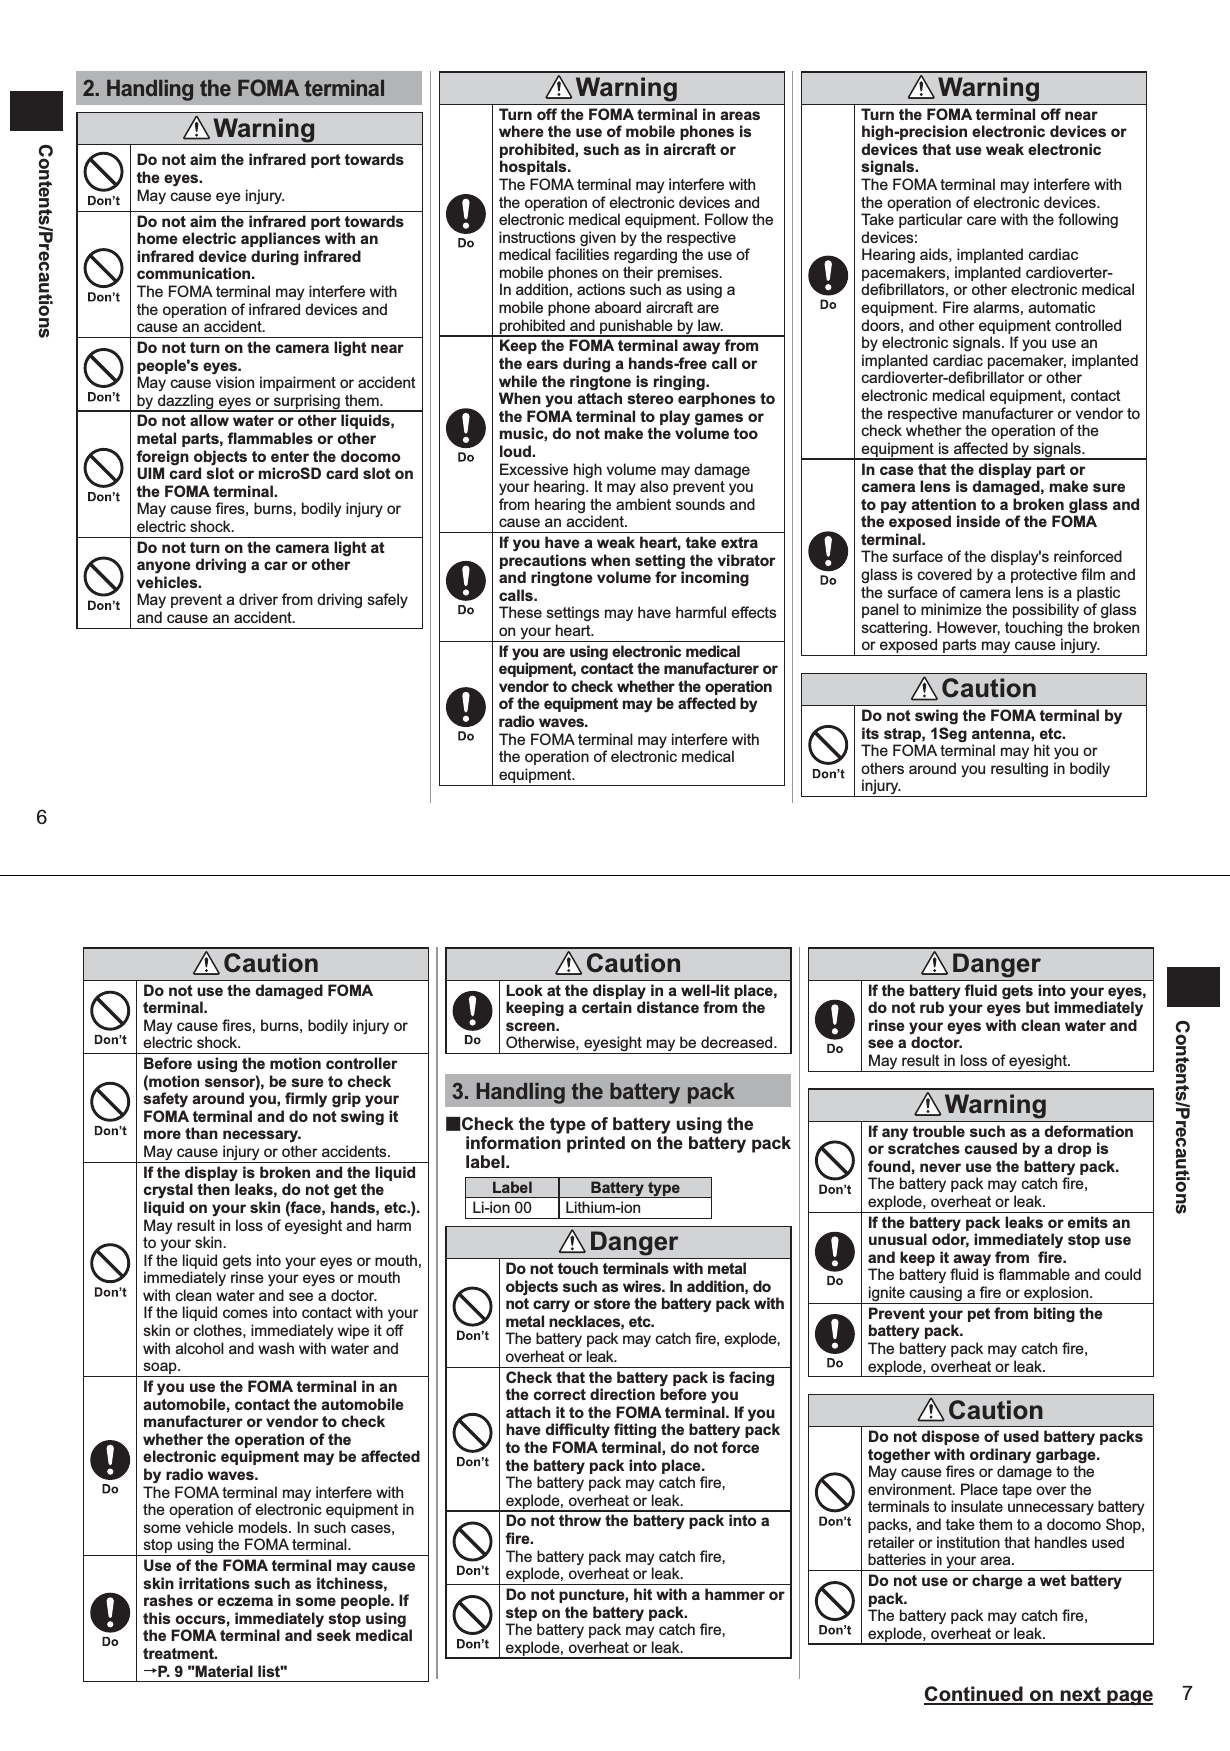
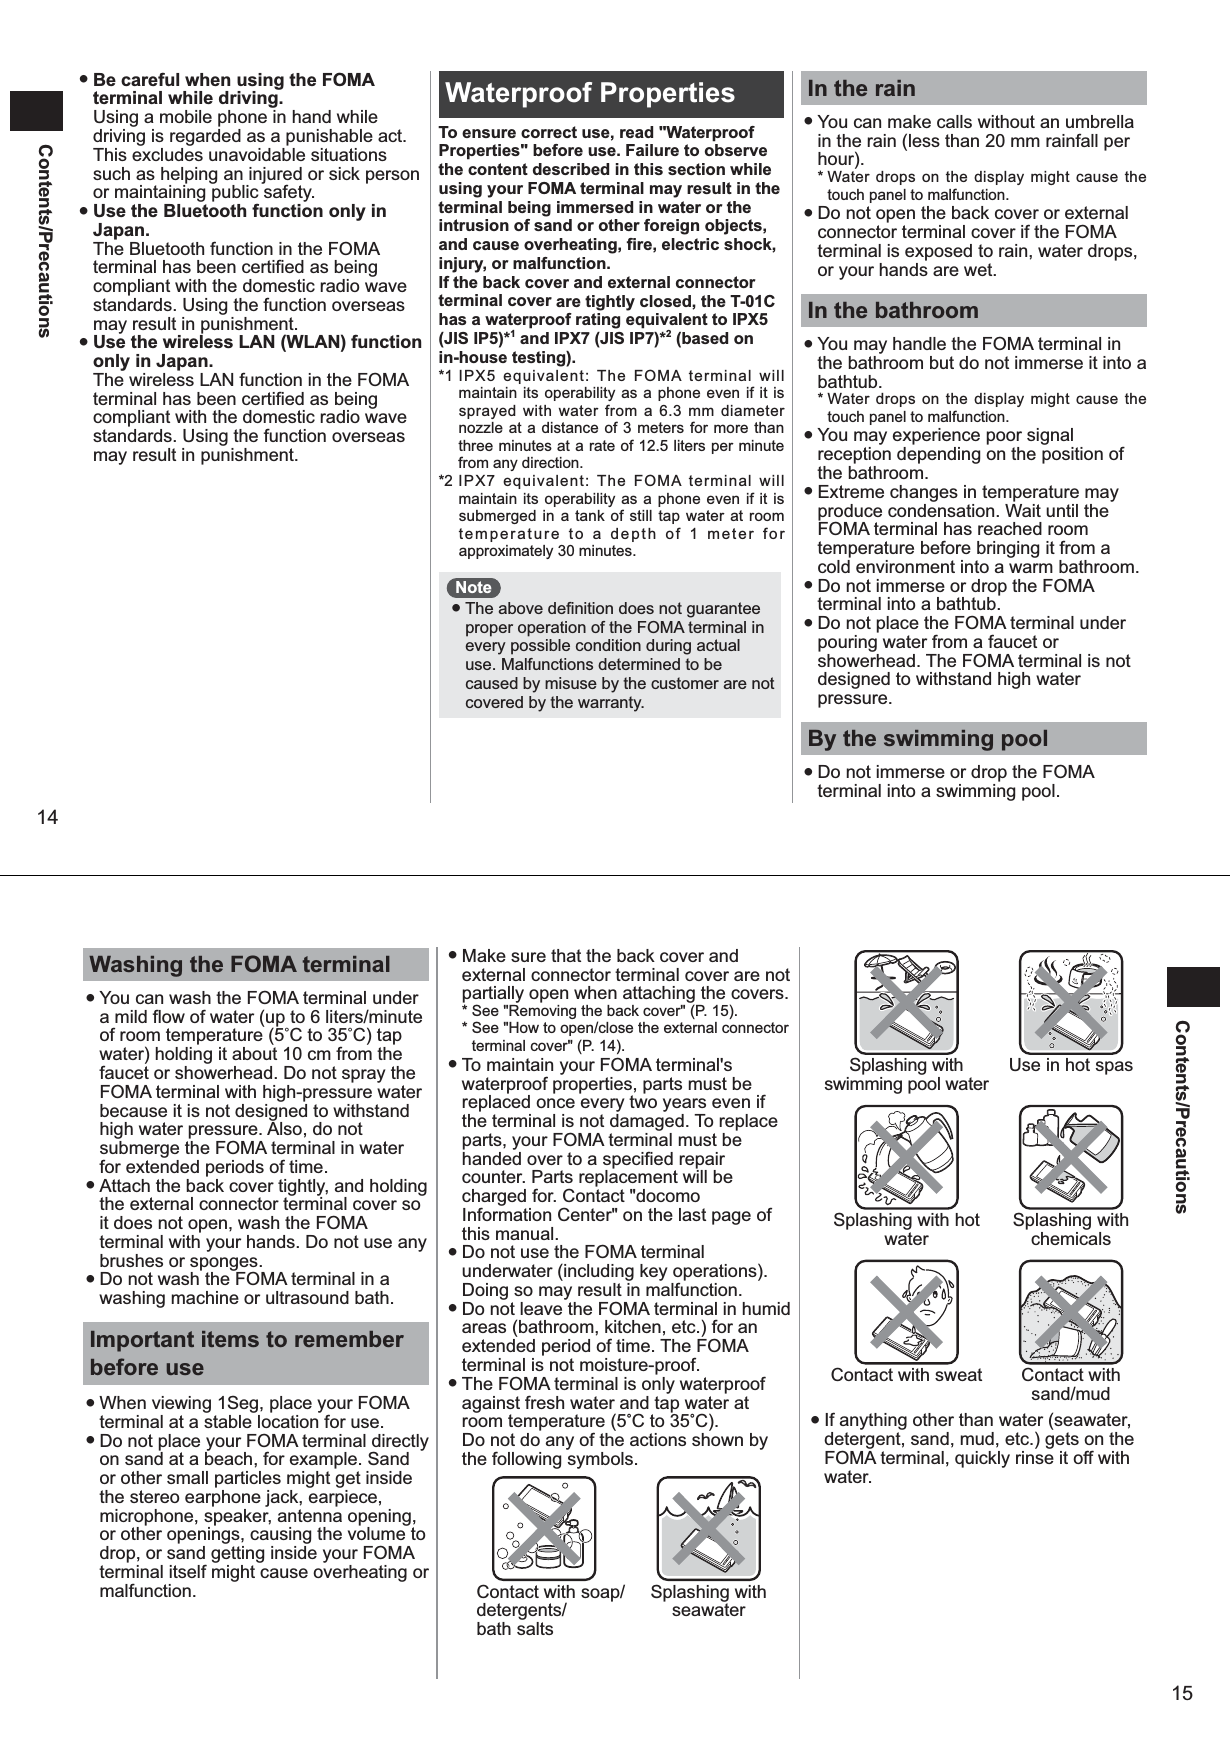
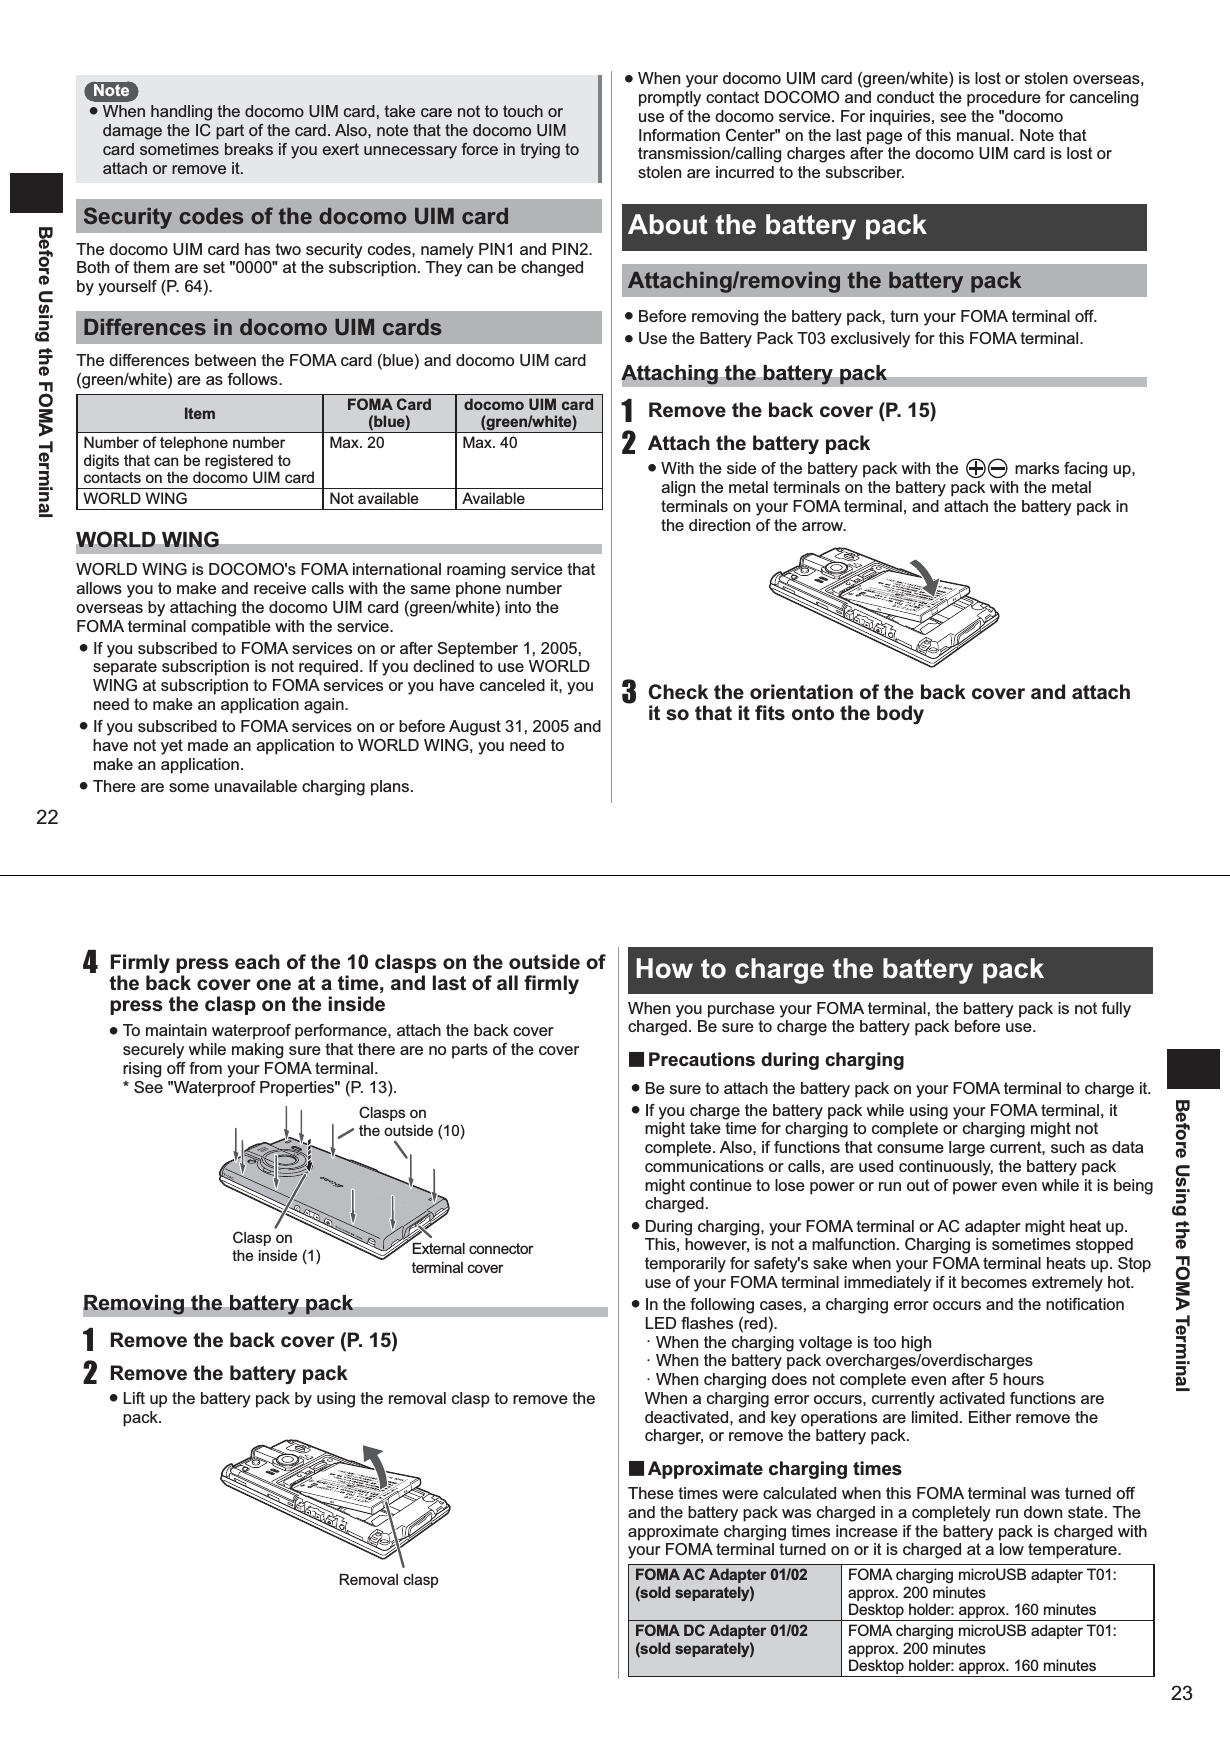
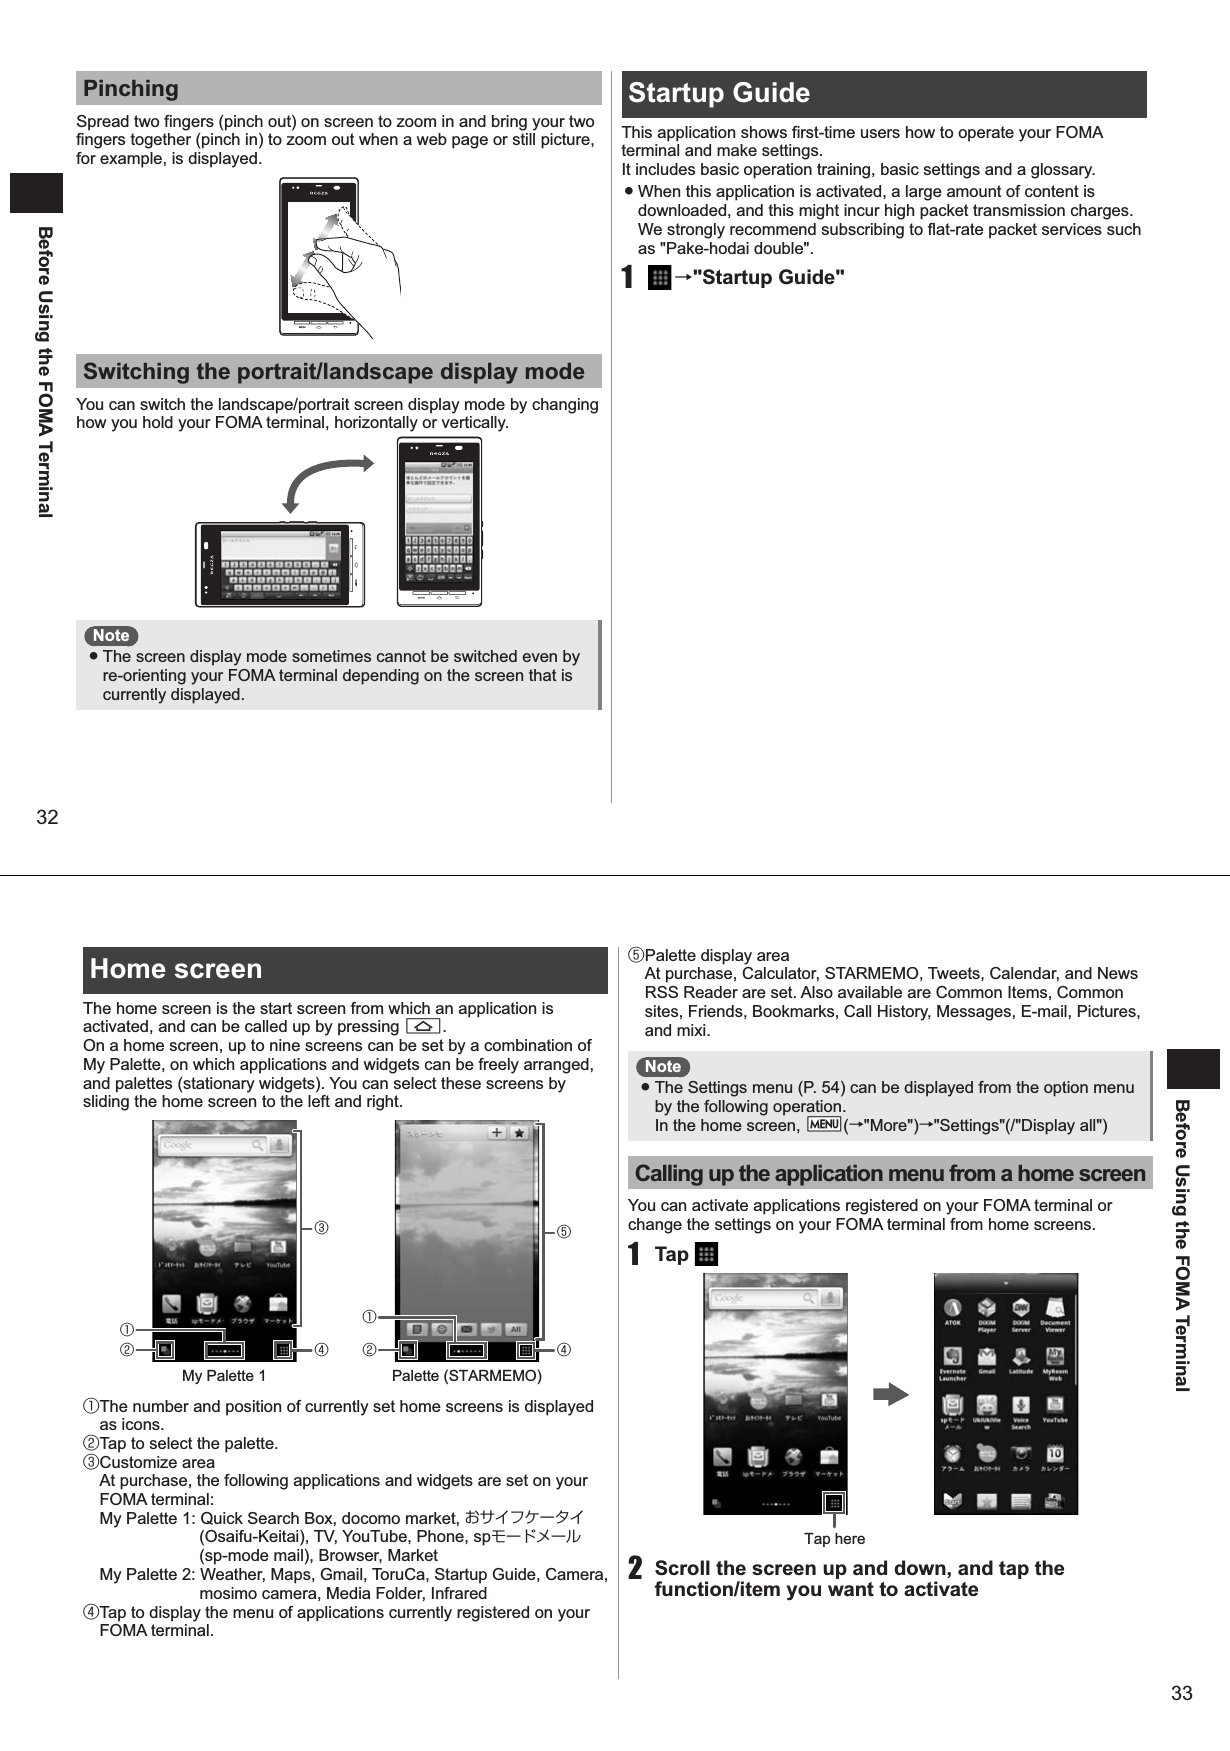
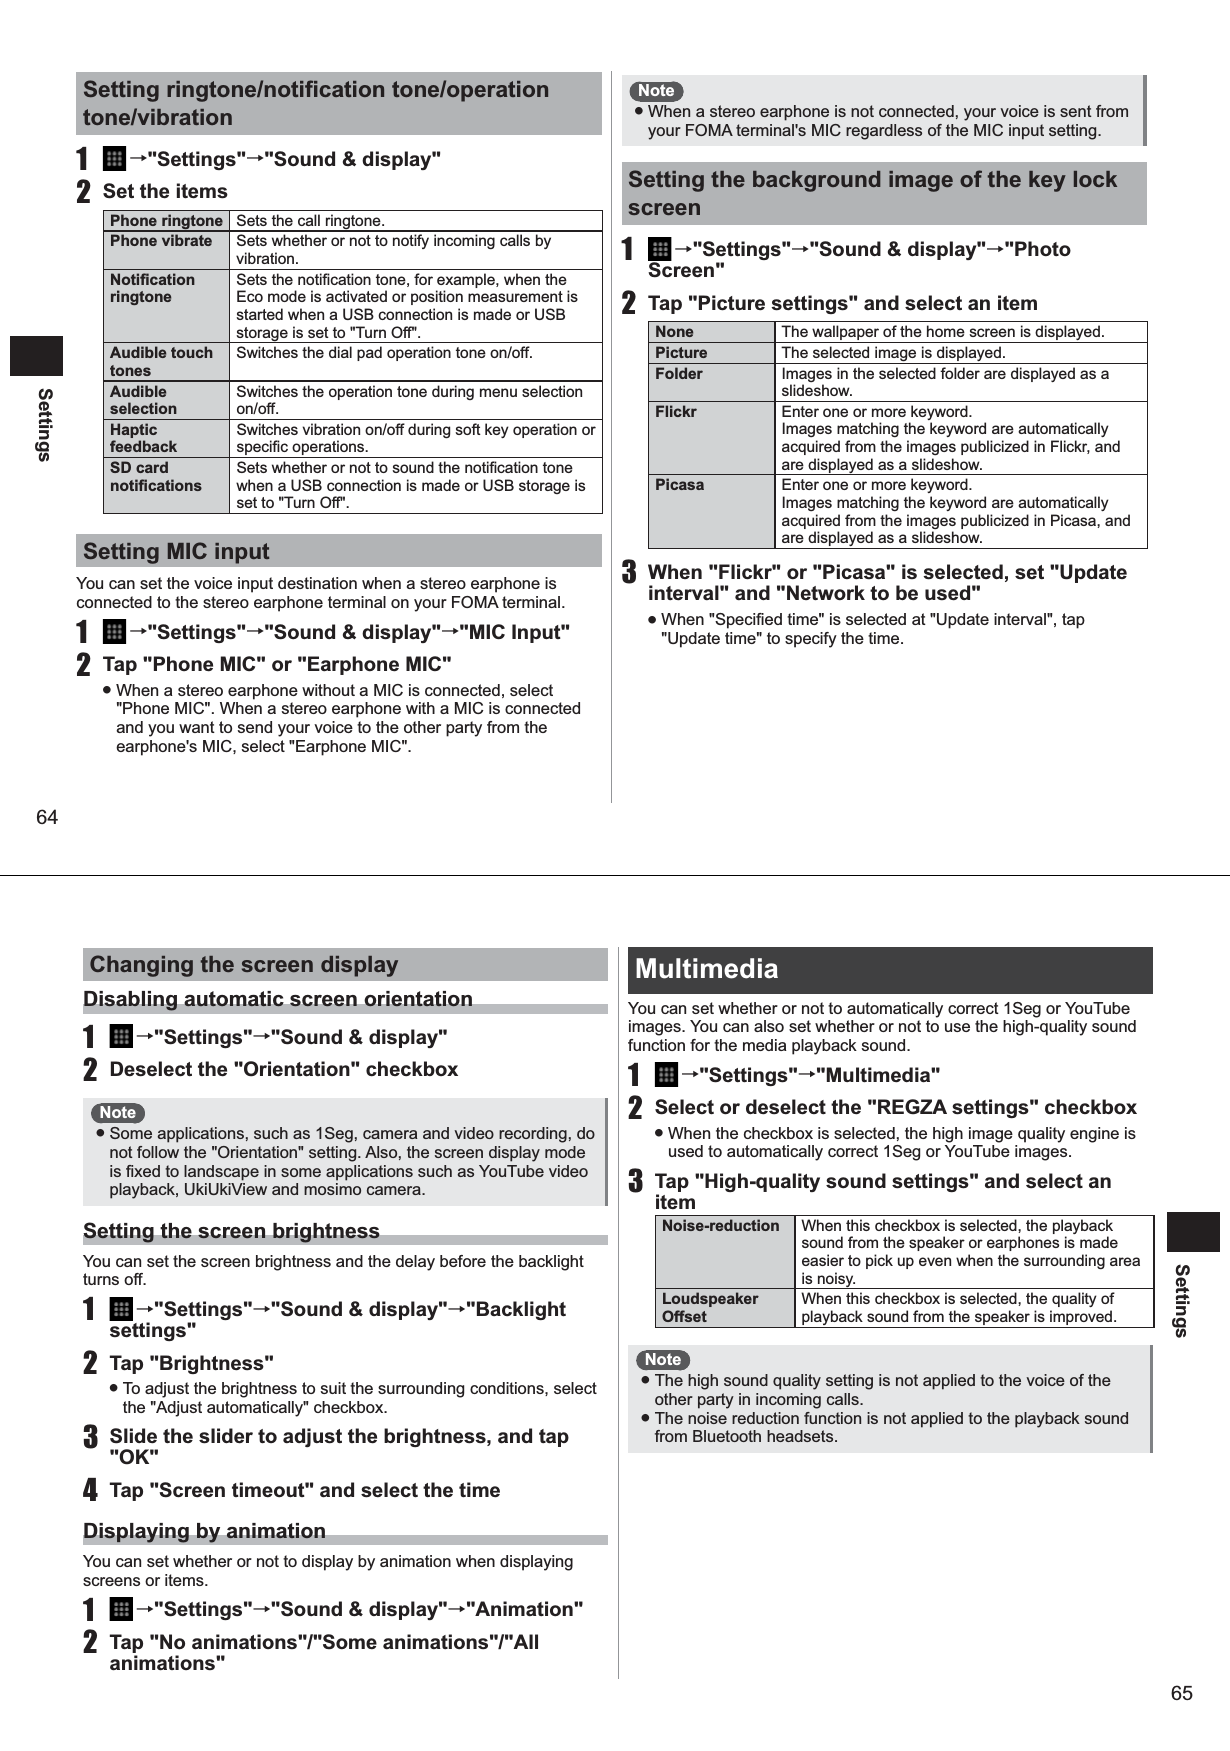
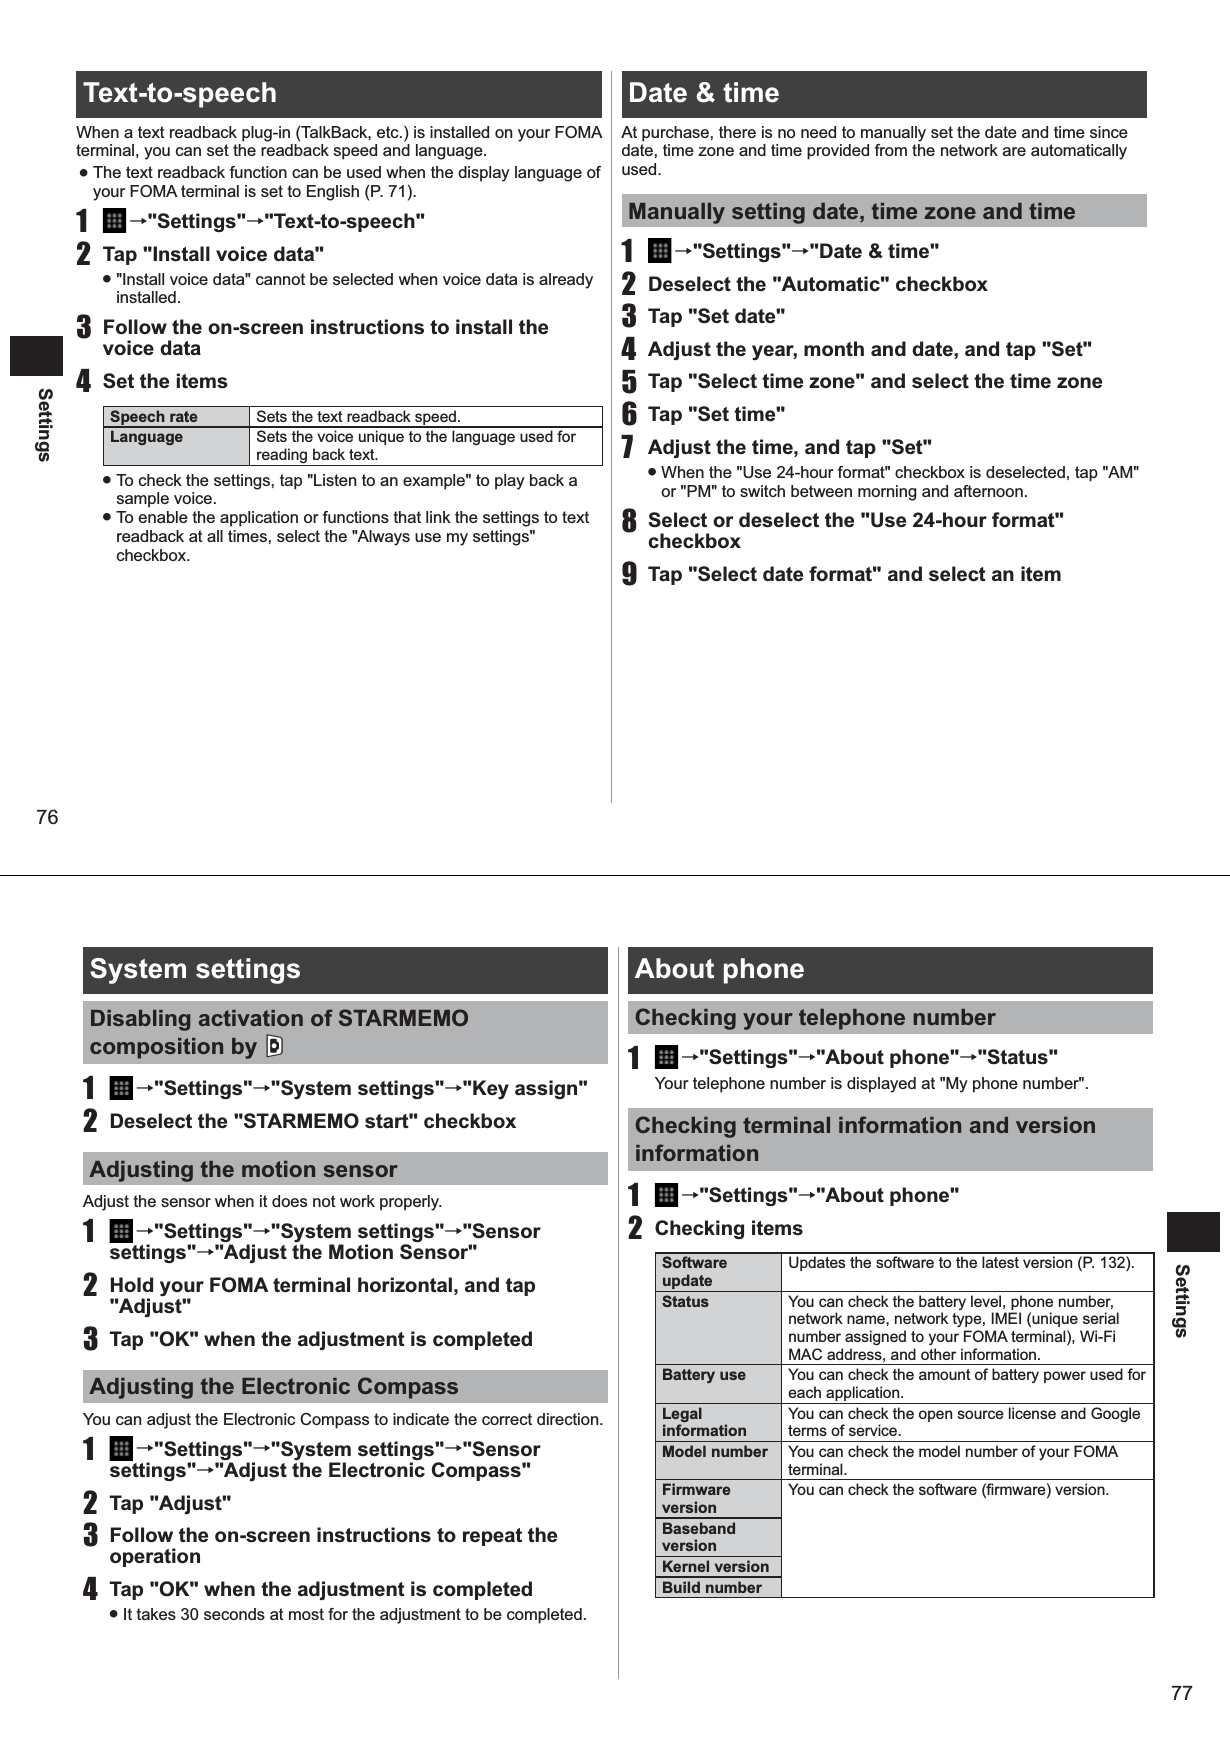
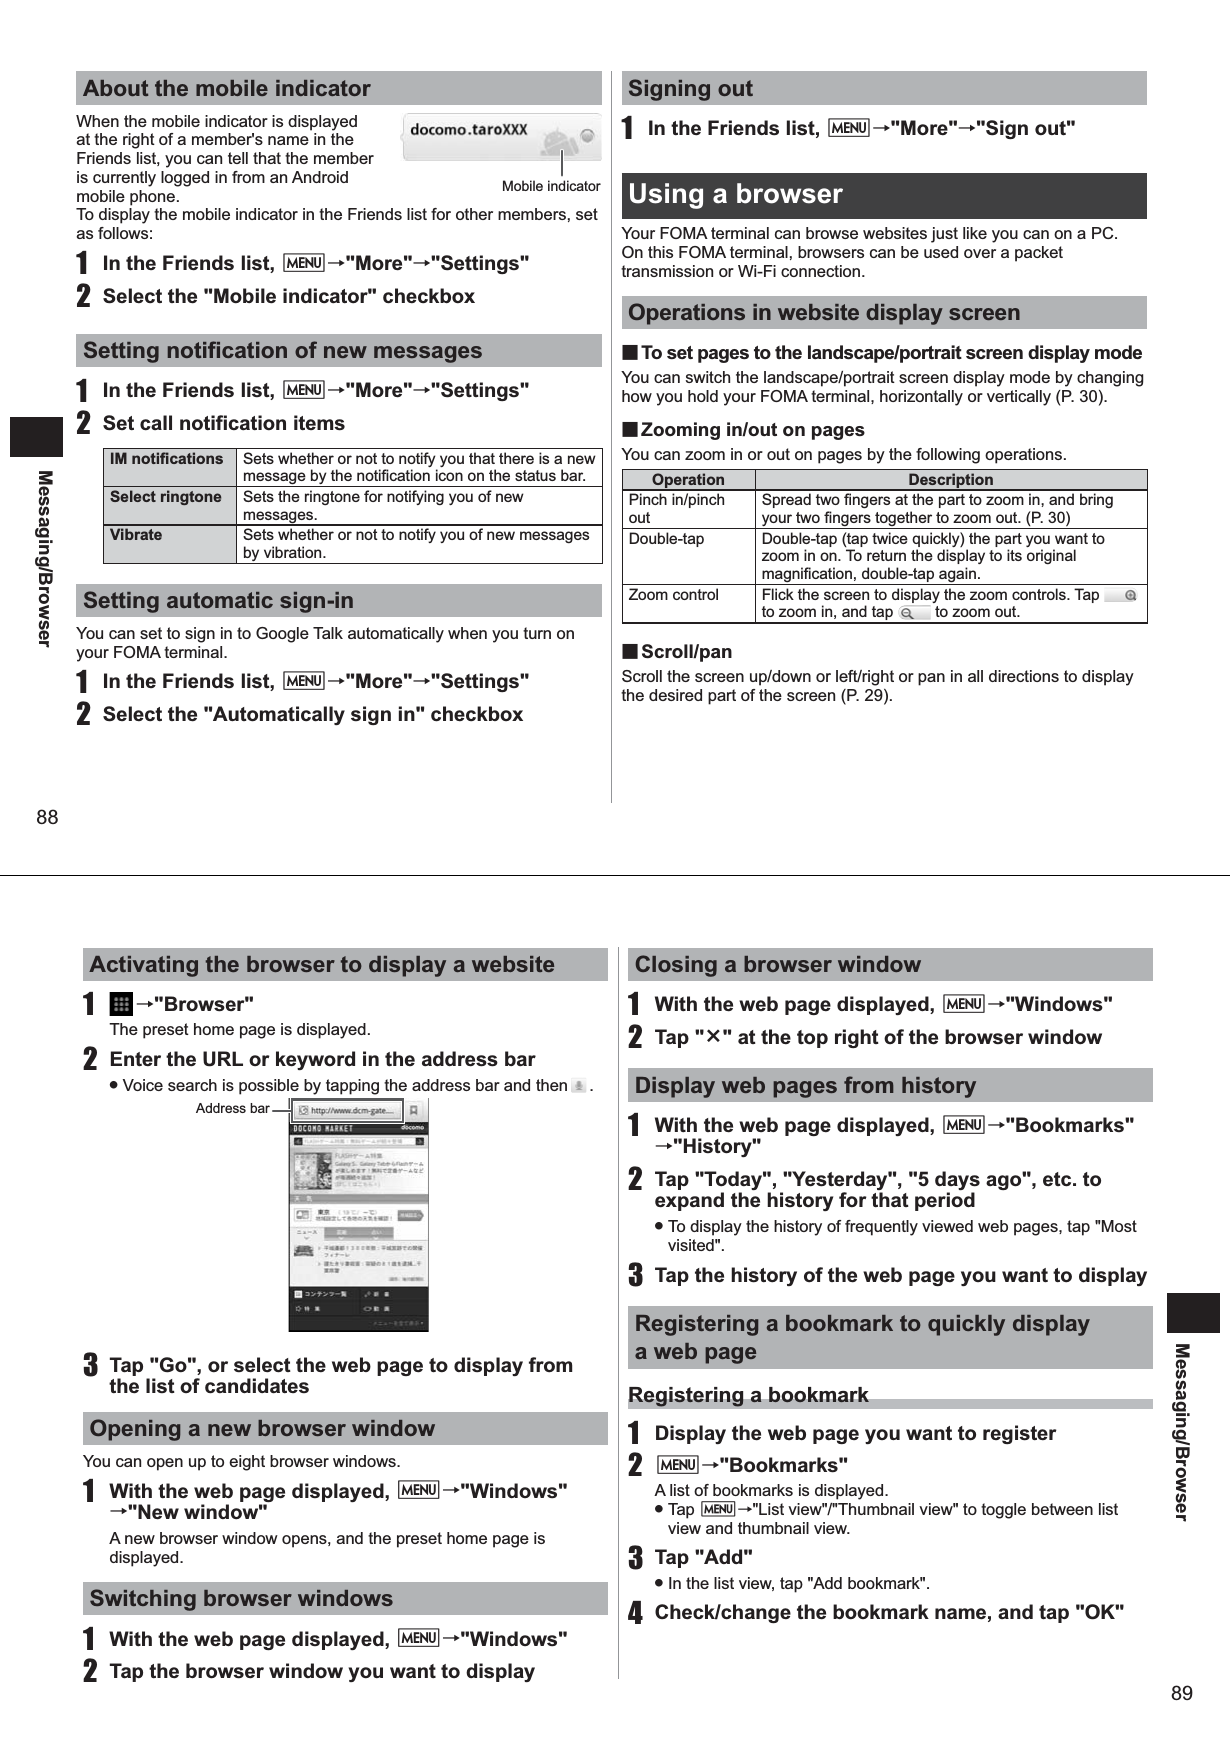
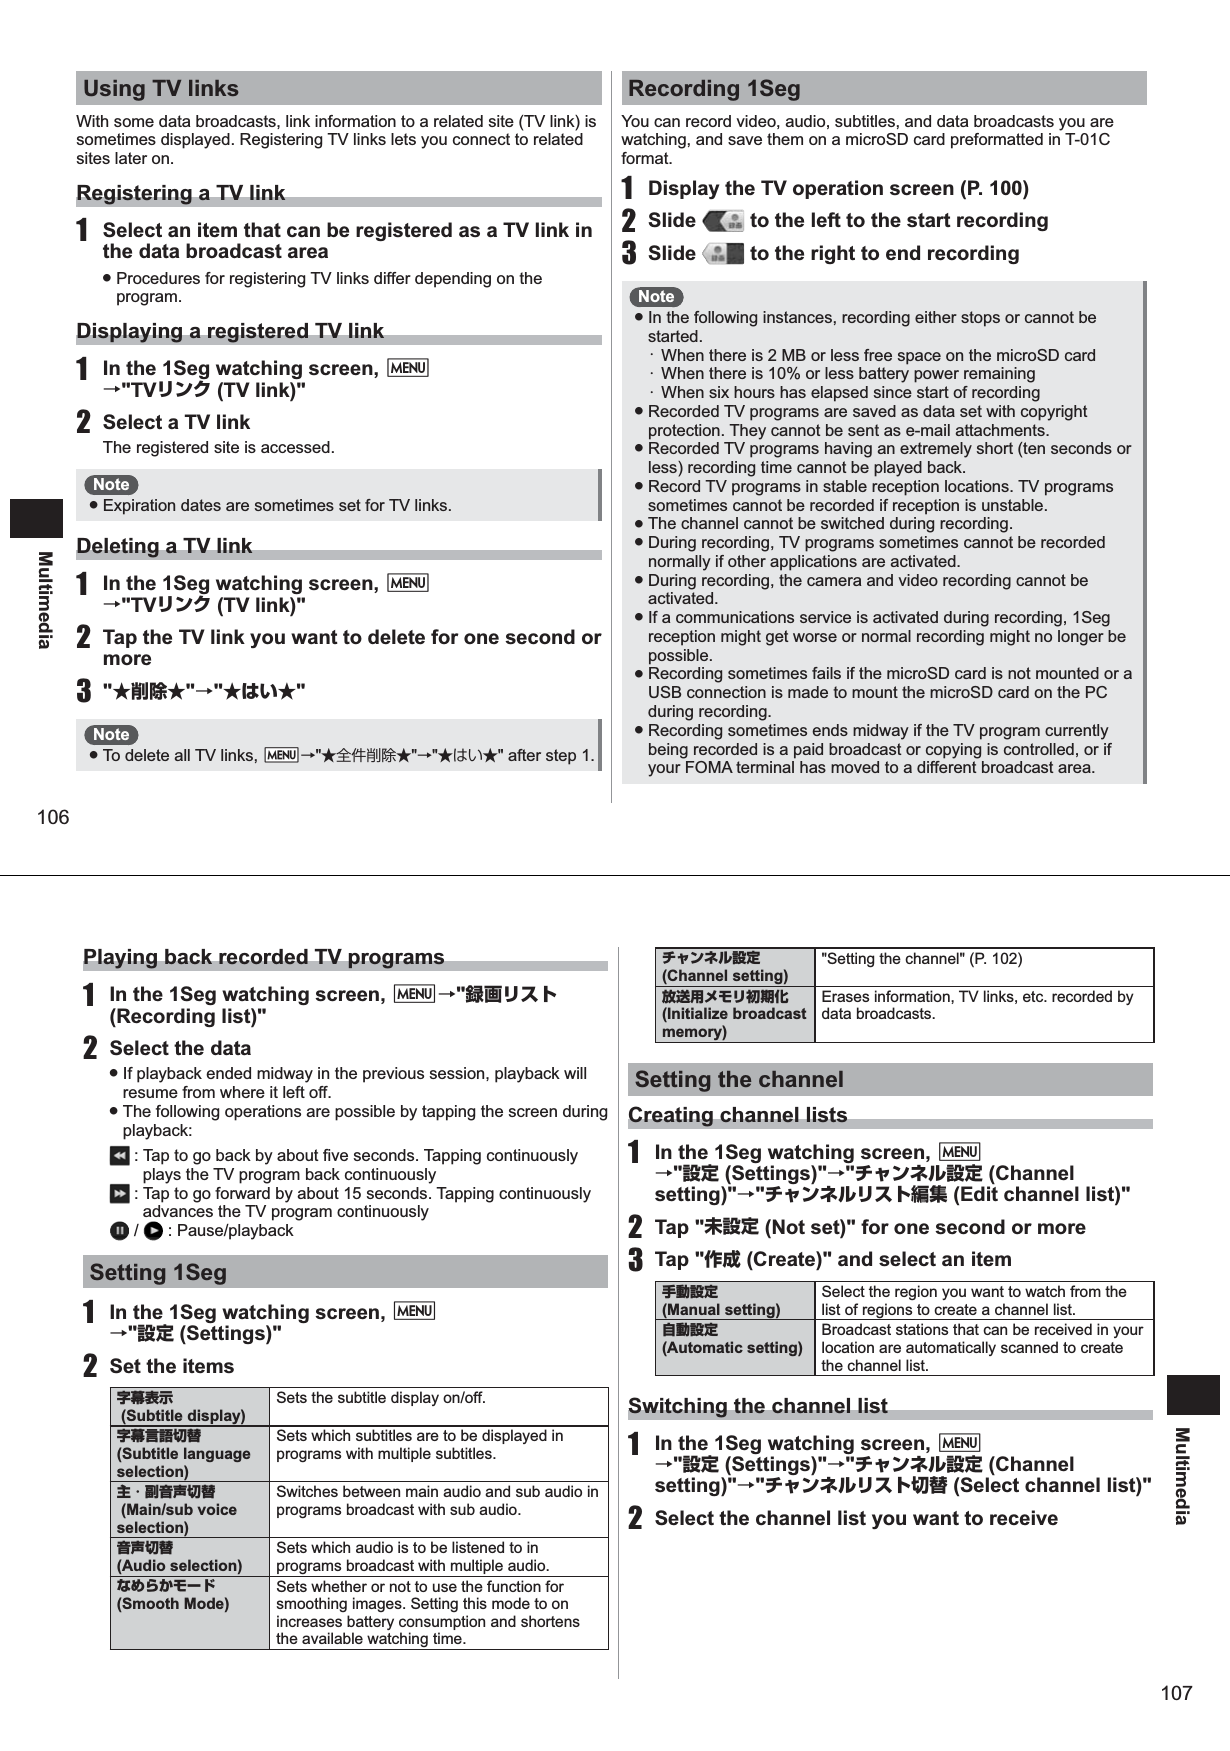
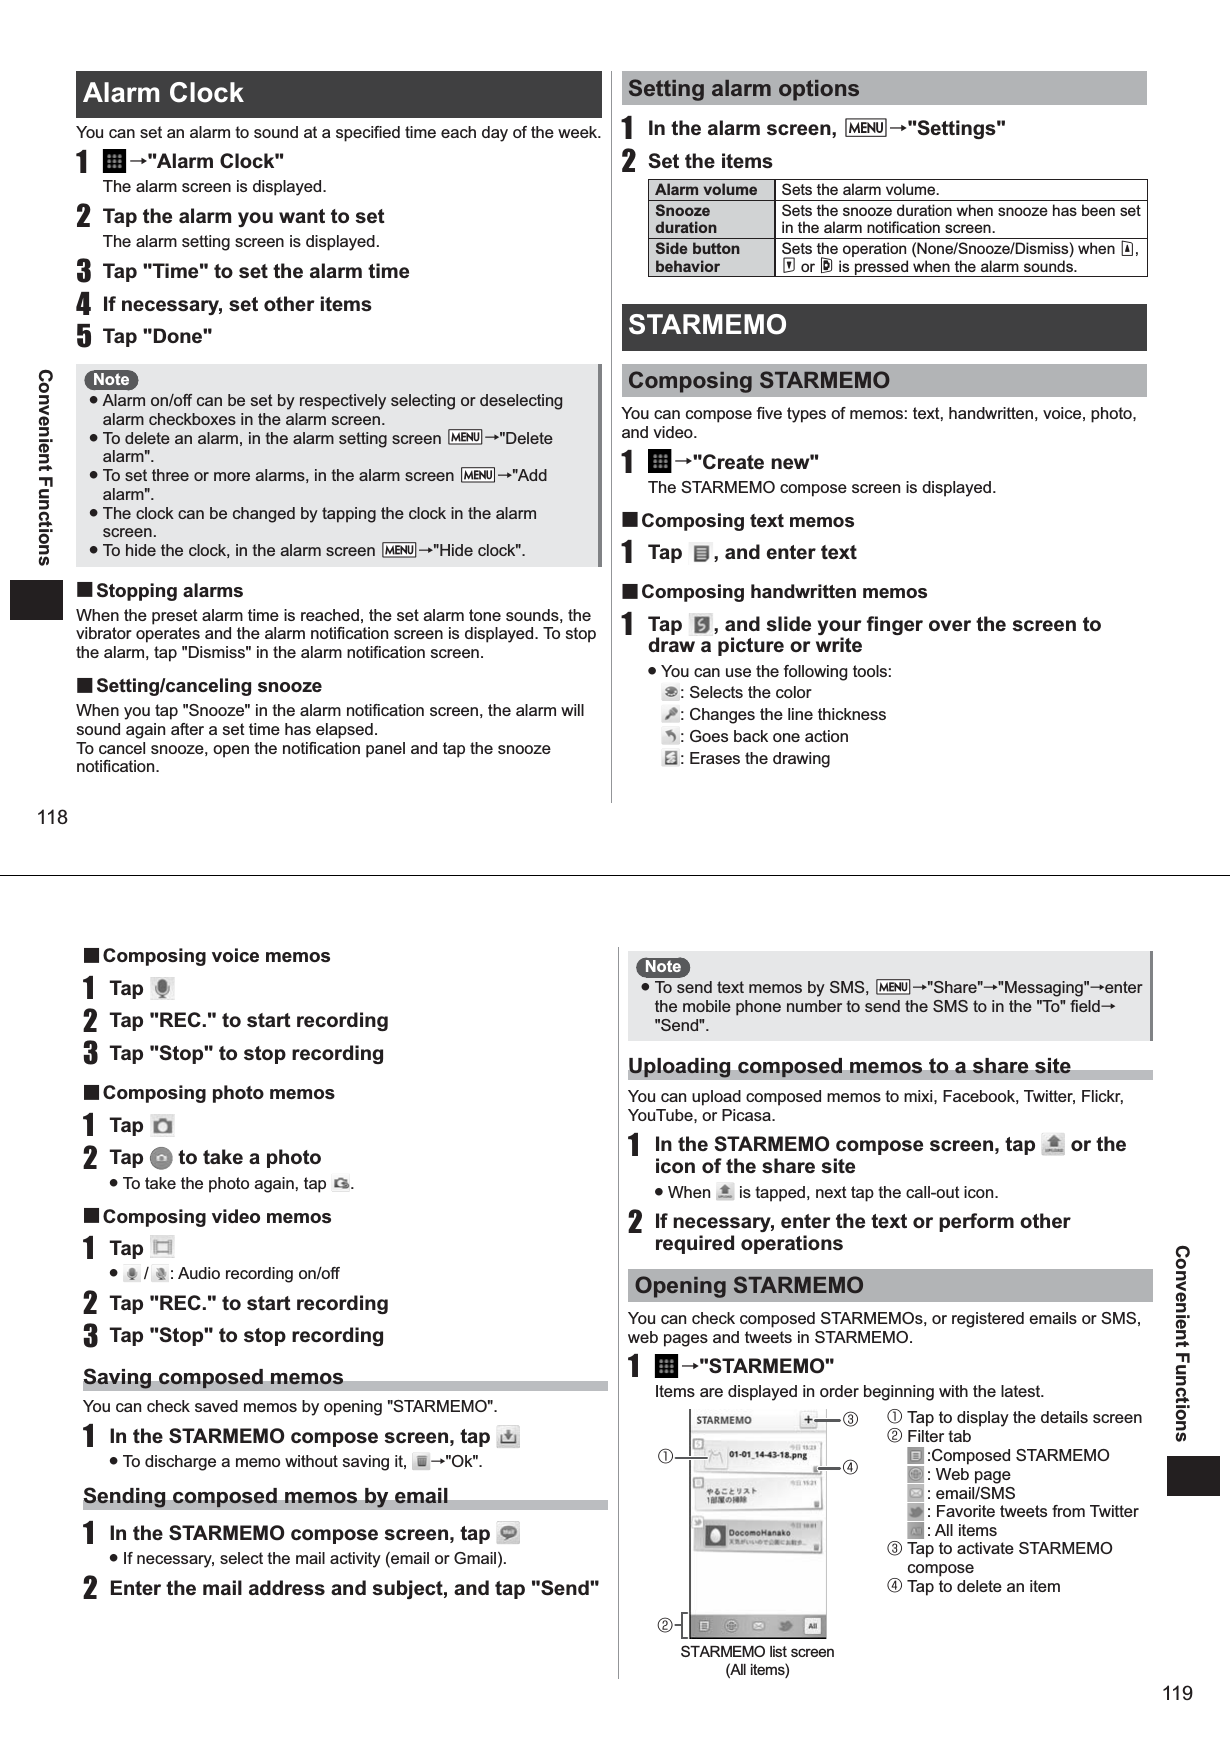
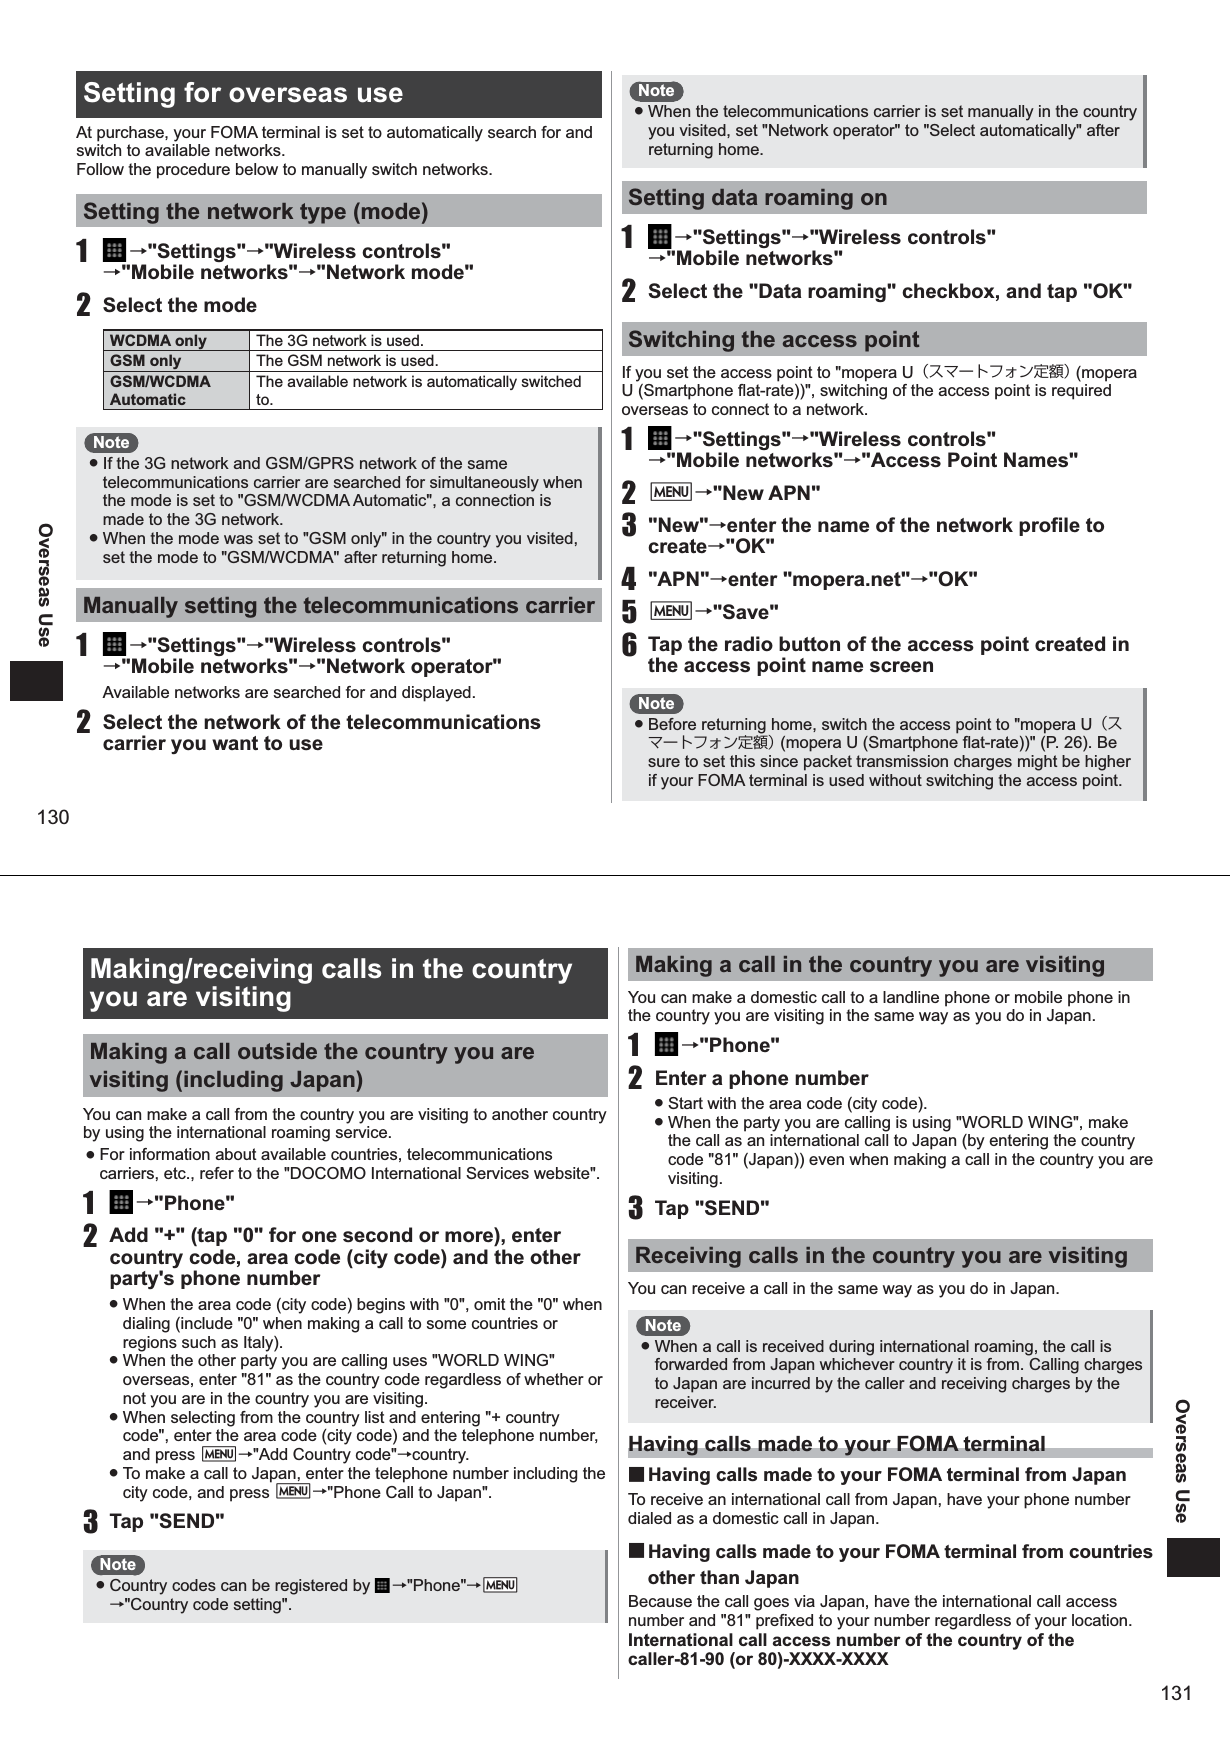
![26Before Using the FOMA Terminal4 When charging ends, disconnect the microUSB plug from your FOMA terminal, and close the external connector terminal cover5 Disconnect the AC adapter from the external connector terminal on the charging microUSB adapter ● Draw out the adapter horizontally while pressing in the release buttons on both sides of the connector.6 Disconnect the AC adapter power plug from the power outletNote ● The FOMA charging microUSB adapter T01 is for connecting the AC adapter to your FOMA terminal. Even if your FOMA terminal is connected to a PC via the FOMA USB cable, for example, data communications or charging cannot be performed. For connecting to a PC, use the PC connection USB cable T01 (provided).Charging using the PC connection USB cableYou can charge your FOMA terminal from a PC if your FOMA terminal is connected to the PC by the PC connection USB cable (provided). ● When the "新しいハードウェアの検索ウィザードの開始 (Start new hardware search wizard)" screen is displayed on the PC, select "キャンセル (Cancel)". Playing back slideshows during chargingYou can play back slideshows by various methods after charging has begun.1 →"SlideShow"2 Select the "Enable when charging" checkbox3 Set the image and image transition methodNote ● During slideshow playback, is displayed at the bottom right of the screen. When this is tapped, the following operations are possible from the left: pause, clock display, and return to previous operation screen.Turning your FOMA terminal on/offTurning your FOMA terminal on1 Keep C pressed (for about two seconds) until your FOMA terminal vibrates once and the notification LED lights (green)After a while, the key lock screen is displayed.Turning your FOMA terminal off1 Keep C pressed until the Phone options menu is displayed2 "Power off"→"OK"When the display goes outIf you have not operated your FOMA terminal for a set period of time, the display indication will automatically go out and your FOMA terminal will enter the Sleep mode.1 Press C or AThe Sleep mode is deactivated, and the key lock screen is displayed.27Before Using the FOMA TerminalNote ● To manually set your FOMA terminal to the Sleep mode, press cC while the display is active. ● The Sleep mode is deactivated when you receive an incoming call or SMS. When the key lock screen is displayed1 Slide "Unlock" at the bottom right of the screen upwardsThis cancels the key lock.Setting access pointsAccess points for Internet connection are pre-registered. However, you can add or change these access points as required. ● sp-mode and mopera U access points are already set. At purchase, the sp-mode is set as the default access point. Checking the access point in use1 →"Settings"→"Wireless controls"→"Mobile networks"→"Access Point Names" ● At purchase, the "spモード (sp-mode)" checkbox is selected.Setting additional access points[New APN] ● Never set the MCC to other than 440 and the MNC to other than 10. Otherwise, they will no longer be displayed on screen.1 →"Settings"→"Wireless controls"→"Mobile networks"→"Access Point Names"2 M→"New APN"3 "Name"→enter the name of the network profile to create→"OK"4 "APN"→enter the access point name→"OK"5 Enter other items required by the telecommunications carrier6 M→"Save"Note ● When the MCC and MNC settings have been changed and the access point is no longer shown on the access point name screen, either reset these settings to their defaults or manually set the access point.Key lock screen](https://usermanual.wiki/Fujitsu-Mobile-communications/TU12-J01/User-Guide-1378867-Page-15.png)
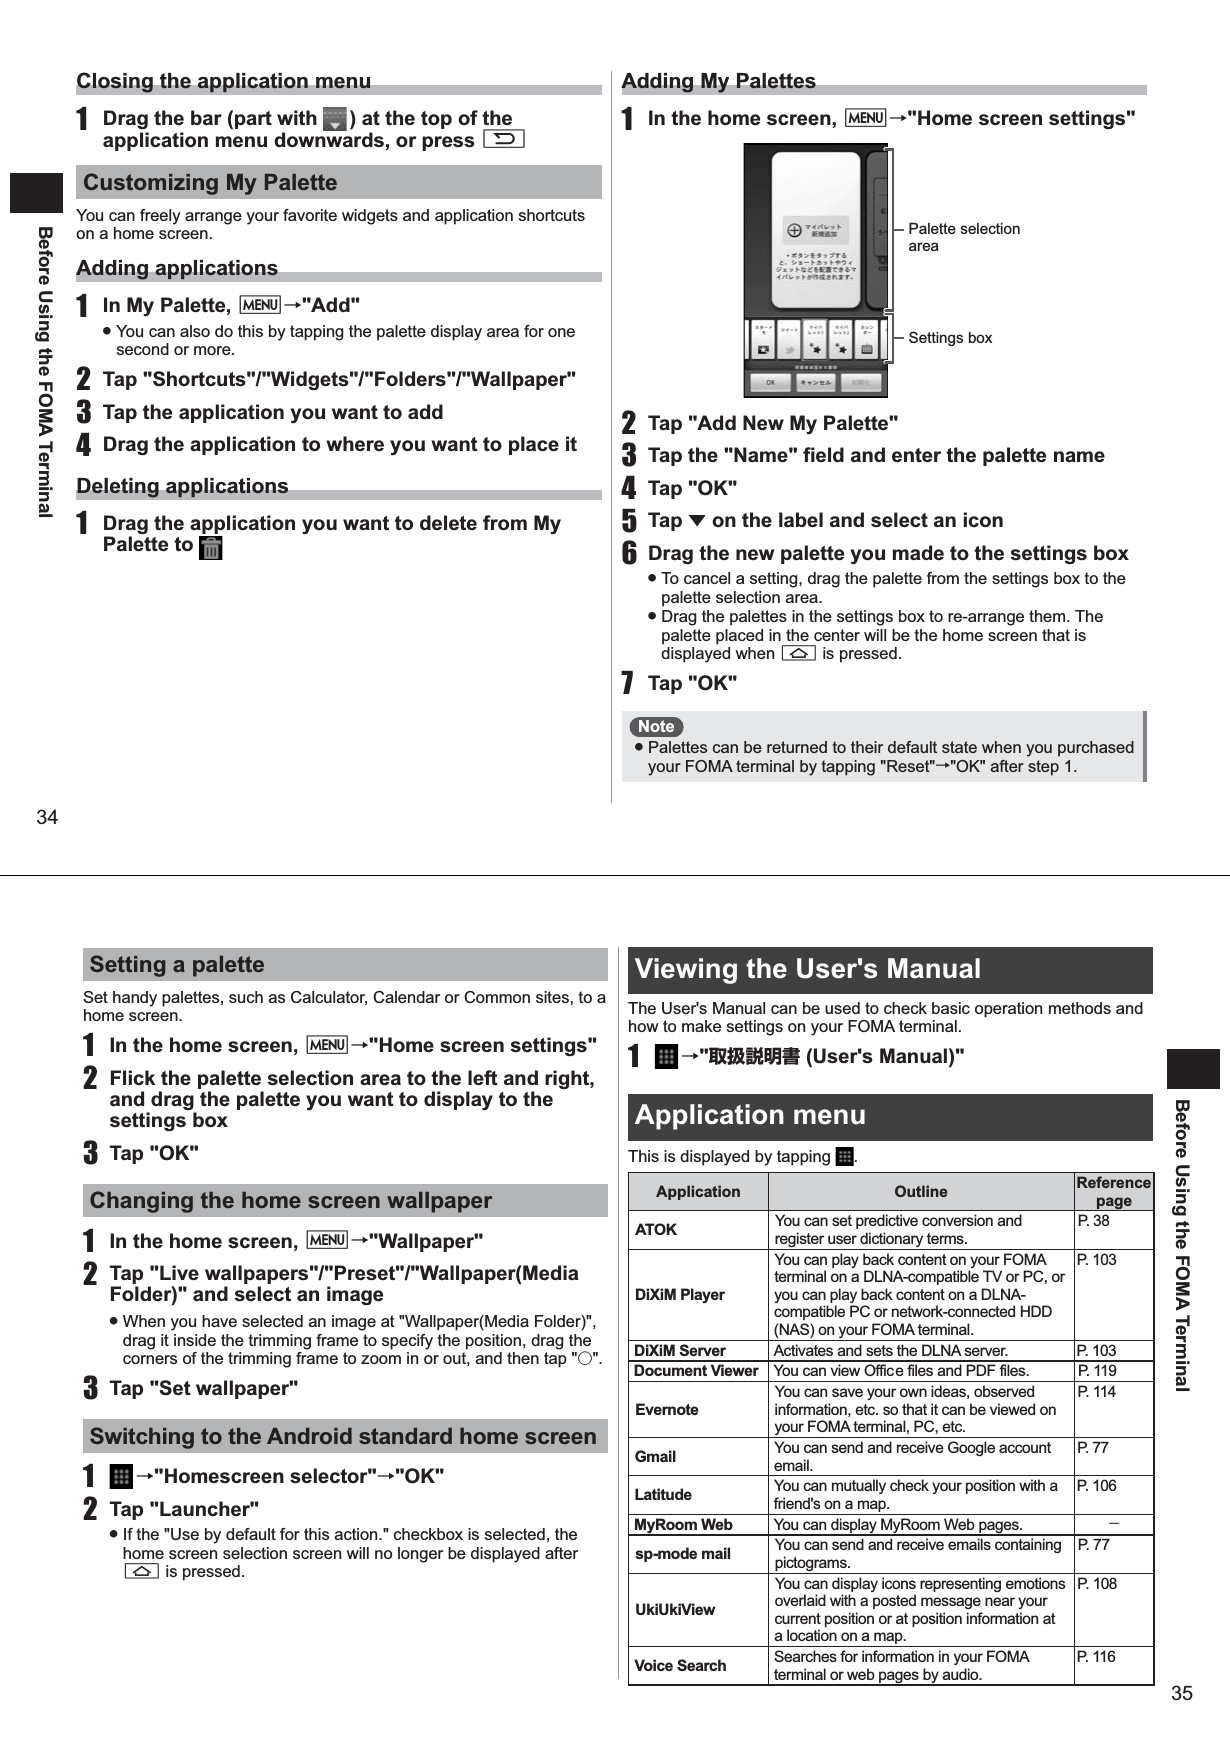
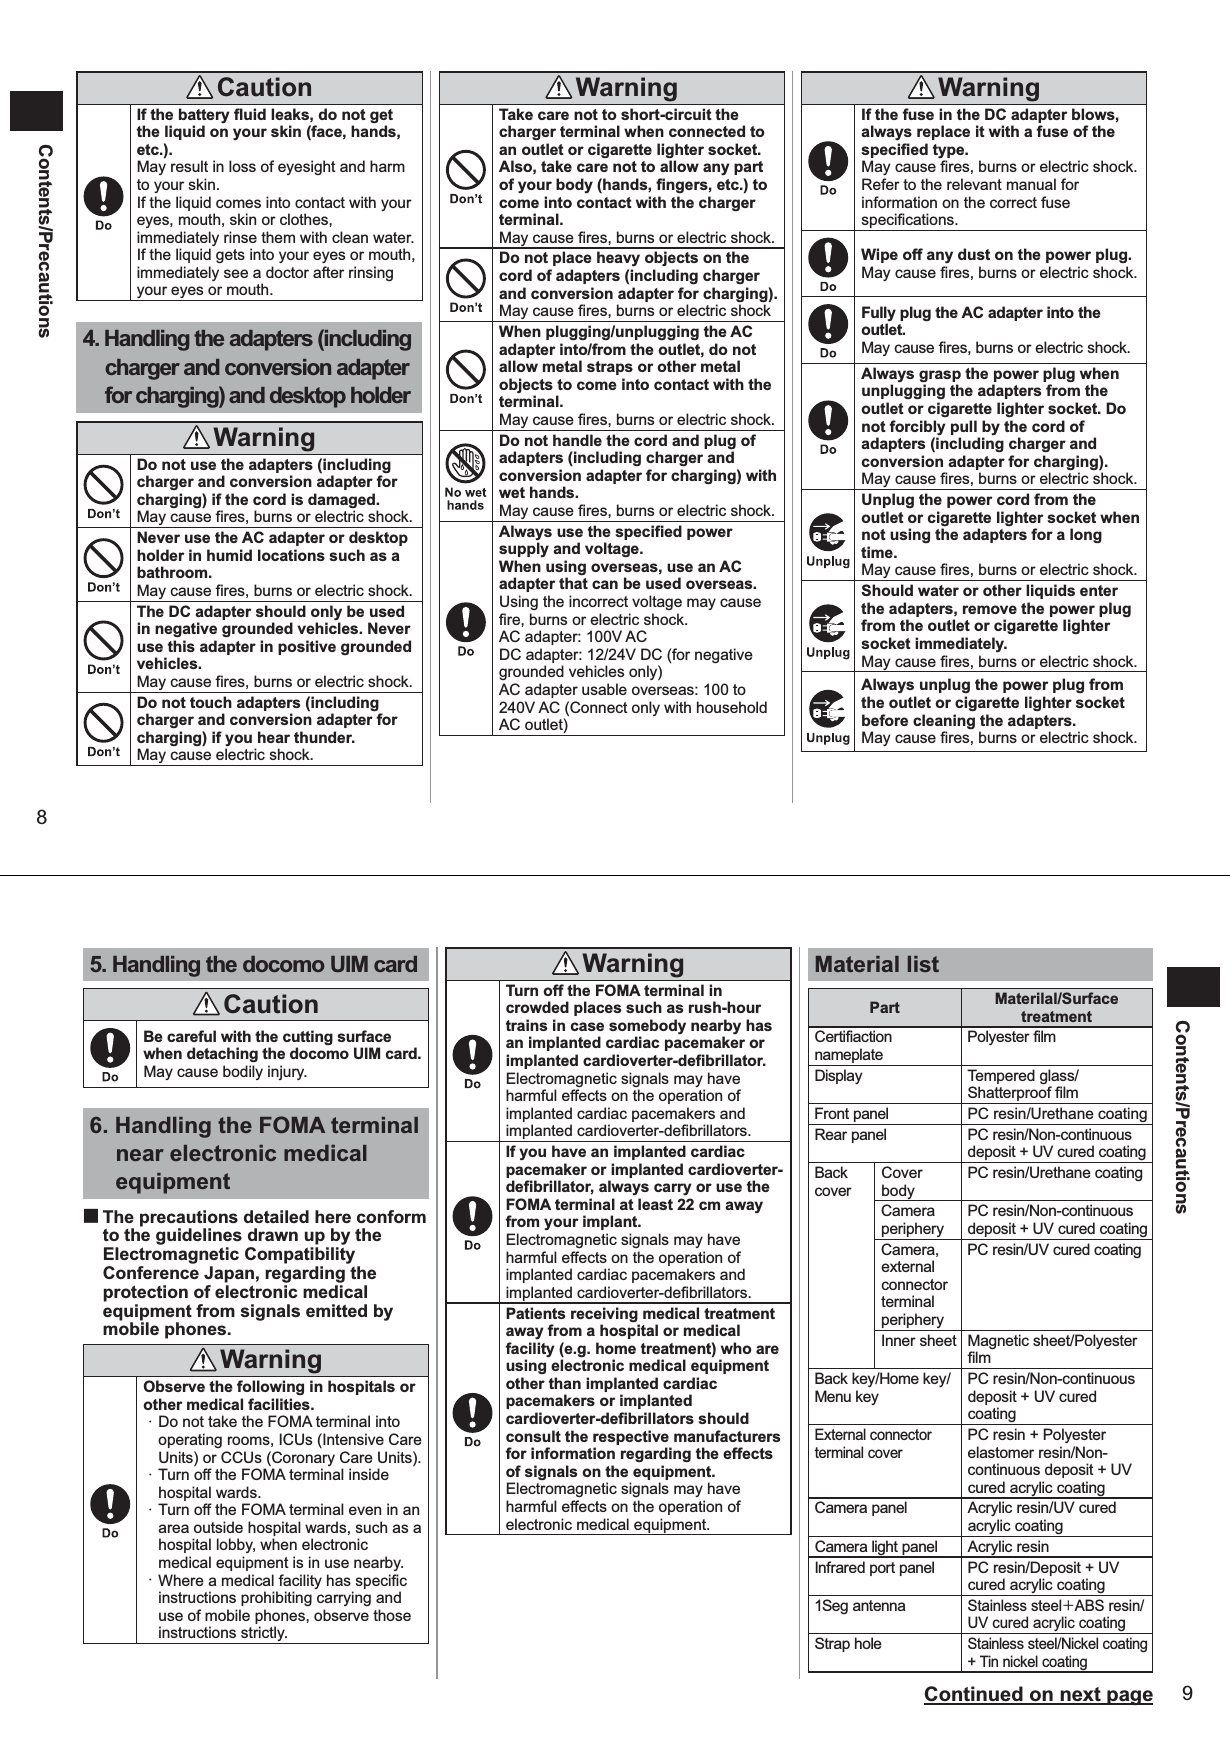
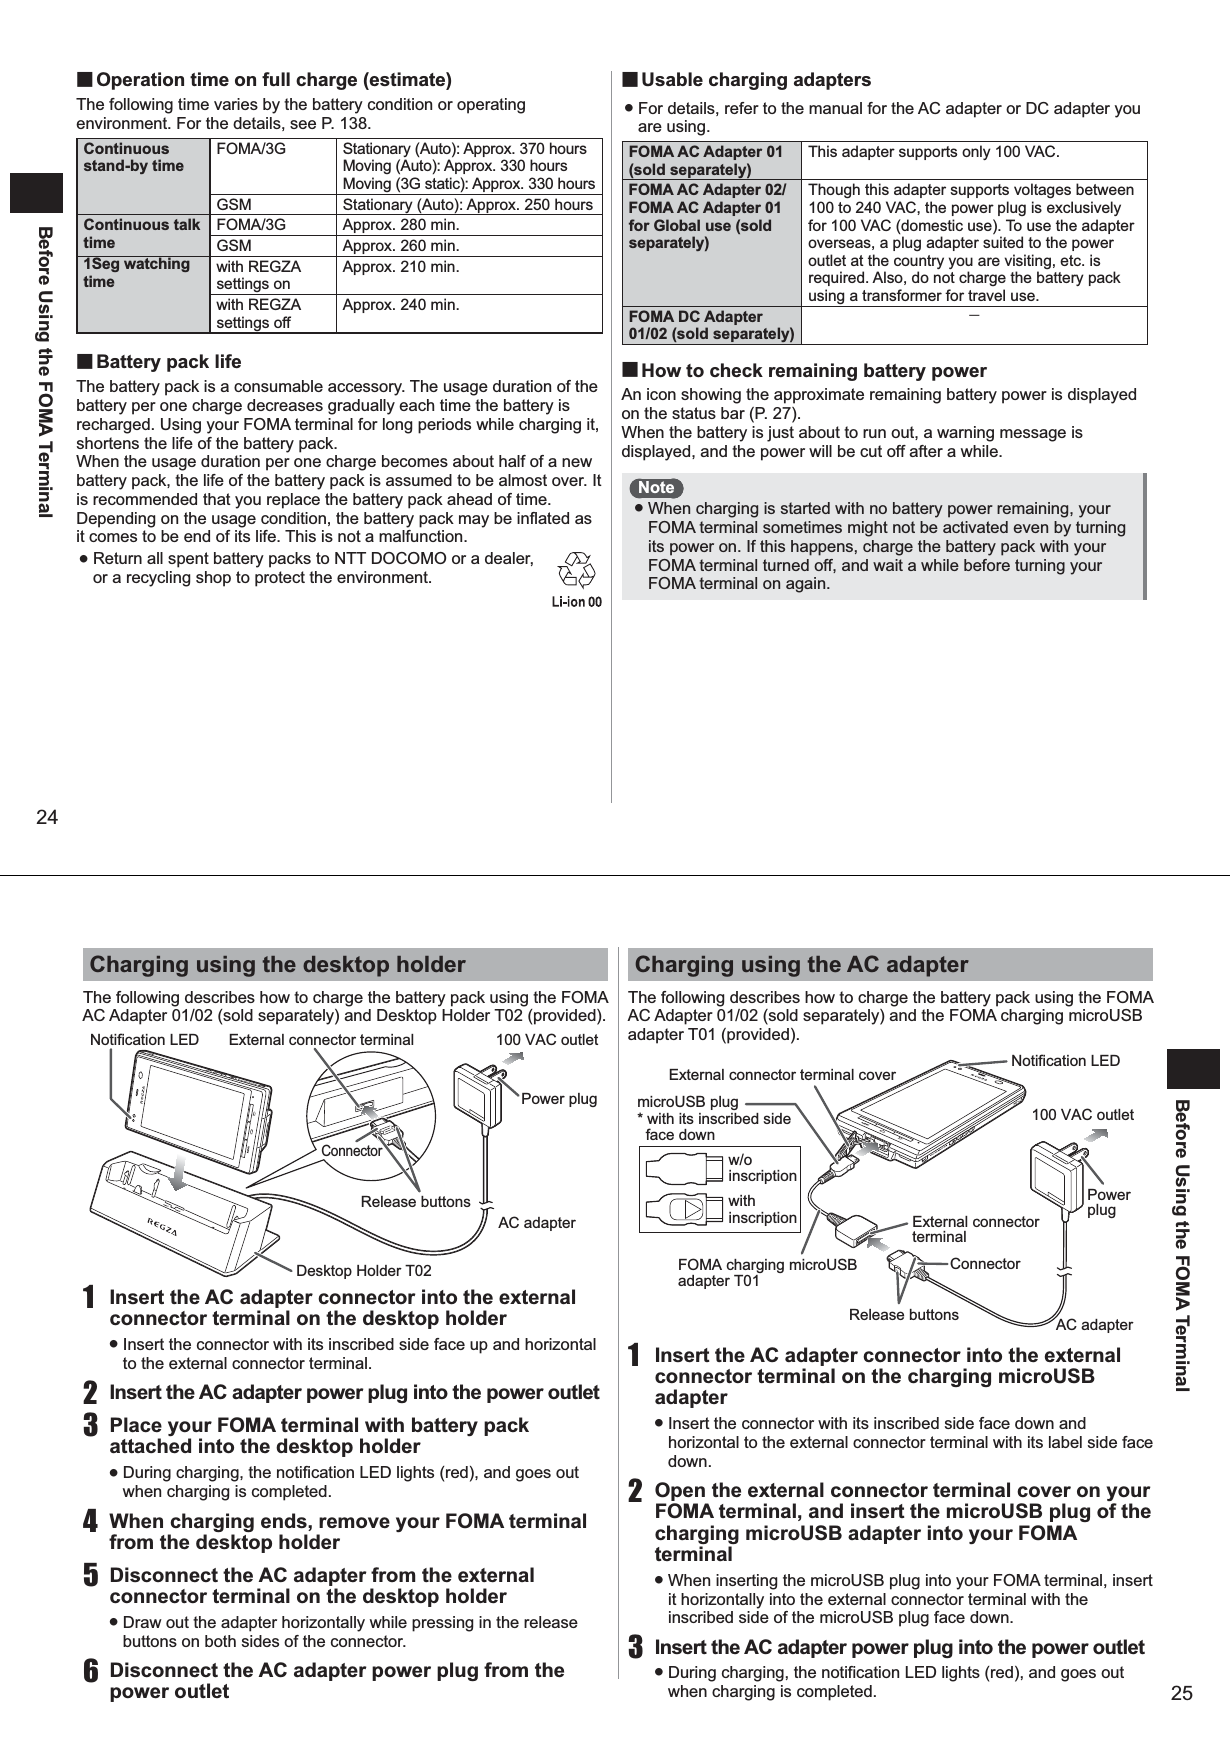
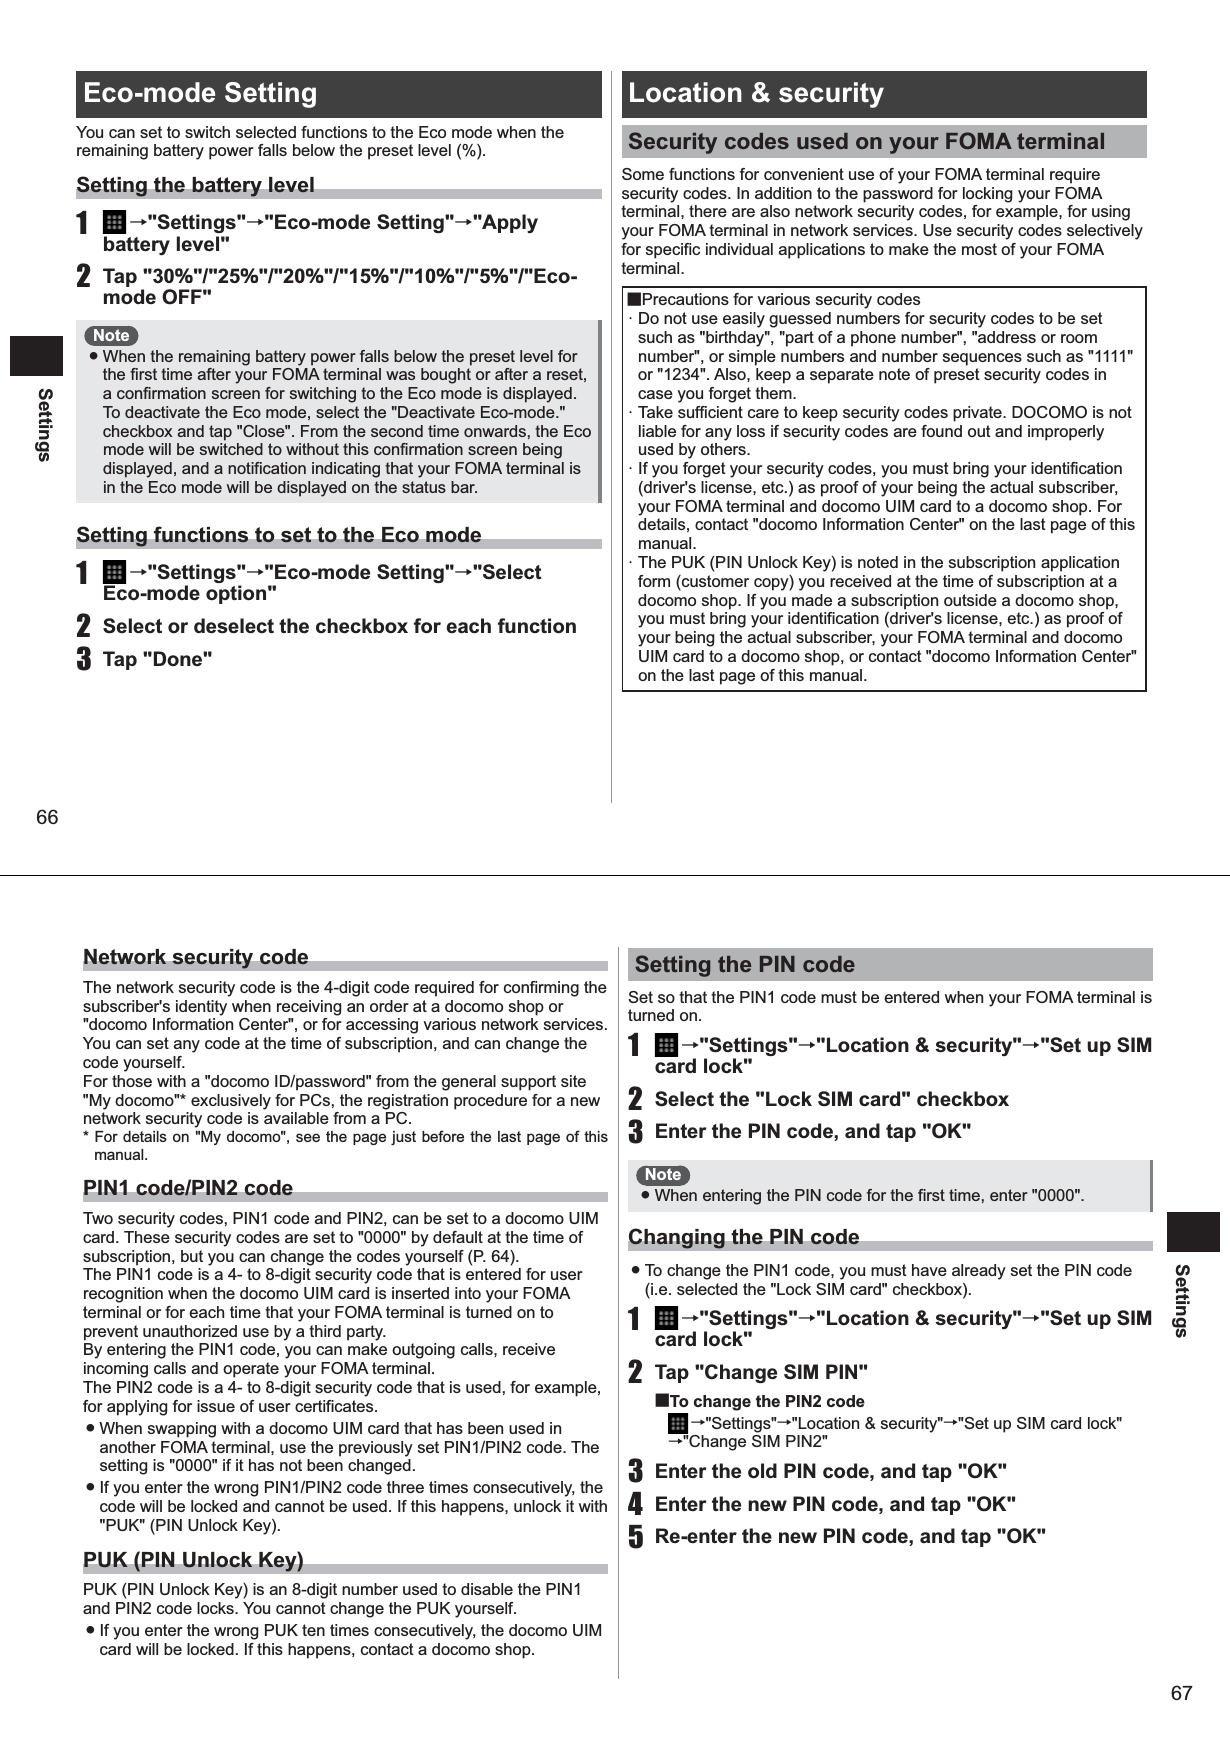
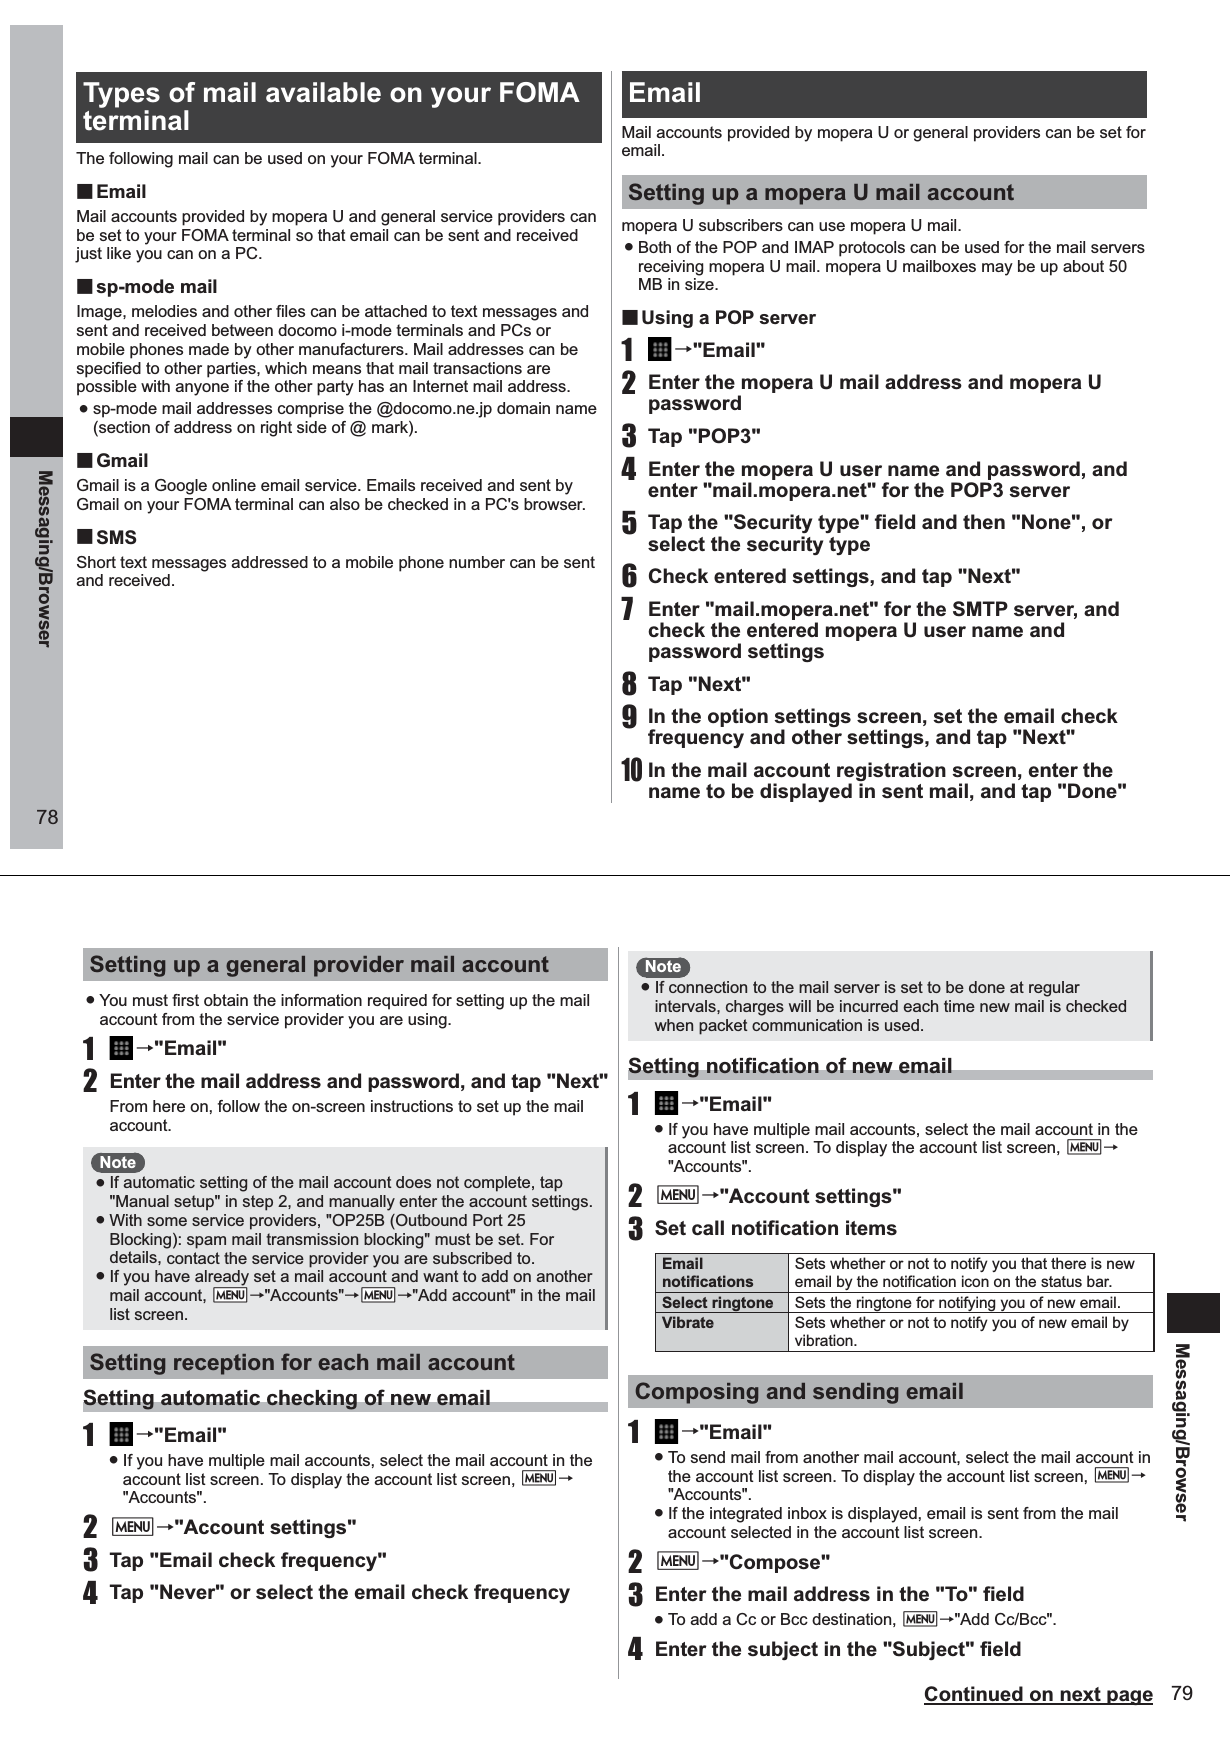
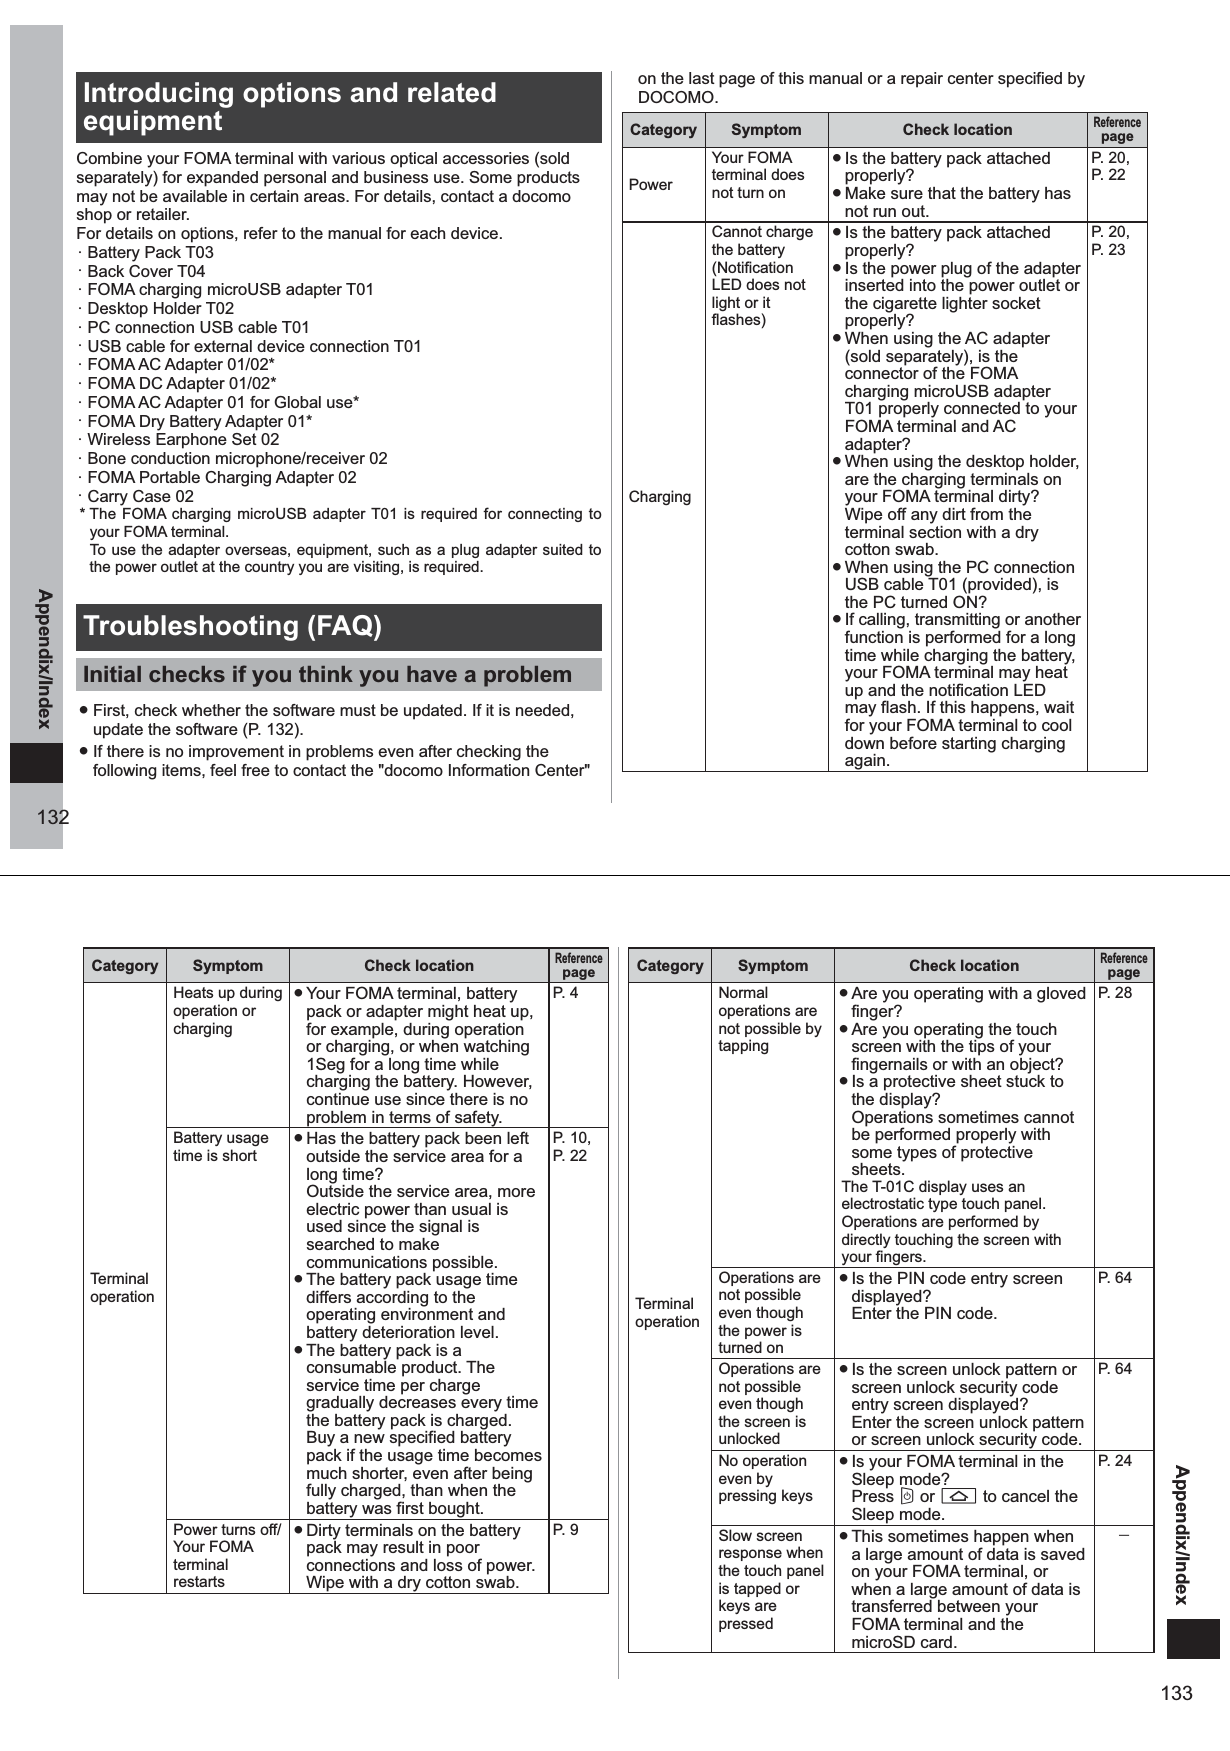
![40Before Using the FOMA TerminalSetting ATOKSetting the ATOK keyboard1 →"ATOK"→"Software keyboard"2 Set the required itemsKeypad sound When this checkbox is selected, the operation tone sounds each time you tap a key.Keypad vibrationWhen this checkbox is selected, your FOMA terminal vibrates each time you tap a key.Input mode* Sets the input mode on the number keyboard. Auto cursor moving*When the "Enable auto cursor moving" checkbox is selected, the cursor automatically moves to the right and stands by for entry of the next character if you do not tap for a set period of time during multi-tapping. You can also set the tap interval or time it takes until the cursor moves. Character delete key*When "[BS]Backspace" is selected, the character immediately to the left of the cursor is deleted when is tapped. When "[CLR]Clear" is selected, the character immediately to the right of the cursor is deleted when "Clear" is tapped. Gesture guide* When setting by gesture input Pro, if this checkbox is deselected and "OK" is tapped, the gesture guide is no longer displayed. When this checkbox is selected, you can set the time until the gesture guide is displayed after a key is tapped.* Number keyboard onlyEntry/conversion related settings1 →"ATOK"→"Entering/Converting"2 Set the required itemsInput predictionWhen this checkbox is selected, predictive conversion candidates are displayed.Showing prediction candIf this checkbox is selected with predictive conversion enabled, input predictive candidates are displayed before the next character is entered.Auto space insertIf this checkbox is selected, a space is automatically inserted after a word is applied in the English input mode (P. 36, P. 3 7). ■Deleting learned dataOnce a phrase or expression is entered, it is automatically stored in memory, and is displayed as a predictive conversion candidate. All learned data can be deleted and your FOMA terminal can be returned to its default state by initializing learned data. 1 →"ATOK"→"Entering/Converting"2 "Initializing learning data"→"OK"Changing the keyboard design1 →"ATOK"→"Design"2 Set the required itemsTheme Sets the design theme of the ATOK software keyboard.Font size Sets the text size of conversion candidates.number of lines to display (vertical screen)Sets the number of lines to display conversion candidates in the portrait display mode.number of lines to display (horizontal screen)Sets the number of lines to display conversion candidates in the landscape display mode.41Before Using the FOMA TerminalUser dictionaryYou can register frequently used words to a user dictionary in advance. When you enter characters with the same reading, words in the user dictionary will be given priority over other conversion candidates and displayed first. ■Registering words to a user dictionary1 →"ATOK"→"Tools"→"Dictionary utility"The ATOK dictionary utility screen is displayed.2 M→"新規登録 (New)"3 Enter the word to register at "単語 (Word)"4 Enter the reading at "読み (Reading)"5 Select the part of speech, and tap "登録 (Register)" ■Modifying registered words1 In the ATOK dictionary utility screen, tap the word you want to modify2 Modify its registered content, and tap "修正 (Modify)" ■Deleting registered words■Deleting one dictionary entry1 In the ATOK dictionary utility screen, tap the word you want to delete for one second or more2 "削除 (Delete)"→"はい (Yes)"■Deleting all entries1 In the ATOK dictionary utility screen, M→"全削除 (Delete all)"→"はい (Yes)" ■Saving registered words to microSD card1 In the ATOK dictionary utility screen, M→"一覧出力 (Output list)"2 At the "場所 (Output to)" field, select "sdcard" and select the folder to save the registered words in3 Enter the file name4 "OK"→"実行 (Execute)"→"閉じる (Close)"Note ● To read word data saved on the microSD card, do the following: In the ATOK dictionary utility screen, mM→"一括登録 (Batch register)"→at the "場所 (Output to)" field, select "sdcard"→select the folder→select the file→"OK"→"登録 (Register)"→"閉じる (Close)"Adding common phrases1 →"ATOK"→"Tools"→"Common phrase utility"The common phrase list screen is displayed. ● You can add new categories by M→"カテゴリー (Category)" →M→"新規作成 (New)". 2 M→"新規作成 (New)"3 Enter the common phrase, and select the category at the "カテゴリー (Category)" field4 Tap "登録 (Register)"Editing common phrases ■Editing the body text of common phrases1 Select the common phrase you want to edit in the common phrase list screen](https://usermanual.wiki/Fujitsu-Mobile-communications/TU12-J01/User-Guide-1378867-Page-22.png)
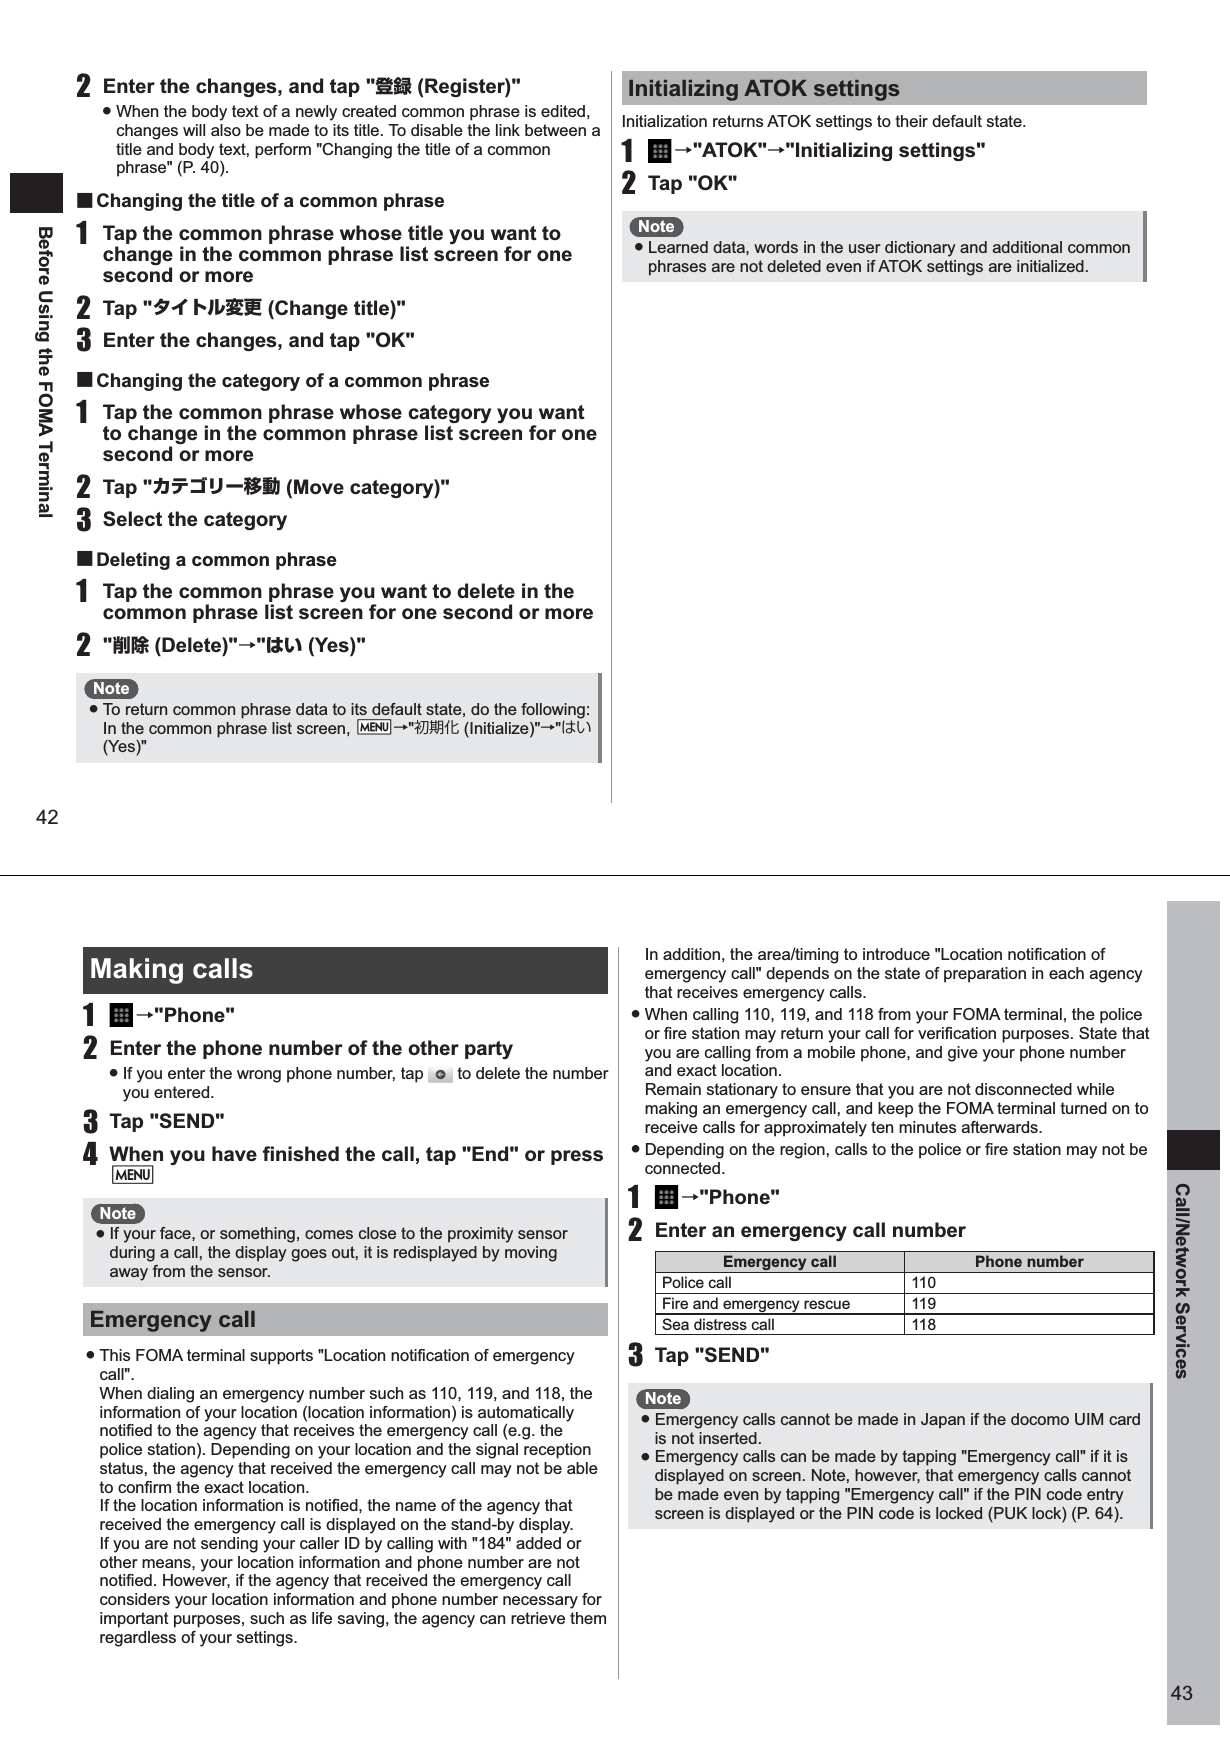
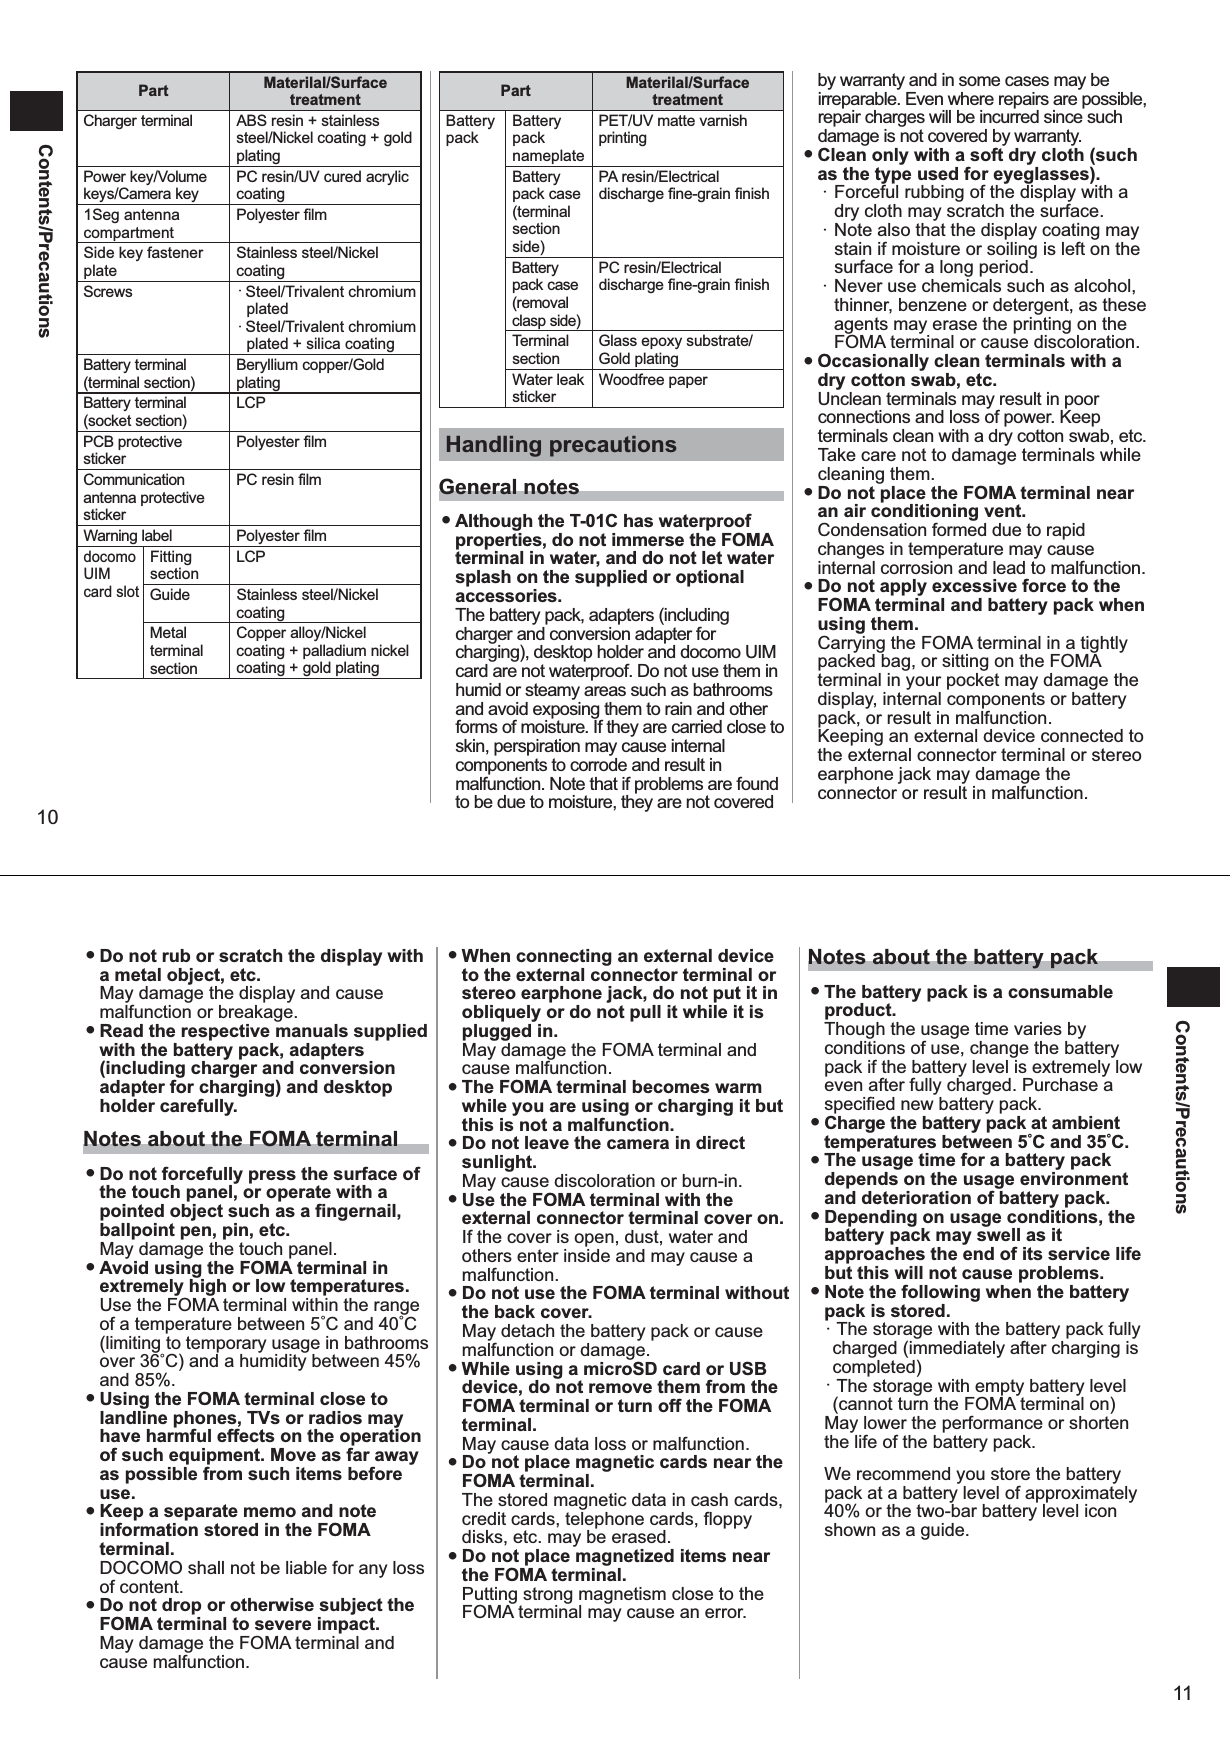
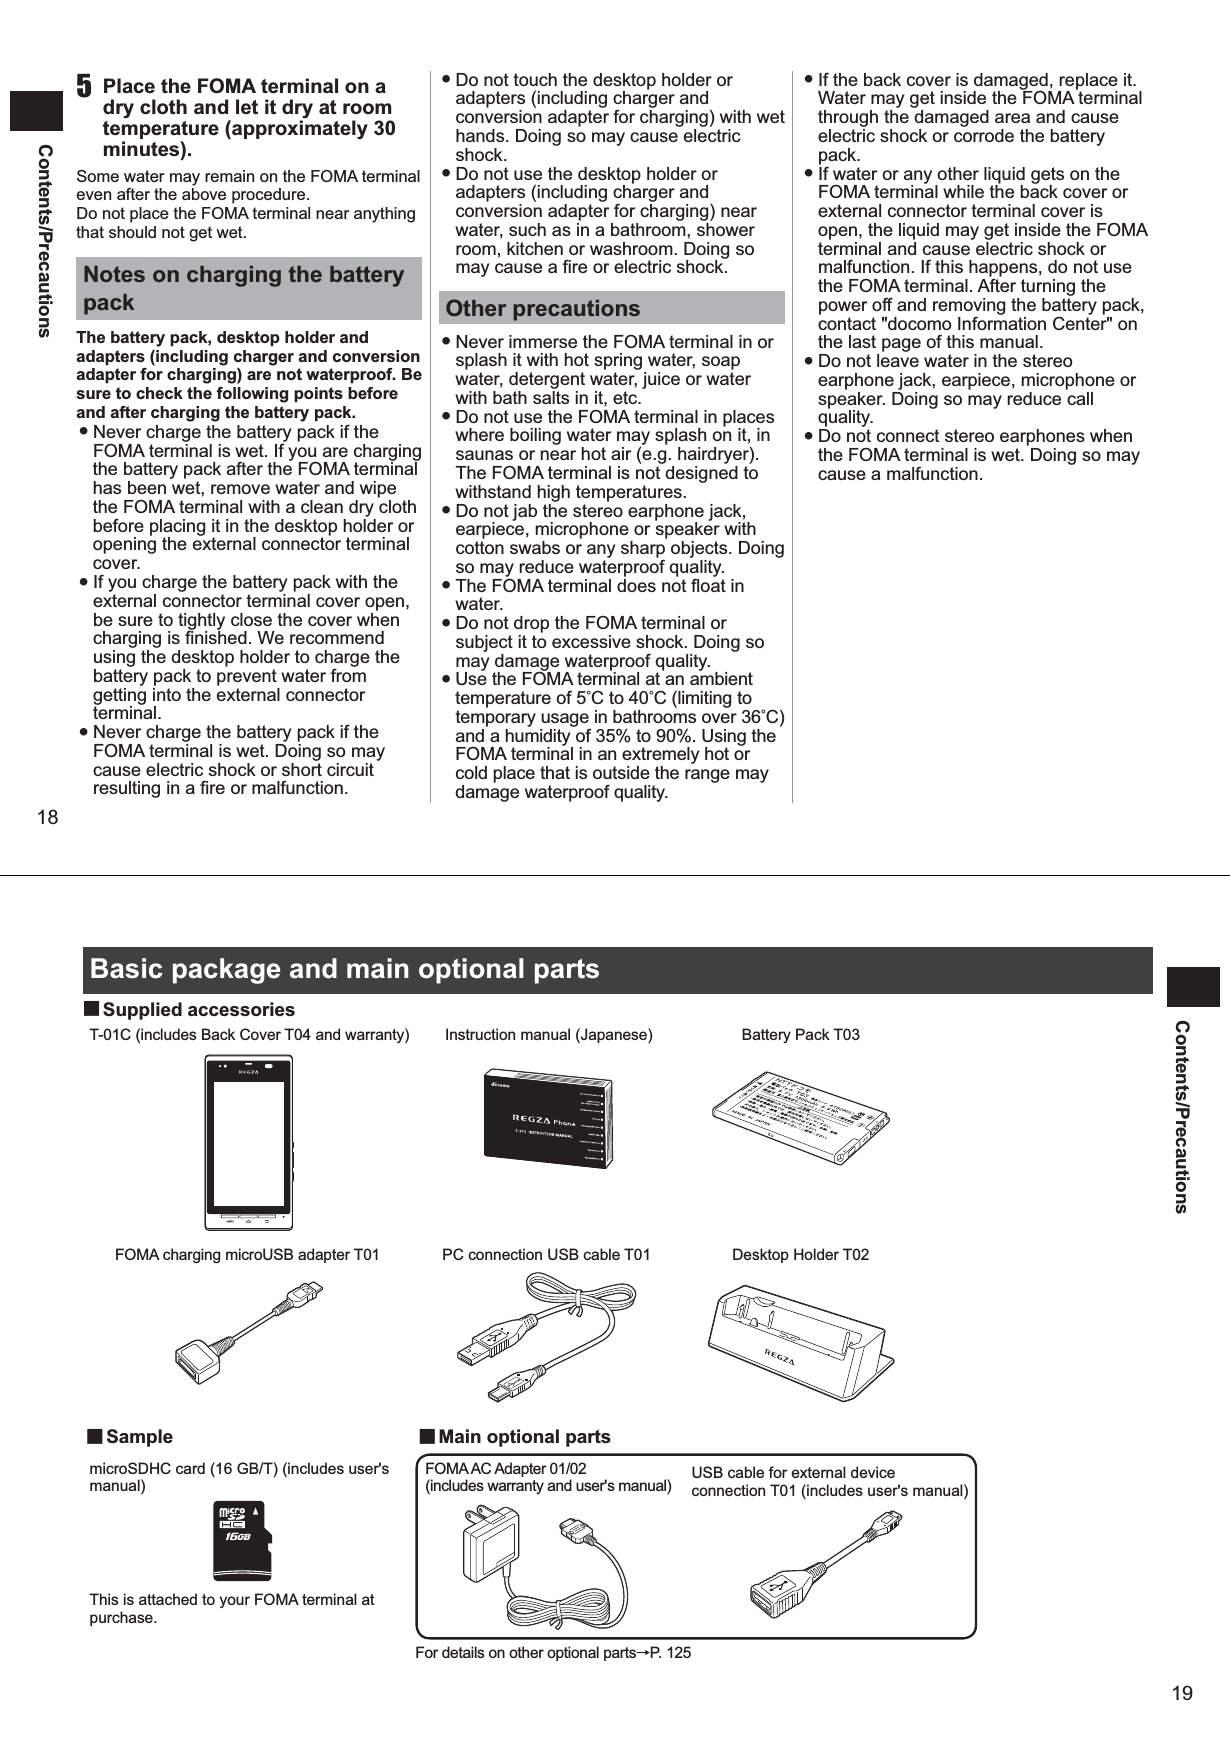
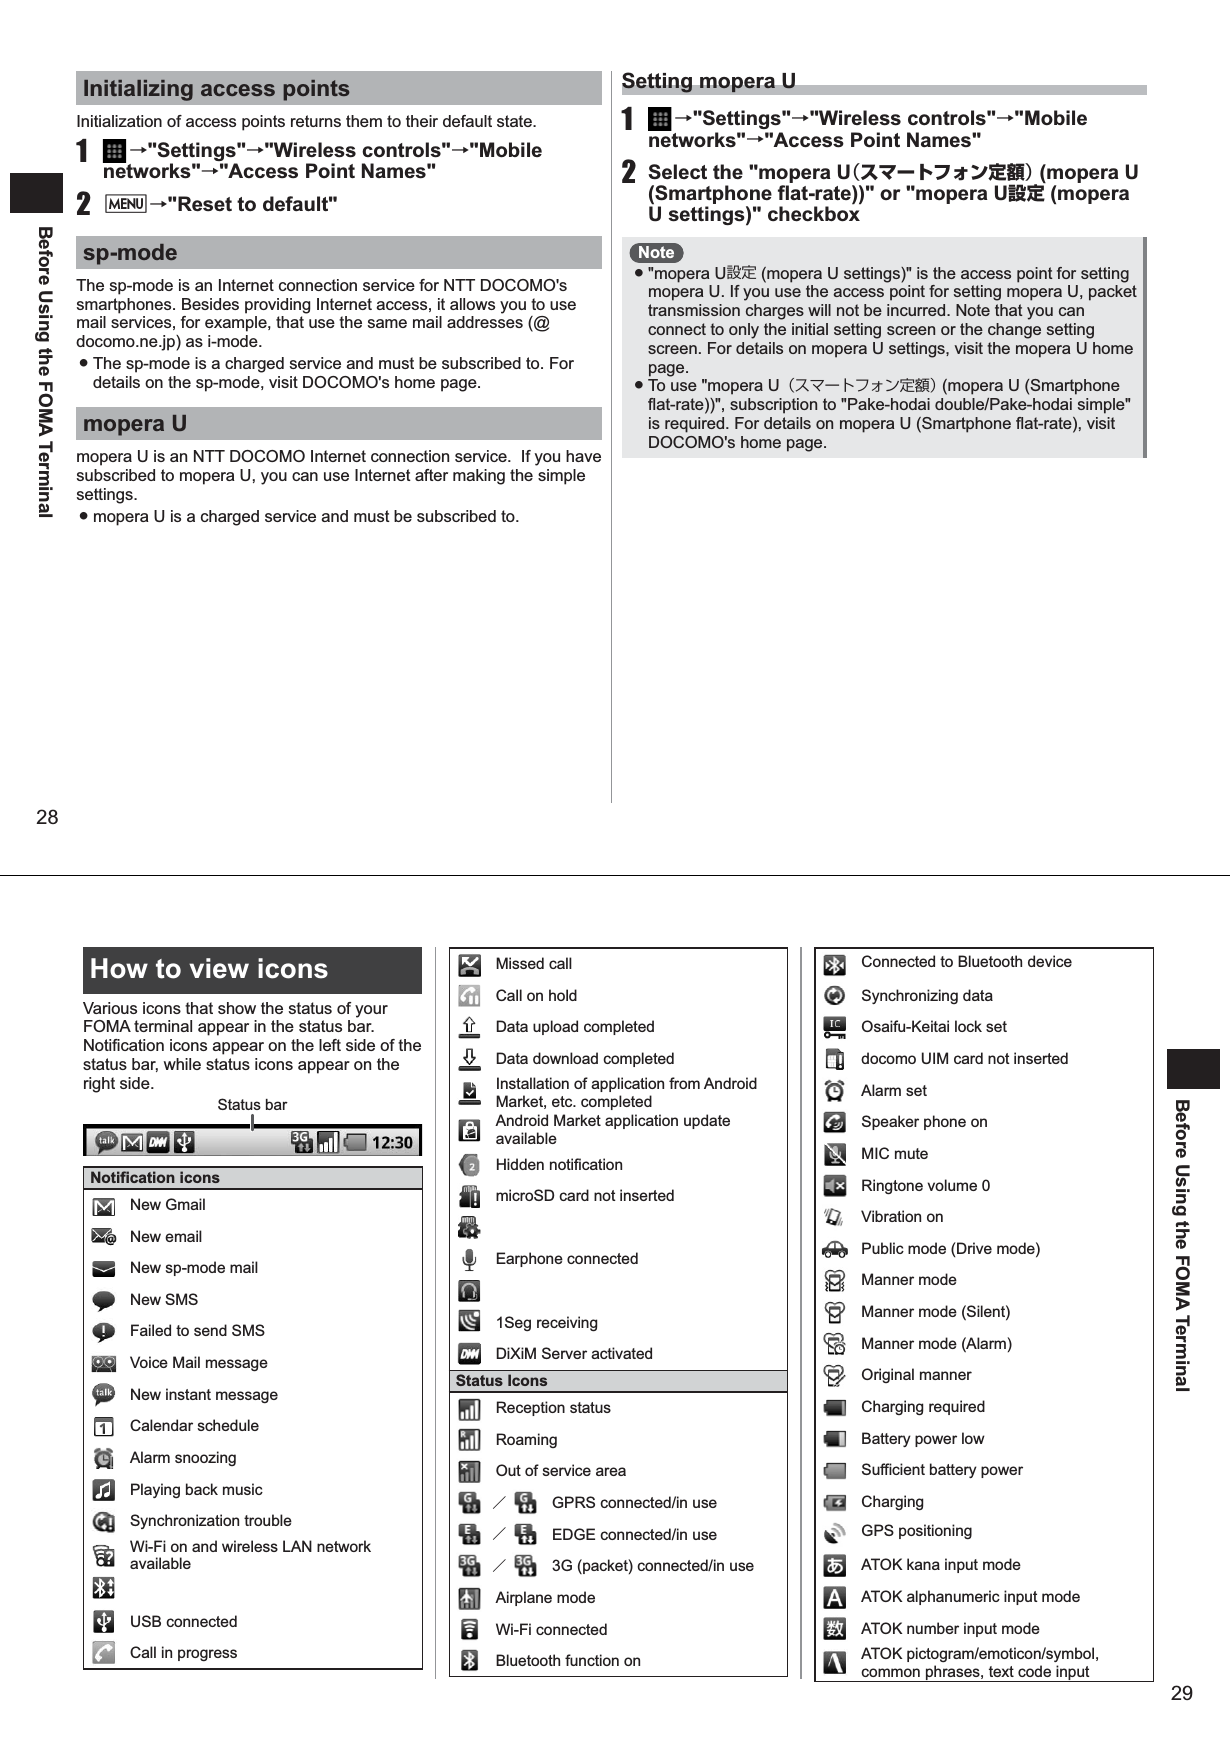
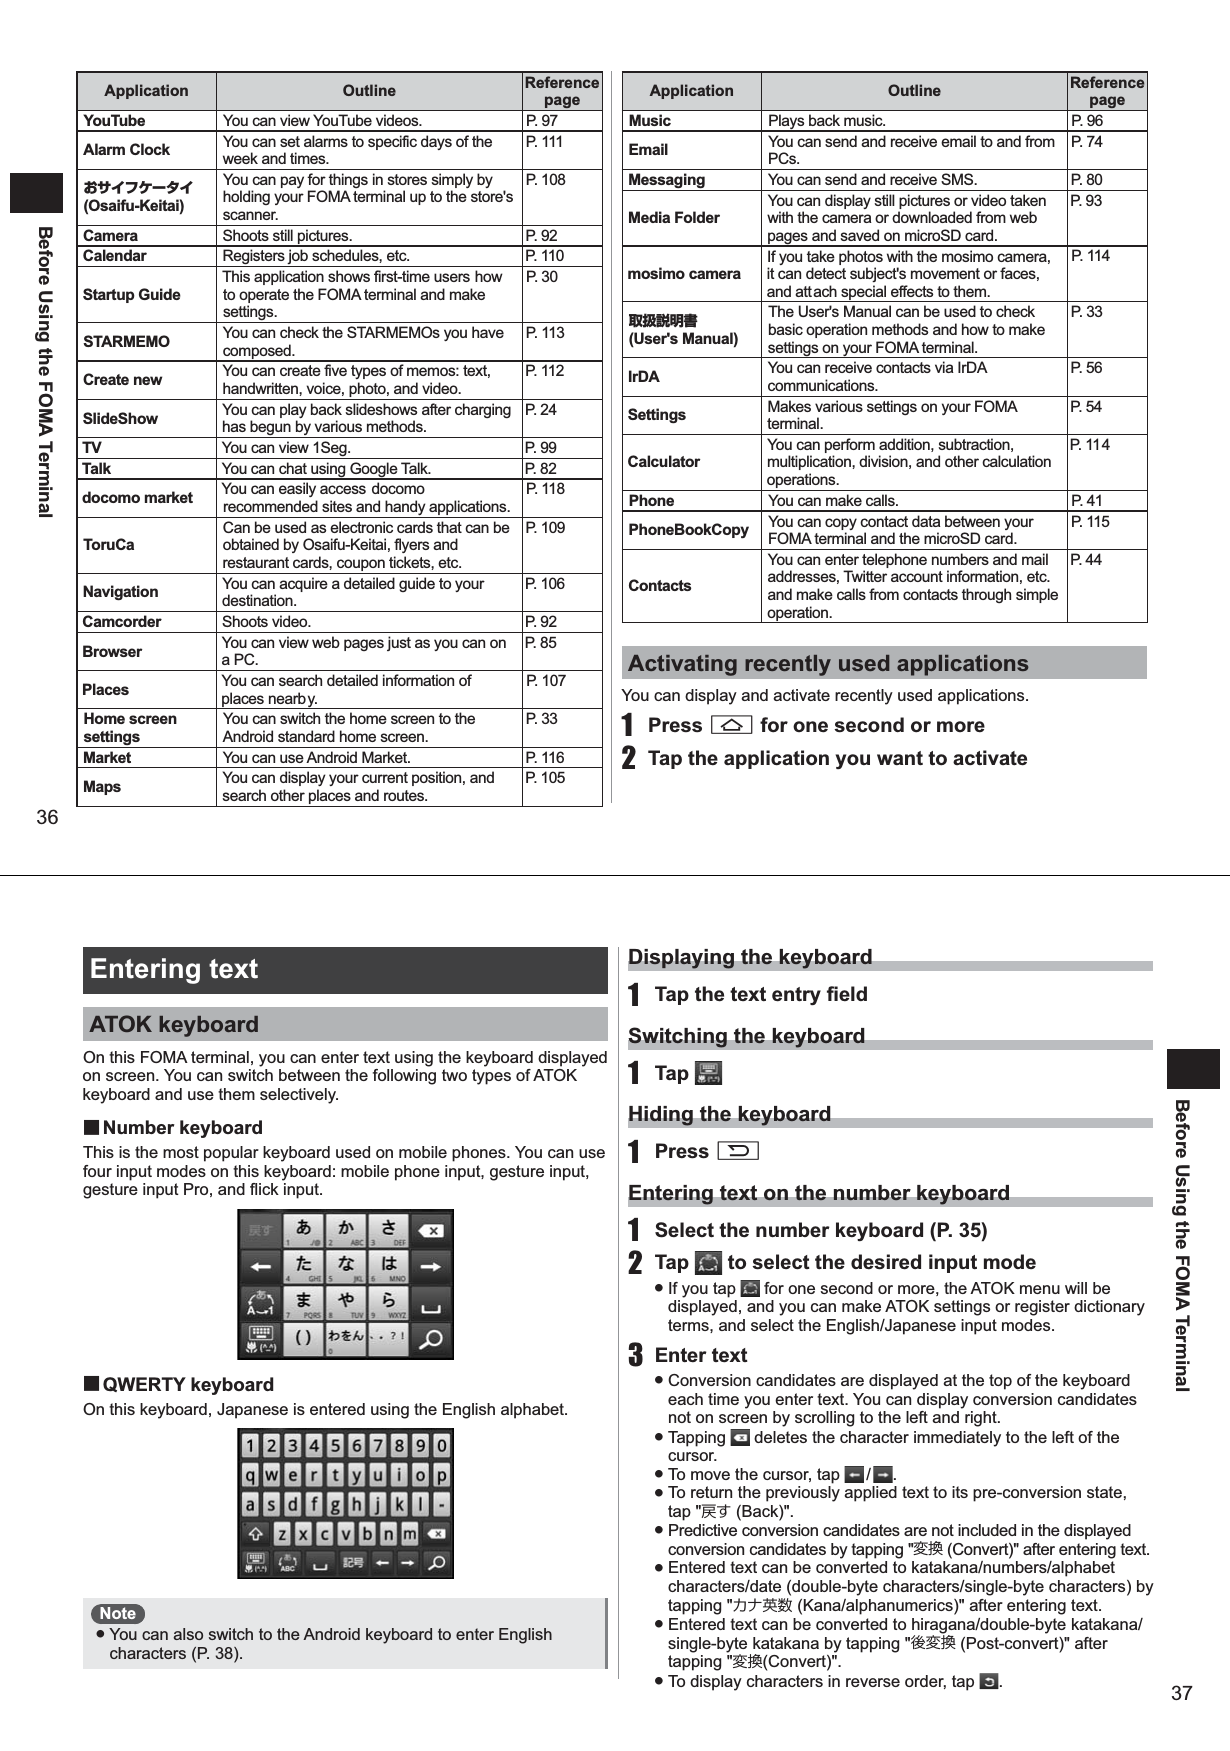
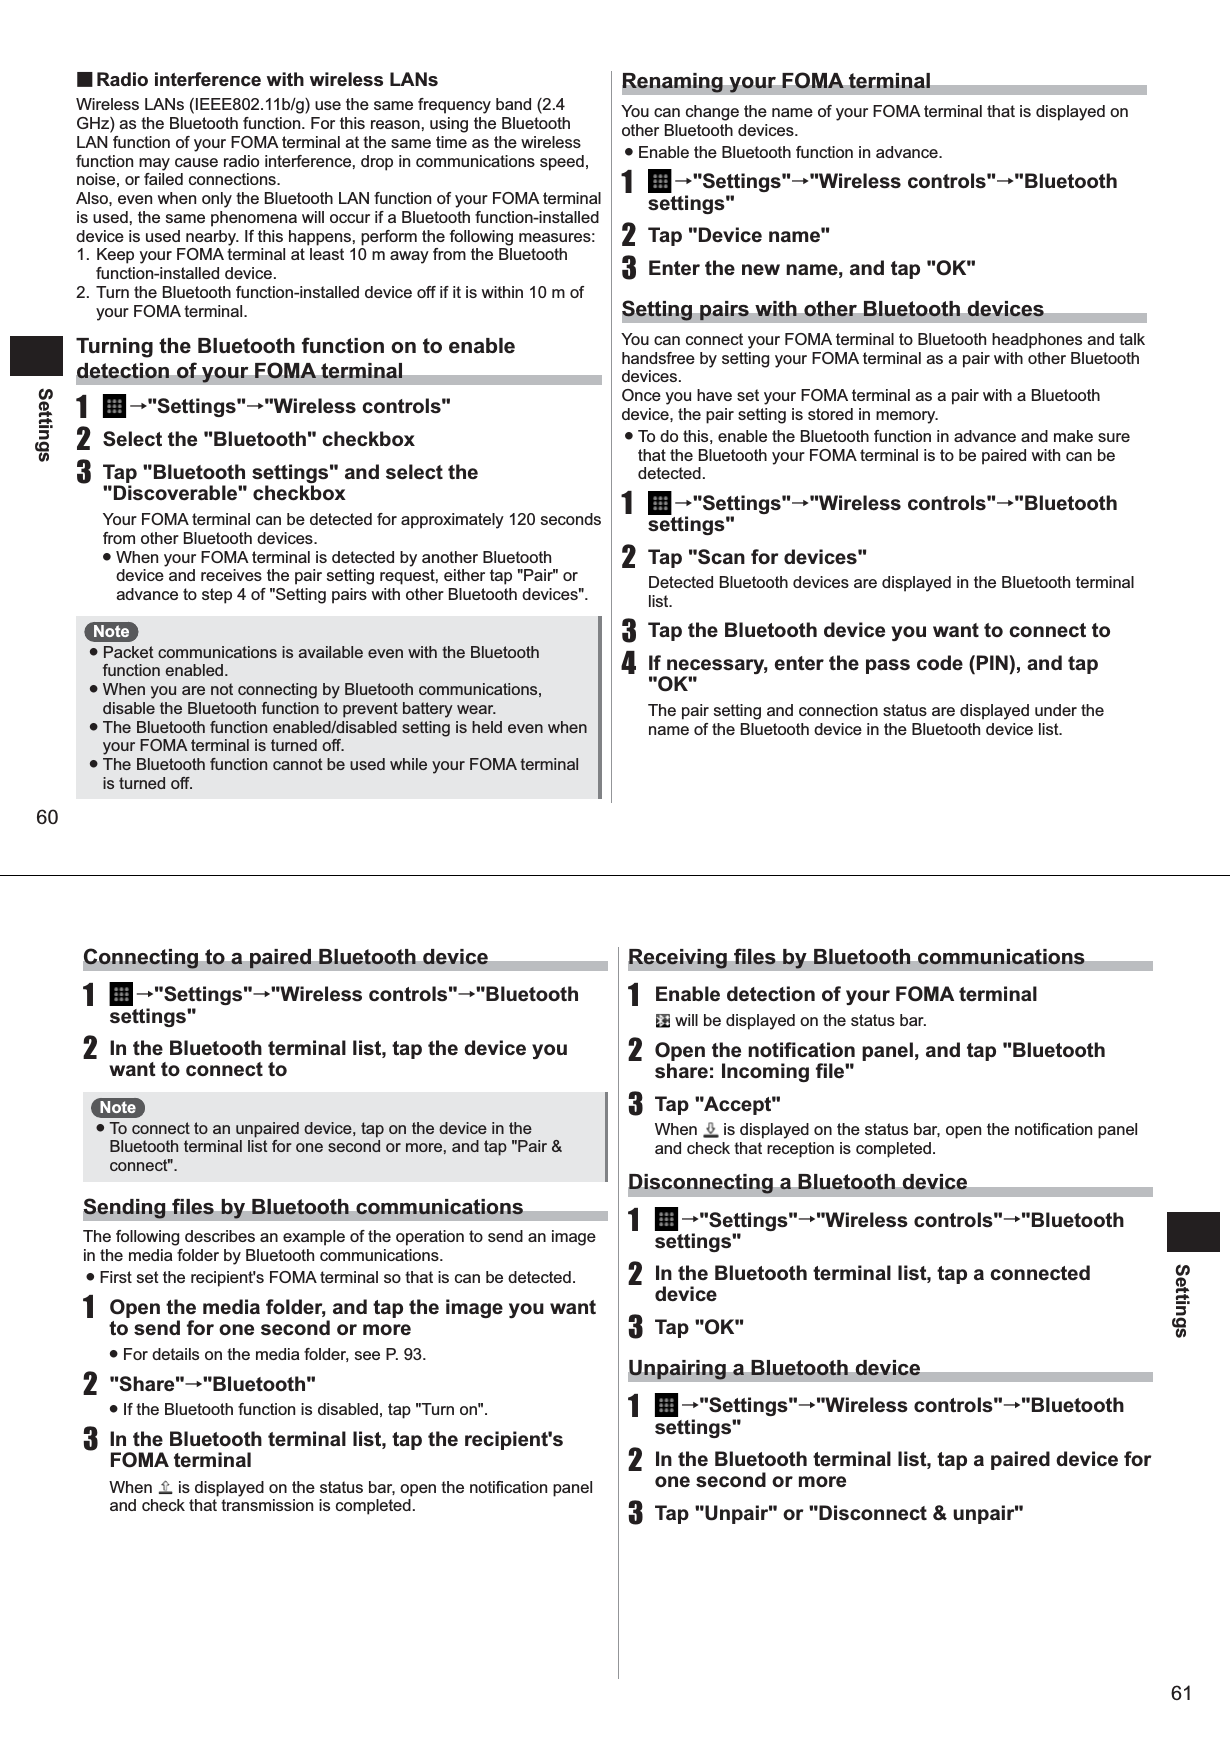
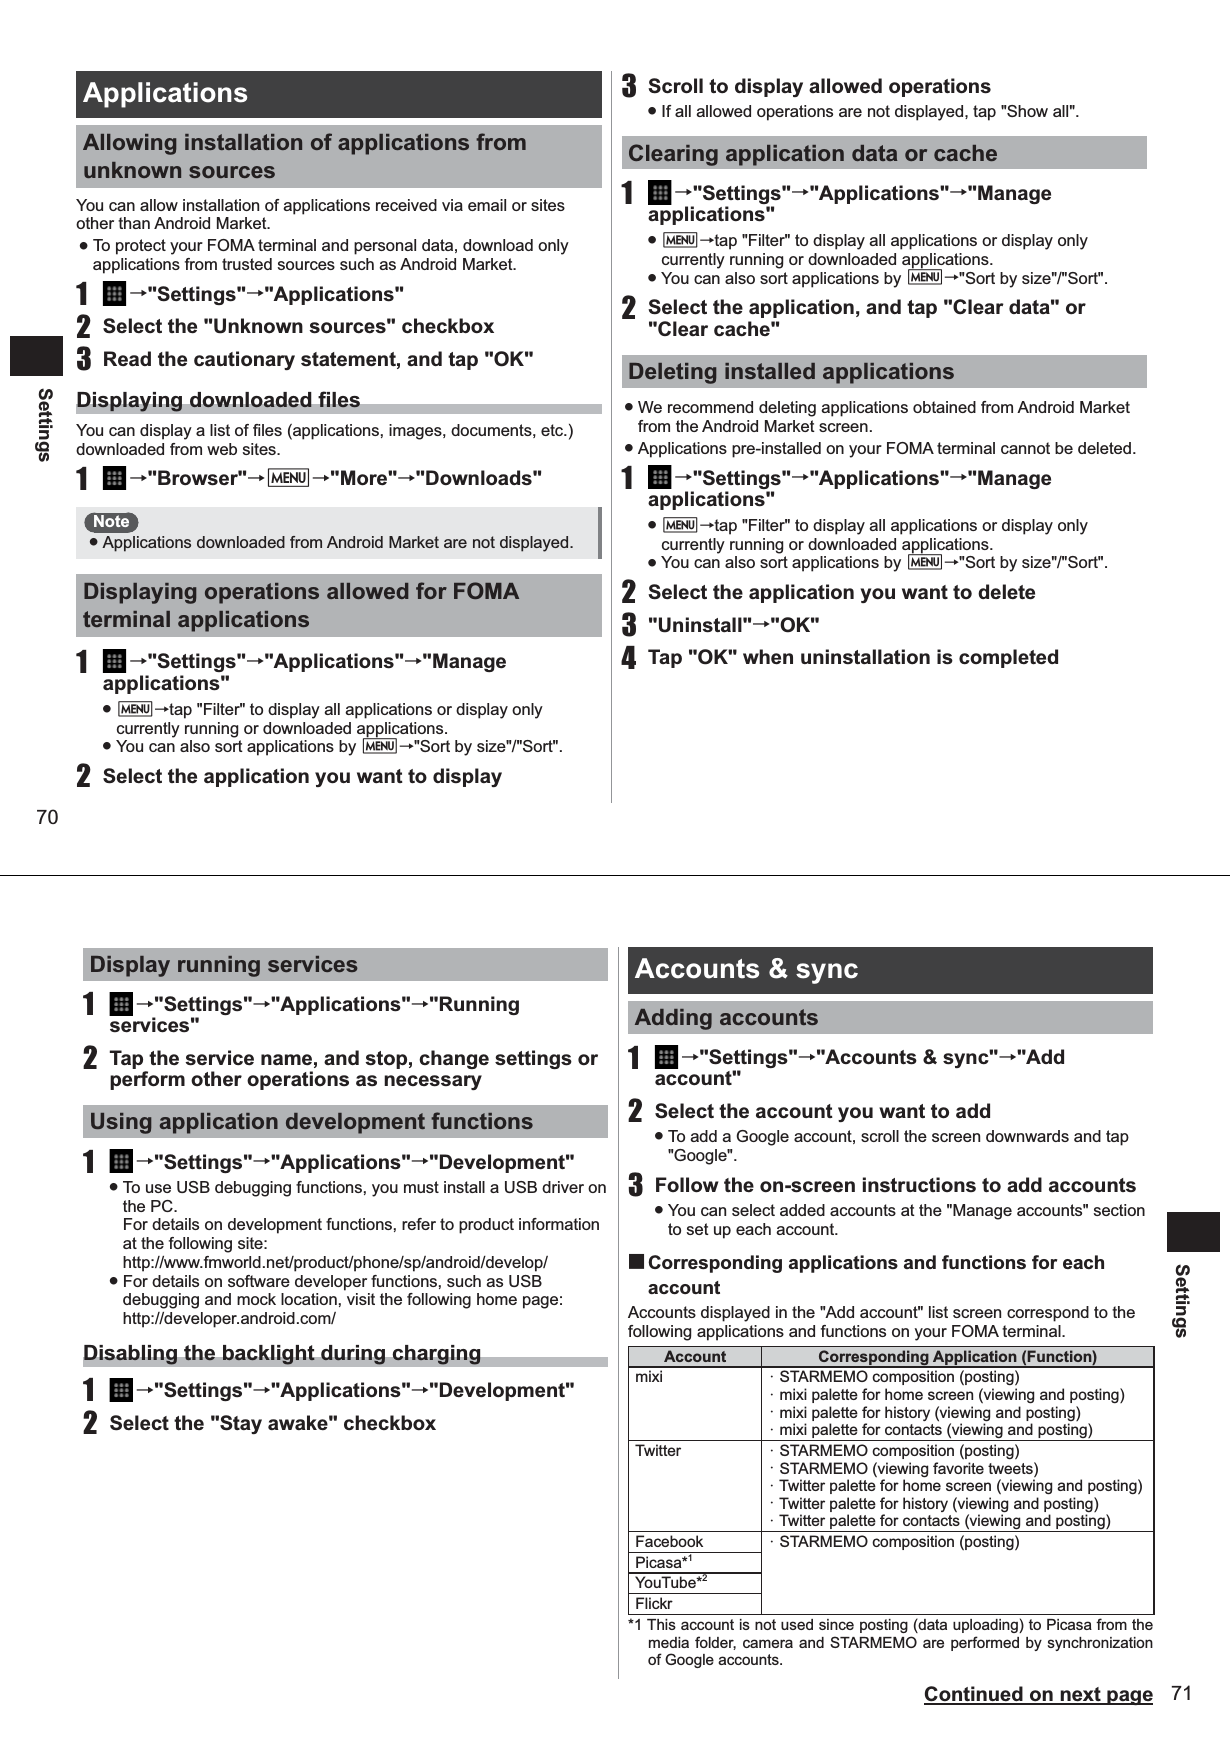
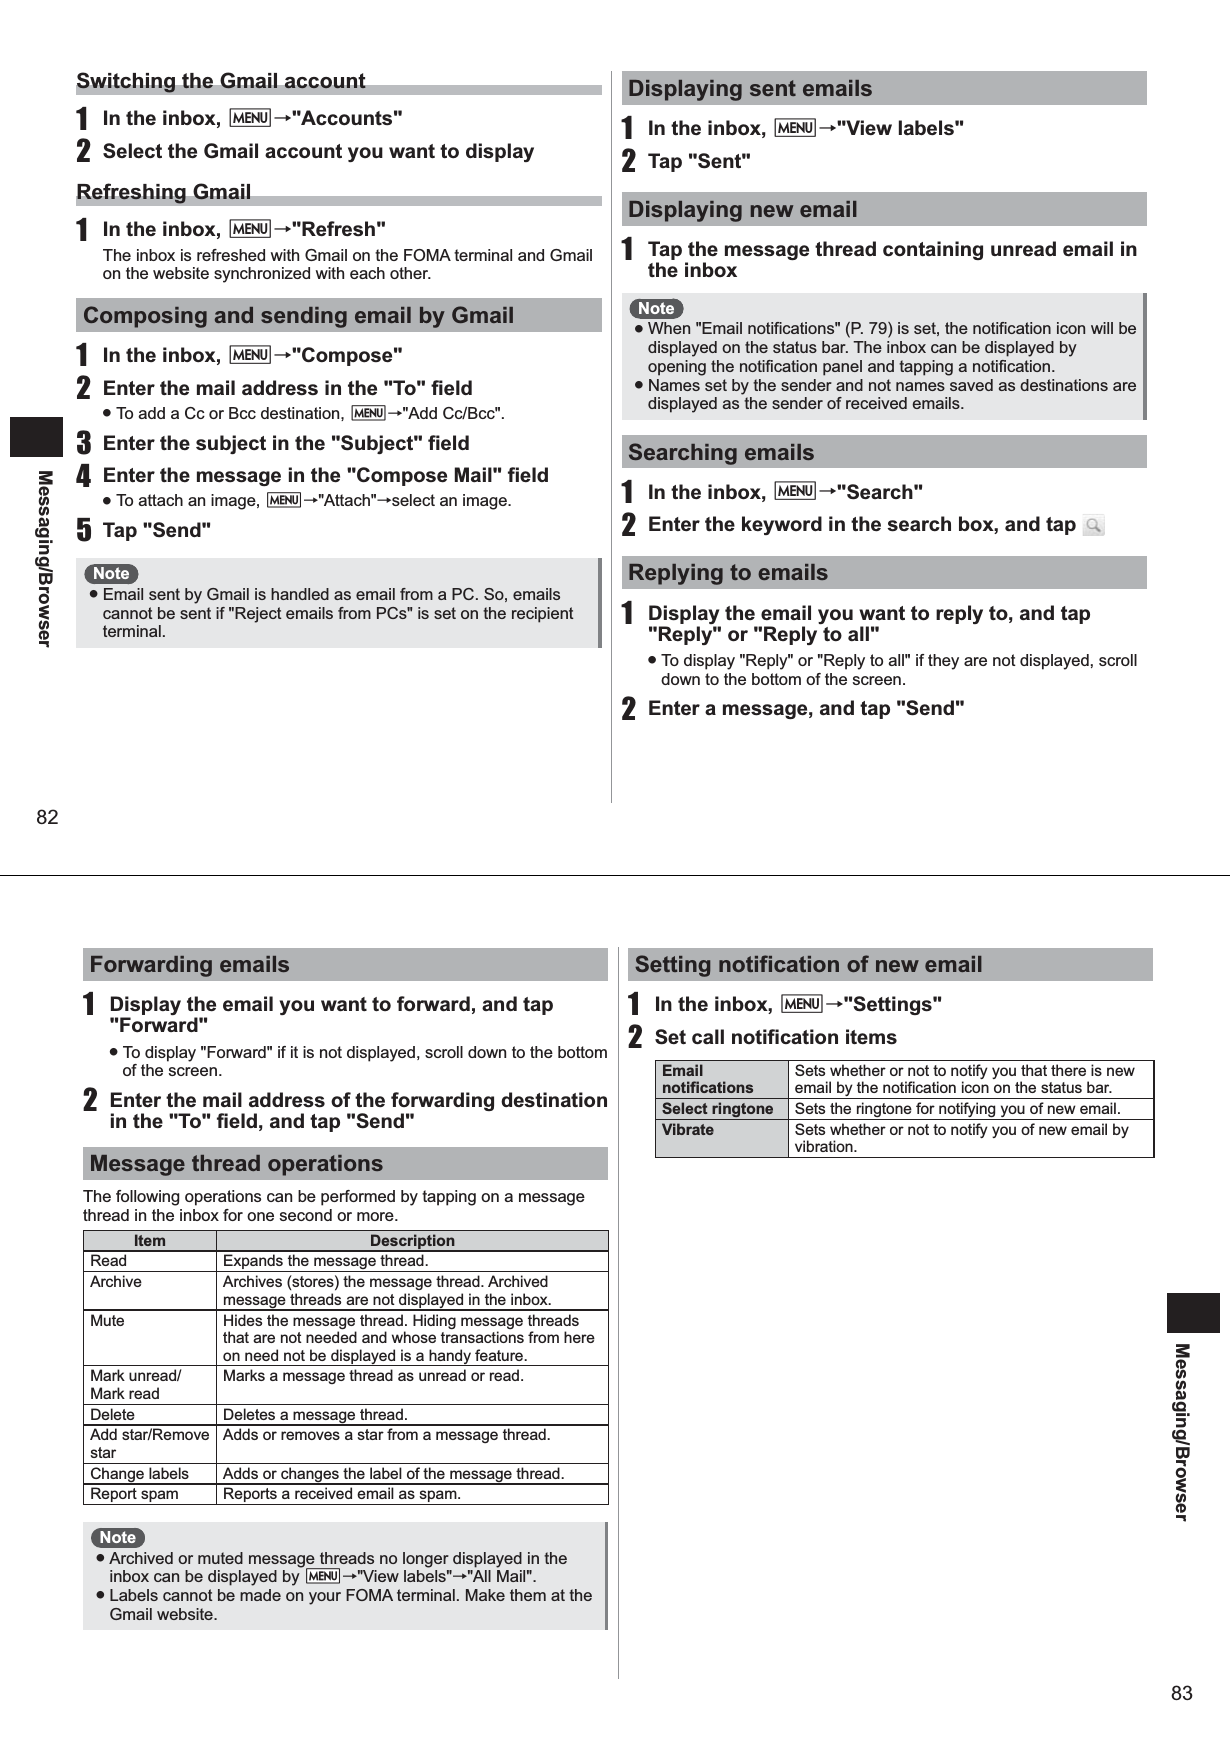
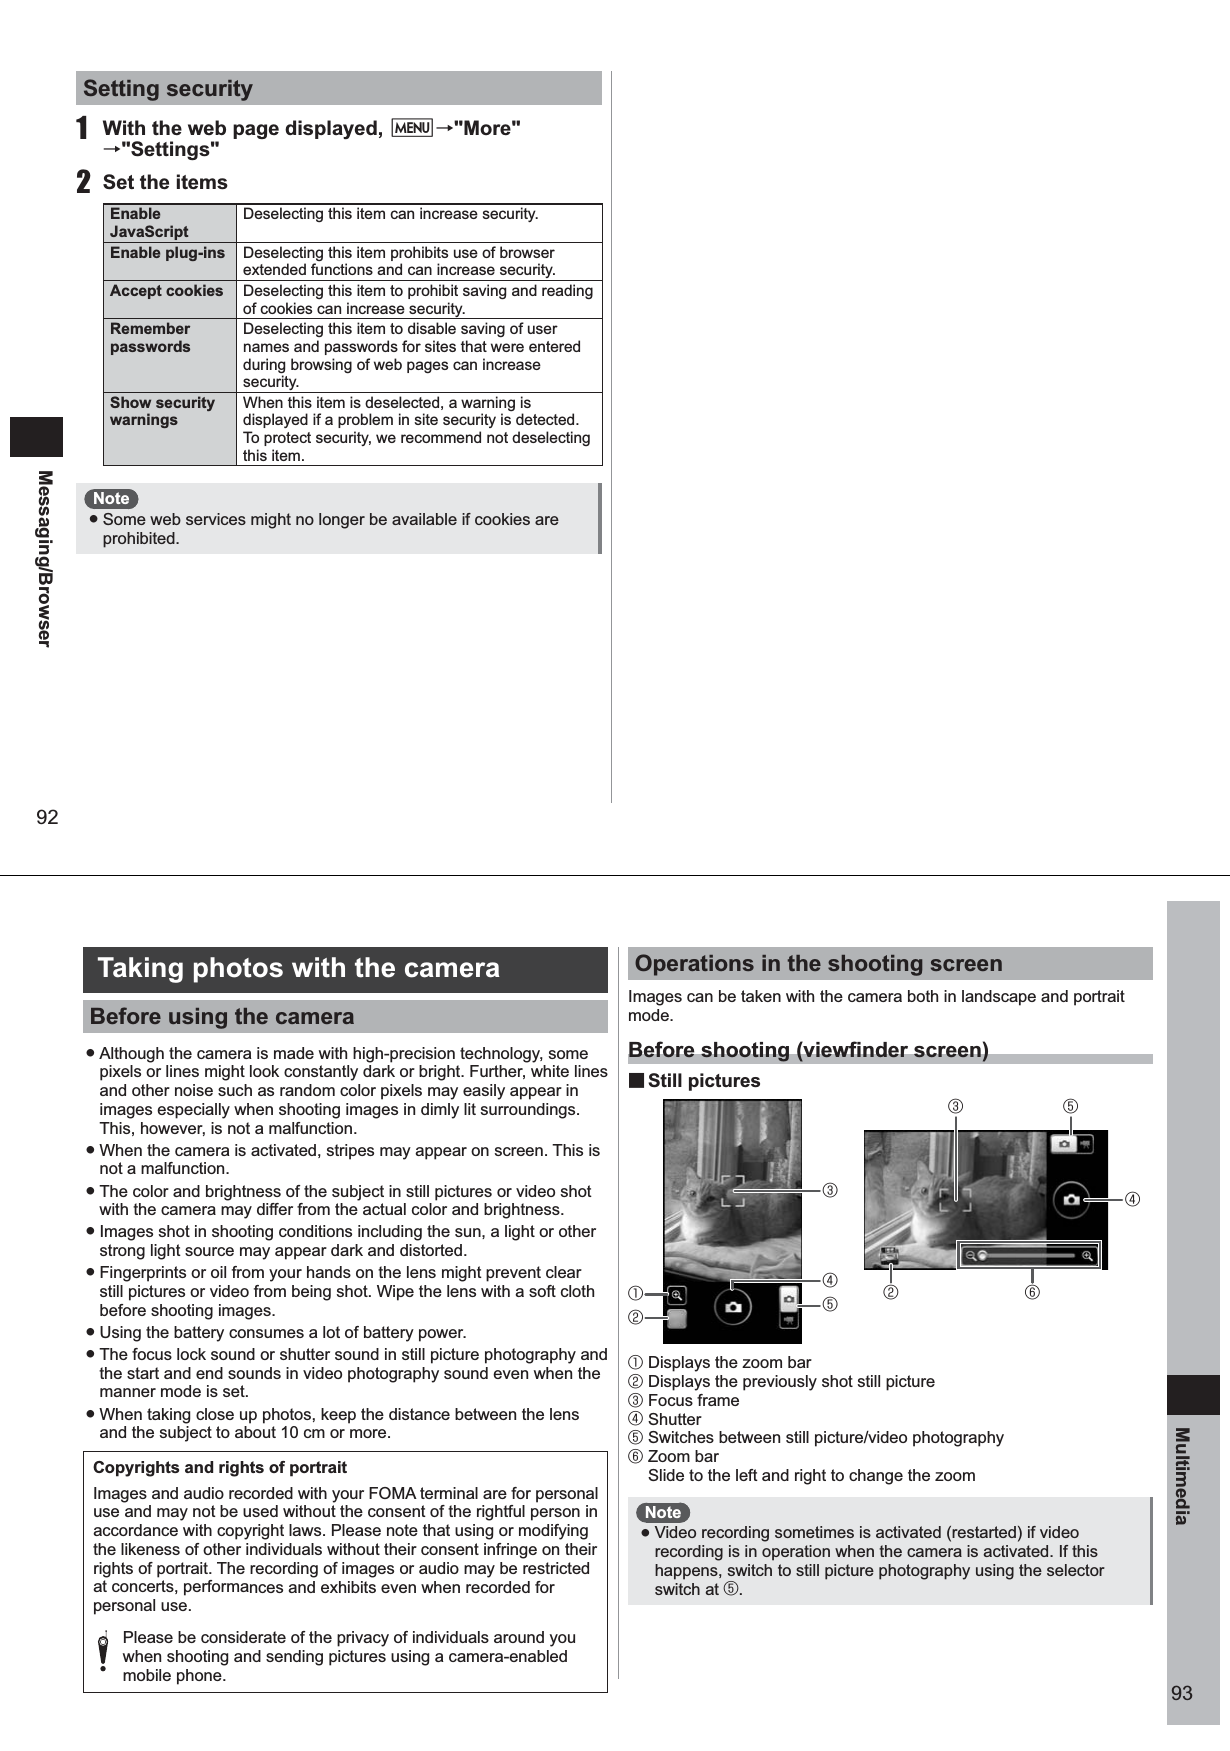
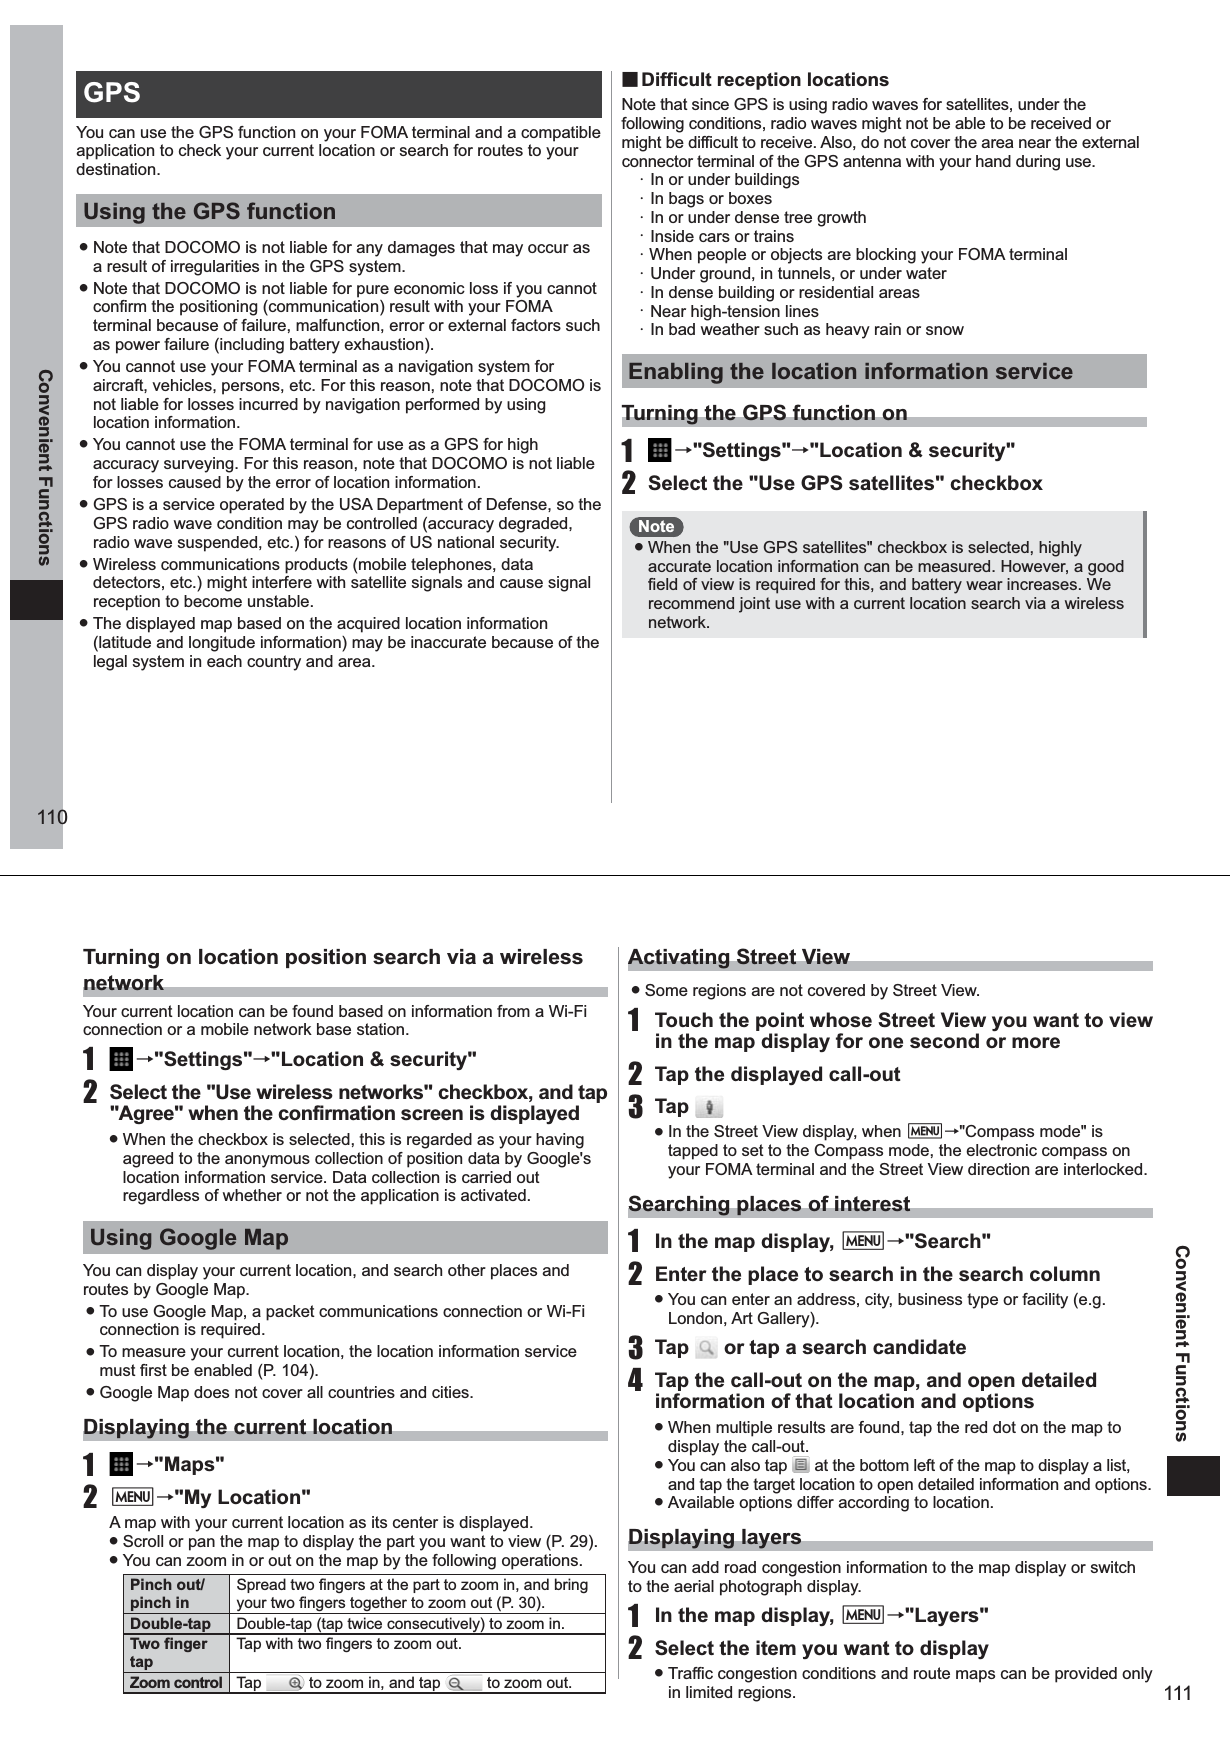
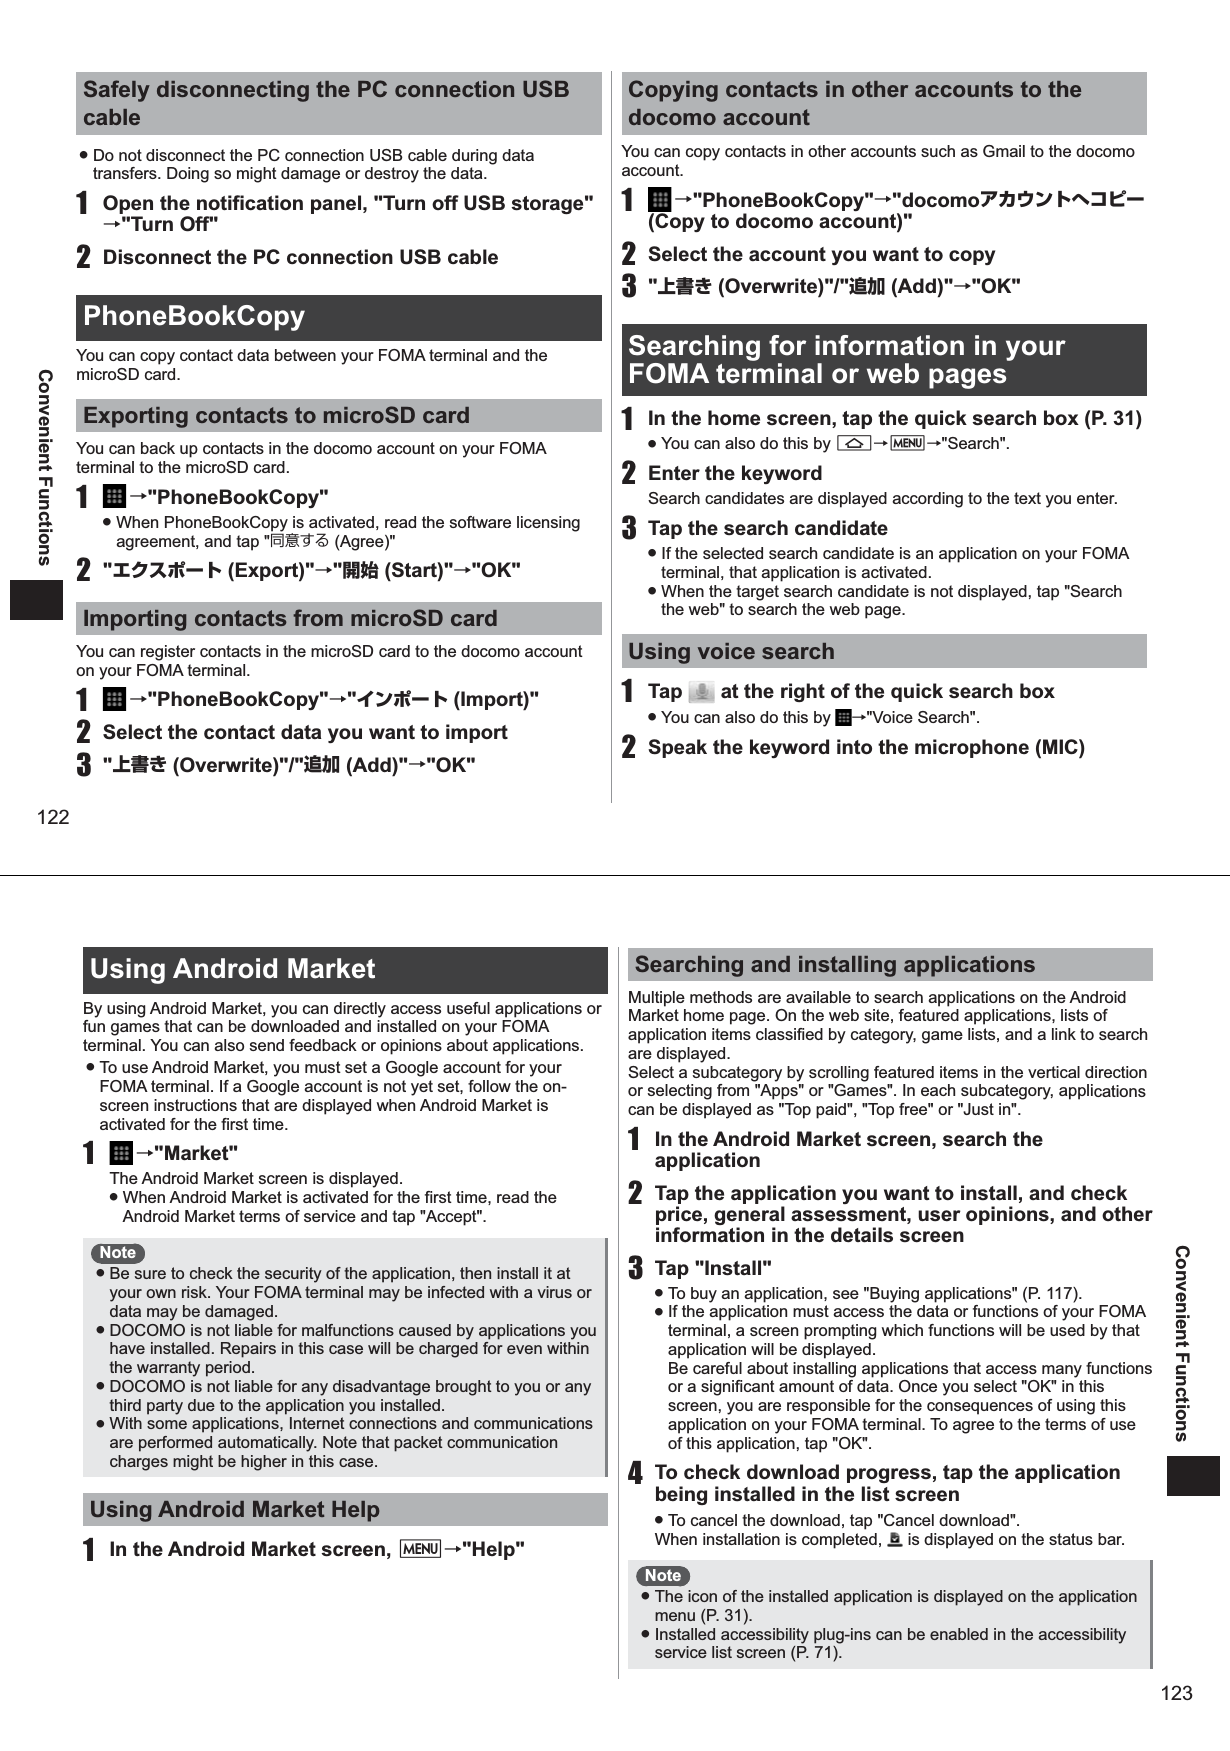
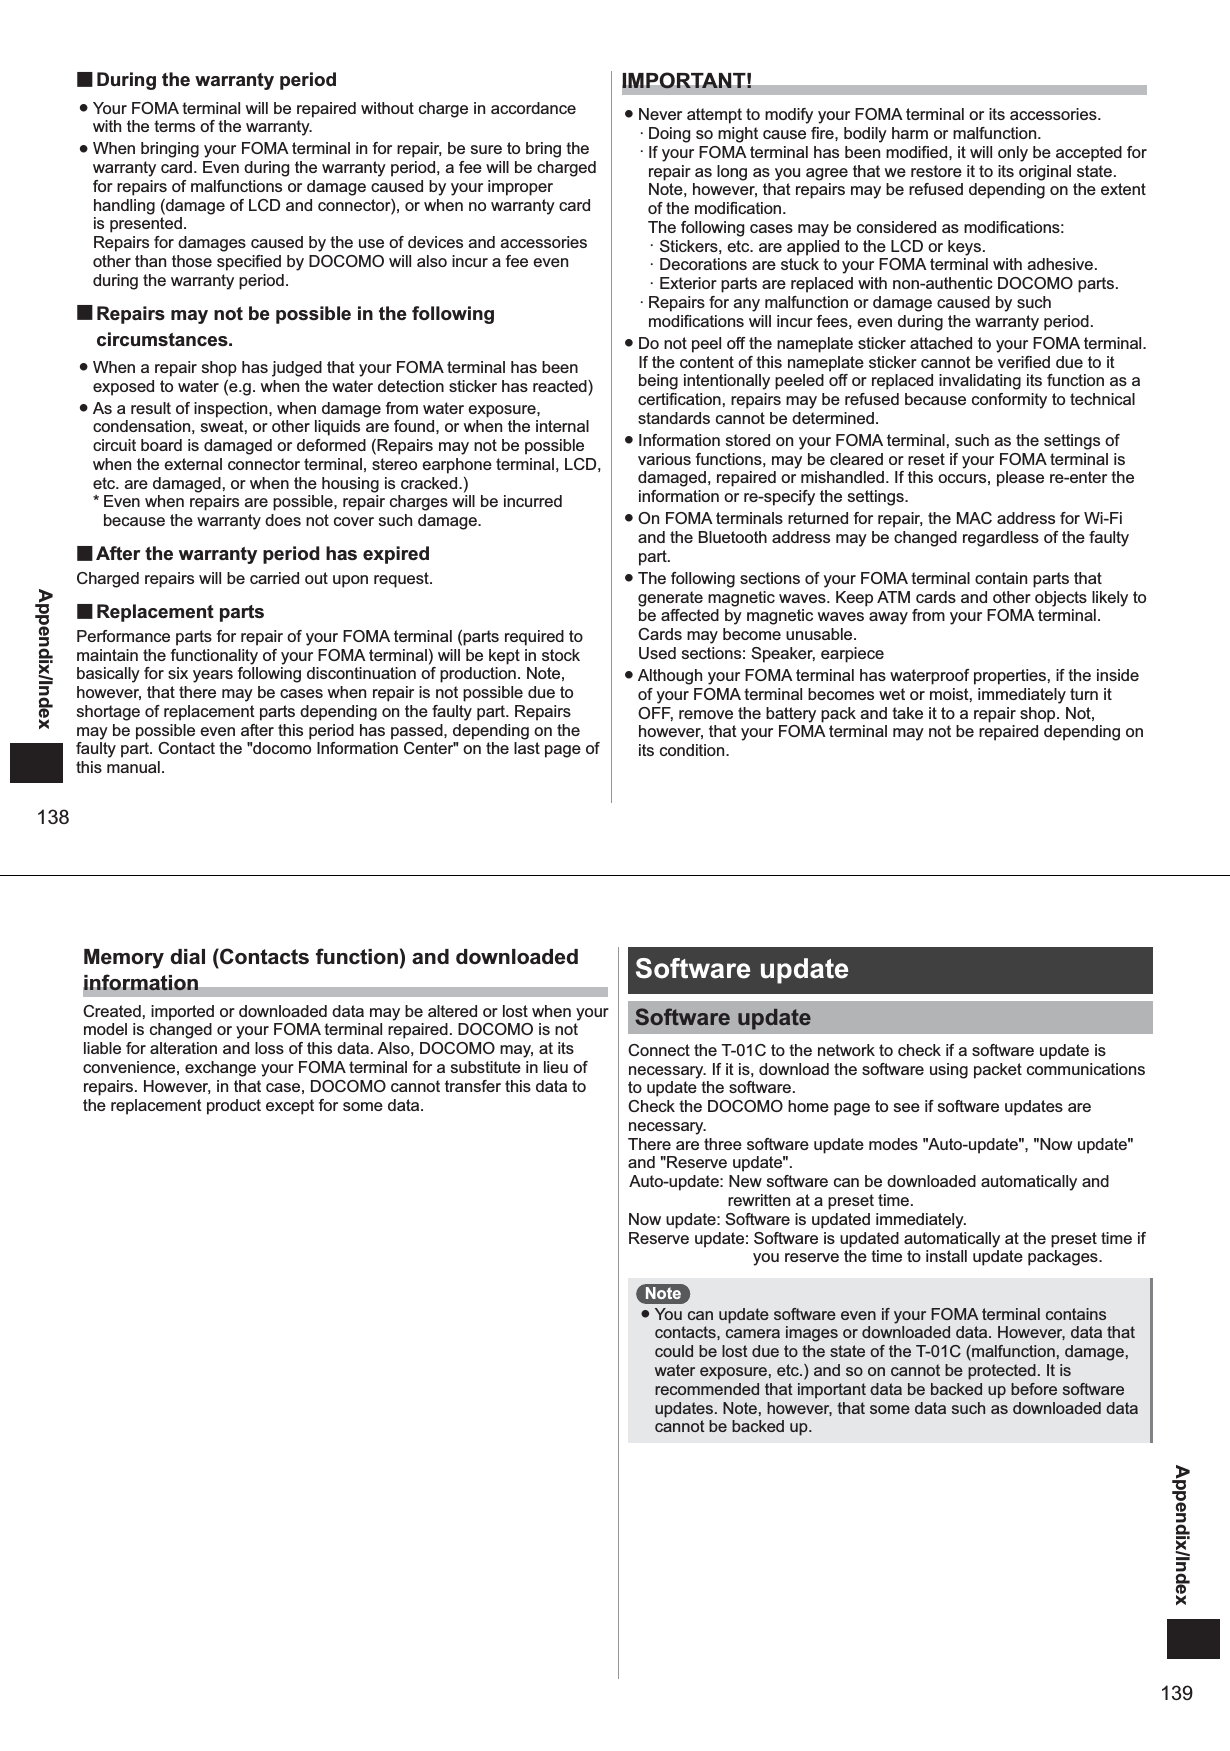
![44Call/Network Services Entering touch-tone signals (DTMF tones)This feature is used for services such as listening to calls on your home answering machine, ticket reservations and bank balance inquiries. 1 →"Phone"2 Enter the phone number, tap " " for one second or more, and enter a pause (,)3 Enter the message (touch-tone signal) to send ● Enter "0" to "9", "*" and "#". ● When sending multiple messages, separate each message with a pause (,) delimiter. 4 Tap "SEND"Note ● For details on sending touch-tone signals during a call, see "Operations during calls in progress" (P. 43). Showing/hiding caller ID at each call[186/184]You can specify whether or not to show your telephone number (caller ID) on the other party's telephone when you make a call. ● Your caller ID is important personal information. So, take care when notifying people about it. 1 →"Phone"2 Enter the phone number of the other party3 M→"Hide My ID" (Add 184)/"Show My ID" (Add 186)4 Tap "SEND"Note ● Show/hide caller ID can be batch set in "Caller ID Notification Service" (P. 52).Making an international call[WORLD CALL] ● For details on use overseas, see "Overseas Use" (P. 120).For details on unclear points about WORLD CALL, contact the "docomo Information Center" on the last page of this manual.1 →"Phone"2 Add "+" (tap "0" for one second or more), enter country code, area code (city code) and the other party's phone number ● If the area code (city code) begins with "0", omit the "0". However, "0" must be included when making a call to some countries or regions such as Italy. ● When selecting from the country list and entering "+ country code", enter the area code (city code) and the telephone number, and select M→"Add Country code". 3 Tap "SEND"Note ● Country codes can be registered by tapping →"Phone"→mM→"Country code setting". 45Call/Network Services Receiving calls1 You have an incoming call2 Tap or press D ● To reject incoming calls, either tap or press M for one second or more. ● If you had a call in the sleep mode or while key operations or the screen were locked, slide to the right end to answer the call. To reject the call, slide to the left end. 3 When you have finished the call, tap "End" or press MNote ● On this FOMA terminal, calls cannot be put on hold. ● If your face, or something, comes close to the proximity sensor during a call, the display goes out, it is redisplayed by moving away from the sensor. ■To temporarily mute the ringtone during an incoming callDuring an incoming call, press E or F.Operations during calls in progressThe following operations are possible in the call in progress screen.① Temporarily puts the call on hold*1*2② Name or telephone number③ Ends the call④ Calls another party*2⑤ Turns the Bluetooth head set on*1 Switches to hands-free talking using the Bluetooth head set.⑥ Call time⑦ Displays the dial pad*1 Sends touch-tone signals (DTMF tones).⑧ Turns the MIC off (mute)*1 Makes your voice inaudible to the other party.⑨ Turns the speaker phone on*1 Makes the other party's voice audible from the speaker.*1 Tapping again restores the screen to the previous state.*2 Catch Phone (P. 50) must be subscribed to.Note ● Grayed out items are unavailable.Adjusting the in-call volume[In-call volume]1 During a call in progress, press E (increase volume) or F (decrease volume)Note ● The in-call volume can be adjusted only during a call in progress and not at other times.③①④⑤②⑦⑧⑨⑥Call in progress screen](https://usermanual.wiki/Fujitsu-Mobile-communications/TU12-J01/User-Guide-1378867-Page-24.png)
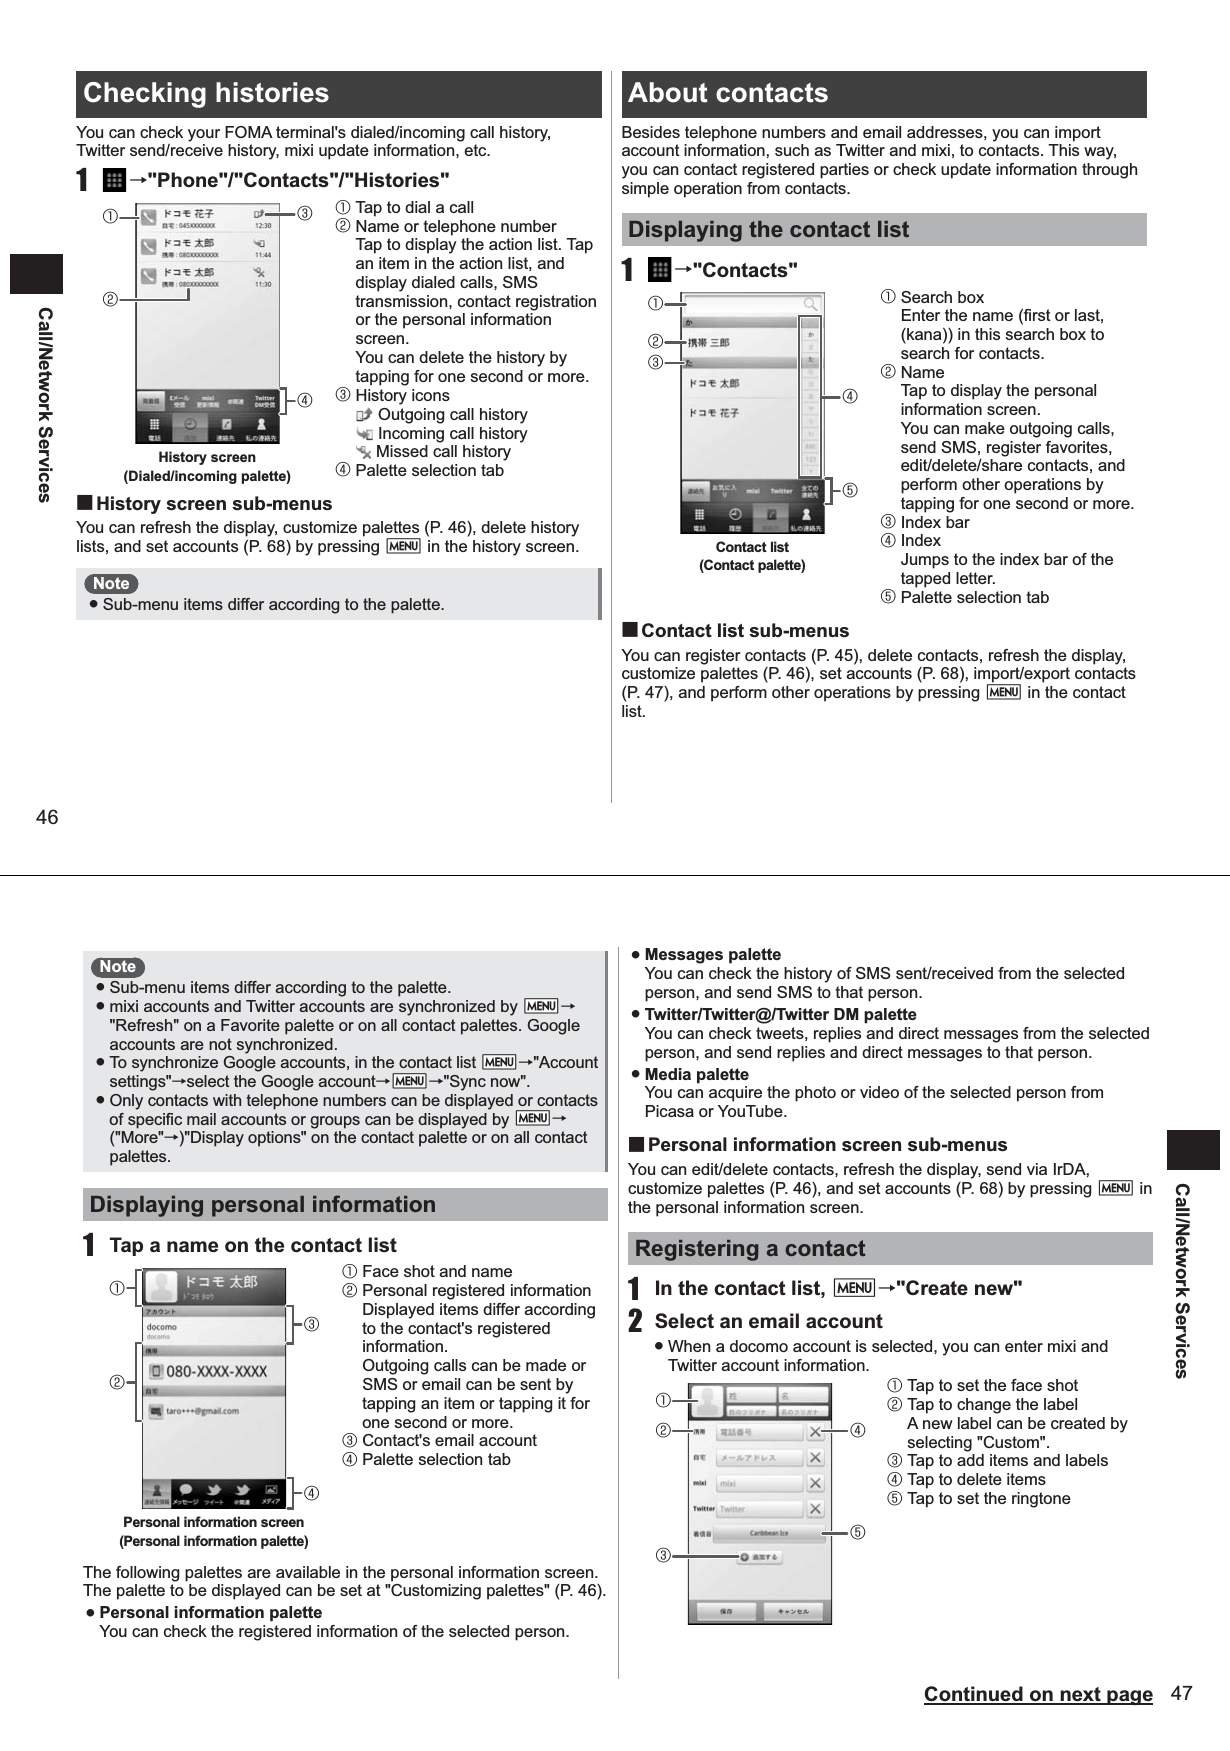
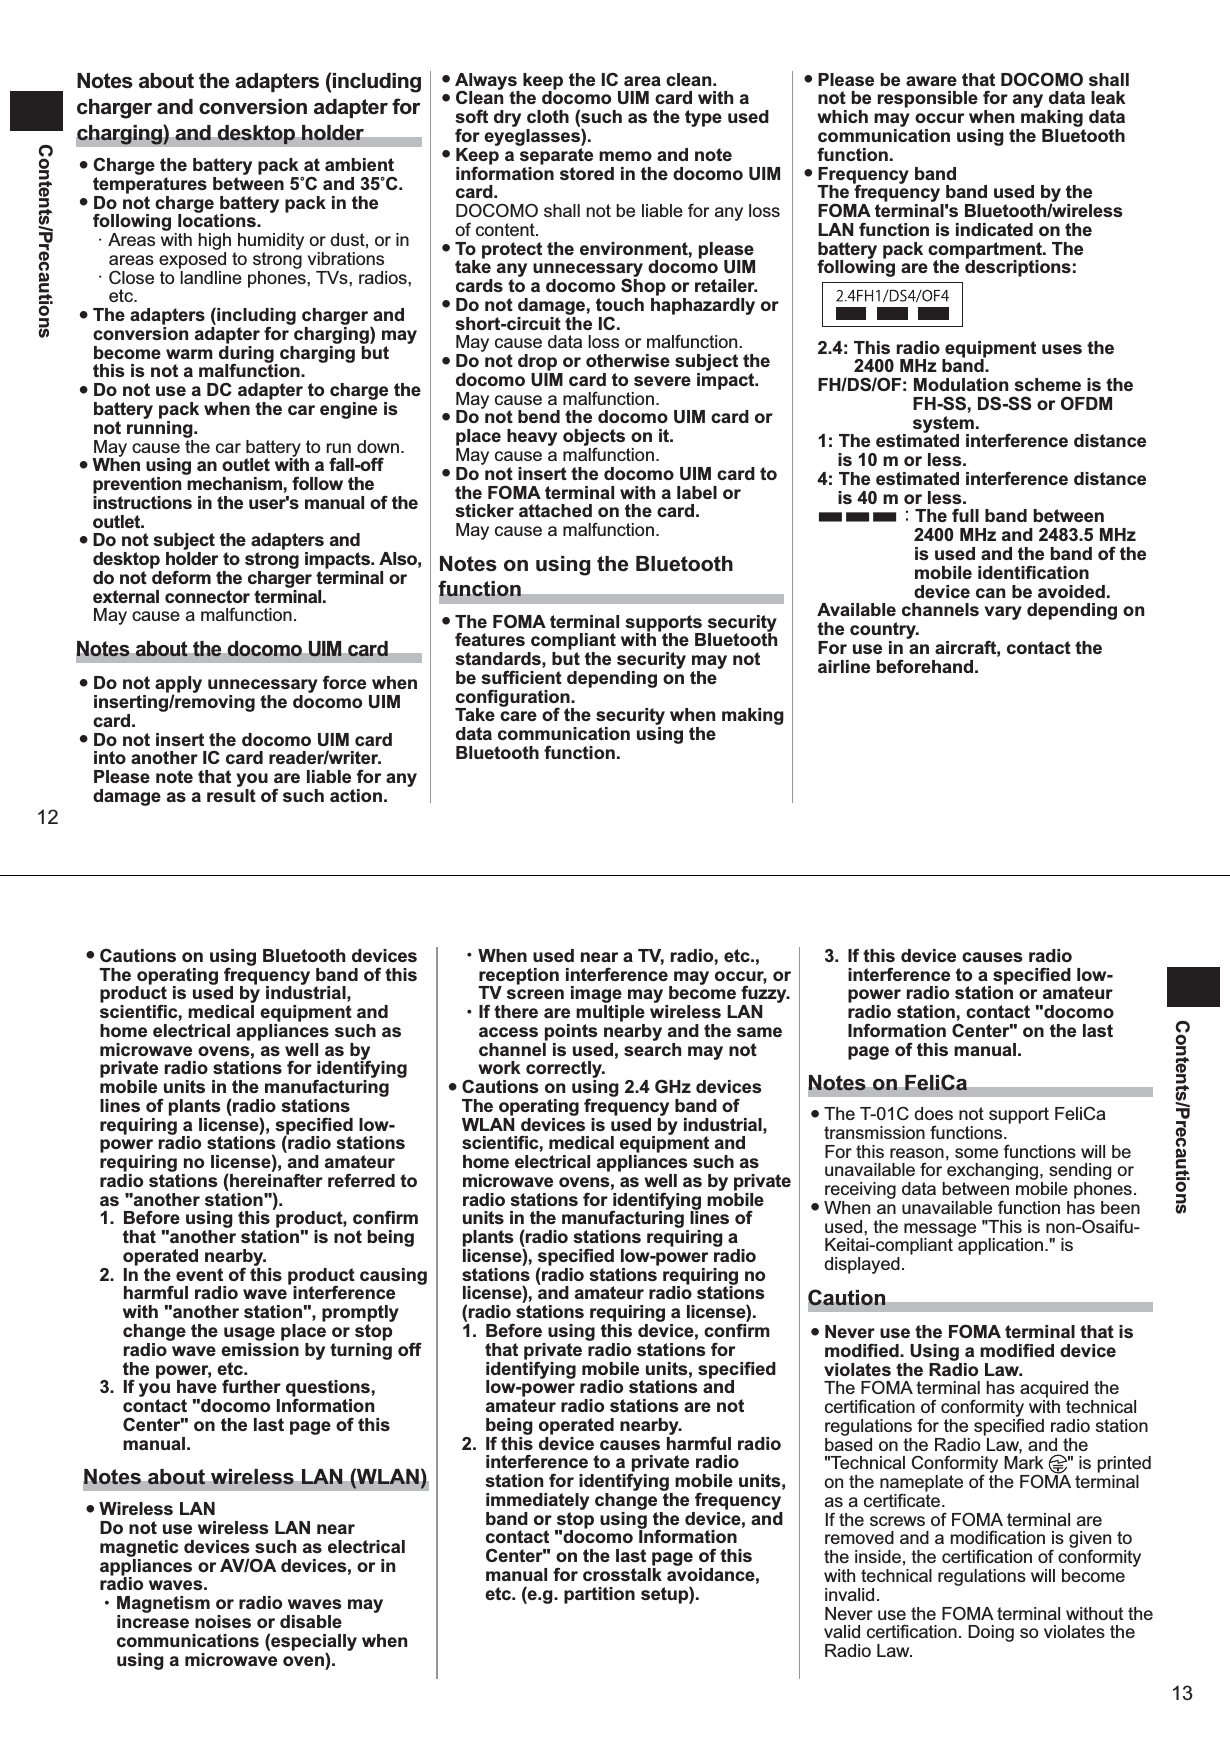
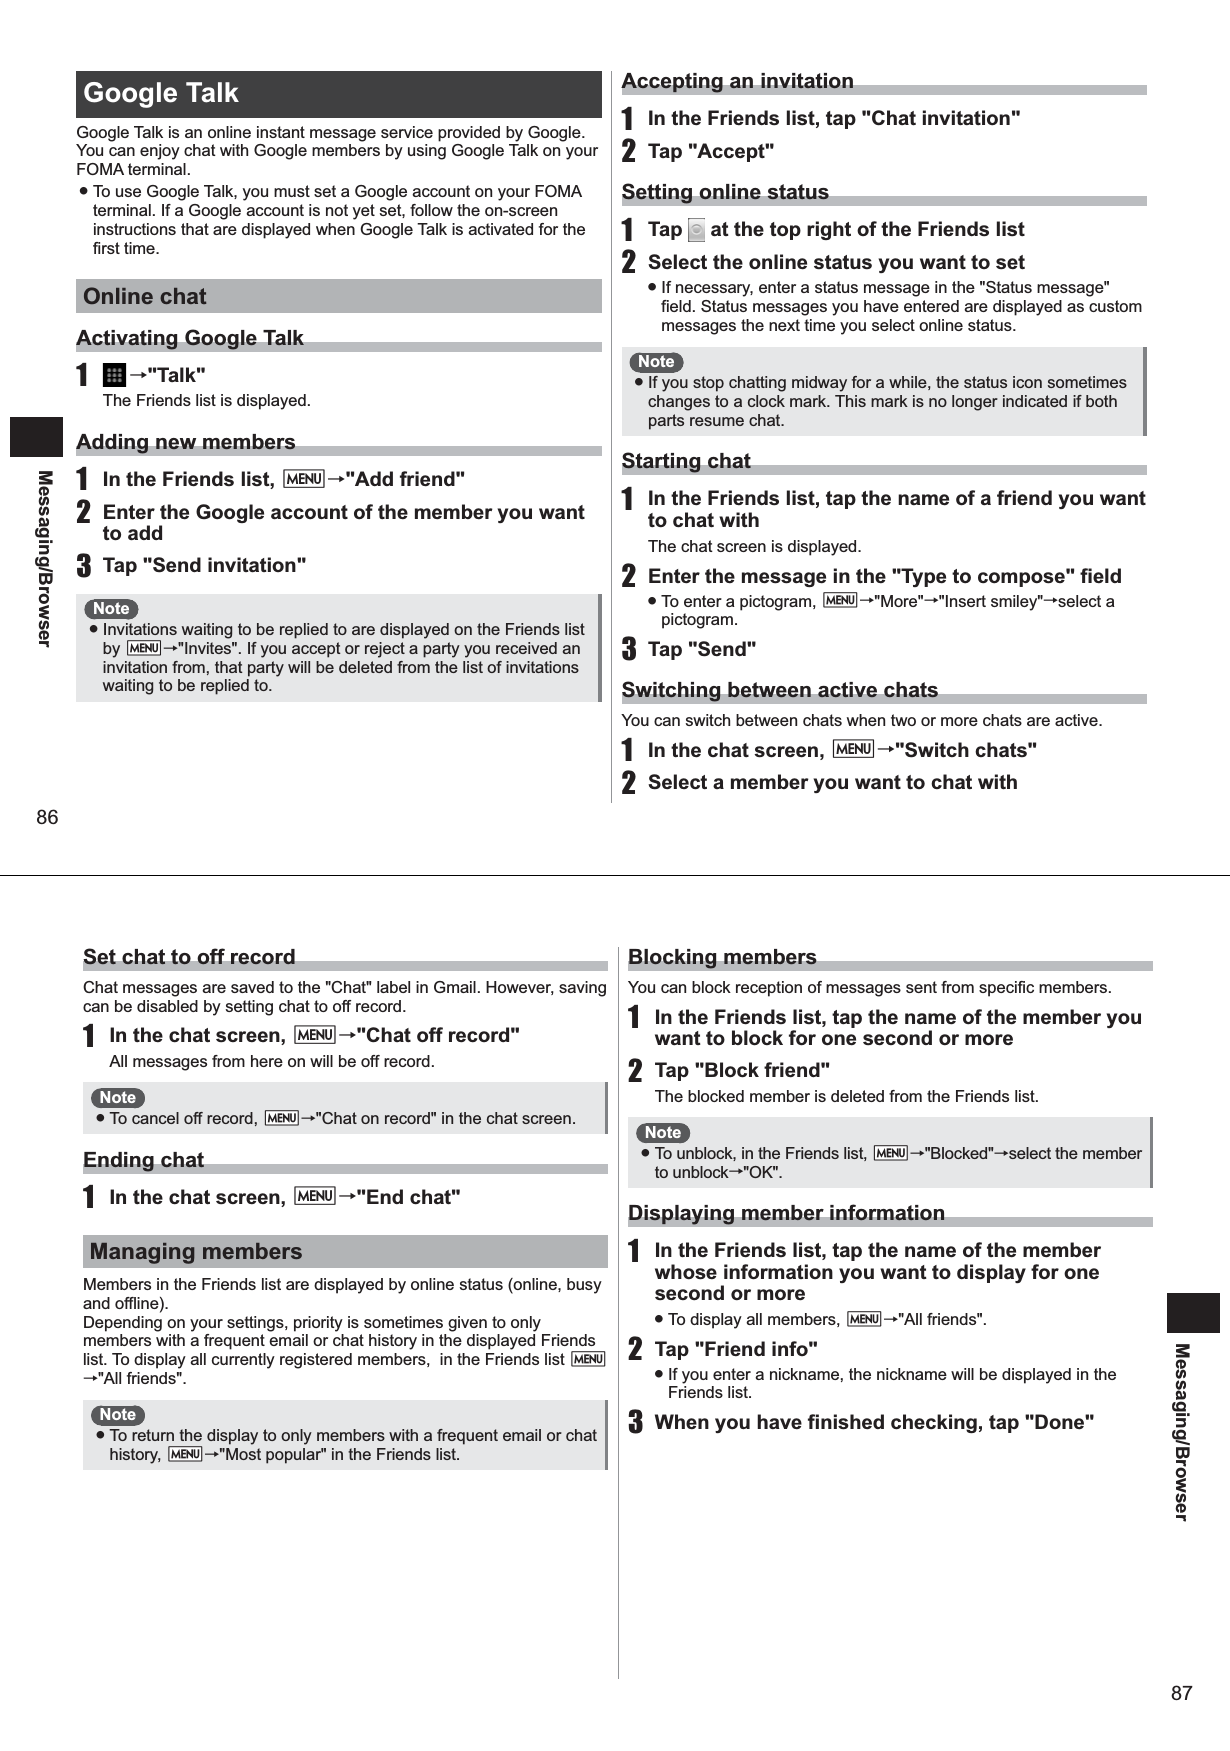
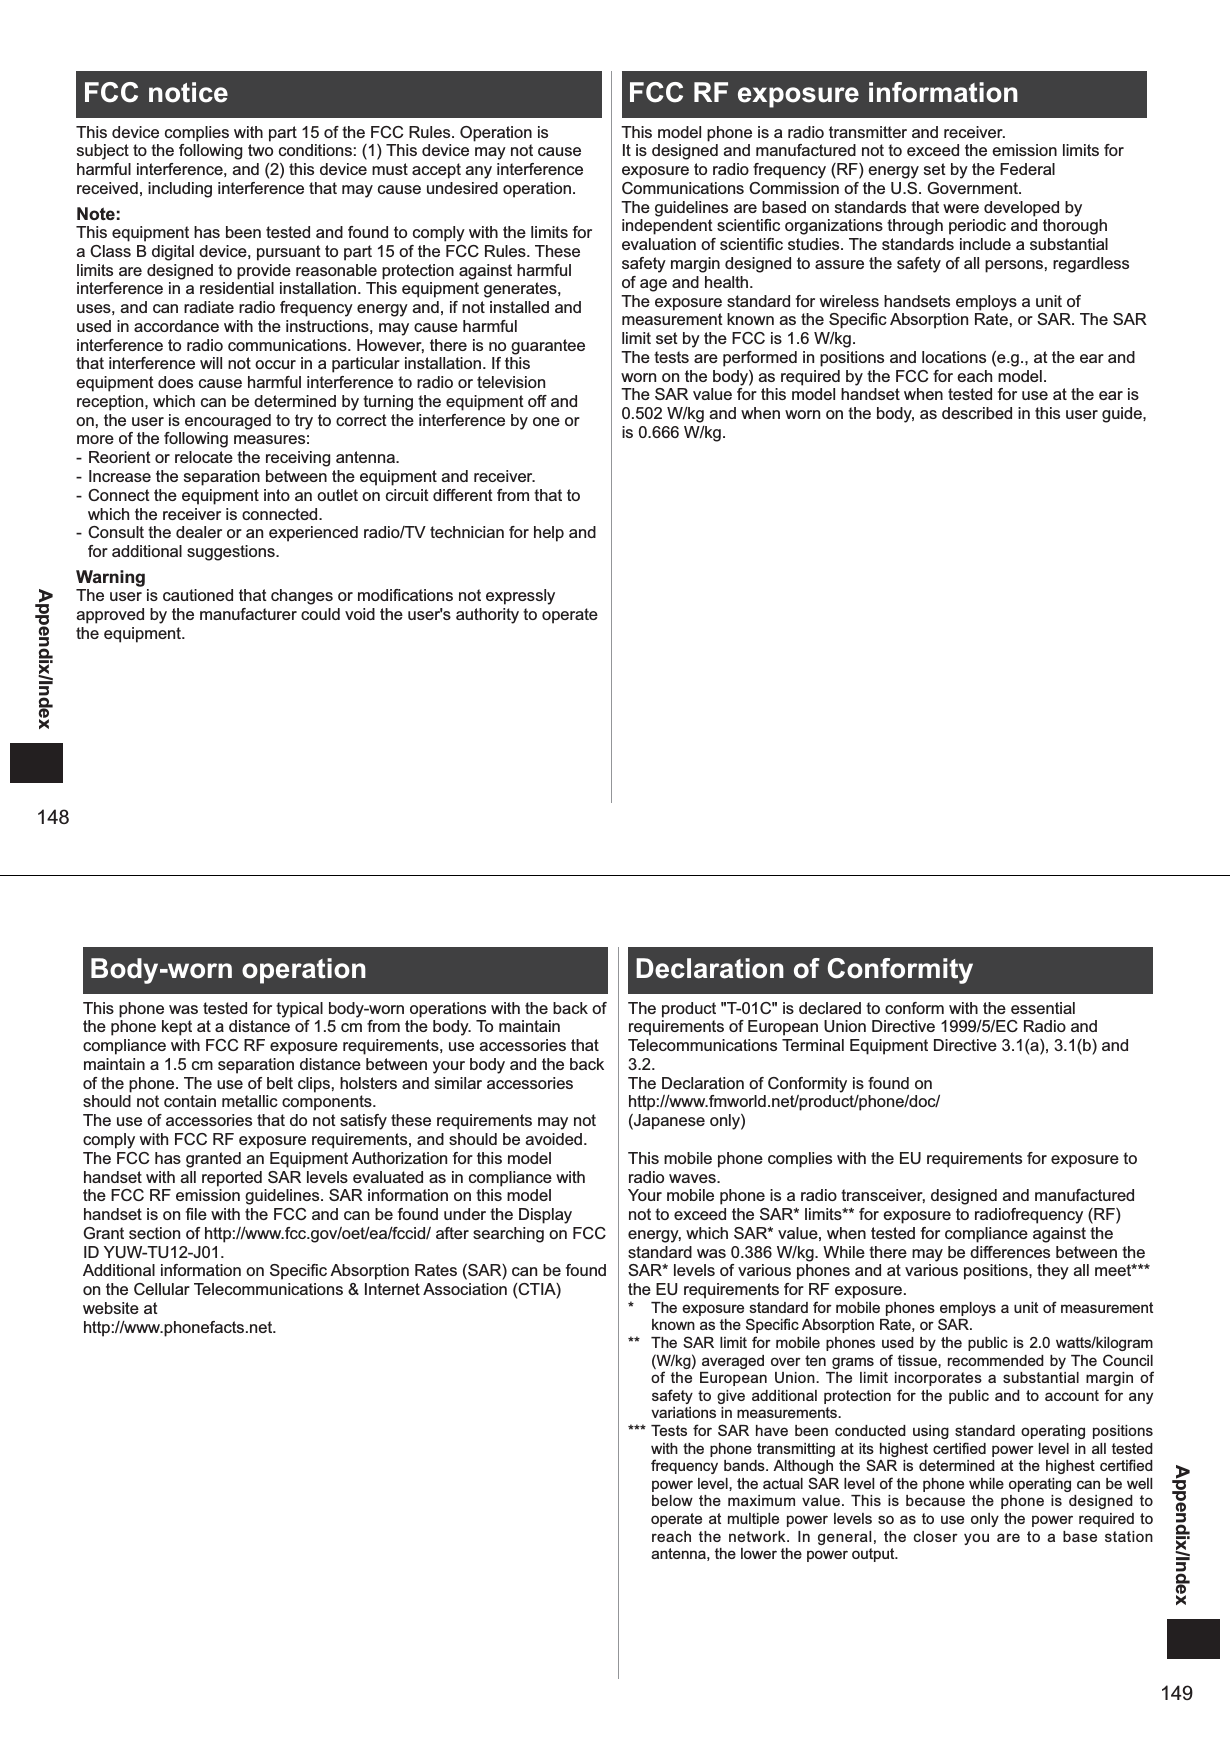
![50Call/Network Services Importing/exporting contacts1 In the contact list, M→"More"→"Import"/"Export"2 Select and operate each of the import/export items■To import contactsSIM card Specifies the contacts you want to add from contacts saved on the docomo UIM card to import them.SD card Selects one or multiple contact data stored on the microSD card to import them, or import all contacts.IrDA Receives all contacts via IrDA communications. After contact data is received, select "add to the contact list" or "delete all before add".■To export contactsSD card Backs up contact data to the microSD card.IrDA Sends all contacts via IrDA communications.Editing your own contactsYou can check the telephone numbers on your FOMA terminal. You can also enter and edit your own information.1 →"Phone"/"Contacts"/"Owner info"2 M→"Edit"3 Edit the itemsFace shot, Last name, First name, FuriganaYou can set a face shot and enter name.Owner information You can check your own telephone number, and enter your mail address and URL. Account information mixi, Twitter, YouTube, Picasa, and Flickr account information is displayed. Tap to enable setting of the account (P. 68).4 Tap "Save"51Call/Network Services Network services You can use the following docomo network services on your FOMA terminal. For a brief outline and details on how to use each service, see the reference page in the table below. Service name Monthly fee Subscription Reference pageVoice Mail Service Charged Required See belowCall Waiting Service Charged Required P. 50Call Forwarding Service Free Required P. 51Caller ID Notification Service Free Not required P. 52Public Mode (Drive Mode) Free Not required P. 53Public Mode (Power Off) Free Not required P. 53 ● Network services are not available outside the service area or in places out of signal range. ● For details, see "Mobile Phone User's Guide [Network Services]". ● For subscription and inquiries, contact "docomo Information Center" on the last page of this manual. Voice Mail Service Voice Mail Service is a service for answering incoming voice calls with a reply message and recording callers' messages when the FOMA terminal is outside the service area or turned off, or when you cannot answer calls. ● You can record up to 20 messages respectively for calls with approximately 3 minutes of recording time per message. Messages are saved for up to approximately 72 hours. ● If a call is not answered when Voice Mail Service is activated, the call is saved as a missed call in the Incoming History and is displayed on the status bar. ● This FOMA terminal does not support the videophone call Voice Mail Service. Make a voice call to "1412" to disable videophone call. ● When a Voice Mail message is recorded, is displayed on the status bar. Also, the "VM: XX" notification SMS (where, XX is the number of Voice Mail messages) is received from NTT DOCOMO. You can dial the Voice Mail Service Center by opening the notification panel and tapping the notification.Basic flow of Voice Mail ServiceActivate the Voice Mail ServiceYour FOMA terminal will receive a voice callThe call is connected to the Voice Mail Service Center if not answeredThe caller records a Voice Mail messageTo immediately record a message without hearing a reply message, for example, when you are in a hurry, press "#" when the reply message is played. You are notified that there is a Voice Mail message at the Voice Mail Service CenterPlay the Voice Mail message](https://usermanual.wiki/Fujitsu-Mobile-communications/TU12-J01/User-Guide-1378867-Page-27.png)

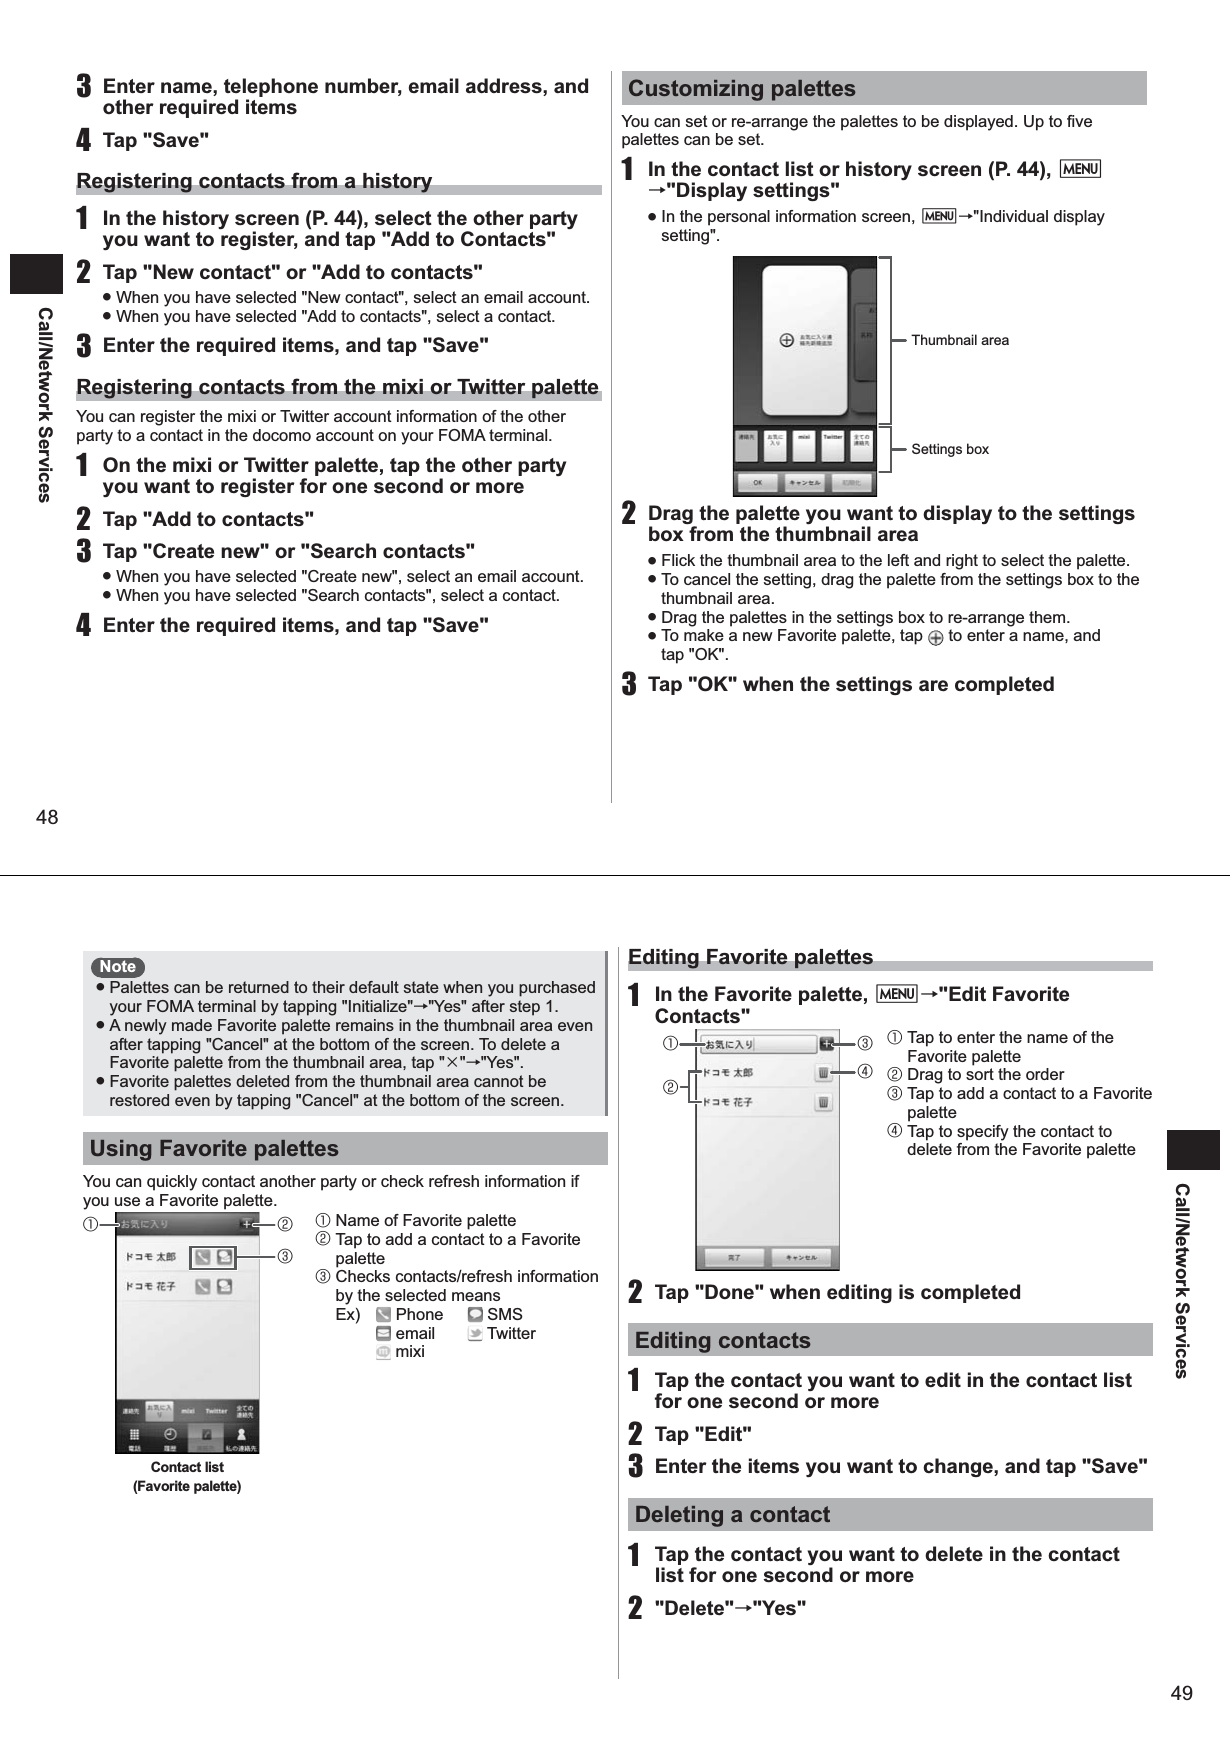
![68SettingsDisabling the PIN lock1 If the PIN1/PIN2 code is locked, tap "Emergency call"2 Enter "**05* [PUK] * [new PIN1/PIN2 code] * [new PIN1 code/PIN2 code] #" ● For example, to change the PIN1 code to "7777" when the PUK is 88888888, enter "**05*88888888*7777*7777#". Setting the screen lockYou can lock your FOMA terminal with a specific screen unlock pattern (or unlock method) or security code to prevent it from being used by other people. Creating an unlock methodYou can set so that a pattern must be entered to unlock the screen.1 →"Settings"→"Location & security"→"Set unlock method"2 Tap "Pattern"3 Read the explanation in the screen, and tap "Next"4 When you have determined the pattern, tap "Next"5 Slide your finger to at least four points vertically, horizontally or diagonally to draw a pattern. When you have drawn the pattern, release your finger6 Tap "Continue"7 Draw the pattern again, and tap "Confirm"Note ● To disable display of the pattern when unlocking the screen, →"Settings"→"Location & security"→deselect the "Use visible pattern" checkbox. ● To enable vibration when entering the pattern, →"Settings" →"Location & security"→select the "Use tactile feedback" checkbox. ● To change the screen unlock pattern, →"Settings"→"Location & security"→"Change unlock pattern". ● If you forget your screen unlock pattern, log in by your Google account, and follow the on-screen instructions to make a new pattern. Setting the screen lock security codeYou can set so that a security code must be entered to unlock the screen.1 →"Settings"→"Location & security"→"Set unlock method"2 Tap "Security code"3 Enter the 4- to 8-digit security code, and tap "Continue"4 Enter the security code again, and tap "Confirm"Note ● To change the screen unlock security code, →"Settings" →"Location & security"→"Change security code". ● If you forget your screen unlock security code, log in by your Google account, and follow the on-screen instructions to make a new pattern. Manually locking the screen1 Press C69SettingsUnlocking the screen1 Press C or AThe key unlock screen is displayed.2 Slide "Unlock" upwards to unlock the screenThe pattern entry screen or the security code entry screen is displayed.3 Enter the screen unlock pattern or the screen unlock security code, and tap "OK"Managing authentication informationYou can install authentication information for accessing security-protected Wi-Fi networks or VPNs or other certificates from the microSD card. You can also set a password to certification information storage for saving authentication information and certificates. Setting a password to certification information storage1 →"Settings"→"Location & security"→"Set password"2 Enter the password3 Enter the password again, and tap "OK"Enabling authentication information and certificatesYou can enable authentication information and certificates by allowing applications on your FOMA terminal to access authentication information storage set with a password. ● Set a password to certification information storage in advance. 1 →"Settings"→"Location & security"2 Select the "Use secure credentials" checkbox3 Enter the password for the authentication information storage, and tap "OK"Clearing authentication information storageYou can clear all authentication information or certificates from the authentication information storage to reset the storage password.1 →"Settings"→"Location & security"→"Clear storage"2 Tap "OK"Installing authentication information or certificates from the microSD card1 →"Settings"→"Location & security"→"Install from SD card"2 Tap the authentication information/certificate you want to install3 If necessary, enter the password, and tap "OK"4 Enter the name of the authentication information/certificate, and tap "OK" ● If a password is not set to the authentication information storage, follow the on-screen instructions to set the password.](https://usermanual.wiki/Fujitsu-Mobile-communications/TU12-J01/User-Guide-1378867-Page-36.png)

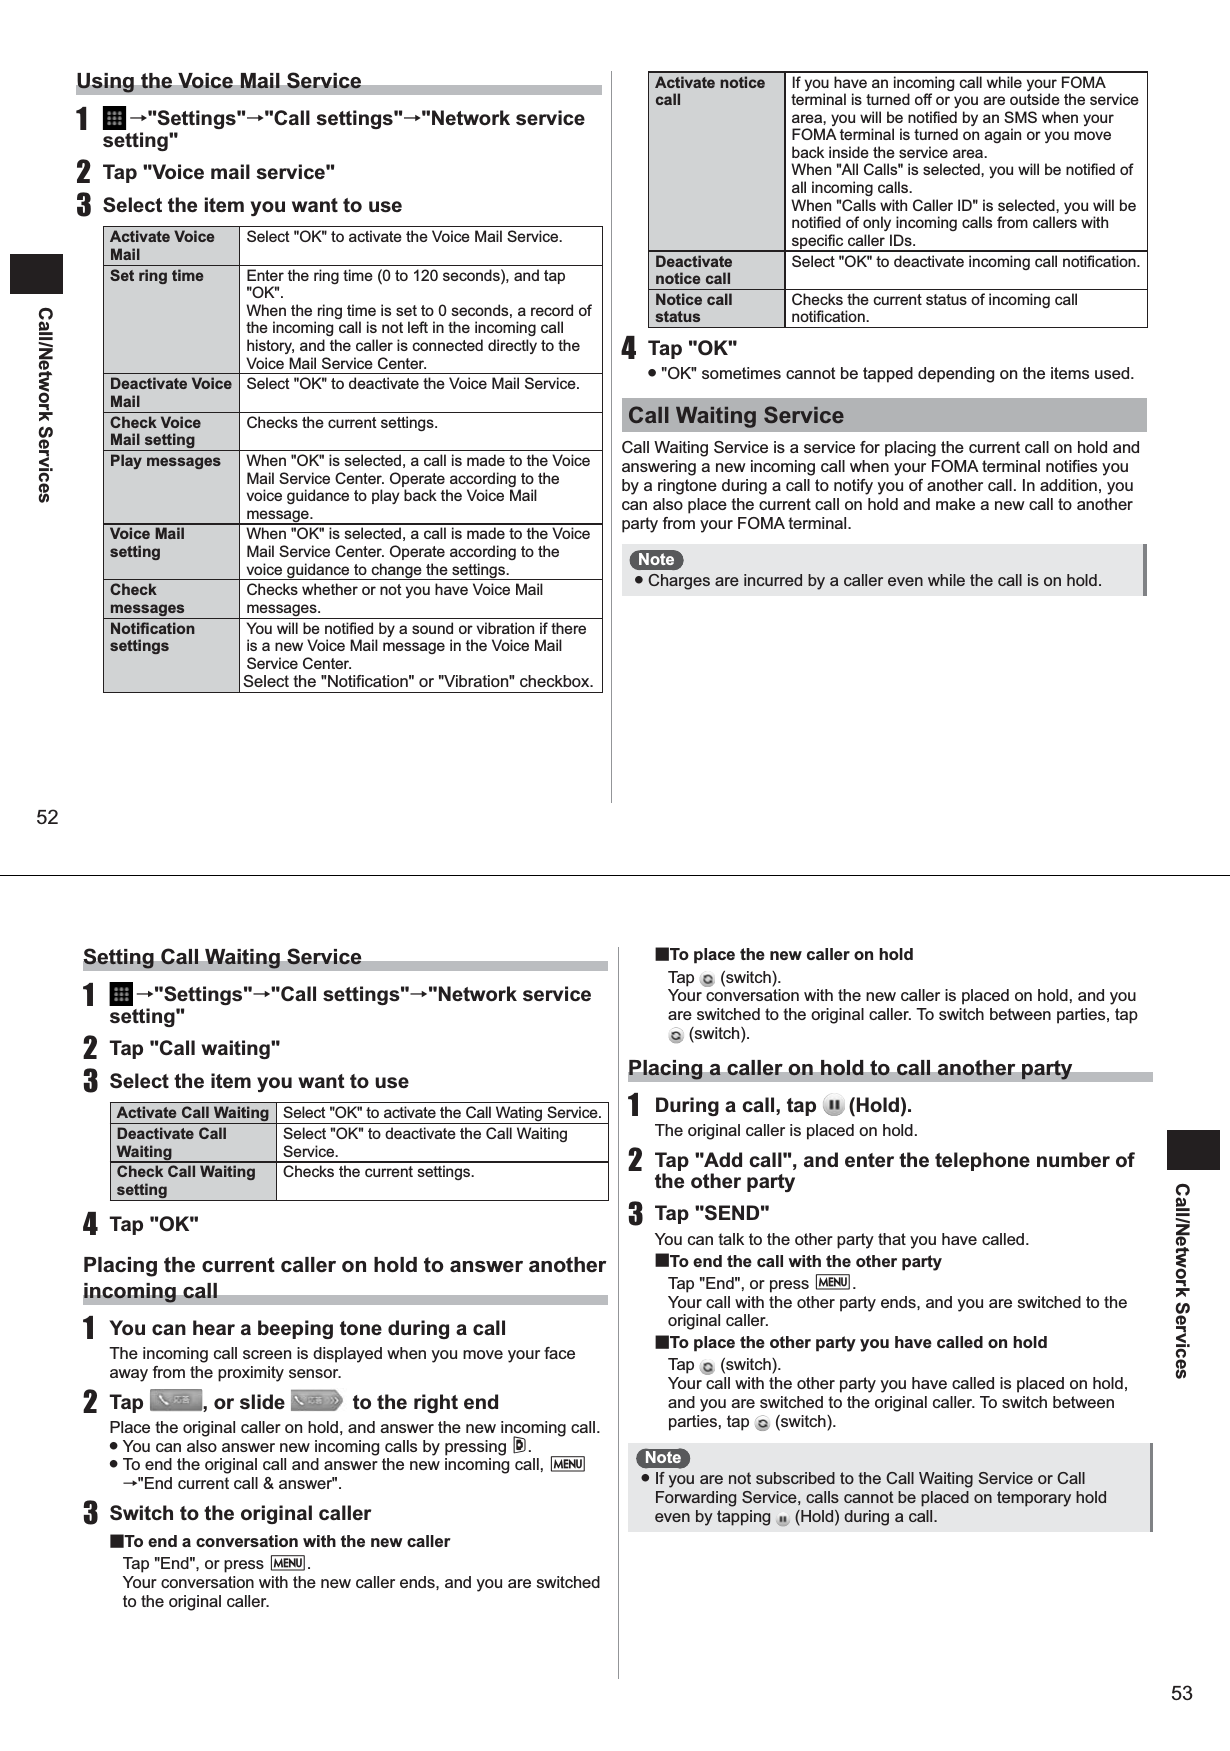
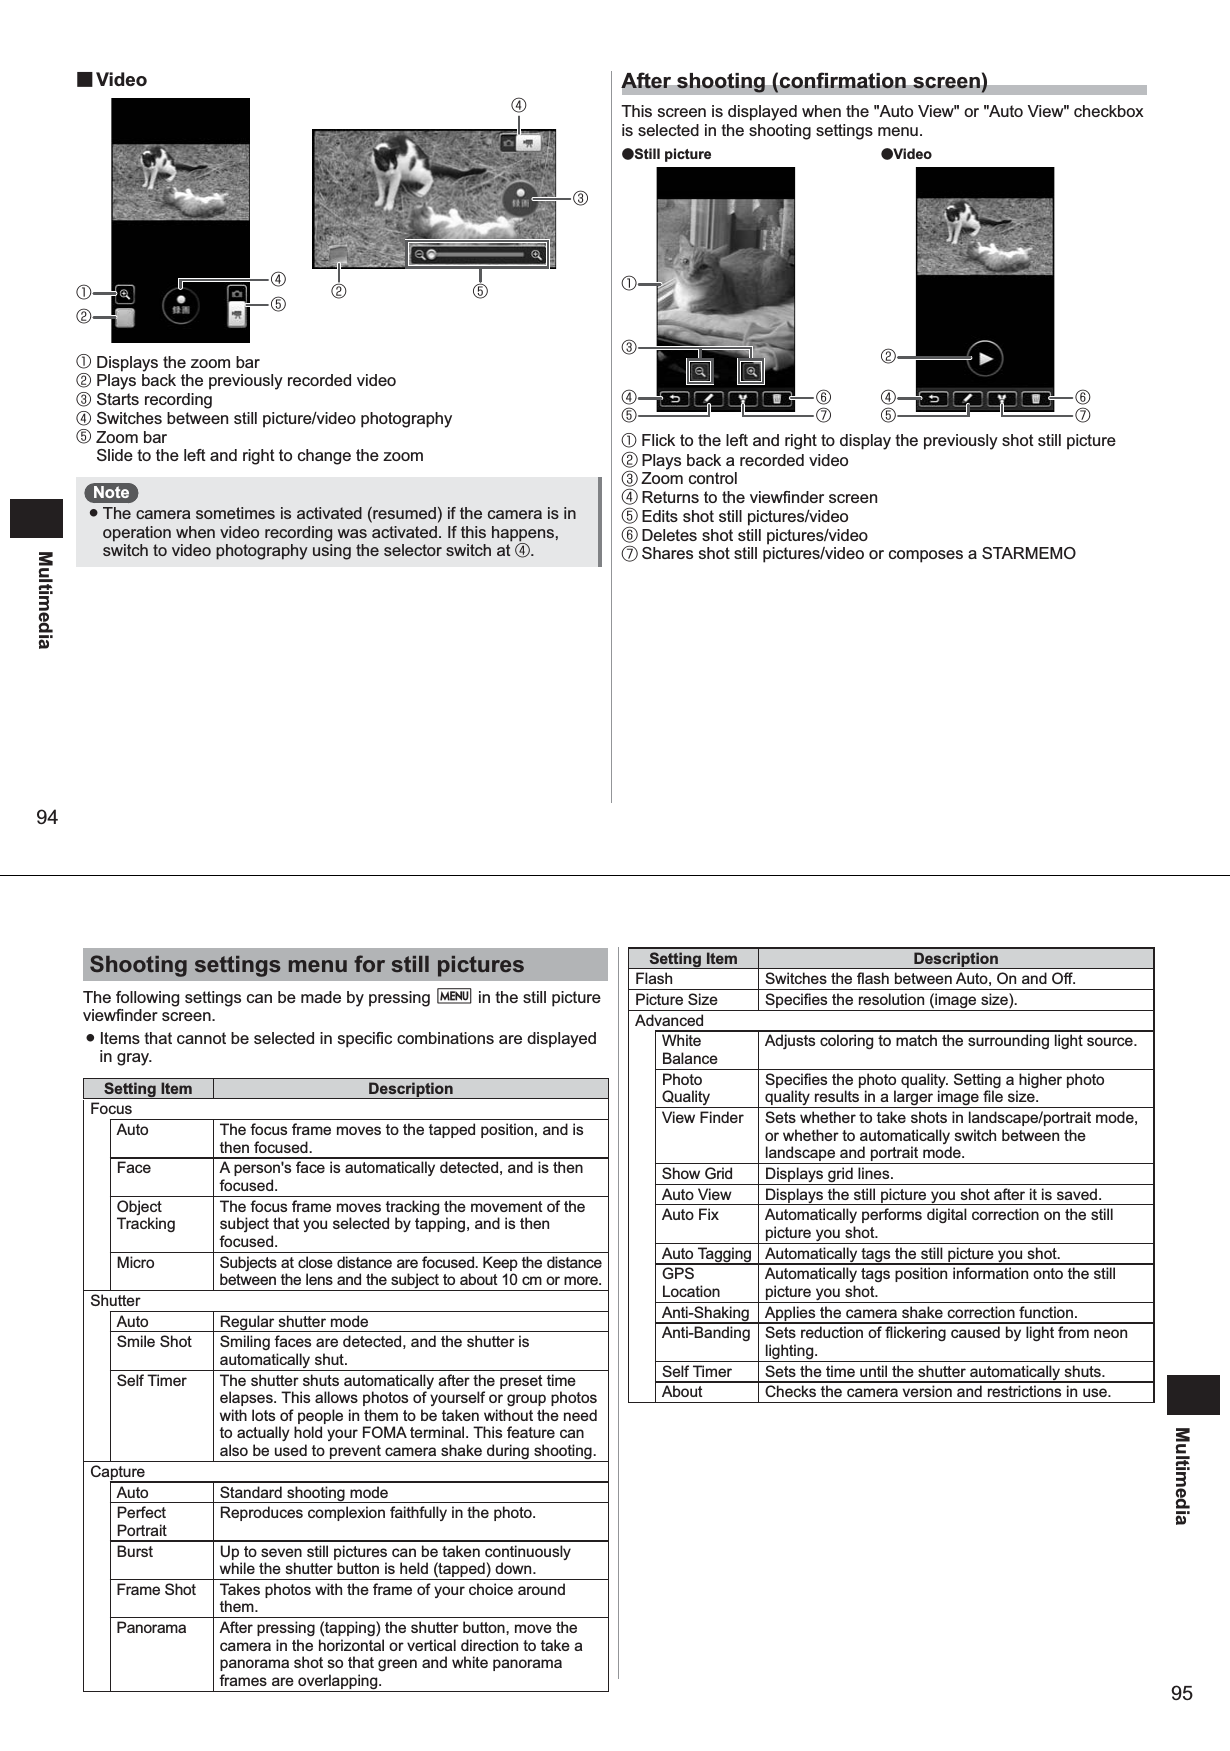
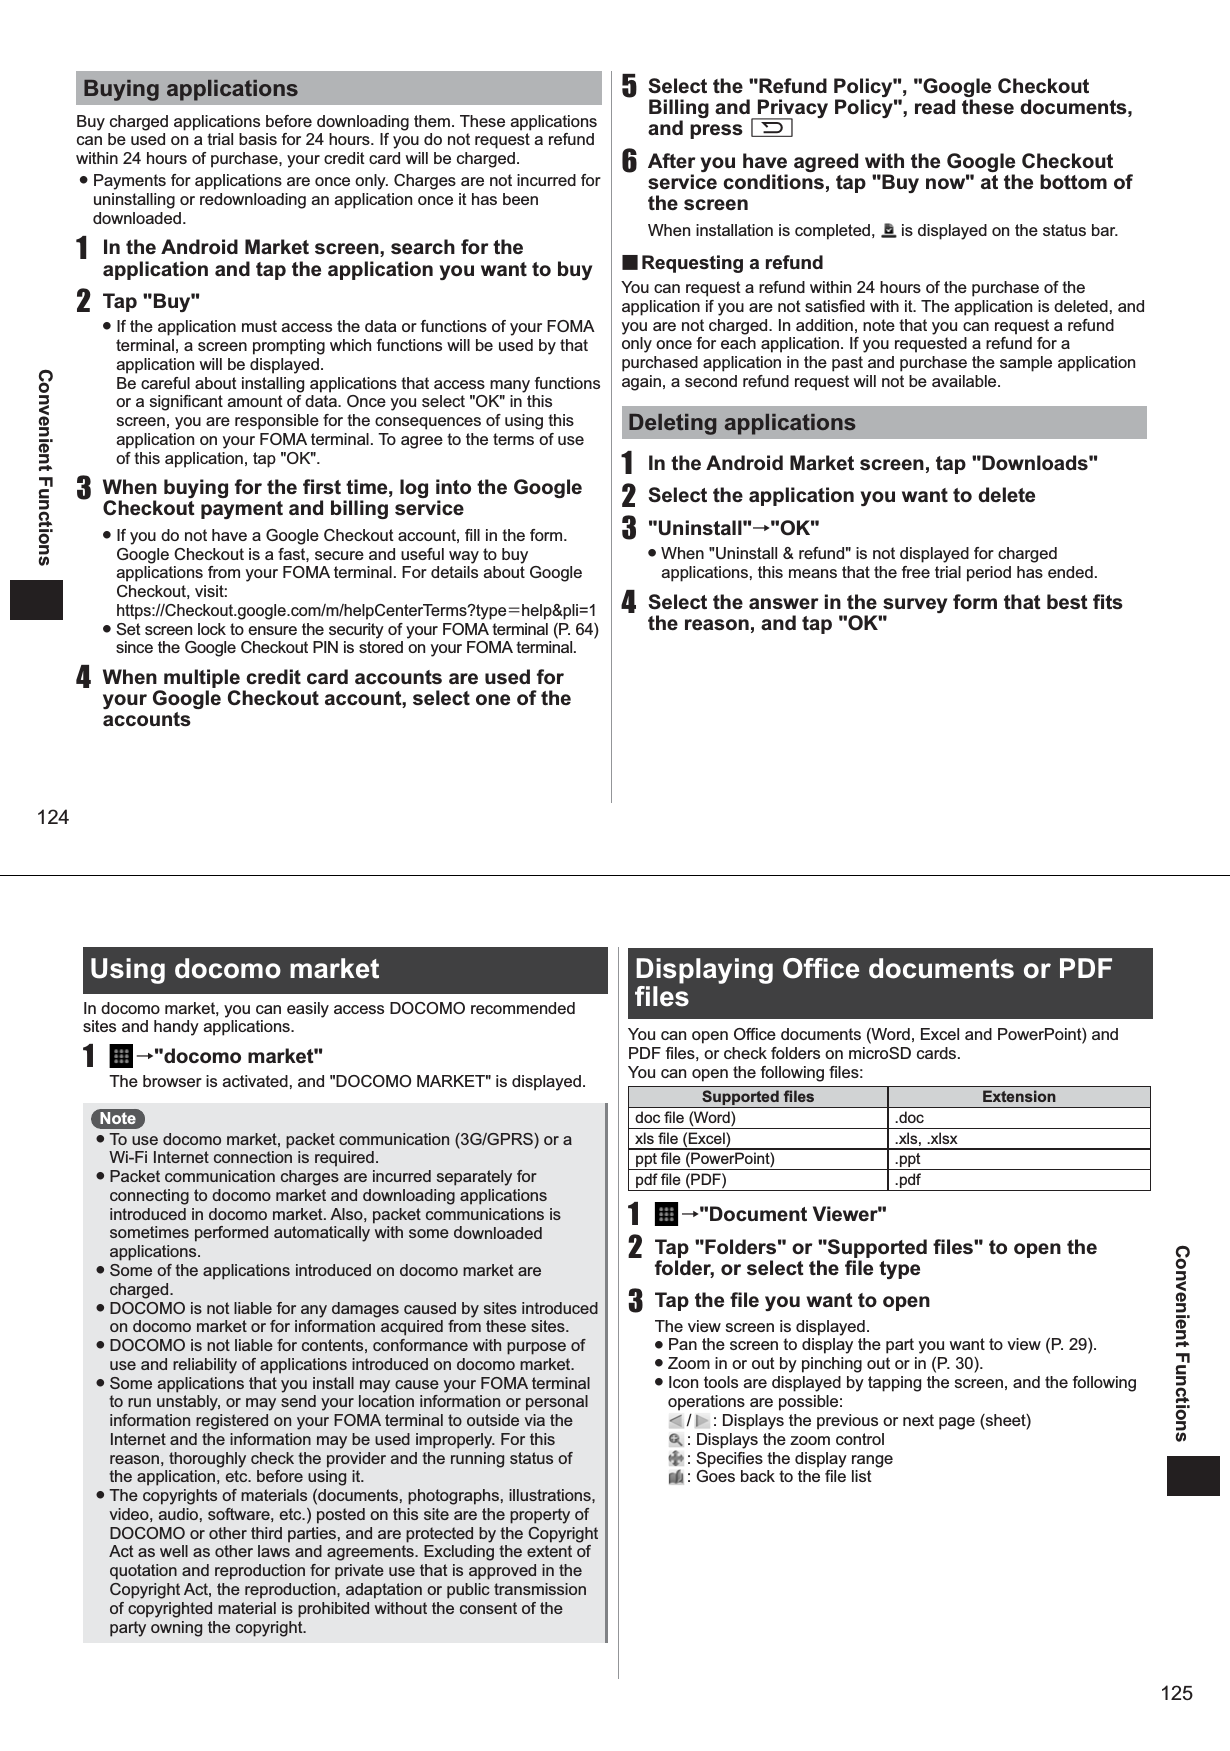
![80Messaging/Browser5 Enter the message in the "Compose Mail" field ● To attach a file, M→"Attach"→select a file.6 Tap "Send"Note ● Email is handled as email from a PC. So, emails cannot be sent if "Reject emails from PCs" is set on the recipient terminal.Receiving and reading emails1 →"Email" ● If you have multiple mail accounts, select the mail account in the account list screen. To display the account list screen, M→ "Accounts". ● If you tap the "integrated inbox" in the account list screen, an inbox containing a mixture of emails from all mail accounts will be displayed. Each of the mail accounts is distinguished by a color bar prefixing the email. 2 To refresh the inbox, M→"Refresh"3 Tap the email you want to read to open itNote ● If "Email check frequency" and "Email notifications" (P. 75) are set in the account settings, the notification icon will be displayed on the status bar. The inbox can be displayed by opening the notification panel and tapping a notification. Replying to emails1 Open the email you want to reply to2 Tap "Reply" or "Reply to all"3 Enter a message, and tap "Send"Forwarding emails1 Open the email you want to forward2 M→"Forward"3 Enter the mail address of the forwarding destination in the "To" field, and tap "Send" Registering emails to STARMEMO 1 Open the email you want to register2 M→"Add StarMemo"→"OK"Deleting emails1 Open the email you want to delete2 Tap "Delete"81Messaging/Browsersp-mode mailYou can send and receive email using e-mode mail addresses (@docomo.ne.jp).With this mail type, pictograms and deco-mail® can be used, and automatic reception also is supported. ● For details on sp-mode mail, refer to the "Mobile Phone User's Guide (sp-mode [Smartphone])". 1 →"spモードメール (sp-mode mail)"From here on, follow the on-screen instructions.GmailGmail is a Google online email service. You can send and receive emails using Gmail on your FOMA terminal. ● To use Gmail, you must set a Google account for your FOMA terminal. If a Google account is not yet set, follow the on-screen instructions that are displayed when Gmail is activated for the first time.Opening Gmail1 →"Gmail"A list of message threads is displayed in the inbox.① Number of unread emails② The same operation can be performed on a group of emails by selecting the checkboxes of multiple message threads.③ Currently displayed Gmail account④ Number of emails contained in a message thread⑤ Tap to add a star.⑥ Message threads with no unread emails (gray background) ■About message threadsGmail displays emails in groups as a message thread each time you reply to an email. If the new emails are replies to existing emails, these are grouped together in the same message thread. When the subject of a new email or an existing email has been changed, a new message thread will be created. ②①③④⑤Inbox⑥](https://usermanual.wiki/Fujitsu-Mobile-communications/TU12-J01/User-Guide-1378867-Page-42.png)
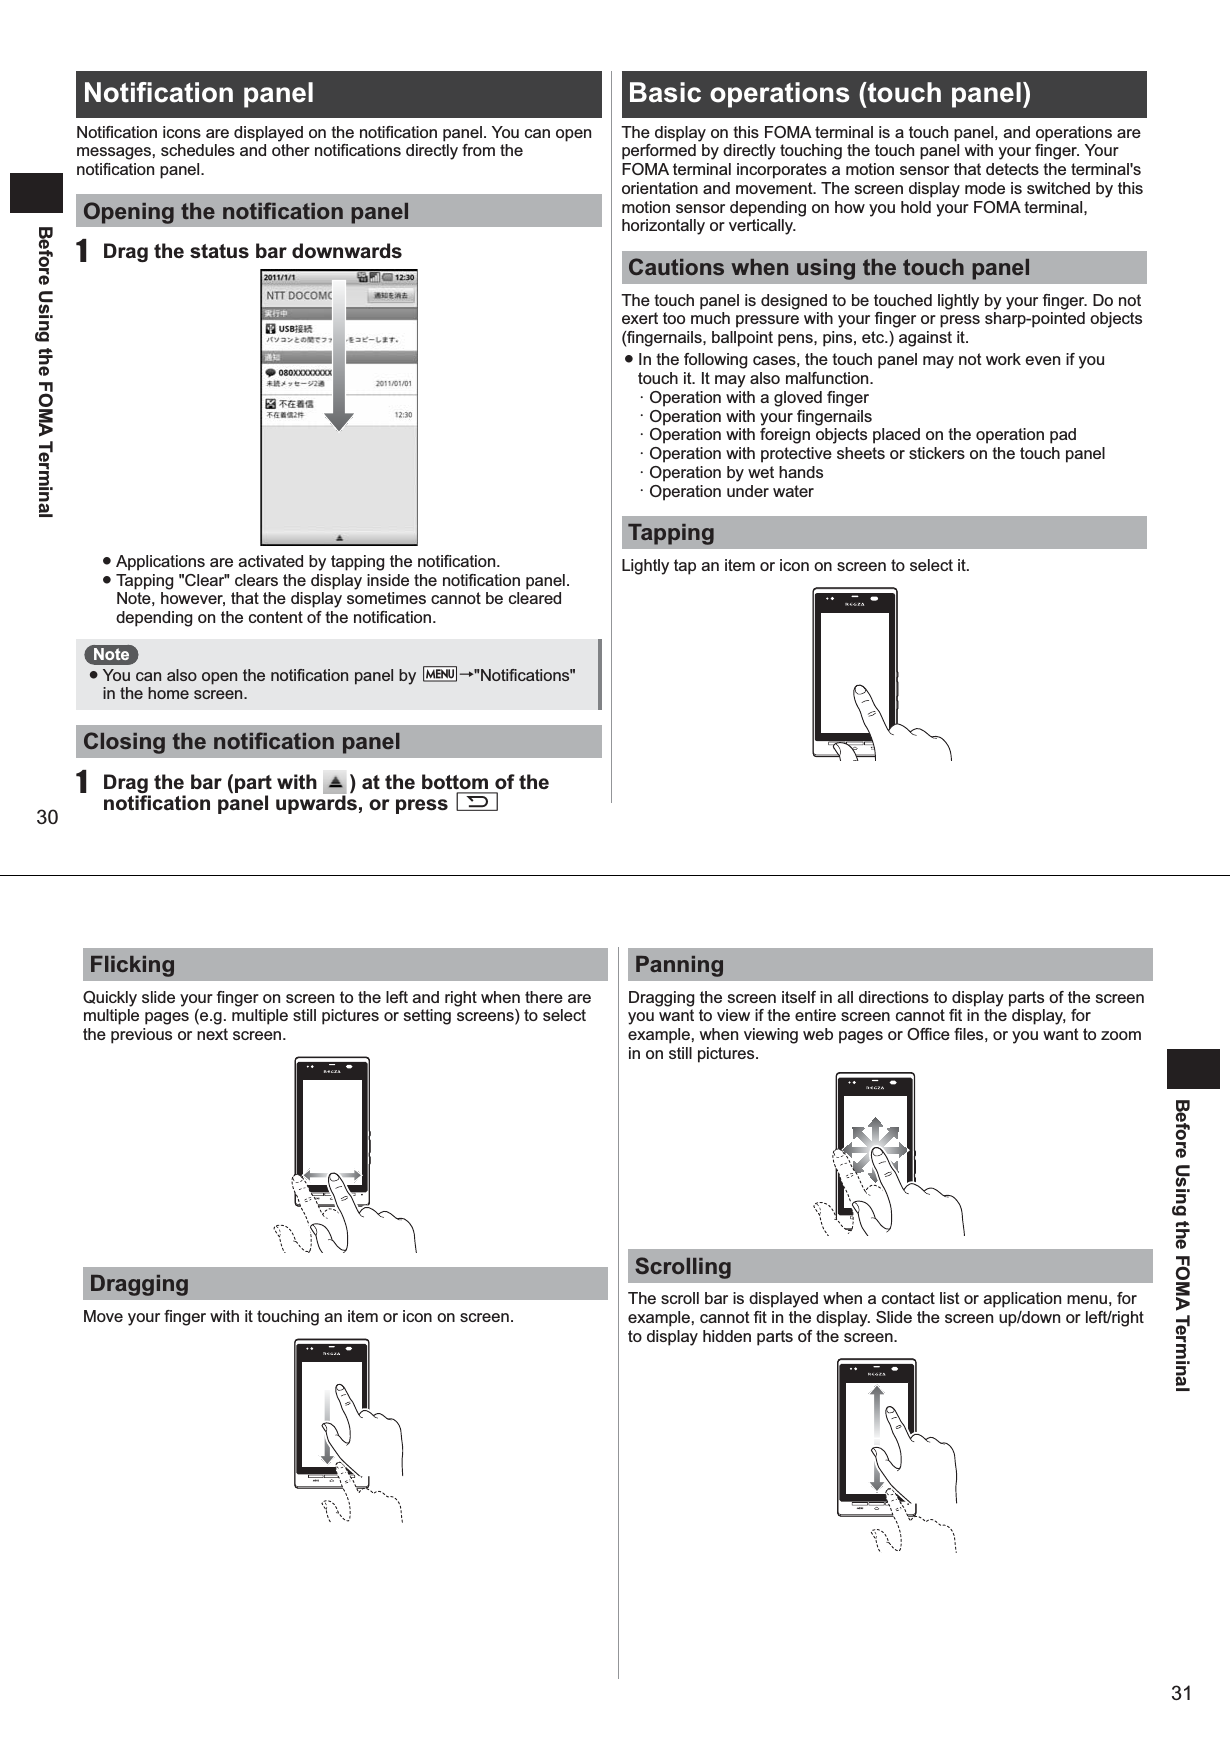
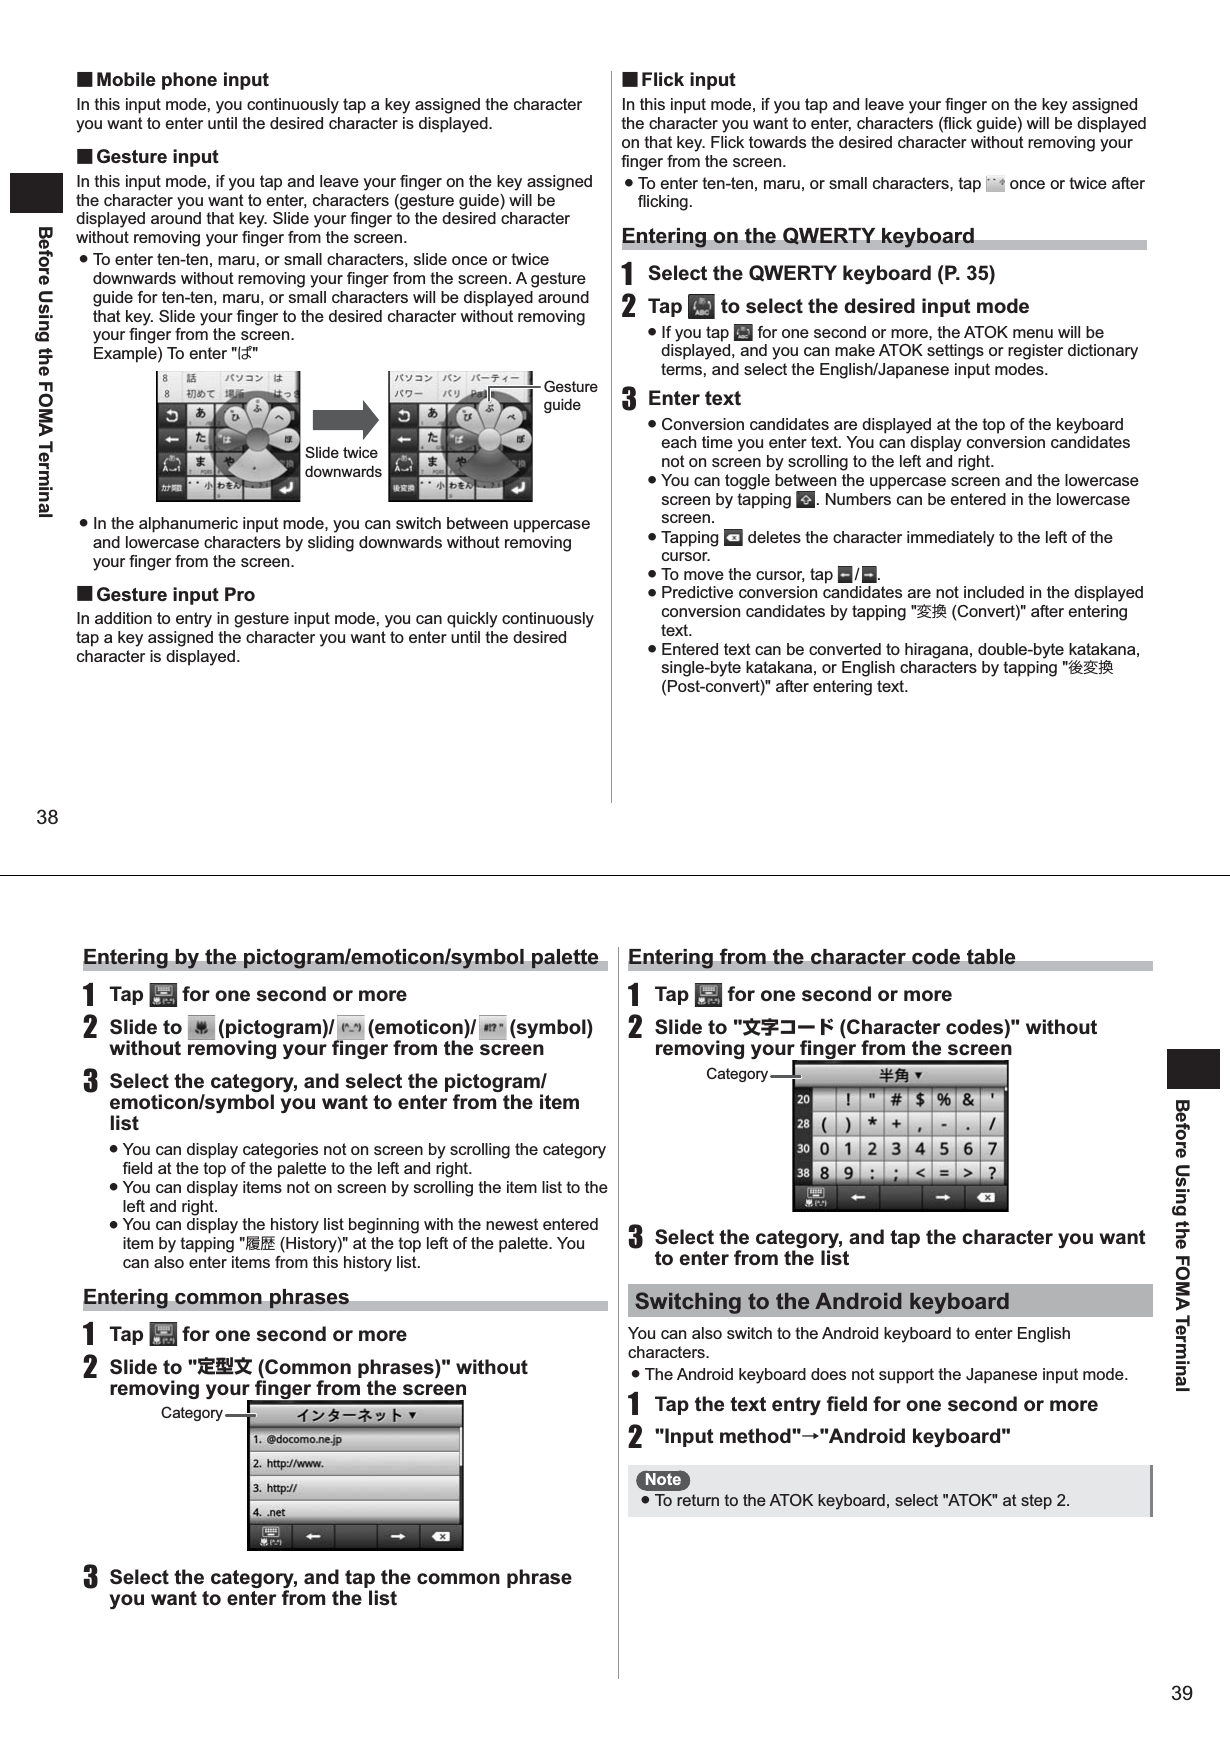
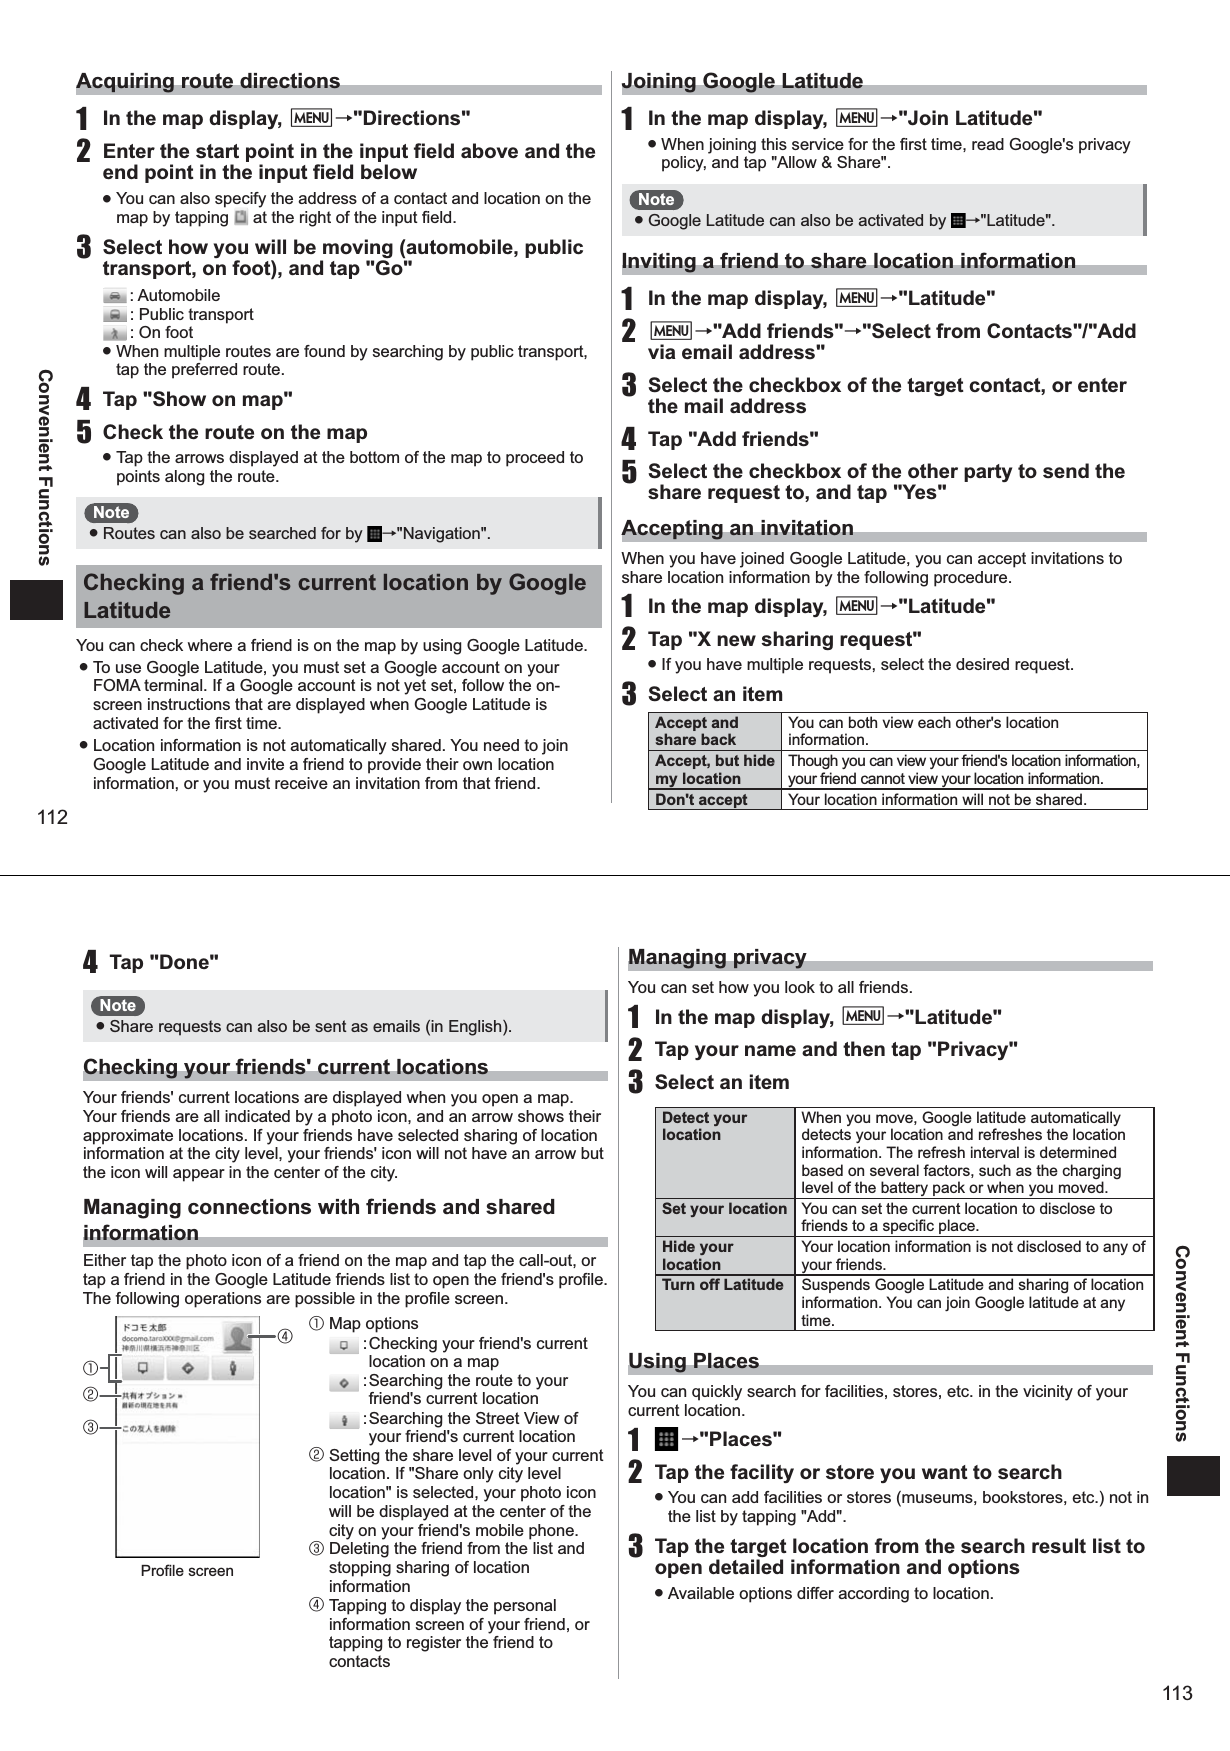
![84Messaging/BrowserSMSYou can send and receive text messages up to 70 double-byte characters long (up to 160 single-byte characters comprising only alphanumerics) addressed to a mobile phone number. Composing and sending SMS1 →"Messaging"→"New message"2 Enter the mobile phone number to send the SMS to in the "To" field3 Enter the message in the "Type to compose" field ● To enter a pictogram, M→"Insert smiley"→select a pictogram.4 Tap "Send"Note ● You can exchange messages with users or non-docomo overseas telecommunications carriers. Refer to "Mobile Phone User's Guide [International Services]" or the "docomo International Services website" for information on available countries and overseas telecommunications carriers. ● For destinations of non-docomo overseas telecommunications carriers, enter "+", the country code, and the recipient's mobile phone number. Alternatively, enter "010", the country code and the recipient's mobile phone number. (Add "010" to reply to SMS received from abroad.) If the phone number begins with "0", omit the "0". However, "0" must be included when making a call to some countries or regions such as Italy. When you have received an SMSWhen you receive an SMS, the notification icon will be displayed on the status bar. New SMS can be checked by opening the notification panel and tapping a notification. Note ● You cannot check for any SMS in the SMS center from your FOMA terminal. ● SMS cannot be received when your FOMA terminal is low on memory. Increase memory, for example, by deleting unwanted applications (P. 67, P. 118).Reading sent/received SMS1 →"Messaging"2 Tap the message thread containing the SMS you want to read to open itReplying to SMS1 →"Messaging"2 Open the message thread containing the SMS you want to reply to3 Enter a message, and tap "Send"Forwarding SMS1 →"Messaging"2 Open the message thread and tap the SMS you want to forward for one second or more3 Tap "Forward"4 Enter the mobile phone number of the forwarding destination in the "To" field, and tap "Send"85Messaging/BrowserRegistering SMS to STARMEMO 1 →"Messaging"2 Open the message thread and tap the SMS you want to register for one second or more3 "Add StarMemo"→"OK"Deleting SMS ■Deleting one SMS1 →"Messaging"2 Open the message thread and tap the SMS you want to delete for one second or more3 "Delete message"→"Delete" ■Deleting a message thread1 →"Messaging"2 Tap the message thread you want to delete for one second or more3 "Delete thread"→"Delete"All the SMS in the message thread are deleted. ■Deleting all message threads1 →"Messaging"→M→"Delete threads"→"Delete"Setting SMS auto delete1 →"Messaging"→M→"Settings"2 Select the "Delete old messages" checkbox, and tap "Message limit"3 Enter the message limit for the number of SMS in each message thread, and tap "Set"Note ● You can protect SMS from being deleted by the following operation: →"Messaging"→open the message thread, and tap the SMS you want to protect for one second or more→"Lock message"Backing up SMSYou can back up SMS saved on your FOMA terminal to a microSD card. 1 →"Messaging"→M→"Settings"→"Backup"2 "Backup"→"Start"3 Tap "OK" when the backup is completedNote ● To copy backed up SMS to your FOMA terminal tap "Restore" →"Start" after step 1.Setting new SMS notification1 →"Messaging"→M→"Settings"2 Set call notification itemsNotifications Sets whether or not to notify you that there is new SMS by the notification icon on the status bar. Select ringtone Sets the ringtone for notifying you of new SMS.Vibrate Sets whether or not to notify you of new SMS by vibration.](https://usermanual.wiki/Fujitsu-Mobile-communications/TU12-J01/User-Guide-1378867-Page-44.png)

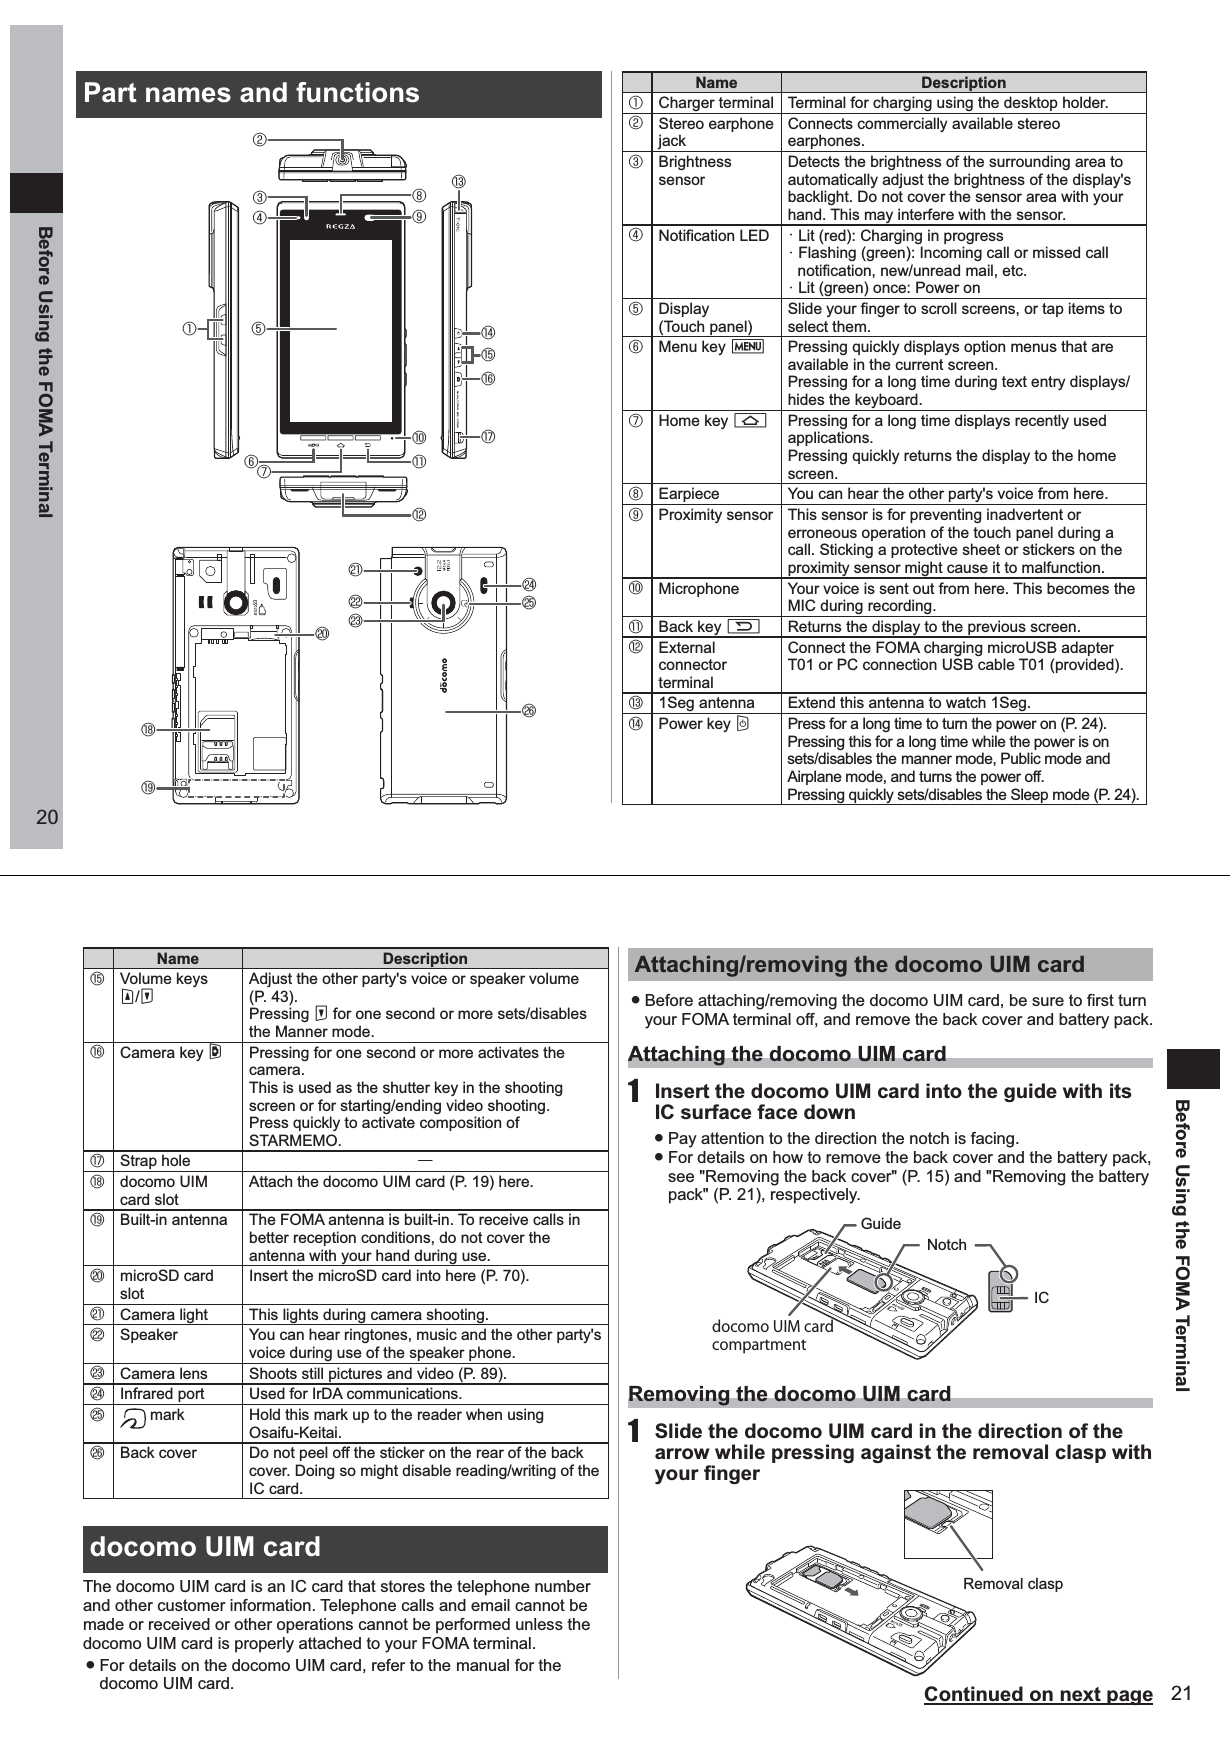
![114Convenient FunctionsUsing UkiUkiViewYou can display icons representing emotion overlaid with a posted message on a map or image of your current location taken with your camera.1 →"UkiUkiView"→"使ってみる (Trial use)"2 Read the software licensing agreement, and tap "同意する (Agree)"3 Read the exemptions, and tap "同意する (Agree)"4 Tap "まずは世界を体験する (First, experience the world)" or "新規登録/ログインする (New/Login)"From here on, follow the on-screen instructions.Viewing how to use UkiUkiViewYou can display Help and check how to use UkiUkiView. 1 →"UkiUkiView"→"ヘルプ (Help)"Osaifu-Keitai The Osaifu-Keitai function is incorporated in the IC card. It allows you to pay, use coupons, or collect points, etc. simply by holding your FOMA terminal up to the store's scanner. Hold your FOMA terminal up to a scanner to access sites or home pages, or use communications to obtain the latest coupon tickets, charge electronic money or check payments and balance. The Osaifu-Keitai function can also be used securely since it can be locked as a measure for when your FOMA terminal is lost. ● To use Osaifu-Keitai compatible services, their use must be set in sites or applications. ● For details on Osaifu-Keitai, refer to the "Mobile Phone User's Guide (sp-mode [Smartphone])." ● The "iD設定アプリ (iD setup application)" for using iD/DCMX will be downloadable from docomo market from February 2011.When using Osaifu-Keitai ● Data (e.g. electronic money, points) inside the IC card is sometimes lost or altered if your FOMA terminal malfunctions. (In principle, you must erase the data yourself since DOCOMO is not responsible for the data in your FOMA terminal if it must be handed in for repair, etc.) For details on support, such as re-issue or recovery of data, temporary receipt and replacement, check with your Osaifu-Keitai service provider. Be sure to use backup services for backing up important data. ● DOCOMO is not liable for any damages arising from loss or alteration of data inside the IC card or other Osaifu-Keitai services in any instances whatsoever, including malfunction and change of model. ● If your FOMA terminal is lost or stolen, immediately contact your Osaifu-Keitai service provider for instructions on what to do. Using Osaifu-Keitai1 →"おサイフケータイ (Osaifu-Keitai)" ● When Osaifu-Keitai is activated for the first time, tap "★はい★" to make the initial settings.Service information is acquired to refresh the service list. 2 Select the service you want to use from the service list.3 Set up the service ● Make the required settings from the service site or application.115Convenient FunctionsHolding your FOMA terminal up to the scannerYour FOMA terminal can communicate with the scanner merely by holding the mark up to the scanner. ● When holding the mark up to the scanner, bring it close to the scanner gently without bumping it hard against the scanner. ● Hold up the mark so that it is parallel to the center of the scanner. If the mark cannot be scanned even with it held in front of the center of the scanner, lift up your FOMA terminal slightly, or move it backwards/forwards or to the left/right. ● The mark sometimes cannot be scanned if there is a metal object between the mark and the scanner. Also, note that stickers or other objects near the mark might affect communications performance.Locking the Osaifu-Keitai function[Osaifu-Keitai lock setting]When the Osaifu-Keitai function is locked, you can no longer use Osaifu-Keitai services or acquire data from scanners. 1 →"おサイフケータイ (Osaifu-Keitai)"2 M→"おサイフケータイ ロック設定 (Osaifu-Keitai lock setting)"3 Enter a 4- to 8-digit password4 Enter the password again for confirmation, and tap "OK"Unlocking the Osaifu-Keitai function1 →"おサイフケータイ (Osaifu-Keitai)"2 M→"おサイフケータイ ロック設定 (Osaifu-Keitai lock setting)"3 Enter the password, and tap "OK"mark](https://usermanual.wiki/Fujitsu-Mobile-communications/TU12-J01/User-Guide-1378867-Page-59.png)

![126Convenient FunctionsView screen option menuThe following operations can be performed by pressing M in the view screen for each file:Item DescriptionGo to Displays the specified page.Find Searches text strings.Page display Sets the page display mode.Copy Copies text from Office documents to the clipboard.Settings Makes file display settings.Properties Displays PDF file properties.About Displays version information and license information.USB host functionThis FOMA terminal has a built-in USB host function. This function allows you to use commercially available USB devices by connecting the USB cable for external device connection T01 (sold separately) to the external connector terminal. ● For details on the USB host function, refer to the manual for the USB cable for external device connection T01.127Overseas UseOutline of international roaming (WORLD WING)International roaming (WORLD WING) is a service that enables you to use the same FOMA terminal as you use in Japan in the service area of docomo affiliated overseas telecommunications carriers without changing your phone number and mail address. You can use voice calls, SMS and sp-mode mail without any changes in settings. ● Available area You can use your FOMA terminal in the 3G network and GSM/GPRS network service areas. You can also use your FOMA terminal in countries and regions that support 3G850MHz/GSM850MHz. Check available area before use. ● Refer to the following before using your FOMA terminal overseas. ・ "Mobile Phone User's Guide [International Services]"・ DOCOMO International Services websiteNote ● For country codes, international call access number and universal number international prefix, refer to "Mobile Phone User's Guide [International Services]" or the "DOCOMO International Services website". Available services(○: Available, ×: Unavailable)Communication service 3G GSM GPRSVoice call ○○○SMS*1○○○sp-mode mail ○×○e-Mail ○×○Browser ○×○GPS position location*2○×○*1 Enter the same phone number as used in Japan when sending to a FOMA terminal.*2 Packet transmission charges are charged for GPS positioning.Note ● Some services are not available depending on the telecommunications carrier or network. Refer to "Mobile Phone User's Guide [International Services]" or the "DOCOMO International Services website" for information on available countries and regions, and telecommunications carriers. ● At purchase, "Data roaming" is set to off. To use services or applications that use packet communications overseas, set "Data roaming" to on (P. 123).](https://usermanual.wiki/Fujitsu-Mobile-communications/TU12-J01/User-Guide-1378867-Page-65.png)
![128Overseas UsePreparation for useCheck before departureCheck the following in Japan before using your FOMA terminal overseas. SubscriptionCheck the status of your WORLD WING subscription. For details, contact the "docomo Information Center" on the last page of this manual.Charging the batteryOverseas use may require more battery power than use in Japan. ● For precautions for handling the AC adapter (sold separately), see P. 7. ● For details on charging with the AC adapter (sold separately), see P. 23. ChargesOverseas charges (call charges, packet transmission charges) differ from those in Japan. ● If you set the access point to "mopera U(スマートフォン定額) (mopera U (Smartphone flat-rate))", switching of the access point is required (P. 123). ● The specifications of your FOMA terminal are such that some communications are automatically performed, such as communications for checking the latest software version or communications for maintaining a connection with the server. Also, packet communications is sometimes performed automatically with some applications. Note that packet communications charges when used overseas are sometimes higher.Preparationssp-mode mailMail functions can be stopped or the size of received sp-mode mail can be limited. For details, refer to the "Mobile Phone User's Guide (sp-mode [Smartphone])".Network service settingsWhen you are subscribed to network services, you can use voice mail, call forwarding, number notification request, and other network services even overseas. Note, however, that some network services are unavailable. ● To use network services overseas, "Remote operation settings" must be started. For details on remote operation settings, refer to the "Mobile Phone User's Guide [International Services]". ● "Remote operation settings" can also be performed at overseas destinations. ● Also some network services that allow setting, delete and other operations are sometimes not available depending on the overseas telecommunications carrier. 129Overseas UseChecking in the country you are visiting Your FOMA terminal automatically connects to the available telecommunications carrier when you have arrived in the country you are visiting and you turn the power on. ConnectionIf your FOMA terminal moves outside the currently used service area when "Network operator" in "Mobile networks" is set to "Select automatically", your terminal automatically searches and connects to another available telecommunications carrier. Display indication ● The currently used network type is displayed on the status bar. : 3G (packet) network : GPRS network : EDGE network ● The currently connected telecommunications carrier can be checked on the notification panel. Date/time settingIf the →"Settings"→"Date & Time"→"Automatic" checkbox is selected, your FOMA terminal receives time and time difference information automatically from the currently connected overseas telecommunications carrier, and corrects the time and time differences on the terminal. ● The correction timing differs depending on the telecommunications carrier. ● To set these differences manually, deselect the "Automatic" checkbox, and set each of "Set date", "Select time zone" and "Set time" (P. 72).Inquiries ● When your FOMA terminal or the UIM card is lost or stolen overseas, promptly contact docomo and conduct the procedure for canceling use of the service from the country you are visiting. For inquiries, see the "docomo Information Center" on the last page of this manual. Note that transmission/calling charges after your FOMA terminal or the UIM card is lost or stolen are incurred by the subscriber. ● To use a landline phone, etc., the "international call access number" or "universal number international prefix" of the country you are visiting is required. Check after homecomingYour FOMA terminal automatically connects to the FOMA network after you return home. If it fails, perform the following setting. ● Set "Network mode" in "Mobile networks" to "GSM/WCDMA Automatic" (P. 123). ● Set "Network operator" in "Mobile networks" to "Select automatically" (P. 123).](https://usermanual.wiki/Fujitsu-Mobile-communications/TU12-J01/User-Guide-1378867-Page-66.png)
![134Appendix/IndexCategory Symptom Check locationReference pageYour FOMA terminal operations are slower/Application operation is unstable/Some applications are not activated ● Operation becomes unstable if your FOMA terminal is running out of memory. When memory is running low and the warning message is displayed, delete unwanted applications to secure extra memory. P. 70No operations even by tapping the screen ● Turn the power off then on again.P. 24Terminal operationData is not displayed normally/Normal touch panel operations are not possible ● Restart your FOMA terminal. P. 69The docomo UIM card is not recognized ● Is the docomo UIM card inserted in the correct orientation?P. 19The clock is not correct ● The clock sometimes becomes incorrect if your FOMA terminal is left on for a long time.Make sure that date and time "Automatic" settings are on, and then turn your FOMA terminal off then back on again in a good-reception area. P. 72ConnectionsCalls cannot be made ● Is the docomo UIM card correctly inserted into your FOMA terminal? ● Did you enter the telephone number starting from the city code? ● Is the Airplane mode enabled?P. 19,P. 54Category Symptom Check locationReference pageRingtone does not sound ● Is the ringtone volume set to "0"? ● Is the Public mode or Manner mode set? ● Is the Voice Mail Service or Call Forwarding Service ring time set to "0 seconds"?P. 49,P. 52,P. 53,P. 59,P. 60ConnectionsConnections cannot be made (the "out of service" indication does not disappear even after moving into the service area, or calls cannot be made/received even though reception is not bad) ● Turn your FOMA terminal off then back on again, or re-insert the battery pack or the docomo UIM card. ● Depending on the signal properties, making or receiving calls may not be available even though signals are strong and four-bar antenna icon is shown (). Move to another place and call again. ● In crowded places, heavy telephone/mail traffic may be caused and make it difficult to get a connection depending on the state of the incoming signal. If this happens, "Please wait for a while" is displayed and the busy signal is played. Either move to another place or call again later.P. 19,P. 20,P. 24ScreenDisplay is dark ● Adjust the brightness setting "Brightness". ● Is your FOMA terminal in the ECO mode?P. 61,P. 62SoundDuring a conversation, the other party's voice is difficult to hear or is too loud ● Have you changed the in-call volume?P. 43135Appendix/IndexCategory Symptom Check locationReference pageMailThe notification icon indicating new mail does not appear ● Are email and Gmail "Email notifications" set to off? ● Is SMS "Notifications" set to off?P. 75,P. 79,P. 81CameraStill picture or video shot with the camera is out-of-focus ● Make sure that the camera lens is not misted up or dirty. ● Set the focus mode to "Face" when taking photos of people. ● Take photos using the "Anti-Shaking" function.P. 89,P. 91,P. 921SegCannot watch 1Seg ● Are you outside the terrestrial digital TV broadcasting service area or in a poor reception area? ● Have channel settings been made?P. 98,P. 102Osaifu-KeitaiCannot use Osaifu-Keitai ● IC card functions are no longer available regardless of the Osaifu-Keitai lock setting when the battery pack is removed. ● Is Osaifu-Keitai lock setting activated? ● Are you holding the part of your FOMA terminal with the mark up to the scanner? P. 109Category Symptom Check locationReference pageOut-of-service is displayed, and the international roaming service is unavailable ● Are you outside the international roaming service area or in a poor reception area? ● Refer to "Mobile Phone User's Guide [International Services]" or the "docomo International Services website" for information on available service areas or telecommunications carriers. ● After moving outside Japan, switch the network type (mode) to "GSM/WCDMA Automatic" or a supported network. When "GSM/WCDMA Automatic" is set in Japan, turn your FOMA terminal off then back on again.P. 123Overseas use Making/receiving calls suddenly becomes unavailable during overseas use ● Check your accumulated use at "docomo Information Center". For "International roaming service (WORLD WING)", the approximate limit of use fees is set in advance. If this limit is exceeded, all services are stopped. In this case, pay the accumulated use fees to resume services. ● Check the network type (mode). When "GSM/WCDMA Automatic" is set, special networks cannot be received and are unavailable. Change the setting to a network ("WCDMA only" or "GSM only") that can be connected to where you are visiting.Last page of this manual,P. 123](https://usermanual.wiki/Fujitsu-Mobile-communications/TU12-J01/User-Guide-1378867-Page-69.png)

![140Appendix/IndexUsing software update ● Do not remove the battery pack while the software update is in progress. Doing so might result in the update failing. ● Recharge the battery before updating the software. ● The software cannot be updated in the following cases:・ During a call or when your FOMA terminal is outside the service area・ During international roaming・ While your FOMA terminal is in the Airplane mode・ While your FOMA terminal is connected to a Wi-Fi network・ While mounted and connected via USB, during OS version upgrade, during MTP connection ・ When the date and time are set incorrectly・ When there is insufficient battery power for the software update・ When there is insufficient free space for the software update ● Software updates (downloading and rewriting) might take time. ● During a software update, outgoing calls cannot be made, incoming calls cannot be received, and various communications functions and other functions are unavailable. (During a download, voice calls can be received.) ● During a software update, your FOMA terminal performs SSL/TLS communications with the server (DOCOMO site). ● It is recommended that you update software at locations with a strong signal (four antenna bars displayed) and while you are not moving.* If reception status weakens and the download is interrupted when you are downloading software, update the software again at a location where reception is good. ● If the software has already been updated, "No update is needed." is displayed when the software update is checked. ● SMS that were received during the software update are stored at the SMS center. ● When updating software, information unique to your T-01C (model, serial number, etc.) is automatically sent to the server (DOCOMO software update server). Sent information is used only for software updates by DOCOMO and not for other purposes. ● If a software update fails, "Rewrite failed" is displayed, and all other operations may no longer be possible. If this happens, bring your FOMA terminal to a repair shop specified by DOCOMO. ● When the PIN code is set, the PIN code entry screen is displayed during restart of your FOMA terminal after rewriting the software, and you must enter the PIN code. ● During a software update, do not activate other applications. Updating software automatically[Auto-update]New software can be downloaded automatically and rewritten at a preset time.At purchase, the Auto-update setting is set to "Automatic Update". When your FOMA terminal is ready for rewriting, the (software update available) notification icon is displayed on the status bar. You can confirm the rewrite start time, change the rewrite start time, and select whether or not to rewrite the software right away. When the rewrite start time is reached with the (software update available) notification icon displayed, the software is automatically rewritten, and the (software update available) notification icon disappears.If there is insufficient battery power or a voice call is in progress when the rewrite start time is reached, the software update will not be started and will be performed at the same time the following day. Software cannot be updated automatically when the automatic update setting is set to "Manual Update" or while updating software by Now update. 141Appendix/IndexSetting Auto-update1 →"Settings"→"About phone"→"Software update"→"Configure the software update"2 Select the action to be performed when update software notification is received ● To update the software automatically: "Automatic Update" ● To not update the software automatically: "Manual Update"Actions when software update is requiredWhen the software is automatically downloaded, the (software update available) notification icon is displayed on the status bar. 1 Open the notification panel and tap the notification2 Select the rewrite method ● When a software update is required, the rewrite start time is displayed.■Tap "OK" ● The screen returns to the standby screen. Rewriting is started when the preset time is reached. ■ Step 1 of "Sets Time"→"Reserving a time to update the software" (P. 136) ● Set the time to execute installation of the update package.■ Step 1 of "Starts update"→"Updating software immediately" (P. 135) ● Rewriting is started immediately. ● When the rewrite is complete, the (software update completed) notification icon is displayed on the status bar. ● Once you have checked the notification icon, it disappears.](https://usermanual.wiki/Fujitsu-Mobile-communications/TU12-J01/User-Guide-1378867-Page-72.png)
![142Appendix/IndexNote ● If the software update could not be activated at the auto-update time, the (software update available) notification icon is displayed on the status bar. Activating software update[Now update]1 →"Settings"→"About phone"→"Software update"→"Start the software update"→"Yes" ● The software update is automatically updated when the download is started. ● If you cancel a download midway, data downloaded till then is deleted. ● When the software update is not needed, "No update is needed." is displayed. ● If your FOMA terminal is in international roaming or out of the service area, "Failed to start update. Due to no network or roaming." is displayed. ● If there is insufficient battery power for a software update, "Failed to start update. Due to low battery. Please recharge and retry later." is displayed.2 Tap "OK" ● Your FOMA terminal restarts and the update starts. ● During an update, all key operations are disabled. The update also cannot be canceled. ● Your FOMA terminal restarts automatically twice during an update. 3 The standby screen is displayed ● will be displayed on the status bar. Once you have checked the notification icon, it disappears.143Appendix/IndexUpdating software immediately1 "Starts update"→"★はい★"2 When "Ready for update." is displayed, tap "OK" ● Rewriting starts automatically about three seconds after "Ready for update." is displayed. ● During a rewrite, all key operations are disabled. The rewrite also cannot be updated. ● When rewriting ends, your FOMA terminal restarts automatically.3 After your FOMA terminal restarts, the software update starts automatically ● During an update, all key operations are disabled. The update also cannot be canceled. ● About five seconds after the update ends, your FOMA terminal restarts automatically. 4 Open the notification panel and tap the notification ● The software update ends, and the standby screen is displayed. ● The (software update completed) notification icon is displayed on the status bar to indicate that the software update is completed. Once you have checked the notification icon, it disappears.Post-update display is displayed on the status bar of the standby screen. When you open the notification panel, a message indicating that the software update is completed is displayed.](https://usermanual.wiki/Fujitsu-Mobile-communications/TU12-J01/User-Guide-1378867-Page-73.png)
![144Appendix/IndexReserving a time to update the software[Reserve update]You can preset a time to update the software if you want to specify a separate time for installing the update package. 1 Tap "Sets Time" ● The rewrite start time setting screen is displayed. ● The displayed time is the same as the time on your FOMA terminal.2 Enter the desired time, and tap "OK" ● Set the time. ● Tap "+"/"-" to change the update time, and tap "OK".When the reserved time is reached1 When "Ready for update." is displayed, tap "OK" ● The software update starts automatically about three seconds after "Ready for update." is displayed. ● Before the software starts, make sure that the standby screen is displayed and that your FOMA terminal is in a place with a strong signal. ● When there is insufficient battery power for the software update at the reserved time, the software update will be performed at the same time the following day. ● The software will not be updated while mounting with a USB connection, during OS version upgrade, during MTP connection at the reserved time. ● When an alarm, etc. is set at the same time as the reserved time, priority will be given to the software update. ● When the T-01C is turned off during the time reserved for the software update, the software update will be performed at the same time as the reserved time when the T-01C is turned on again.145Appendix/IndexMain specifications ■PackageProduct name T-01CSize Approx. 126 (H) x 62 (W) x 11.9 (D) mmWeight Approx. 149 g (with battery pack attached)Memory ROM 1024 MBRAM 512 MBContinuous standby timeFOMA/3G At rest (automatic): approx. 370 hoursMobile (automatic): approx. 330 hoursMobile (3G fixed): approx. 330 hoursGSM At rest (automatic): approx. 250 hoursContinuous talk timeFOMA/3G Approx. 280 minutesGSM Approx. 260 minutesCharging time by FOMA AC Adapter (sold separately)When FOMA charging microUSB adapter T01 is used: approx. 200 minutesWhen desktop holder is used: approx. 160 minutesCharging time by FOMA DC Adapter (sold separately)When FOMA charging microUSB adapter T01 is used: approx. 200 minutesWhen desktop holder is used: approx. 160 minutesLCD Type TFTSize Approx. 4.0 inchesNumber of colors262,144Number of pixels480 (H) x 854 (V) (full wide VGA)Image pickup deviceType CMOSSize 1/2.5 inchEffective camera pixels Approx. 12.2 millionMax. recorded pixels Approx. 12 millionDigital zoom Max. approx. 4x (20 steps)Music playbackWMA file Continuous playback time: approx. 680 minutes (compatible with background playback)MP3 files Continuous playback time: approx. 660 minutes (compatible with background playback)Wireless LAN IEEE802.11b/g-compliantBluetoothFunctionCompatible versionBluetooth standard Ver.2.1 + EDR*1Output Bluetooth standard Power Class 1Distance with no obstructions in sight*2Within approx. 10 mCompatible profiles*3HFP, HSP, OPP, HID, A2DP, AVRCP, PBAP, SDP*1 This FOMA terminal and all Bluetooth devices have been confirmed as being compatible with the Bluetooth standard by methods determined by Bluetooth SIG, and have acquired certification. Note, however, that operation methods may differ according to the properties and specifications of connected devices, and that data communications sometimes cannot be performed even if connections are made. *2 Changes according to objects obstructing devices and signal reception. *3 These are created by standardizing connection procedures for Bluetooth communications according to individual product properties. ● Continuous talk time is an estimate of the time that you can talk on your FOMA terminal when the signal can be sent and received normally. ● Continuous standby time is an estimate of the time when the signal can be received normally.The standby time may be reduced by about half depending on the battery charging status, functions used, temperature and other operating environment conditions, and signal strength (no signal or weak signal).](https://usermanual.wiki/Fujitsu-Mobile-communications/TU12-J01/User-Guide-1378867-Page-74.png)
![146Appendix/Index ● Talk time (communications) and standby time are shortened when and Internet connection is used. The talk time (communications) and standby time are also shortened when email is composed or applications are activated even if you are not talking or an Internet connection is not made. ● The continuous standby time at rest is the average available time in an at rest state when the signal can be received normally. ● The continuous standby time when mobile is the average available time in an area where the signal can be received normally, and in an At rest, Mobile and Outside the service area state. ● Charging times were calculated when this FOMA terminal was turned off and the battery pack was charged in a completely run down state. The charging time increases when the battery pack is charged while your FOMA terminal is turned on. ■Battery packProduct name Battery Pack T03Battery Lithium-ionNominal voltage 3.7 VNominal capacity 1300 mAhFile formatStill pictures and video shot on your FOMA terminal are saved in the following file formats.Type File format ExtensionStill pictures JPEG jpgVideo 3GPP 3gp ■Approximate number of still pictures that can be shotResolution Number that can be saved on microSD card (2 GB)640×480 (VGA) Approx. 20480854×480 (FWVGA) Approx. ●●●●●2592×1944 (5M) Approx. ●●●●●4000×3000 (12M) Approx. ●●●●●* Shooting conditions, zoom: not used, image quality: normal ■Approximate video shooting timeResolutionShooting time that can be saved on microSD card (2 GB)320×240 (QVGA) Approx. ●●● minutes640×480 (VGA) Approx. 340 minutes848×480 (FWVGA) Approx. ●●● minutes1280×720 (HD) Approx. ●●● minutes* Shooting conditions, zoom: not used, image quality: normal, type: video+audio ■Approximate 1Seg recording timeRecording time that can be saved on microSD card (2 GB) Approx. 600 minutes* Changes according to the amount of free space on the microSD card and content of program (size of data broadcast, etc.) to be recorded. 147Appendix/IndexSpecific absorption rate (SAR) of Mobile phonesThis model [T-01C] mobile phone complies with Japanese technical regulations and international guidelines regarding exposure to radio waves.This mobile phone was designed in observance of Japanese technical regulations regarding exposure to radio waves (*1) and limits to exposure to radio waves recommended by a set of equivalent international guidelines. This set of international guidelines was set out by the International Commission on Non-Ionizing Radiation Protection (ICNIRP), which is in collaboration with the World Health Organization (WHO), and the permissible limits include a substantial safety margin designed to assure the safety of all persons, regardless of age and health condition.The technical regulations and international guidelines set out limits for radio waves as the Specific Absorption Rate, or SAR, which is the value of absorbed energy in any 10 grams of tissue over a 6-minute period. The SAR limit for mobile phones is 2.0 W/kg. The highest SAR value for this mobile phone when tested for use at the ear is 0.487 W/kg. There may be slight differences between the SAR levels for each product, but they all satisfy the limit.The actual SAR of this mobile phone while operating can be well below that indicated above. This is due to automatic changes to the power level of the device to ensure it only uses the minimum required to reach the network. Therefore in general, the closer you are to a base station, the lower the power output of the device.This mobile phone can be used in positions other than against your ear. This mobile phone satisfies the international guidelines when used with a carrying case or a wearable accessory approved by NTT DOCOMO, INC.(*2) In case you are not using the approved accessory, please use a product that does not contain any metals, and one that positions the mobile phone at least 1.5 cm away from your body.The World Health Organization has stated that present scientific information does not indicate that there are harmful effects attributed to the use of mobile devices. They recommend that if you are worried about your exposure then you can limit your usage or simply use a hands-free kit to keep the mobile device away from the head and body.Please refer to the WHO website if you would like more detailed information.http://www.who.int/docstore/peh-emf/publications/facts_press/fact_english.htmPlease refer to the websites listed below if you would like more detailed information regarding SAR.Ministry of Internal Affairs and Communications Website: http://www.tele.soumu.go.jp/e/sys/ele/index.htmAssociation of Radio Industries and Businesses Website: http://www.arib-emf.org/index02.html (in Japanese only)NTT DOCOMO, INC. Website: http://www.nttdocomo.co.jp/english/product/sar/FUJITSU LIMITED Website: http://www.fmworld.net/product/phone/sar/*1: Technical regulations are defined by the Ministerial Ordinance Related to Radio Law (Article 14-2 of Radio Equipment Regulations).*2: Regarding the method of measuring SAR when using mobile phones in positions other than against the ear, international standards (IEC62209-2) were set in March of 2010. On the other hand, technical regulation is currently being deliberated on by national council. (As of November, 2010)](https://usermanual.wiki/Fujitsu-Mobile-communications/TU12-J01/User-Guide-1378867-Page-75.png)

![Check/change the subscription, apply for various services, and request various information materials online. My docomo (http://www.mydocomo.com/) ⇒各種お申込・お手続き (Various Applications/Procedures) (in Japanese only)* You will need your "docomo ID/Password" to access the site. * If you do not have or you have forgotten your "docomo ID/Password", contact the "docomo Information Center" on the last page of this manual.* The site may not be available depending upon the content of your subscription.* You may not be able to access some site services due to system maintenance, etc.Using mobile phones with good manners!When using your FOMA terminal, please be considerate of those around you.Turn off your FOMA terminal in the following places■ When in an area where use is prohibitedBe sure to turn off your FOMA terminal on an aircraft and in a hospital. * There are people outside hospital wards who also use electric medical equipment. Be sure to turn off your FOMA terminal in lobbies and waiting rooms. ■ When in crowded places such as rush-hour trains in case somebody nearby is using an implanted cardiac pacemaker or implanted cardioverter-defibrillator Your FOMA terminal may adversely affect the operation of such equipment.Set Public mode in the following places■ While drivingUsing a mobile phone in hand while driving is regarded as a punishable act. * This excludes unavoidable situations such as helping an injured or sick person or maintaining public safety. ■ When in public places such as theaters, movie theaters, or museums. Use of your FOMA terminal in quiet places will annoy others. Be careful of where you use your FOMA terminal and the volume of your voice and ringtone■ When using your FOMA terminal in a restaurant or a hotel lobby, lower your voice and other sounds. ■ In crowded places, be careful not to obstruct other pedestrians.Be considerate of the privacy of individuals around youPlease be considerate of the privacy of individuals around you when shooting and sending pictures using a camera-enabled mobile phone. The following functions will help you to keep good manners in publicThere are useful functions you can use to set your FOMA terminal not to answer incoming calls, and to silence all sounds.[Manner mode]→P. 59Silences the ringtone, music, video and other sounds from your FOMA terminal.[Public mode (Drive mode/Power off)]→P. 53The caller hears a guidance message stating that the receiver is driving or is in a place where the receiver should turn off the power, and cannot answer the call.[Vibrator]→P. 60Notifies incoming calls by vibration.](https://usermanual.wiki/Fujitsu-Mobile-communications/TU12-J01/User-Guide-1378867-Page-82.png)