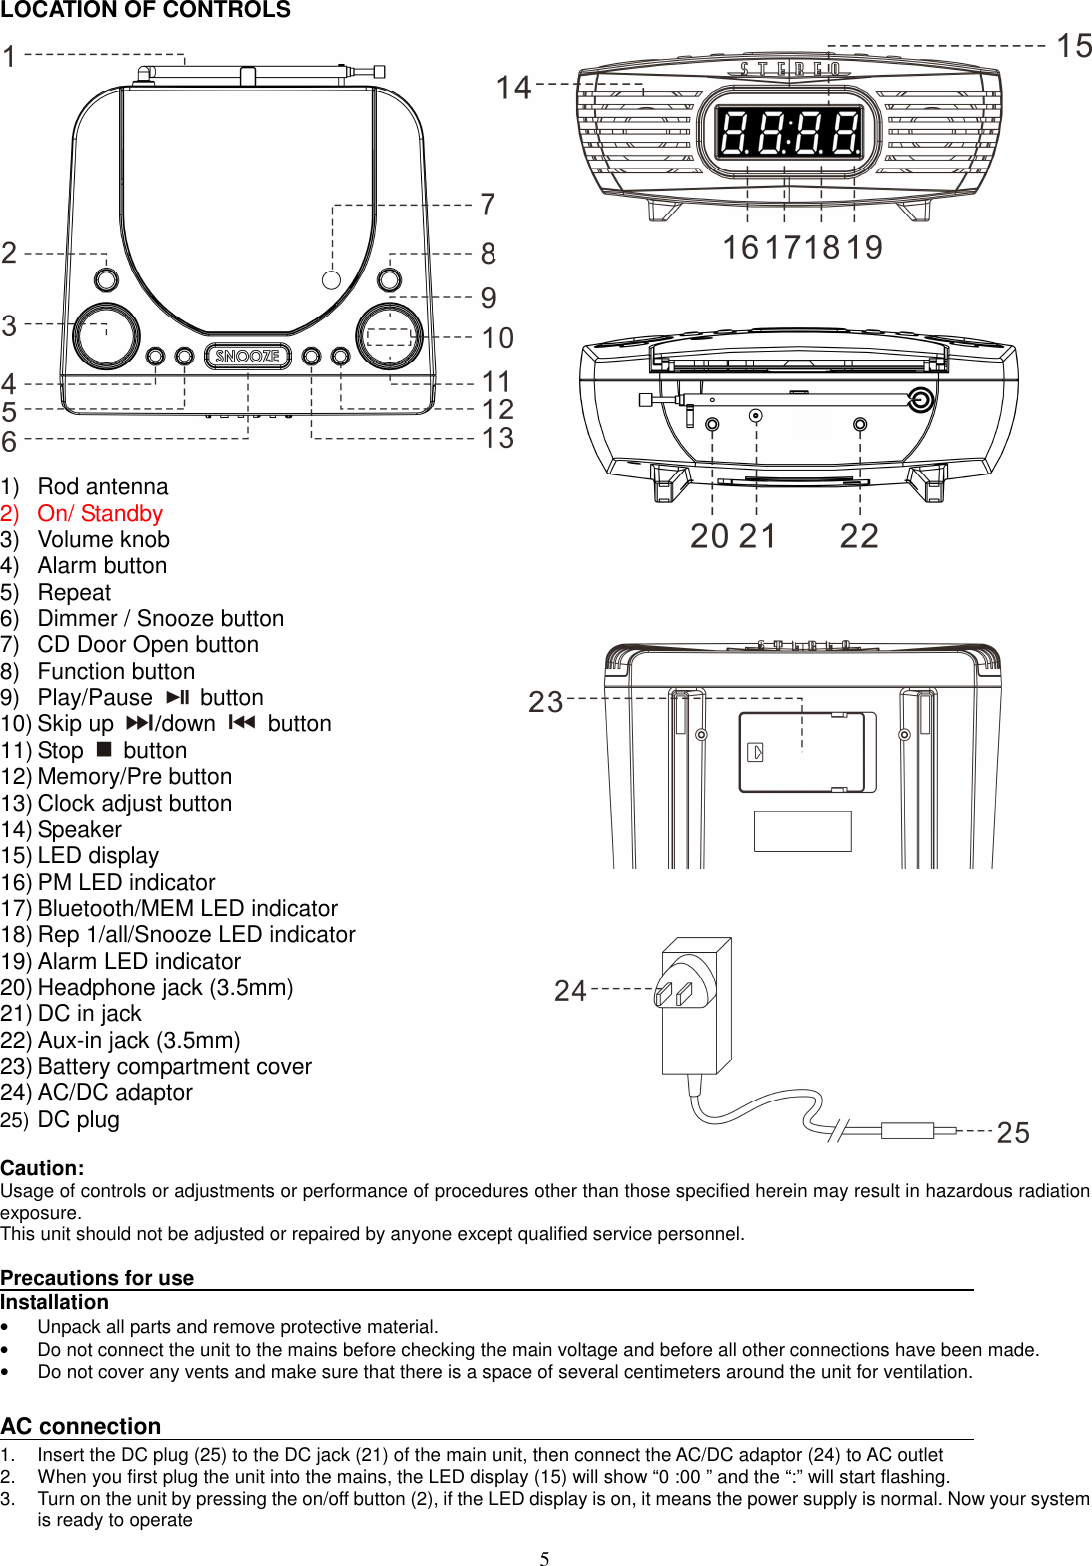
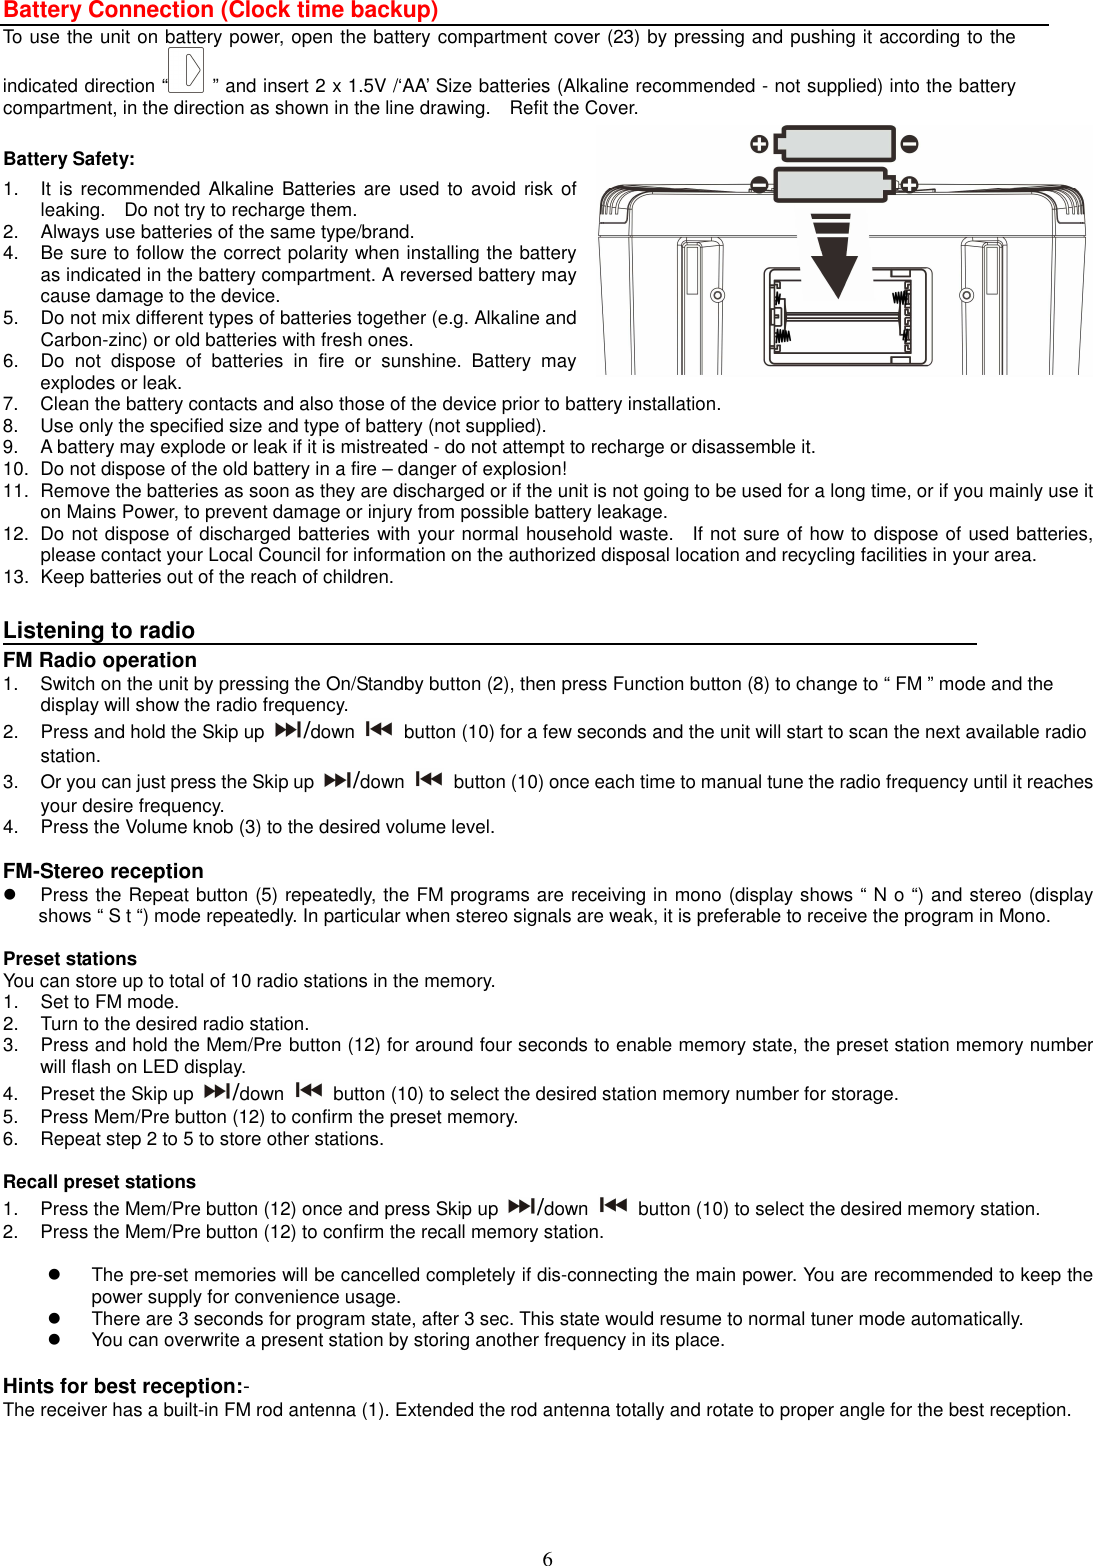
Goldsound Electronic CDC89BT Bluetooth digital clock radio with CD player User Manual CDC 89BT UL 20170927 rev 1

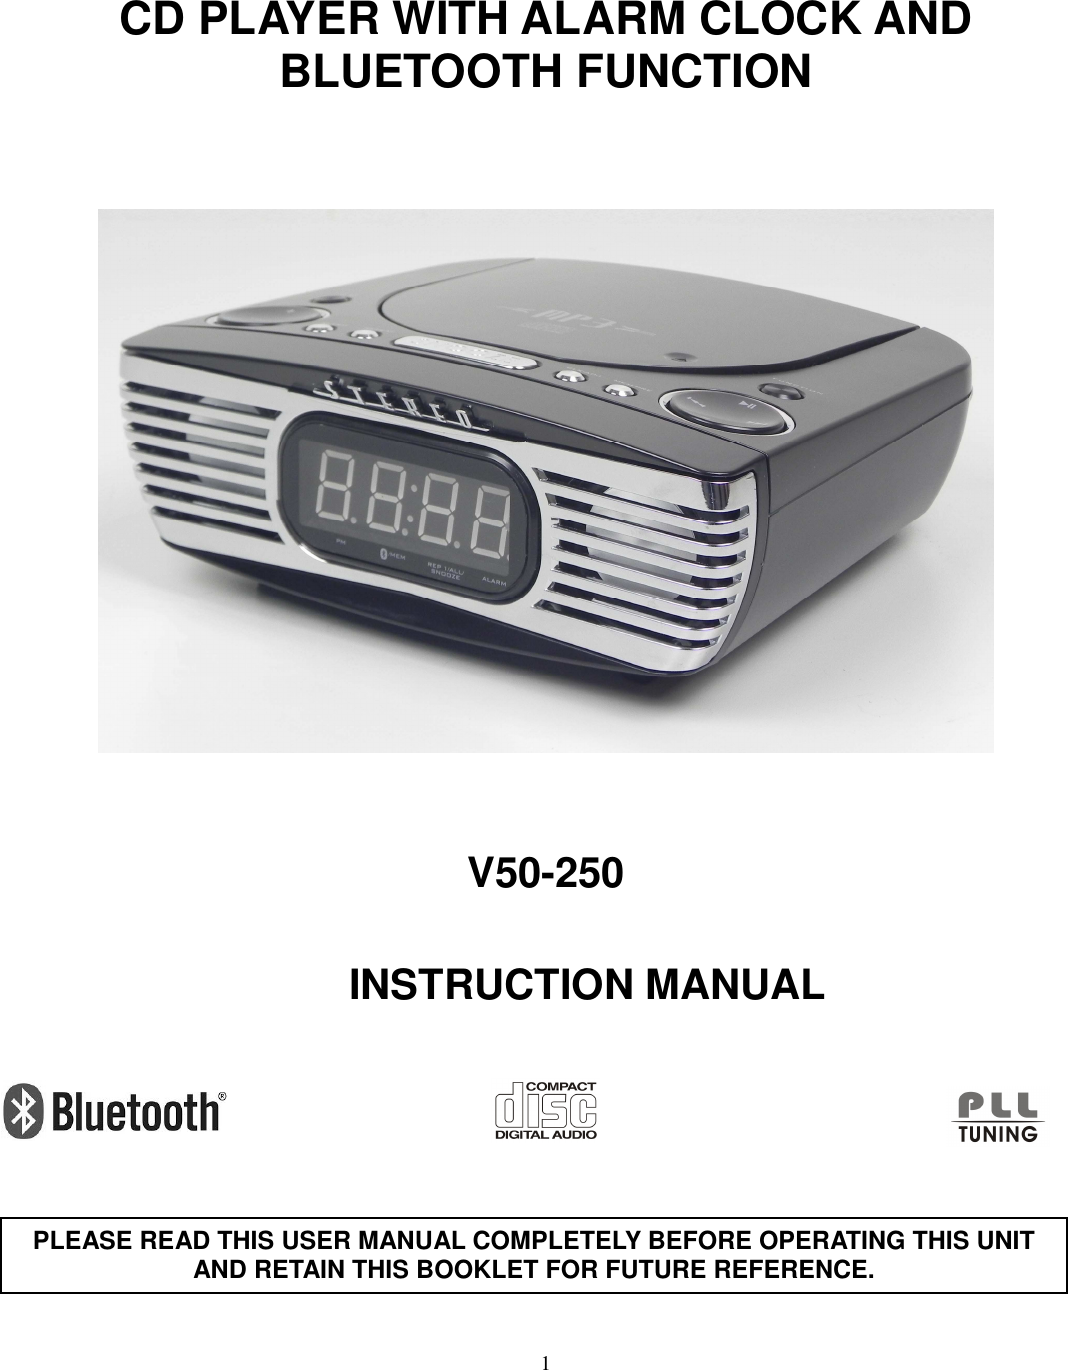
Goldsound Electronic Limited Bluetooth digital clock radio with CD player CDC 89BT UL 20170927 rev 1

User Manual

1         CD PLAYER WITH ALARM CLOCK AND BLUETOOTH FUNCTION        V50-250            INSTRUCTION MANUAL             PLEASE READ THIS USER MANUAL COMPLETELY BEFORE OPERATING THIS UNIT AND RETAIN THIS BOOKLET FOR FUTURE REFERENCE.
2 WARNING  TO    PREVENT    FIRE    OR    SHOCK    HAZARD,    DO    NOT    USE    THIS    PLUG    WITH   AN EXTENSION CORD, RECEPTACLE OR OTHER OUTLET UNLESS THE BLADES CAN BE FULLY  INSERTED  TO  PREVENT  BLADE  EXPOSURE.  TO  PREVENT  FIRE  OR  SHOCK HAZARD, DO NOT EXPOSE THIS APPLIANCE TO RAIN OR MOISTURE.      The Caution Marking is located at the bottom enclosure of the apparatus.   The Rating plate is located at the bottom enclosure of the apparatus    IMPORTANT SAFETY INSTRUCTIONS    1.  Read these instructions. 2.  Keep these instructions. 3.  Heed all warnings. 4.  Follow all instructions. 5.  Do not use this apparatus near water. 6.  Clean only with dry cloth. 7.  Do not block any ventilation openings. Install in accordance with the manufacturer’s instructions. 8.  Do not install near any heat sources such as radiators, heat registers, stoves, or other apparatus (including amplifiers) that product heat.   9.    Do not defeat the safety purpose of the polarized or grounding-type plug. A polarized plug has two blades with one wider than the other. A grounding type plug has two blades and a third grounding prong. The wide blade or the third prong is provided for your safety. If the provided plug does not fit into your outlet, consult an electrician for replacement of the obsolete outlet.   10.   Protect  the  power  cord  from  being  walked  on  or  pinched  particularly  at  plugs,  convenience receptacles, and the point where they exit from the apparatus.   11.   Only use attachments/accessories specified by the manufacturer.   12.  Use only with a cart, stand, tripod, bracket, or table recommended by the manufacturer, or sold with the product. When a cart is used, use caution when moving the cart/apparatus combination to avoid injury from tip-over. 13.   Unplug  this  apparatus  during  lightning  storms  or  when  unused  for  a  long periods of time. 14.   Refer all servicing to qualified service personnel. Servicing is required when the apparatus has been damaged in any way, such as power-supply cord or plug is damaged, liquid has been spilled or objects have fallen into the apparatus, the apparatus has been exposed to rain or moisture, does not operate normally, or has been dropped.   15.   This appliance shall not be exposed to dripping or splashing water and that no object filled with liquids such as vases shall be placed on the apparatus.   16.  Do not overload wall outlet. Use only power source as indicated. 17.  Use replacement part as specified by the manufacturer. 18.  Upon completion of any service or repairs to this product, ask the service technician to perform safety checks.
3 19.   Power Sources - This product should be operated only from the type of power source indicated on the marking label. If you are not sure of the type of power supply to your home, consult your product dealer or local power company. For products intended to operate from battery power, or other sources, refer to the operating instruction.   20.   Object and Liquid Entry - Never push objects of any kind into this product through openings as they may touch dangerous voltage points or short-out parts that could result in a fire or electric shock. Never spill liquid of any kind on the product.   21.   Damage  Requiring  Service  -  Unplug  this  product  from  the  wall  outlet  and  refer  servicing  to qualified service personnel under the following conditions:   a)  When the power-supply cord or plug is damaged,   b)  If liquid has been spilled, or objects have fallen into the product,   c)  If the product has been exposed to rain or water,   d)  If the product does not operate normally by following the operating instructions.  Adjust only those controls that are covered by the operating instructions as an improper adjustment of other controls may result in damage and will often require extensive work by a qualified technician to restore the product to its normal operation.   e)  If the product has been dropped or damaged in any way, and   f)  When the product exhibits a distinct change in performance - this indicates a need for service.   22.  Mains plug is used as disconnect device and it should remain readily operable during intended use. In order to disconnect the apparatus from the mains completely, the mains plug should be disconnected from the mains socket outlet completely.   23.  Battery shall not be exposed to excessive heat such as sunshine, fire or the like. 24.  Excessive sound pressure from earphones and headphone can cause hearing loss. 25.    Minimum distances of 10 cm around the apparatus for sufficient ventilation. 26.    The ventilation should not be impeded by covering the ventilation openings with items, such as newspapers, table-cloths, curtains, etc. 27.    No naked flame sources, such as lighted candles, should be placed on the apparatus. 28.    The use of apparatus in moderate climates. 29.    Attention should be drawn to the environmental aspects of battery disposal  This symbol indicates that this product incorporates double insulation  between hazardous mains voltage and user accessible parts.   CAUTION:   TO PREVENT ELECTRIC SHOCK, MATCH WIDE   BLADE OF AC PLUG TO WIDE SLOT. FULLY INSERT.
4 SAVE THESE INSTRUCTIONS  COMPLIANCE WITH FCC REGULATIONS  This device complies with Part 15 of the FCC Rules. Operation is subject to the following two conditions: (1)   This device may not cause harmful interference, and (2)   This device must accept any interference received, including interference that may cause undesired operation. This equipment has been tested and found to comply with the limits for a Class B Digital Device, pursuant  to  Part 15  of  the  FCC  Rules.  These  limits  are  designed  to  provide  reasonable protection against harmful interference in a residential installation. This equipment generates, uses and  can radiate  radio  frequency energy and,  if  not  installed  and  used  in  accordance  with  the instructions,  may  cause  harmful  interference  to  radio communications.  However,  there  is  no guarantee that interference  will not occur in a particular installation.  If this equipment does  cause harmful  interference  to  radio  or  television  reception,  which  can  be  determined  by  turning the equipment off and on, the user is encouraged to try to correct the interference by one or more of the following measures:     Reorient or relocate the receiving antenna.     Increase the separation between the equipment and receiver.     Connect the equipment into an outlet on a circuit different from that to which the receiver is connected.     Consult the dealer or an experienced radio/TV technician for help.    WARNING   Changes  or  modifications  to  this  unit  not  expressly  approved  by  the  party  responsible  for compliance could void the user's authority to operate the equipment.     CAUTION           Follow the advice below for safe operations.  ON PROTECTION AGAINST LASER ENERGY EXPOSURE     As the laser beam used in this compact disc player is harmful to the eyes, do not attempt to disassemble the casing.     Stop operation immediately if any liquid or solid object should fall into the cabinet.     Do not touch the lens or poke at it. If you do, you may damage the lens and the player may not operate properly.     Do not put anything in the safety slot. If you do, the laser diode will be ON when the CD door is still open.     If  the  unit is  not  to be  used for a  long  period of time, make  sure that  all power  sources are disconnected from the unit. Remove all batteries from the battery compartment.     This unit employs a laser. The use of controls or adjustment or performance of procedures other than those specified here may result in exposure to hazardous radiation.     Should any trouble occur, remove the power source and refer servicing to qualified personnel.
5 LOCATION OF CONTROLS  1)  Rod antenna   2)  On/ Standby 3)  Volume knob   4)  Alarm button 5)  Repeat 6)  Dimmer / Snooze button 7)  CD Door Open button 8)  Function button 9)  Play/Pause    button   10) Skip up  /down   button 11) Stop    button 12) Memory/Pre button 13) Clock adjust button 14) Speaker 15) LED display 16) PM LED indicator 17) Bluetooth/MEM LED indicator 18) Rep 1/all/Snooze LED indicator   19) Alarm LED indicator 20) Headphone jack (3.5mm) 21) DC in jack 22) Aux-in jack (3.5mm) 23) Battery compartment cover 24) AC/DC adaptor 25) DC plug  Caution: Usage of controls or adjustments or performance of procedures other than those specified herein may result in hazardous radiation exposure. This unit should not be adjusted or repaired by anyone except qualified service personnel.  Precautions for use Installation •  Unpack all parts and remove protective material. •  Do not connect the unit to the mains before checking the main voltage and before all other connections have been made. •  Do not cover any vents and make sure that there is a space of several centimeters around the unit for ventilation.  AC connection 1.  Insert the DC plug (25) to the DC jack (21) of the main unit, then connect the AC/DC adaptor (24) to AC outlet   2.  When you first plug the unit into the mains, the LED display (15) will show “0 :00 ” and the “:” will start flashing. 3.  Turn on the unit by pressing the on/off button (2), if the LED display is on, it means the power supply is normal. Now your system is ready to operate
6 Battery Connection (Clock time backup) To use the unit on battery power, open the battery compartment cover (23) by pressing and pushing it according to the indicated direction “   ” and insert 2 x 1.5V /‘AA’ Size batteries (Alkaline recommended - not supplied) into the battery compartment, in the direction as shown in the line drawing.    Refit the Cover.  Battery Safety: 1.  It is  recommended  Alkaline  Batteries are  used to avoid  risk of leaking.    Do not try to recharge them.   2.  Always use batteries of the same type/brand. 4.  Be sure to follow the correct polarity when installing the battery as indicated in the battery compartment. A reversed battery may cause damage to the device. 5.  Do not mix different types of batteries together (e.g. Alkaline and Carbon-zinc) or old batteries with fresh ones. 6.  Do  not  dispose  of  batteries  in  fire  or  sunshine.  Battery  may explodes or leak. 7.  Clean the battery contacts and also those of the device prior to battery installation. 8.  Use only the specified size and type of battery (not supplied). 9.  A battery may explode or leak if it is mistreated - do not attempt to recharge or disassemble it. 10.  Do not dispose of the old battery in a fire – danger of explosion! 11.  Remove the batteries as soon as they are discharged or if the unit is not going to be used for a long time, or if you mainly use it on Mains Power, to prevent damage or injury from possible battery leakage. 12.  Do not dispose of discharged batteries with your normal household waste.    If not sure of how to dispose of used batteries, please contact your Local Council for information on the authorized disposal location and recycling facilities in your area. 13.  Keep batteries out of the reach of children.  Listening to radio FM Radio operation 1.  Switch on the unit by pressing the On/Standby button (2), then press Function button (8) to change to “ FM ” mode and the display will show the radio frequency. 2.  Press and hold the Skip up /down  button (10) for a few seconds and the unit will start to scan the next available radio station.   3.  Or you can just press the Skip up /down  button (10) once each time to manual tune the radio frequency until it reaches your desire frequency.   4.  Press the Volume knob (3) to the desired volume level.  FM-Stereo reception   Press the Repeat button (5) repeatedly, the FM programs are receiving in mono (display shows “ N o “) and stereo (display shows “ S t “) mode repeatedly. In particular when stereo signals are weak, it is preferable to receive the program in Mono.  Preset stations   You can store up to total of 10 radio stations in the memory. 1.  Set to FM mode. 2.  Turn to the desired radio station. 3.  Press and hold the Mem/Pre button (12) for around four seconds to enable memory state, the preset station memory number will flash on LED display. 4.  Preset the Skip up /down  button (10) to select the desired station memory number for storage. 5.  Press Mem/Pre button (12) to confirm the preset memory.   6.  Repeat step 2 to 5 to store other stations.  Recall preset stations   1.  Press the Mem/Pre button (12) once and press Skip up /down  button (10) to select the desired memory station. 2.  Press the Mem/Pre button (12) to confirm the recall memory station.    The pre-set memories will be cancelled completely if dis-connecting the main power. You are recommended to keep the power supply for convenience usage.     There are 3 seconds for program state, after 3 sec. This state would resume to normal tuner mode automatically.   You can overwrite a present station by storing another frequency in its place.  Hints for best reception:- The receiver has a built-in FM rod antenna (1). Extended the rod antenna totally and rotate to proper angle for the best reception.
7 Playing Compact Disc / MP3 Disc  Getting start 1.  Switch on the unit by pressing the On/Standby button (2), then press Function button (8) to change to “ CD ” mode and the LED will have “ - - - - “ flashing. 2.  Push the CD tray open (7) to open the CD tray. 3.  Place a CD with the printed side facing up and then close the CD tray. 4.  Focus search will performing and the LED display will have “ - - - - “ flashing. Once the focus search is completed, the unit will start playback of CD automatically. The LED display will first show the total number of track and then change to the number of track and then display the playback time for the first 5-10 seconds. The display will finally show the time.   5.  Press the Volume knob (3) to the desired volume level.    Play / Pause mode   1.  To interrupt, press the Play/Pause    button (9) once, the playing time will freeze on the LED display for a while, then change to the time display. Press again to resume normal playback.    Stop mode   1.  If the Stop    button (11) is pressed during play or when the music is paused the system will stop.   Skip mode (skip up  / skip down  ) 1.  In play mode, if the SKIP up    button (10) is pressed, the track number of the next track will be displayed and the track will play.   2.  In play mode, if the SKIP down    button (10) is pressed, the track number of the previous track will be displayed and the track will play.  Important: When you press the CD function button during time display, the unit will first show up the number of current track. Please press again the same CD function button to confirm the operation. This is a normal operation.   Repeat function A.    Repeat 1 mode Press the Repeat button (5) during playback once to enable repeat the current track. And the Rep 1/all/Snooze LED indicator (18) will flash for a while and then will disappear. Press the Repeat button (5) twice more to cancel the repeat mode.    B.    Repeat All mode Press the Repeat button (5) during playback twice to enable repeat all the track of the CD. And the Rep 1/all/Snooze LED indicator (18) will light up for a while and then will disappear. Press the Repeat button (5) once more to cancel the repeat mode.    (1) repeat 1 (indicator flashing)    (2) repeat all track (indicator light up)      (3) off mode              Important: You may press any CD function buttons (play/pause, Skip up  /down    button) to check the status of the repeat mode.  CD programming   Up to 20 tracks can be programmed for disc play in any order. Before use, be sure to press the Stop    button (11). 1.  Set in CD mode & stop the CD playback. 2.  Press the Mem/Pre button (12) and “ P01 ” will appear on LED display with flashing Bluetooth/MEM LED indicator (17). 3.  Select a desired track by pressing Skip up  /down    button (10). 4.  Press the Mem/Pre button (12) to store the track into memory. 5.  Repeat steps 3 and 4 to enter additional tracks into the memory if necessary. 6.  When all the desired tracks have been programmed, press Play/Pause    button (9) to play the disc in assigned order. 7.  Press Stop    button (11) to stop playback, press Stop button again to clear all stored memory.    The programming mode will automatically stop if no button is being pressed in a period of about 10 seconds after pressing the Mem/Pre button (12). Display will show “FULL” if stored program track is full.    Bluetooth Connection 1.  Switch on the unit by pressing the On/Standby button (2), then press Function button (8) to change to “ bt ” (Bluetooth) mode and the Bluetooth/MEM LED indicator (17) will flash meaning the unit is searching and waiting to connect to Bluetooth. 2.  Switch the Bluetooth function of your Bluetooth device on (such as a mobile phone) and select the Bluetooth equipment code “V50-250” to connect. 3.  When the  Bluetooth  device  has  connected  successfully,  the LED  display  will  show “  bt  “  and  the  Bluetooth/MEM  LED indicator (17) will no longer flash but be static. 4.  Start playback of the music on your Bluetooth device and enjoy the music through the speakers of this unit. 5.  Press the Volume knob (3) to the desired volume level.
8 6.  The LED display may change to show the time and the Bluetooth/MEM LED indicator (17) will keep showing the Bluetooth connection status.    More features A.    Setting the Clock 1.  Set the unit to standby mode 2.  Press and hold the Clock Adjust button (13) and the LED display will show “ 24 H “ or “ 12 H” and flash. 3.  Press Skip up  /down    button to select 24 hour display or 12 hour display and press the Clock Adjust button (13) to confirm.   4.  The hour digit of alarm time will flash, press the Skip up /down  button (10) to select the hour, then press the Clock Adjust button (13) to confirm 5.  The minute digit of alarm time will flash, press the Skip up /down  button (10) to select the minute, then press the Clock Adjust button (13) to confirm. 6.  The time will be shown on the LED display.    The pre-set time will be cancelled completely if dis-connecting the main power. You are recommended to keep the power supply for convenience usage or insert 2 AA batteries into battery compartment to keep the clock time.  B.    Setting the alarm This function allows the system to turn on automatically and wake you up by buzzer or CD or FM mode. 1.  Set the unit to standby mode and press the Alarm button (4) once.   2.  The hour digit of alarm time will flash, press the Skip up /down  button (10) to select the alarm time hour, then press the Alarm button (4) to confirm 3.  The minute digit of alarm time will flash, press the Skip up /down  button (10) to select the alarm time minute, then press the Alarm button (4) to confirm 4.  Alarm type will be shown on display, press Skip up /down  button (10) to select alarm mode. b2 = Buzzer Cd = CD rd = FM radio 5.  Volume level showed on display, press Skip up /down  button (10) to adjust the wake up volume level, then press the Alarm button (4) button again to complete the alarm setting. 6.  The Alarm LED indicator (19) will light up meaning the alarm is activated. 7.  To turn off the alarm, press the Alarm button (4) once, then the Alarm LED indicator (19) will turn off.   Remark :  Please never set the unit to off mode as alarm will not working in off mode.  Please be sure the AC/DC adaptor is connected to the AC outlet and check the current time was correct before setting alarm function    SNOOZE Press the Snooze (6) once to extend the alarm for 9 minutes every time and the Rep 1/all/Snooze LED indicator (18) will be flashing.  C. Aux-in This unit provides an auxiliary audio signal input jack for connecting external audio devices like MP3 players, CD players, so you can listen to your external source through the speakers of this system. 1.  Use an audio cable (not included) with one 3.5 mm stereo plug on each end of the cable. 2.  Plug one end into the Aux-in jack (22) on the main unit and the other end of the cable into the Line-out Jack or Headphone Jack of your external audio device. It will automatically switch the unit to AUX mode. 3.  Switch on the unit by pressing the On/Standby button (2), then press Function button (8) to select “ AU ” mode. 4.  The volume level can now be controlled through the main unit. Operate all other functions on the auxiliary device as usual. Note:   If the Line Out Jack of your external device is connected, then you only need to adjust the volume control of this system. If the Headphone Jack of your external device is connected, then you may need to adjust both the volume control of your external device and the volume control of this system to find the most desirable volume setting.    D.    Earphone Inserting the plug of your headphones into the headphone jack (20) will enable you to listen in private. Read this important information before using your headphones 1. Avoid extended play at very high volume as it may impair your hearing. 2. If you experience ringing in your ears, reduce the volume or shut off your unit. 3. Keep the volume at a reasonable level even if your headset is an open-air type designed to allow you to hear outside sounds. Please note that excessively high volume may still block outside sounds.  E.    Dimmer In the standby mode, you can press the Dimmer/Snooze button (6) to select the3 different brightness of the LED display.

Navigation menu