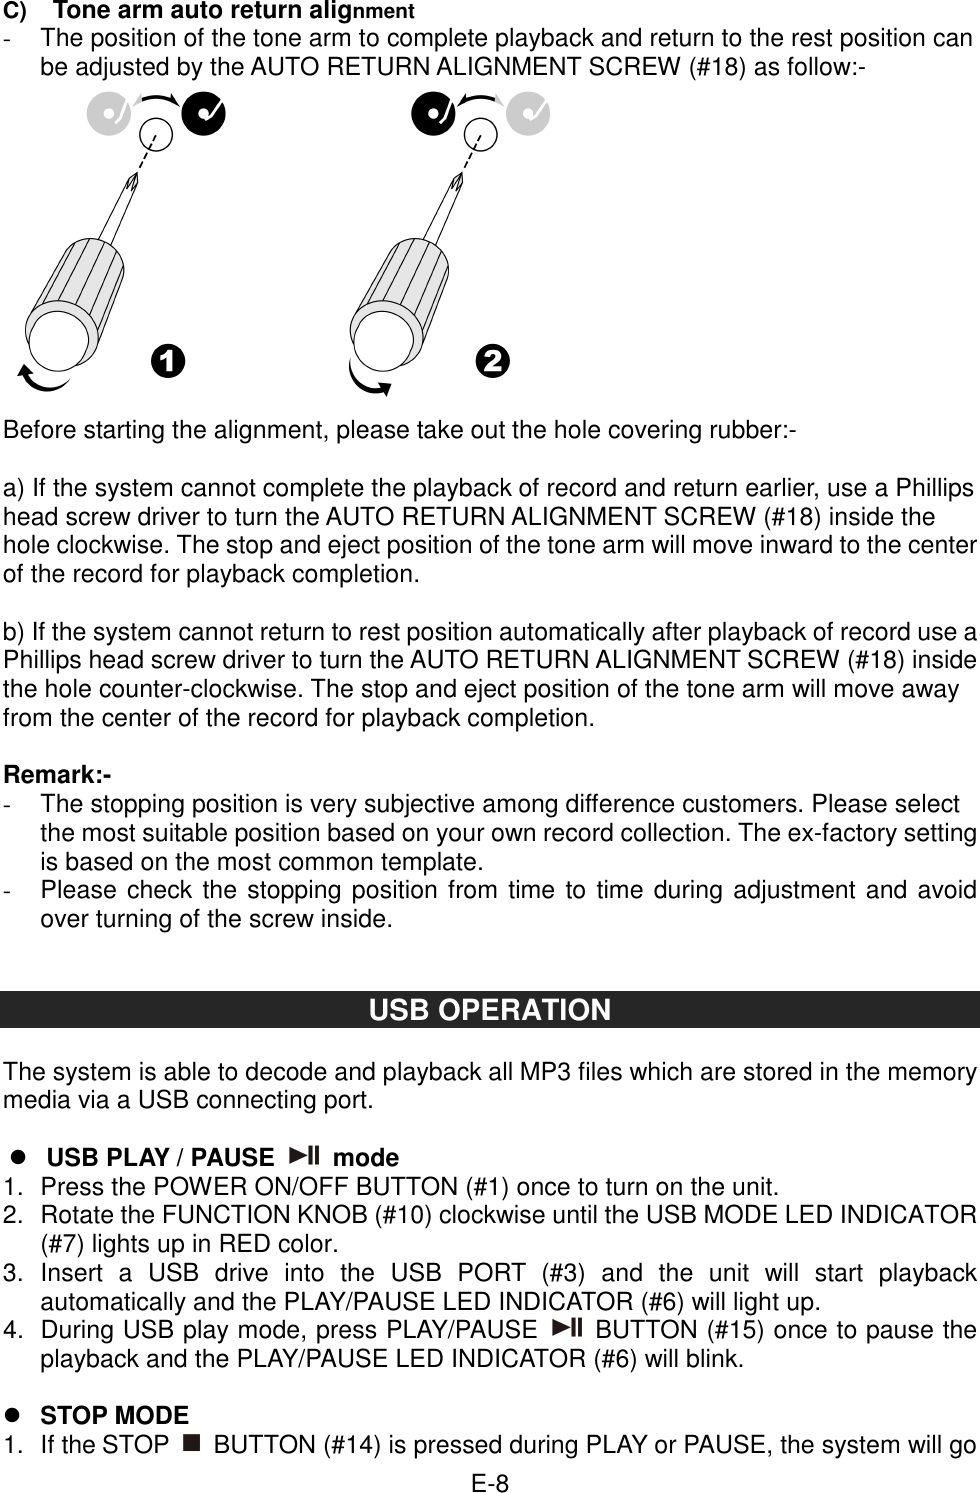
Goldsound Electronic TT-9913BT Stereo Turntable with Bluetooth Receiver and Record Storage Compartment User Manual SB6059 English UM USA 0616
Goldsound Electronic Limited Stereo Turntable with Bluetooth Receiver and Record Storage Compartment SB6059 English UM USA 0616
User Manual
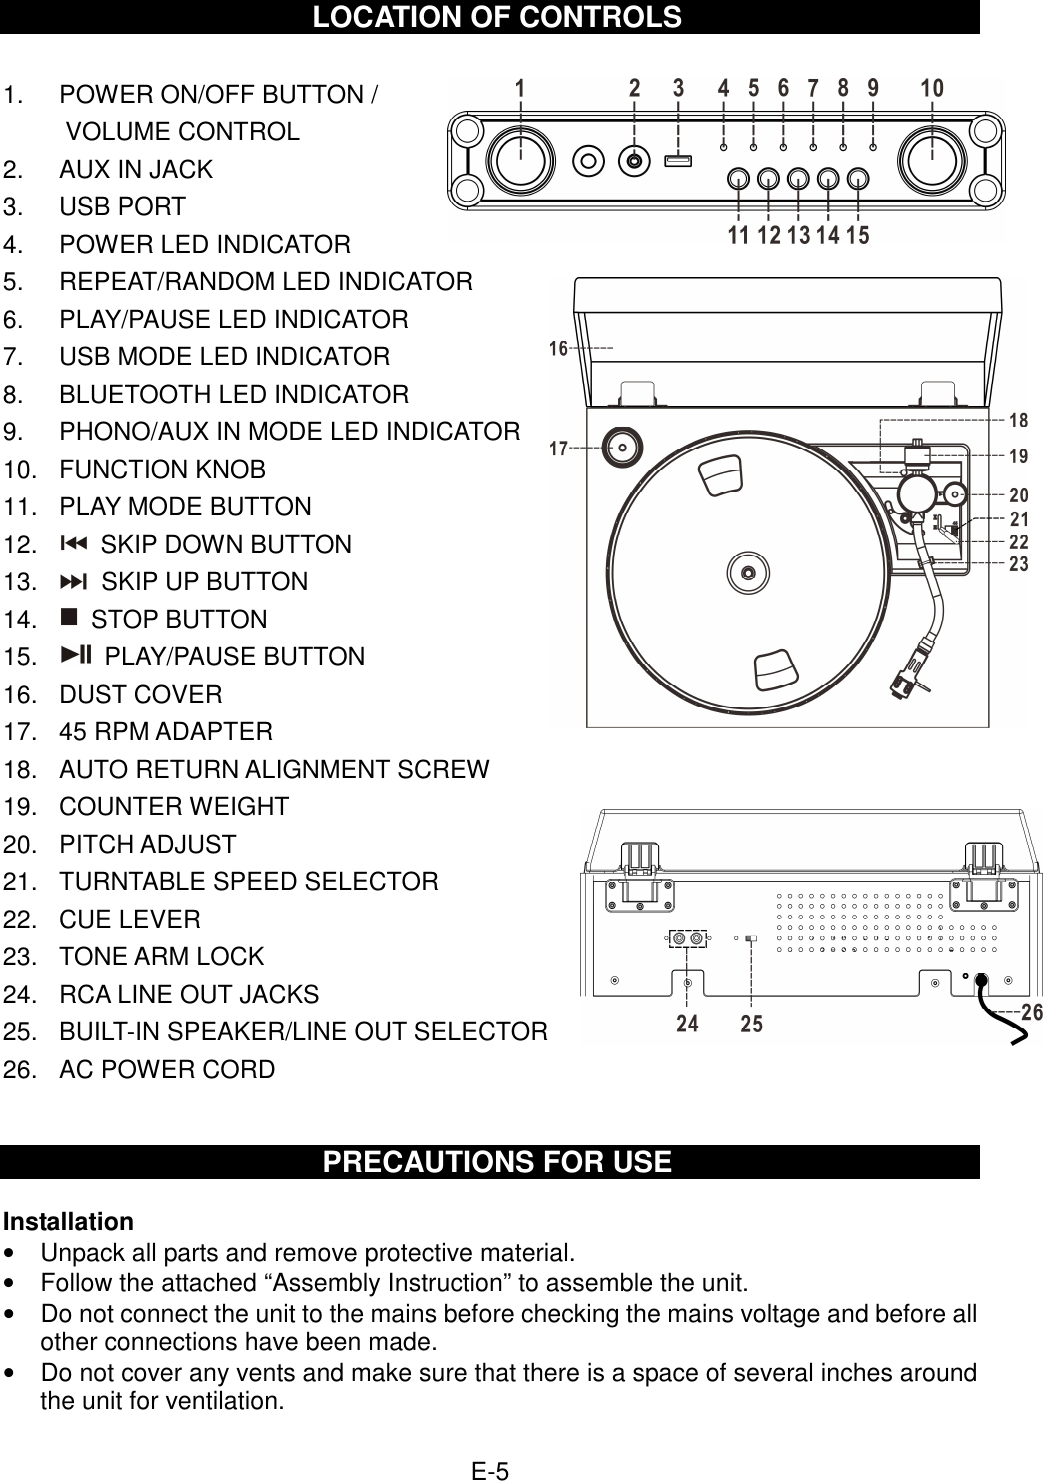
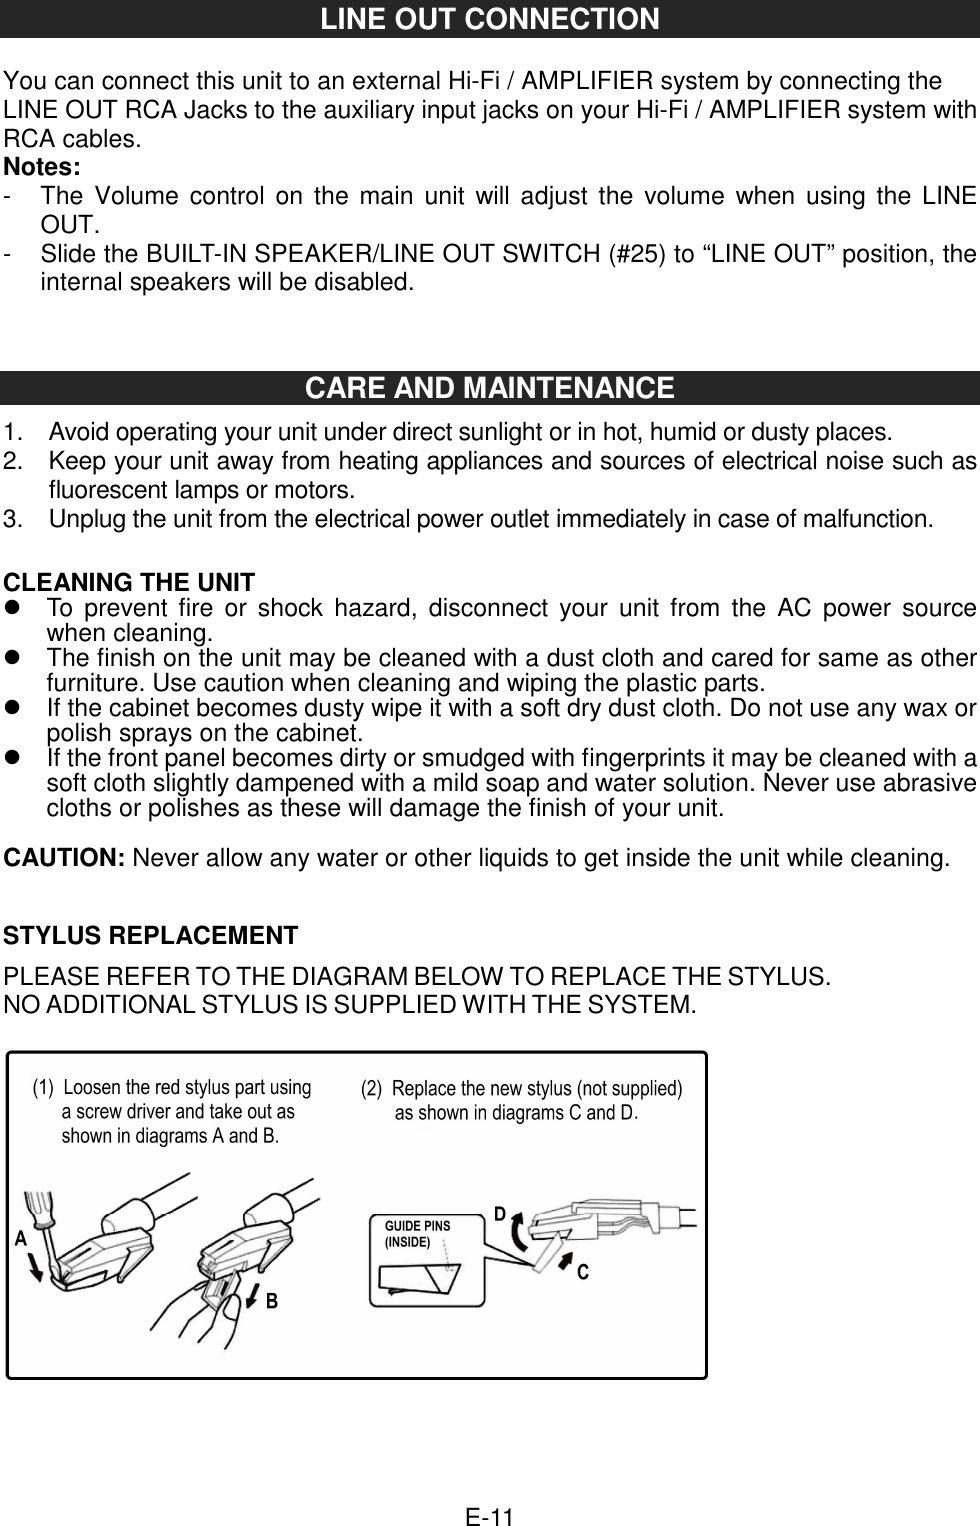
![E-7you are playing. 5. Place the record on the platter [use the 45 RPM ADAPTER (#17) if necessary]. 6. You can manually raise the tone arm or you can use the CUE LEVER (#22) to lift up the tone arm. 7. The platter will start to rotate. Position the tone arm over the desired track on the record to start the playback. 8. At the end of record, the tone arm will return to the rest position automatically. 9. To stop the record manually, lift the tone arm from the record or use the CUE LEVER (#22) and return it to the rest position. Play suspension Press the CUE LEVER (#22) so it’s in the UP position. The tone arm will lift up and then stop playback temporarily. Remark : - The tone arm may automatically return to the rest position the first time you use the unit. This is not a malfunction. The unit will reset and operate properly the next time used. - This unit is not compatible with magnetic cartridges. If you change the cartridge and stylus to a magnetic type, you will no longer be able to use this unit via the Aux-in on your music system. - Certain records may have the end of the record located before the auto return detection area. The tone arm may not automatically return to the rest position. To stop the record manually, lift the tone arm from the record or use the CUE LEVER (#22) and return it to the rest position B) Platter speed adjustments - During playback of a record, observe the appropriate strip of strobe calibration dots under indoor lighting. The upper row is for 33 RPM, the middle row is for 45 RPM, and the bottom row is for 78 RPM. - If the strobe dots for the speed you are playing appear to be moving to the right, it means the platter is revolving slower than the rated speed. Adjust the PITCH CONTROL (#20) to the “ + “ direction. If the strobe dots appear to moving to the left, it means the platter is revolving faster than rated speed. Adjust the PITCH CONTROL (#20) to the “ – “ direction. - Adjust the PITCH CONTROL (#20) until the strobe dots for the selected speed appear to be stationary without moving left or right. IMPORTANT: Using the turntable on any other power source other than 120V AC/60Hz will affect the strobe tuning accuracy.](https://usermanual.wiki/Goldsound-Electronic/TT-9913BT/User-Guide-3139133-Page-8.png)