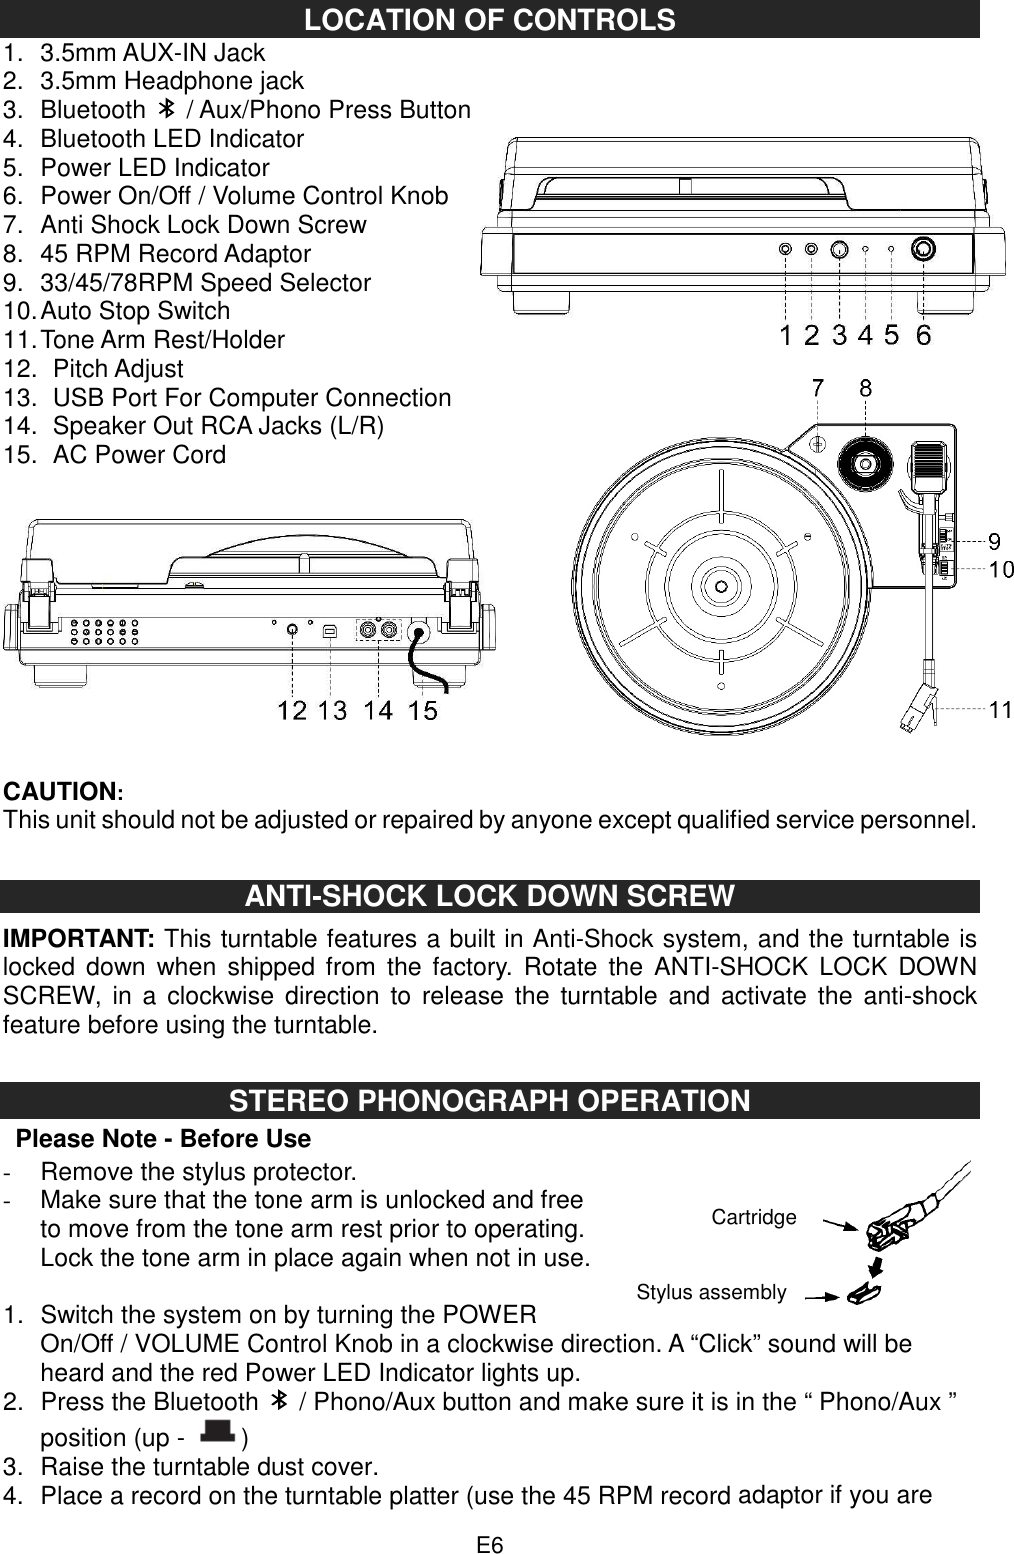
Goldsound Electronic TT938PCBT 3-Speed Stereo Turntable with Bluetooth, Stereo Speaker and Speed Adjustment User Manual
Goldsound Electronic Limited 3-Speed Stereo Turntable with Bluetooth, Stereo Speaker and Speed Adjustment
UserManual.wiki
>
Goldsound Electronic
>
TT938PCBT User Manual
User Manual
Navigation menu
Upload a User Manual
Namespaces
Wiki Guide
HTML
PDF
Info
Views
User Manual
Discussion / Help
Navigation

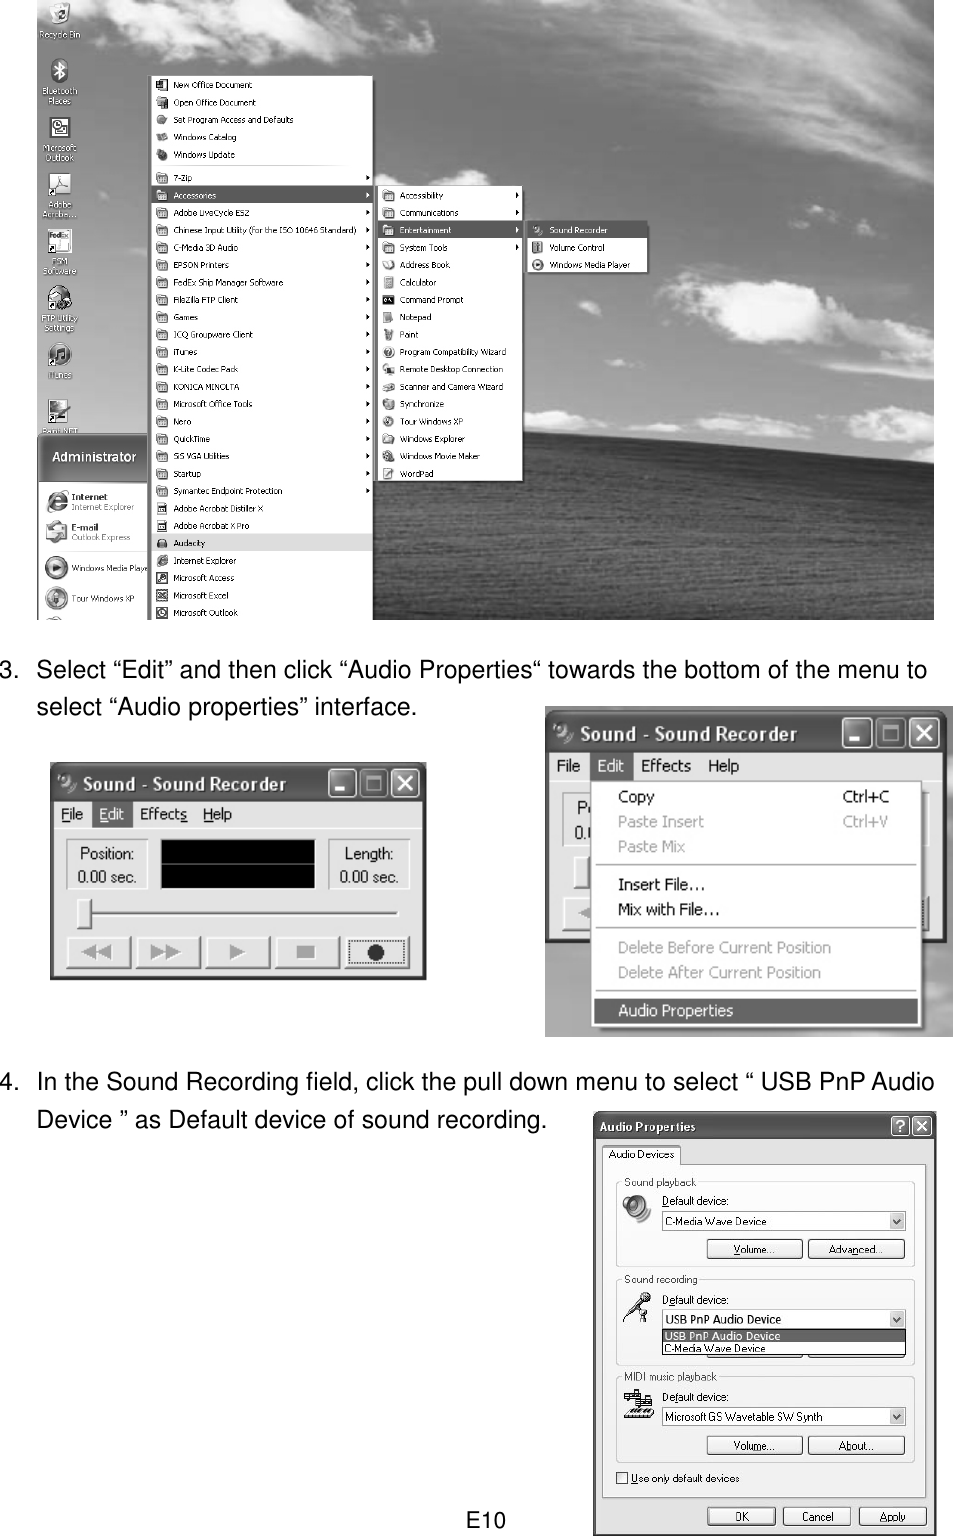
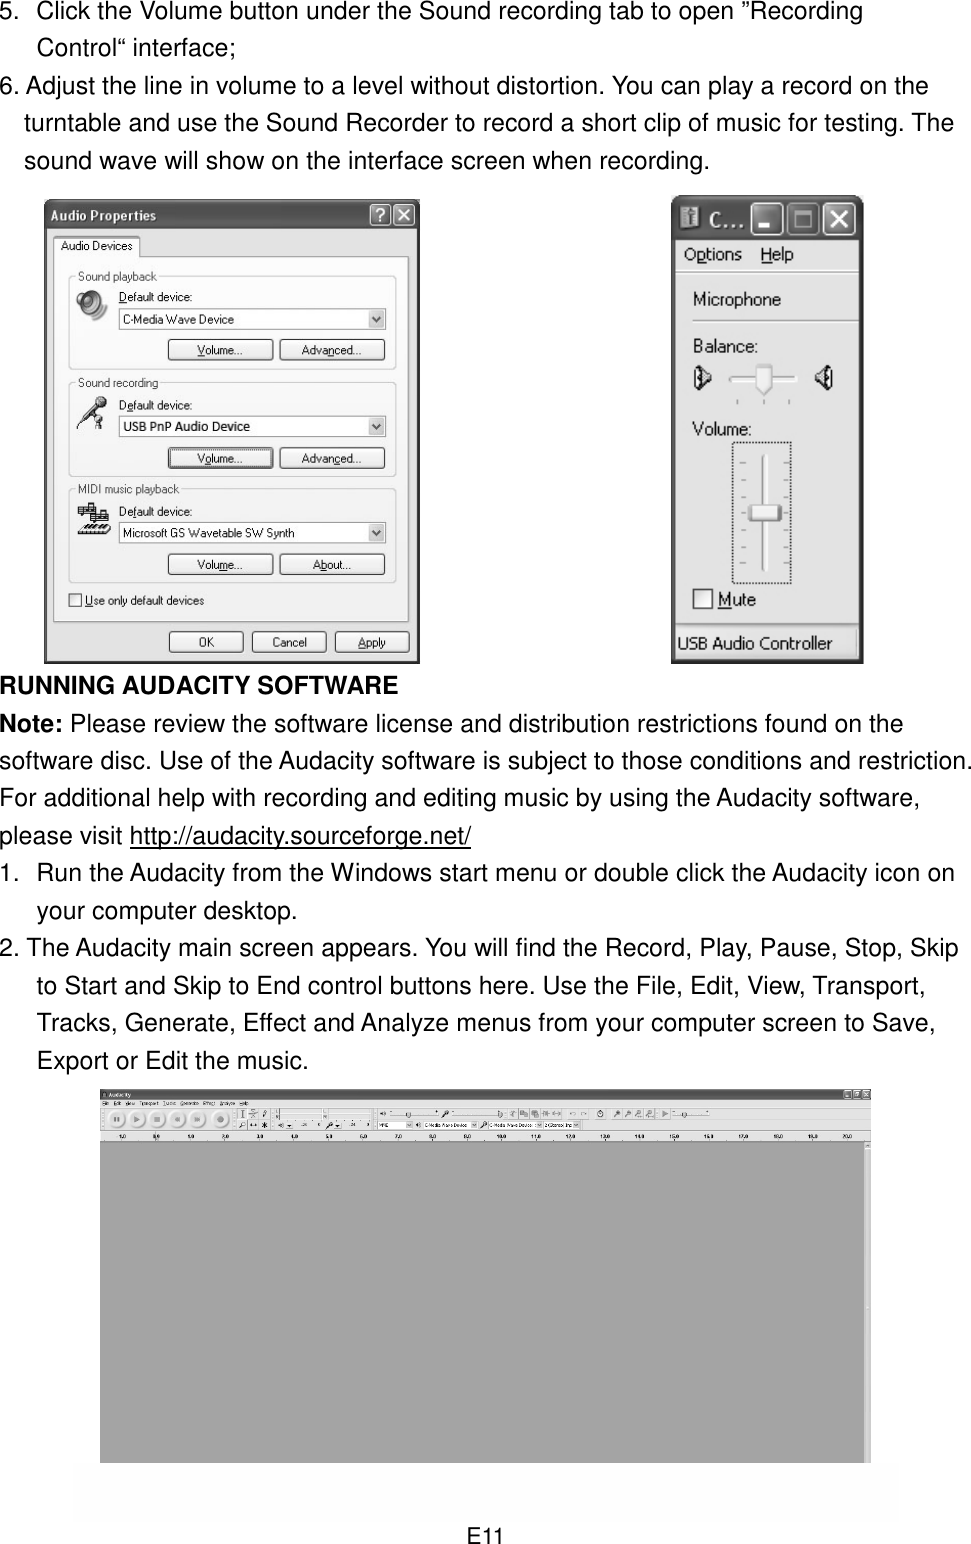
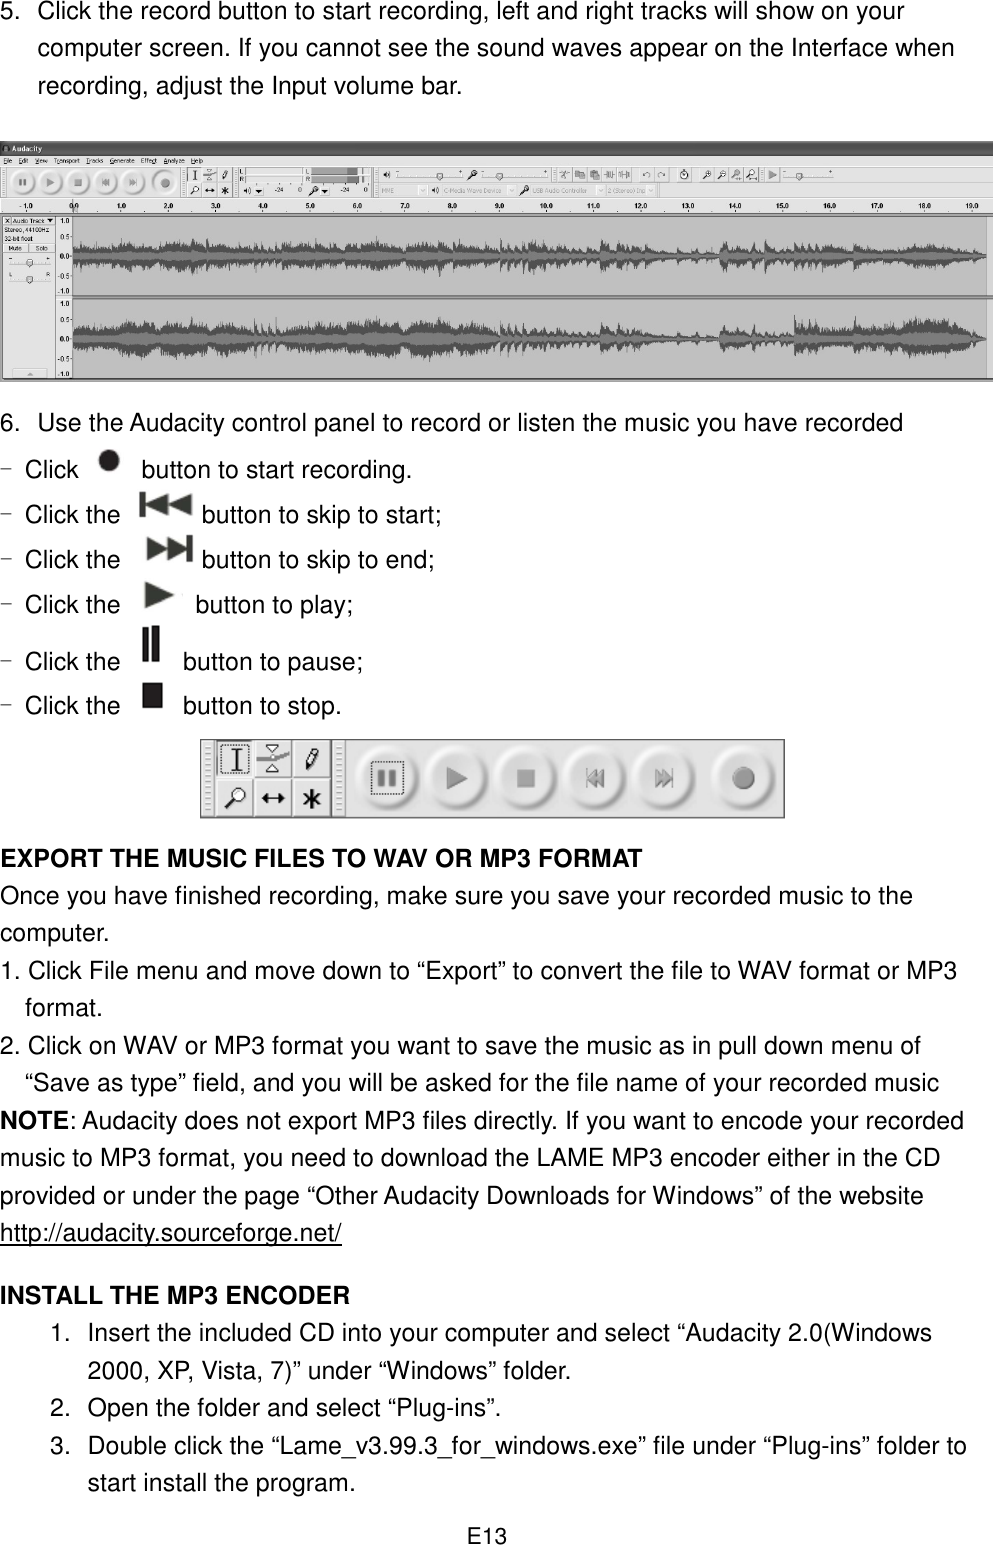
![E9 USING HEADPHONES (NOT INCLUDED) Inserting the plug of your headphones into the Headphone jack will enable you to listen in private. READ THIS IMPORTANT INFORMATION BEFORE USING YOUR HEADPHONES 1. Avoid extended play at very high volume as it may impair your hearing. 2. If you experience ringing in your ears, reduce the volume or shut off your unit. 3. Keep the volume at a reasonable level even if your headset is an open-air type designed to allow you to hear outside sounds. Please note that excessively high volume may still block outside sounds. CONNECTING TO A COMPUTER FOR RECORDING Before getting start, please install the “ AUDACITY ” recording software to your computer. Below is an example using a computer with Microsoft XP and the Audacity software installed. For other Windows OS or Mac OS, please visit Audacity website for details. http://audacity.sourceforge.net/ INSTALLING THE AUDACITY SOFTWARE 1. Insert the Audacity disc (included) into the CD drive of your computer. 2. Click on My computer on the desktop. 3. Double click CD drive to view the contents of the CD and select “Windows” under “Audacity” folder. 4. Open “Windows” folder and select “Audacity 2.0 (Windows 2000, XP, Vista, 7)”. 5. Open the folder and then double click Audacity set up icon with file name “audacity-win-2[1].0.exe)” to install the Audacity software according to the instruction, read license agreements of Audacity before installation. NOTE: Free software (AUDACITY) licensed under the GNU general public license (GPL). More information as well as open source code can be found on the provided CD or on the website at: http://audacity.sourceforge.net/ INSTALL THE USB DRIVE 1. Use the included USB cable to connect the turntable to your computer. 2. Your computer will detect the JTA-325BTW as a “ USB PnP Audio Device ” & start to install USB drivers for it automatically. 3. Waiting for the installation complete until your computer shows a pop up a message that it is installed properly and ready to use. SET RECORDING INPUT LEVEL (USE WINDOWS XP COMPUTER) 1. Click the “Start“ in the left corner of your computer 2. Select “All Programs“ “Accessories” “Entertainment“ “Sound Recorder“ to open the sound record interface.](https://usermanual.wiki/Goldsound-Electronic/TT938PCBT/User-Guide-3481777-Page-10.png)