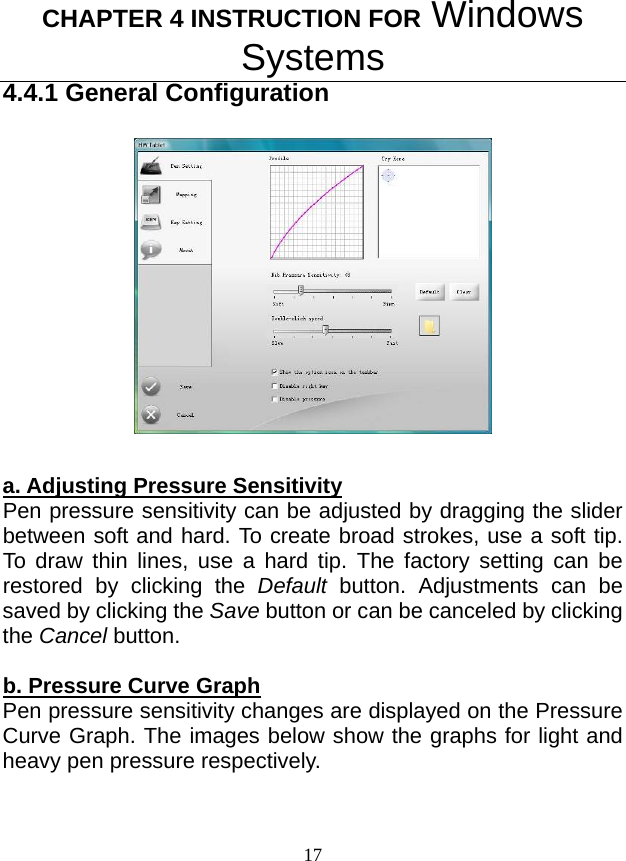
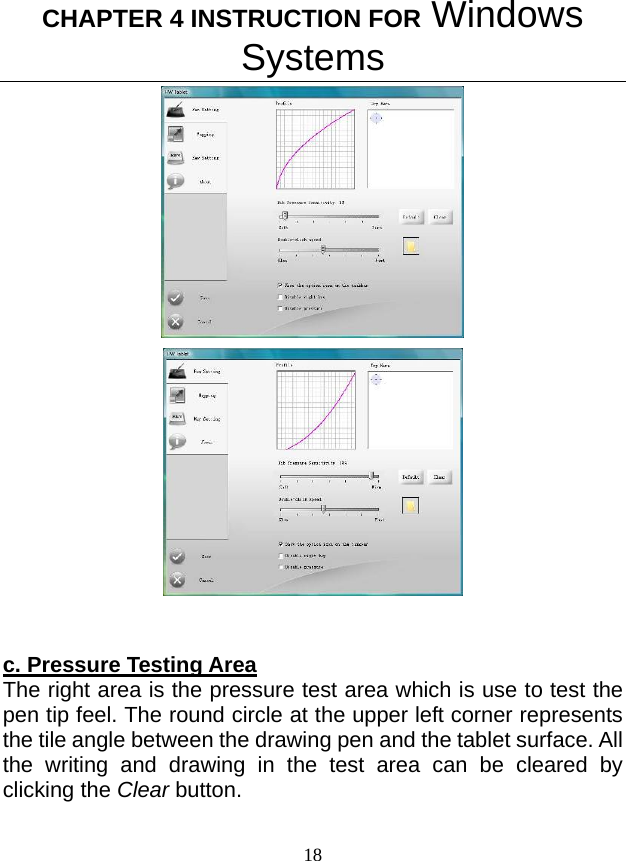
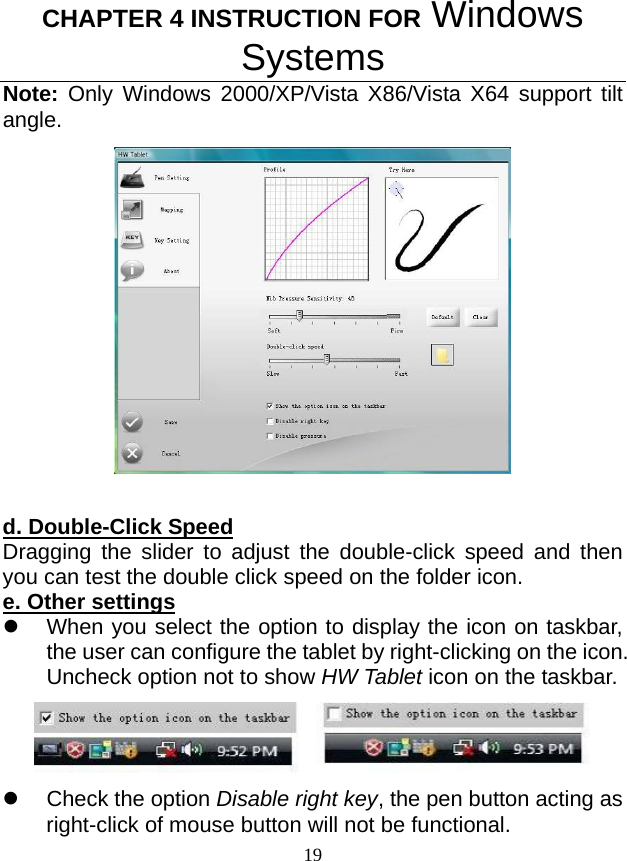
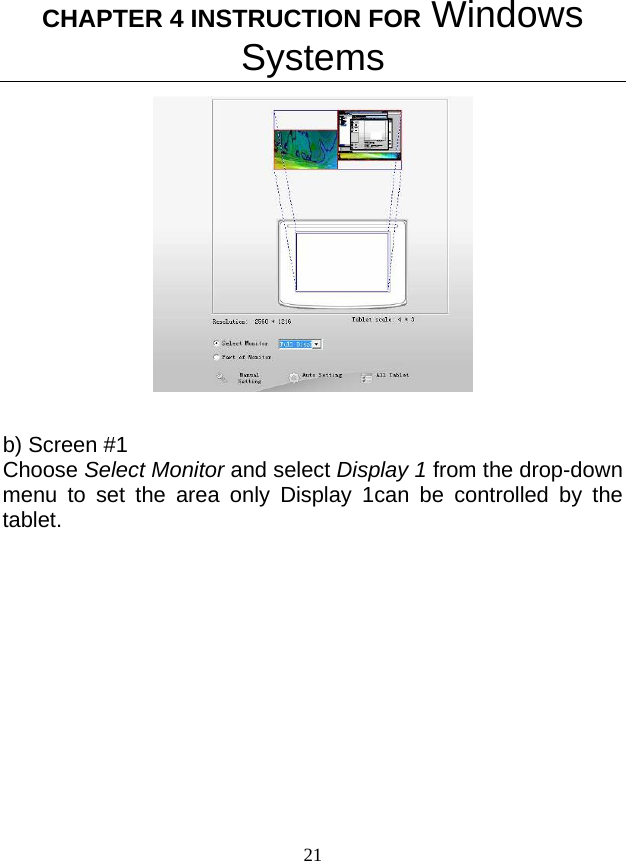
Hanwang Technology WLTABLET Wireless Tablet User Manual
Hanwang Technology Co., Ltd Wireless Tablet Users Manual
UserManual.wiki
>
Hanwang Technology
>
WLTABLET User Manual
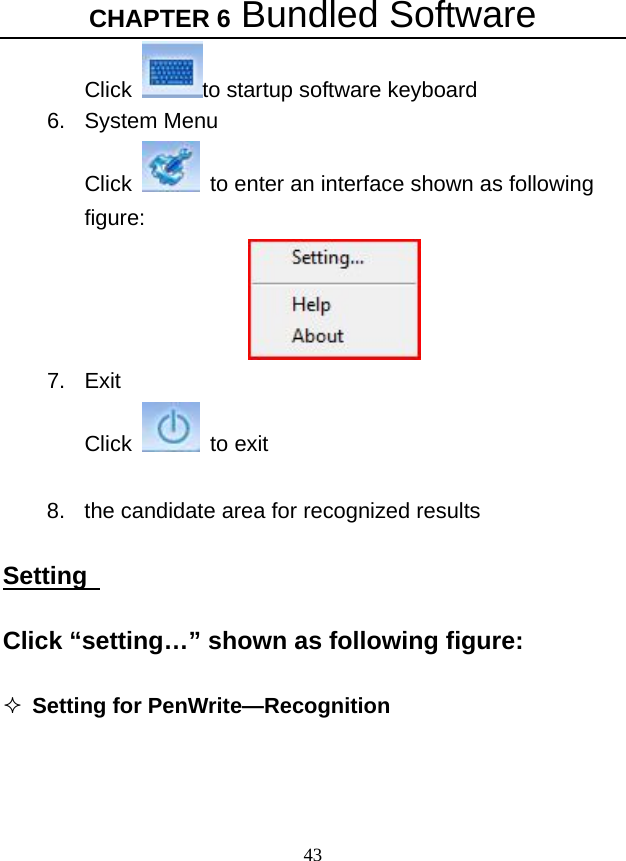
User Manual
Navigation menu
Upload a User Manual
Namespaces
Wiki Guide
HTML
PDF
Info
Views
User Manual
Discussion / Help
Navigation


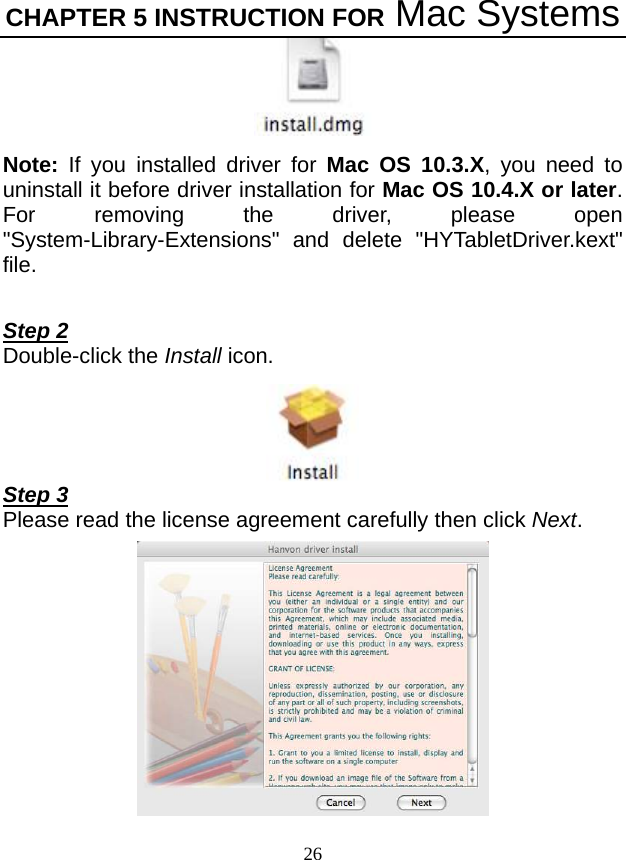


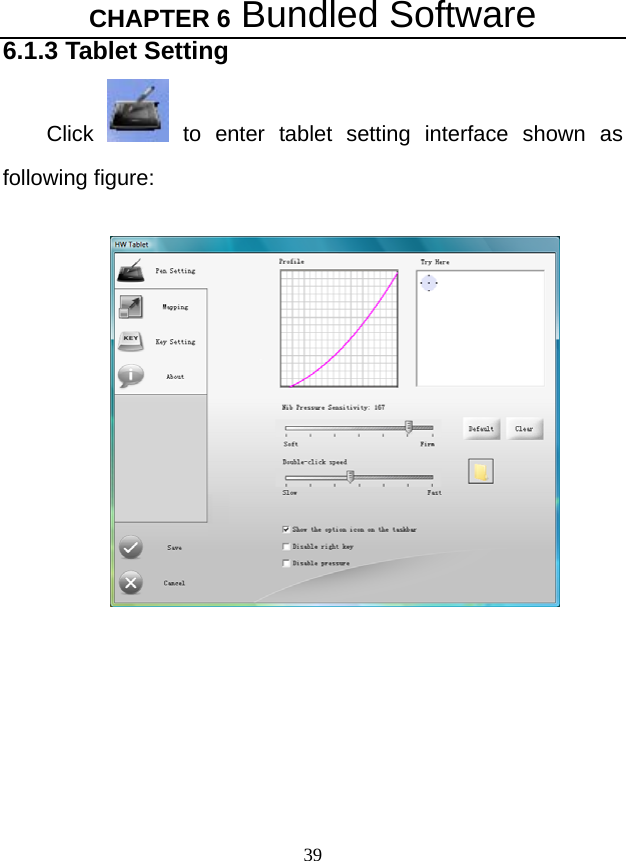
![CHAPTER 6 Bundled Software 44 [Select Language] Choose recognition language between 9 kinds of languages; [Recognition Range] Choose the recognition range; [Recognition Delay] Adjust the recognition interval time.](https://usermanual.wiki/Hanwang-Technology/WLTABLET/User-Guide-1171733-Page-48.png)
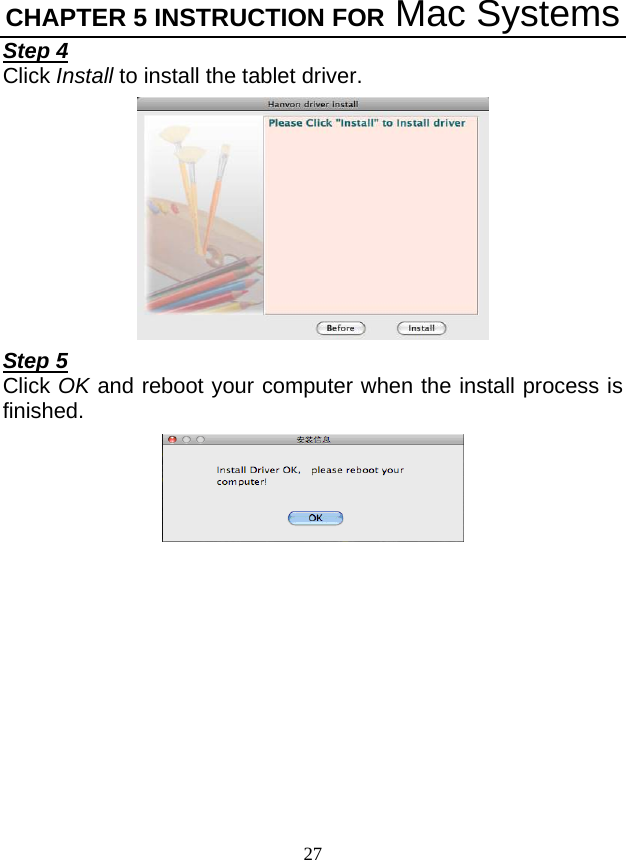
![CHAPTER 6 Bundled Software 45 Setting for PenWrite Asia—Recognition [Select Language] Choose recognition language between Simplified Chinese、Traditional Chinese (Hong Kong) 、Traditional Chinese (Taiwan) 、Japanese and Korean. [Recognition Range] Choose the recognition range; [Recognition Delay] Adjust the recognition interval time.](https://usermanual.wiki/Hanwang-Technology/WLTABLET/User-Guide-1171733-Page-49.png)