Hisense Communication HISENSEC306 CDMA 1X Mobile TelePhone User Manual C306
Hisense Communication Co., Ltd. CDMA 1X Mobile TelePhone C306
UserManual.wiki
>
Hisense Communication
>
HISENSEC306 User Manual
User Manual
Navigation menu
Upload a User Manual
Namespaces
Wiki Guide
HTML
PDF
Info
Views
User Manual
Discussion / Help
Navigation
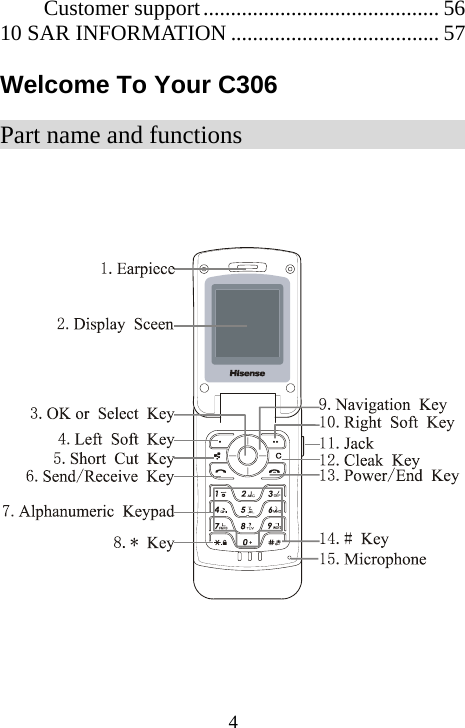

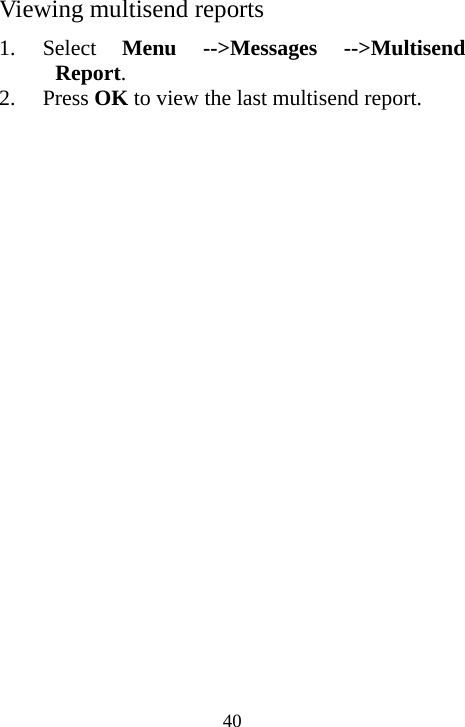
![26the soft key located at the bottom of the display screen. 2. Scroll with the LEFT and RIGHT Navigation Keys to locate the current input mode. 3. To access the text input options press OK. 4. Scroll down to Symbols then press OK to enter the menu. You will be presented with a list of symbols, such as : - . @ ' ( ) _ ! ? * # % " : + < > =/ \ & ,~ { } $ [ ] ^ ;。、…‘ ’ “ ” ¥《 》 5. Press the number corresponding to the symbol of your choice. Changing input modes To change input modes, while in any text editor do the following: 1. Press the DOWN Navigation Key to access the soft key located at the bottom of the display screen. 2. Scroll with the LEFT and RIGHT Navigation Keys to locate the input mode. 3. Press OK to access the text input options. 4. Scroll to select your desired input mode then press OK to confirm.](https://usermanual.wiki/Hisense-Communication/HISENSEC306/User-Guide-771454-Page-26.png)