ICU Medical 20677 PlumA + with MedNet Wireless Enabled Infuser User Manual sec07
Hospira, Inc. PlumA + with MedNet Wireless Enabled Infuser sec07
Contents
- 1. Installation Manual
- 2. Users Manual
- 3. Replacement Installation Guide
Replacement Installation Guide
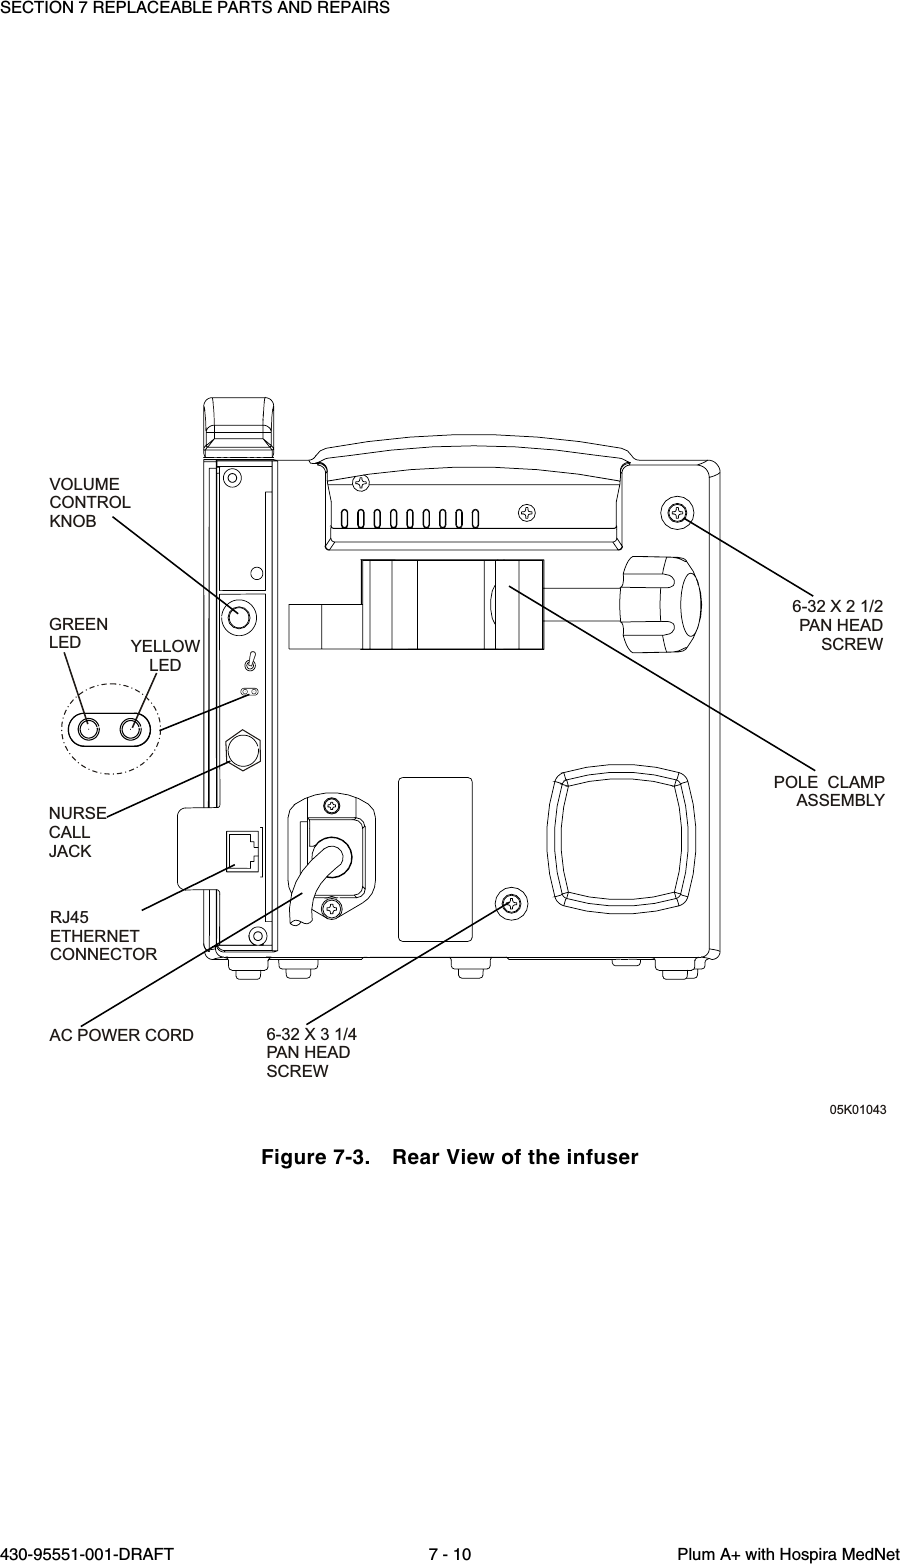
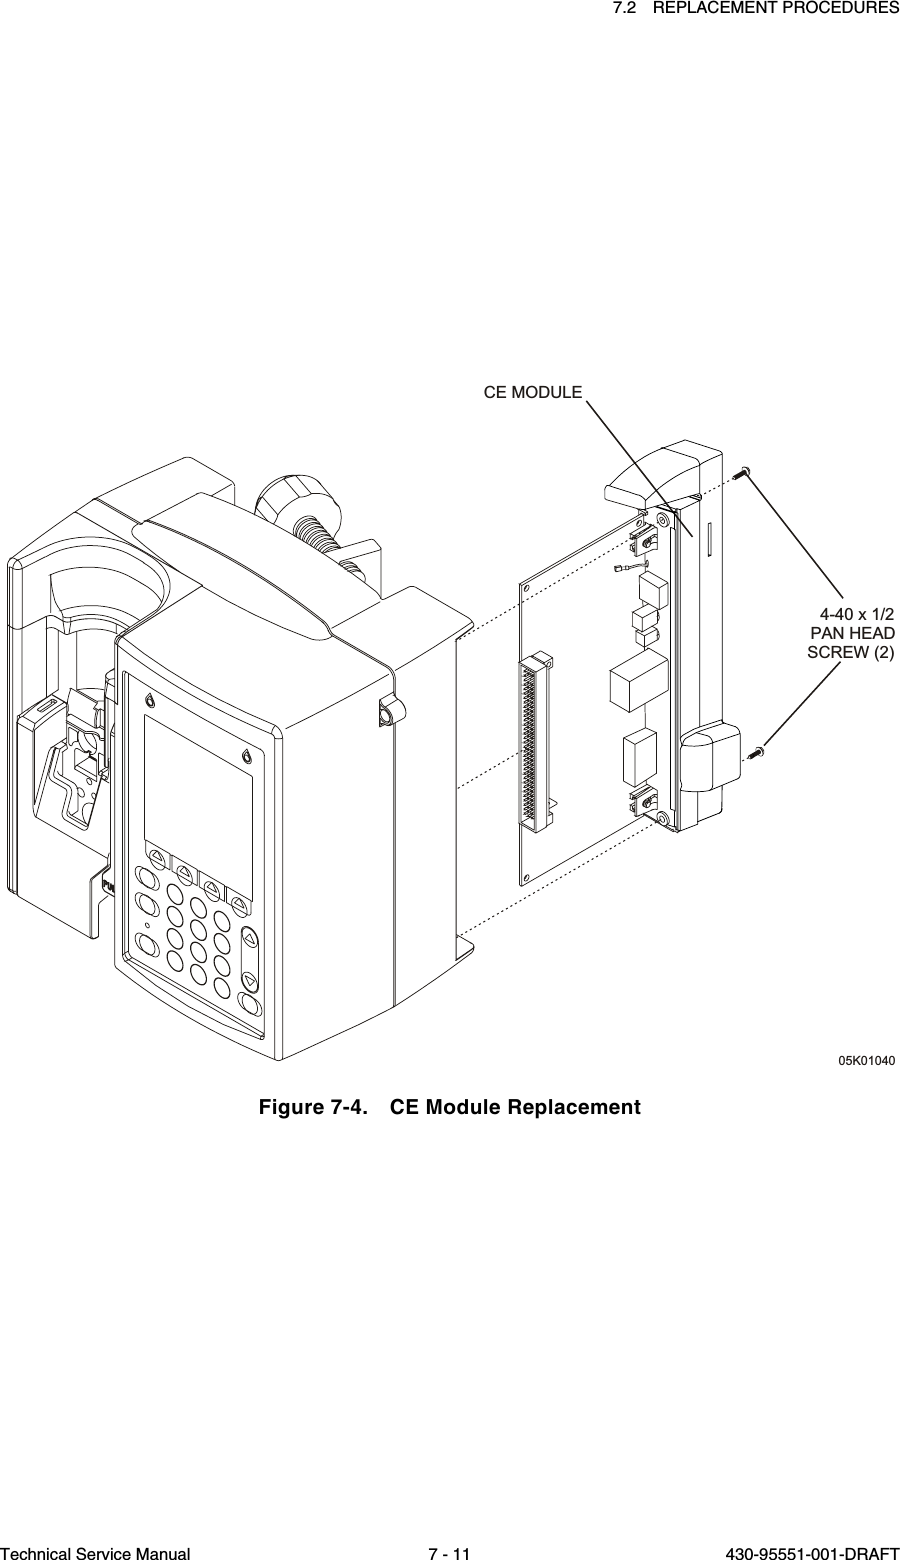
![7.2 REPLACEMENT PROCEDURESTechnical Service Manual 7 - 9 430-95551-001-DRAFT7.2.6CE MODULE REPLACEMENTThe recommended tool for this procedure is a No. 2 Phillips screwdriver.The replacement parts for this procedure are:CE ModuleScrew, 4-40 x 1/4, Pan Head, Square ConeCAUTION: Use proper ESD grounding techniques when handling components.Wear an antistatic wrist strap and use an ESD-protected workstation. Store the PWAin an antistatic bag before placing it on any surface.CAUTION: When replacing the CE module, carefully check the Ethernet MACaddress on the module label to assure it matches the infuser barcode.Note: Replacing the CE module does not change the existing biomed settings.To replace the CE module, see Figure 7-3, Rear View of the Infuser, and Figure 7-4,CE Module Replacement, then proceed as follows:1. Press [ON/OFF] to turn off the infuser, and disconnect the device from AC power.2. Carefully set the infuser face down.3. Using the Phillips screwdriver, remove the two 4-40 screws from the CE module.4. Carefully pull the assembly away from the infuser.Note: When removing the CE module, note the placement guides where theperipheral PWA rests.5. Install the replacement CE module in the exact reverse order of removal.Note: Verify the peripheral PWA is placed properly between the guides andfits correctly into the CPU PWA.To verify successful CE module replacement, perform the PVT in Section 5.2.](https://usermanual.wiki/ICU-Medical/20677.Replacement-Installation-Guide/User-Guide-545437-Page-1.png)