KTC Technology 00001 A 7.0 inch PAD with WLAN function. User Manual ROU00001
Shenzhen KTC Technology Co., Ltd. A 7.0 inch PAD with WLAN function. ROU00001
UserManual.wiki
>
KTC Technology
>
00001 User Manual
Exhibit 08 Users Manual
Navigation menu
Upload a User Manual
Namespaces
Wiki Guide
HTML
PDF
Info
Views
User Manual
Discussion / Help
Navigation
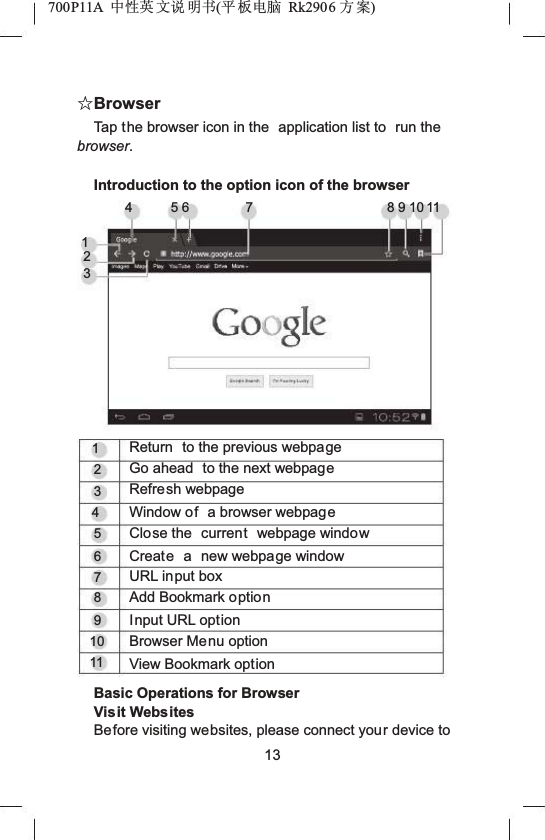
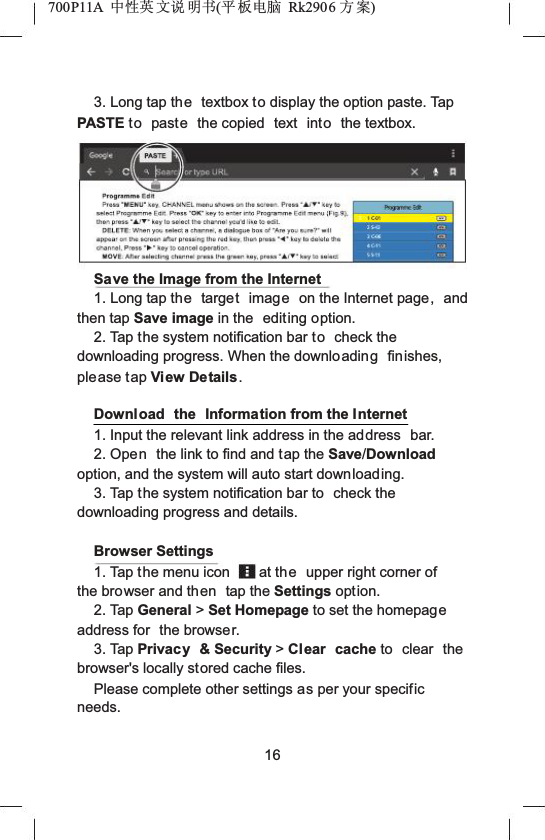
![700P11A Ёᗻ㣅 ᭛䇈 ᯢк(ᑇ ᵓ⬉㛥 Rk2906 ᮍḜ)the Internet via Wi-Fi, mobile Internet or Ethernet (refer to "System Settings" for specific settings).1. Tap the address bar in the browser, and you will seea virtual keyboard.2. Tap the virtual keyboard to input the correct address and then tap the [Enter] key at the virtual keyboard to visit the relevant website.Touch Screen Operations for Webpage Browsing1. Zoom in the webpage:put two fingers closely together on the target part of the webpage and separate them quickly, or double tap the target part of the webpage.2. Drag the webpage:put a finger on the screen and slide it upwards, downwards, leftwards or rightwards quickly to drag the webpage upwards, downwards, leftwards or rightwards.3. Long press Text/Link/Image to display and edit the editable items.Use of Bookmark14](https://usermanual.wiki/KTC-Technology/00001/User-Guide-1907226-Page-18.png)
![700P11A Ёᗻ㣅 ᭛䇈 ᯢк(ᑇ ᵓ⬉㛥 Rk2906 ᮍḜ)You can use the bookmark to save your favoritewebpages so that you can find and open them easily next time.ŶSave a Webpage as a Bookmark1. Tap the add bookmark icon in the browser.2. Tap the virtual keyboard to input the browser tabs, and then tap the [Enter] key.3. Make sure the address displayed in the address bar is correct and then tap the [Enter] key at the virtual keyboard.4. Tap Account and Add to to display the relevant drop-down lists, tap account and target storage location, and then tap OK.ŶView a Bookmark1. Tap the view bookmark icon in the browser.2. Tap the target bookmark to open it.ŶDelete or Edit a Bookmark1. Tap t he View Bookmark icon in the browser.2. Long-tap the target bookmark.3. Edit the relevant editable items.Copy and Paste the Text from the Internet1. Long-tap the target text on the Internet page, and you will see the editing options on the upper part of the screen. Drag the cursor select the text that you want to copy.2. Tap t he Copy option on the browser toolbar.15](https://usermanual.wiki/KTC-Technology/00001/User-Guide-1907226-Page-19.png)

![700P11A 中性英文说明书(平板电脑 RK2906 方案) Hereby, [Shenzhen KTC Technology Co., Ltd.], declares that this [7”PAD] is in compliance with the essential requirements and other relevant provisions of Directive 1999/5/EC. 36](https://usermanual.wiki/KTC-Technology/00001/User-Guide-1907226-Page-40.png)