Konftel 1066 1.9GHz CORDLESS PHONE User Manual
Konftel AB 1.9GHz CORDLESS PHONE Users Manual
UserManual.wiki
>
Konftel
>
1066 User Manual
Users Manual
Navigation menu
Upload a User Manual
Namespaces
Wiki Guide
HTML
PDF
Info
Views
User Manual
Discussion / Help
Navigation
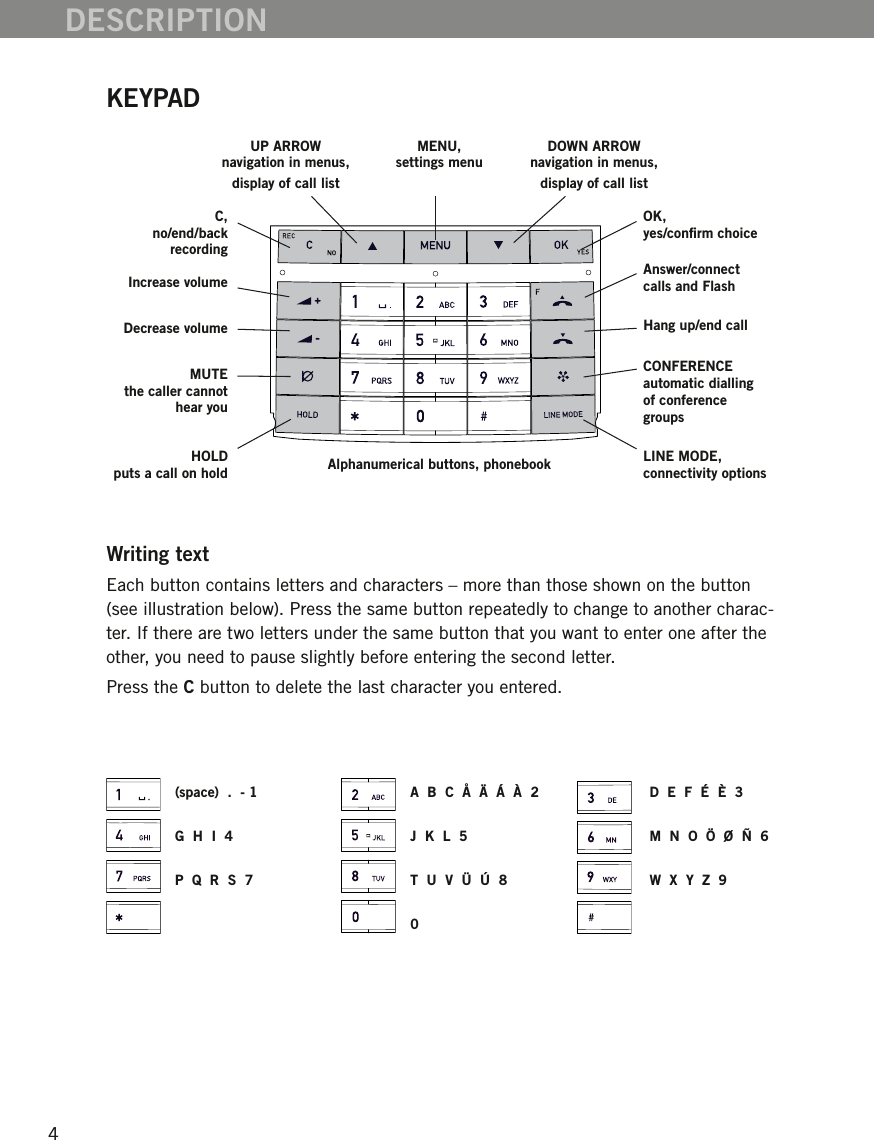
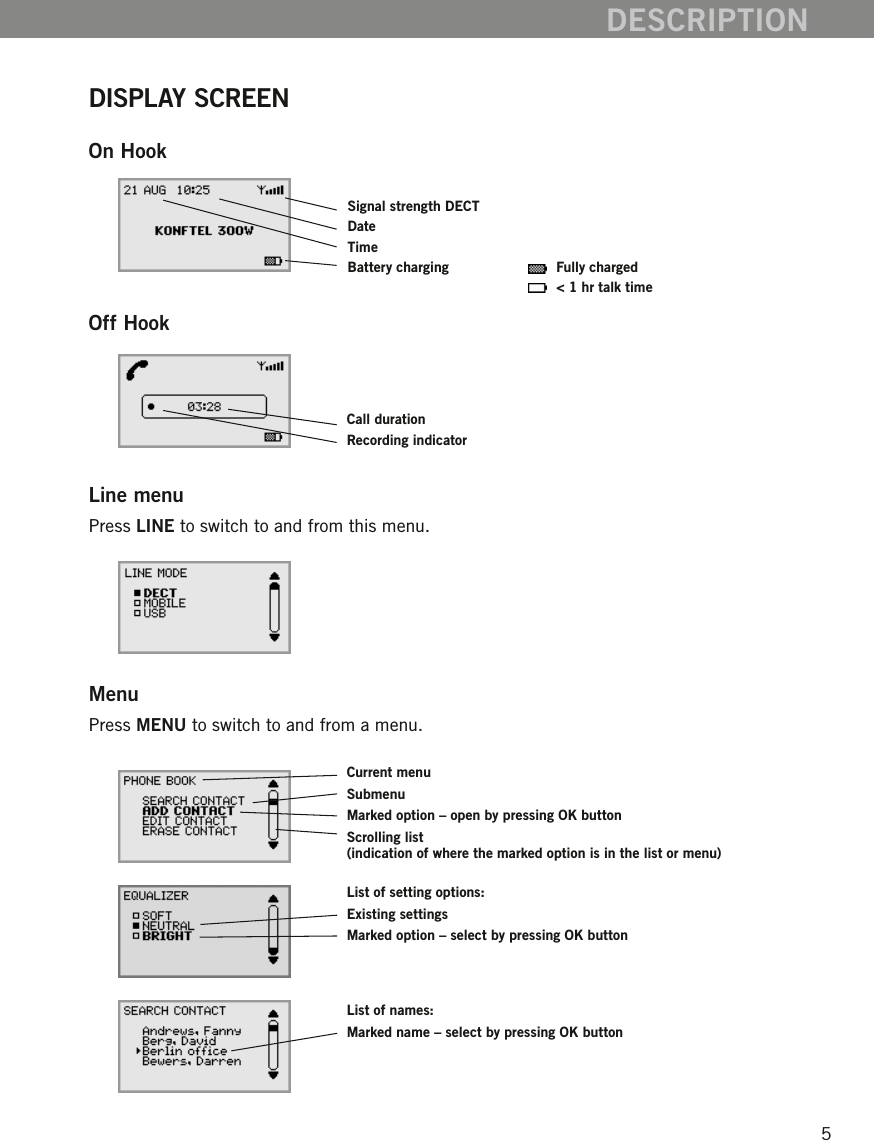
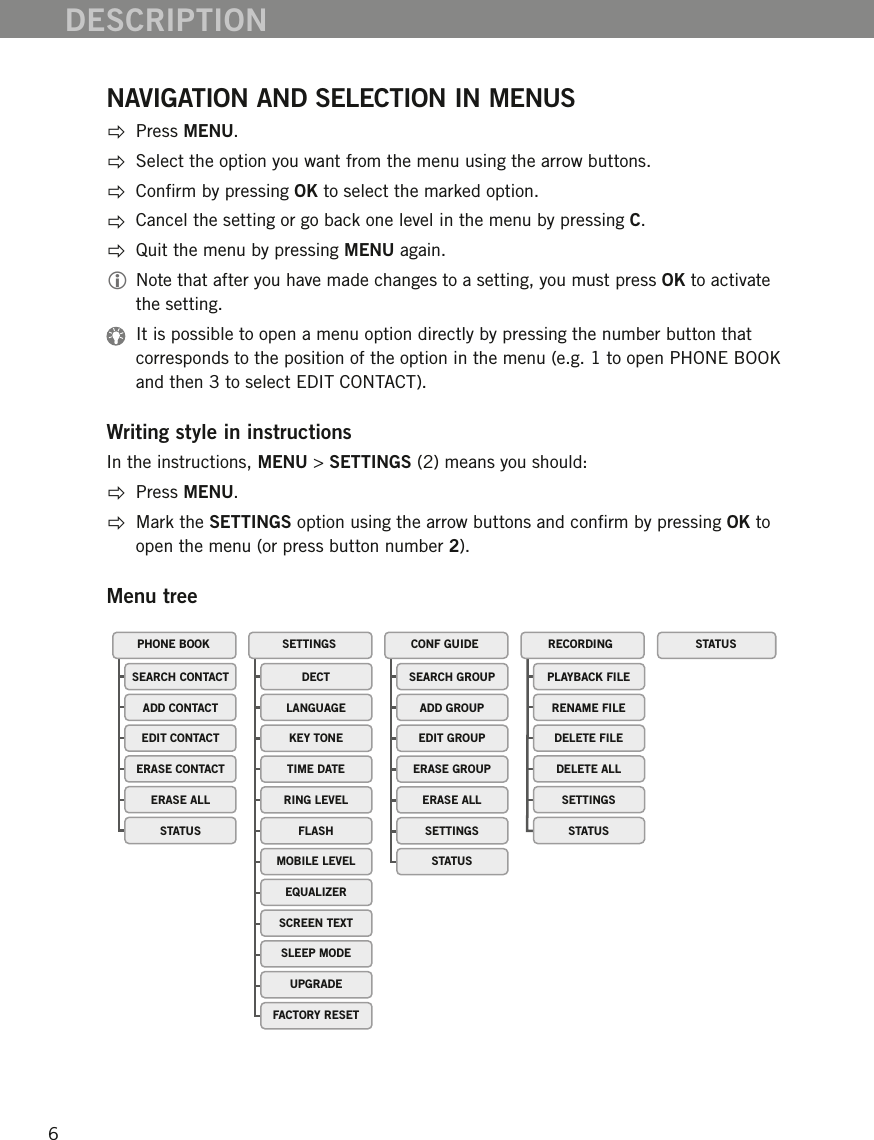
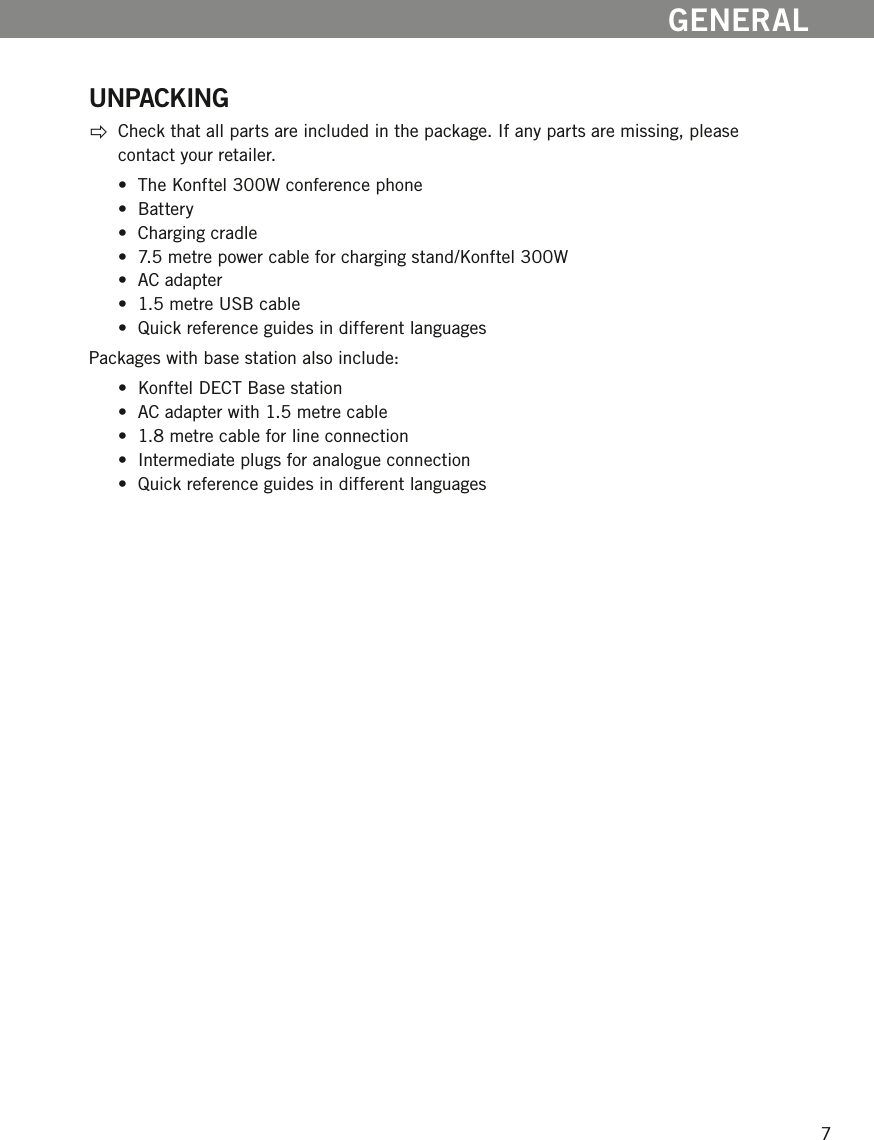


![FCC STATEMENTThisequipmentcomplieswithPart68oftheFCCrulesandtherequirementsadoptedbytheACTA.Onthebottomofthisequipmentisalabelthatcontains,amongotherinformation,aproductidenti-erintheformatUS:5RWW400B1066.Ifrequested,thisnumbermustbeprovidedtothetelephonecompany.AplugandjackusedtoconnectthisequipmenttothepremiseswiringandtelephonenetworkmustcomplywiththeapplicableFCCPart68rulesandrequirementsadoptedbytheACTA.Acomplianttelephone cord and modular plug is provided with this product. It is designed to be connected to a compatiblemodularjackthatisalsocompliant.Seeinstallationinstructionsfordetails.TheRENisusedtodeterminethenumberofdevicesthatmaybeconnectedtoatelephoneline.ExcessiveRENsonatelephonelinemayresultinthedevicesnotringinginresponsetoanincomingcall.Inmostbutnotallareas,thesumofRENsshouldnotexceedve(5.0).Tobecertainofthenumberofdevicesthatmaybeconnectedtoaline,asdeterminedbythetotalRENs,contactthelocaltelephonecompany.[ForproductsapprovedafterJuly23,2001,theRENforthisproductispartoftheproductidentierthathastheformatUS:5RWW400B1066.Thedigitsrepresentedby00aretheRENwithoutadecimalpoint(e.g.,00isaRENof0.0).Forearlierproducts,theRENisseparately shown on the label.]NOTICE:Ifyourhomehasspeciallywiredalarmequipmentconnectedtothetelephoneline,ensuretheinstallationofthisunitdoesnotdisableyouralarmequipment.Ifyouhavequestionsaboutwhatwilldisablealarmequipment,consultyourtelephonecompanyoraqualiedinstaller.NOTICE:Accordingtotelephonecompanyreports,ACelectricalsurges,typicallyresultingfromlightningstrikes,areverydestructivetotelephoneequipmentconnectedtoACpowersources.Tominimizedamagefromthesetypesofsurges,asurgeprotectorisrecommended.AnapplicablecerticationjacksUniversalServiceOrderCodes(USOC)fortheequipmentisprovidedinthepackagingwitheachpieceofapprovedterminalequipment.Ifthisequipment(Konftel300W)causesharmtothetelephonenetwork,thetelephonecompanywillnotifyyouinadvancethattemporarydiscontinuanceofservicemayberequired.Butifadvancenoticeisn’tpractical,thetelephonecompanywillnotifythecustomerassoonaspossible.Also,youwillbeadvisedofyourrighttoleacomplaintwiththeFCCifyoubelieveitisnecessary.Thetelephonecompanymaymakechangesinitsfacilities,equipment,operationsorproceduresthatcouldaffecttheoperationoftheequipment.Ifthishappensthetelephonecompanywillprovideadvance notice in order for you to make necessary modications to maintain uninterrupted service.The FCC wants you to knowThisequipmentcomplieswiththelimitsforaClassBdigitaldeviceasspeciedinPart15ofFCCRules.TheselimitsprovidereasonableprotectionagainstradioandTVinterferenceinaresidentialarea.However,thereisnoguaranteethatinterferencewillnotoccurinaparticularinstallation.Ifthisequipmentdoescauseharmfulinterferencetoradioortelevisionreception,whichcanbedeterminedbyturningtheequipmentoffandon,theuserisencouragedtotrytocorrecttheinterferencebyoneor more of the following measures:• Reorientorrelocatethereceivingantenna.• IncreasethedistancebetweentheequipmentandtheradioorTV.• UseoutletsondifferentelectricalcircuitsfortheequipmentandtheradioorTV.Consultyourlocalstoreiftheproblemstillexists.Connectiontopartylineserviceissubjecttostatetariffs.Contactthestatepublicutilitycommission,public service commission or corporation commission for information.Warning:Changesormodicationstothisphonenotexpresslyapprovedbythepartyresponsibleforcompliancecouldvoidtheuser’sauthoritytooperatetheequipment.Important note:Itisalegalrequirementforyoutohavetheconsentofallpartiesinaconversationbefore the conversation can be recorded.](https://usermanual.wiki/Konftel/1066/User-Guide-1273993-Page-46.png)