Listen Technologies 700-216 LPRS assistive listening system User Manual productmanual 11x17 qrk
Listen Technologies Corporation LPRS assistive listening system productmanual 11x17 qrk
UserManual.wiki
>
Listen Technologies
>
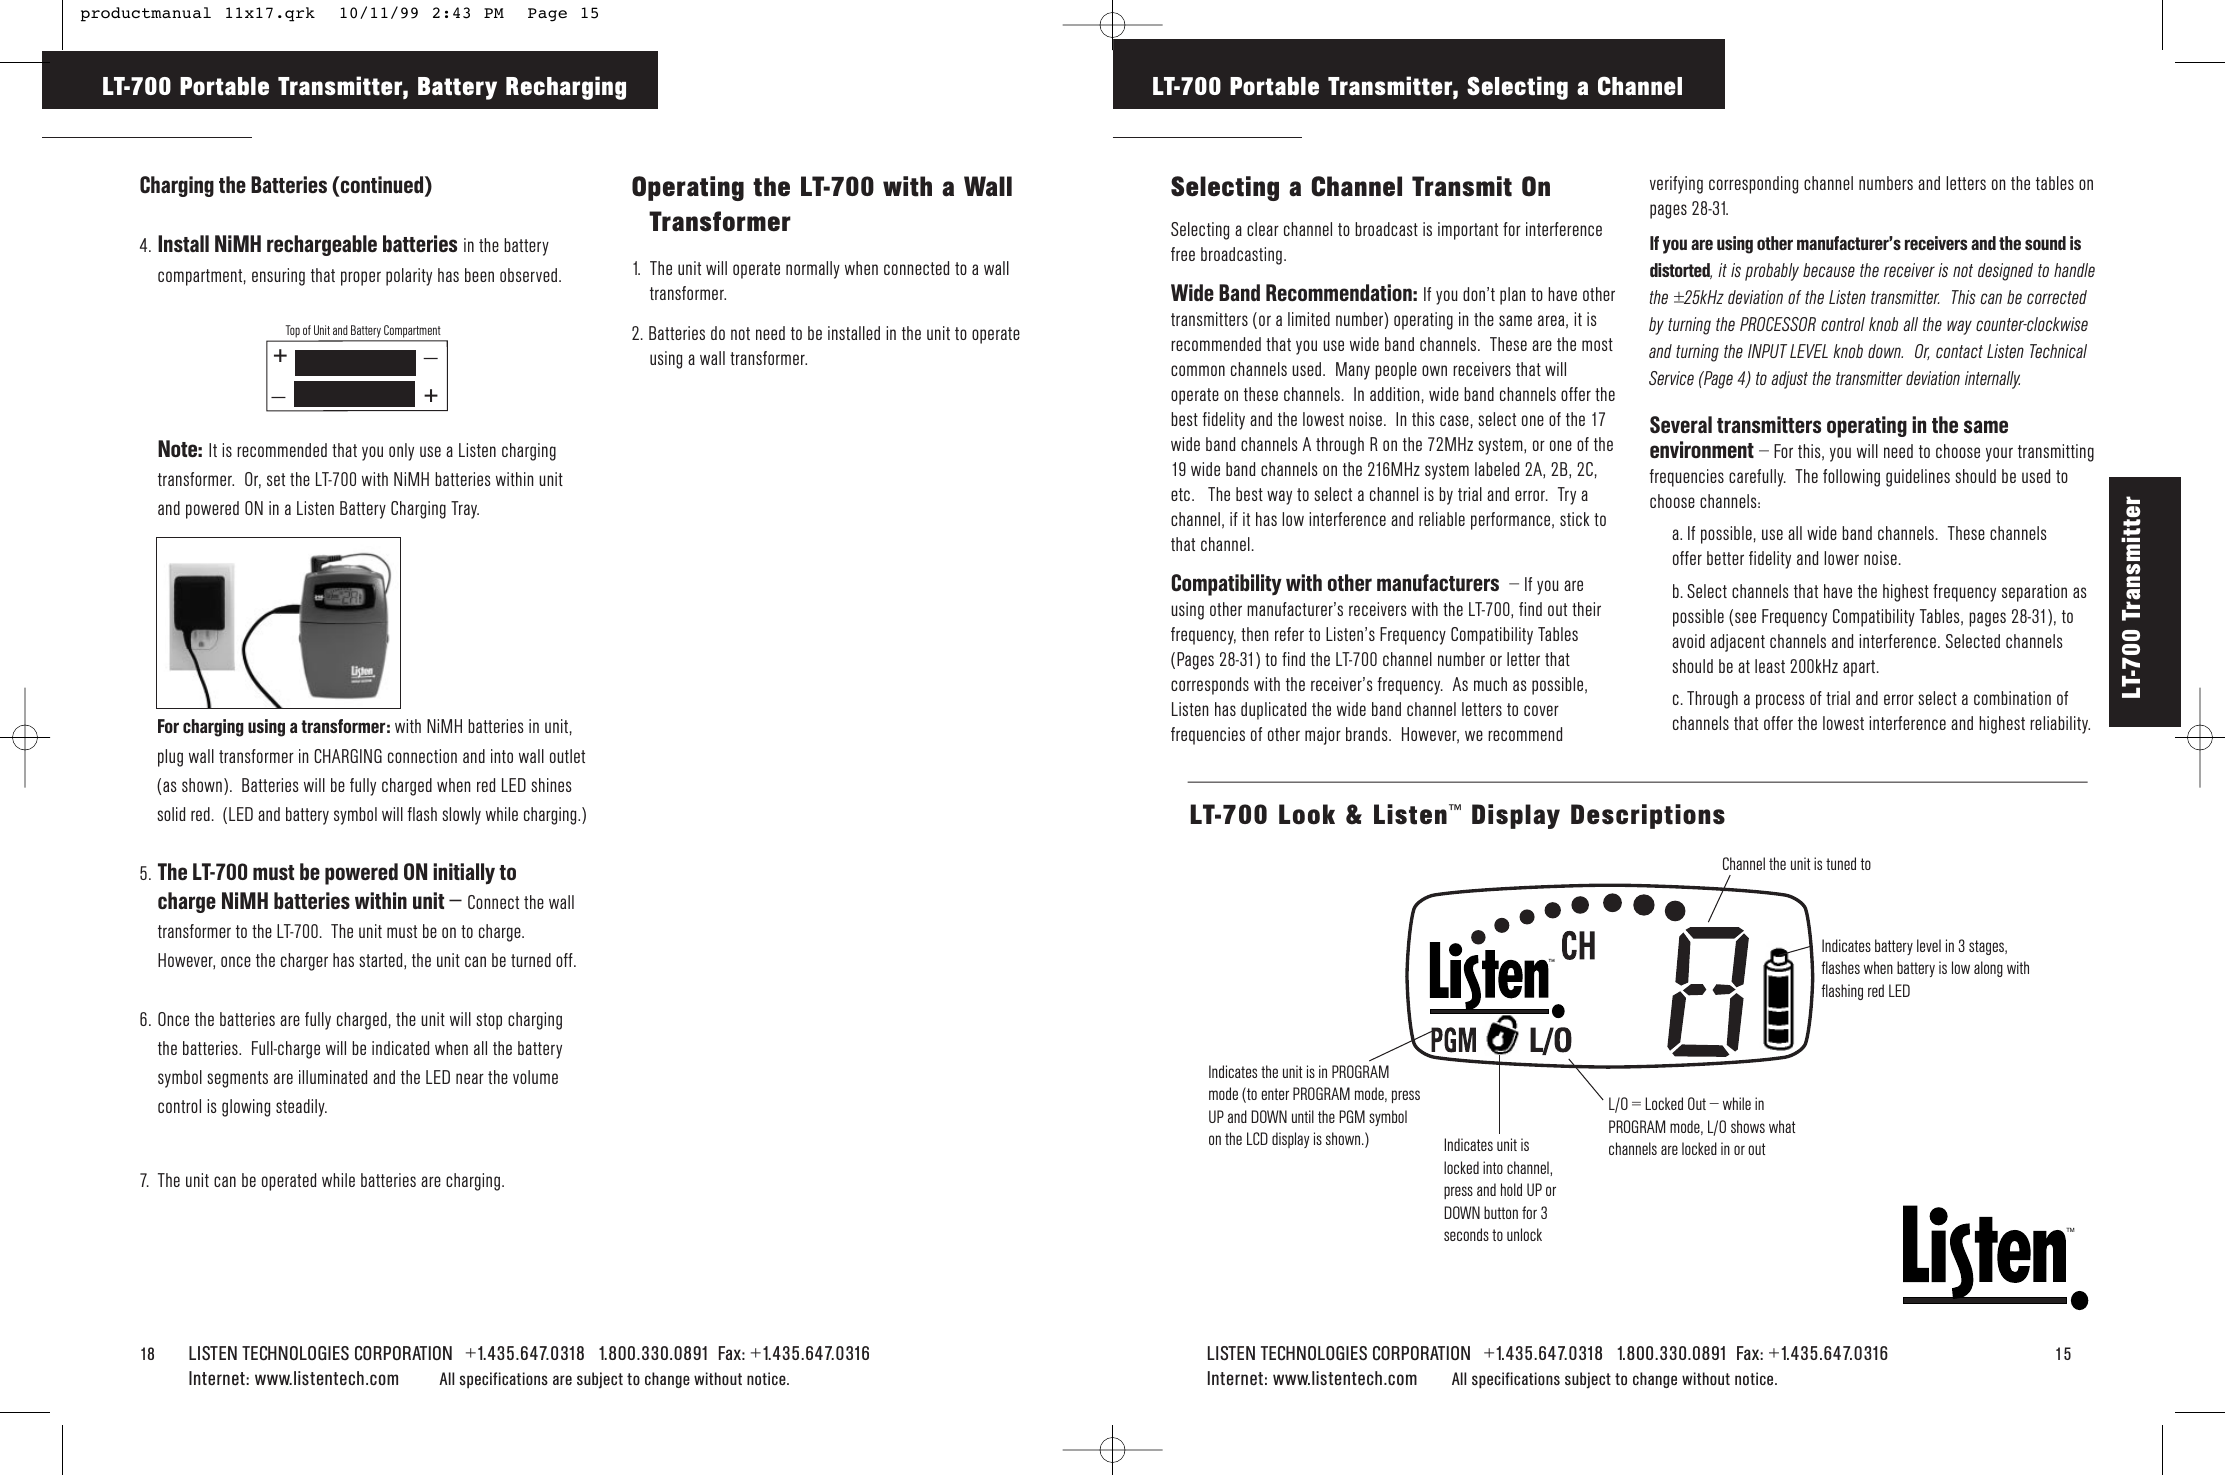
700 216 User Manual
101199
Navigation menu
Upload a User Manual
Namespaces
Wiki Guide
HTML
PDF
Info
Views
User Manual
Discussion / Help
Navigation