Motorola Mobility T6GF1 Portable PCS GSM Transceiver with Bluetooth User Manual Brit01 EN User guide
Motorola Mobility LLC Portable PCS GSM Transceiver with Bluetooth Brit01 EN User guide
Contents
- 1. Exhibit 8a Users Manual
- 2. Exhibit 8b Users Manual
- 3. Supplemental Response to IHD0071
Exhibit 8b Users Manual
![131VideoFilming a videoYou can record videos up to 5 MB.An Options list is then available:Note: When the record mode is launched the shutter sound is played.1Place yourself or the subject in front of the phone so that the image is displayed on the screen.2Adjust the required settings (see "Adjusting the preview", page 132).3Press OK to launch the recording. 4Select Stop ([Right] softkey) to stop the recording.options descriptionStoreTo store the video.PlayTo play the recorded video.Send by...To send the video by Mail, by MMS or by Bluetooth. DeleteTo delete the current video.DetailsTo display information about the file Name, the Resolution (width*height in pixels), the Duration of the video, the Size, the Storage date, the File protection status. The empty fields are not displayed.Brit01_EN_User guide.book Page 131 Friday, March 3, 2006 3:02 PM](https://usermanual.wiki/Motorola-Mobility/T6GF1.Exhibit-8b-Users-Manual/User-Guide-665289-Page-1.png)
![132VideoSetting the video to PauseThis mode allows to record several sequences on a single file. During the recording you can pause your video in the following way:Storing/erasing your videoWhen a video has just been recorded, the file name and the «Keep this video?» message are displayed.The video is automatically stored in the Video sub-folder of the Fun & Media box menu (see "Video", page 138), except if you have previously chosen to have it stored on the Memory Card.Adjusting the previewYou can adjust several setting types before making a video. These settings can be accessed from the option menu.To select the image size:1During the recording, press OK.2Press OK to restart the Recording.1Select OK to store the video or select Discard to erase it.1Press on the [Menu] key. Select Settings and Resolution.2Select the Normal or the Small mode.3Press OK to confirm your selection and then Save to store your settings.Brit01_EN_User guide.book Page 132 Friday, March 3, 2006 3:02 PM](https://usermanual.wiki/Motorola-Mobility/T6GF1.Exhibit-8b-Users-Manual/User-Guide-665289-Page-2.png)
![133VideoTo select the image quality:This setting allows you to choose a quality level for your video. The better the quality, the bigger the file size. If you wish to send your video by Mail or by MMS, we advise you choose the Economic mode.To select the brightness:To select the zoom setting:To access the video size limit setting:You can determine the size limit you wish to set for your video file. You can choose whether you allow the video to reach its maximum allowed size (5 MB) - you can of course stop the 1Press on the [Menu] key. Select Settings and Quality. Or press the [Down arrow] key to access the Quality feature.2Select the Super fine, the Fine or the Economic mode.3Press OK to confirm your selection and then Save to store your settings.1Scroll up or down. Select Brightness. Or press the [Left arrow] key to access the Brightness feature.2Select one of the seven brightness levels.3Press OK to confirm your selection.1Scroll up or down. Select Zoom. Or press the [Up arrow] key to access the Zoom feature.2Select one of the zoom levels by scrolling left or right.3Press OK to confirm your selection.Brit01_EN_User guide.book Page 133 Friday, March 3, 2006 3:02 PM](https://usermanual.wiki/Motorola-Mobility/T6GF1.Exhibit-8b-Users-Manual/User-Guide-665289-Page-3.png)
![134Videovideo recording when you wish to - or if you prefer the phone to automatically stop the recording when the available limit for Mail or MMS sending is reached.Note: The Short mail and Long mail values depend on your operator (min: 100 KB, max: 300 KB).To access the microphone setting:This setting allows you to activate or mute the microphone during the recording.To access the self timer:The self timer offers the possibility of recording a delayed video, thereby enabling you to be in the video.1Press on the [Menu] key. Select Settings and Video size limit.2Select Fit to mail or Maximum size.3Press OK to confirm your selection and then Save to store your settings.1Press on the [Menu] key. Select Microphone.2Select On or Off.3Press OK to confirm your selection.1Press on the [Menu] key. Select Self timer.2Select On.3Press OK to launch the countdown.The 10 seconds countdown is displayed. The recording is automatically launched when the countdown is over. Please proceed as usual (to stop or pause the video).4Select Stop to stop the recording.Brit01_EN_User guide.book Page 134 Friday, March 3, 2006 3:02 PM](https://usermanual.wiki/Motorola-Mobility/T6GF1.Exhibit-8b-Users-Manual/User-Guide-665289-Page-4.png)
![135VideoNote: If an event occurs (Mail, MMS reception...) or the phone’s behaviour is modified (any key pressed, ...) after the countdown has started, the self timer is automatically stopped and set to Off Once the event has been processed, the phone returns to the preview screen.To display/conceal information icons:This option allows you to activate or conceal the phone information status icons display on top of the screenTo adjust the shutter sound level:This option allows you to adjust the shutter sound level.Note: You cannot deactivate or mute the shutter sound Option on your phone1Press on the [Menu] key Select Settings and Info.2Select On (the icons are displayed) or Off (the icons are not displayed).3Press OK to confirm your selection and then Save to store your settings.1Press Option. Select Settings and Shutter sound.2Scroll up or down to adjust the shutter sound level.3Press OK to confirm your selection and then Save to store your settings.Brit01_EN_User guide.book Page 135 Friday, March 3, 2006 3:02 PM](https://usermanual.wiki/Motorola-Mobility/T6GF1.Exhibit-8b-Users-Manual/User-Guide-665289-Page-5.png)
![136VideoHow to play your videoYou can watch a video that has just been recorded before storing it in the following way:You can also watch a video that is stored in you phone in the Fun & Media box.Here is how to use the keypad while in the Play mode:1Press on the [Menu] key. 2Select Play.keys description[0] to [7] keys To set the volume (if any audio track on the video) from Mute to level 7.[8] & [9] keys To set the volume to its maximum level (if any audio track on the video).[Up arrow] key To Play or Pause the video.[Down arrow] key To Stop the video playing.[Left arrow] key To open the previous video.[Right arrow] key To open the next video.[Up] side key To increase the audio volume.[Down] side key To decrease the audio volume.[Left] softkey To set the video to Full screen.[OK] key To diplay the Details screen.Brit01_EN_User guide.book Page 136 Friday, March 3, 2006 3:02 PM](https://usermanual.wiki/Motorola-Mobility/T6GF1.Exhibit-8b-Users-Manual/User-Guide-665289-Page-6.png)
![137VideoDuring the Play mode, during the Pause mode or when the video is stopped, an Options menu is available (Press on the [Menu] key):options descriptionVolumeTo increase or decrease the audio volume.Full screenTo set the video playing to Full screen.Loop modeTo play the video repeateadly.Send by...To send the video by Mail, by MMS or by Bluetooth. Set as...To set the video as Idle screen, Incoming call, Alarm, Message alert or New mail alert. DetailsTo display information about the file Name, the Title, the Author, the Copyright, the Resolution (width*height in pixels), the Duration of the video, the Size, the Storage date, the File protection status. The empty fields are not displayed.Brit01_EN_User guide.book Page 137 Friday, March 3, 2006 3:02 PM](https://usermanual.wiki/Motorola-Mobility/T6GF1.Exhibit-8b-Users-Manual/User-Guide-665289-Page-7.png)
![138Fun & media boxFun & media boxThis menu groups and manages all the images, melodies, MP3, videos, speech notes, frames, Games and Java applications contained in the phone as well as all the files received via the i-mode browser, Bluetooth, Mail, MMS or SMS.VideoThis sub-menu allows you to play videos that are stored on your phone (see "Video", page 128). You can also send/receive these videos by Mail, MMS or by Bluetooth. The video file format supported by your phone is .3gp.To access videos stored on your phone1Press the [Left arrow] key or Press the [Menu] key and select Fun & Media box.2Select Videos.3Scroll up and down to select the required video or select the required folder (press OK to view its content) then the required video. An Options menu is then available (Press on the [Menu] key):Brit01_EN_User guide.book Page 138 Friday, March 3, 2006 3:02 PM](https://usermanual.wiki/Motorola-Mobility/T6GF1.Exhibit-8b-Users-Manual/User-Guide-665289-Page-8.png)
![139Fun & media boxoptions descriptionPlayTo play the selected video.Set as...To set the video as Idle screen, Incoming call Line 1 or Line 2, Alarm, Message alert or New mail alert. Send by...To send the selected video by Mail, by MMS or by Bluetooth.DeleteTo delete the current video.Delete allTo delete all the videos in the current folder.Multiple selectionTo select several videos (by pressing OK). Press OK to unselect a ticked video. Press on the [Menu] key to access Send by... (Bluetooth), Delete, Move to (to one of the Video sub-folders or to the memory card), Copy to (a folder of Videos), Select all (to select all the files of the current folder or to the memory card), Unselect all (to unselect all the ticked files).Move toTo move the selected file to one of the Videos sub-folders or to the memory card.Copy toTo copy the selected file in one of the Videos sub-folders or to the memory card.New folderTo create a new folder in the Videos sub-folder (available only if the selection is not a folder already).Brit01_EN_User guide.book Page 139 Friday, March 3, 2006 3:02 PM](https://usermanual.wiki/Motorola-Mobility/T6GF1.Exhibit-8b-Users-Manual/User-Guide-665289-Page-9.png)
![140Fun & media boxNote: If the selection is a sub-folder, another Options list is available (press on the [Menu] key).To play a videoDuring the Play mode, during the Pause mode or when the video is stopped you can access the following options list (Press on the [Menu] key):RenameTo rename the selected video.DetailsTo view the current file name, copyright, resolution, duration, size, storage date and file protection status information.My preferencesTo sort the stored videos (by date, name, size).1The video playing is automatically launched.options descriptionVolumeTo set the sound volume level (from 0 to 7).Full screenTo play the video on full screen.Loop modeTo play the video repeatedly. Send by...To send the current video by Bluetooth, by MMS or by Mail.Set as...To set the current video as an idle screen, an incoming call, an Alarm, a Message alert or a New mail alert. DetailsTo display information about the file Name, the Copyright, the Resolution (width*height in pixels), the Duration of the video, the Size, the Storage date, the File protection status.options descriptionBrit01_EN_User guide.book Page 140 Friday, March 3, 2006 3:02 PM](https://usermanual.wiki/Motorola-Mobility/T6GF1.Exhibit-8b-Users-Manual/User-Guide-665289-Page-10.png)
![142Fun & media boxRestrictions:Some of the videos you received by Mail, by MMS, via the i-mode or Bluetooth may bear restrictions:Note: Each time a restricted video is launched, a warning message is displayed before the Playing, thus informing on the remaining span time, number of remaining allowed playing times, etc.To access videos stored on your Memory CardYou can play videos that are stored on your Memory Card. The Options lists are the same as in the Videos sub-menu.restrictions descriptionRestricted number of playable timesThe video can be played a pre-determined number of times.Deadline restrictionThe video can be played until a pre-determined date.Playable span timeThe video can be played during a pre-determined duration from its downloading date.1Press the [Menu] key. Select Fun & Media box.2Select Videos, then Memory card (this item is only displayed when a Memory Card is inserted).3Scroll up or down to select the required video or choose a folder (press OK to view its content) then select a video.4Press OK to play the selected video.Brit01_EN_User guide.book Page 142 Friday, March 3, 2006 3:02 PM](https://usermanual.wiki/Motorola-Mobility/T6GF1.Exhibit-8b-Users-Manual/User-Guide-665289-Page-12.png)
![144Fun & media boxViewing an image:Options:The Pictures folder Options list contains the following items:1Press the [Menu] key. Select Fun & Media box.2Select Pictures.3Scroll down the images list or mosaic. Select the required image or select a folder to view its contents (press OK).4Press OK or press the [Menu] key and select View to view the selected image in full size. options descriptionView To view the full image and name.Set as... To set the image as an Idle screen, as a Welcome screen on switching on your phone or as a Goodbye screen on switching it Off.Send by...To send the image via Bluetooth, by Mail or by MMS.DeleteTo delete the current image.Delete allTo delete all the pictures of the current folder.Brit01_EN_User guide.book Page 144 Friday, March 3, 2006 3:02 PM](https://usermanual.wiki/Motorola-Mobility/T6GF1.Exhibit-8b-Users-Manual/User-Guide-665289-Page-14.png)
![145Fun & media boxNote: If the selection is a sub-folder, a different Options list is available (Press on the [Menu] key).Multiple selectionTo select several images (by pressing OK). Press OK to unselect a ticked image. Press on the [Menu] key to access Send by... (Bluetooth), Delete, Move to (a folder of Pictures or the Memory Card), Copy to (a folder of Pictures or the Memory Card), Select all (to select all the files of the current folder), Unselect all (to unselect all the ticked files).Move toTo move the current image to the Pictures folder, to one of the Pictures sub-folders or to the Memory Card.Copy toTo copy the current image to the Pictures folder, in one of the Pictures sub-folders or the Memory Card.New folderTo create a sub-folder in the Pictures folder (available only if the selection is not a folder already).RenameTo rename the current picture.DetailsTo show the name, resolution, size, storage date and protection status of the current file.My preferencesTo sort the stored images (by date, name or size) and select a view mode (List, Thumbnails 4 - to display a 4 - picture mosaic).options descriptionBrit01_EN_User guide.book Page 145 Friday, March 3, 2006 3:02 PM](https://usermanual.wiki/Motorola-Mobility/T6GF1.Exhibit-8b-Users-Manual/User-Guide-665289-Page-15.png)
![146Fun & media boxNote: The sending of an image may not be allowed if it is exportation (copyright) protected (the ’File protected’ message is then displayed).Note: To send an image via Bluetooth please see "Bluetooth", page 48. To send an image via Mail or MMS, please see "Mail system", page 196.Note: Error messages may be displayed when setting, viewing or storing an image:’File too big’: Please see "Error messages", page 251; ’Decoding failure’: the image cannot be viewed by the phone.Note: You can only access the Memory Card storage space if the Memory Card is inserted in the phone.When viewing an image, an Options menu is available (Press on the [Menu] key):options descriptionFull viewTo view the picture in full screen.Set as...To set the image as an Idle screen or as a Welcome screen on switching on your phone or as a Goodbye screen on switching it Off.Send by...To send the picture via Bluetooth, by Mail or by MMS.DeleteTo delete the current picture.Slide showTo display automatically all the pictures of a folder one after another.Brit01_EN_User guide.book Page 146 Friday, March 3, 2006 3:02 PM](https://usermanual.wiki/Motorola-Mobility/T6GF1.Exhibit-8b-Users-Manual/User-Guide-665289-Page-16.png)
![147Fun & media boxSetting a still or animated image as an Idle screen as a Welcome screen or as a Goodbye screen from the Pictures folderThis option allows you to set a picture as an Idle screen, as a Welcome or a Goodbye screen.Cropping:If the image you want to set as an Idle screen is too large to be inserted into the available space, your phone will propose a cropped image.Add frame...To add a frame to the current picture.Rotate...To rotate the picture to the right (90°), to the left (90°) or turnover (180°). Once the picture is rotated, an Options menu is available to store the current picture, to view it in Full screen, to Cancel the rotation, to Add a frame to the current picture or to Rotate it once again.DetailsTo show the name, resolution, size, storage date and protection status of the current file.1Press the [Menu] key. Select Fun & Media box.2Select Pictures.3Use the [Up arrow] and [Down arrow] keys to scroll through the image names list and select one. Press on the [Menu] key and then Set as... 4Select Idle screen, Welcome screen or Goodbye screen. options descriptionBrit01_EN_User guide.book Page 147 Friday, March 3, 2006 3:02 PM](https://usermanual.wiki/Motorola-Mobility/T6GF1.Exhibit-8b-Users-Manual/User-Guide-665289-Page-17.png)
![148Fun & media boxThis allows you to move the image left, right, up and down (cursor key). The image you have cropped is then displayed as such on the phone (as an Idle screen).Downloading images via the i-modePlease refer to "Quick access to i-mode basic features", page 212.To access images stored on your Memory CardYou can store or view pictures that are stored on your Memory Card. The Options lists are the same as in the Pictures sub-menu.1Select Set as... then select Idle screen. If the image is too big, the crop screen is displayed. 2Use the cursor key to move the image up, down, left or right (the availability of the four arrows depends on the image size). 3Select OK. Stored is then displayed.1Press the [Menu] key. Select Fun & Media box.2Select Pictures, then Memory card (this item is only displayed when a Memory Card is inserted).3Select the required picture or choose a folder (press OK to view its content) then select a picture.4Press OK or press the [Menu] key and select Full view to view the selected image in full size.Brit01_EN_User guide.book Page 148 Friday, March 3, 2006 3:02 PM](https://usermanual.wiki/Motorola-Mobility/T6GF1.Exhibit-8b-Users-Manual/User-Guide-665289-Page-18.png)
![149Fun & media boxMelodiesThis sub-folder allows you to play/store pre-defined melodies or melodies you downloaded via Bluetooth or via the i-mode browser, or you received by SMS, by Mail or by MMS. You can set these melodies as a ringtone for Line1 or Line2, an Alarm melody, a Message alarm melody, a New mail alert, a Welcome or Goodbye melody. The melody and audio file formats supported by your phone are .mid, .smf, .midi, .mld, .mfi and .nsm (except when a .nsm is received via Bluetooth).MelodiesTo display the Melodies file contents:The following Options list is available while scrolling the melodies list.1Press the [Menu] key. Select Fun & Media box.2Select Melodies.3Use the [Up arrow] and [Down arrow] keys to scroll to the required melody. options descriptionPlayTo play the selected melody.Set as...To set the selected melody as a Ringtone for Line1 or Line2, as an Alarm melody, as a Message alert melody, as a New mail alert melody or as a Welcome melody or a Goodbye melody.Send by...To send the selected melody by Mail, by MMS or via Bluetooth.DeleteTo delete the current melody.Brit01_EN_User guide.book Page 149 Friday, March 3, 2006 3:02 PM](https://usermanual.wiki/Motorola-Mobility/T6GF1.Exhibit-8b-Users-Manual/User-Guide-665289-Page-19.png)
![150Fun & media boxNote: You can only access the Memory Card storage space ifthe Memory Card is inserted in the phone.Delete allTo delete all the melodies of the current folder.Multiple selectionTo select several melodies (by pressing OK). Press OK to unselect a ticked melody. Press on the [Menu] key to access Send by... (Bluetooth), Delete, Move to (a folder of Melodies or the Memory Card), Copy to (a folder of Melodies or the Memory Card), Select all (to select all the files of the current folder), Unselect all (to unselect all the ticked files).Move toTo move the selected file to the Memory Card or to one of the Melodies sub-folders.Copy toTo copy the selected file in the Memory Card or to to one of the Melodies sub-folders.New folderTo create a new sub-folder in the Melodies folder (available only if the selection is not a folder already).RenameTo rename the selected melody.DetailsTo view the current file name, size, storage date and file protection status information.My preferencesTo sort the stored melodies (by date, name, size).options descriptionBrit01_EN_User guide.book Page 150 Friday, March 3, 2006 3:02 PM](https://usermanual.wiki/Motorola-Mobility/T6GF1.Exhibit-8b-Users-Manual/User-Guide-665289-Page-20.png)
![151Fun & media boxMelody downloadYou can download melodies from the Internet (via your PC), from interactive voice servers, from the i-mode browser and mailer or via Bluetooth.In addition to the usual SMS download of melodies, you can download melodies by browsing internet web sites. Motorola phones are compatible with the Nokia™ Smart Messaging system. The principle is the following:You can also receive melodies or audio files via Bluetooth.Formats managed by the phone are .mid, .smf, .midi, .mld, .mfi and .nsm formats.1Melodies are stored on a Web server.2Select your Motorola phone type to access a choice of melodies.3Select one or more melodies to be downloaded to your phone.4All selected melodies are downloaded via SMS.5Once the melody is received, a reception screen is displayed. Press OK or press on the [Menu] key then select Play to play the received melody. To set a melody as a ringtone, a message alert melody, an alarm melody, a Welcome or a Goodbye, please see "Tones", page 215.Brit01_EN_User guide.book Page 151 Friday, March 3, 2006 3:02 PM](https://usermanual.wiki/Motorola-Mobility/T6GF1.Exhibit-8b-Users-Manual/User-Guide-665289-Page-21.png)
![152Fun & media boxTo play a downloaded melody from the reception screen:To store a downloaded melody:To discard a downloaded melody:To access melodies stored on your Memory CardYou can store or play melodies on your Memory Card. The Options lists are the same as in the Melodies sub-menu.1Select OK or Press on the [Menu] key then select Play.2Select Exit to stop the playback.1Press on the [Menu] key.2Select Install.If the memory space is sufficient, the melody is automatically stored in the Melodies file. If there is no space left, you need to select one or several melody(ies) to be replaced from the set of melodies (melodies associated with a ring feature cannot be deleted).Once stored, a message is displayed. The melody can be played and selected via theFun & Media box menu.1Select Discard. The melody is erased and is therefore lost for further installation. 1Press the [Menu] key. Select Fun & Media box.2Select Melodies, then Memory card (this item is only displayed when a Memory Card is inserted).3Scroll up or down to select the required melody or choose a folder (press OK to view its content) then select a melody.Brit01_EN_User guide.book Page 152 Friday, March 3, 2006 3:02 PM](https://usermanual.wiki/Motorola-Mobility/T6GF1.Exhibit-8b-Users-Manual/User-Guide-665289-Page-22.png)
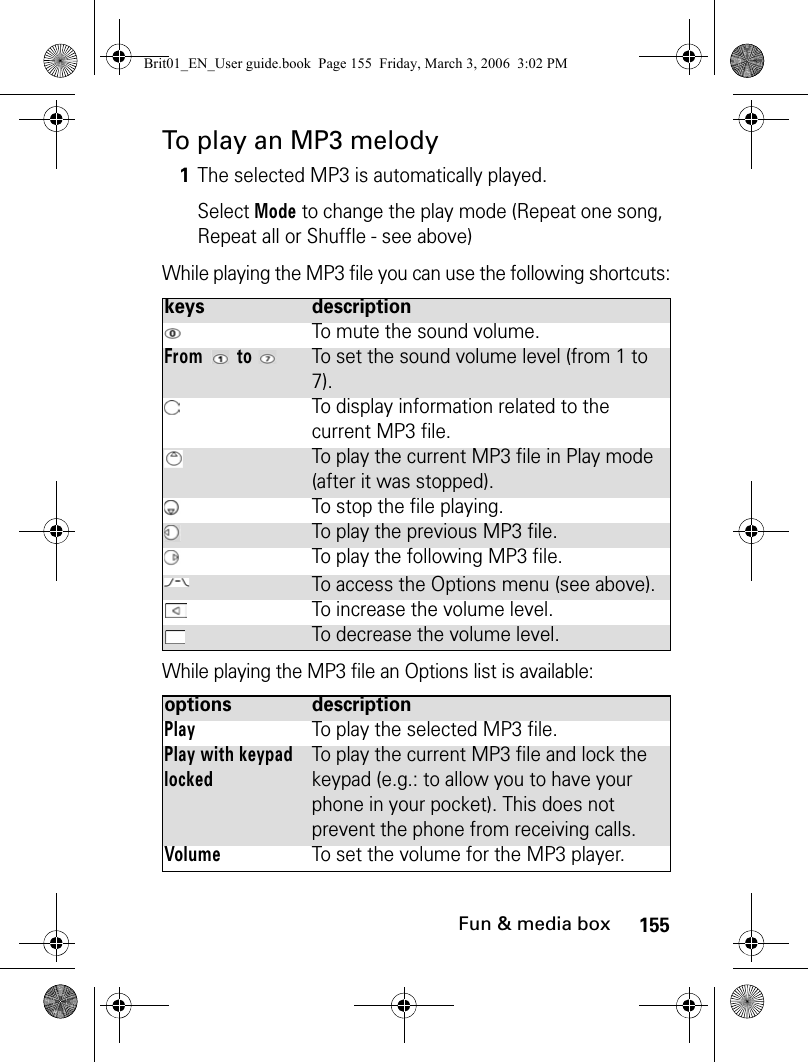
![153Fun & media boxMP3 playerThis sub-menu allows you to play MP3 melodies that are stored on your phone. You can also send/receive these MP3 files by Bluetooth. To access MP3 files stored on your phoneListening to personal stereo equipment at full volume for long periods can damage the user’s hearing.1Press the [Menu] key. Select Fun & Media box.2Select MP3.3Scroll up and down to select the required MP3 file or select the required folder (press OK to view its contents) then the required MP3 file. An Options menu is then available (Press on the [Menu] key):options descriptionPlayTo play the selected MP3 file.Set as...To associate the selected MP3 to an event (Incoming call, Alarm, Message alert, New mail alert) if it is not protected.This option may not be available on your phone.Send by...To send the selected MP3 file by Bluetooth, Mail or MMS.DeleteTo delete the current MP3 file.Delete allTo delete all the MP3 files of the current folder.Brit01_EN_User guide.book Page 153 Friday, March 3, 2006 3:02 PM](https://usermanual.wiki/Motorola-Mobility/T6GF1.Exhibit-8b-Users-Manual/User-Guide-665289-Page-23.png)
![154Fun & media boxMultiple selectionTo select several MP3 files (by pressing OK). Press OK to unselect a ticked MP3 file. Press on the [Menu] key to access Send by... (Bluetooth), Delete, Move to (a folder of MP3 files or the Memory Card), Copy to (a folder of MP3 files or the Memory Card), Select all (to select all the files of the current folder), Unselect all (to unselect all the ticked files).Move toTo move the selected file to the Memory Card or to one of the MP3 sub-folders.Copy toTo copy the selected file in the Memory Card or to to one of the MP3 sub-folders.New folderTo create a new sub-folder in the MP3 folder (available only if the selection is not a folder already).RenameTo rename the selected MP3 file.DetailsTo view the current file name, size, storage date and file protection status information.My preferencesTo sort the stored MP3 files (by date, name, size).options descriptionBrit01_EN_User guide.book Page 154 Friday, March 3, 2006 3:02 PM](https://usermanual.wiki/Motorola-Mobility/T6GF1.Exhibit-8b-Users-Manual/User-Guide-665289-Page-24.png)
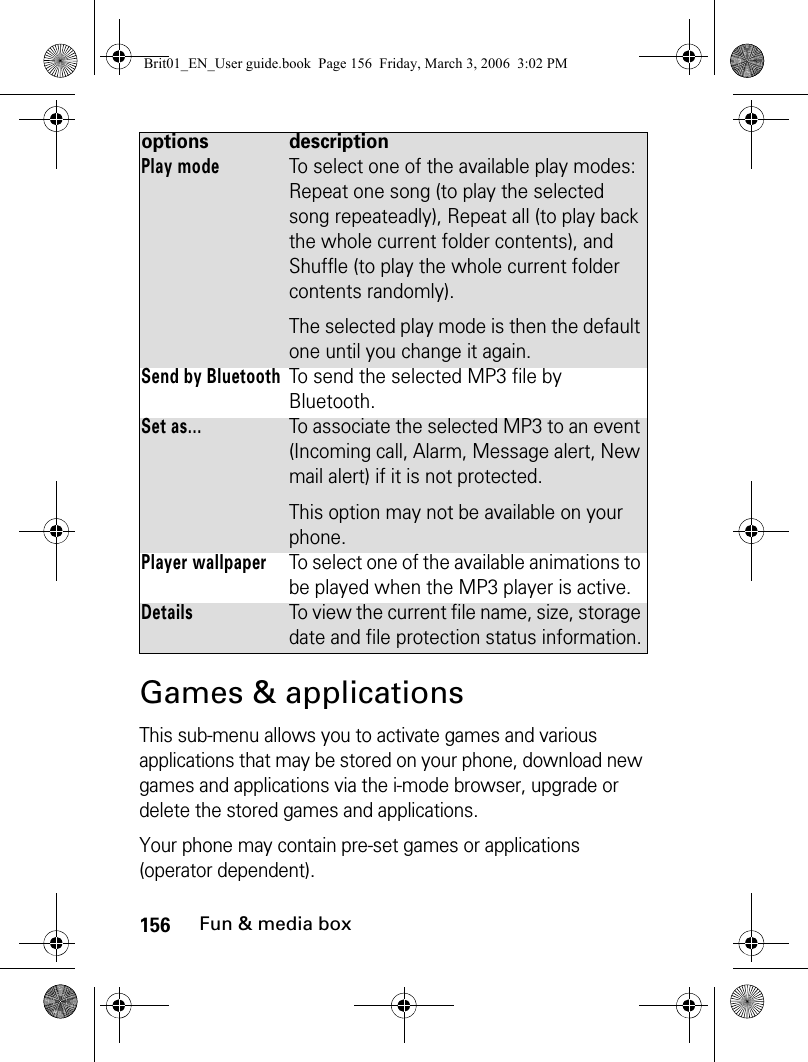
![157Fun & media boxYou can store/download up to 100 games and/or applications on your phone.To activate a game/application: or:Note: Depending on the game/application stored on your phone, you may need to activate a network connection via the i-mode browser. Select Yes or No.Note: The downloaded games/applications can only be activated if the phone contains the SIM card that was used during the downloading process.Press the [Menu] key when in the Games & Applications list:1Press the [Menu] key. Select Fun & Media box.2Select Games & applications.3Select one of the available games/applications from the list or from one of the available folders (if any).1Press and hold the i-mode softkey from the idle screen.2Select one of the available games/applications from the list or from one of the available folders (if any).options descriptionCreate FolderTo create a new folder and name it.Delete FolderTo delete the current folder.Rename FolderTo rename the current folder.Move to FolderTo move the current game or application to a folder.UpgradeTo download the latest version of the game from the network.Brit01_EN_User guide.book Page 157 Friday, March 3, 2006 3:02 PM](https://usermanual.wiki/Motorola-Mobility/T6GF1.Exhibit-8b-Users-Manual/User-Guide-665289-Page-27.png)
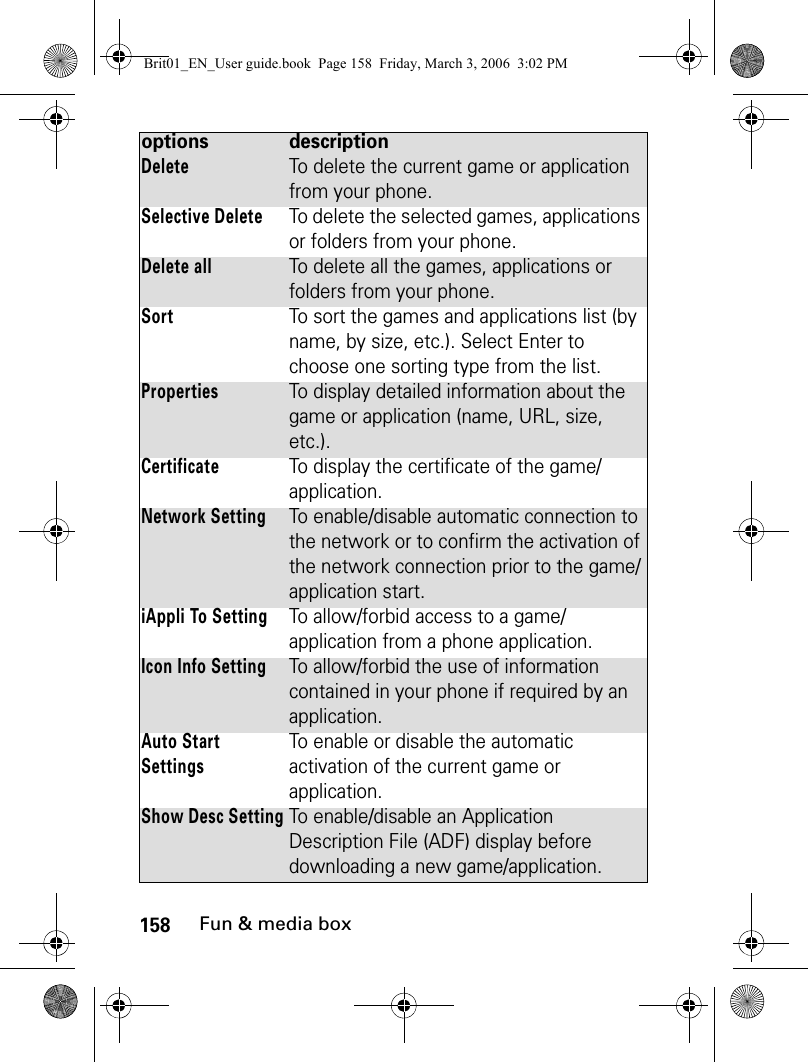
![159Fun & media boxNote: Some of these items are also available from the folders. When in a folder, select Menu ([Left] softkey) to get to this list. Note: The availability of these items depends on the games/applications.Speech notesThis feature allows you to record speech notes up to 25 minutes on your phone.Auto Start Failure To display the Auto Start failure date and type information.Trace InfoTo display the errors that occurred in executing the application.System InfoTo view the used memory information, remaining memory space and the Games & Applications software system details.options descriptionBrit01_EN_User guide.book Page 159 Friday, March 3, 2006 3:02 PM](https://usermanual.wiki/Motorola-Mobility/T6GF1.Exhibit-8b-Users-Manual/User-Guide-665289-Page-29.png)
![160Fun & media boxTo record a speech note:To select a speech note:1Press the [Menu] key. Select Fun & Media box.2Select Speech notes.3If no speech note has been recorded, select New. If one/several speech note(s) is/are stored in the phone, Press on the [Menu] key then Record new.4Select Stop to end the recording.5Enter the note name and press OK.1Press the [Menu] key. Select Fun & Media box.2Select Speech notes.3Scroll up or down to select the required speech note or the required folder.options descriptionPlayTo play the selected speech note(s).NewTo record a new speech note.Set as...To set the selected speech note as a ring tone for Line1 or Line2, as an alarm melody, as a message alert melody, as a new mail alert or as a Welcome or a Goodbye melody.Send by...To send the speech note via Bluetooth, by MMS or Mail.DeleteTo delete the current speech note.Delete allTo delete all the speech notes of the current folder.Brit01_EN_User guide.book Page 160 Friday, March 3, 2006 3:02 PM](https://usermanual.wiki/Motorola-Mobility/T6GF1.Exhibit-8b-Users-Manual/User-Guide-665289-Page-30.png)
![161Fun & media boxNote: You can only access the Memory Card storage space ifthe microSD™ Card is inserted in the phone.If the selection is a sub-folder, an Options list is available.Multiple selectionTo access the Multiple selection screen and select several speech notes. You can then press on the [Menu] key to Send the selected file(s) via Bluetooth, to Delete the selected file(s), to Move them to a Speech notes sub-folder or to the Memory Card, to Copy them to a Speech notes sub-folder or to the Memory Card, to Select all the speech notes or to Unselect all the ticked speech notes.Move toTo move the selected speech note to the Memory Card or to a Speech notes sub-folder.Copy toTo copy the selected speech note to the Memory Card or to a Speech notes sub-folder.New folderTo create a new folder in the Speech note sub-folder (only available if the selection is not a folder already).RenameTo change the name of the current speech note.DetailsTo view information about the name, file size and recording date, and file protection status.My preferencesTo sort the stored speech notes (by date, name, size).options descriptionBrit01_EN_User guide.book Page 161 Friday, March 3, 2006 3:02 PM](https://usermanual.wiki/Motorola-Mobility/T6GF1.Exhibit-8b-Users-Manual/User-Guide-665289-Page-31.png)
![162Fun & media boxTo play a speech note:To access speech notes stored on your Memory CardYou can store (see "To record a speech note:", page 160 ) or play speech notes that are stored on your Memory Card. The Options lists are the same as in the Speech notes sub-menu.FramesThe frame border feature allows you to illustrate your pictures and give them a more personal and fun touch. You can add frames, speech balloons, etc. to the pictures stored in the Pictures folder or while doing your picture preview.1Press the [Menu] key. Select Fun & Media box.2Select Speech notes.3Scroll up or down to the required speech note. Press OK or press on the [Menu] key then select Play.1Press the [Menu] key. Select Fun & Media box.2Select Speech notes, then Memory card (this item is only displayed when a microSD™ Card is inserted).3Scroll up or down to select the required speech notes or choose a folder (press OK to view its content) then select speech note.4Press OK or press the [Menu] key then select Play.Brit01_EN_User guide.book Page 162 Friday, March 3, 2006 3:02 PM](https://usermanual.wiki/Motorola-Mobility/T6GF1.Exhibit-8b-Users-Manual/User-Guide-665289-Page-32.png)
![163Fun & media boxThe frame folder contains all files that can be used as frame borders on the phone and may contain pre-embedded frames and sub-folders. The frame file type supported by your phone is .ifm. When adding a frame to a picture, the new image is stored as .jpg file.Note: It is not possible to add a frame to a video, to an animated gif and to a Flash file.Frames browserThe Frames browser allows you to display the stored frames as a list or as a mosaic of frames. When the frames are displayed as a list the screen is divided into two parts: the frames names list and the selected frame. When they are displayed as a mosaic (Thumbnails mode: see ’Options/My preferences’ below) the screen contains a mosaic of frames and the name of the selected frame.While browsing the Frames folder the following Options list is available (Press on the [Menu] key):options descriptionView To view the frame and its name.DeleteTo delete the current frame.Delete allTo delete all the frames of the current folder.Brit01_EN_User guide.book Page 163 Friday, March 3, 2006 3:02 PM](https://usermanual.wiki/Motorola-Mobility/T6GF1.Exhibit-8b-Users-Manual/User-Guide-665289-Page-33.png)
![164Fun & media boxNote: If the selection is a sub-folder, another Options list is available (press on the [Menu] key). Note: You cannot transfer a frame out of the Frames folder (e.g. via Bluetooth).Note: Error messages may be displayed when setting, viewing or storing an image: ’File too big’ (please see "Error messages", page 251); ’Decoding failure’: the frame cannot be viewed by the phone.Multiple selectionTo select several frames (by pressing OK). Press OK to unselect a ticked frame. Press on the [Menu] key to access Delete, Move to (a Frames sub-folder), Copy to (a Frames sub-folder), Select all (to select all the files of the current folder), Unselect all (to unselect all the ticked files).Move toTo move the current image to one of the Frames sub-folders.Copy toTo copy the current image in one of the Frames sub-folders.New folderTo create a sub-folder in the Frames folder.RenameTo rename the current frame.DetailsTo show the name, resolution, size, storage date and protection status of the current file.My preferencesTo sort the stored frames (by date, name, size) and select a view mode (List, Thumbnails 4 to display a 4-frame mosaic) to change the Frames browser mode.options descriptionBrit01_EN_User guide.book Page 164 Friday, March 3, 2006 3:02 PM](https://usermanual.wiki/Motorola-Mobility/T6GF1.Exhibit-8b-Users-Manual/User-Guide-665289-Page-34.png)
![165Fun & media boxViewing a frame:An Options menu is available (press the [Menu] key).1Press the [Menu] key. Select Fun & Media box.2Select Frames.3Scroll the frames list or mosaic. Select the required frame or select a folder to view its content (press OK).4Press OK or press on the [Menu] key then View to view the selected frame in full size. options descriptionFull viewTo view the frame in full screen.DeleteTo delete the current picture.Slide showTo automatically display all the frames of the selected folder one after another.DetailsTo show the name, resolution, size, storage date and protection status of the current file.Brit01_EN_User guide.book Page 165 Friday, March 3, 2006 3:02 PM](https://usermanual.wiki/Motorola-Mobility/T6GF1.Exhibit-8b-Users-Manual/User-Guide-665289-Page-35.png)
![166Fun & media boxAdding a frame to your pictureThis feature allows you to add a frame to your preview before capturing an image. According to the selected frame, you may need to use your phone horizontally or vertically in order to make the preview screen content fit your frame.Note: The new picture is stored in the Pictures folder as a .jpg file.Note: When capturing a picture, the preview size is automatically adapted to the selected frame size. Modifying the preview size removes the frame. 1From the idle screen, press the [Menu] key. Select Camera & Video and select Capture a Photo.2Press on the [Menu] key then select Frames. The frames list or mosaic is displayed.3Scroll down the frames list or mosaic. Select the required frame or select a folder then select the required frame. A preview with the selected frame over your preview is displayed so that you can define your picture settings and view the final result.4Press OK to confirm your selection.5Press OK to capture your picture.Brit01_EN_User guide.book Page 166 Friday, March 3, 2006 3:02 PM](https://usermanual.wiki/Motorola-Mobility/T6GF1.Exhibit-8b-Users-Manual/User-Guide-665289-Page-36.png)
![167Fun & media boxAdding a frame to a stored pictureThis feature allows your to add a frame to a stored image.Note: The new picture is stored in the Pictures folder as a .jpg file. In case of format conversion the quality of the new picture is not guaranteed.Note: The picture size is adapted to the frame size.Note: If the source picture is protected by a copyright, you may not be allowed to add a frame to this picture.1Press the [Menu] key. Select Fun & Media box.2Select Pictures.3Scroll down the Pictures list or mosaic. Select the required picture or select a folder then select the required picture.4Press on the [Menu] key then select Add frame. The frames list or mosaic is displayed.5Scroll down the frames list or mosaic. Select the required frame or select a folder then select the required frame. A preview screen with the selected frame over the current picture is displayed so that you can view the final result.6Press OK to confirm your selection. The new picture and its name are displayed.7Press on the [Menu] key then select Store to save the new picture.Brit01_EN_User guide.book Page 167 Friday, March 3, 2006 3:02 PM](https://usermanual.wiki/Motorola-Mobility/T6GF1.Exhibit-8b-Users-Manual/User-Guide-665289-Page-37.png)
![168Fun & media boxFrames receivingYou can receive frames via the i-mode browser (please see "Quick access to i-mode basic features", page 212). But it is not possible to send or to transfer a frame to a folder other than the Frames folder or to another device (a PC, etc.). The frames you received via the i-mode browser are automatically stored in the Frames folder. If you receive frames by Bluetooth, the files are stored in the Fun & Media Box Others folder, but you will not be able to read them as your phone does not support any other Frame downloading than via the i-mode.Note: When you download frames whose format is not accepted by the phone, these frames are not stored in the phoneOthersThis menu allows you to store/view/play vCard files (Phone book), vCalendar files (Diary cards), vbookmarks (Web bookmarks), text files and files with unknown/unsupported format.To display the others file contents:Note: The contents of this Options list may vary according to the file type.1Press The [Menu] key. Select Fun & Media box.2Select Others.3Use the [Up arrow] and [Down arrow] keys to select the required file. Brit01_EN_User guide.book Page 168 Friday, March 3, 2006 3:02 PM](https://usermanual.wiki/Motorola-Mobility/T6GF1.Exhibit-8b-Users-Manual/User-Guide-665289-Page-38.png)
![169Fun & media boxNote: You cannot send any copyright protected file (the ’File protected’ message is displayed on any attempt to send copyright protected files).The following Options list is available:options descriptionViewTo view the file contents.StoreTo store the selected file in the corresponding application folder.Send by...To send the text, the vBookmark(s) and the unknown file(s) via Bluetooth.To send the current vCard or vCalendar via Bluetooth, by SMS, by MMS or by Mail.DeleteTo delete the current file.Delete allTo delete all the files of the current folder.Multiple selectionTo select several files (by pressing OK). Press OK to unselect a ticked file. Press on the [Menu] key to access Send by... (Bluetooth), Delete, Move to (a folder of Others or the Memory Card), Copy to (a folder of Others or the Memory Card), Select all (to select all the files of the current folder), Unselect all (to unselect all the selected files)Move toTo move the selected file to the Memory Card or to an Others sub-folder. Copy toTo copy the selected file to the Memory Card an Others sub-folder.Brit01_EN_User guide.book Page 169 Friday, March 3, 2006 3:02 PM](https://usermanual.wiki/Motorola-Mobility/T6GF1.Exhibit-8b-Users-Manual/User-Guide-665289-Page-39.png)
![170Fun & media boxNote: You can only access the Memory Card storage space ifthe microSD™ Card is inserted in the phone.Data exchangeThe purpose of this feature is to allow the easy transfer of vCards, vCalendars, Bookmarks... vCards and vCalendars are Phone book cards and diary cards that are sent or received to/from another device (phone, pc,...). Storing a received vCard:Note: A received file may contain several vCards. Select the one(s) you want to keep, then select Store.New folderTo create a new folder in the Others folder (only available if the selected file is not a folder already).RenameTo rename the selected file.DetailsTo view the current file name, size, storage date and file protection status information.My preferencesTo sort the stored files (by date, name, size).1Press on the [Menu] key when you have received the file.2Select View. 3The received file is displayed. Select Store.4Select Phone names, SIM names, SIM fixed or My card. The vCard is then stored.options descriptionBrit01_EN_User guide.book Page 170 Friday, March 3, 2006 3:02 PM](https://usermanual.wiki/Motorola-Mobility/T6GF1.Exhibit-8b-Users-Manual/User-Guide-665289-Page-40.png)
![171Fun & media boxStoring a received vCalendar:Note: A received file may contain several vCalendars. Select the one(s) you want to keep, then select Store.Storing a received vBookmark:Note: A received file may contain several vBookmarks. Select the one(s) you want to keep, then select Store.Sending a vCard or a vCalendar by SMS:1Press on the [Menu] key when you have received the file.2Select View. 3The received file is displayed. Select Store. The vCalendar is then stored in the diary. 1Press on the [Menu] key when you have received the file.2Select View. 3The received file is displayed. Select Store. The vCalendar is then stored in the bookmarks.1Select the vCard (please see "Export", page 115) or the vCalendar (please see "Sending an event/a task", page 41) you wish to transfer.2Press on the [Menu] key.3Select Send by... then SMS. A warning may be displayed regarding the number of required SMS to send the card (where more than one SMS is required).4Select OK if you wish to continue.5Enter the number to which you want to send the vCard or the vCalendar, or select a name from the Names list.Brit01_EN_User guide.book Page 171 Friday, March 3, 2006 3:02 PM](https://usermanual.wiki/Motorola-Mobility/T6GF1.Exhibit-8b-Users-Manual/User-Guide-665289-Page-41.png)
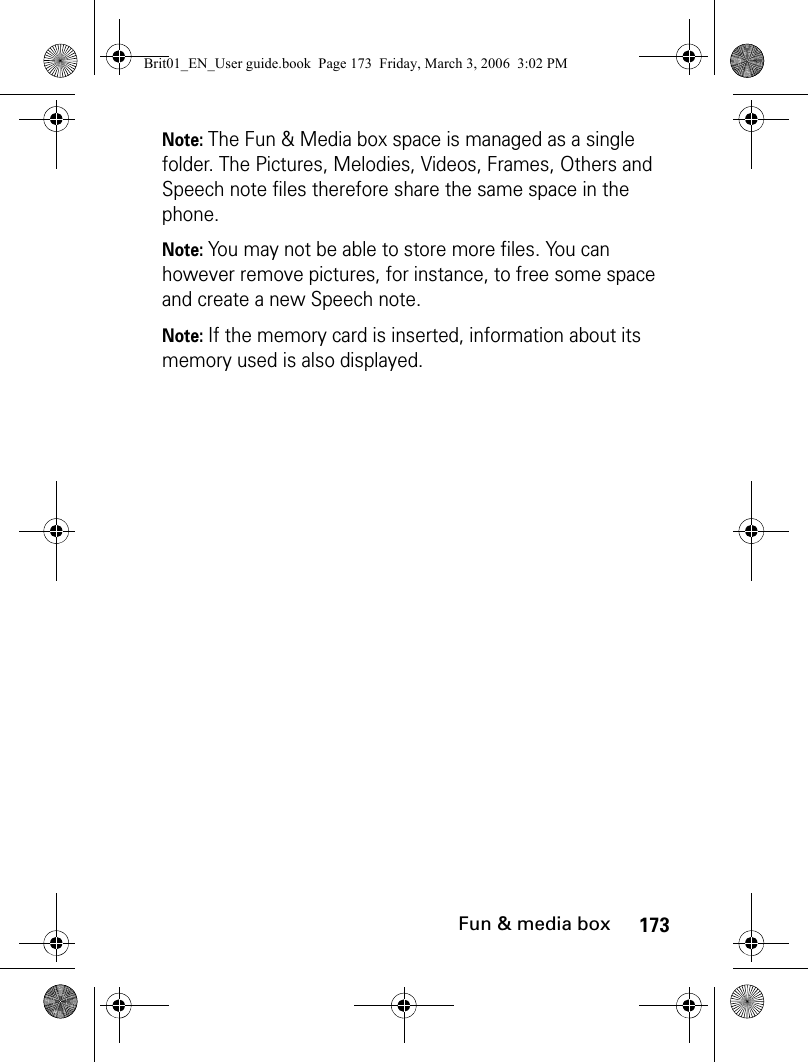
![172Fun & media boxTo access other files stored on your Memory CardYou can store or view other file types that are stored on your Memory Card. The Options lists are the same as in the Others sub-menu.Storage usedTo consult the percentage of memory used for the Pictures, Melodies, MP3, Videos, Frames, Speech note and Others folders:1Press the [Menu] key. Select Fun & Media box.2Select Others, then Memory card (this item is only displayed when a microSD™ Card is inserted).3Scroll up or down to select the required file or choose the required folder (press OK to view its content) then select a file.4Select press the [Menu] key then select View.1Press the [Menu] key. Select Fun & Media box.2Select Storage used. The total memory used is displayed (all file types). Select Details to view storage information per file type.3Use the [Up arrow] and [Down arrow] keys to scroll to the required information type (Pictures, Melodies, MP3, Videos, Frames, Speech note, Others).Brit01_EN_User guide.book Page 172 Friday, March 3, 2006 3:02 PM](https://usermanual.wiki/Motorola-Mobility/T6GF1.Exhibit-8b-Users-Manual/User-Guide-665289-Page-42.png)
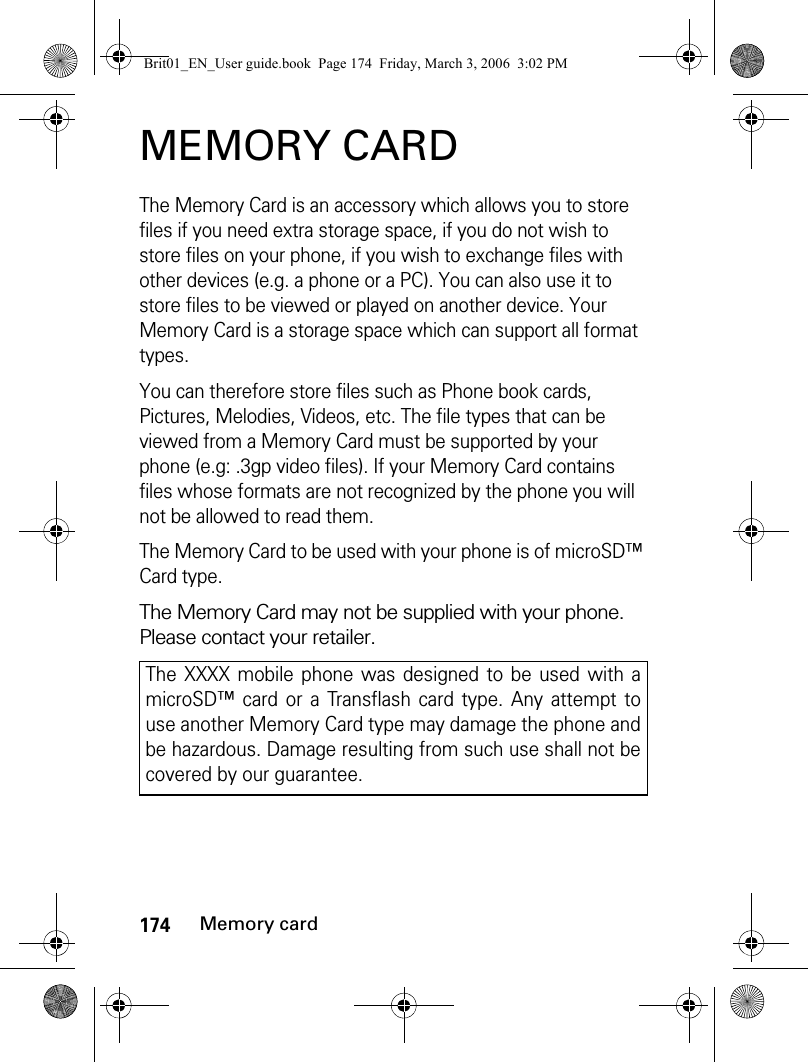
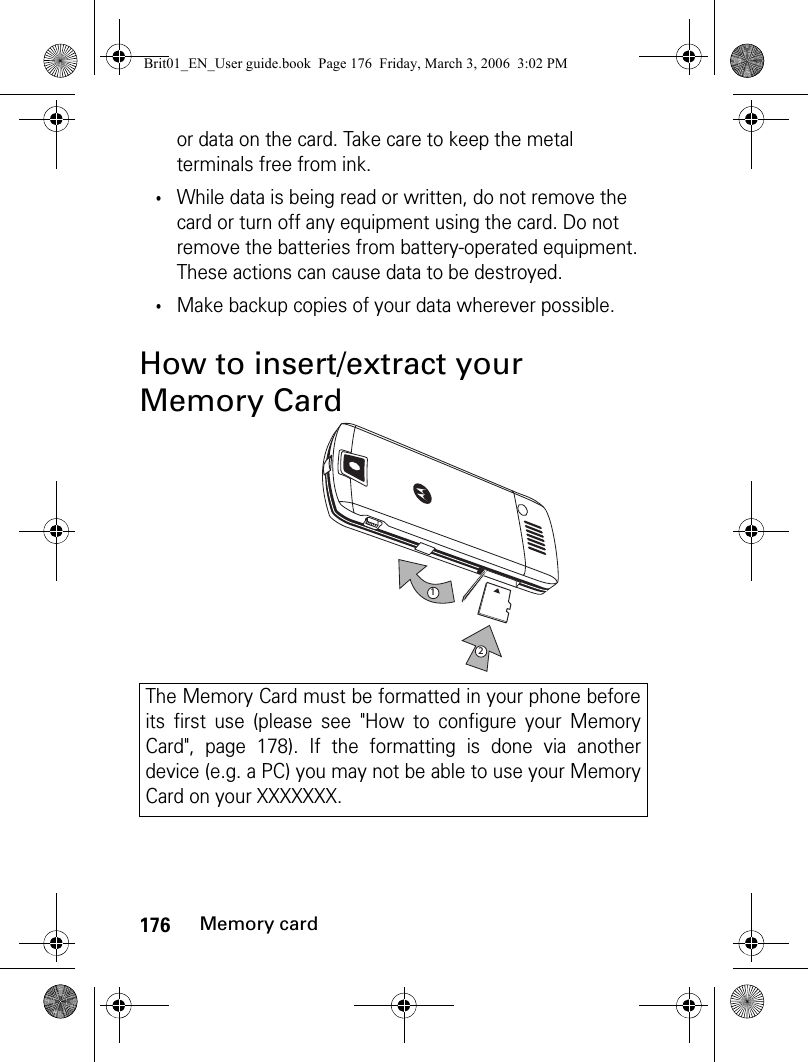
![179Memory cardNote: The first time you use your Memory Card, do not formatit via another device (e.g. your PC).Note: Formatting your Memory Card deletes all the files on it.Note: Removing your Memory Card during the formattingprocess can damage it.You can also format your Memory Card via the Settings menu. Formatting your Memory Card deletes all the files on it. Do not forget to back up or transfer your files on your internal phone memory or on another device before going over the formatting process.Note: Removing your Memory Card during the formattingprocess could damage it. 1Insert the Memory Card in the phone.2From the idle screen, press the [Menu] key. Select Settings.3Select Memory card.4Select Format card.5Select Yes then press OK to launch the Memory Card formatting. An information screen is displayed during the process.Brit01_EN_User guide.book Page 179 Friday, March 3, 2006 3:02 PM](https://usermanual.wiki/Motorola-Mobility/T6GF1.Exhibit-8b-Users-Manual/User-Guide-665289-Page-49.png)
![180Memory cardStorage usedTo check the remaining storage space on a Memory Card:1Insert the Memory Card.2From the idle screen, press the [Menu] key. Select Fun & Mediabox.3Select Storage used. The total phone memory used is displayed (all file types). 4Use the [Up] and [Down arrow] keys to scroll to the required information type (Memory card).Brit01_EN_User guide.book Page 180 Friday, March 3, 2006 3:02 PM](https://usermanual.wiki/Motorola-Mobility/T6GF1.Exhibit-8b-Users-Manual/User-Guide-665289-Page-50.png)
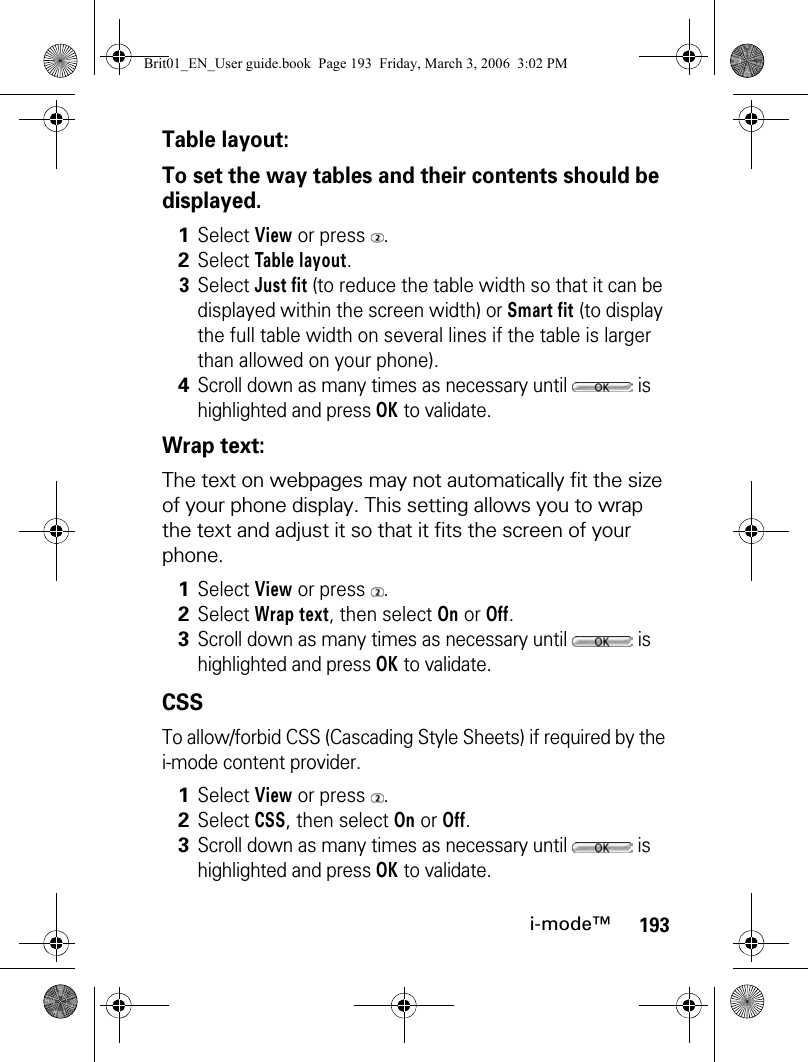
![183i-mode™ i-mode™NetFront is a trademark and registered trademark of Access Co. Ltd.in Japan and other countries.Copyright © 1996-2004 ACCESS CO. LTD.i-mode and the i-mode logo are registered trademarks of NTT DoComo inc. in Japan and other countries.Your phone allows you to access dedicated i-mode web sites and webpages thanks to the i-mode standards. You can for instance send and receive e-mails and MMS, connect to i-mode sites and download images, videos, frames and 64 tone melodies for your phone (see "Fun & media box", page 138).Access to the i-mode is network dependent. Please contact your service provider for full details about subscription conditions. To be able to use the i-mode features on your phone, you must have a GPRS subscription.User interfaceWhilst navigating the i-mode menu, please note that the [Up arrow], [Down arrow], [Left arrow] and [Right arrow] keys allow you to access further settings or fields to be filled in, as well as validation and cancellation options (OK, Cancel, Send, Save, etc.).Scroll up or down to highlight (blue highlighting) the correct field, select an option or enter text. Depending on the menu you are in, you may have to scroll down many times until you reach the correct option.Brit01_EN_User guide.book Page 183 Friday, March 3, 2006 3:02 PM](https://usermanual.wiki/Motorola-Mobility/T6GF1.Exhibit-8b-Users-Manual/User-Guide-665289-Page-53.png)
![184i-mode™While browsing i-mode features, you can access Options menus by pressing the [Menu] key. These Options menus are operator dependenti-mode menuThis section describes access to the i-mode lock, i-mode profiles and New mail alert. To access these features:1Press the [Menu] key. Select i-mode.[ Right] soft keyTo Ex it the cu rrent m enu.Navigation keyTo scroll Up, Down, Right orLeft according to the context.[Menu] key To access the Options menuwhen is shown on the display. Alphanumeric keysPress the 1 to 9 keys to accessthe requiered menu.Brit01_EN_User guide.book Page 184 Friday, March 3, 2006 3:02 PM](https://usermanual.wiki/Motorola-Mobility/T6GF1.Exhibit-8b-Users-Manual/User-Guide-665289-Page-54.png)
![185i-mode™i-mode lockThe purpose of this feature is to lock access to all i-mode features, thereby protecting your phone from any unauthorised operation.Note: The default i-mode lock code is 0000. To change the code, select Change lock code instead of Lock and follow the instructions displayed.Note: Mail and MMS reception is not affected by the i-mode lock. However it does not allow you to read the e-mails and MMS received.i-mode profilesTo use the i-mode and connect to i-mode webpage, you must first define and store the profile details, then select the required i-mode profile (a default profile is generally provided by your operator).Note: Select View to view the profile details, or select Delete to erase the current profile.1Press the [Menu] key. Select i-mode.2Select i-mode lock.3Select Lock.4Enter your 4 digit i-mode lock code and select OK.1Press the [Menu] key. Select i-mode.2Select i-mode profiles.3Select one of the available profiles and press on the [Menu] key.4Choose Select.Brit01_EN_User guide.book Page 185 Friday, March 3, 2006 3:02 PM](https://usermanual.wiki/Motorola-Mobility/T6GF1.Exhibit-8b-Users-Manual/User-Guide-665289-Page-55.png)
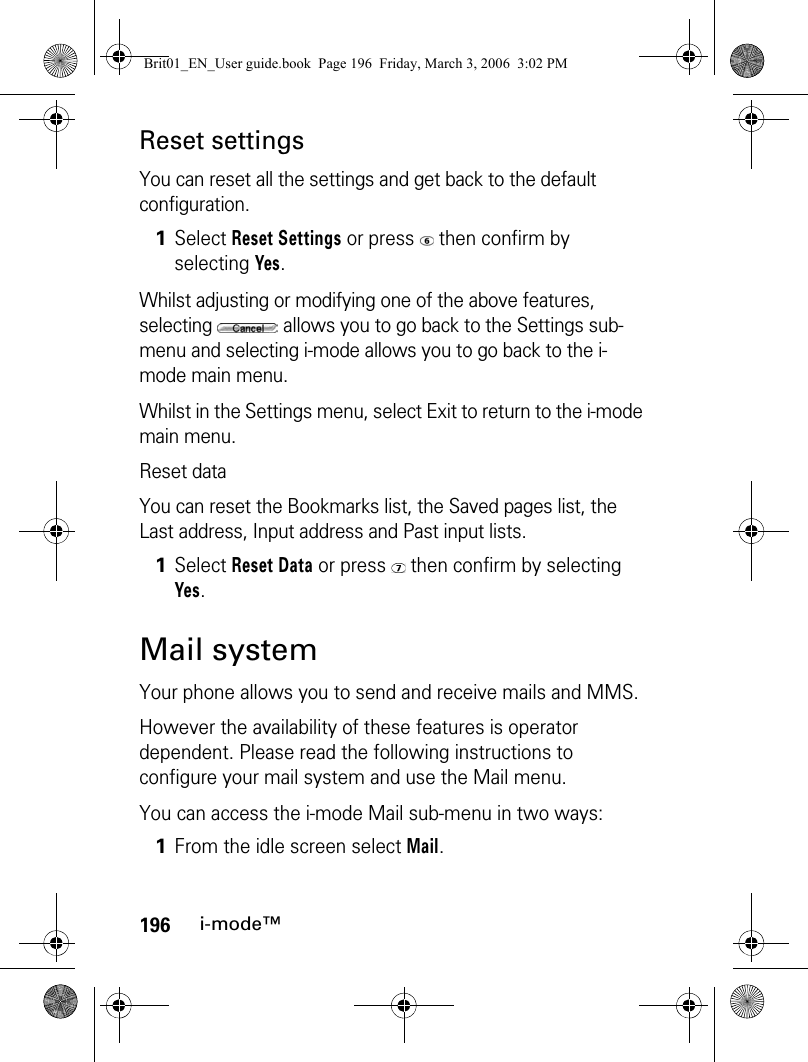
![186i-mode™New mail alertThis sub-menu allows you to define and activate the alert melody that is played on new incoming mail or MMS.To select a melody:Note: The Alert field must be set to On to allow access to the melodies list.Note: If Alert is set to Off, the New mail icon only is displayed on receipt of a new mail.i-mode applicationsThe i-mode applications menu allows access to the main i-mode features. To access it:i-MenuYou can access i-mode services via this sub-menu. The content of this sub-menu is operator dependent1Press the [Menu] key. Select i-mode.2Select New mail alert.3Select Alert and select On.4Select Melody and select one of the available files from the Melodies, MP3, Video or Speech notes folders.5Select Save to store the settings.1From the idle screen, select i-mode ([Right] softkey).Brit01_EN_User guide.book Page 186 Friday, March 3, 2006 3:02 PM](https://usermanual.wiki/Motorola-Mobility/T6GF1.Exhibit-8b-Users-Manual/User-Guide-665289-Page-56.png)
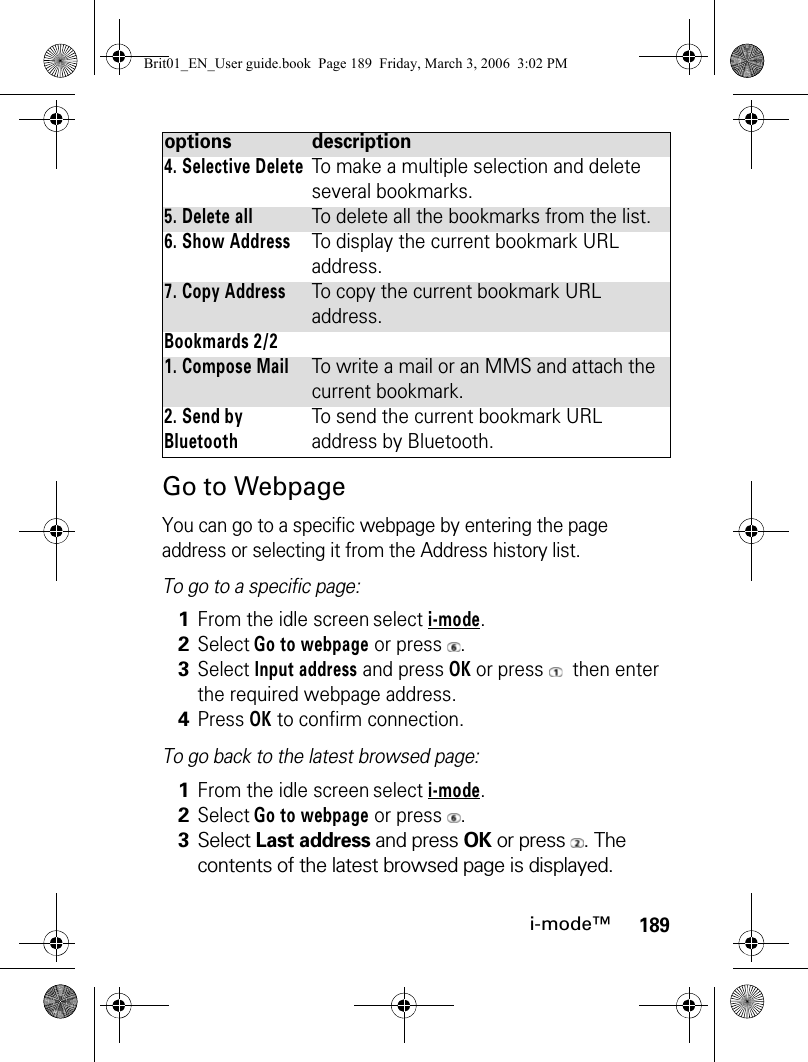
![187i-mode™Whilst browsing an i-mode site (see "Go to Webpage", page 189, "Saved Pages", page 190), press the [Menu] key to access the following options:options descriptionBrowser 1/31. Add BookmarkTo select the current page as a bookmark.2. Save PageTo store the current page.3. Save ImageTo store the displayed image in the Pictures folder.4. Show PropertiesTo display information menus.5. Bookmark ListTo display the registered bookmarks list.6. Go to WebpageTo enter a webpage address or select one from a list (see "Go to Webpage", page 189 ).7. Saved Page ListTo browse registered i-mode pages without connecting to the Web.Browser 2/31. Browser SettingsTo optimise the use of i-mode and the way information is displayed (please see "Setting your i-mode features", page 191).2. i-MenuTo display the i-mode site.3. HomeTo display the Home page.4. ReloadTo refresh the page displayed.5. Compose MailTo send the current page via Mail or MMS.6. Save in PhonebookTo save the address in the phone book.7. Play AnimationTo play back the Flash file animation.Browser 3/31. Sound EffectTo set sound effects for Flash files.Brit01_EN_User guide.book Page 187 Friday, March 3, 2006 3:02 PM](https://usermanual.wiki/Motorola-Mobility/T6GF1.Exhibit-8b-Users-Manual/User-Guide-665289-Page-57.png)
![188i-mode™Note: The items on this options list may not all be availabe according to the contents of the page displayed.MailThis sub-menu allows you to edit and send mail/MMS. Please see "Mail system", page 196.JavaThis sub-menu allows you to launch Java™ applications.Please see "Games & applications", page 156.SMSThis sub-menu allows you access SMS menu. Please see "Messages/Text editing", page 56.BookmarksYou can view the list of the saved bookmarks without having to connect to the i-mode.Scroll down to the required page name, then press the [Menu] key to access the following options:1From the idle screen select i-mode.2Select Bookmark or press . options descriptionBookmarks 1/21. Go ToTo go to the selected web site address.2. TitleTo modify the selected URL address.3. DeleteTo delete the current bookmark.Brit01_EN_User guide.book Page 188 Friday, March 3, 2006 3:02 PM](https://usermanual.wiki/Motorola-Mobility/T6GF1.Exhibit-8b-Users-Manual/User-Guide-665289-Page-58.png)
![190i-mode™To go back to a page you have previously visited:Saved PagesYou can view pages that you have previously saved without having to connect to the i-mode.Scroll down to the required page name, then press the [Menu] key to access the following options:Browser SettingsPlease see "Setting your i-mode features", page 191.1From the idle screen select i-mode.2Select Go to webpage or press .3Select Past input or press .4Scroll to the required page address and select OK to display it.1From the idle screen select i-mode.2Select Saved pages or press .options description1. ShowTo display the selected saved page.2. Edit TitleTo modify the selected page name.3. DeleteTo delete the selected saved page.4. Selective DeleteTo make a multiple selection and delete several saved pages.5. Delete allTo delete all the saved pages.6. Show AddressTo display the URL address of the saved page.7. Protect On/OffTo protect/unprotect the selected saved page from deletion.Brit01_EN_User guide.book Page 190 Friday, March 3, 2006 3:02 PM](https://usermanual.wiki/Motorola-Mobility/T6GF1.Exhibit-8b-Users-Manual/User-Guide-665289-Page-60.png)
![194i-mode™Screen Scroll:To display the number of lines to be scrolled on each [Down arrow] key press when reading a page.CertificatesCertificates are used for network security exchange (e.g. for secure payment transactions).Scroll down to the required certificates, then press the [Menu] key to access the following options:OthersTo set the Response timeout, allow or forbid the sending of terminal information and activate or deactivate the melody/video autoplay or the automatic display of an image.1Select View or press .2Select Screen Scroll, then select 1 line, 3 lines or 5 lines. 3Scroll down as many times as necessary until is highlighted and press OK to validate.1Select Certificates or press .2Select one of the displayed certificates to view its contents.3Press Exit to return to the certificates list.options description1. Certificate InfoTo display the certificate details.2. Valid/InvalidTo enable/disable the selected certificate.1Select Others or press .Brit01_EN_User guide.book Page 194 Friday, March 3, 2006 3:02 PM](https://usermanual.wiki/Motorola-Mobility/T6GF1.Exhibit-8b-Users-Manual/User-Guide-665289-Page-64.png)

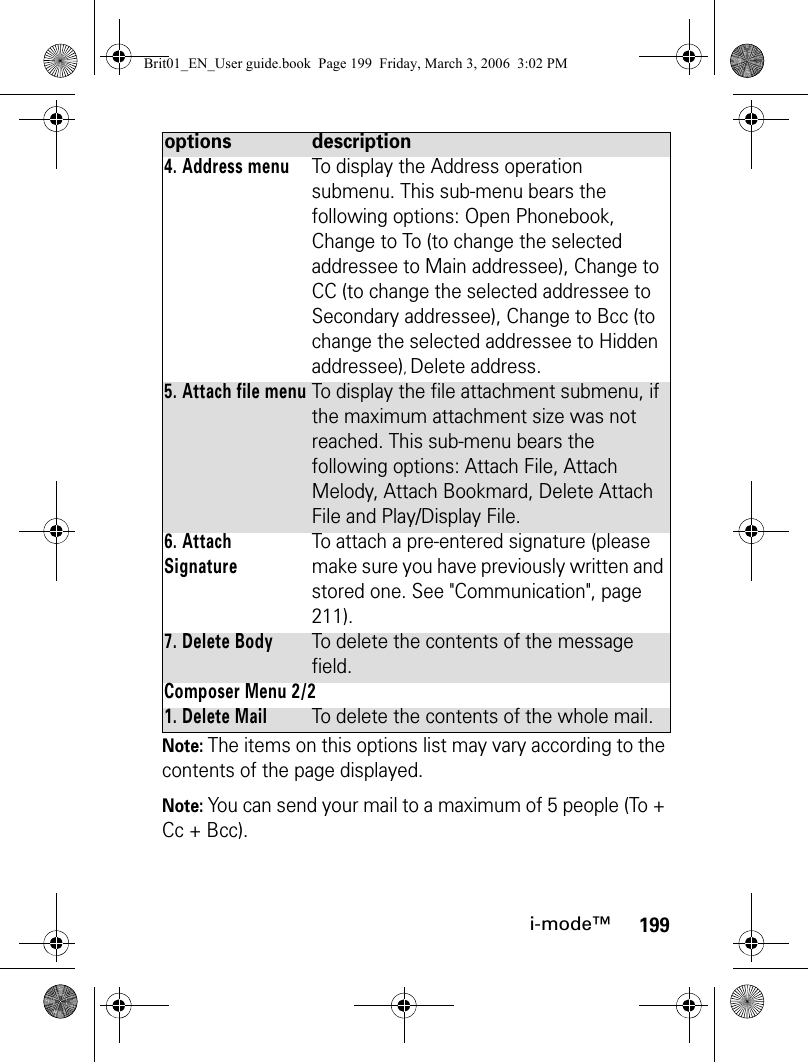
![197i-mode™or:Note: The contents of the Mail menu may vary according to your service provider. Note: The total attachment size cannot exceed 300KB. However this value may vary according to your operator.Once in the Mail sub-menu:Composing an iMail1From the idle screen select i-mode.2Select Mail or press .1Select Compose imail or press .2Highlight the first field (Address field). Press OK, select the required name or press New to enter ithe required address. You can also press the [Menu] key to enter a new address or access another folder. Press OK. 3Highlight the second field (Subject field). Press OK to enter in the edition screen and type the required text in or press on the [Menu] key to get to the usual edition options list. Press OK.Brit01_EN_User guide.book Page 197 Friday, March 3, 2006 3:02 PM](https://usermanual.wiki/Motorola-Mobility/T6GF1.Exhibit-8b-Users-Manual/User-Guide-665289-Page-67.png)
![198i-mode™Note: The content of this page and the information to be entered is operator dependent.Note: The maximum content of the mail is 300 KB provided there is no header, no signature and no attached file. Each additional text or file uses the available memory space and reduces the maximum content of the message text.Whilst writing your mail, you can access the Options menu at any time by pressing the [Menu] key.4Highlight the attachment field if you want to add a file (picture, melody, video, etc.) to your message. Press OK then select Attach File. Select Pictures, Melodies, Speech notes, Videos, Phonebook card or Diary and select one of the available files. You can also select Attach Melody or Attach Bookmark and select the required melody or bookmark.Press OK.5Highlight the text field. Press OK and type in the mail text (maximum 10KB). Press OK.6Scroll down as many times as necessary to highlight (to send your message) or (to store your message in the Draft folder) and select OK to validate your choice.options descriptionComposer Menu 1/21. SendTo send your mail.2. SaveTo store your mail in the Draft folder.3. Add addressTo add (an) addressee(s).Brit01_EN_User guide.book Page 198 Friday, March 3, 2006 3:02 PM](https://usermanual.wiki/Motorola-Mobility/T6GF1.Exhibit-8b-Users-Manual/User-Guide-665289-Page-68.png)
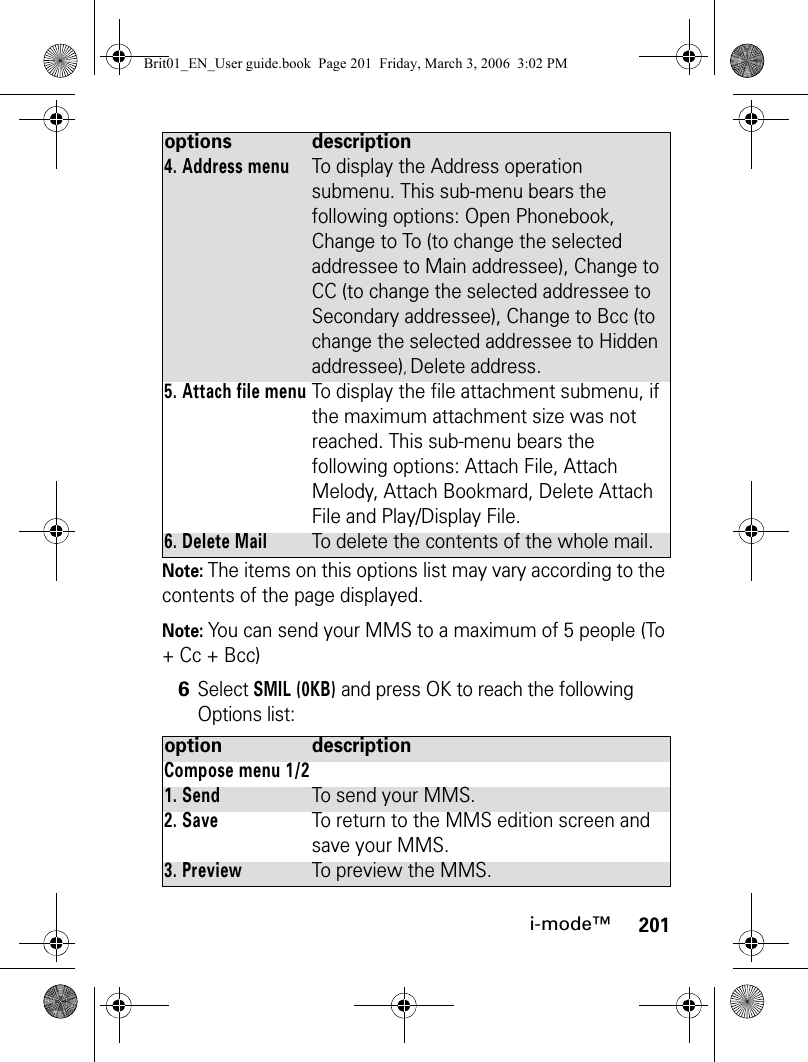
![200i-mode™Composing an iMMSThe Multimedia Messaging Service (MMS) is a service that allows you to send and receive messages to and from other MMS enabled mobile phones. An MMS contain several slides composed of text + image and/or melody/speech note/video.Whilst in the three first fields, you can access an Options menu by pressing the [Menu] key.1Select Compose iMMS or press .2Highlight the first field (Address field). Press OK, select the required name or press New to enter ithe required address. You can also press the [Menu] key to enter a new address or access another folder. Press OK.3Highlight the second field (Subject field). Press OK to enter in the edition screen and type the required text in or Press on the [Menu] key to get to the usual edition options list. Press OK.4Highlight the third field (Attachment field). Press OK then select Attach file.5If required, select the type of file to be attached, then select the required file.options description1. SendTo send your mail.2. SaveTo store your mail in the Draft folder.3. Add addressTo add (an) addressee(s).Brit01_EN_User guide.book Page 200 Friday, March 3, 2006 3:02 PM](https://usermanual.wiki/Motorola-Mobility/T6GF1.Exhibit-8b-Users-Manual/User-Guide-665289-Page-70.png)
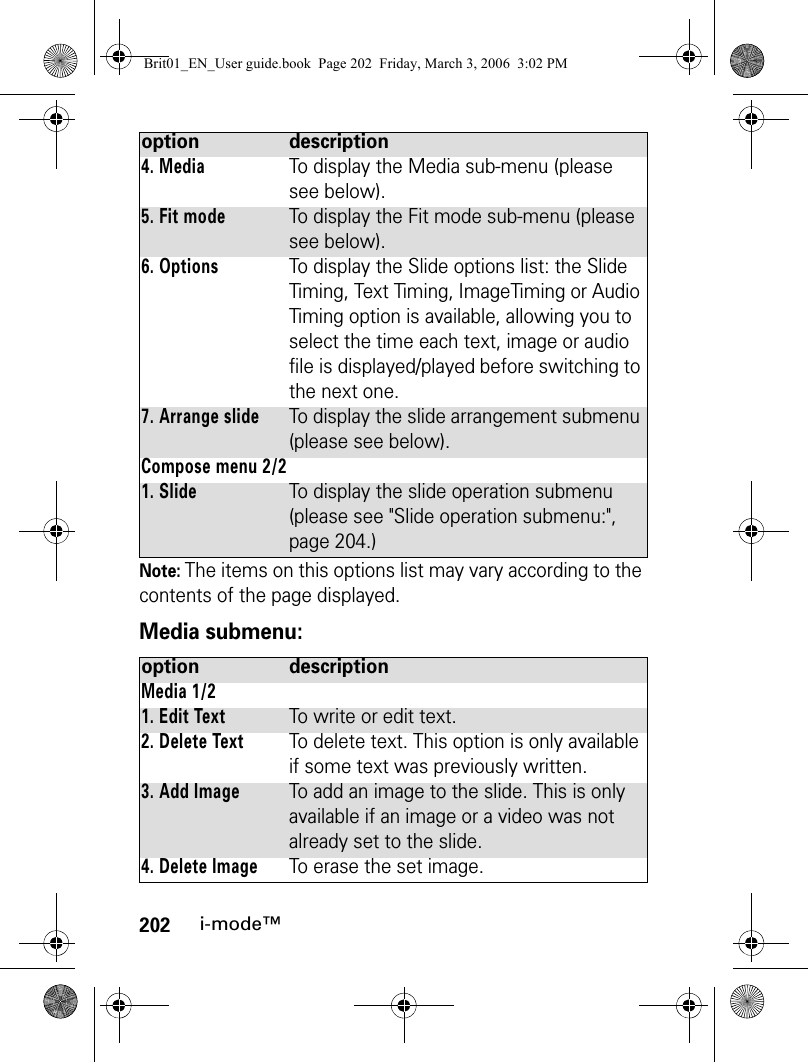
![204i-mode™Slide operation submenu:InboxThe Inbox bears all received iMails and iMMS. These received iMails and iMMS are displayed as a list. Folders can be created to store these messages.Whilst in the Inbox list, pressing the [Menu] key displays the following Options list:2. Background ColorTo select one of the available colours for the page(s) background (one colour only per message).3. Change Region SizeTo modify the borderline location between the text and the image area by using the [Up arrow] and [Down arrow] keys.4. Swap PositionTo swap the text and the image locations on the slide.option description1. AddTo add a new slide after the current one.2. InsertTo add a new slide before the current one.3. DeleteTo erase the current slide. The next one is then displayed.4. ClearTo erase the current slide contents. The slide is then blank.option description1. Create FolderTo create and name a folder.2. Rename FolderTo change the name of the selected folder.3. Delete FolderTo delete the selected folderoption descriptionBrit01_EN_User guide.book Page 204 Friday, March 3, 2006 3:02 PM](https://usermanual.wiki/Motorola-Mobility/T6GF1.Exhibit-8b-Users-Manual/User-Guide-665289-Page-74.png)
![205i-mode™Note: The protected and unread mails cannot be deleted.To view the received iMails and iMMS list:When viewing an iMail or a iMMS, pressing the [Menu] key allows you to:1Select Inbox or press .2Select one of the files and scroll to the required imail or iMMS and select OK to view it.option description1. ReplyTo display the following options list: Reply, Reply quoted (to reply and attach the text contents of the received mail), Reply all (to reply to the current message and send it to all To and Cc addresses), Reply quoted all (to reply to all the origin message To an Cc addresses and attach the current message contents).2. ForwardTo forward the current message.3. MoveTo move the selected message to one of the available folders.4. DeleteTo delete the current message.5. Protect On/OffTo protect/unprotect the current message (this feature allows you to protect the mail from unauthorised deletion).6. Save in PhonebookTo store the sender’s address in the phone book.7. Copy To copy the message body, subject or sender content.8. Play SMILTo play the SMIL contents (image, melody, video, etc.) of the current iMMS.Brit01_EN_User guide.book Page 205 Friday, March 3, 2006 3:02 PM](https://usermanual.wiki/Motorola-Mobility/T6GF1.Exhibit-8b-Users-Manual/User-Guide-665289-Page-75.png)
![206i-mode™Note: The items on this options list may vary according to the contents of the page displayed.SentThis sub-menu allows you to view and edit sent iMails and iMMS.You must have saved your messages before sending them to be able to find them in the Sent messages sub-menu.When on the sent messages list, pressing the [Menu] key allows you to reach:9. Browse SMILTo manually browse the SMIL contents of the current iMMS.10. Save melodyTo save the melody contained in the current imail and store it in the Melodies folder (Fun & Media box).11. Save attached fileTo save the attached file and store it in the required location (Others folder if the extension type is not recognised by the phone).option description1. EditTo edit the selected message.2. DeleteTo delete the selected message from the list.3. Selective deleteTo make a multiple selection and delete several messages.4. Delete allTo delete all the selected messages provided they are not protected.option descriptionBrit01_EN_User guide.book Page 206 Friday, March 3, 2006 3:02 PM](https://usermanual.wiki/Motorola-Mobility/T6GF1.Exhibit-8b-Users-Manual/User-Guide-665289-Page-76.png)
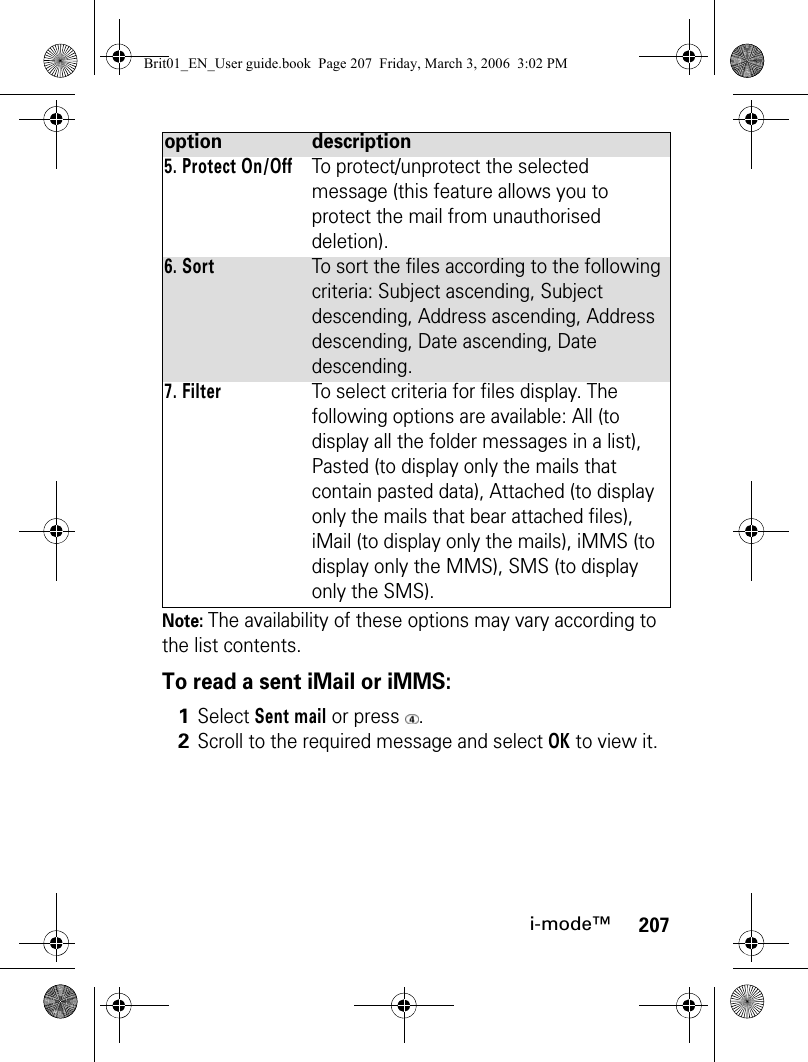
![208i-mode™Whilst reading an iMail or an iMMS, pressing the [Menu] key allows you to:Note: The availability of these options may vary according to the message contents type.DraftThe mails you have stored (see "Composing an iMail", page 197 and "Quick access to i-mode basic features", page 212) are filed in the Draft folder.To edit the stored mails: option description1. EditTo edit the selected sent message contents in order to re-send it.2. DeleteTo delete the current message.3. Protect On/OffTo protect/unprotect the current message (this feature allows you to protect the mail from unauthorised deletion).4. Save in PhonebookTo save the message sender’s address.5. CopyTo copy the message subject or body.6. Play SMILTo play the SMIL contents (image, melody, video, etc.) of the current iMMS7. Browse SMILTo manually browse the SMIL contents of the current iMMS.1Select Draft or press .2Scroll to the required mail and select OK to view and edit it.Brit01_EN_User guide.book Page 208 Friday, March 3, 2006 3:02 PM](https://usermanual.wiki/Motorola-Mobility/T6GF1.Exhibit-8b-Users-Manual/User-Guide-665289-Page-78.png)
![209i-mode™Whilst in the Draft folder, pressing the [Menu] key allows you to:Check New MailThis allows you to view new incoming mails and MMS.Note: Depending on your operator you may be allowed to select whether you want All, mails only or MMS only to be checked.option description1. SendTo send the selected mail.2. DeleteTo delete the selected mail.3. Delete allTo delete all the draft mails.4. Protect On/OffTo protect/unprotect the selected message (this feature allows you to protect the mail from unauthorised deletion).5. SortTo sort the files by Subject, Address or by Date.6. FilterTo select criteria for files display. The following options are available: All, Pasted, Attached, iMail, iMMS, SMS (please see the Options description above).1Select Check new mail or press .2The phone connects to the network and opens any new mail(s) or MMS if any. Select OK to view it/them.Brit01_EN_User guide.book Page 209 Friday, March 3, 2006 3:02 PM](https://usermanual.wiki/Motorola-Mobility/T6GF1.Exhibit-8b-Users-Manual/User-Guide-665289-Page-79.png)
![213i-mode™To connect to a new i-mode site:To access a stored address:To bookmark a page:To go to a bookmarked page:1Select i-mode from the idle screen.2Press and then .3Enter the site address. 4Press OK. The connection is then automatically activated.1Select i-mode from the idle screen.2Press .3Select or .4Select the required address.Press OK. The connection is then automatically activated.1Whilst visiting a webpage, press the [Menu] key to go to the options menu.2Press then scroll down until is highlighted and press OK to validate.The selected page URL address is now stored in your Bookmarks list.1Select i-mode from the idle screen.2Press .3Select the required bookmark and press OK. The connection is then automatically activated.Brit01_EN_User guide.book Page 213 Friday, March 3, 2006 3:02 PM](https://usermanual.wiki/Motorola-Mobility/T6GF1.Exhibit-8b-Users-Manual/User-Guide-665289-Page-83.png)
![214i-mode™To save a webpage:To display a saved page:To download a melody, a video, an image or a frame:You can download melodies, videos, images or frames via the i-mode. The downloaded items are automatically stored in the corresponding sub-folder of the Fun & Media box menu.Note: The maximum size for i-mode downloadable melodies, videos, images or frames is operator dependent.1Whilst visiting a webpage, press the [Menu] key to go to the options menu.2Press . The selected page is now stored in your Page memo list.1Select i-mode from the idle screen.2Press .3Select the required page name and press OK.1Once on a page bearing a melody, a video, an image, or a frame, select the required item and press OK to download it.Brit01_EN_User guide.book Page 214 Friday, March 3, 2006 3:02 PM](https://usermanual.wiki/Motorola-Mobility/T6GF1.Exhibit-8b-Users-Manual/User-Guide-665289-Page-84.png)
![215SettingsSettingsThis menu allows you to adjust the features on your phone to your own convenience and to ensure the security of the phone.TonesAlert modeYou can set the ring, alert and alarm tone types via the Mode menu.Note: If you select the 'Vibrate' or 'Vibrate then ring' option, the vibrating option replaces all the alert and alarm tones.To modify the alert mode:or:Note: If the Alert mode is set to Silent, the icon is displayed on the idle screen.Note: If the Alert mode is set to Vibrate, Vibrate & ring or Vibrate then ring, the icon is displayed on the idle screen.1Press the [Menu] key. Select Settings.2Select Tones.3Select Mode.4Select one of the available settings (Ring, Silent, Vibrate, Vibrate & ring or Vibrate then ring) and press OK to validate.Brit01_EN_User guide.book Page 215 Friday, March 3, 2006 3:02 PM](https://usermanual.wiki/Motorola-Mobility/T6GF1.Exhibit-8b-Users-Manual/User-Guide-665289-Page-85.png)
![216SettingsNote: When the phone is connected to either the Desk Top Charger, HF kit, CLA or AC adaptor, the vibrator mode selection is temporarily inhibited and the phone rings instead of vibrating.Ringtone selectionYou can select a melody, an MP3, a speech note or a video file (provided it bears a sound track) from the available ring tones stored in the phone. Note: When scrolling up or down in the Melodies list, wait for a few seconds for the selected melody to be played (except when on Silent mode).Note: The ‘No sound’ item may be selected to deactivate the Welcome and Goodbye melodies.1From the idle screen, press the [Left arrow] key. 2Select one of the available settings (Ring, Silent, Vibrate, Vibrate & ring or Vibrate then ring) and press OK to validate.1Press the [Menu] key. Select Settings.2Select Tones.3Select Ringtones.4Select Incoming call, Incoming call L2, Alarm, Welcome melody or Goodbye melody then select Melodies, Speech notes, MP3 or Videos.5Scroll up or down to listen to the different ringtones. Select one by pressing OK.6Select Save to store your settings.Brit01_EN_User guide.book Page 216 Friday, March 3, 2006 3:02 PM](https://usermanual.wiki/Motorola-Mobility/T6GF1.Exhibit-8b-Users-Manual/User-Guide-665289-Page-86.png)
![217SettingsNote: You can set a ringtone for each of your phone book cards (please see "Setting a melody, a MP3 file, a video or a speech note as a ringtone", page 101). This ringtone is played on reception of an incoming call.Volume adjustmentsThe ring tone, key tones, conversation, alarm tones (alarm clock, diary alarm and low battery alarm), multimedia and Main screen audio levels can all be individually set via the Settings menu:During a call and while playing an MP3 or a video you can adjust the conversation volume level by using the [Up] side key and the [Down] side key.Note: If the ringtone volume level is set to 0, the icon is displayed on the idle screen.Note: Setting the key tones to 0 deactivates the key tones.1Press the [Menu] key. Select Settings.2Select Tones.3Select Volume.4Select Ring, Ramping, Conversation, Alarm, Multimedia, Keys or Main screen. 5Scroll up or down to adjust the settings. You can also use the numeric keys to set the required audio level: pressing sets the volume to 2, pressing or sets the volume to 6 or 7, pressing sets the volume to the minimum value (1 for speech and 0 for all others).6Press OK to validate the setting.7Select Save to store your setting.Brit01_EN_User guide.book Page 217 Friday, March 3, 2006 3:02 PM](https://usermanual.wiki/Motorola-Mobility/T6GF1.Exhibit-8b-Users-Manual/User-Guide-665289-Page-87.png)
![218SettingsRampingWhen activated, this feature gradually increases the incoming ringtone to the maximum volume level if the call is not answered after the first ring.DisplayIdle screenYou can set an image or a video as an idle screen. To select a background image or a background video for your idle screen:1Press the [Menu] key. Select Settings.2Select Tones.3Select Volume.4Select Ramping.5Select On.6Select Save to store your setting.1Press the [Menu] key. Select Settings.2Select Display.3Select Idle screen.4Select My picture (see "Pictures", page 143) or Videos (see "Video", page 138) to select one of the stored images or videos or select one of the five available background images.5Select Save to store your setting.Brit01_EN_User guide.book Page 218 Friday, March 3, 2006 3:02 PM](https://usermanual.wiki/Motorola-Mobility/T6GF1.Exhibit-8b-Users-Manual/User-Guide-665289-Page-88.png)
![219SettingsNote: You can also set your idle screen image from the Pictures menu, via the Options menu. You can set your idle screen video from the Videos list, via the Options menu.Welcome screenOn switching on your phone, a Welcome screen is displayed prior to the idle screen. This screen is a default one but it can be customised by selecting any of the Pictures folder images (see "Pictures", page 143). Note: You can also set the Welcome screen from the Pictures and the Video menu (see "Setting a still or animated image as an Idle screen as a Welcome screen or as a Goodbye screen from the Pictures folder", page 147).1Press the [Menu] key. Select Settings.2Select Display.3Select Welcome screen.4Select Default to set the default image as a Welcome screen or select My picture (see "Pictures", page 143) to select one of the stored pictures. 5Select Save to store your setting.Brit01_EN_User guide.book Page 219 Friday, March 3, 2006 3:02 PM](https://usermanual.wiki/Motorola-Mobility/T6GF1.Exhibit-8b-Users-Manual/User-Guide-665289-Page-89.png)
![220SettingsGoodbye screenOn switching off your phone, a Goodbye screen is displayed. This screen is a default one but it can be customised by selecting any of the Pictures folder images (see "Pictures", page 143). Note: You can also set the Goodbye screen from the Pictures menu (see "Setting a still or animated image as an Idle screen as a Welcome screen or as a Goodbye screen from the Pictures folder", page 147).BacklightTo adjust the backlight for your screen:1Press the [Menu] key. Select Settings.2Select Display.3Select Goodbye screen.4Select Default to set the default image as a Goodbye screen or select My picture (see "Pictures", page 143) to select one of the stored pictures. 5Select Save to store your setting.1Press the [Menu] key. Select Settings.2Select Display.3Select Backlight.4Adjust the backlight with the [Up arrow] or [Down arrow] keys (select a value from 1 to 3) and select OK.5Select Save to store the setting.Brit01_EN_User guide.book Page 220 Friday, March 3, 2006 3:02 PM](https://usermanual.wiki/Motorola-Mobility/T6GF1.Exhibit-8b-Users-Manual/User-Guide-665289-Page-90.png)
![221SettingsStatus lightTo adjust your phone status light:KeypadKeypad lockWhen the keypad lock is activated, this prevents the accidental operation of the keys. The key tones are muted. The keypad lock is suspended when an incoming call is received and resumed once the call is over. Emergency calls (112 or other official emergency number) can however be made. If a key is pressed, a reminder message is displayed.To activate and deactivate the automatic keypad lock:1Press the [Menu] key. Select Settings.2Select Display.3Select Status light.4Select On or Off.5Select Save to store the setting.1Press the [Menu] key. Select Settings.2Select Keypad. 3Select Keypad lock and select Yes.4When the phone is on idle state, the keypad is automatically locked 5 seconds after the screen saver is activated if the phone remains unused. To unlock the keypad, press Unlock then the key.Brit01_EN_User guide.book Page 221 Friday, March 3, 2006 3:02 PM](https://usermanual.wiki/Motorola-Mobility/T6GF1.Exhibit-8b-Users-Manual/User-Guide-665289-Page-91.png)
![222SettingsTo activate and deactivate the manual keypad lock:Any key answerThis feature allows you to answer a call by pressing any key (except from the Off, No ring and Side keys).Speed dialPhone book numbers can be assigned to keys to . The key cannot be assigned a Phone book number as it is already assigned by default to the Voice Mail number (see "Calling the voice mail centre to check your messages", page 228). Numbers stored in both the SIM card and the phone (except fixed dialling numbers) can be selected.To assign Phone book numbers to the speed dialling keys:1From the idle screen, press and hold the key to activate the keypad lock.2Press and hold the key to de-activate the keypad lock.1Press the [Menu] key. Select Settings.2Select Keypad.3Select Any key answer and select On.1Press the [Menu] key. Select Settings.2Select Keypad.3Select Speed dial.Brit01_EN_User guide.book Page 222 Friday, March 3, 2006 3:02 PM](https://usermanual.wiki/Motorola-Mobility/T6GF1.Exhibit-8b-Users-Manual/User-Guide-665289-Page-92.png)
![223SettingsNote: If a number which has been assigned to a speed dial key is deleted from the Phone book, the corresponding number is automatically deleted from the speed dial key.To call a number using the Speed dial feature:Phone settingsLanguage selectionYou can change the language on your phone:4The Key number and the attached name (if any) are displayed. Select Names (or press on the [Menu] key then select Names if a number has already been attached to the key) to select a name from the names list.4’If the card bears several numbers, choose one.5Select OK to validate.1From the idle screen, press and hold the required to key to launch a call.1Press the [Menu] key. Select Settings.2Select Phone settings. 3Select Language.4Select a language from the list displayed and press OK to validate. Brit01_EN_User guide.book Page 223 Friday, March 3, 2006 3:02 PM](https://usermanual.wiki/Motorola-Mobility/T6GF1.Exhibit-8b-Users-Manual/User-Guide-665289-Page-93.png)
![224SettingsAuto featuresAuto-answer:This feature is only operational when the phone is connected to a headset. The phone answers the call automatically after about 5 seconds without the need to press a key.Note: This feature is inhibited if the silent mode is activated or if the ringtone is set to 0.Auto-retry:This feature allows the phone to redial a number automatically if call has failed due to an engaged line or an unavailable signal from the network. The number is re-dialled 10 times maximum until connection is established.When activated, Retrying and a countdown timer are displayed prior to each new attempt. An auto-retry warning tone beeps each time a new call attempt is made.1Press the [Menu] key. Select Settings.2Select Phone settings.3Select Auto features.4Select Auto-answer and select On.5Select Save to store your setting.1Press the [Menu] key. Select Settings.2Select Phone settings.3Select Auto features.4Select Auto-retry and select On.5Select Save to store your setting.Brit01_EN_User guide.book Page 224 Friday, March 3, 2006 3:02 PM](https://usermanual.wiki/Motorola-Mobility/T6GF1.Exhibit-8b-Users-Manual/User-Guide-665289-Page-94.png)
![225SettingsSelecting Exit or pressing any key during the retry process cancels the operation.Auto-switch-on/off:This feature allows the phone to switch on or off automatically at a pre-determined time.If the phone is already on at automatic switch-on time, it remains on.When the phone is about to automatically switch off, a warning message and a countdown timer are displayed. Selecting Exit cancels the switch off process.If the phone is already off at switch-off time, it remains off.Note: If a call is in progress at switch-off time, the switch-off process is postponed until the call has ended.Time & dateThis feature allows you to set the phone time according to the world time zone map, based on Greenwich Mean Time (Origin clock). A Secondary clock is also available. This feature is useful for the Diary. To import or export calendar cards, events 1Press the [Menu] key. Select Settings.2Select Phone settings.3Select Auto features.4Select Auto-switch-on or Auto-switch-off and select On to activate the feature.5Enter the time you want your phone to switch on and/or to switch off and press OK. 6Select Save to store your setting.Brit01_EN_User guide.book Page 225 Friday, March 3, 2006 3:02 PM](https://usermanual.wiki/Motorola-Mobility/T6GF1.Exhibit-8b-Users-Manual/User-Guide-665289-Page-95.png)
![226Settingsand tasks, schedules must be set according to Time zones. Both clocks are displayed on the screen. The date and time and the city name are displayed for both clocks.Clock setting:To set the clocks:Press on the [Menu] key to get to the following features:1Press the [Menu] key. Select Settings.2Select Phone settings.3Select Time & date.4Select the Origin clock or press on the [Menu] key, then choose Edit origin. Scroll through the panels and fill in the required information. 5Select Save to store the data.6Select the Secondary clock or press on the [Menu] key, then choose Edit secondary. Scroll through the panels and enter the required information.7Select Save to store the data.options actionSwap clocksTo swap the Origin clock and the Secondary clock. This feature is useful when travelling: the secondary clock becomes the origin/phone clock and the origin clock becomes the secondary one.Edit originTo edit the origin clock panel in order to modify its contents.Edit secondaryTo edit the secondary clock panel in order to modify its contents.Time formatTo select a time format (12Hrs or 24Hrs).Brit01_EN_User guide.book Page 226 Friday, March 3, 2006 3:02 PM](https://usermanual.wiki/Motorola-Mobility/T6GF1.Exhibit-8b-Users-Manual/User-Guide-665289-Page-96.png)
![227SettingsDefault settingsYou can reset your phone and return to your phone default settings via the Settings menu. This has no effect on the Phone book entries, the phone lock code or the i-mode lock code.Voice mailYour network provider may offer a Voice Mail service which operates like an answering machine. You may be able to access it directly by pressing and holding the .Contact your service provider for further details. Storing a voice mail centre numberIf your SIM card does not contain the Voice Mail centre number, you must store it manually:Note: The Voice Mail number is automatically assigned to speed dial location number 1 (see "Speed dial" on page 222).1Press the [Menu] key. Select Settings.2Select Phone settings3Select Default settings.4Select Yes (The «Set default?» message is displayed)1Press the [Menu] key. Select Settings.2Select Voice Mail.3Select Number. Enter the number (either by keying it or pressing on the [Menu] key then selecting Names list).4Press OK to validate.Brit01_EN_User guide.book Page 227 Friday, March 3, 2006 3:02 PM](https://usermanual.wiki/Motorola-Mobility/T6GF1.Exhibit-8b-Users-Manual/User-Guide-665289-Page-97.png)
![228SettingsNote: If you subscribe to the 'Line 2' service, an additional Voice Mail centre number must be stored separately.Activating/deactivating the voice mail alert toneIf you wish to be advised by a tone when receiving a new Voice Mail message:Note: The availability of this feature is operator dependent.Calling the voice mail centre to check your messagesYou can either:•Dial the Voice Mail centre number directly after receiving a message:•or:1Press the [Menu] key. Select Settings.2Select Voice Mail.3Select Alert. Select On.1From the idle screenidle screen, press and hold .1Press the [Menu] key. Select Settings.2Select Voice Mail.3Select Call.Brit01_EN_User guide.book Page 228 Friday, March 3, 2006 3:02 PM](https://usermanual.wiki/Motorola-Mobility/T6GF1.Exhibit-8b-Users-Manual/User-Guide-665289-Page-98.png)
![229SettingsGSM servicesCall divertingThis Network dependent service allows you to divert incoming calls (voice, fax or data calls) to another numberTo divert a call:1Press the [Menu] key. Select Settings.2Select GSM Services.3Select Call diverting. The following sub-menu is displayed (the contents of this menu may vary according to your service provider).divert options actionAlwaysTo divert all incoming voice calls.When not reachableTo divert all voice calls when the phone cannot be reached (out of service).On no replyTo divert all voice calls when the call is not answered.When busyTo divert all voice calls when the line is engaged.All conditionsTo divert all voice calls when Not Reachable, No Reply and When Busy.Cancel allTo cancel all diverting options.All FAX callsTo divert incoming fax calls unconditionally.All DATA callsTo divert incoming data calls unconditionally.Brit01_EN_User guide.book Page 229 Friday, March 3, 2006 3:02 PM](https://usermanual.wiki/Motorola-Mobility/T6GF1.Exhibit-8b-Users-Manual/User-Guide-665289-Page-99.png)
![230SettingsNote: If the 'On no reply' option is selected, please enter the time limit (5, 15 or 30 seconds; this also depends on your network) after which the feature will operate.Note: Call diverting must to be set for both Line1 and Line2. Only the selected line is affected by the call divert.To check the call divert status or deactivate it:To cancel all call diverts:Note: This action cancels all call diverts (voice, faxes and data calls) for the current line. Note: To cancel call diverts for the other line, you must select this line first (menu Calls & Times - Line selection).4Select one of these options and select OK.5Select Activate.6Select Voice Mail (if you want the calls to be diverted to your voice mailbox), Names (select one of the Phone book entries) or Number (Enter the number to which the calls are to be diverted) and select OK. A validation message containing the selected number is displayed.1Press the [Menu] key. Select Settings.2Select GSM Services. Select Call diverting.3Select the call diverting type to be checked or cancelled. 4Select Status or Cancel.1Press the [Menu] key. Select Settings.2Select GSM Services. 3Select Call diverting. 4Select Cancel all. Brit01_EN_User guide.book Page 230 Friday, March 3, 2006 3:02 PM](https://usermanual.wiki/Motorola-Mobility/T6GF1.Exhibit-8b-Users-Manual/User-Guide-665289-Page-100.png)
![231SettingsCall waitingThis network dependent feature allows you to receive a new call while a call is already in progress. To activate the call waiting feature:Note: You can also cancel or check the service status.To put a call on hold and switch from Call 1 to Call 2:1Press the [Menu] key. Select Settings.2Select GSM Services. 3Select Call waiting. 4Select Activate. Activated or Check your request is then displayed.1Whilst a call is in progress, a beep sounds to indicate a second incoming call.Select Replace to take Call 2 and end Call 1, select Reject to refuse Call 2 or press the Call/[Send] key to put Call 1 on hold and take Call 2.Press the [On/Off] key to end Call 1 and press the [Call/Send] key to take Call 2. 2Press the [Menu] key then select Swap to get back to Call 1 and put Call 2 on hold.Brit01_EN_User guide.book Page 231 Friday, March 3, 2006 3:02 PM](https://usermanual.wiki/Motorola-Mobility/T6GF1.Exhibit-8b-Users-Manual/User-Guide-665289-Page-101.png)
![232SettingsTo set up a conference-callYou can set up a conference-call with up to 5 participants. This option is network/subscription dependent.During the conference-call, the following Options menu is available:Note: You can set up and receive a new call during the conference-call. In these cases the conference-call is put on hold.1Whilst two calls are in progress and a new call is received, press on the [Menu] key then select Join then press the [Call/Send] key to set up the conference-call. Repeat the action each time a new call is received.In compliance with European regulations, you are obliged to inform your correspondents before recording a phone conversation.options descriptionRoute to phoneTo get the call back to the phone, if a Bluetooth headset is connected.Speaker On/OffTo activate/deactivate the hands free mode.Auto-DTMFTo type a new phone number and add this new correspondent to the conference-call. If the Auto-DTMF option is deactivated, you cannot type in a new phone number.Brit01_EN_User guide.book Page 232 Friday, March 3, 2006 3:02 PM](https://usermanual.wiki/Motorola-Mobility/T6GF1.Exhibit-8b-Users-Manual/User-Guide-665289-Page-102.png)
![233SettingsTo end a conference-call:Caller line identity - showing/hiding your phone number (network dependent)Most networks have Caller Line Identity feature (CLI). This feature allows the phone number or the identity of the caller to be displayed on incoming calls.You can disable the sending of your own number on a call by call basis by adding #31# before the number you are dialling. You can also ask your service operator to hide your phone phone number by default. Once hidden by your operator, you can show your number, on a call by call basis, by entering *31# before the number you are calling.Private withTo have a private conversation with one of the participants. During a private conversation, the conference-call is put on hold.HoldTo put the conference-call on hold.RetrieveTo retrieve the conference-call if it is put on hold.Mute/UnmuteTo mute/unmute the microphone.End oneTo end one call.End allTo end the conference-call.RecordTo record the conference-call up to 11 min.1Press the [On/Off] key or press on the [Menu] key then select End all to end the conference-call.options descriptionBrit01_EN_User guide.book Page 233 Friday, March 3, 2006 3:02 PM](https://usermanual.wiki/Motorola-Mobility/T6GF1.Exhibit-8b-Users-Manual/User-Guide-665289-Page-103.png)
![234SettingsStandard network setting:To reset the standard network setting and send your phone ID:Hiding or showing your number:Viewing your current ID status:Please contact your service provider for more information.1Press the [Menu] key. Select Settings.2Select GSM Services. 3Select Sending my ID.4Select My settings.5Select Preset. The phone resets and reverts to its original network setting.1Press the [Menu] key. Select Settings.2Select GSM Services. 3Select Sending my ID.4Select My settings.5Select Hide my ID to prevent the phone from sending your ID when making a call, select Show my ID to allow the phone to send your ID or select Preset to get back to the default factory/operator setting.1Press the [Menu] key. Select Settings.2Select GSM Services. 3Select Sending my ID. 4Select Status. The request is launched and an information message displays the Sending my ID status. Brit01_EN_User guide.book Page 234 Friday, March 3, 2006 3:02 PM](https://usermanual.wiki/Motorola-Mobility/T6GF1.Exhibit-8b-Users-Manual/User-Guide-665289-Page-104.png)
![235SettingsReceiving caller IDMost networks have the Caller Line Identity feature (CLI). This feature allows the phone number or the identity of the caller to be displayed on incoming calls.You can check the availability of this feature on your network or subscription.Network automatic searchWhen the phone is on, it automatically searches the last network to which it was registered (usually the home network). If it is not available, the phone automatically searches and selects one of the networks registered in the preferred network list (located in the SIM card).Editing the preferred list:Your phone contains a list of networks which can be selected (e.g.: to suit your travel arrangements). You can also transfer items from this list to the preferred networks list.1Press the [Menu] key. Select Settings.2Select GSM Services. 3Select Receiving caller ID.The network then either returns Presentation available or Presentation unavailable information.Brit01_EN_User guide.book Page 235 Friday, March 3, 2006 3:02 PM](https://usermanual.wiki/Motorola-Mobility/T6GF1.Exhibit-8b-Users-Manual/User-Guide-665289-Page-105.png)
![236SettingsThe order and names of the networks in the preferred networks list can be edited and amended.Your SIM card may contain a forbidden list of networks which cannot be used. To view this or show your home network:1Press the [Menu] key. Select Settings.2Select GSM Services.3Select Network.4Select Preferred list. A list of networks is displayed.5Use the [Up arrow] and the [Down arrow] to select the required network. Press OK to select one of the following Options if you want to amend the list:option descriptionModify by listTo display the list of all networks stored in the phone.Modify by codeTo edit or enter the identification operator number if you have the information.DeleteTo delete an entry1Press the [Menu] key. Select Settings.2Select GSM Services.3Select Network.4Select either Forbidden to view the list of forbidden networks, or select Home network to view the name of your usual network.Brit01_EN_User guide.book Page 236 Friday, March 3, 2006 3:02 PM](https://usermanual.wiki/Motorola-Mobility/T6GF1.Exhibit-8b-Users-Manual/User-Guide-665289-Page-106.png)
![237SettingsSelecting manual search:You may need to select a specific network (e.g. better coverage than your own in the current location). Note: You cannot select a network for manual change if it is on the forbidden list (even if it is still listed as a choice). Note: You cannot delete a network from the forbidden list. This list is automatically updated when the manual network selection is performed.Note: If the Manual search has been selected before turning the phone off and if the manually selected network cannot be found when the phone is next turned on, you must select another network manually for your phone to lock on.1Press the [Menu] key. Select Settings.2Select GSM Services. 3Select Network. 4Select Search.5Select Manual. The Scanning for networks... message is displayed.6Use the [Up arrow] or [Down arrow] keys to select a network from the list.7Press OK to confirm your choice.The Requesting... message is displayed, after which the phone will return to the idle screen.Brit01_EN_User guide.book Page 237 Friday, March 3, 2006 3:02 PM](https://usermanual.wiki/Motorola-Mobility/T6GF1.Exhibit-8b-Users-Manual/User-Guide-665289-Page-107.png)
![238SettingsSelecting automatic search: To perform an automatic search from the preferred list, proceed as follows: Call barringThis network dependent service forbids certain outgoing or incoming call types. It requires a call barring password.To bar a call: To remove call barring or check its status:1Press the [Menu] key. Select Settings.2Select GSM Services. 3Select Network.4Select Search.5Select Automatic.1Press the [Menu] key. Select Settings.2Select GSM Services. 3Select Call barring. 4Select Outgoing calls (to bar All outgoing calls, International calls or International calls excluding your Home network) or Incoming calls (to bar All incoming calls or all incoming calls while Roaming only). 5Select Activate. Enter the password and press OK.The network then confirms the selection.1Press the [Menu] key. Select Settings.Brit01_EN_User guide.book Page 238 Friday, March 3, 2006 3:02 PM](https://usermanual.wiki/Motorola-Mobility/T6GF1.Exhibit-8b-Users-Manual/User-Guide-665289-Page-108.png)
![239SettingsCall barring password:The call barring password is used to select the call barring levels. It is supplied via your service provider.To change the password:Security featuresThe security features described in this section protect your phone from unauthorised use. When prompted, enter the code and press OK. Codes are displayed as asterisks (*).Select Clear if you need to amend your entry.Note: Avoid using codes similar to emergency numbers such as 112 to prevent the accidental dialling of these numbers.KEEP A RECORD OF YOUR CODES IN A SAFE PLACE.2Select GSM Services. 3Select Call barring. 4Scroll up or down to select the barring type to be deactivated (Cancel) or checked (Status) and follow the instructions displayed.1Press the [Menu] key. Select Settings.2Select GSM Services. 3Select Call barring. 4Select Change password.First enter the former password then enter the new password twice. A Confirmation message is displayed. Brit01_EN_User guide.book Page 239 Friday, March 3, 2006 3:02 PM](https://usermanual.wiki/Motorola-Mobility/T6GF1.Exhibit-8b-Users-Manual/User-Guide-665289-Page-109.png)
![240SettingsPhone lock codeA phone lock code is supplied with the phone for security purposes. It prevents unauthorised access to the phone and some of its features.The default code is 0000. We suggest that you change this code and keep the new one in a safe place. Once this feature is activated, the code is requested each time the phone is turned on. To change the phone lock code:To activate/deactivate the phone lock code:Note: Emergency calls can still be made when phone lock is activated.1Press the [Menu] key. Select Settings.2Select Security.3Select Phone lock change and follow the instructions displayed.4Press OK to validate the new code.1Press OK. Select Settings.2Select Security.3Select Phone lock enable (if the code has been disabled) or Phone lock disable (if the code has been enabled) and enter your Phone lock code.Brit01_EN_User guide.book Page 240 Friday, March 3, 2006 3:02 PM](https://usermanual.wiki/Motorola-Mobility/T6GF1.Exhibit-8b-Users-Manual/User-Guide-665289-Page-110.png)
![241SettingsPIN codeYour SIM card was provided with a 4 to 8 digit PIN code for protection against unauthorised use. When enabled, the PIN code is required each time you turn your phone on. If an incorrect PIN code is entered three times in succession, your SIM card will be blocked. The 8 digit PUK code is then required to unblock your phone. Please contact your service provider for this code.To activate the PIN protection:To change the PIN code (PIN must first be enabled):PIN2 codePIN2 code prevents unauthorised access to some of the phone features (e.g. activating/deactivating FDN operations, modifying the FDN Phone book, setting calls costs to zero, modifying the costs display features). This code can be changed but not be activated or deactivated.1Press the [Menu] key. Select Settings.2Select Security.3Select PIN enable (if the code has been disabled) or PIN disable (if the code has been enabled) and enter your PIN code.1Press the [Menu] key. Select Settings.2Select Security.3Select PIN change and follow the information displayed.4Press OK to validate your new PIN code. Brit01_EN_User guide.book Page 241 Friday, March 3, 2006 3:02 PM](https://usermanual.wiki/Motorola-Mobility/T6GF1.Exhibit-8b-Users-Manual/User-Guide-665289-Page-111.png)
![242SettingsPlease contact your service provider for your PIN2 code. To change the PIN2 code:PUK codeThe PUK ( ing key) is an 8 digit code supplied by your service provider. It is used to unblock the phone when an incorrect PIN code has been entered three times in succession. A PUK code cannot be changed. When prompted, enter the PUK code and select OK. You are then requested to enter a new PIN code. Follow the prompts displayed to reset the PIN code.Note: If you have entered an incorrect PUK code 10 times in succession your SIM card will be permanently blocked. Contact your service provider for a new card.PUK2 codeThe PUK2 is an 8 digit code supplied by your service provider. It is used to unblock the phone when an incorrect PIN2 code has been entered three times in succession. A PUK2 code cannot be changed. When prompted, enter the PUK2 code.Note: If you have entered an incorrect PUK2 code 10 times in succession for use of the features requiring the PIN2 code, your phone will be permanently blocked. Contact your service provider for a new card.1Press the [Menu] key. Select Settings.2Select Security.3Select PIN2 change and follow the information displayed.4Press OK to validate your new PIN2 code. Brit01_EN_User guide.book Page 242 Friday, March 3, 2006 3:02 PM](https://usermanual.wiki/Motorola-Mobility/T6GF1.Exhibit-8b-Users-Manual/User-Guide-665289-Page-112.png)