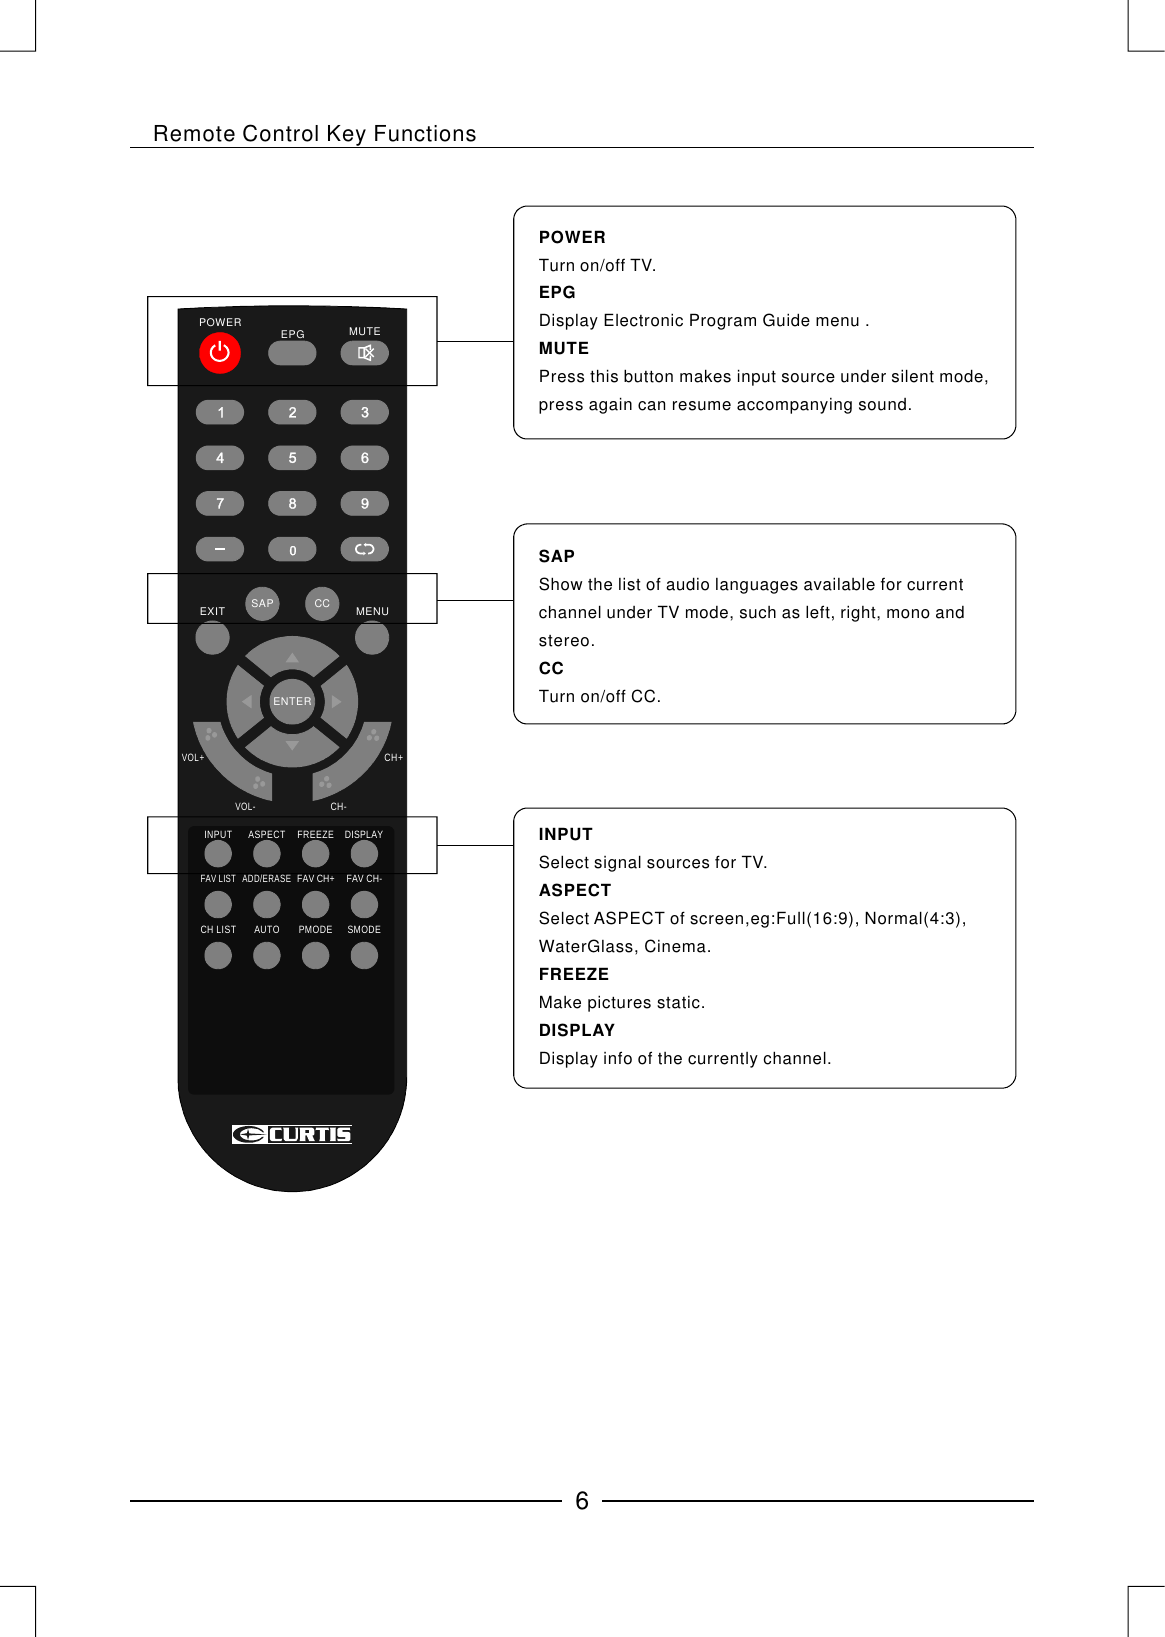
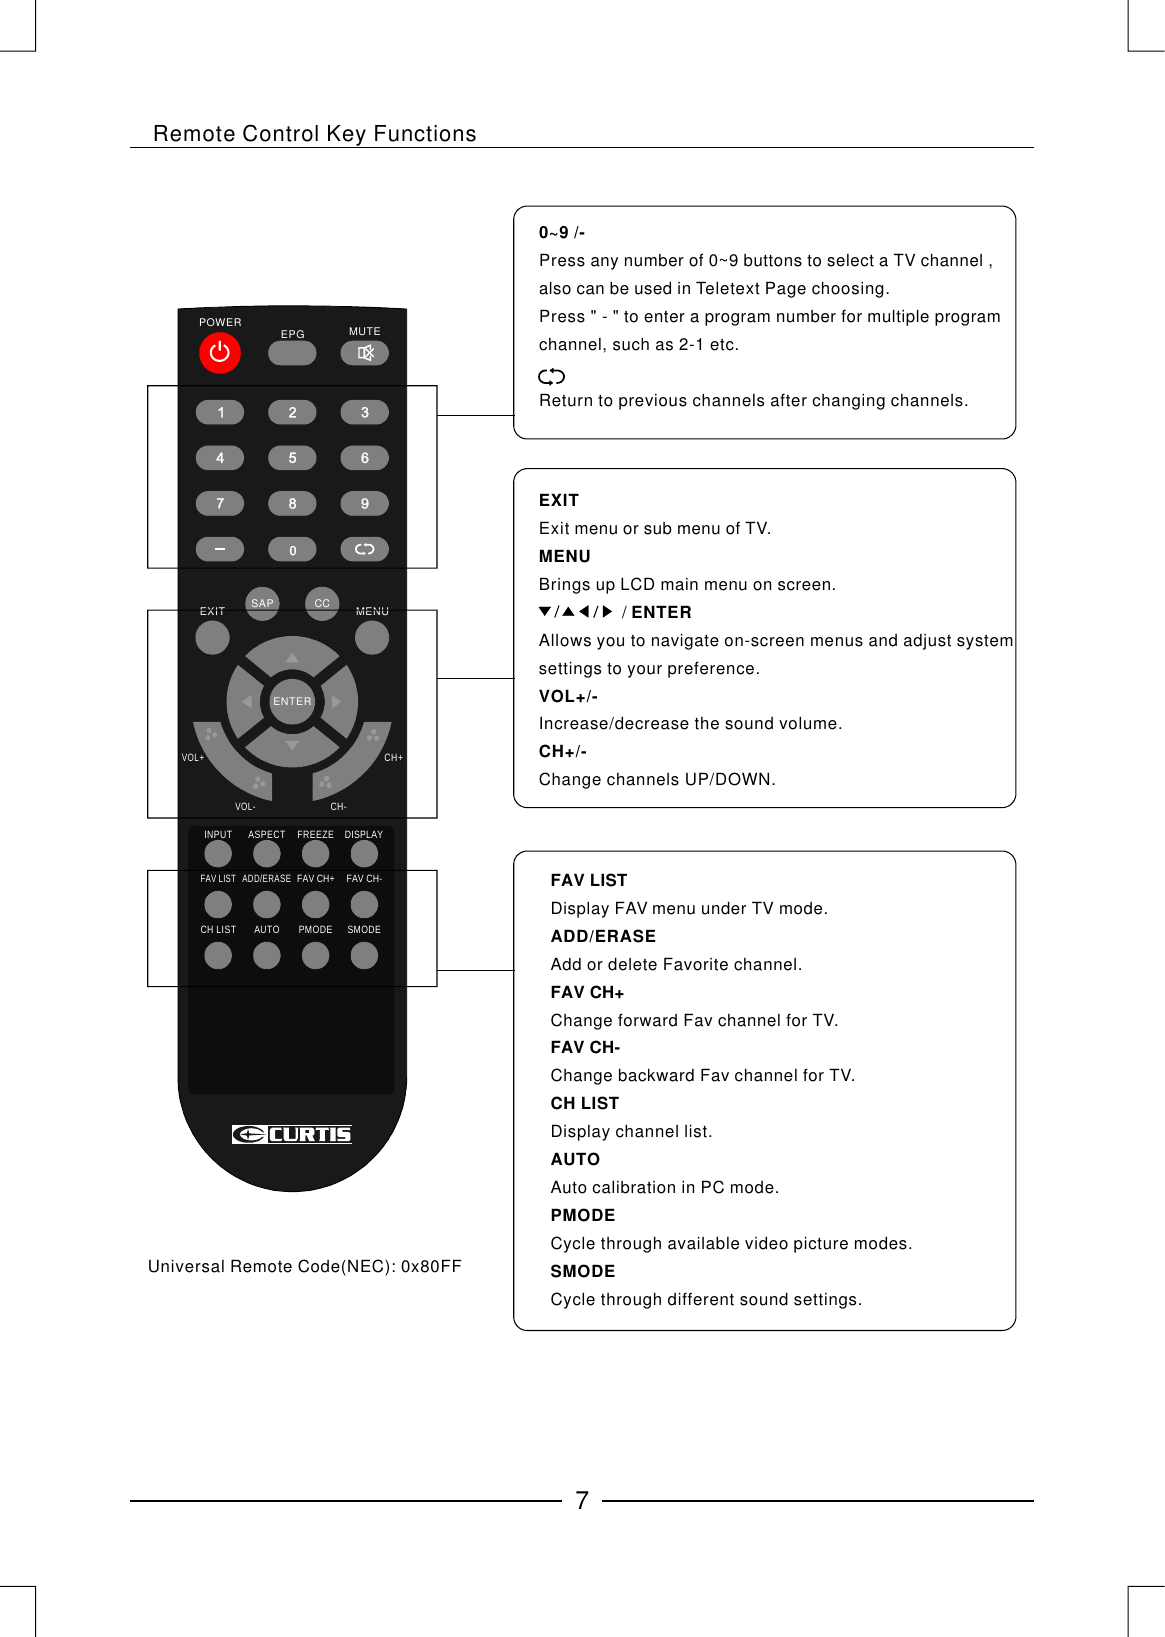
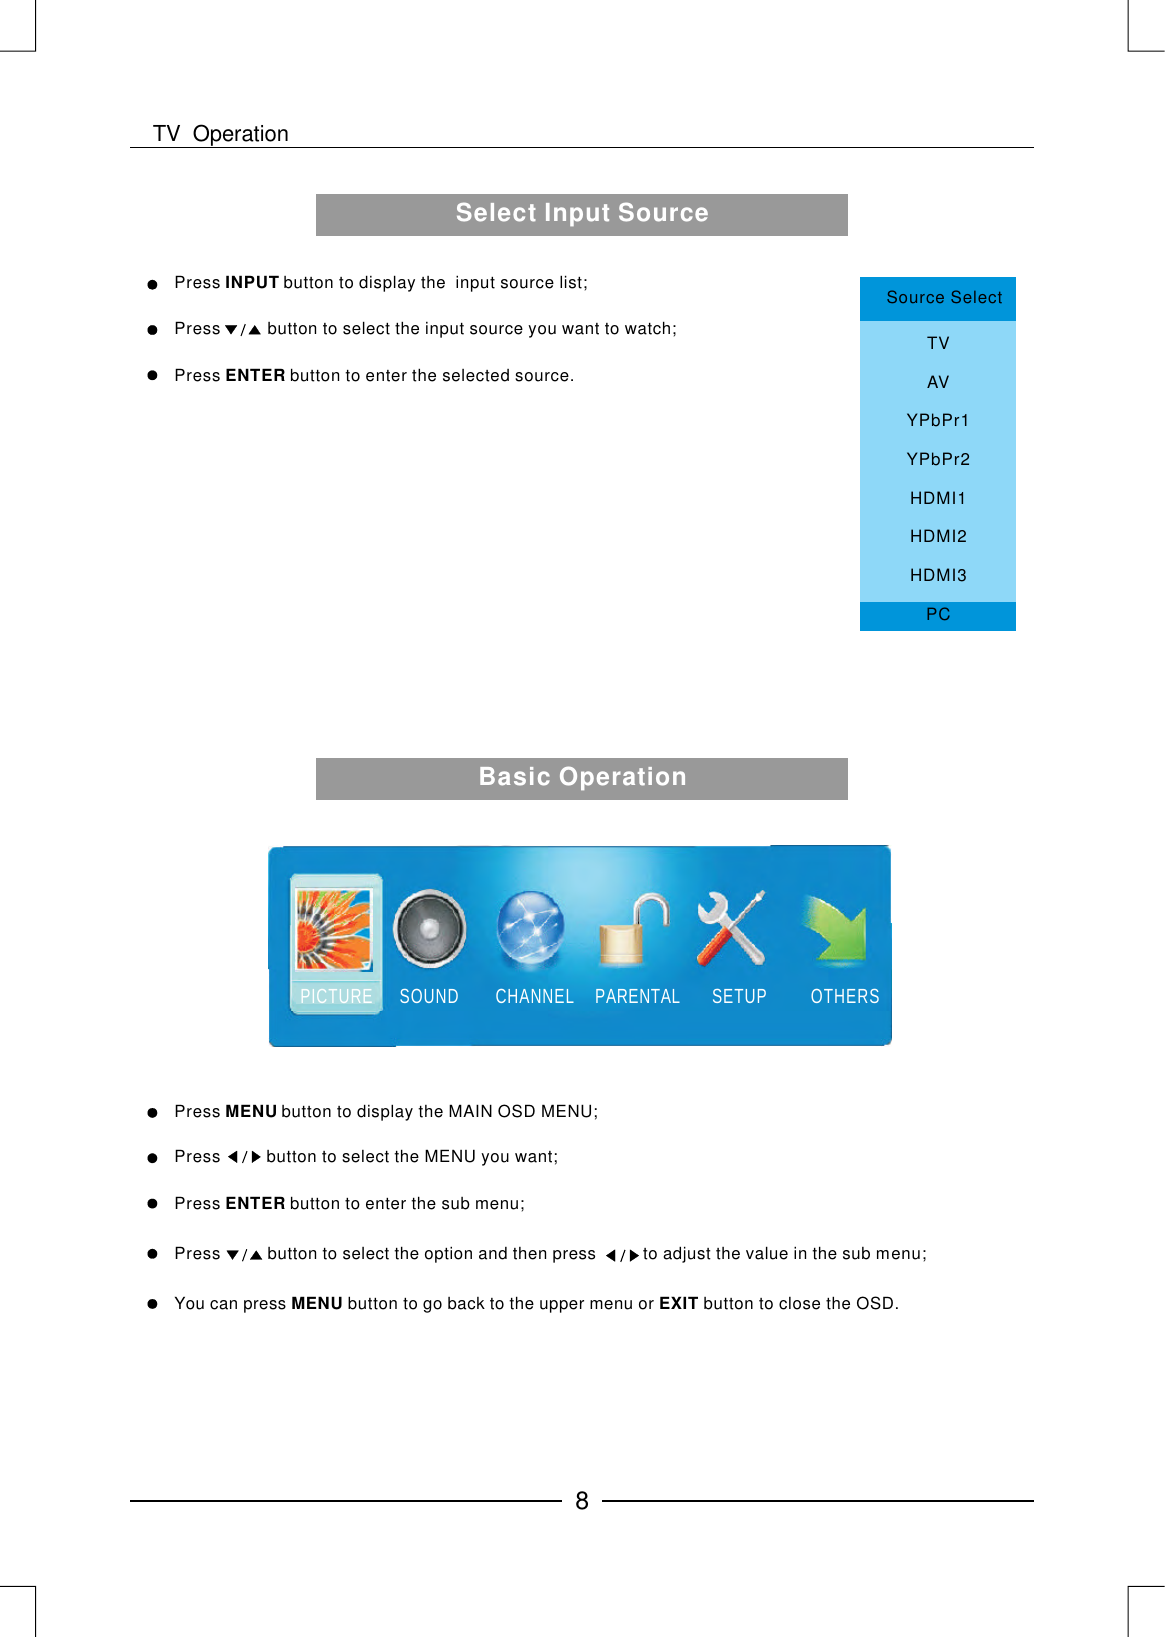
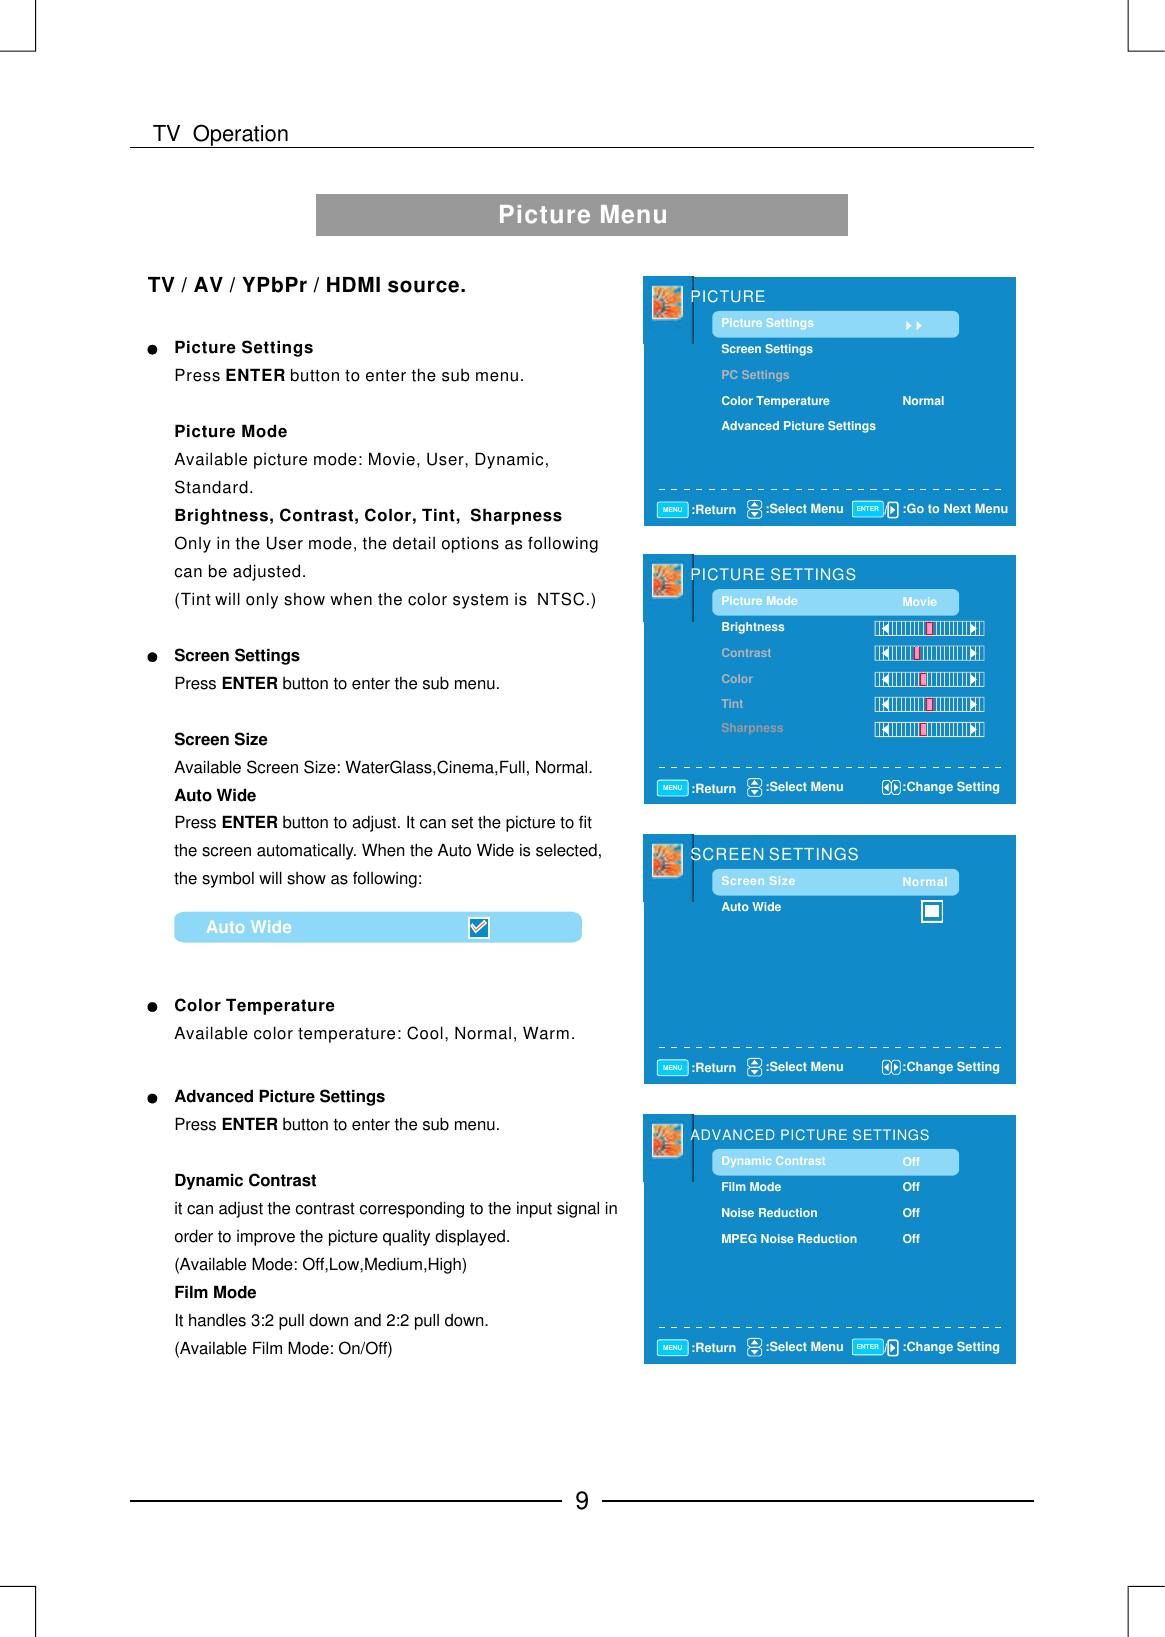
NANJING PANDA ELECTRONICS ANUFACTURING LCDTV32 LCD Monitor/TV User Manual
NANJING PANDA ELECTRONICS ANUFACTURING CO., LTD. LCD Monitor/TV
UserManual.wiki
>
NANJING PANDA ELECTRONICS ANUFACTURING
>
LCDTV32 User Manual
User Manual
Navigation menu
Upload a User Manual
Namespaces
Wiki Guide
HTML
PDF
Info
Views
User Manual
Discussion / Help
Navigation

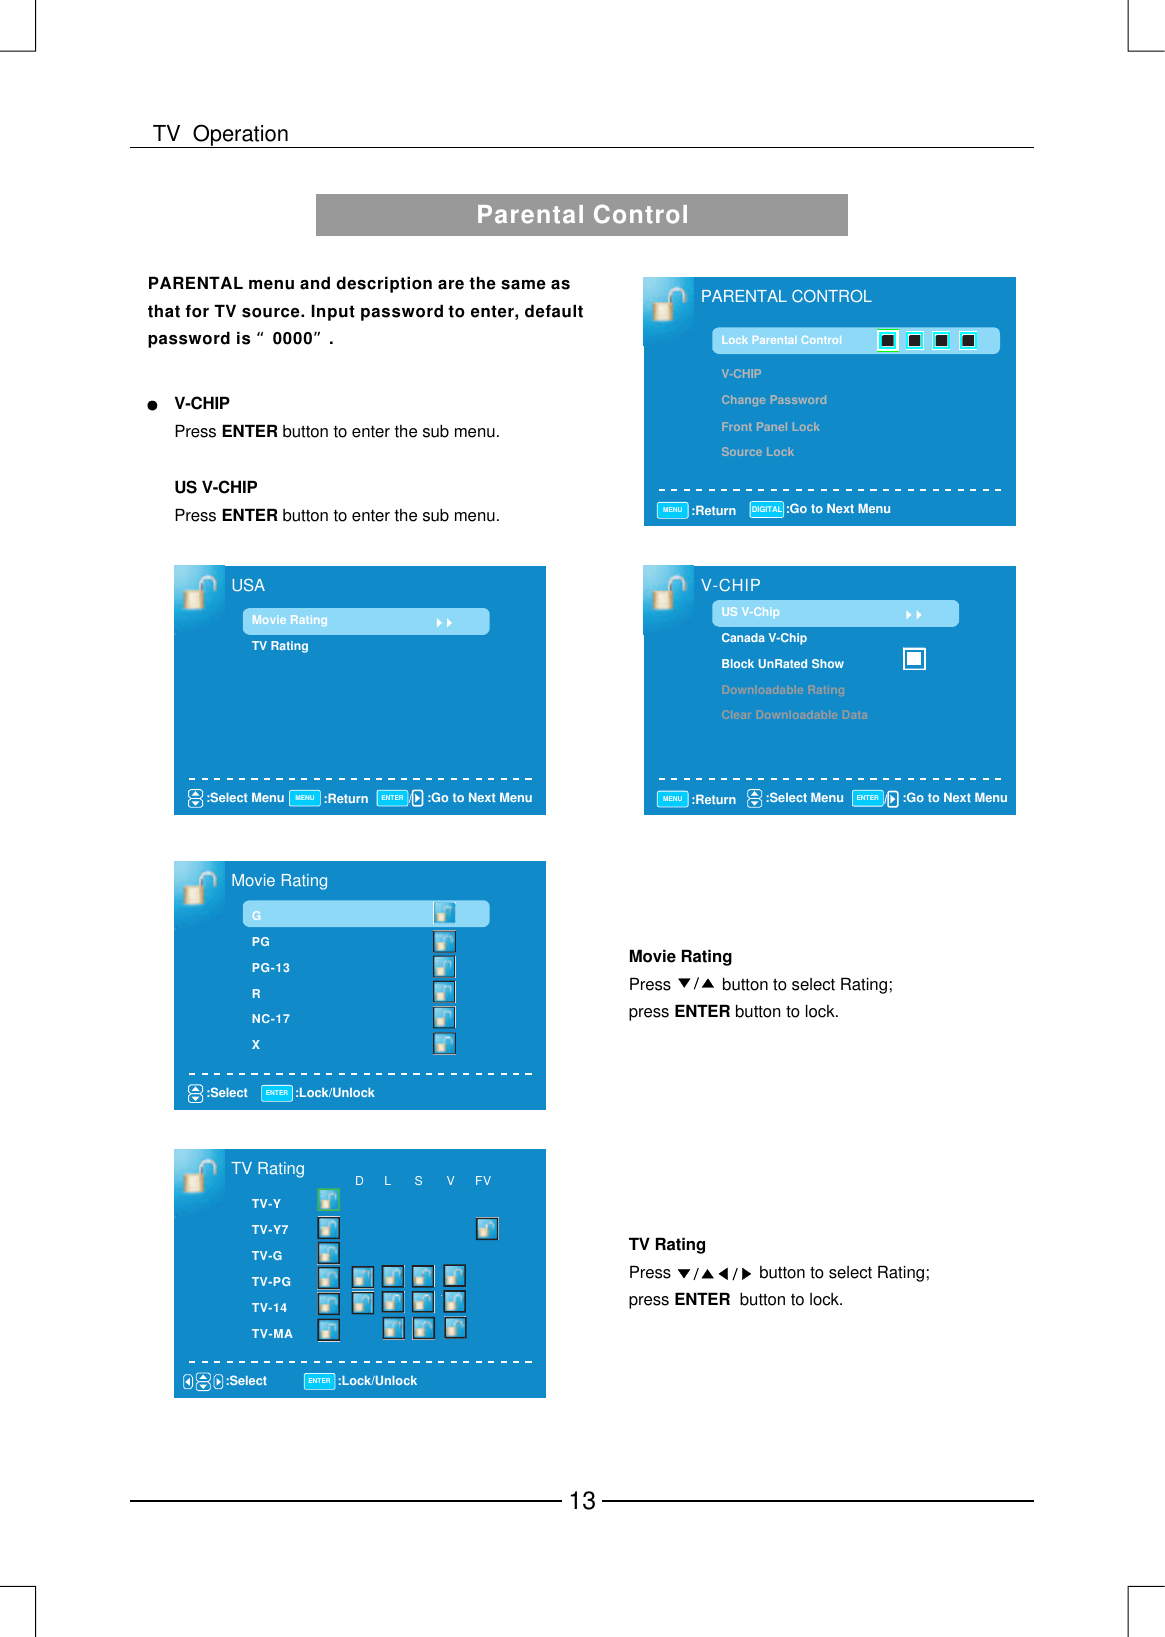
![Others MenuOTHERSBlue BackNo Signal Power OffNo Operation Power OffAll ResetAudio Only:Return :Select MenuMENUExecute:On/ OffENTERAttention!If [All Reset] was executedTV system is reset.Blue BackENTERPress button to select when there is no signal, whether set the background in blue or not.No Signal Power OffENTERPress button to select it On or Off. When set it On and there is no signal input, it will turns off the panel and the LED light turns red.No Operation Power OffENTERPress button to select it On or Off. When set it On and there is no operation input, it will turns off the panel and the LED light turns red.All ResetENTERPress button to execute reset . When you select All Reset item, a dialogue box will appear as following.Audio OnlyPowerHold on power key 3 sec. to restore video. Then there will be only audio output.To wake up video,please press button for 3 secretary.Press button to enter the sub menu.ENTEROTHER menu and description are the same as that for TV source.:Select Menu :Press to ExecuteENTERHold on power key 3 sec. to restore videoExecuteAUDIO ONLYAudio Only17TV Operation](https://usermanual.wiki/NANJING-PANDA-ELECTRONICS-ANUFACTURING/LCDTV32/User-Guide-1345708-Page-18.png)