NComputing U200 Network Terminal (USB Type) User Manual pc expanion user s guide eng
NComputing Co., Ltd. Network Terminal (USB Type) pc expanion user s guide eng
UserManual.wiki
>
NComputing
>
U200 User Manual
Users Manual
Navigation menu
Upload a User Manual
Namespaces
Wiki Guide
HTML
PDF
Info
Views
User Manual
Discussion / Help
Navigation
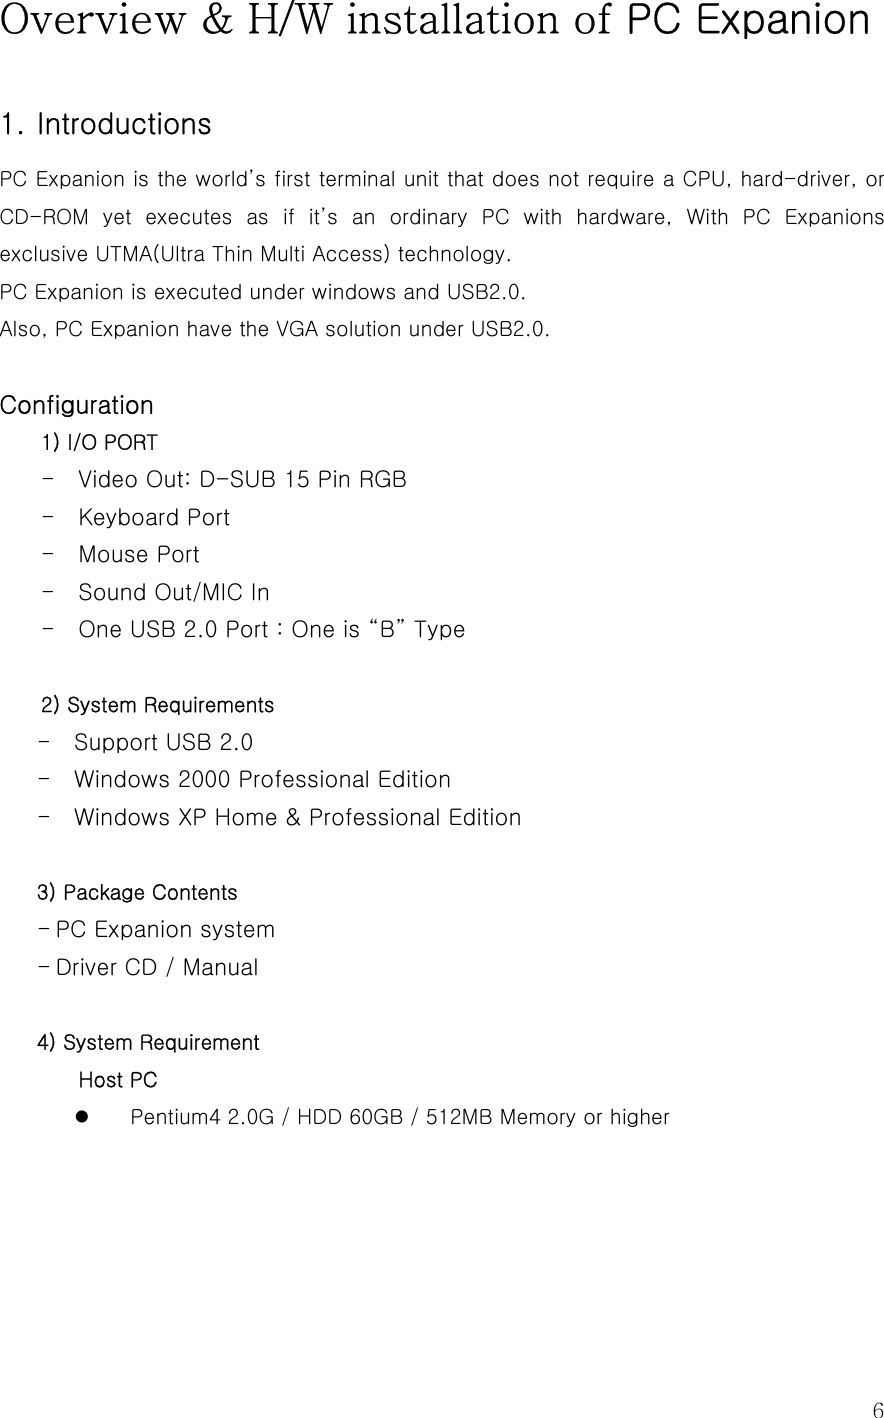

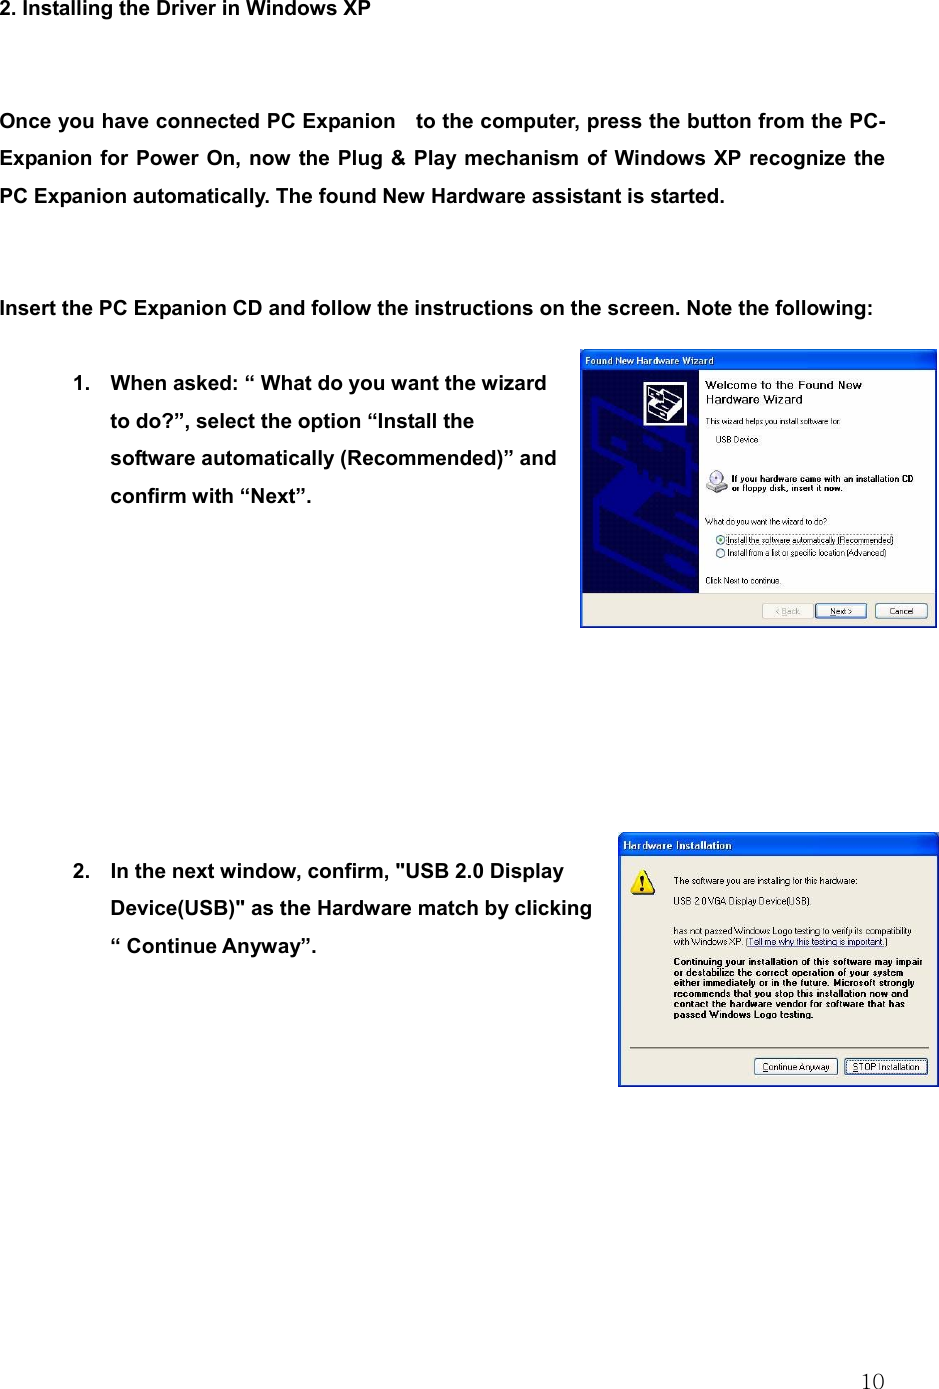

![13 2. Installing NCU-2000/XP Software Insert PC Expanion installation CD into your PC’s CD-ROM and follow the instructions. 1. Installation programm will start automatically. When the installation screen appears, click [SETUP] 2. If your computer is connecting to the internet, it is recommended to install the latest software version directly from FTP-server via Internet. To do so, click [Yes] and wait until download of the software has been finished. (If your computer is not connecting to the internet got to step 4.) 3. Your computer is connected to PC Expanion FTP site and downloads the latest version NCP-2000-XP. 4. Installation program will start automatically. When the installation wizard screen appears, click [Next]](https://usermanual.wiki/NComputing/U200/User-Guide-481632-Page-13.png)
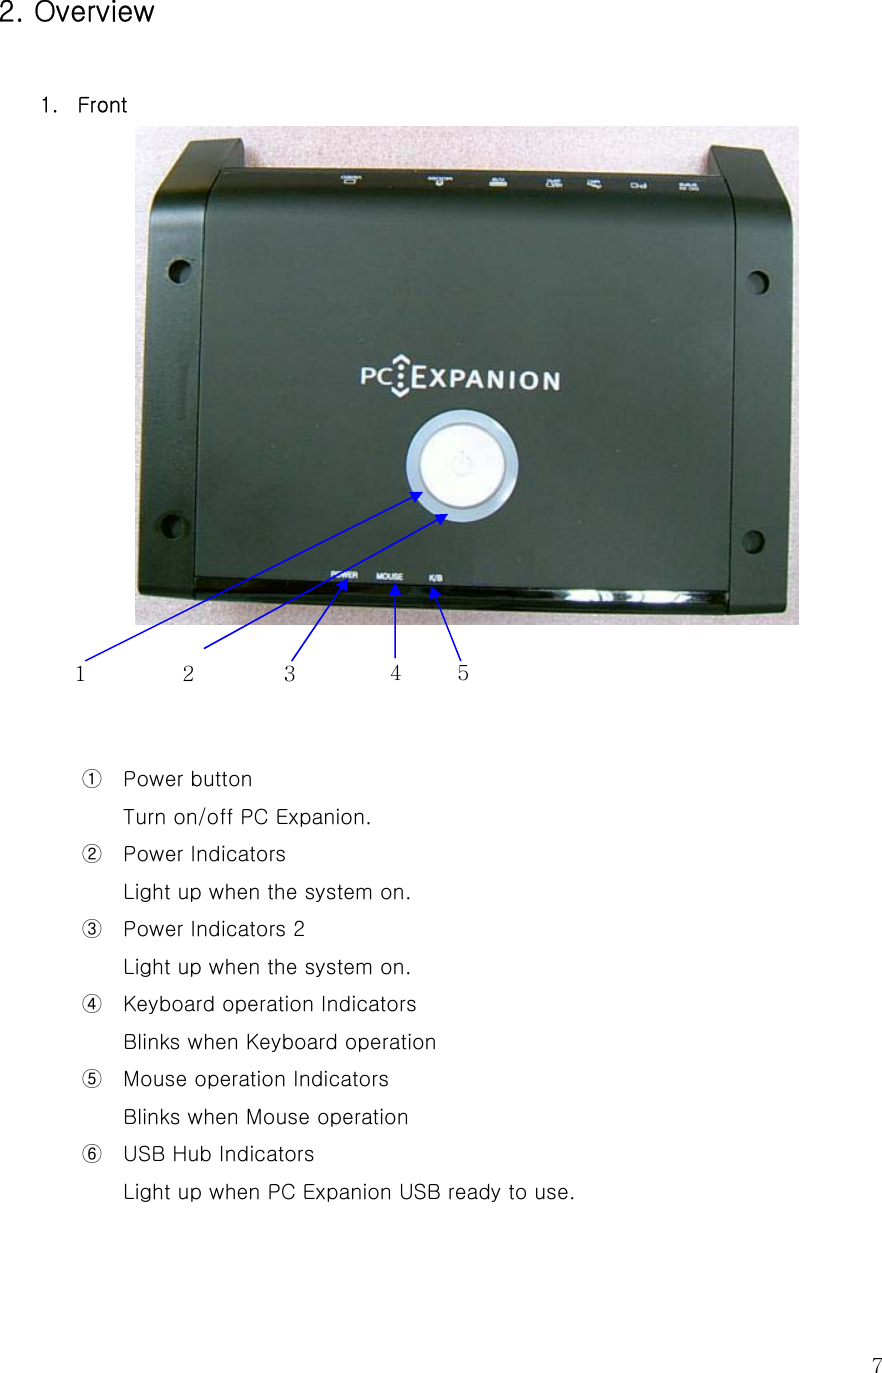
![14 5. Please read the End User License Agreement and check the [I agree] box, 6. Please read the Terms of Use, check the [I agree] box and click [Next]. 7. “Select installation folder” windows appears. Click [Next] button, if you want to install NCU-2000-XP in the default folder.](https://usermanual.wiki/NComputing/U200/User-Guide-481632-Page-14.png)
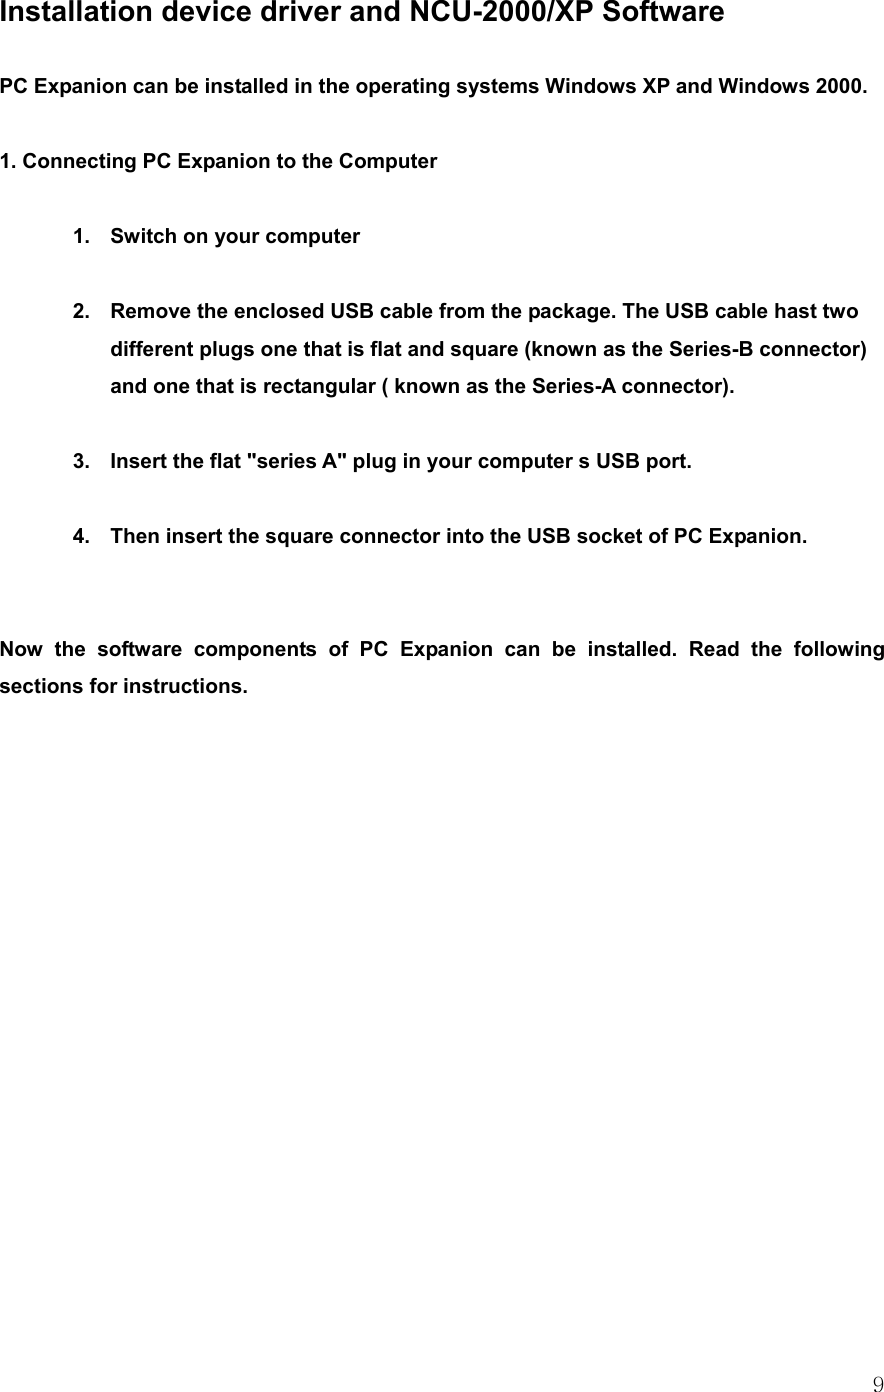
![158. Enter the Serial Number and Activation Key you find on the buttom side of the PC Expanion and type in the user’s information. 9. 10. Click [Next] or go [Back], if you want to change something. 11. System copies files needed for installation. 12. Add now the user profile: At this point you can install new user profiles. To do so, the software provides you with the program “user accounts” from the Windows control panel. 13. When the “installation complete” window appears, click [Restart] button after selecting [Yes, I want to restart my computer now.]](https://usermanual.wiki/NComputing/U200/User-Guide-481632-Page-15.png)