Pantech Co G700 PCS 1900 (with WAP & GPRS) User Manual UserMan
Pantech Co Ltd PCS 1900 (with WAP & GPRS) UserMan
UserManual.wiki
>
Pantech Co
>
G700 User Manual
UserMan
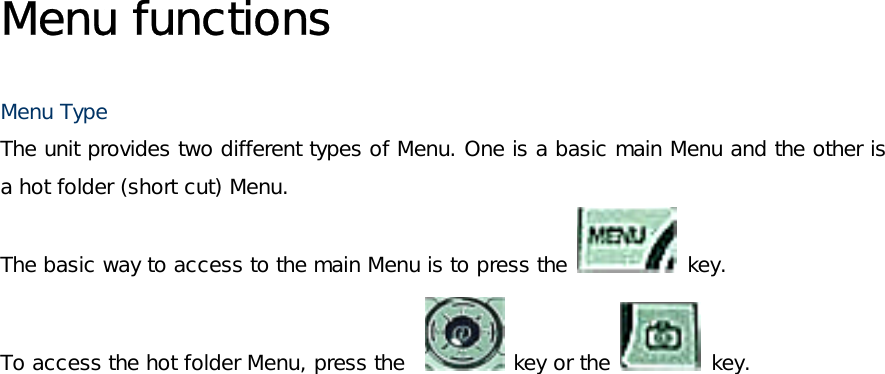
Navigation menu
Upload a User Manual
Namespaces
Wiki Guide
HTML
PDF
Info
Views
User Manual
Discussion / Help
Navigation
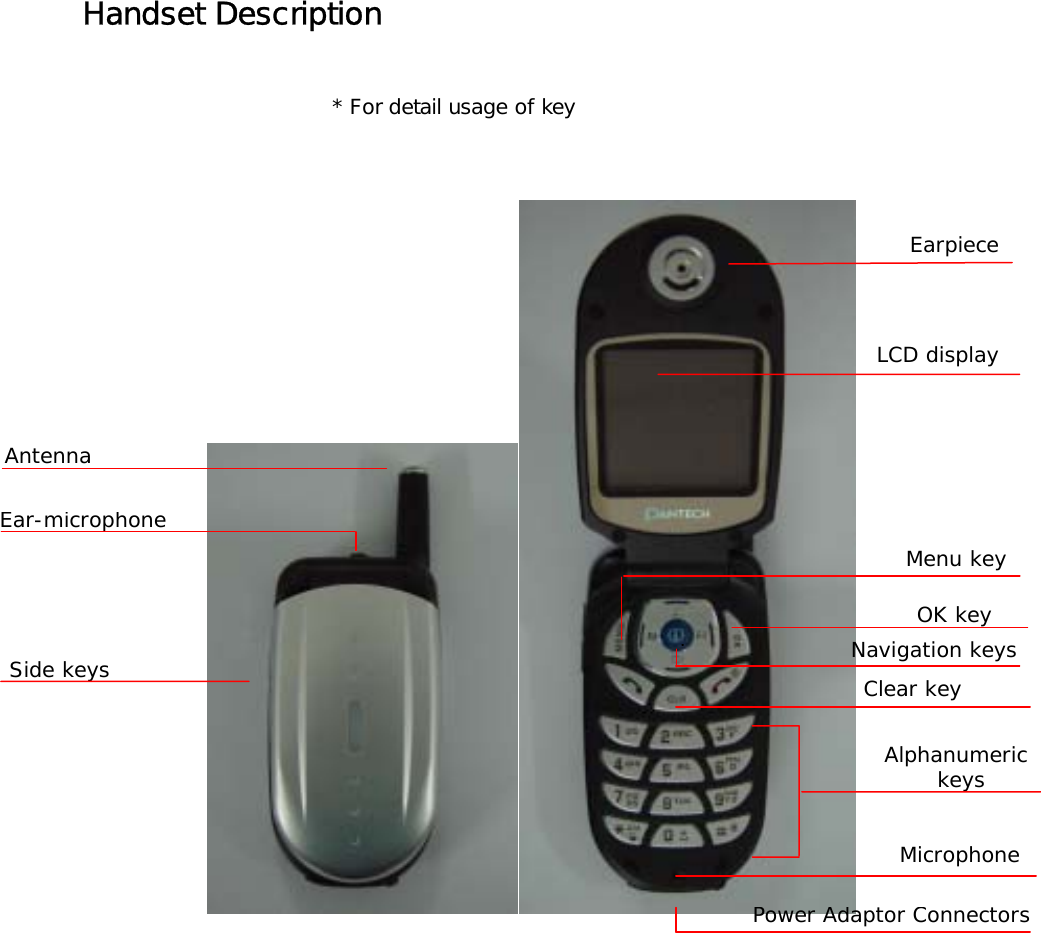
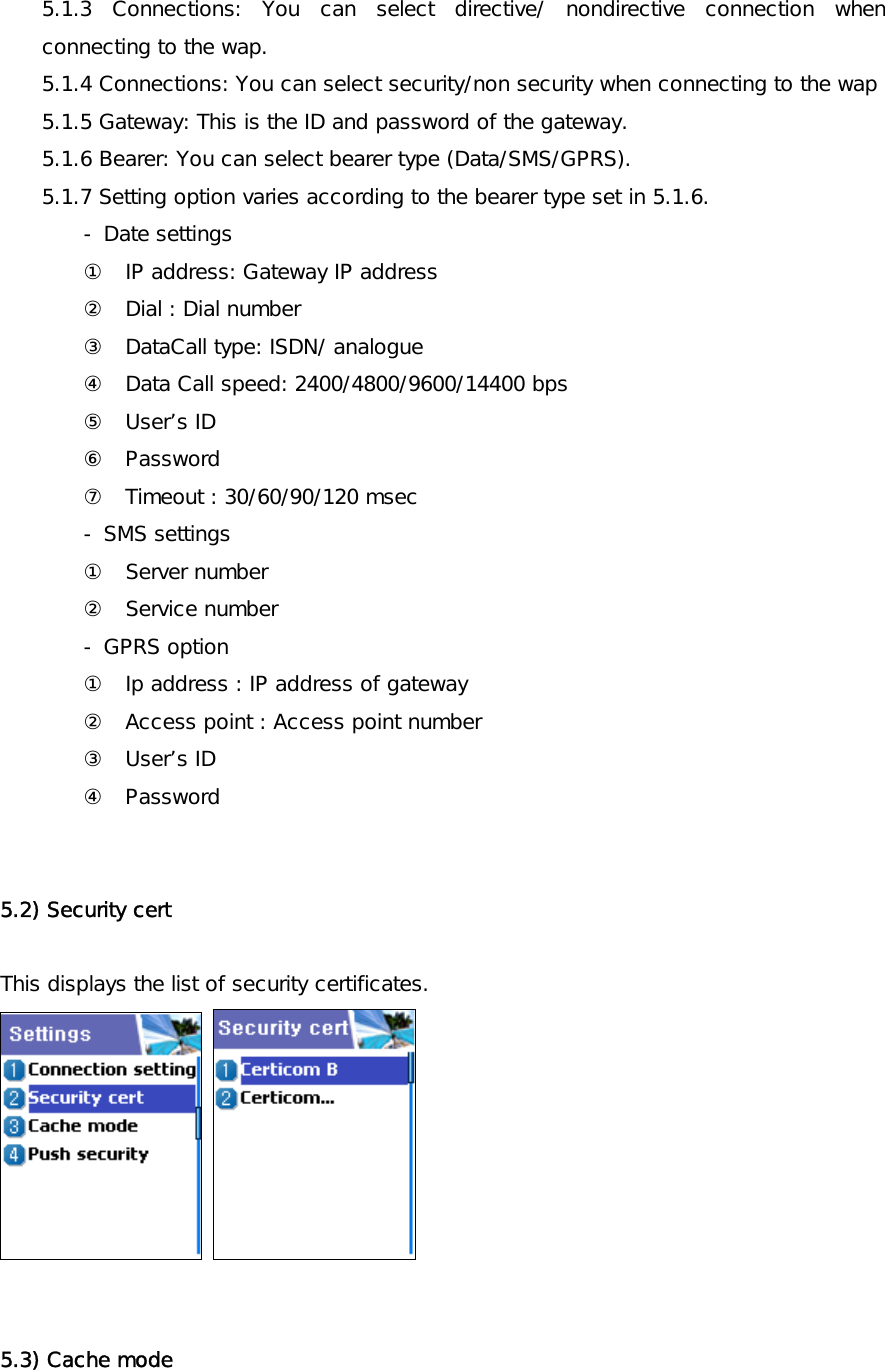
![Function keys Key Icon Name Key Function SEND KEY Press this key when you attempt to make or take calls. (Except for in the case when the receiving call is set as “Any Key Answer” type). Keep pressing this key for a moment when you want to recall the last number. Press this key once when you would like to check out the last called number. END KEY Press this key when you would like to end a call or convert to standby mode from Menu mode. If you keep pressing this key for a moment, the power of the unit either turns on or off. OK KEY Press this key to choose or carry out a Menu option shown on the screen. MEMU KEY Pressing this key leads you to the main Menu. CLEAR KEY Press this key briefly to delete a message, or keep pressing this key for a moment to delete a whole sentence. Press this key if you would like to go to the previous Menu. NAVIGATION KEYS with shortcut keys to WAP, Sound setting, Message and Phonebook Press one of the 4 keys for left, right, Up, or Down as you want to move when you would like to change the position of the cursor in Menu list or editor. If you press the [Up] key while talking on the phone, it shows the last number received, and pressing the [Down] key, shows the list of missed calls. If you press this key in the initial screen, you can get easy access to the phonebook, Sound setting, SMS, My Menu, (Hot Folder) Menus. SIDE UP and DOWN KEYS Press this key if you would like to adjust the volume of the conversation.](https://usermanual.wiki/Pantech-Co/G700/User-Guide-388624-Page-10.png)
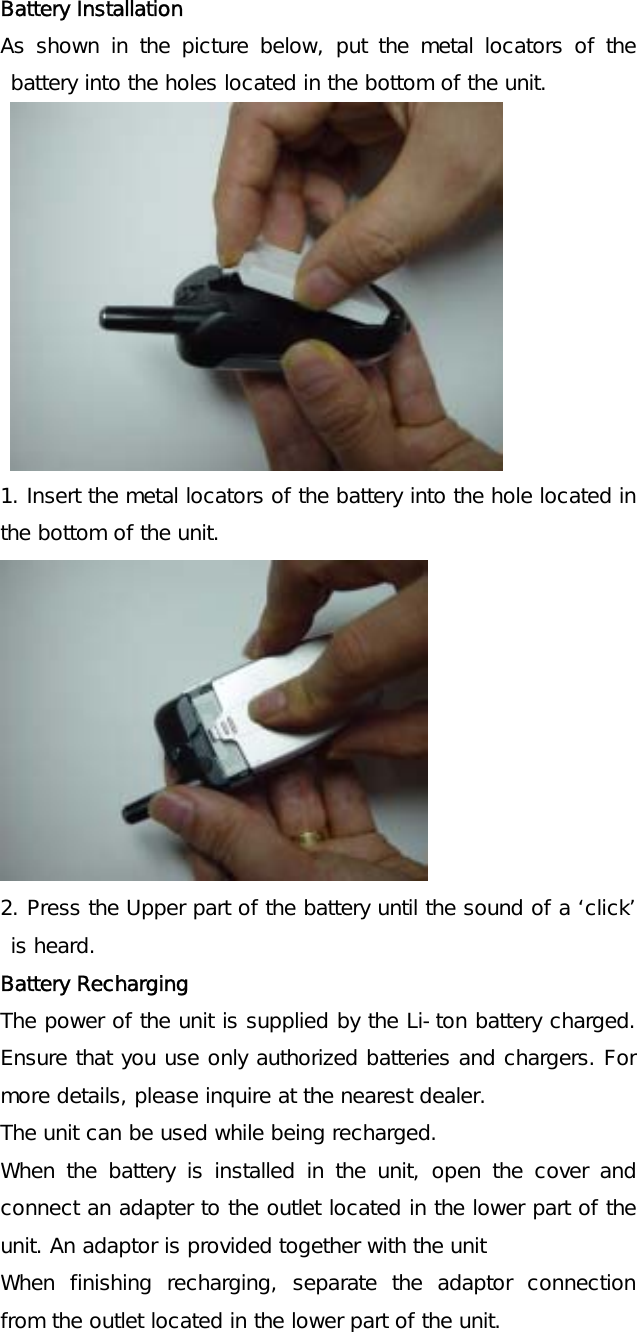
![Quick start If you use the unit for the first time, please follow the procedures as below. : Put the SIM card within the unit. If a user is registered to the network provider, he/she is supposed to be provided with a ‘plug-in SIM’ which contains the user’s registration information. (PIN, the existence of additional service, etc). If required, keep pressing the [END] key until the message of power off appears. 1. Separate the battery from the unit. 2. After checking whether the SIM slot is empty, put the SIM card into the slot. 3. If you would like to remove the SIM card, please push the SIM card in the direction of the arrow shown in the picture as below.](https://usermanual.wiki/Pantech-Co/G700/User-Guide-388624-Page-12.png)
![Getting started 1. Unit power on Press the [END] key for a moment (approximately 3 seconds) in order to turn on the power of the unit. 2. Unit power off Press the [END] key for a moment in order to turn off the power of the unit. 3. Making calls Press the [END] key for a moment in order to turn on the power of the unit. If a message “Insert SIM card” appears, insert the SIM into the SIM slot. Unlock the handset by inputting the PIN (maximum 8 letters) when applicable If a wrong PIN is inputted, the system automatically detects the network the user belongs to. Press the telephone number including the area code in the initial mode. Then attempt to make a call by pressing the [Send] key. If you would like to make overseas calls, press the [0] key until the sign ‘+’ appears and then input the country code, area code, telephone number in your order. You can insert the sign ‘P’ between each code and telephone number in order to have approximately 2 seconds of pause by pressing the [#] key. You can make emergency calls without a SIM. If you input the number 112 and press the [Send] key, you can make an emergency call. 4. Finishing calls Pres the [END] key if you would like to cancel or finish your call. 5. Taking calls When the unit rings in a melody or vibrates, if it has network service, the name or the telephone number of the caller appears on the screen. The screen says the name only when you have the number and name saved in the Phone Book. Press the [SEND] key if you would like to take a call in general mode. If the receiving mode is set to [Any key], You can take calls by pressing any key except for the [END] key. 6. Adjusting the volume of conversations](https://usermanual.wiki/Pantech-Co/G700/User-Guide-388624-Page-14.png)
![If you would like to adjust the volume of conversations while using the unit, adjust the volume by pressing the volume key on the side of the unit for up to 8 steps as you wish. 7. Searching the main Menu If you would like to move to the main Menu in the initial screen, press the [Menu] key. Press the [End] key if you would like to escape from the Menu and return to the initial screen. You can select one of the items in the Menu by pressing the Navigation key [Up][left] and [Down][right]. You can reply to questions with ‘Yes’ by pressing the [OK] key, and ‘No’ the [Clr] key. 8. Inputting letters and number in the handset If you would like to input a number, select the number key pad you desire to input. If you input a number in the handset, the system should be in ‘T9’ mode. (i.e. Phone book, Message). For more details, please refer to the ‘T9’ page. If you would like to delete a wrongly inputted letter, press the [Clr] key and to delete a whole sentence, keep pressing the [Clr] key for a moment. If you keep pressing the [Clr] key for a while, all the letters in the screen are deleted.](https://usermanual.wiki/Pantech-Co/G700/User-Guide-388624-Page-15.png)
![Basic Telephone Functions 1. Speed Dial There are two ways to make a call in the initial screen. One is to press [Send] normally after inputting a telephone number. The other is to use speed dial. When making calls by using speed dial, you should press the index number for a moment which is allocated when saved in the Phone Book of the unit. Then, the telephone number matching the index number is attempted to be called. For example, if the index number saved in the Phone Book of the unit is 5, press the number [5] key for a moment, then the applicable telephone number will be attempted to be called. The scope of the index available for speed dial is up to 99. 2. Making overseas calls If you would like to make overseas calls, press the [0] key twice at first so that sign ‘+’ appears on the screen and then press the country code after the sign. 3. Making emergency calls Input number 112 (emergency number) and press the [SEND] key. If you belong to the GSM net, regardless of the existence of a SIM card, making emergency calls is available in any country. 4. Hold calls When you can not take a call for some reason, the unit displays a call message which shows you have missed a call on the screen. If you would like to get back to any missed calls, first select the [MENU]-[Call logs]-[Missed calls] keys in order. Then select a number by using the [Up/Down] key that the user desires to get back, and press the [SEND] key. A call will be made to the number selected. 5. Access to the Phonebook from the initial screen You can move to the lower Menu of the unit by pressing the Down key of the Navigation key in the initial screen without going via the Menu 6. Check out the latest number received If you would like to check out the list of latest numbers taken or made, press the [SEND] key. If you would like to make a call to any number from the list, press the [Up/Down] key to select the applicable number and then press the [SEND] key and a call will be made. If](https://usermanual.wiki/Pantech-Co/G700/User-Guide-388624-Page-16.png)
![you press the [OK] key, the information of the number selected will appear. 7. Holding calls (This function is available only for users who are registered to the internet service provider.) When taking calls, you can select a calling option by pressing the [MENU] key. [MENU] 1. Answer 2. Reject 3. I am busy If you take another call while talking on the phone, you can select one of the options according to your situation. Press the [End] key, if you would like to finish the current conversation. Press the [Send] key if you would like to hold the current conversation and connect to another call received. 8. Options while taking a call Press the [MENU] key if you would like to use the option while taking a call. [Menu] 1. Phonebook 2. Messages 3. Volume 4. Hold 5. End current 6. Mute on 7. DTMF on/off The following explain each function of the above. Hold – This option allows you to attempt another call while keeping the current call. End current – by selecting this option, you can finish the current call. Mute – this option allows the other party not to hear you while the user is taking another call. DTMF on/off –you can turn on or off the DTMF tone with this option.](https://usermanual.wiki/Pantech-Co/G700/User-Guide-388624-Page-17.png)
![1. Messages 1. SMS/EMS EMS (Enhanced Messaging Service) is formed based on SMS (Short Message Service). You can create a text message (SMS) including pictures, animation, melodies, messages, and emoticons through EMS. The characteristics of the lettering can also be adjusted. Before starting You, first ensure that the number of the service center is set. This number is normally provided by dealers and saved in the SIM card. [MENU] 1. Create (writing message) 2. Inbox (received message) 3. Outbox (sent message) 4. Settings (configuration settings) 5. Used space (SIM capacity) Create – you can write messages including items Inbox – displays the list of received messages Outbox – displays the list of sent messages Settings – Please refer to the contents that follow. Used space – shows the condition of the SIM card. (the total capacity of the SIM, the number of used messages, the number of unread messages)](https://usermanual.wiki/Pantech-Co/G700/User-Guide-388624-Page-19.png)
![Settings’ detailed functions [MENU] 1. Message center 2. Message lifetime 3. Message format Message center – Authorization of the URL of proxy relay or set MMSC. Message lifetime –Adjustment of the lifetime of messages (1hour~6 months) Message format – General, fax, voice mail, ERMES, National paging, X.400, Internet) Used space detailed functions 1. Capacity 2. Used records 3. Unread records Capacity – displays the maximum number of messages that the SIM can save Used records – displays the number of messages saved in the SIM. Unread records – displays the number of messages unread. Message check in Inbox, Outbox, Archive 1. Inbox (received messages) 1. If you press the [OK] key after selecting the “Inbox” Menu, the list will then be displayed. The list displays callers’ numbers corresponding to the names saved in the Phone Book. 2. Press the [OK] key to select the message from the list of the “Inbox”. 3. The selected message appears. If the message includes any items, when positioning the cursor at the item, for Animated parts, it moves and for Melodies, it makes sounds. 4. If you press the [Menu] key, Menus such as “Edit”, “Delete”, “Forward”, ”Text Reply” or “Voice call” pop up and you can select any Menu as desired. 2. Outbox (sent messages)](https://usermanual.wiki/Pantech-Co/G700/User-Guide-388624-Page-20.png)
![1. Press the [OK] key after selecting the “Outbox” menu, then the list will be displayed. 2. Select a message in the list of the “Outbox” by pressing the [OK] key. 3. Press the [Menu] key when the selected message appears. 4. You can select a menu among the “Edit”, “Delete”, and “Forward” icons that pop up. * Menu of Inbox and Outbox [MENU] 1. Edit (editing) 2. Delete (deleting) 3. Forward (delivering) 4. Text Reply (replying) 5. Voice call (making calls) Edit – edits the messages received or sent. Delete – deletes messages. Forward – delivers the same message received to other transmitters. Text Reply – sends a new message to a transmitter’s number while setting it as a default. Voice call – makes calls to transmitter’s numbers. Message creating/sending/saving 1. Message created You can add items in the ‘Insert item’. 1. Press the [OK] key after selecting “Create” 2. Press the [MENU] key to select “Insert items” while creating a message. 3. Select one of the menus among the Picture/Animation/Melody/Message/ Emoticon under “Insert items”.. 4. Then “Predefined” and “Load” are indicated. 5. Select item by using the [Navigation] key and press [OK]. The selected item will be loaded.](https://usermanual.wiki/Pantech-Co/G700/User-Guide-388624-Page-21.png)
![Predefined – you can load the items saved in the phone memory. (This is not indicated in Picture/Message.) Load – you can load the items that you have saved in the file item. * The limitation of EMS file size Picture- 16*16 (pixels), 32*32 (pixels) Animation- 8*8 (pixels), 16*16 (pixels) Melody- 128 bytes * The limitation of EMS item extension (when Loading) Picture- *.wbmp Animation- *.awb Melody- *.imy Text style You can modify the properties of text messages. 1. Press the [MENU] key when creating a message. 2. Press the [OK] key after selecting “Text style” 3. Select one of the properties among Underline/Bold/Strikeout. T9 options For more detail about how to edit, please refer to the Appendix. 2. Sending Messages 1. Press the [OK] key after creating a message.](https://usermanual.wiki/Pantech-Co/G700/User-Guide-388624-Page-22.png)
![2. Press the [OK] key after selecting “Send”. 3. At this time, you can either input a number or bring out a number saved in the “phonebook list” through the [MENU] to transmit. 4. If you press [OK] after inputting a number, sent animation and sending progress (i.e. :1/3) is displayed. 3. Saving Messages Saving messages in SIM 1. Press the [OK] key after creating a message. 2. Press the [Ok] key after selecting “Save”. 3. After the sign “Saving message->Message saved” pops up, the message is saved in the SIM Receiving messages When receiving a message, an alarm indicating to you the arrival of a message is activated along with the animation of “Received message” Then the number of messages is indicated on the idle screen. (In the case of the message consisting of many pages, the alarm rings when the last page arrives) Messages saved on the SIM card Received messages are saved on the SIM card. If the SIM card is full, no more messages can be received. If so, the icon showing the SIM being full appears at the top of the idle screen. If you delete saved messages, you can receive messages which have not been received. Saving items in the Inbox If messages include Pictures/Animations/Melodies/Messages/Emoticons, you can save them in the Phone memory. (User defined items only.) 1. Place the cursor at the back of the item while checking messages. 2. You can set file name and directory by pressing the [MENU] key. 3. Message is saved in the File system. 4. Saved items can be sent by selecting Insert item] –[Picture/Animation/melody/Message]-[Load] under message created. Limitation of pages in message creation](https://usermanual.wiki/Pantech-Co/G700/User-Guide-388624-Page-23.png)

![2.Voicemail [MENU] 1. Call 2. On 3. Off 4. Settings This function is for checking your voice mails by connecting to the voice mail box provided by network dealers. If you select Call menu, the system automatically attempts to connect to the voice mail box allocated to you. The details of each function are as follows. Call – Calls the voice mail box system allocated in order to check your voice mail. On – Makes a call at the voice mail box in order to start the voice mail service. Off – Makes a call at the voice mail box in order to stop the voice mail service. Settings –please refer to the “Settings” part. Settings 1. Mail box Number Sets each home mail box / roaming mail box / voice / message / activating / inactivating number. 2. Sets the reminder of receiving voice mail by call 3. Sets the reminder of receiving voice mail by SMS 4. Alert match – sets a message to be shown when voice mails arrive 3.Cell broadcasts [MENU] 1. Reading information (Read info) You can read the message of Cell Broadcast provided by your network service. 2. Settings](https://usermanual.wiki/Pantech-Co/G700/User-Guide-388624-Page-25.png)
![You can select the subject and language you prefer. - Language You can set the language of the information message. Adding or deleting a new language to the existing language is possible. When pressing the [OK] key in the list of language registered 1. Insert- adds a new language. The added language is displayed first. 2. Add to End -1. function is the same as Insert but the added language is displayed last. 3. Delete – deletes a language. - Setting title You can set the tile for information messages. 1. Subject creation: adds a new subject in the 'Current list'. If you press the [OK] key in the registered title, a new subject can be 1. added 2. edited, 3. deleted, etc. 2. Current list: displays the list of subjects currently registered. You can 1. add or 2. delete a new title by pressing the [OK] key in the registered title. You can select a maximum of 2 titles of information message. For more detail, please ask network service provider. 2. Call logs You can set Received calls, Dialed numbers, Missed calls, Clear logs, Call timers, Call costs with this function 1) Received calls This displays the list of received calls and has the functions of edit, view call log, add to P-Book, and send SMS’ sub functions. 2) Dialed calls This displays the list of dialed calls and has the functions of edit, view call log, add to P-Book, and send SMS’ sub functions. 3) Missed calls](https://usermanual.wiki/Pantech-Co/G700/User-Guide-388624-Page-26.png)
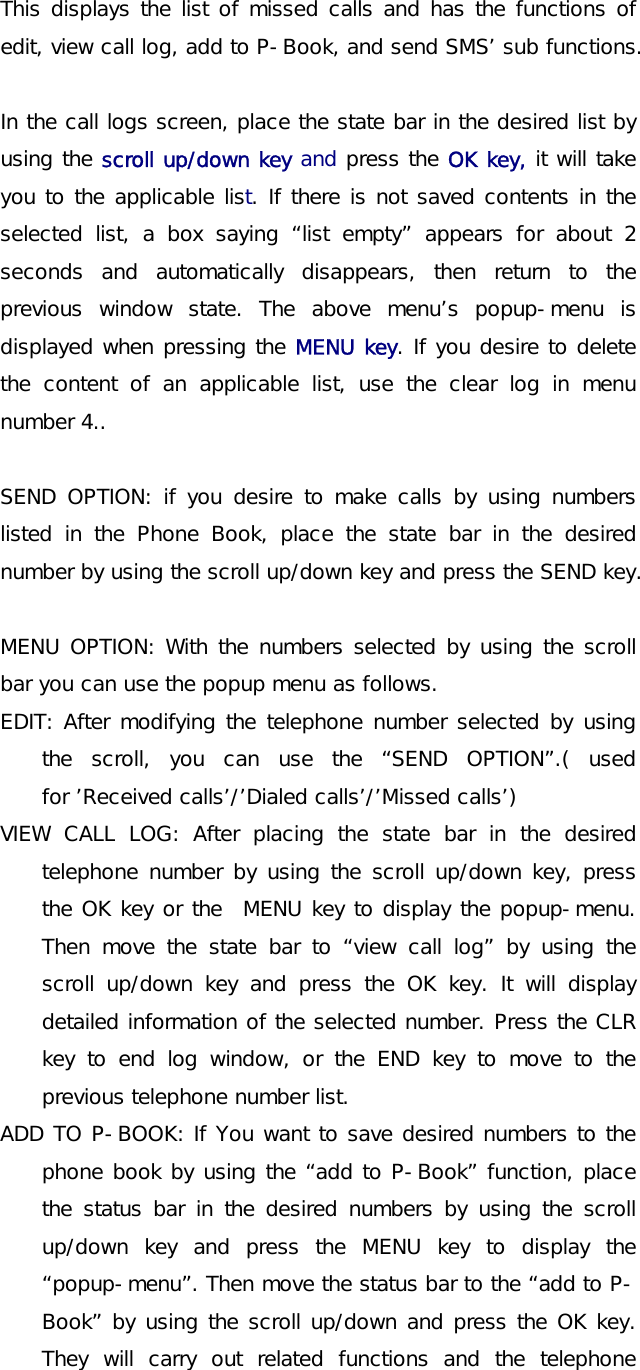
![numbers already saved are not displayed in the “popup-menu”. SEND SMS: If you want to use SMS by using the numbers in the telephone list, place the status bar in the desired telephone number by using the scroll up/down key and press the MENU key to display the “popup-menu”. Then move the status bar to “SMS” by using the scroll up/down key and press the OK key. They will carry out the related functions. If the telephone number is indicated as “withheld”, a box saying “no number” is displayed for about 2 seconds and automatically disappears. The current telephone list will be displayed. ÆIf you press the END key while carrying out functions or before carrying out functions, you will return to the initial screen. Pressing the CLR key takes you to the previous screen. Also after pressing the MENU key, while the “popup-menu” is appears, if you do not press any key for 10 seconds, the “popup-menu” will disappear. 4) Clear logs This is a function to delete the list of calls. You can delete the data of “received calls, dialled calls, missed calls” or delete the whole list of calls by using all calls. 5) Call Info (1) Call costs This records the costs related to calls. You can set a maximum value to avoid overcharge. [1] Last call This displays the cost of the last call. [2] All calls This displays the total cost of all calls. You can delete this by using PIN2 authorization. [3] Clear logs This is a function of deleting logs related to the cost of calls by inputting PIN1.](https://usermanual.wiki/Pantech-Co/G700/User-Guide-388624-Page-28.png)
![[4] Cost units This is a function of setting a standard call within the service zone. You can select the two options as follows. -Read units: this reads Cost unit. -Set units: You can set current cost unit and price per unit. [5] Max cost You can set the maximum value of call costs in specified units through PIN 2 authorization. They have two options as follows. -Read limit: this reads the maximum units. -Set limit: this sets the maximum units. (2) Call timers This is a function to read the information on call times. [1] Last call This displays the time lapse of the latest call. [2] All calls This displays the total lapsed time of all calls [3] Reset call time This initializes the call time of Last call or All call. 6) GPRS Info (1) Current connection This displays what you have currently received or sent in kilobites by using GPRS (2) All connections This displays what you have received or sent all in kilobites by using GPRS. (3) Last connection This displays what you recently have received or sent in kilo bites by using GPRS. (4) Clear logs This deletes the log related to GPRS. 3. Sound You can set the sound of bells, messages, keys, flip. etc. 3.1 Ringing setting 3.2 Message alert](https://usermanual.wiki/Pantech-Co/G700/User-Guide-388624-Page-29.png)
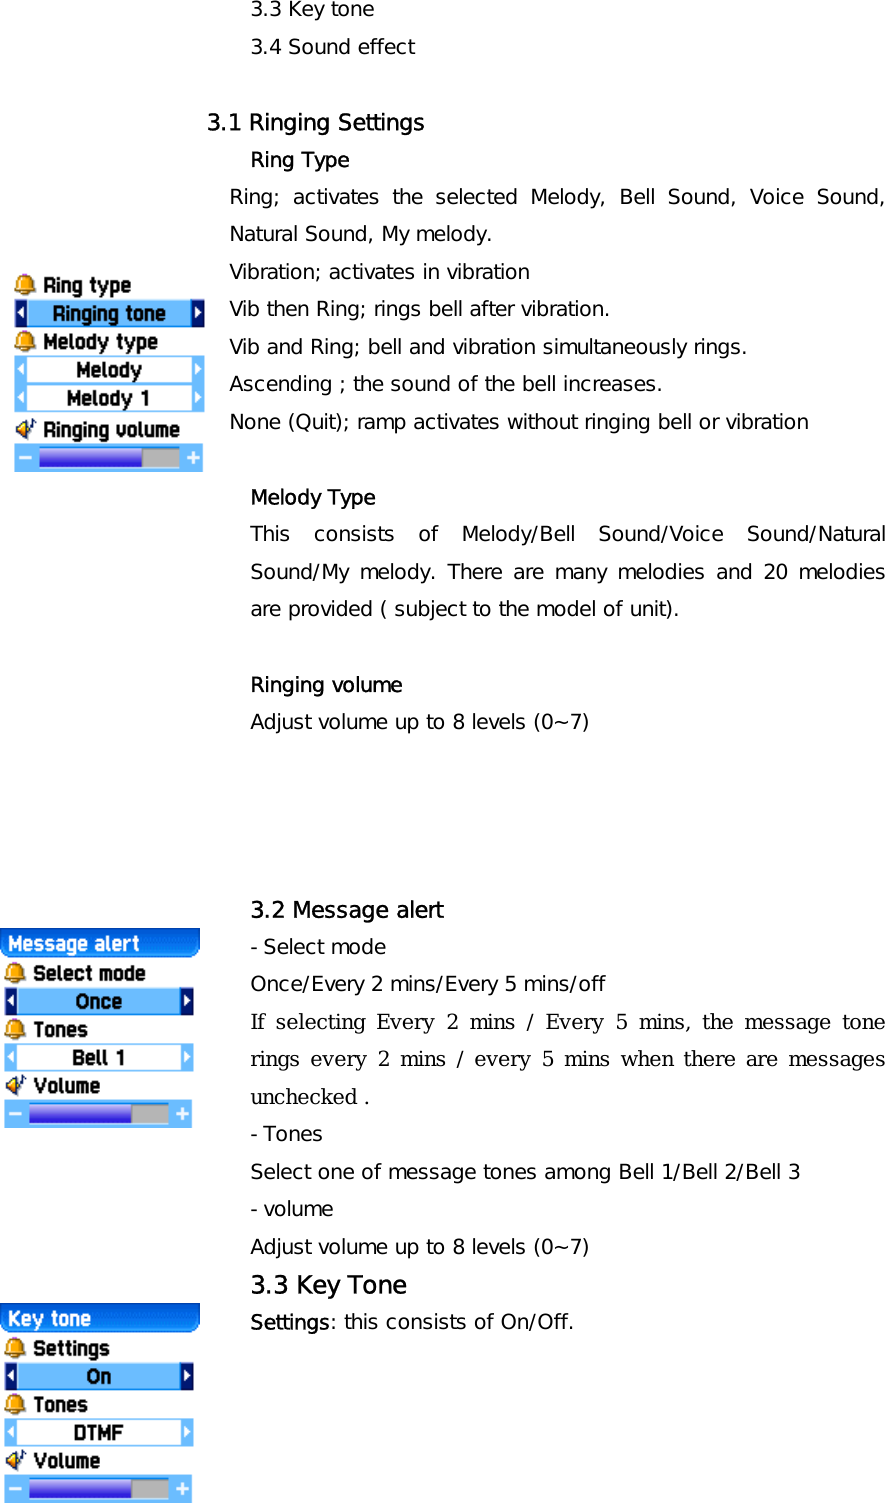
![Tones DTMF/Beep Key Tone is applied to number key. Volume Adjust volume up to 8 levels (0~7) 3.5 Sound effect Minute minder/Area alerting/On&Off melody This activates melody which is checked. (only one melody is available) [Operation Method] Bell/ Vibration/ Volume Select Sound Setting under the Sound Menu Select Bell/ Vibration/ Volume by using the Up/Down/Left/Right key Save the selected one by pressing the OK key. If not wanting to save it, press the CLR or END key to escape from the menu. (CLR; move to the previous page END; return to the IDLE screen) SMS Tone Setting Select Message alert menu. Select Mode/Tone/Volume by using Up/Down/Left/Right key. Save the selected one by pressing the OK key. Once; operates once 2 mins ; operates every 2 mins. 5mins ; operates every 5 minutes. If not wanting to save it, press the CLR or END key to escape from the menu. (CLR; move to the previous page END ; return to the IDLE screen) Key Tone Setting Select Key Tone menu Select Setting/Tone/Volume by using the Up/Down/Left/Right key. Save the selected one by pressing the OK key. If not wanting to save it, press the CLR or END key to escape from the menu. (CLR; move to the previous page END; return to the IDLE screen)](https://usermanual.wiki/Pantech-Co/G700/User-Guide-388624-Page-31.png)
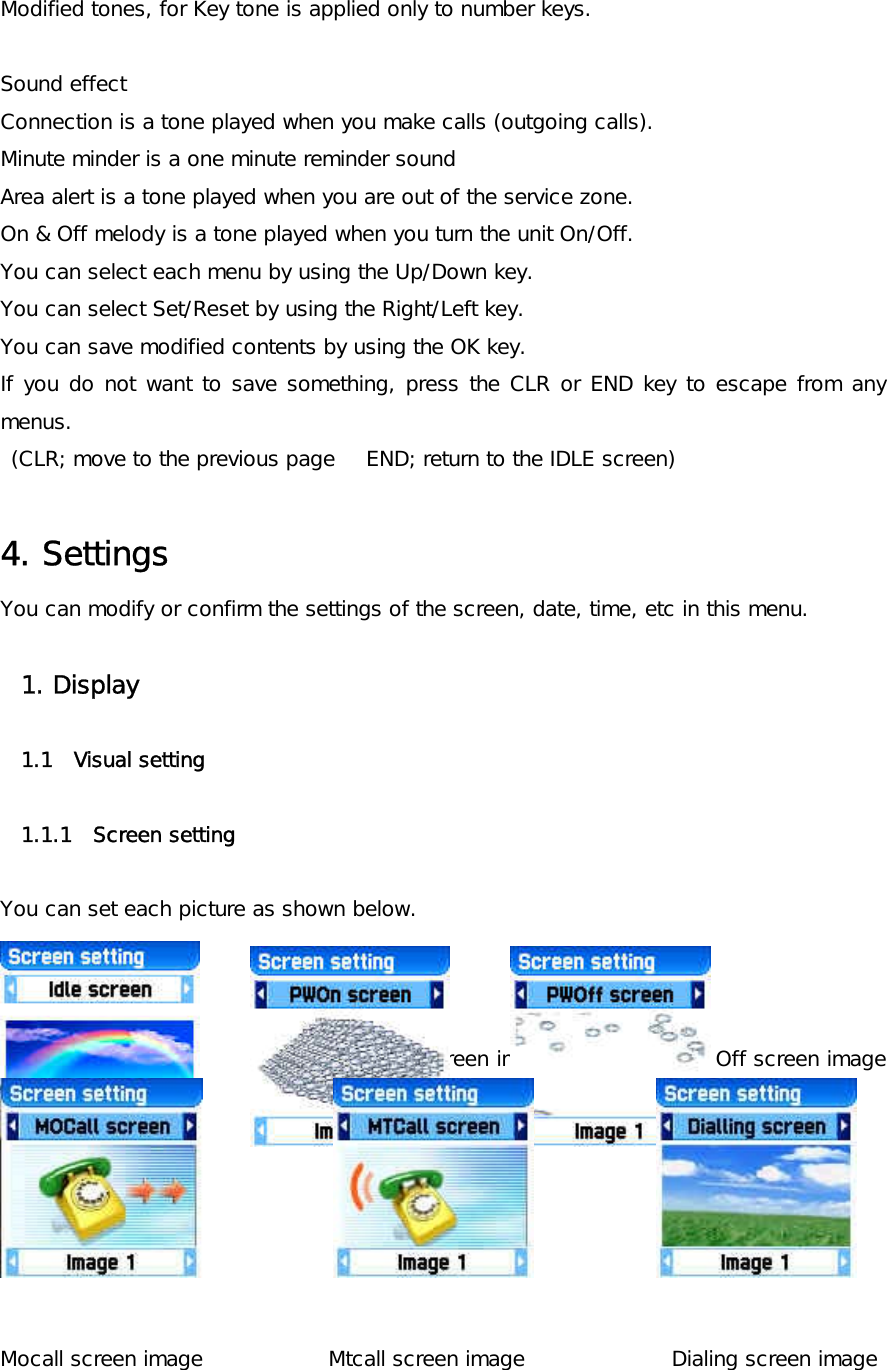
![If you want to change the picture matching each situation, first place the select bar in the desired situation by using the Left/Right key. Then move the Select bar down by using the Down key. Last, select the desired picture by using the Left/Right key. If not wanting to change picture setting, press the CLR or END key to escape from the menu. 1.1.2 Screen Option You can set three screen options here. Screen option: select the kind of idle screen. Display string: modifies the string on the idle screen. Font color: modifies the color of letters. Use the UP/DOWN key in order to move to each option. Screen option You can select one of the IDLE screens among the 4 options this function. Normal image: this displays the picture set in the Screen Setting menu. Analog clock: this displays the analogue time screen. User define image: You can set pictures images downloaded from the internet, etc as background screen. You can set it in [Fun&Tool], or [download] menu. Display string You can select one which will be used for the idle screen among the three options by using the LEFT/RIGHT key. Time&Date: this displays the current date and time. You can modify the setting in [setting]-[time&date]-[displayformat]. Greeting: this indicates the Greetings which You personalize. The message of Greetings can be set in [setting]-[display]-](https://usermanual.wiki/Pantech-Co/G700/User-Guide-388624-Page-33.png)
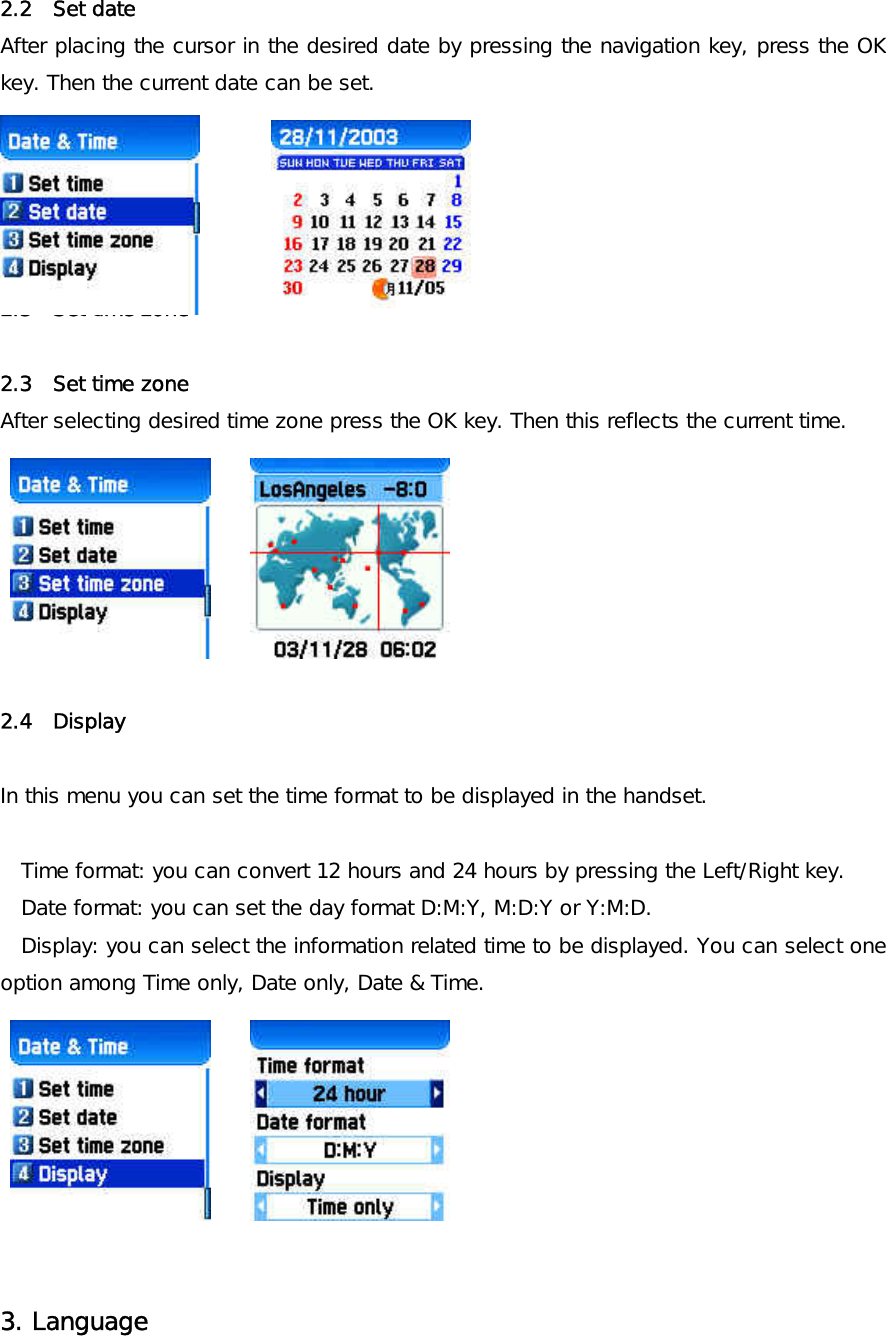
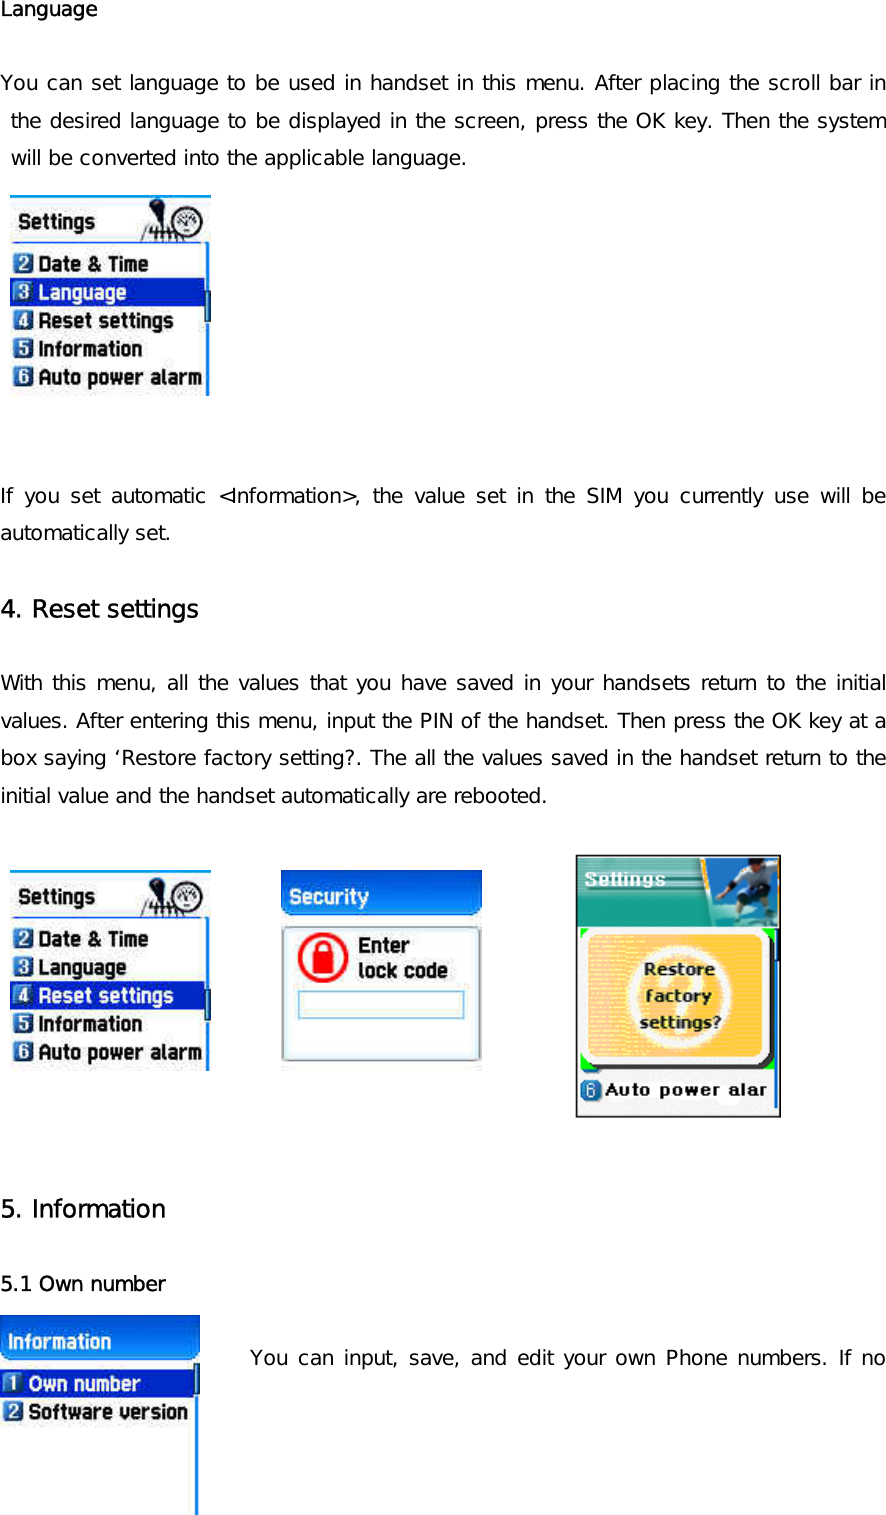
![[greeting]. D-day: this indicates the schedule of D-day. You can input the D-day in the organizers scheduler. Font color You can modify the colors of all the letters used for the handset. The colors available are red, blue, green, and dark grey including basic colors. 2. Date & Time 2.1 Set time After pressing time, press the OK key, then you can set the current time.](https://usermanual.wiki/Pantech-Co/G700/User-Guide-388624-Page-34.png)
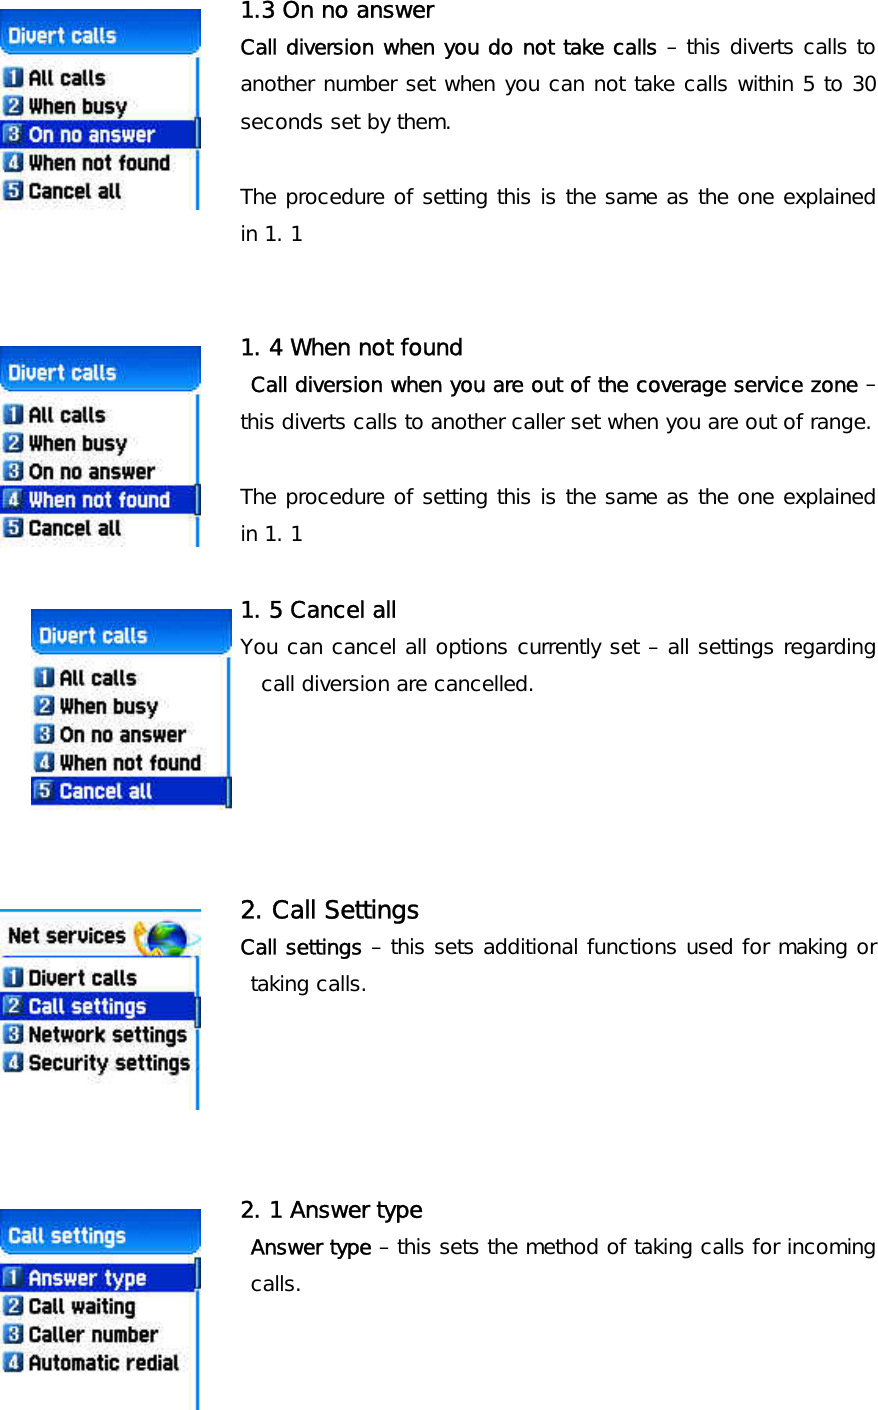
![Divert all calls – sets other numbers to be diverted for voice call, receiving data, fax, message service. 1. 1. 1 On This sets call diversion for all calls. If you press On, the screen saying “Input a number to be diverted” will appear. After inputting a number to be diverted press the [OK] button. Then the screen saying “Input transfer time ranged from 5 to 30 seconds” will appear. After that press the [OK] button to be transferred to the network. 1. 1. 2 Off This cancels the setting of “Call diversion for all calls”. 1. 1. 3 Status This indicates the current status being set. 1. 1. 4 By service You can set call diversion for all 4 services [1], or set call diversion for each service [2][3][4][5]. You also can select all services except for message service [6]. 1.2 When busy Call diversion when line is busy – this diverts calls to another number set when a user’s line is busy. The procedure of setting this is the same as the one explained in 1.1.](https://usermanual.wiki/Pantech-Co/G700/User-Guide-388624-Page-38.png)
![2. 1. 1 Flip open To take incoming calls, open the flip of the unit. 2. 1. 2 Send key To take incoming calls, press the [SEND] key. 2. 1. 3 Any key To take incoming calls, press any key except for the [SEND] and [END] key. 2. 1. 4 Auto answer For incoming calls, this will automatically connect after 10 seconds of ringing, 2. 2 Call waiting Call waiting – When the line is busy, this reminds you that another call is attempting to be connected if there is another call.](https://usermanual.wiki/Pantech-Co/G700/User-Guide-388624-Page-40.png)
![2. 3 Caller number Displays telephone number – this displays the numbers of names of receivers and callers. This function varies according to the settings such as the existence of your service registration, or of callers’ settings. 2. 3. 1 Show caller no This shows the callers’ number 2. 3. 2 Hide your no This hides you’ unit numbers from receivers when you make calls. 2. 3. 3 Show called no This displays the receivers’ unit number when you make calls. This also shows the number diverted to another number set by receivers. 2. 3. 4 Call settings -> Caller number -> Hide if called This hides you’ unit number from callers when you have incoming calls. 2. 4 Automatic redial Automatic redial – this automatically redials twice to 4 times when you attempted to make calls but were cancelled. You can not set trial times. 3. Network settings (1) Preferred N/W Set preferred Network – When the network list currently provided by handset is displayed, press the [MENU] key. Then the sub options as follow will appear.](https://usermanual.wiki/Pantech-Co/G700/User-Guide-388624-Page-41.png)
![- Insert: this adds the preferred net work to the top of the current list. - Added to end: this adds the preferred net work to the end of the current list - Delete: this deletes the contents of selected networks. Units have had the profiles of the various dealers of every country saved on them. This menu provides a function that you select and register to dealers by your preference. (2) Add new N/W Follow the following procedures in order to register a new network. Country code: a window saying ‘input country code’ will appear. (3 digits) Network code: a window saying ‘input a code of desired network’ will appear. (2 digits) Enter name: you should input directly the applicable name of the network. This menu has the following sub-menus. - Add: this adds a new network . - Change: this changes the contents of the net work currently registered. - Delete: this deletes the contents of selected network. “(1) This menu is used when another dealers should be additionally saved, apart from the dealers saved in the contents of Preferred N/W”. (3) N/W selection With this function, you can select your preferred dealers among the list of available networks you make after connection [1] Automatic This automatically selects networks. [2] Manual](https://usermanual.wiki/Pantech-Co/G700/User-Guide-388624-Page-42.png)
![-Call only: this allows general calls but restricting access to the menu by inputting a password onto the handset. - Lock: this allows only emergency calls and restricts access to menus or general calls by the input of the password of the handset. -Change code: you can change your handset password randomly. (3) H/S barring H/S barring is a function that you can restrict the attempts of making or receiving calls of the handset in various ways. Normally, barring services is run from the network but H/S barring restricts the handset itself. Its main functions are as follows. [1] Incoming calls This rejects all incoming calls. You can select Lock/Unlock in the menu. [2] Outgoing calls This restricts making calls. This function includes sub optional menu classified by (1) restricts all dial calls, (2) restricts particular calls, which means the restriction of calls applied to prefixes set and (3) no restriction of dial calls. If you select the Bar prefix, then the bar list is displayed. You can select and set here or, popup menus such as add, modify, delete, delete all, etc. Once H/S barring function is set, if there is a call attempt, a message saying “Call failed / Call barred” is displayed. (4) N/W barring This function is decided according to the existence of service dealers or subscribers’ selection. You can individually set the whole group of basic services or each group just like call diversion services (Call Divert). You can individually set On/Off regarding (1) All services, (2) Voice calls, (3) Data service, (4) Fax service, (5) Message service and (6) All services except message services. If changing settings, the inputting of the PIN](https://usermanual.wiki/Pantech-Co/G700/User-Guide-388624-Page-44.png)
![will be required. [1] Foreign calls Barring of Outgoing International Calls (BOIC)- this restricts all outgoing overseas calls. [2] Only Local/Home Barring of Outgoing Calls except those directed to the HPLMN Country (BOIC-exHC) – this allows only overseas calls outgoing Home PLMN and restricts other outgoing overseas calls. [3] Bar incoming Barring of All Incoming Calls(BAIC) – this restricts all receivied calls. [4] Incoming abroad Barring of Incoming Calls when Roaming Outside the Home PLMN Country (BIC-Roam) – this restricts all received calls when receiving roaming service from other countries’ dealers apart from Home PLMN. [5] Outgoing calls Barring of All Outgoing Calls (BAOC) – this restricts all outgoing calls. The call list which barring should be set is displayed. Select one among the call lists. If you press the [OK] key, you can set the following. On: this sets barring for applicable calls. Off: this sets cancellation of barring for applicable calls. Status: this indicates the current status of applicable calls whether you are barred [6] Clear all This sets the cancellation of barring through [1-5] menu. When attempting to use this, a window input network password will appear. (5) Fixed dialing [1] Fixed dial setting](https://usermanual.wiki/Pantech-Co/G700/User-Guide-388624-Page-45.png)
![Fixed Dialing Numbers (FDN) is a function that only particular numbers are available in the telephone list saved in the SIM. When setting or canceling this function the inputting of the PIN2 password will be required. [2] Fixed dial list This displays the saved numbers of FDN. (6) CUG settings [1] List CUGs This displays the CUG name list inputted by you. After selecting CUG name, press the OK key, then the following functions are available. , Add: this adds a new CUG name inputted by you at the end of the CUG name list. Edit: this edits the CUG name and index. Delete: this deletes the CUG name and index. Clear all: this deletes registered the CUG name and index. [2] Select 1. This displays the CUG name list inputted by you. 2. If you select CUG name, CUG is set with selected content](https://usermanual.wiki/Pantech-Co/G700/User-Guide-388624-Page-46.png)
![6. Organizer You can alarm alert settings, record important events, make memos, use calculations, do unit conversions, use a stop watch, etc with this function. 1. Alarm [left] navigation key Æ 1.Alarm You can set an alarm ringing once on an alert day, or on a daily or weekly basis. [Status showing that no alarm is registered] Add and delete alarm alert Press [Menu] key -> [OK] key. 6.Organizer O Set alarm alert. The select by pressing On or Off. You can decide with the following scroll bar whether the alarm alert set as above is rung once or in a daily or weekly basis. [ Repeat : Once] [ Repeat : Daily] [ Repeat : Weekly]](https://usermanual.wiki/Pantech-Co/G700/User-Guide-388624-Page-47.png)
![If selected [Once], alarm rings once on alert date. If selected [Daily], alarm rings at set time everyday. If selected [Weekly], alarm rings at a set time on a particular day set by pressing the right navigation key [->]. Select alarm melody, If pressing [Menu] in Alarm Setting, you will see a popup window. Select [Melody] here to select alarm melody. If you tick the [On Morning Call] option, alarm will ring even if the handset is in <manner mode>. You can register a maximum 5 of alarms. 2. Scheduler [left] navigation key Æ 2. Scheduler You can record important events by setting a brief memo with alarm in the calendar. You can move <red square> cursor by using the navigation key. [When there is no event registered]](https://usermanual.wiki/Pantech-Co/G700/User-Guide-388624-Page-48.png)
![Add and delete events After moving the <red square> cursor to the date you wish to put the event, press the [MENU] key. Then select [Add Event]. You simply press [OK] and [MENU] to select [Add Event]. Then, you will see the following screens. – By using the [up/down] navigation key, move up or down. By using the [left/right] navigation key, select option 1) Event: you can decide the kind of events. (option: meeting, telephone, meal, entertainment, birthday, travel, etc) 2) Memo: by pressing the [right] navigation key, you can input memos. 3) Time: records event time. 4) Alarm alert: this decides when the alarm alert for the above events recorded. (option: on time, before 1 hour, before 2 hours, before one day, before two days, no alarm alert, etc can be selected) 5) Repeat: this sets the frequency of events. (Option: once, daily, weekly, monthly, and yearly) eg) Select <yearly> for birthday. 6) You can set alarm melody for event by pressing the [MENU] key. 7) Once setting is completed, press the [OK] key to save events.](https://usermanual.wiki/Pantech-Co/G700/User-Guide-388624-Page-49.png)
![If a new event is set on a particular date, this is displayed in the calendar. You can see the events registered at the bottom of the calendar with the date. You can see the details of the event by pressing the [OK] key. OK Æ MenuÆ If you press the [Menu] key, the popup menus will be displayed. 1. Add Event: this adds new events on the date selected 2, 3. Delete and delete all: this deletes an event or all events registered on the selected dates. 4. On D-day: this shows the days left until the event. 5. Memory Info: this displays the number of events registered. View all the events registered in calendar [Menu] key Æ [View All Event] Move to particular dates [Menu] key Æ [ Goto Date]](https://usermanual.wiki/Pantech-Co/G700/User-Guide-388624-Page-50.png)
![3. Memo You can leave a brief memo in your handset. If you press the [MENU] key, sub menus as follows are displayed. 1. Add: this creates new memos. 2. Delete: this deletes selected memos. 3. Delete all: this deletes all the memos. After completing writing memos you can press the [OK] key in order to save the memo. By pressing the [OK] key in the memo list screen, the contents of the selected memo are displayed. A maximum of 20 memos can be left. 4. Calculator This function provides plus, minus, times, and division of decimal numbers. Select one of 4 arithmetic with the navigation key. By using the [OK] key, you can gain the results of arithmetic. Use [*] key to input a decimal point, and the [#] key to change signs. i.e. : 6 X 5 / 2 + 2 = [Keypad 6], [Scroll Left], [5], [Ok Key], [Scroll Right], [2],](https://usermanual.wiki/Pantech-Co/G700/User-Guide-388624-Page-51.png)
![[Ok Key], [Scroll Up], [2], [Ok Key] 5. Converter You can convert units such as length, width, volume, and weight into various units by using the converter. ‘Length’ includes cm, m, inch, feet, yard, and mile, ‘Width’ includes sq. m, a, sq. feet, sq. yard and acre. ‘Volume’ includes cu. cm, cu. m, L, cu. inch, cu. feet, cu. Yard, and gallon, and ‘Weight’ includes g, kg, t, grain, oz, pound, and keun. By using the [Left] or [Right] keys you can select one among length, width, volume, weight. After moving down by using the [Down] key, select a unit to calculate by using the [Left] or [Right] key. Input value to calculate by using key pad. By using the [*] key, you can use decimal points. Select a unit by using the [Left] or [Right] key. Whenever inputting values or changing units, the converter outputs the results. In case several units are not calculated, the result of the value becomes 0. Also if the value is over the range of calculation, the result of the value becomes 0.](https://usermanual.wiki/Pantech-Co/G700/User-Guide-388624-Page-52.png)
![6. Stop Watch You can record events by using the stop watch. The stop watch is operated by the navigation keys. Press ‘Start’ to record events, press ‘Pause’ to pause time, and press ‘Reset’ to delete the time and wait. 7. Fun & Tools 1. Downloaded You can see the list of images and melodies files downloaded through EMS/MMS, mobile service, or PC sync. You can also carry out basic work such as deleting each file, changing file names, and viewing file information, and background screen registration, view image, etc. 1. Image View a list of image files Select image file by using navigation key [UP/DOWN].](https://usermanual.wiki/Pantech-Co/G700/User-Guide-388624-Page-53.png)
![This will display image files downloaded. Select desired image file by using the [search] key. (we do not support viewing over 256X256 sized images or viewing in a small screen at the bottom. Press the [Menu] key to carry out work regarding image files. When the file menu screen appears, select the desired menu by using the [Search] key and press the [OK] key. View – viewing image. Set as wallpaper - background screen registration. After pressing the [OK] key, please wait until the progress bar is completed.](https://usermanual.wiki/Pantech-Co/G700/User-Guide-388624-Page-54.png)

![Rename – Change file names. Enter editor screen by pressing the [OK] key. After inputting the name you desire to change press [OK] to save it. You can escape from the file menu screen by pressing the [OK] key or the [END] key. 2. Animation This shows the list of animation files downloaded (applies to animation with wbmp format. You can see animation gif files at the Image menu.). You can see the selected animation file in a small screen at the bottom. You also can select desired animation files by using the navigation key (we do not support viewing over 256X256 sized images or viewing in a small screen at the bottom). Press [Menu] key in order to carry out works regarding animation files. When the file menu screen appears, select desired menu by using the navigation key and press the [OK] key. View – Views animation. Info – views file information, You can see basic file information, the number of horizontal](https://usermanual.wiki/Pantech-Co/G700/User-Guide-388624-Page-56.png)
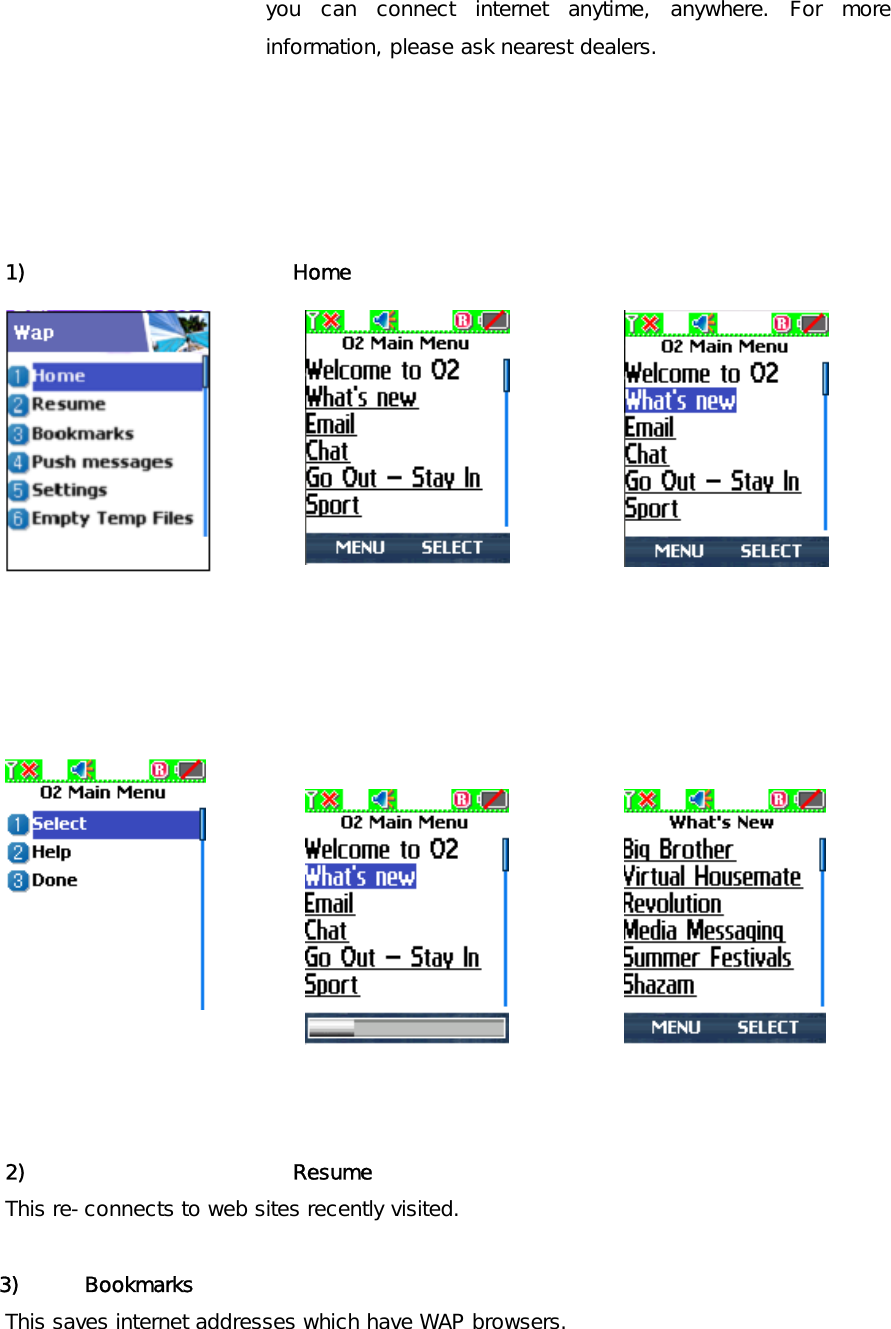
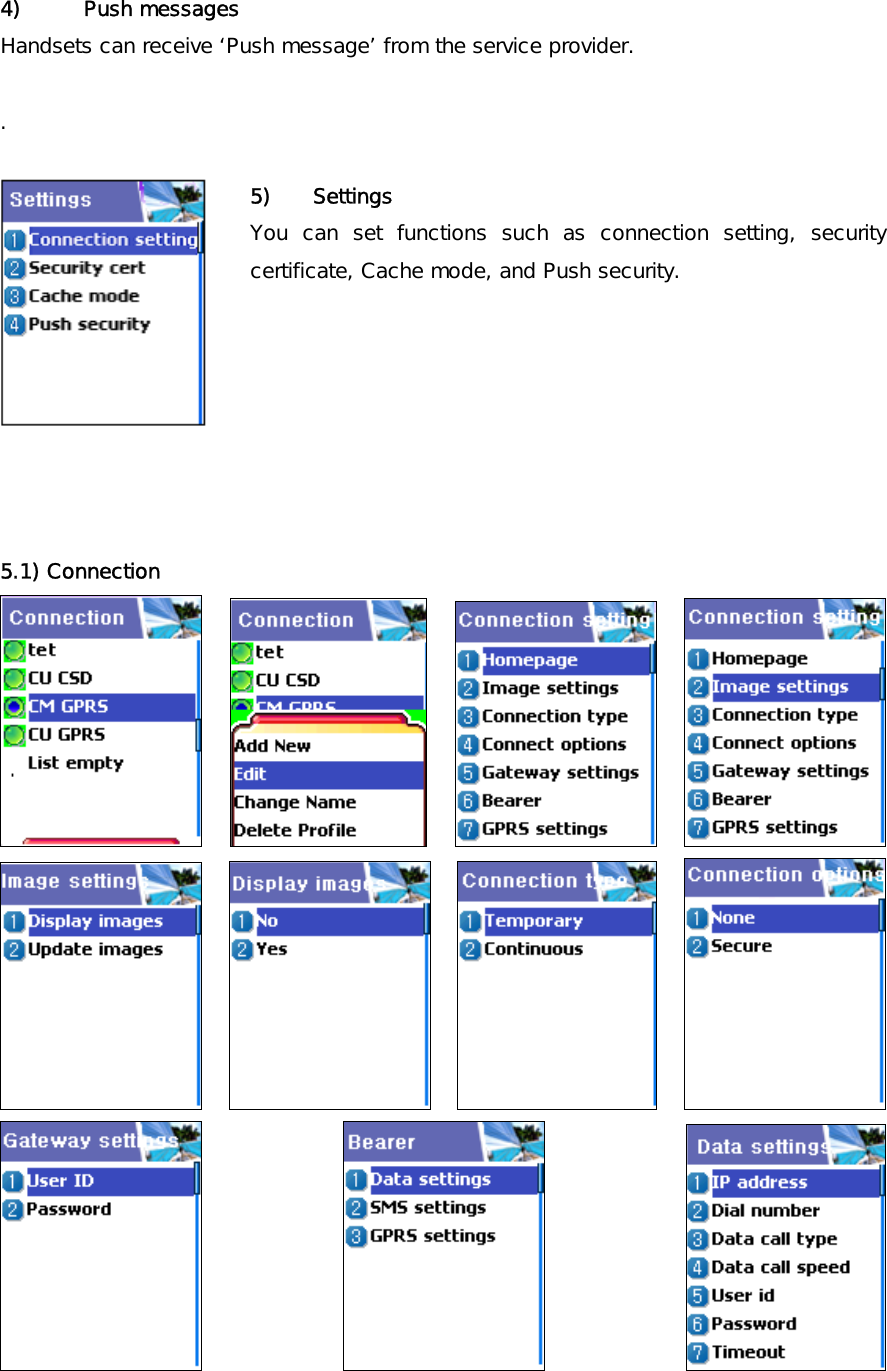
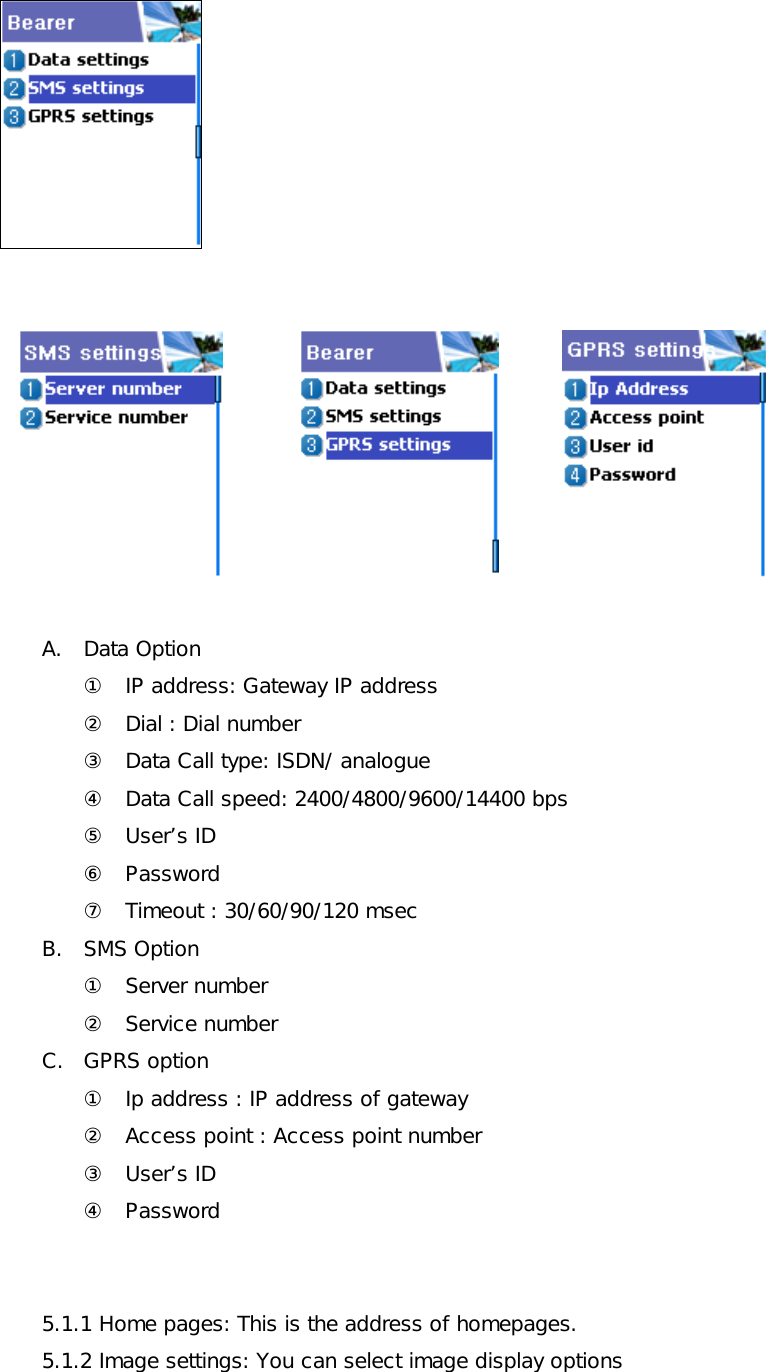
![and vertical pixels, and color resolution. Delete – deletes files Rename – changes file names. Enter editor screen by pressing the [OK] key. After inputting the name you desire to change press [OK] to save it. You can escape from the file menu screen by pressing the [OK] key or the [END] key. 3. Melody This shows the list of melody files downloaded. You can see the size of selected melody files at the bottom. You can select desired melody files by using the [Searching] key. Press the [Menu] key to carry out the work regarding animation files. When the file menu screen appears, select desired menu by using the [Searching] key and press the [OK] key Play – plays melody Set as ring tone – bell sound registration. After pressing the [OK] key wait until the progress bar is completed. Info – views file information. You can see basic file information and audio type (i.e. midi, imelody, etc). Delete – deletes files Rename – changes file names. Enter editor screen by pressing the [OK] key. After inputting the name you desire to change, press the [OK] key to save it. You can escape from the file menu screen by pressing the [OK] or [END] key . 2.Wap You can surf the internet through the WAP browser. This means](https://usermanual.wiki/Pantech-Co/G700/User-Guide-388624-Page-57.png)
![7) Version info This function displays the software version of the WAP browser. 8) On-line menu When browsing, press this menu key, then you can use browser menu. Stop: this stops downloading the current page. Go back: this moves to the previous page of the page in the history list. Bookmarks: this displays bookmarks. Add bookmarks: this creates current pages into a new bookmark. Enter address: this allows entering URL’s for browsing. Home: this returns to the beginning of current page. Top: this goes to the top of the current page. 3. Memory info This displays the consumption and capacity of memory. In order to select memory info press [MENU] – [4] – [6] keys in order and press [OK] key.](https://usermanual.wiki/Pantech-Co/G700/User-Guide-388624-Page-63.png)
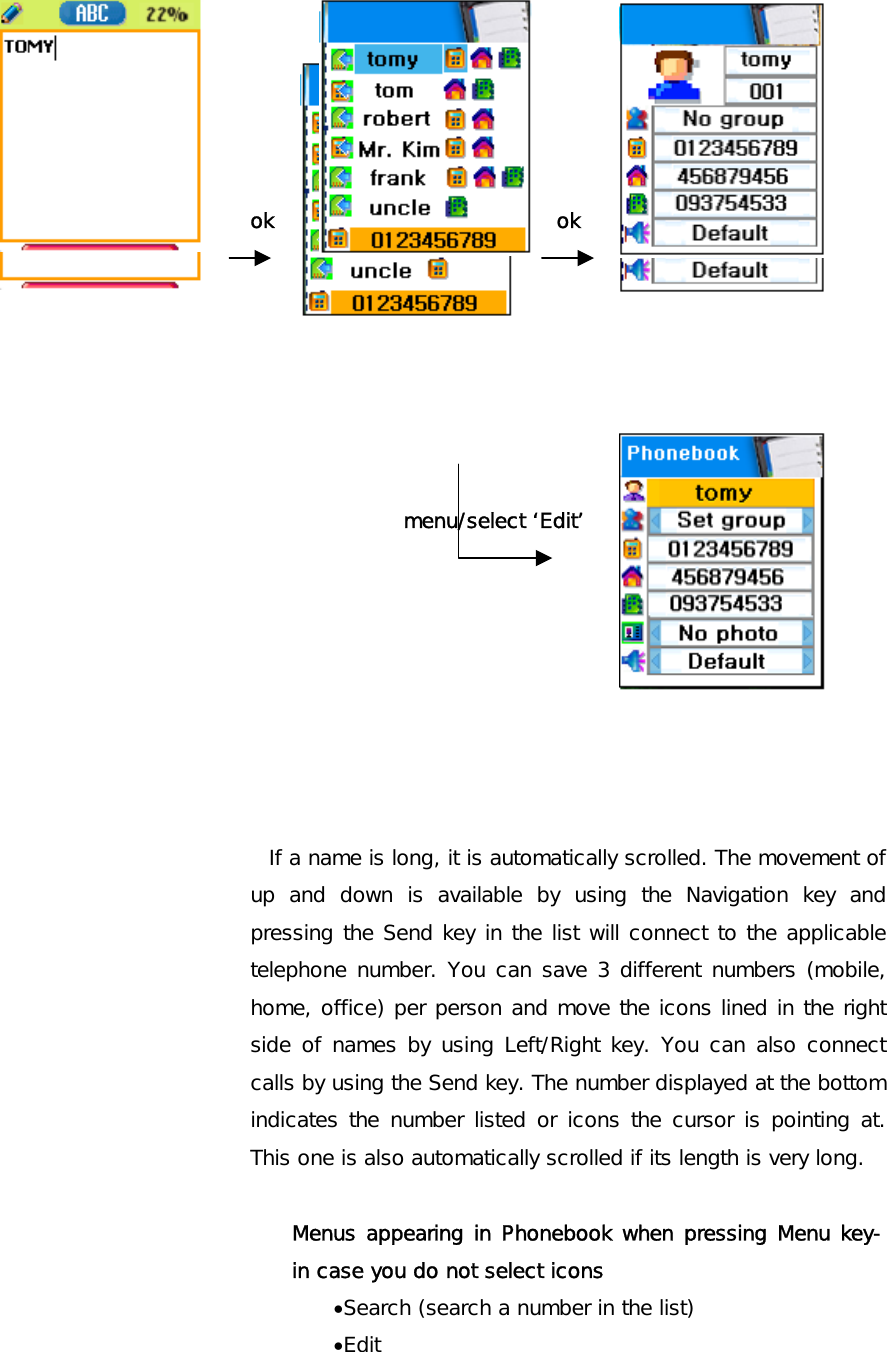
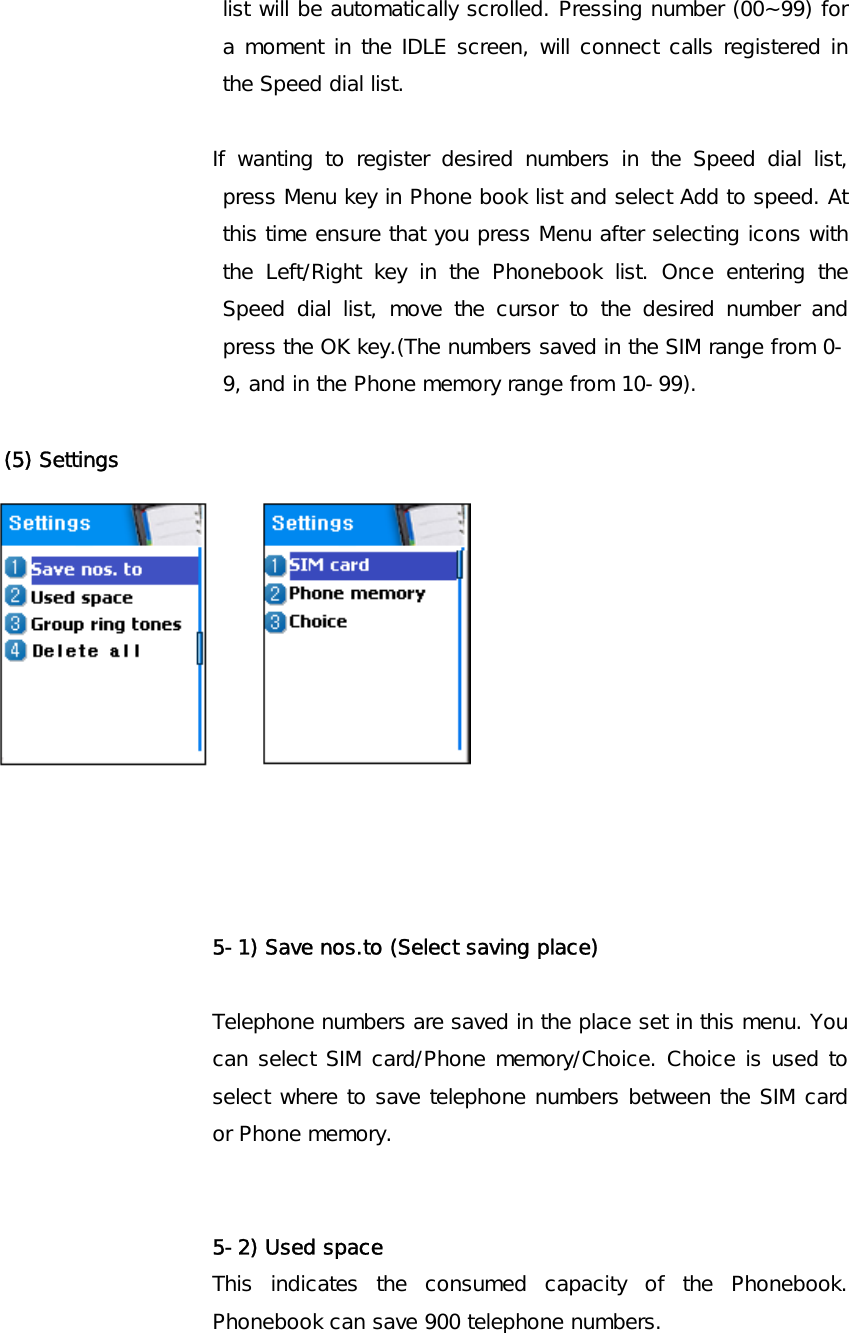
![[HOT KEY] Phonebook Phonebook supports the function of saving the list of private telephone numbers. The addition and deletion of telephone numbers is always available. Besides this, you can select a desired saving space between SIM/Phone memories. A maximum of 500 telephone numbers can be saved. ※ If you press the down key in the IDLE screen, you can enter Phonebook. (1) Group search (1) Group search You can search telephone numbers by group with this function. ok ok menu/select ‘Edit’ (2) Name Search After selecting Name Search, input names to be searched in the Edit Window. The cursor moves to the list of similar names. If not inputting names, the list arranged by name is displayed.](https://usermanual.wiki/Pantech-Co/G700/User-Guide-388624-Page-65.png)
![5.3) Group ring tones You can assign different melodies by group. My Menu You can collect and edit your favorite menus. Register desired menus by pressing [Menu] key 1. Register My Men 1) Go to desired menu. 2) Press the [Menu] key. 3) Register by pressing the [Ok] key when a window saying Add appears. 4) When not wanting to register cancel by pressing the [End] or [Clr] key. 2. Use registered menu 1) Press the [Left] key in the IDLE screen. 2) Select the desired menu among the registered menus. 3. Delete registered menus 1) Run My Menu by pressing the [Left] key in the IDLE screen. 2) Press the [Menu] key in the menu to be deleted. 3) Delete it by pressing the [Ok] key. If not wanting to delete it, cancel it by pressing the [End] or [Clr] key.](https://usermanual.wiki/Pantech-Co/G700/User-Guide-388624-Page-69.png)

