SANYO Electric DWM-4500 Low Power Communication Device User Manual 4500 Eng Front pm65
SANYO Electric Co., Ltd. Low Power Communication Device 4500 Eng Front pm65
UserManual.wiki
>
SANYO Electric
>
DWM 4500 User Manual
Users Manual
Navigation menu
Upload a User Manual
Namespaces
Wiki Guide
HTML
PDF
Info
Views
User Manual
Discussion / Help
Navigation

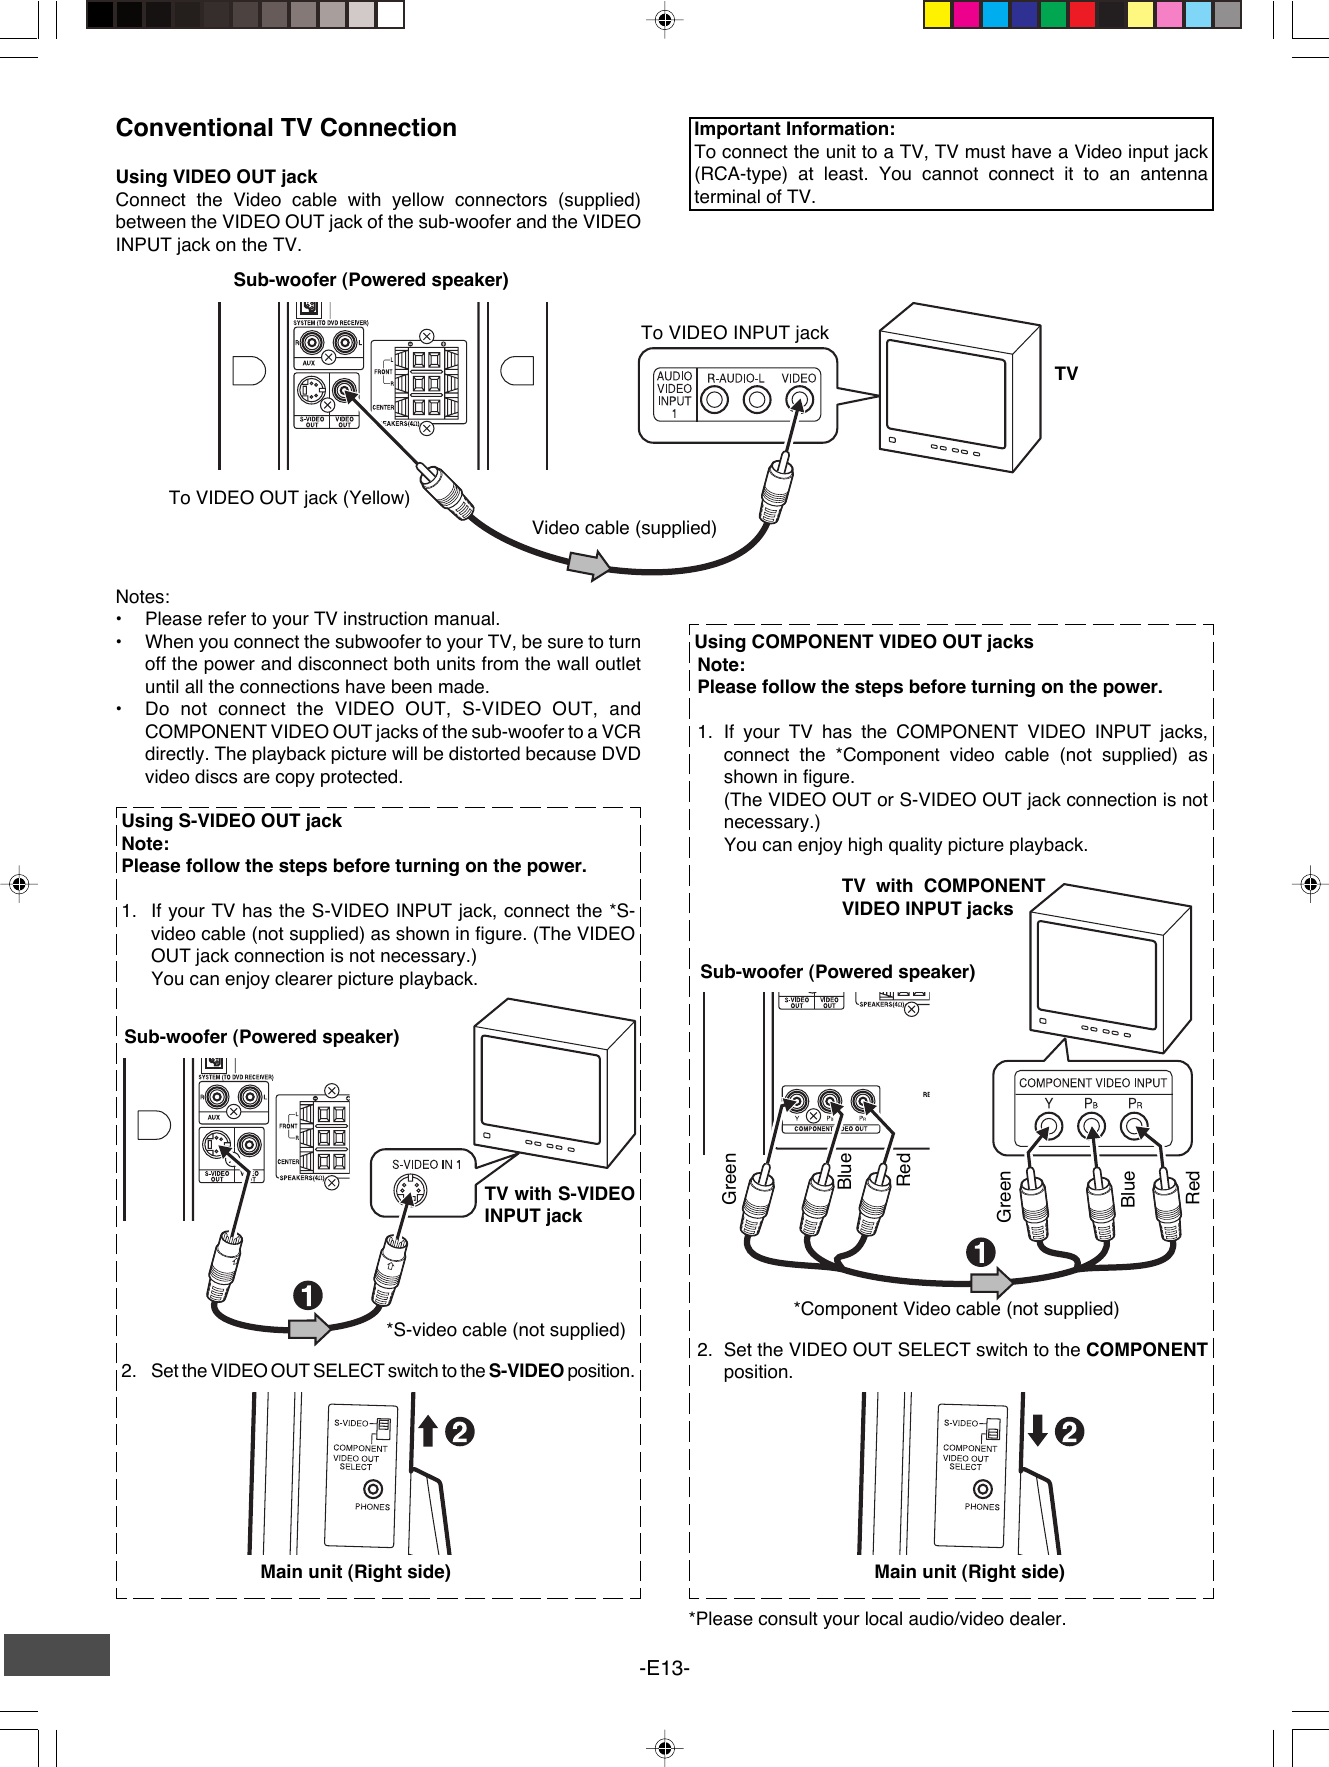
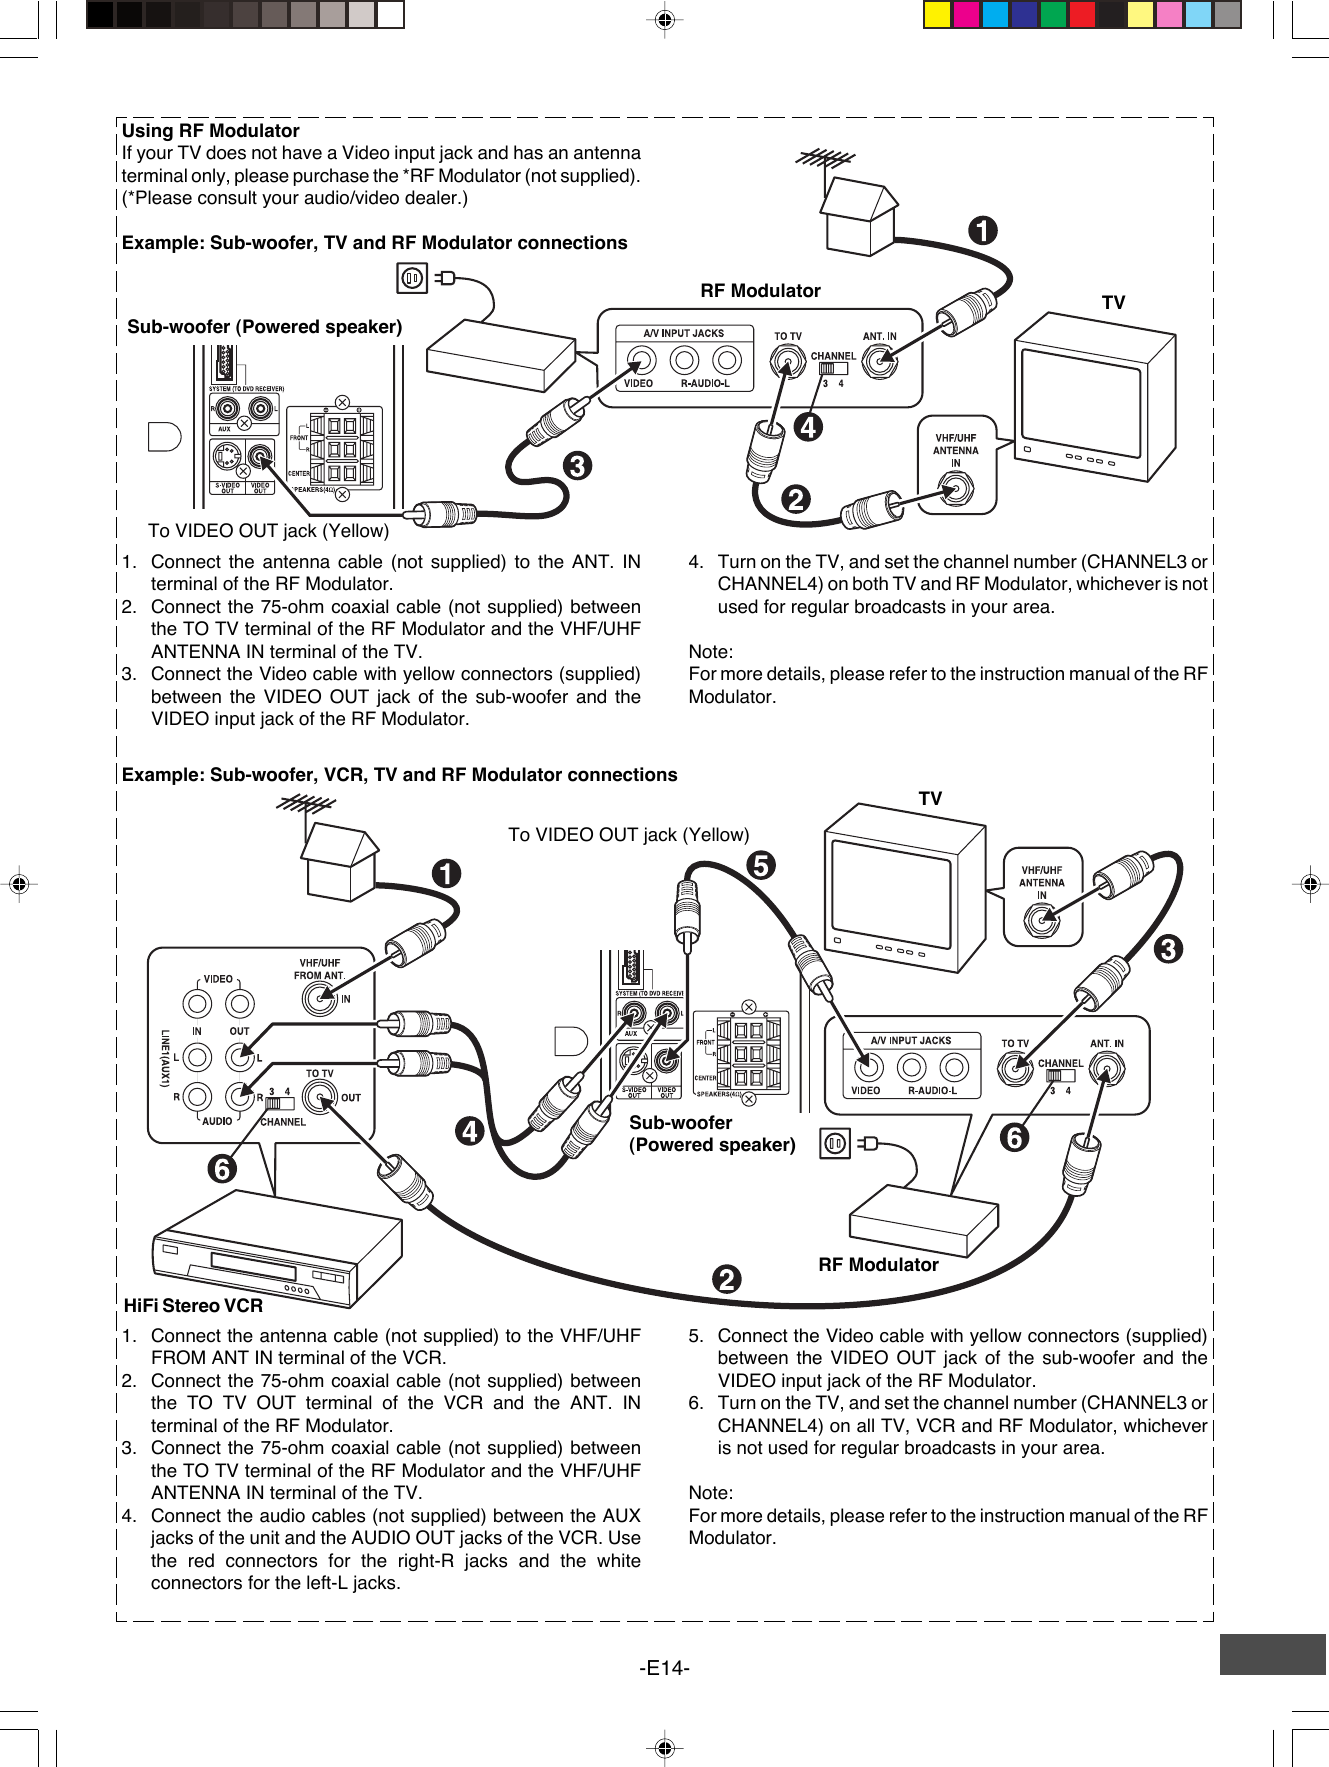
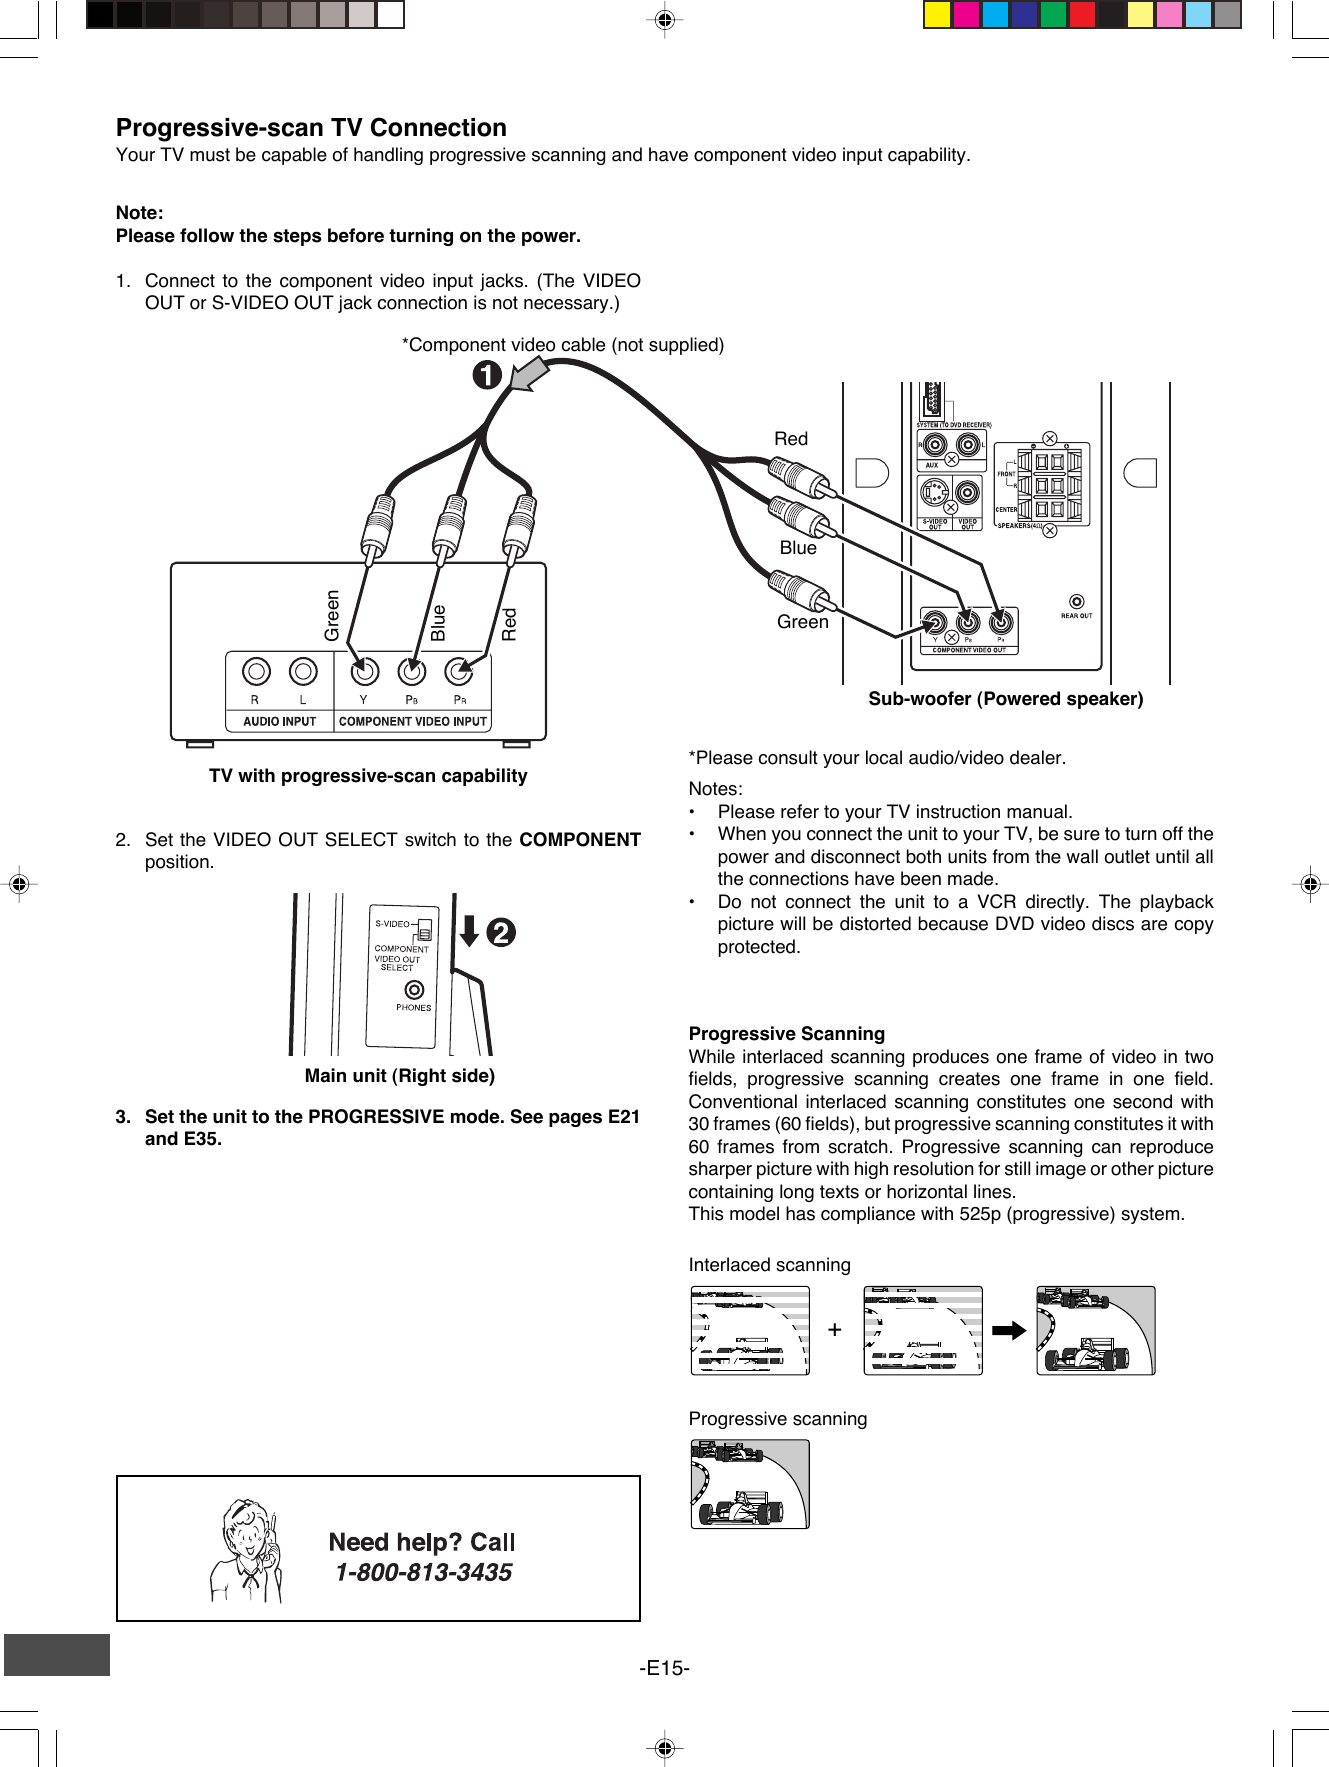
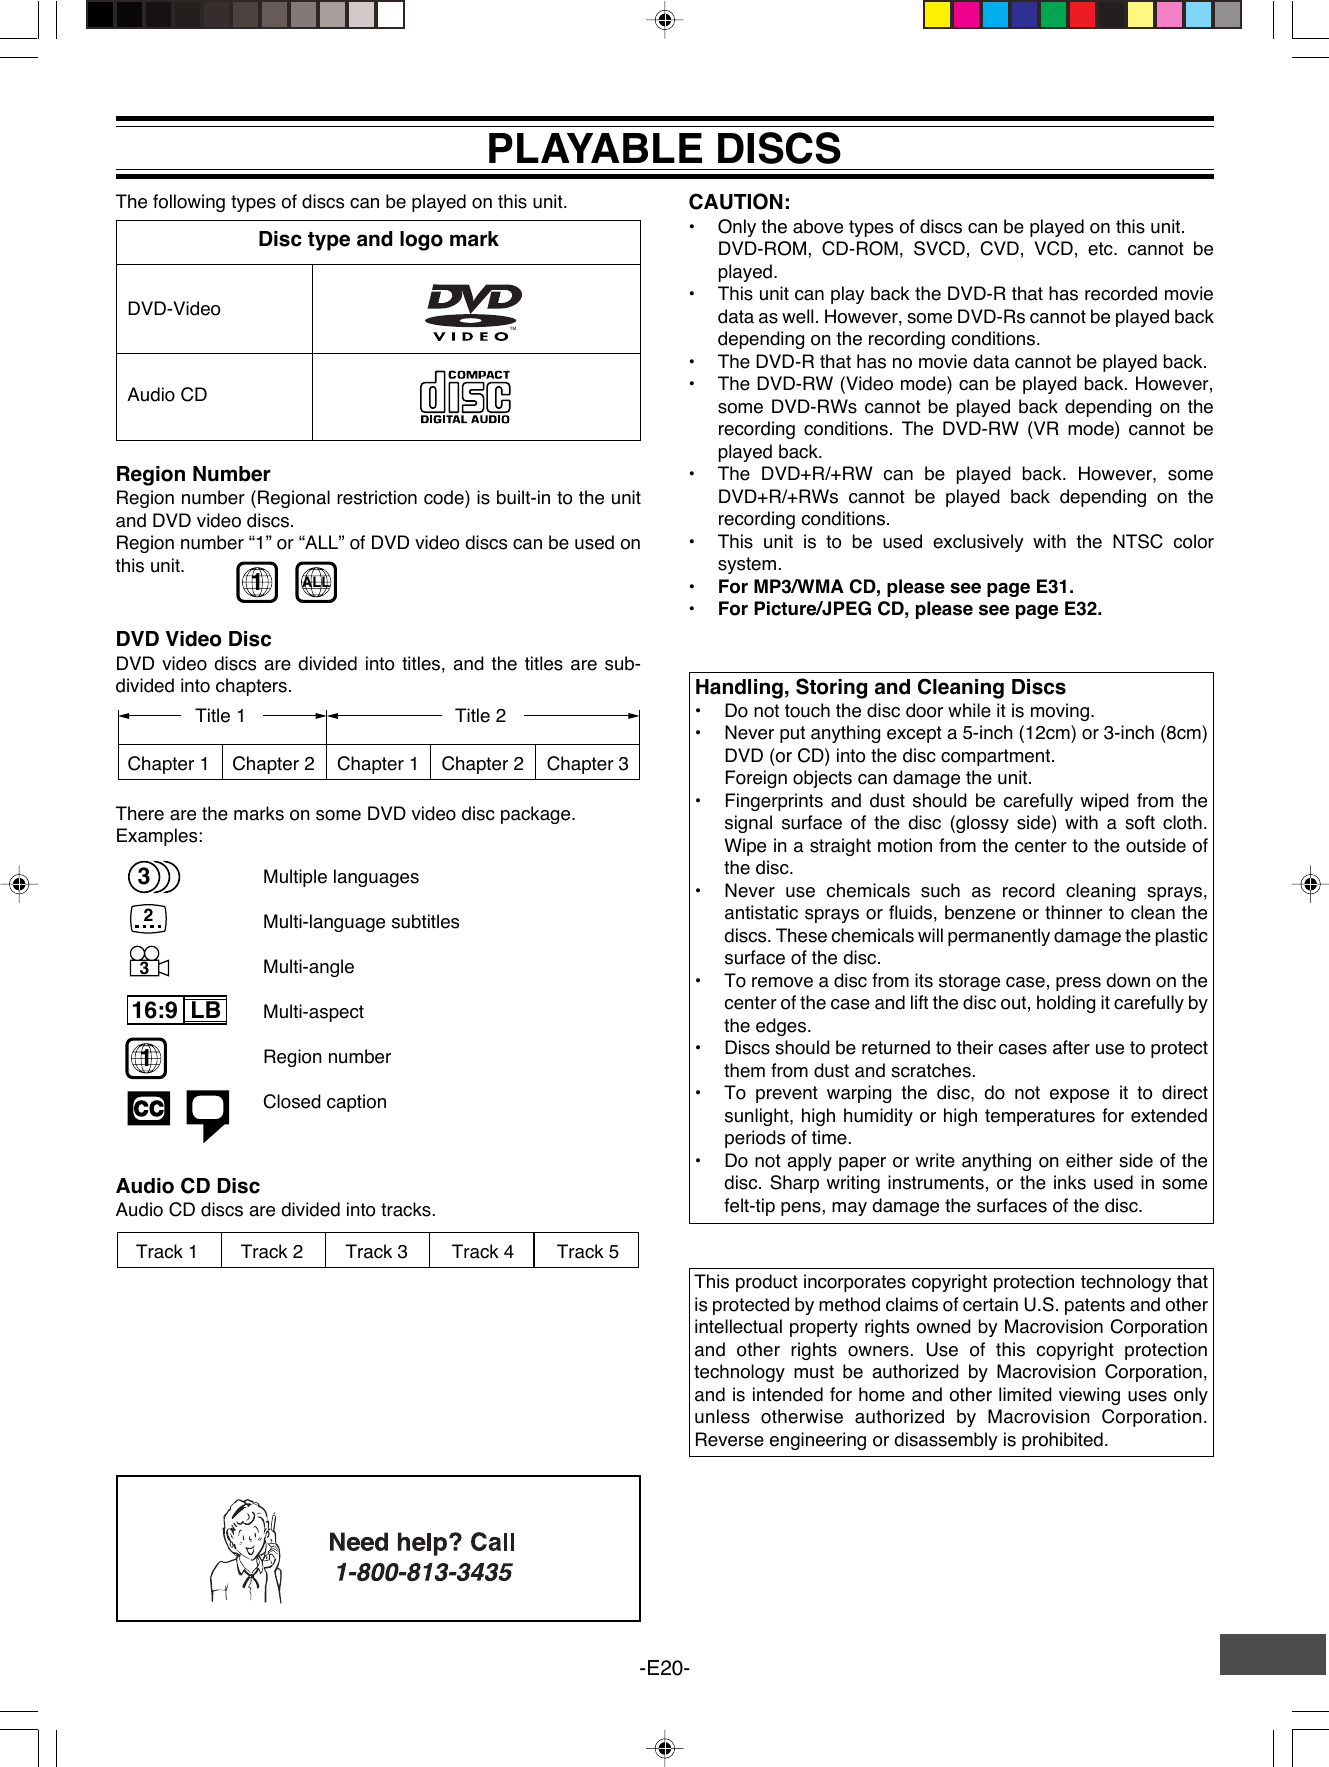
![-E1-CONTENTSAccessories ......................................................................... E2Safety Certification ............................................................. E3For Safe and Efficient Operation ....................................... E3Warning for Transmitter ..................................................... E4Controls ............................................................................... E5Multi-Brand TV Remote Control......................................... E6Basic Connections .............................................................. E8System Cable Connection ............................................... E8Speaker Connections .................................................... E10Speaker Placement ........................................................ E11Using the Rear Speaker in Wireless Mode ................... E12Using the Rear Speaker in Wired Mode ........................ E12If Using the External Speaker (Not Supplied) Instead ofthe Rear Speaker... ....................................................... E12Conventional TV Connection ......................................... E13Using RF Modulator ................................................. E14Progressive-scan TV Connection .................................. E15FM Antenna Connection ................................................ E16Additional Connection Examples ................................... E16Power Supply ................................................................ E16Before Operation ............................................................... E17Common Operation ....................................................... E17Selecting Surround Mode .............................................. E18Adjusting the Speaker Volume Balance ........................ E19Adjusting the Sub-woofer Level ..................................... E19Playable Discs ................................................................... E20Disc Playback .................................................................... E21Preparations .................................................................. E21Basic Playback .............................................................. E22Selecting Picture Mode ................................................. E22Stopping Playback ......................................................... E23Continuing Playback from Where You StoppedWatching (LAST MEMO PLAY), for DVD only ............... E23Selecting a DVD Menu .................................................. E23Selecting a Top Menu [DVD] ......................................... E23Chapter (Track) Skip ..................................................... E23Title Search [DVD] ......................................................... E24Chapter Search [DVD] ................................................... E24Time Search [DVD] ........................................................ E24Time Search [CD] .......................................................... E24Track Search [CD] ......................................................... E24Fast Playback ................................................................ E25Slow Motion Playback [DVD] ......................................... E25Still Picture (Pause) ....................................................... E25Frame by Frame Advance Playback [DVD] ..................... E25Picture Zoom [DVD] ...................................................... E25Viewing from a Desired Camera Angle(Multi-Angle) [DVD] ....................................................... E26Designated Range Repeat Playback (A-B Repeat) ...... E26Repeat Playback ........................................................... E26Random Playback [CD] ................................................. E27Programmed Playback [CD] .......................................... E27Selecting Subtitle Language [DVD] ............................... E28Selecting Audio Soundtrack Language(Multi-Language) [DVD] ................................................. E28Selecting On-Screen Information .................................. E28TVGuardian Operation ...................................................... E29Before Setting ................................................................ E29Setting TVGuardian ....................................................... E29How It Works After Setting TVGuardian ........................ E30MP3/WMA CD Operation ................................................... E31Before Starting .............................................................. E31MP3 CD Playback ......................................................... E31Picture Disc Operation ..................................................... E32Before Starting .............................................................. E32Kodak Picture/JPEG CD Playback ................................ E32Initial Settings.................................................................... E33Setting Language .......................................................... E33Setting Display .............................................................. E34Setting Audio ................................................................. E36Setting Parental ............................................................. E37Language Code List ...................................................... E38Listening to the Radio (FM Only) ..................................... E39Preparation .................................................................... E39Automatic/Manual Tuning .............................................. E39To Preset Stations ......................................................... E39Listening to Preset Stations ........................................... E39Enjoying Other Sources ................................................... E40Sleep Timer Operation ...................................................... E40Maintenance ...................................................................... E40Troubleshooting Guide ..................................................... E40Specifications .................................................................... E42Warranty ............................................................................. E43IMPORTANT INFORMATION:To connect this DVD Home Theater System to a TV, TV must have a Video input jack (RCA-type) at least. You cannotconnect it to an antenna terminal of TV.To operate the built-in TVGuardian®This unit has the built-in TVGuardian® Foul Language Filter (TVG®).When a disc supporting closed caption is played, it will mute the audio during the entire phrase containing offensivelanguage. For more details, see page E29.](https://usermanual.wiki/SANYO-Electric/DWM-4500/User-Guide-518784-Page-2.png)


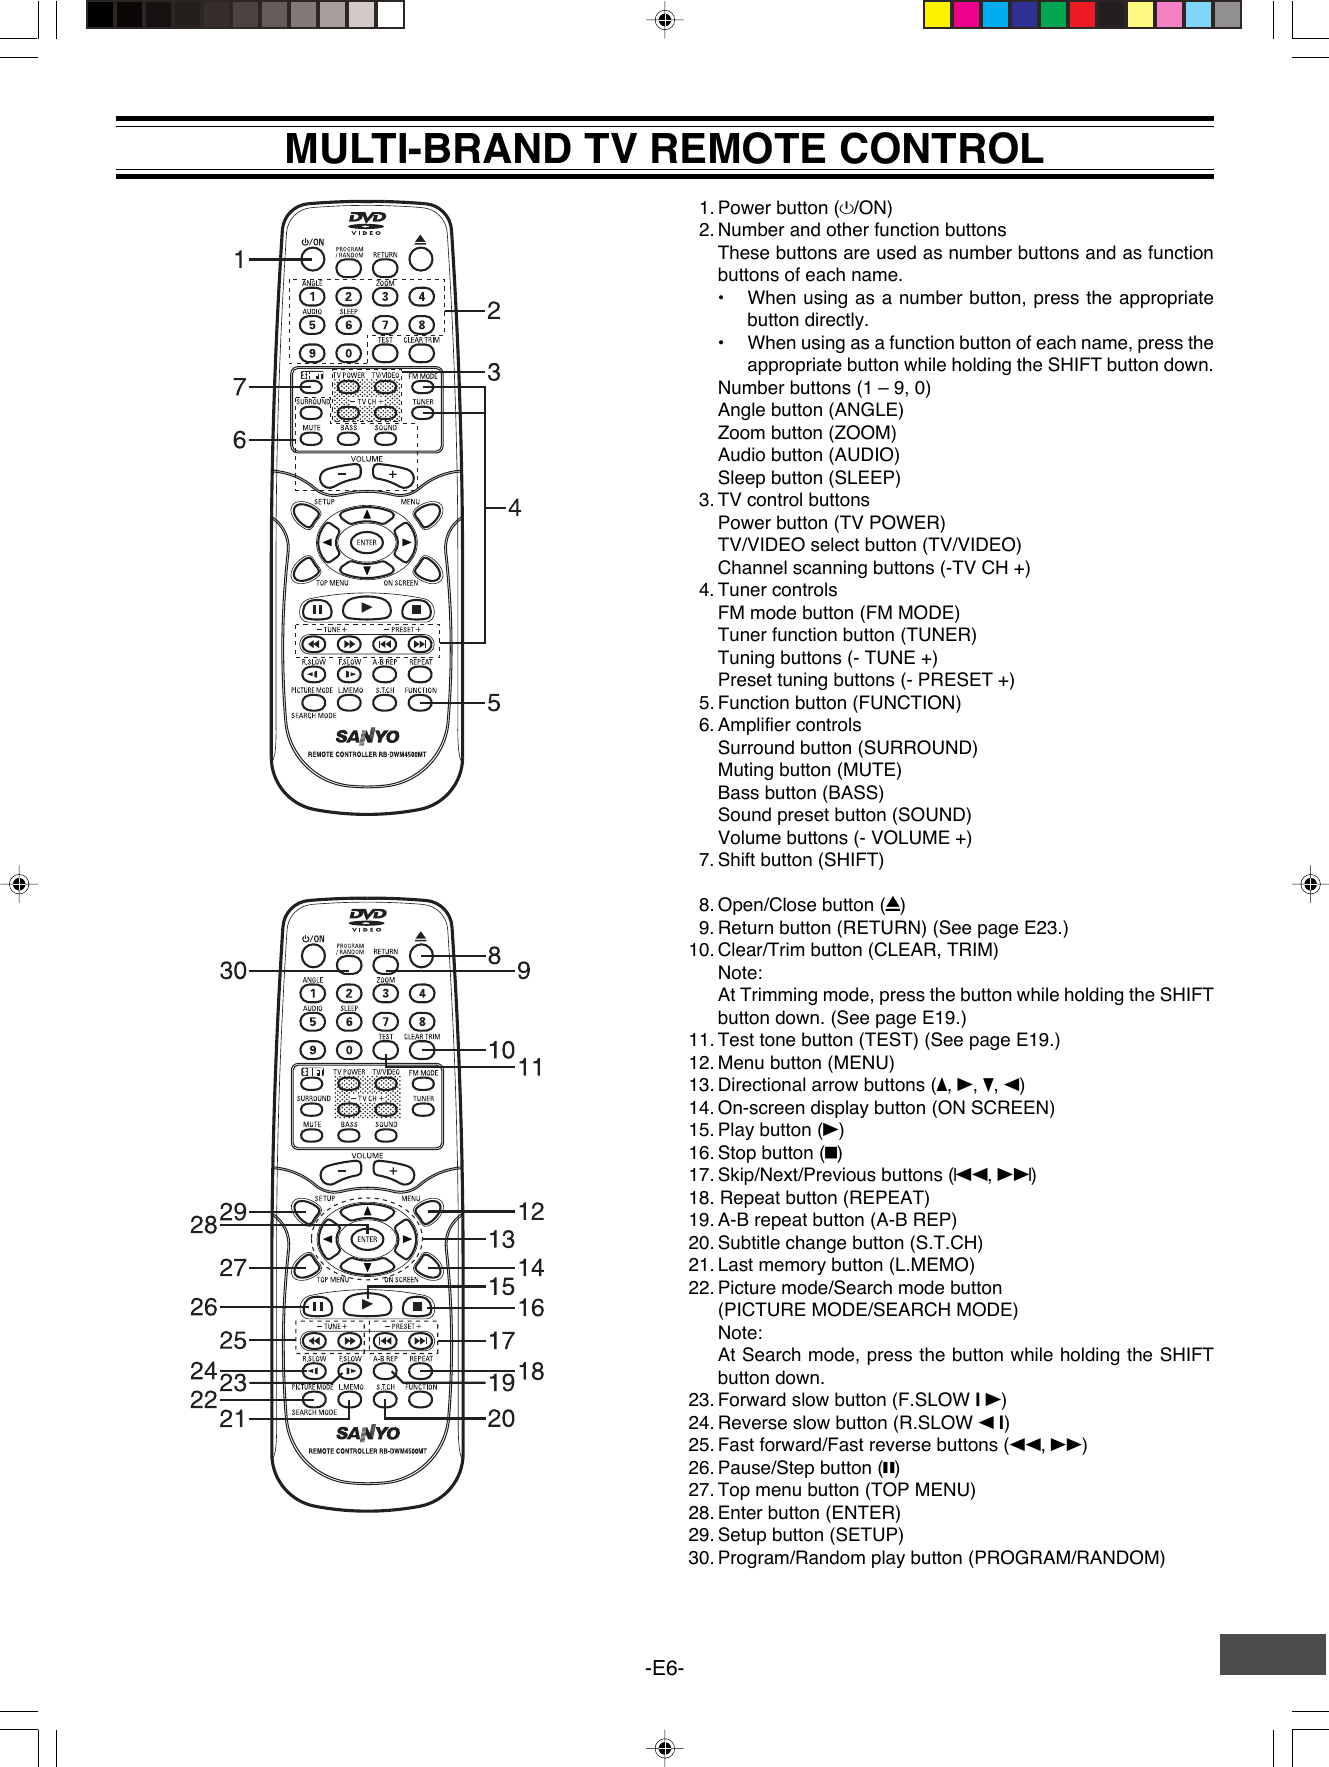
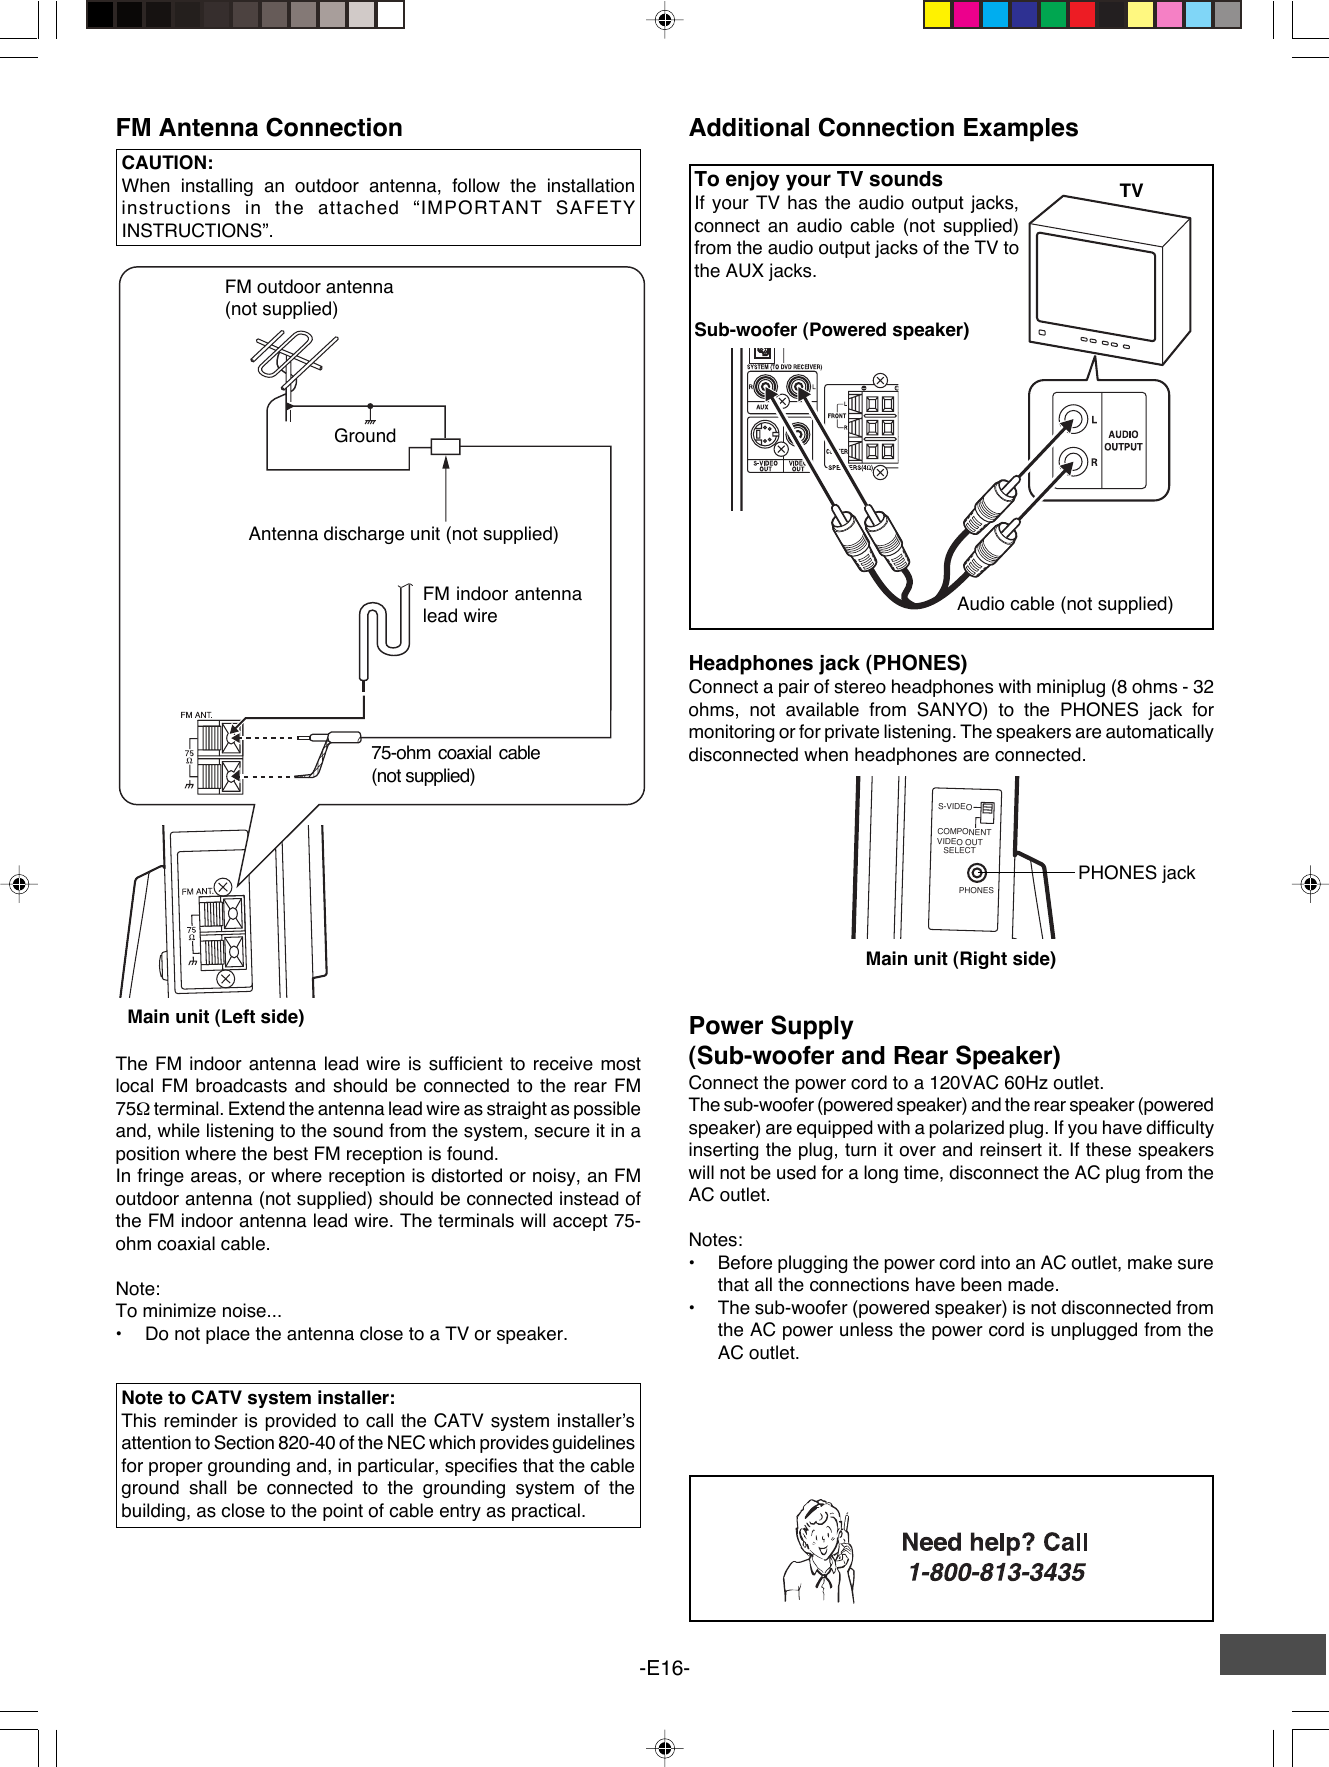
![-E7-To set the remote control code for TVThis remote control can operate the basic functions of TVs madeby the manufacturers listed below.To enter the remote control code for your brand of TV, follow thesteps below.1. In the chart below, find the code corresponding to your brandof TV.2. While holding down [TV POWER], enter the 2-digit codeusing the number buttons [0 - 9], then release [TV POWER].•The remote control is now set to operate your TV.TV brands CodeADMIRAL 05, 10, 13EMERSON 17FISHER 03GE 07GOLD STAR 01HITACHI 02JVC 15MAGNAVOX 08MATSUSHITA 12, 18MITSUBISHI 14PANASONIC 12, 18QUASAR 12, 18RCA 06SAMSUNG 16SANYO 03SHARP 00, 13SONY 11TECHNOL ACE 05TOSHIBA 04ZENITH 09, 10Notes:•Only remote-controlled TVs can be operated using this remotecontrol. (Refer to your TV instruction manual for more details.)•There may be some TV models that cannot be operated withthis remote control. If this is the case, use the original remotecontrol supplied with the TV.IMPORTANT NOTE:If the batteries in the remote control are changed, the codesettings for the TV must be re-entered.Write your code number below for future reference.TV:Note:This remote control cannot operate your VCR.Inserting batteries12Note:Remove the batteries if the remote control is not to be used for amonth or more. Batteries left in the unit may leak and causedamage.IMPORTANT NOTE:SPENT OR DISCHARGED BATTERIES MUST BERECYCLED OR DISPOSED OF PROPERLY IN COMPLIANCEWITH ALL APPLICABLE LAWS.FOR DETAILED INFORMATION, CONTACT YOUR LOCALCOUNTY SOLID WASTE AUTHORITY.Remote control rangeTwo "AA" batteries(not supplied)Remote sensorWithin approx. 20 feet(6 meters)30°30°](https://usermanual.wiki/SANYO-Electric/DWM-4500/User-Guide-518784-Page-8.png)
![-E17-Common OperationTurning the power on and offMain unit (DVD Receiver)BEFORE OPERATIONTo reduce the volume temporarily (muting)Press [MUTE] on the remote control. “MUTE” blinks on thedisplay.To restore the previous volume setting, press [MUTE] again.Selecting the sound mode1. Press [SOUND] repeatedly to select the desired sound mode(“BASS”, “TREBLE” or “NIGHT”).2. Press the button as desired.To turn the power off, press [z/ON] again.Selecting the sourcePress [FUNCTION] to select the desired source. Each time thebutton is pressed, the display changes as follows:DVD/CD v AUX v FM TUNER v DVD/CD...•When the source selection is changed, disc playbackautomatically stops.Adjusting the volumePress [VOLUME] + or - on the remote control (or press [VOL] + or- on the main unit). The volume level appears on the display(VOL 0 ~ VOL MAX).Sound mode Press Display changeBASS p or o“-5” ~ “+5”TREBLE p or o“-5” ~ “+5”NIGHT ENTER “ON” or “OFF”Note for “NIGHT” mode:When enjoying a DVD disc with the volume set low at night,select this mode. It enhances spoken lines making speechclearer.3. Repeat steps 1 to 2 for another sound mode.4. Press [SOUND] repeatedly to close the display.Bass boost systemPress [BASS] repeatedly to select the desired bass boost effect.BOOST v BASS OFF v NORMAL v BOOST. . .Adjusting the FL display brightnessWhile holding [n] down on the main unit, press [ON SCREEN]repeatedly on the remote control.Press [z/ON] to turn the power on.•“HELLO” appears briefly on the display.(After connecting the power cord, when you press [z/ON] for thefirst time, the volume-reset feature automatically sets the initialvolume level.)When the power cord is connected to the AC outlet, the unit willrespond to commands from the remote control.To turn the power off, press [z/ON] again.•“GOOD-BYE” appears briefly on the display.Smart start functionIf the following buttons are pressed when the power is turnedoff, the unit turns on automatically and the selected source isactivated.[q], [a] (Front panel of the main unit)[q], [a], [TUNER] (Remote control)Rear speakerPress [z/ON] to turn the power on. The power indicator lights.](https://usermanual.wiki/SANYO-Electric/DWM-4500/User-Guide-518784-Page-18.png)
![-E18-Selecting Surround ModePress [SURROUND] to select the surround mode.Each time the button is pressed, the surround mode changes as follows:5.1 AUTO v 5.1 SURR v 2.1ch v DIRECT v 5.1 AUTO…FL displayThe unit selects the surround mode automatically depending on the disc.•If a DVD disc is encoded with Dolby Digital 5.1 channel, it is played back with Dolby Digital 5.1channel surround sound.Not all DVD discs are encoded with Dolby Digital 5.1 channel surround sound.•If a DVD disc is encoded with Dolby Digital 2 channel or mono, it is played back with Dolby ProLogic mode. “sPL” appears briefly on the display.•If a DVD disc is encoded with 2 channel Linear PCM (stereo), it is played back with Dolby ProLogic mode. “sPL” appears briefly on the display.•Audio CDs are played back with Dolby Pro Logic mode.• MP3/WMA discs are played back with Virtual 5.1 channel surround sound.Notes:•When using headphones, the surround mode does not change. If [BASS] or [SURROUND] is pressed, “-BASS-” or “-SURR-”appears briefly on the display.•DVD video discs with DTS may not work correctly. You can see the picture on the TV screen, but there is no sound.In this case, press the AUDIO button repeatedly while holding the SHIFT button down to select Dolby Digital sound. (See page E28.)•When receiving weak FM broadcasts, set the mode to “2.1ch”. The sound quality may improve.5.1 SURR5.1 AUTODVD/CDAUXFM TUNER(Stereo)Function Description2.1ch5.1 AUTO5.1 SURR2.1chDisc is played back with Virtual 5.1 channel surround sound.The surround mode is set to 2.1 channel (Front left and right speakers, and Sub-woofer).The surround mode is set to Virtual 5.1 channel surround sound.FM TUNER(Mono)The surround mode is set to 2.1 channel (Front left and right speakers, and Sub-woofer).Manufactured under license from Dolby Laboratories.“Dolby”, “Pro Logic” and the double-D symbol are trademarks of Dolby Laboratories.5.1 AUTO5.1 SURRFront left and right speakers, Center speaker, and Sub-woofer sound.DIRECT Original audio signal from the discDIRECT Original audio signal2.1ch The surround mode is set to 2.1 channel (Front left and right speakers, and Sub-woofer).DIRECT Original audio signal](https://usermanual.wiki/SANYO-Electric/DWM-4500/User-Guide-518784-Page-19.png)
![-E19-Adjusting the Speaker Volume BalanceThis unit is set to the standard level before shipping from thefactory. You may not need any adjustment.However, depending on the size of the room and the placementof the speakers, you may benefit from a fine adjustment.In this case, follow the steps below. Please use the remotecontrol when the test tone sounds.Note:Do not connect the headphones.1. Press [FUNCTION] to select “DVD/CD”.2. Press [n] to stop playback completely.3. Press [TEST] on the remote control.The “Speaker” screen appears on the TV screen.“FNT-L 0” appears on the display.The test tone will be heard from each speaker sequentially asfollows:TV screen FL display SpeakerFront-L FNT-L 0 Front left speakerCenter CENT 0 Center speakerFront-R FNT-R 0 Front right speakerSurround-R SUR-R 0 Rear (surround right) speakerSurround-L SUR-L 0 Rear (surround left) speakerNote:There are Surround left and right speakers in the rearspeaker.4. Press [VOLUME] + or - until the test tone becomes acomfortable level.5. If the test tone level is not the same from each speaker, press[p] or [o] to adjust it while the speaker is activated.The level appears on the TV screen and display.Front-L: “-10” ~ “0” appears.Center: “-10” ~ “+10” appears.Front-R: “-10” ~ “0” appears.Surround-R: “-10” ~ “+10” appears.Surround-L: “-10” ~ “+10” appears.If necessary, repeat this step again.6. Press [TEST] to turn the test tone off.Note:If no adjustments are made, the original display returns afterthe test tone has cycled around 5 times.Adjusting the Sub-woofer LevelNote:Do not connect the headphones.1. Press [TRIM] while holding [SHIFT] down.“FNT-L 0” appears on the display.Note: No test tone.2. Press [ENTER] repeatedly to select “SUB.W 0”.Note:Each time the button is pressed, the display will show theselected speaker and tone level.3. Press [p] or [o] to adjust the level as desired.SUB.W: “-10” ~ “+10” appears.Note:If another speaker is selected, the level can also be changedas above.4. Press [TRIM] while holding [SHIFT] down to turn it off.Note:If no adjustments are made, the original display returns afterapproximately 10 seconds.IMPORTANT INFORMATION:Set the delay time for your center and surround speakers. See“Setting Audio” on page E36.](https://usermanual.wiki/SANYO-Electric/DWM-4500/User-Guide-518784-Page-20.png)
![-E21-VIDEO 1Preparations•Turn on the TV and select the video input source.Refer to your TV’s owner manual.DISC PLAYBACK•Select the playback picture size according to the aspect ratioof the TV. (See “Setting Display” in “INITIAL SETTINGS” onpage E34.)TV4:3 LB(Letterbox)4:3 PS(Panscan)16:9•When you use a TV with Progressive-scan capability andconnect it to the COMPONENT VIDEO OUT jacks of thesub-woofer (See page E15), you must select thePROGRESSIVE mode. (For more details, please refer toyour TV's owner manual.)If you use a Conventional TV or non-progressive-scan TV, skip this section.1. Set the VIDEO OUT SELECT switch to the COMPONENTposition before turning the power on. (See page E15.)2. Press [z/ON] to turn the power on.3. Press [FUNCTION] to select “DVD/CD”.4. Select “TV System: NTSC” and “Progressive: On” in“Setting Display” (See pages E34 and E35.), and closethe setup screen.5. In “NO DISC” mode, press and hold down [ e ] on theremote control until the following message appears onthe TV screen.Important Note:•This instruction manual explains the basic instruction ofthis unit using the remote control unit.•Some DVD video discs have different functions that maynot be explained in this instruction manual. You may needextra instructions. In this case, please follow the instructionsdisplayed on the TV screen or jacket or case of the disc.•“ ” may appear on the TV screen during operation. Thisicon means that the function is not available on the discnow.•For improvement, on-screen displays subject to changewithout notice.6. Press [b] to select “Yes”.7. Press [ENTER].The progressive mode is set. “ ” (Progressive)appears briefly and “SANYO” logo screen returns.Note:If you do not want it, select “No”, then press [ENTER].If you accidentally select it and switch the settingback again, press and hold down [eeeee] until “ ”(INTERLACE) appears briefly on the TV screen.Note:In “ ” mode, the closed caption may not appear onthe TV screen.](https://usermanual.wiki/SANYO-Electric/DWM-4500/User-Guide-518784-Page-22.png)
![-E22- MENU Play Movie Languages & Audio Set-Up Subtitles Theatrical Trailers Scene SelectionsBasic PlaybackWhen operation buttons are pressed, that operation is displayedon the TV screen. The display disappears after several seconds.1. Press [z/ON] to turn the power on.2. Press [FUNCTION] to select “DVD/CD”.3. Press [q].“OPEN” appears on the display and the disc door opens.4. Place the disc (label facing toward you) on the disc turntableuntil it clicks.Label facing toward youCAUTION:Never touch the lens!5. Press [q] to close the disc door.•“CLOSE” ---> “READING” appears on the display.•Playback starts automatically.Example:If a DVD disc menu screen appears on the TV screen...TV1. Press [o], [a], [p] or [b] (or the number buttons) to select thedesired menu.2. Press [ENTER].Playback of the selected menu starts.Note:For more details, please refer to the jacket or case of the disc.Chapter number Elapsed playing timeNote:Some discs may not start playback automatically. In suchcase, press [a] (Play) to start playback.CAUTION:Do not touch the disc door while it is closing. This willdamage the inside of the unit and the disc.Notes:•In some discs, even if 4:3 PS is selected, the black bandsmay remain on the screen.•If the disc is loaded with the label side downward (and it is asingle sided disc), or if a badly scratched disc is loaded, “NODISC” (or “NO PLAY”) appears. If this occurs, load the disccorrectly or replace the disc.Selecting Picture Mode1. Press [PICTURE MODE]. “Video Enhance” screen appears.2. Press [5] or [4] to select “Brightness” or “Edges”.3. Press [a] or [b] to adjust the level as desired. Usually set “0”.4. Press [PICTURE MODE] again to close the screen.](https://usermanual.wiki/SANYO-Electric/DWM-4500/User-Guide-518784-Page-23.png)
![-E23-Stopping Playback•Press [n] once during playback. “Resume n” appears brieflyon the TV screen.When you press [a] (Play), playback starts automaticallyfrom the point where you stopped. “a” appears briefly on theTV screen.Note:Some discs may not resume playback.•Press [n] twice during playback. “n” appears briefly on theTV screen and playback stops completely.When you press [a] (Play), playback starts from the beginningof the disc.Continuing Playback from Where You StoppedWatching (LAST MEMO PLAY), for DVD only1. Press [L.MEMO] to stop playback.“LAST MEMO n” appears briefly on the TV screen.“LM STOP” appear on the display.2. Remove the disc or turn off the power.3. Load the disc (and press [a] (Play)), or turn on the power.“LAST MEMO PLAY?” appears on the TV screen.(The memory is released.)4. Press [4] to select “Yes”.5. Press [ENTER].Playback resumes from the point where you stopped.Notes:•Point on up to 3 discs can be memorized.•The Last Memo Play mode may not work correctly with somediscs.Important Note:“ ” may appear on the TV screen during operation. This iconmeans that the function is not available on the disc now.Selecting a DVD MenuNotes:•The operation may differ depending on the disc used.•Selecting a menu may not be possible on some discs.1. Press [MENU].The main menu screen will appear.Note:Press [MENU] again to resume playback.2. Press [4], [5], [b] or [a] (or the number buttons) to select thedesired menu.3. Press [ENTER]The selected menu playback starts.Note:If [RETURN] is pressed in some discs, it returns to the previousmenu screen.Selecting a Top Menu [DVD]Notes:•The operation may differ depending on the disc used.•Selecting a top menu may not be possible on some discs.1. Press [TOP MENU].The top menu will appear (if the disc contains a top menu).2. Press [4], [5], [b] or [a] (or the number buttons) to select thedesired menu.3. Press [ENTER].The selected menu playback starts.Chapter (Track) SkipSkipping forwardPress [e] during playback to skip to the next chapter (or track).“e” appears briefly on the TV screen.A chapter (or track) is skipped each time the button is pressed.Skipping backwardPress [f] during playback to skip back to the beginning of thechapter (or track) currently played.“f” appears briefly on the TV screen.Press the button again immediately to skip back to the beginningof the previous chapter (or track).Note:You can skip only through the chapters, not over the title on theDVD disc.](https://usermanual.wiki/SANYO-Electric/DWM-4500/User-Guide-518784-Page-24.png)