Samsung Electronics Co CLP500N Laser Beam Printer User Manual 2
Samsung Electronics Co Ltd Laser Beam Printer Users Manual 2
UserManual.wiki
>
Samsung Electronics Co
>
CLP500N User Manual
>
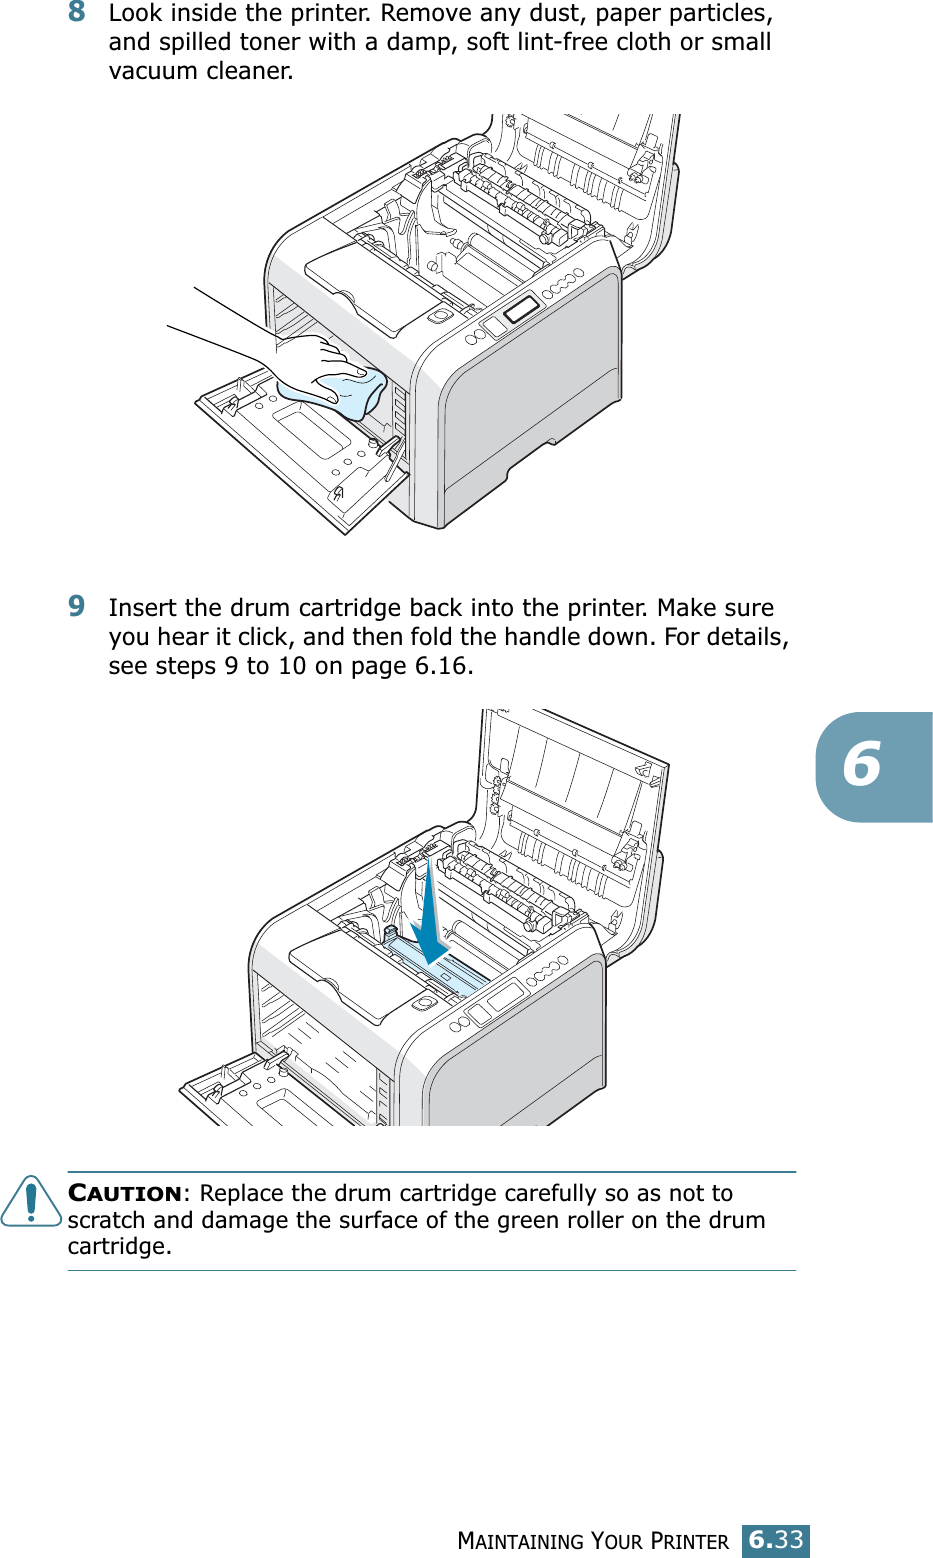
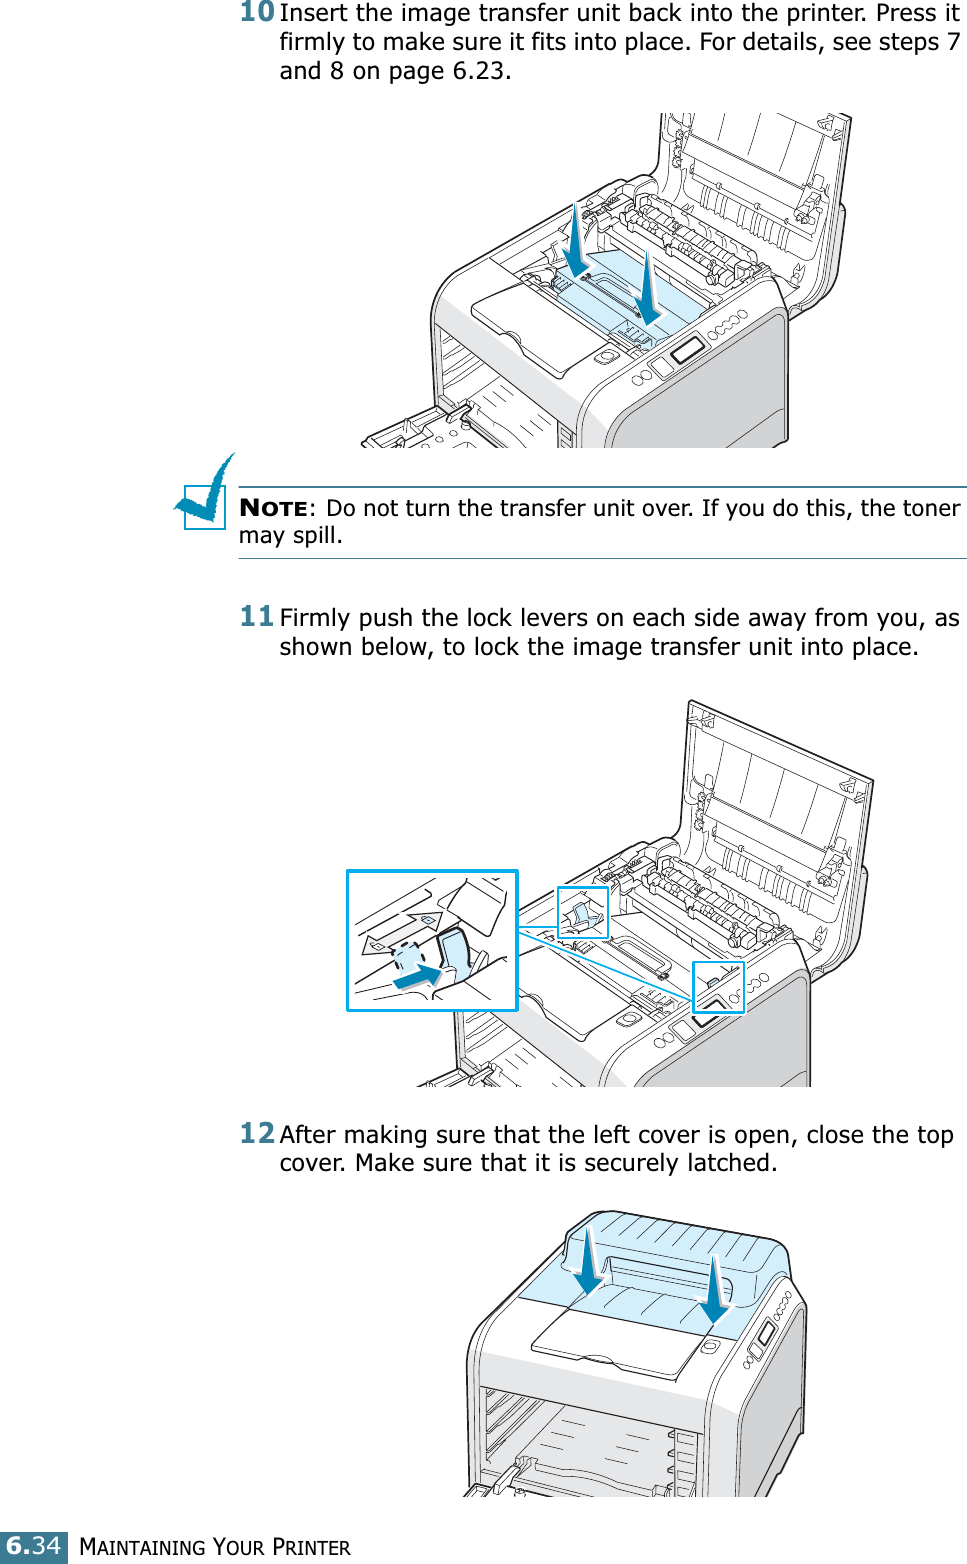
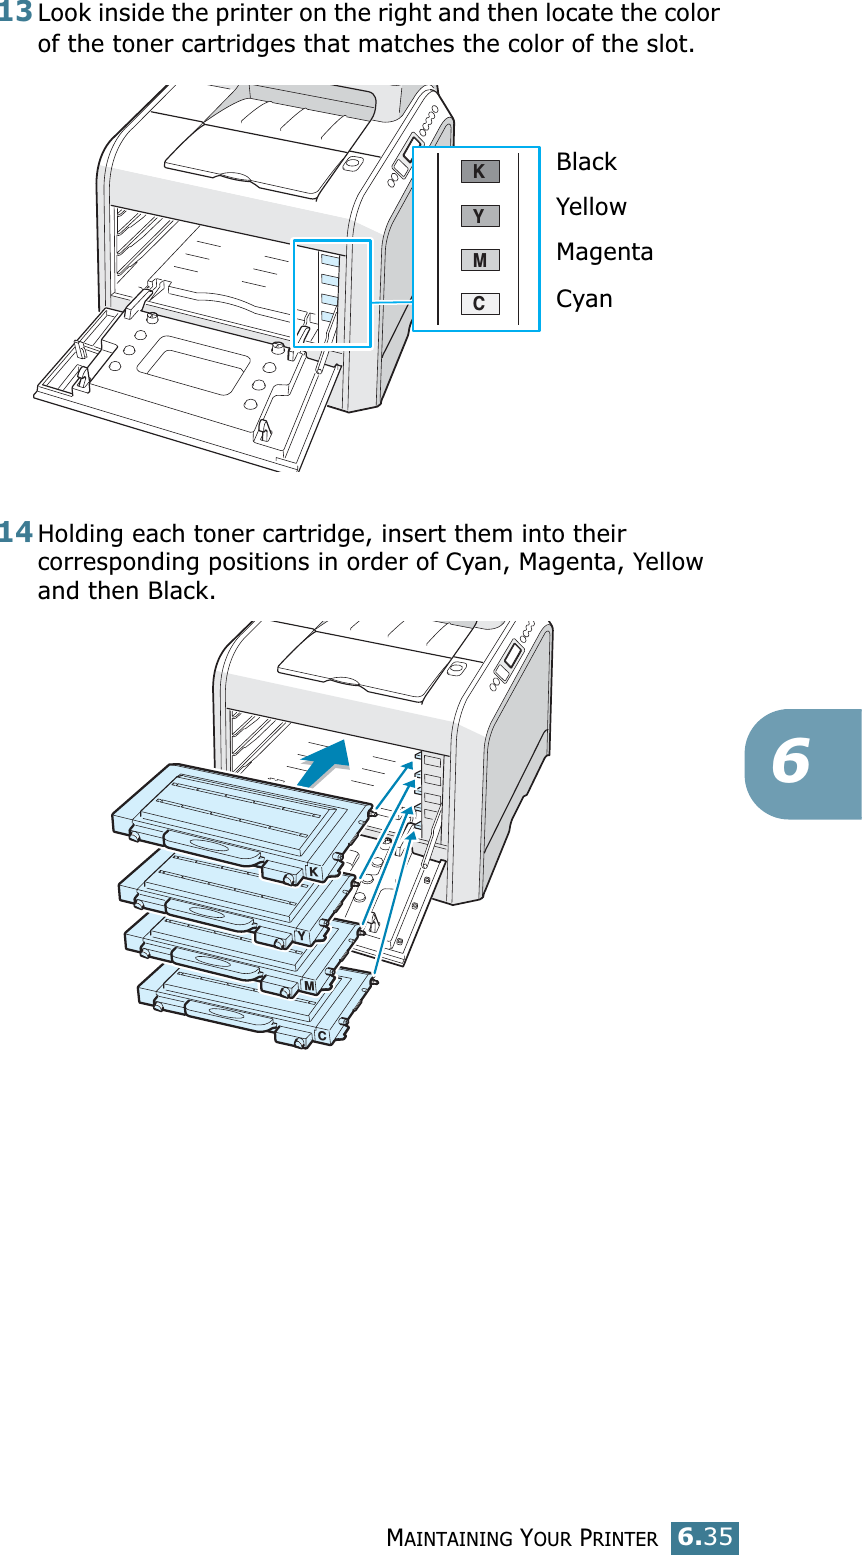
Users Manual 2
Contents
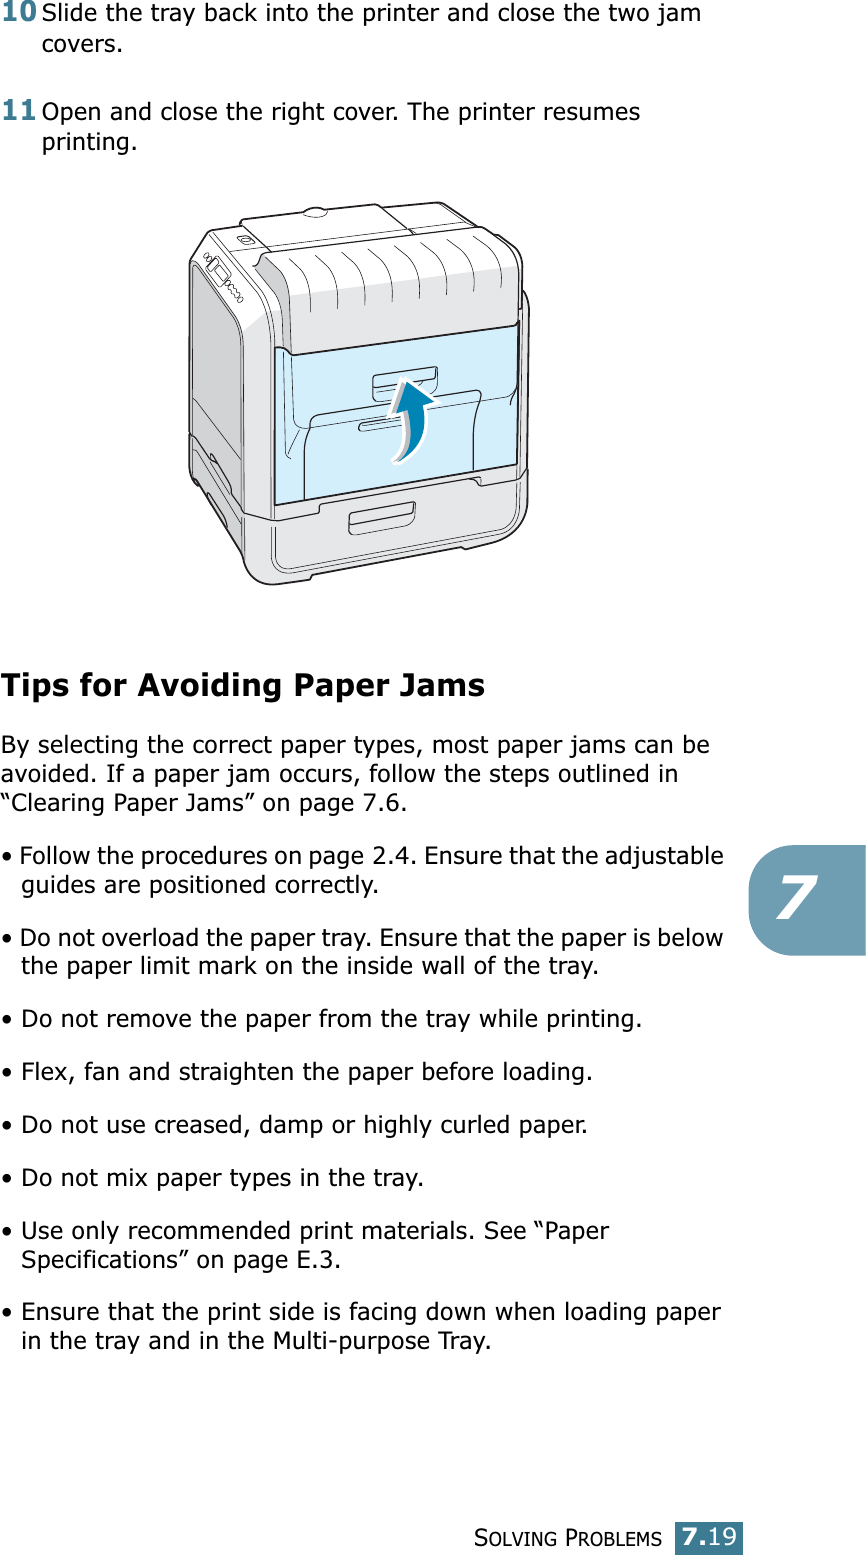
1.
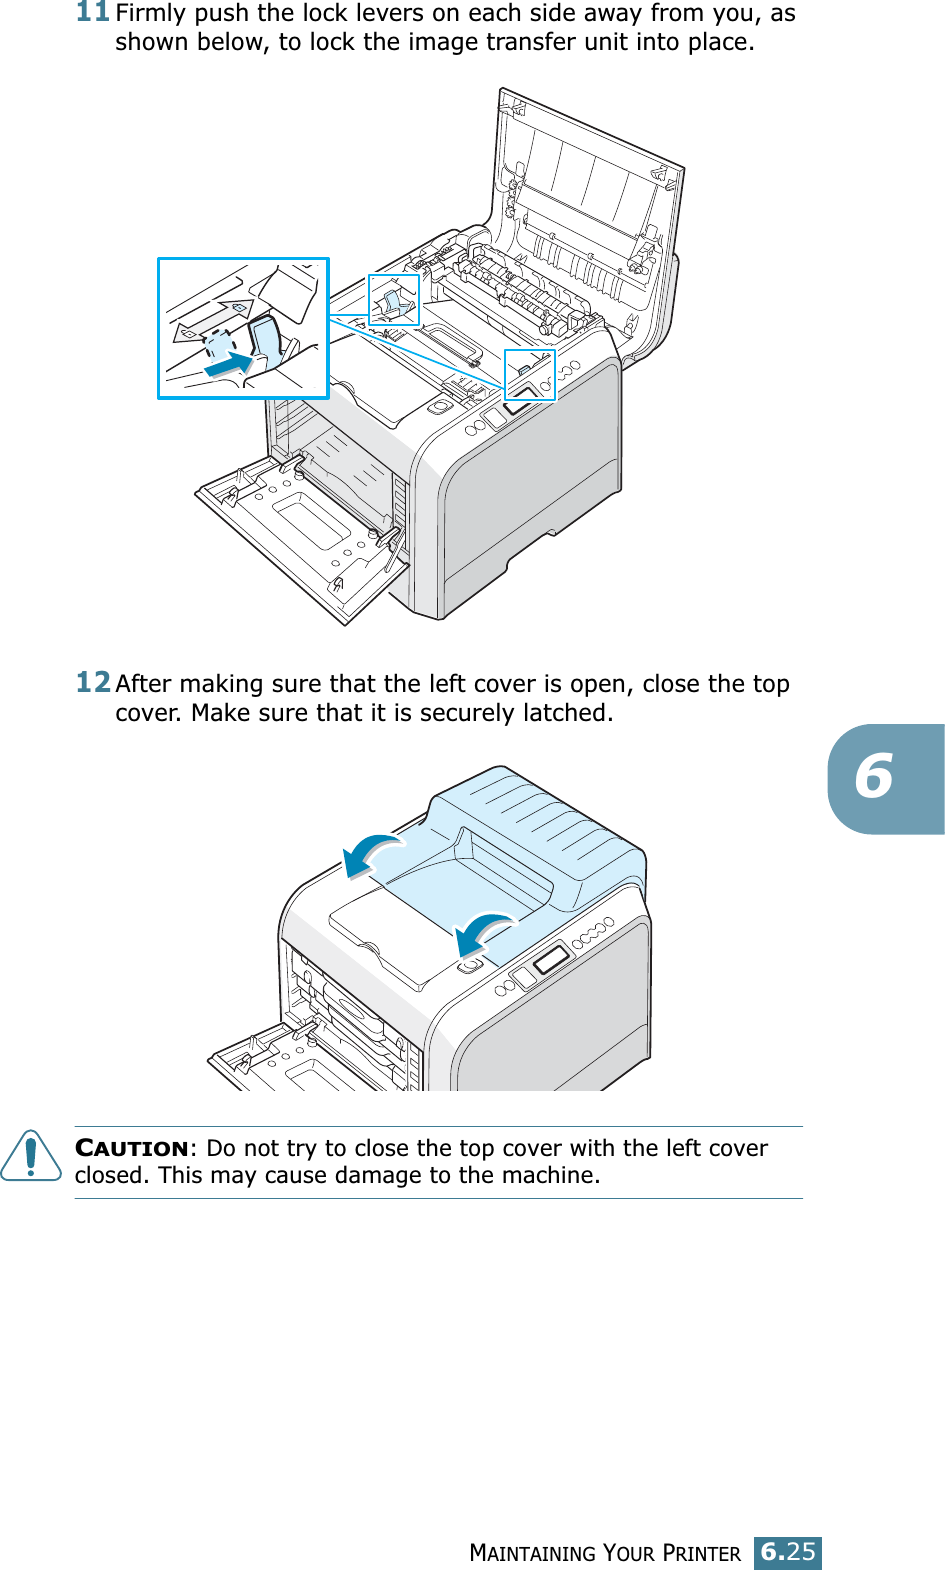
Users Manual 1
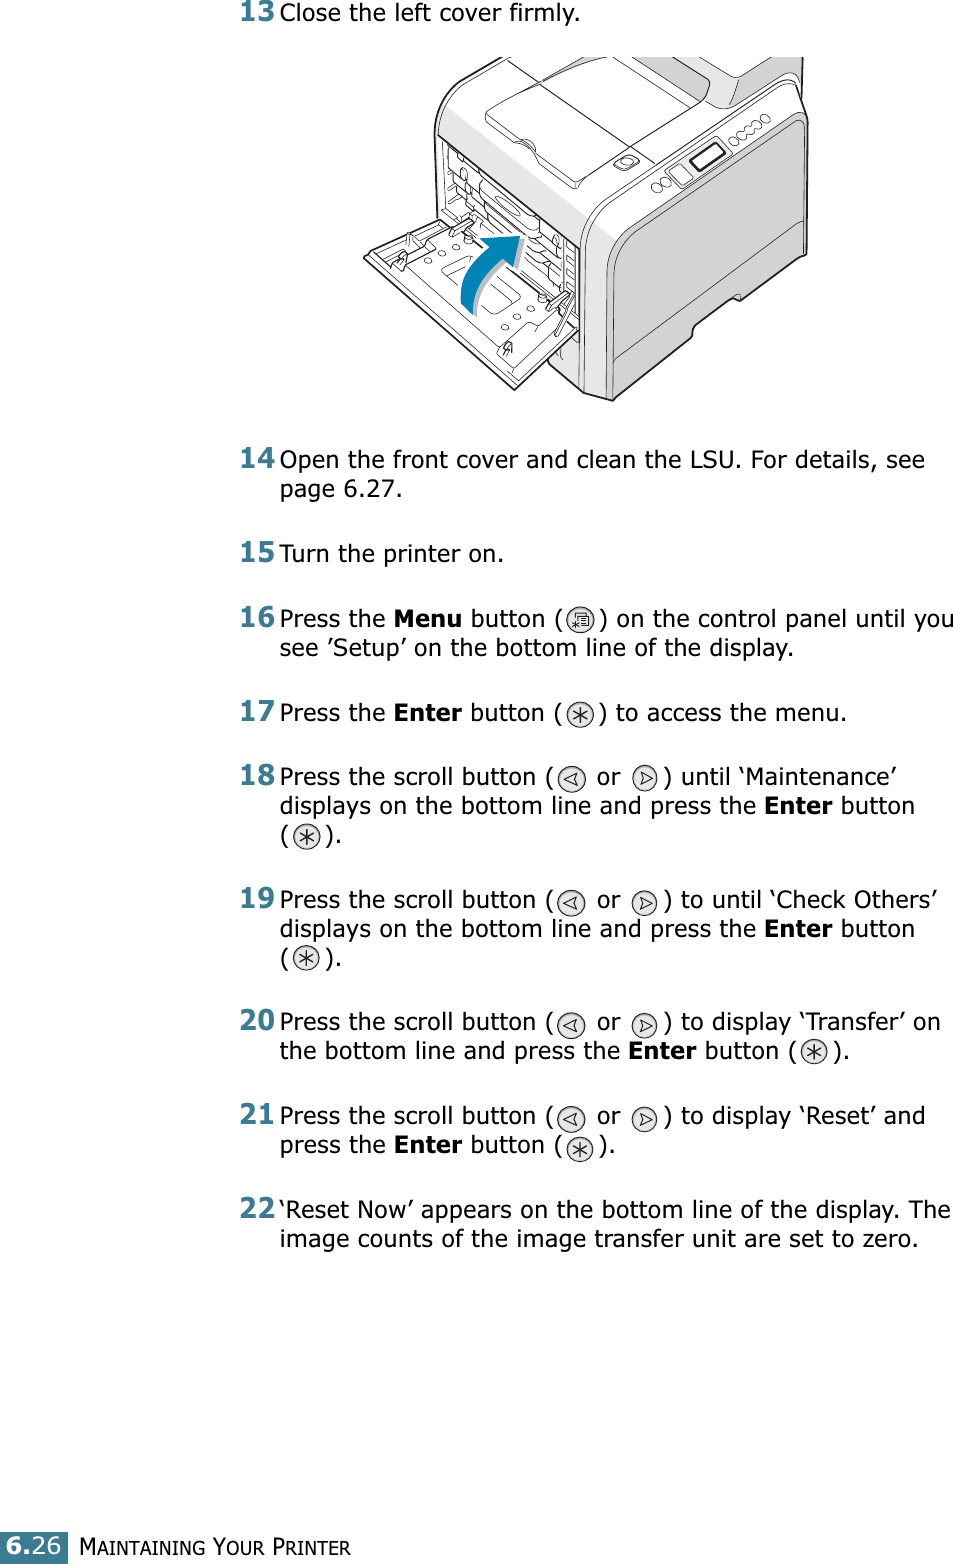
2.
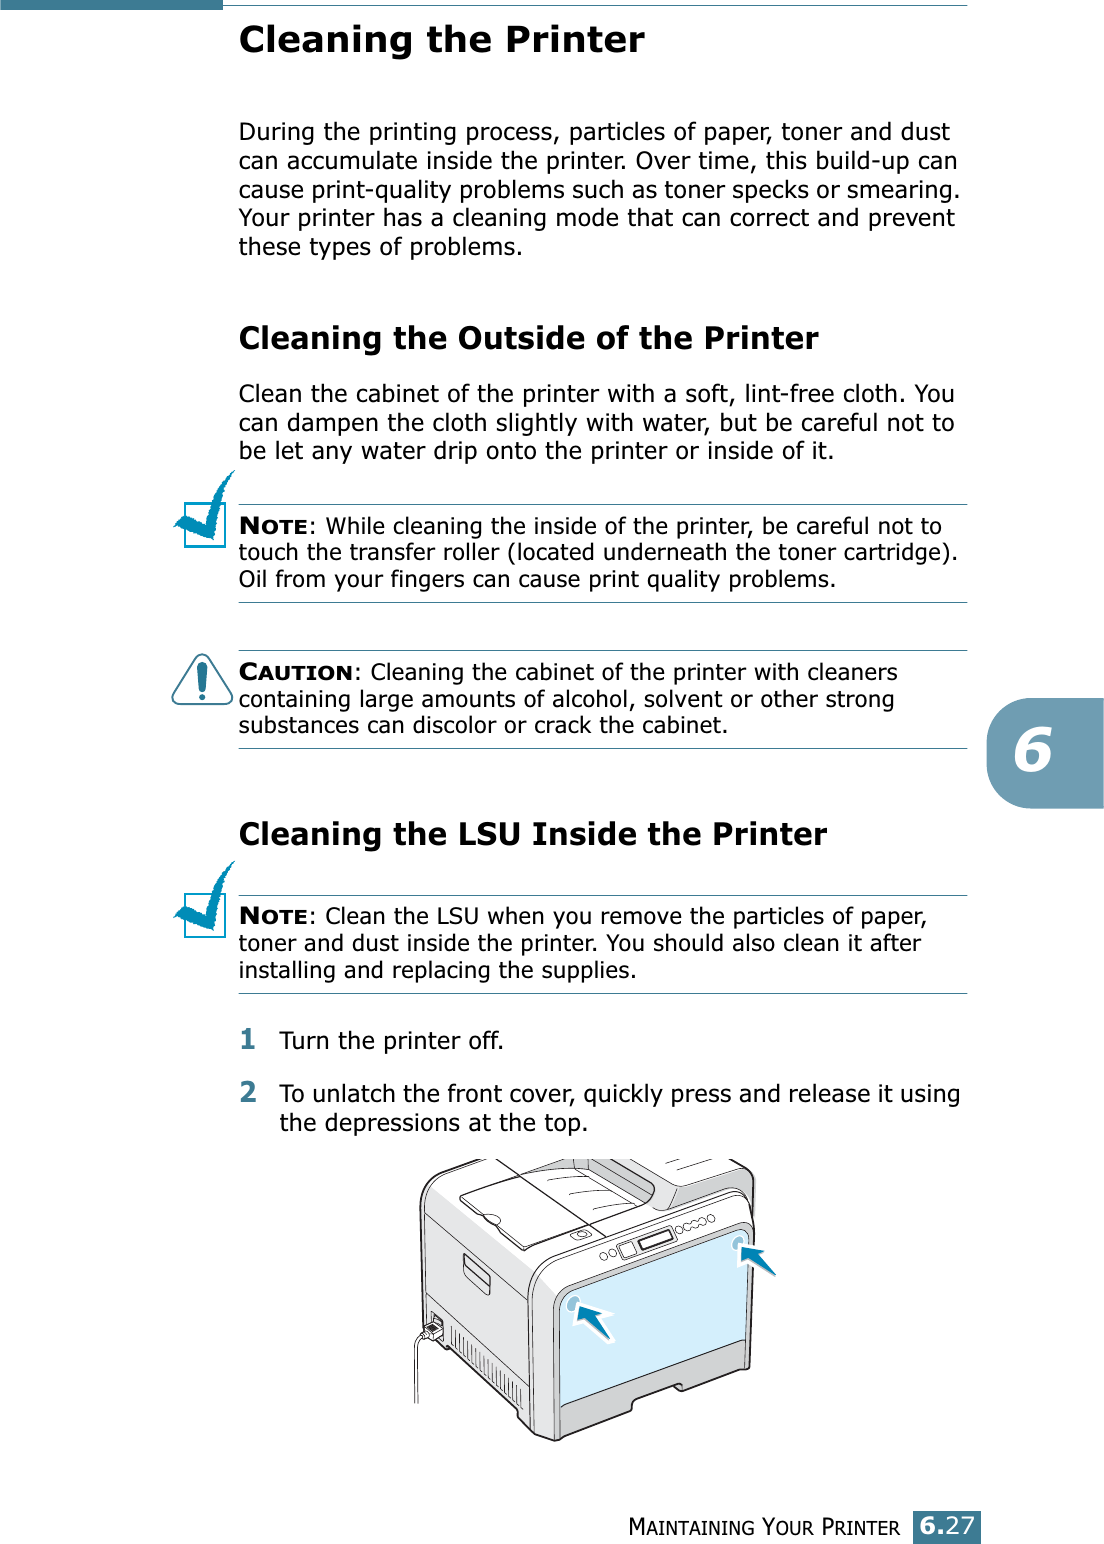
Users Manual 2
Users Manual 2
Navigation menu
Upload a User Manual
Namespaces
Wiki Guide
HTML
PDF
Info
Views
User Manual
Discussion / Help
Navigation
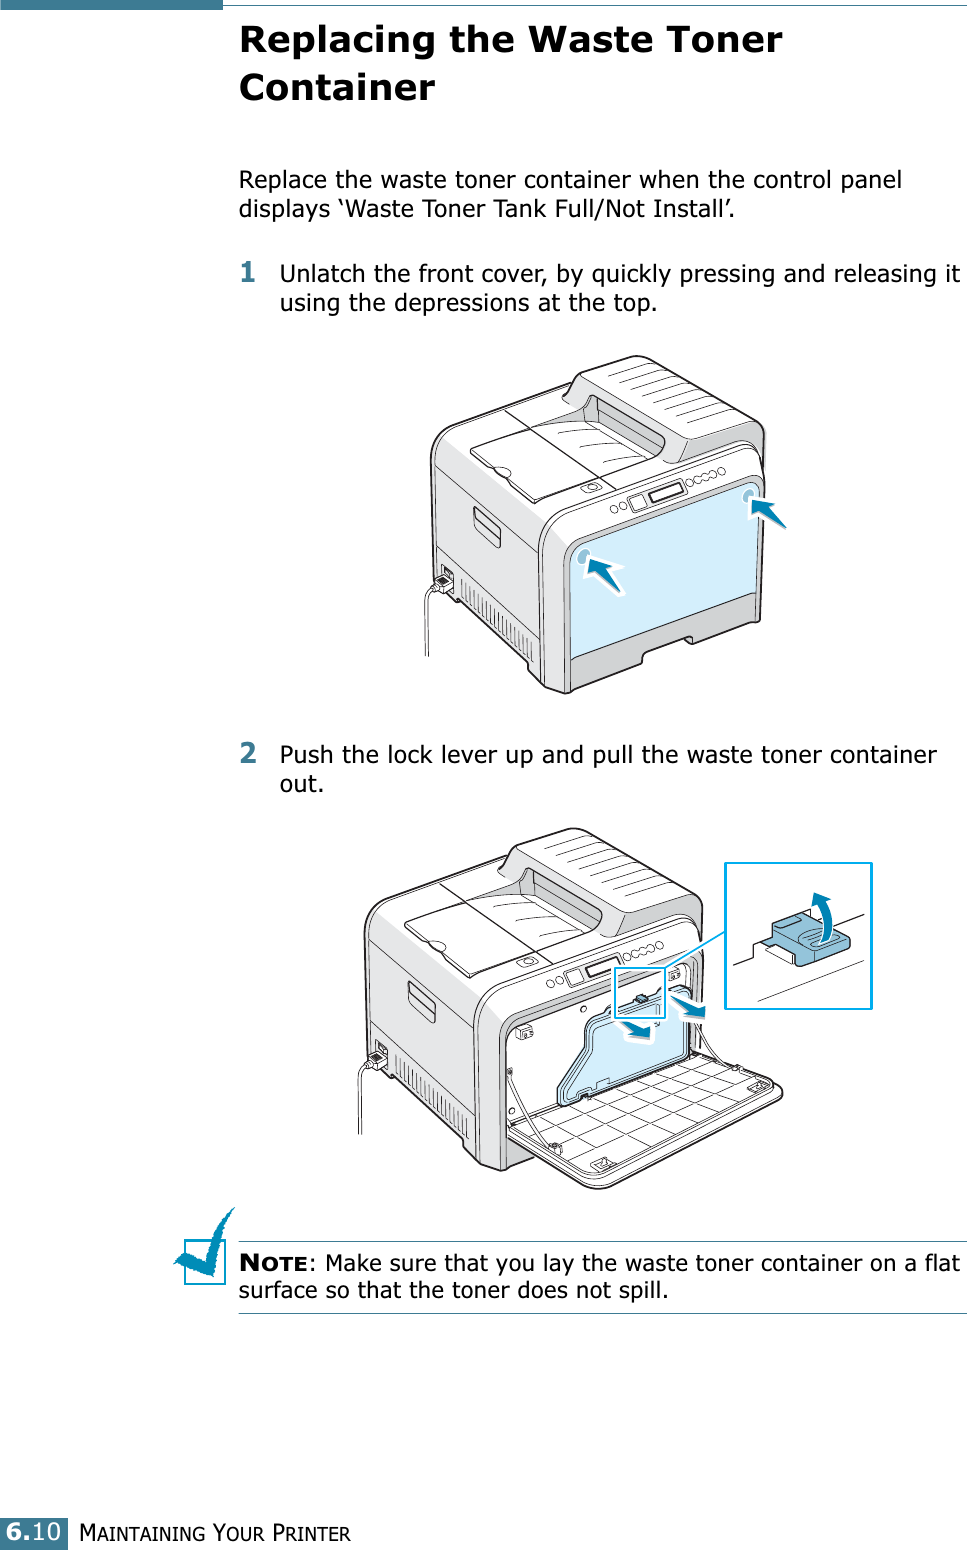
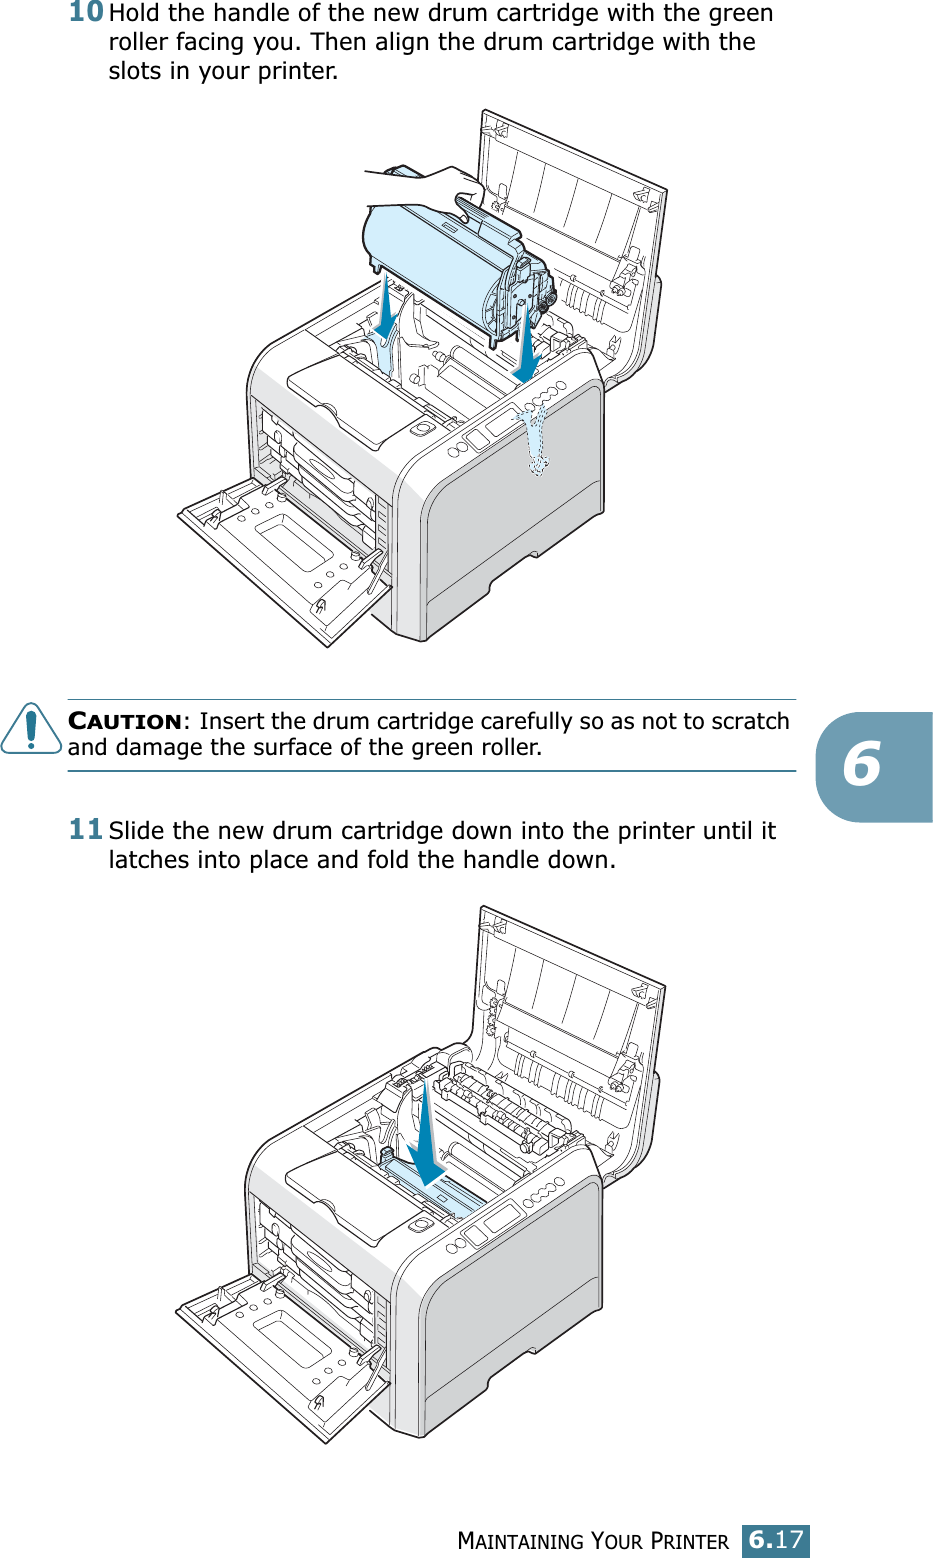
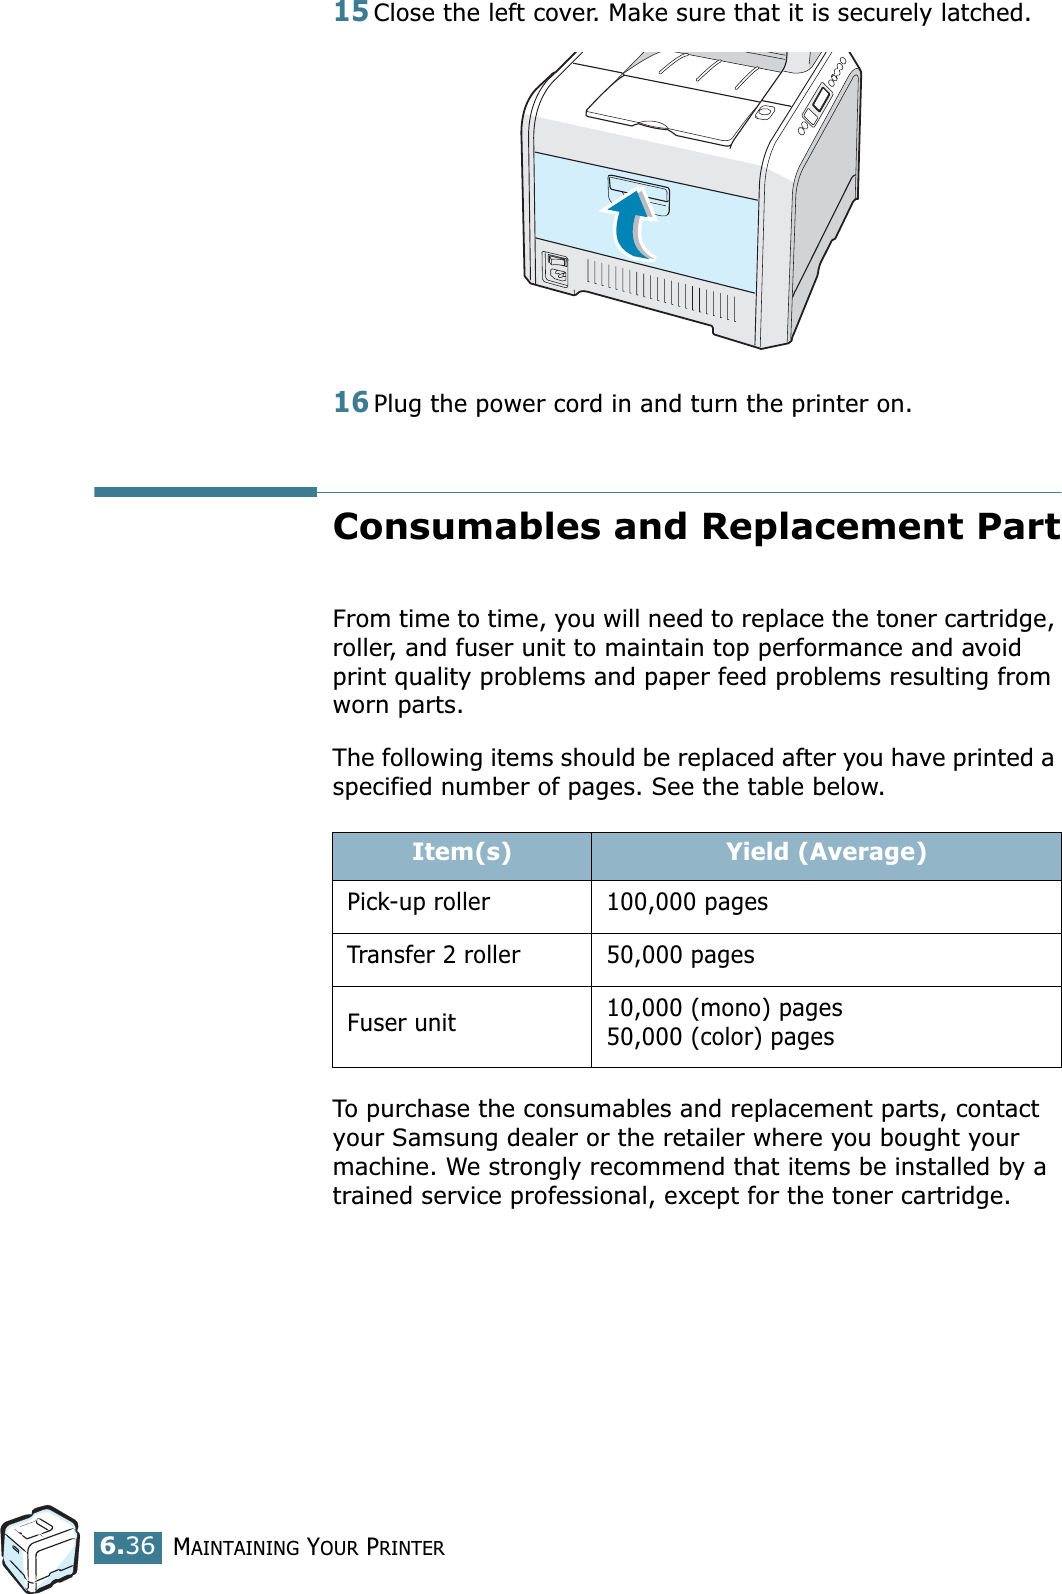
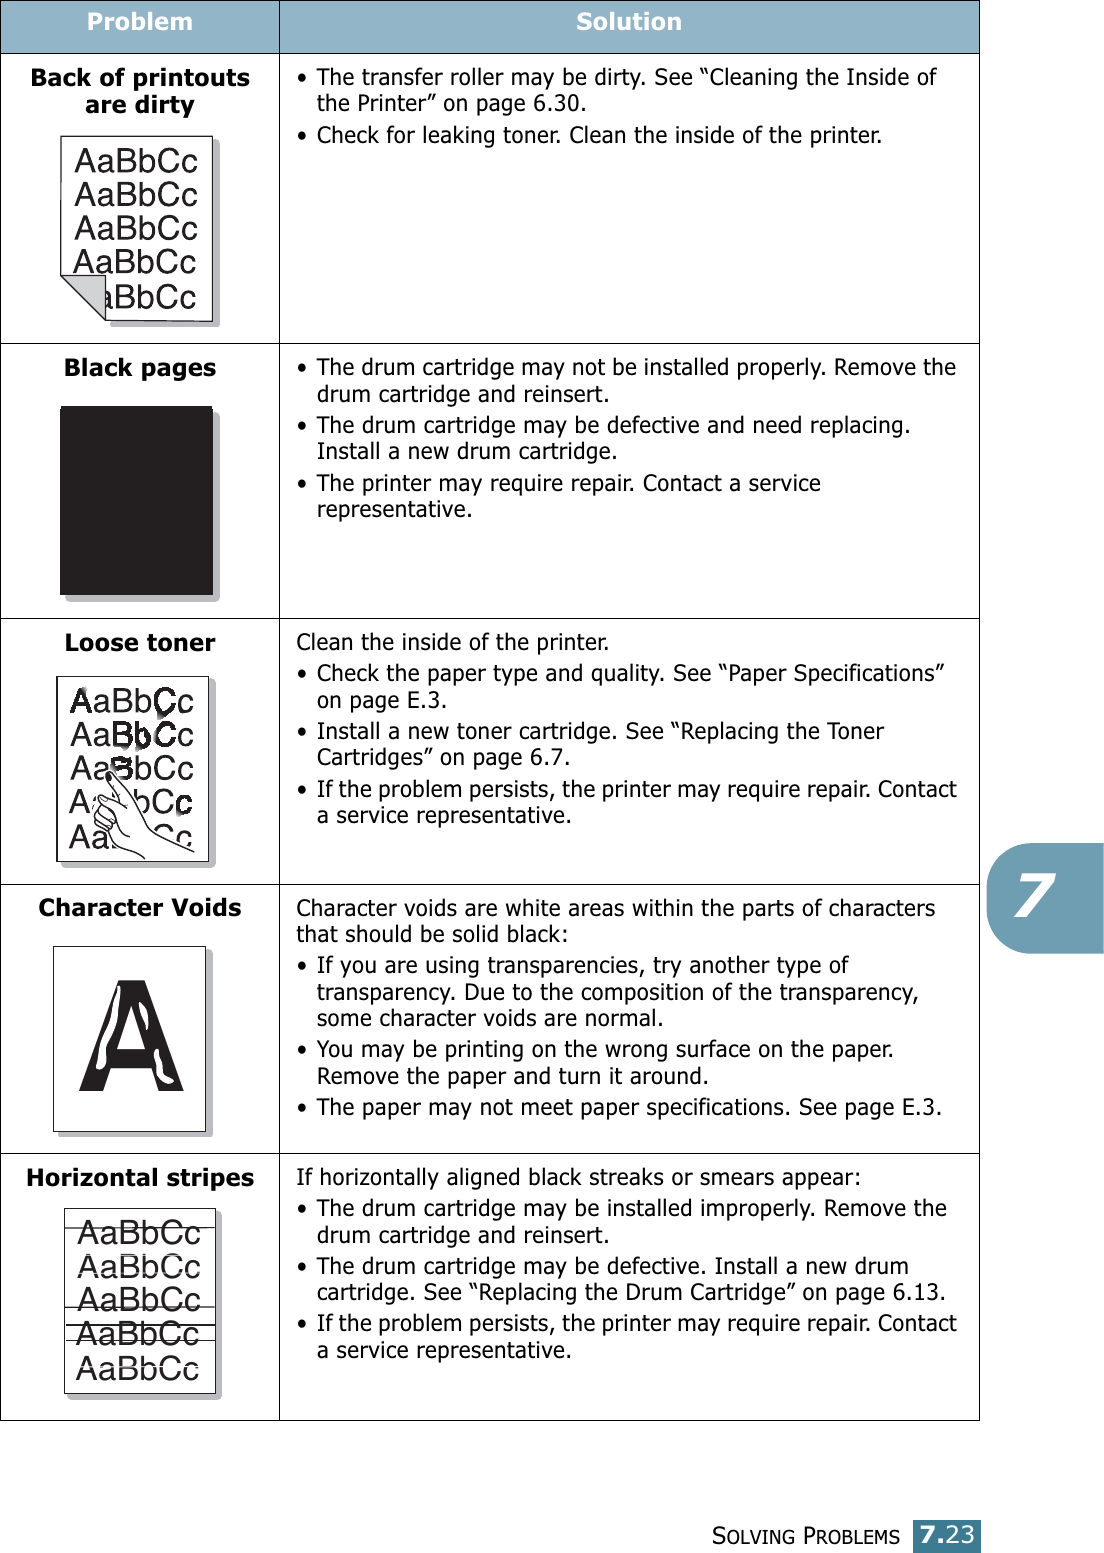
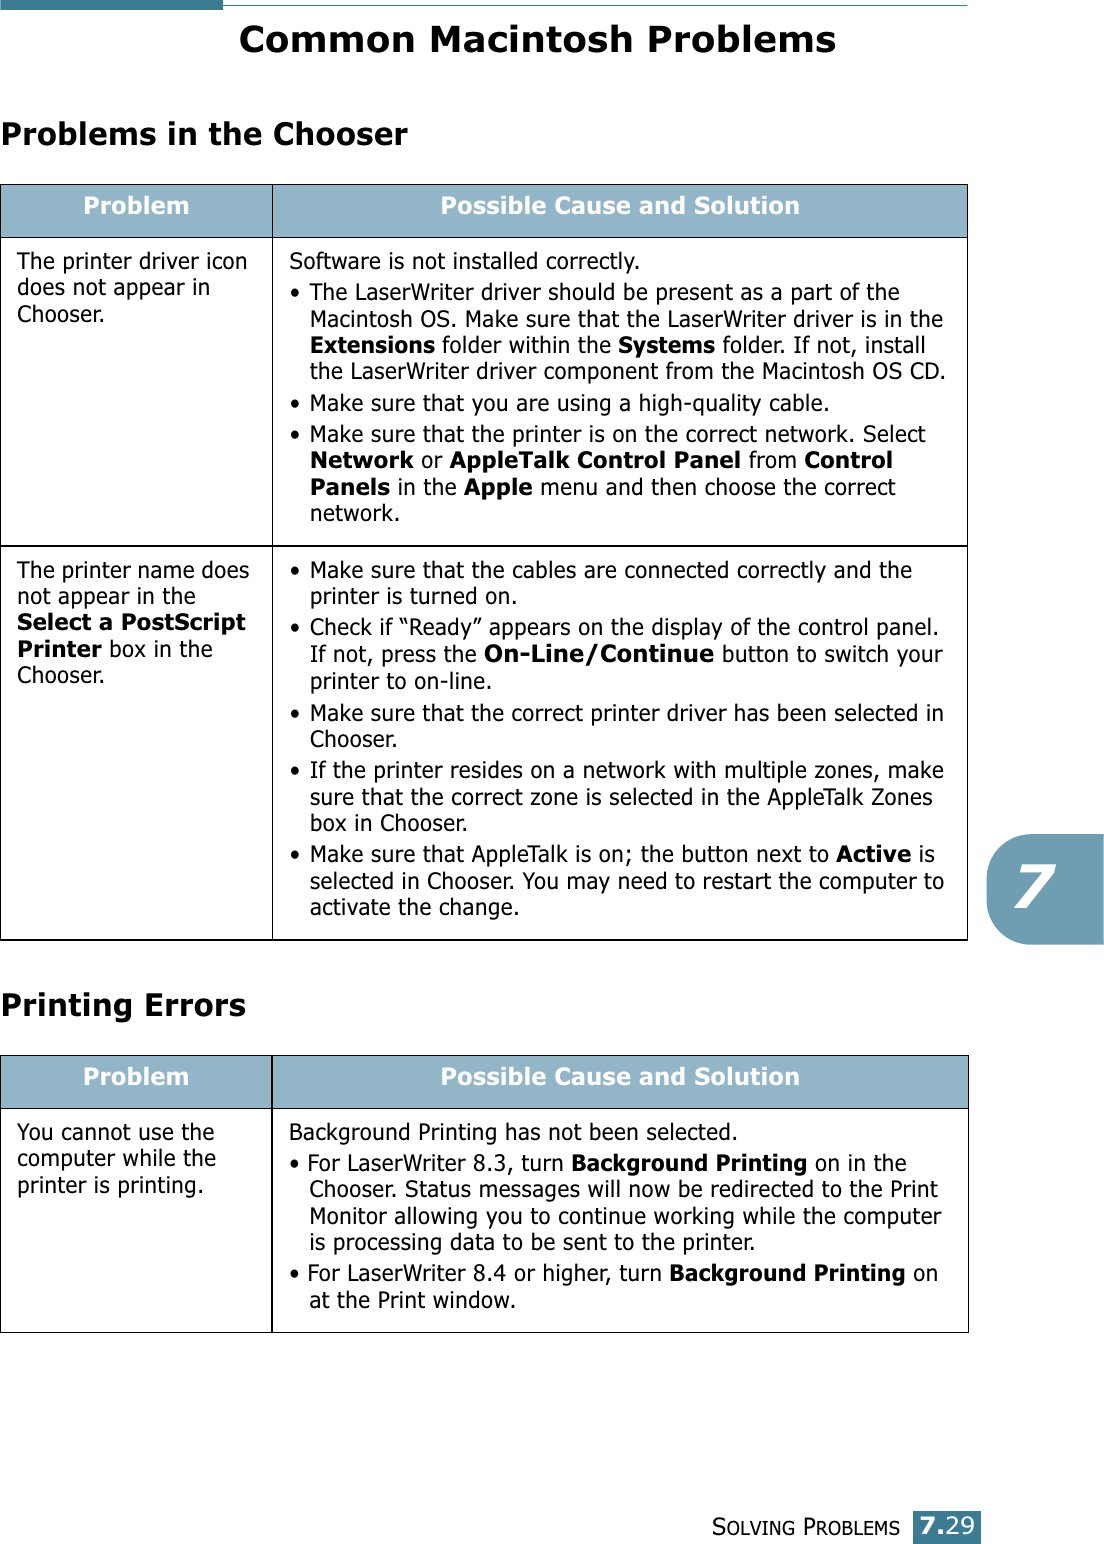
![MAINTAINING YOUR PRINTER6.36Replacing the SuppliesFrom time to time, you need to replace the following items to maintain top performance and to avoid print quality problems. Refer to the table below:Item(s) Printer message Pages PrintedSee pageBlack toner cartridgeReplace TonerBlack 7,000 pages**Average A4-/letter-sized pages counts based on 5% coverage of individual colors on each page. Usage conditions and print patterns may cause results to vary.6.7.Color toner cartridgesReplace Toner [Color] 5,000 pages*6.7.Waste toner containerWaste Toner TankFull/Not Install3,000 images**6.10.Drum cartridge Replace Drum Cartridge50,000 images**6.13.Image transfer unitReplace Image Transfer50,000 images****Image counts based on one color on each page. If you print documents in full colors (Cyan, Magenta, Yellow, Black), the lives of these three items are reduced by 25%.6.21.](https://usermanual.wiki/Samsung-Electronics-Co/CLP500N.Users-Manual-2/User-Guide-339292-Page-1.png)

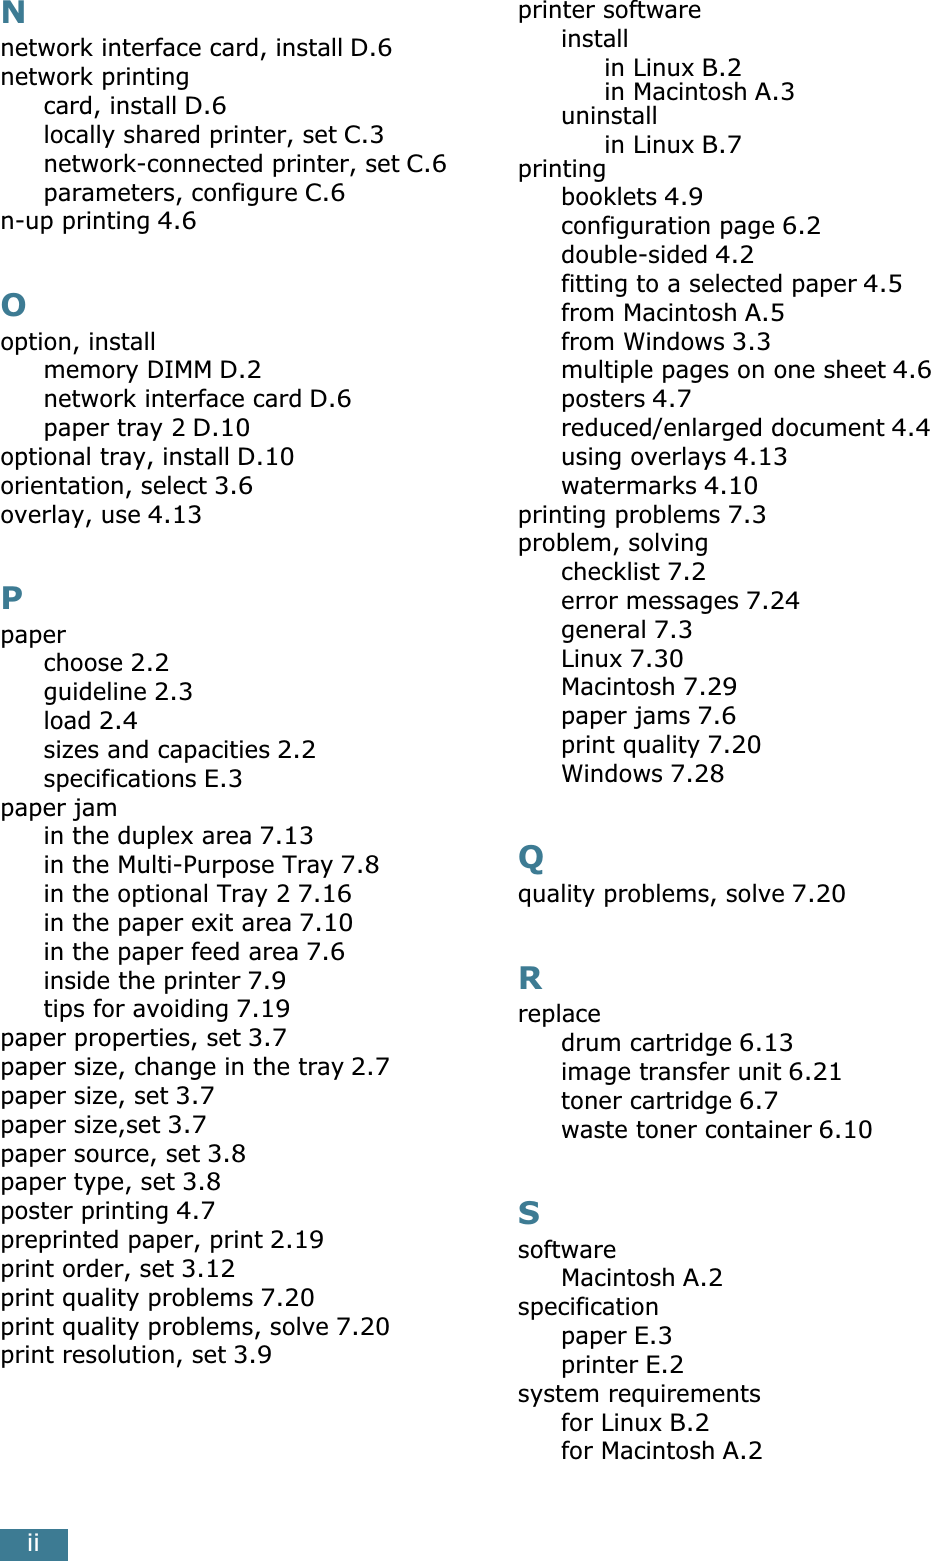
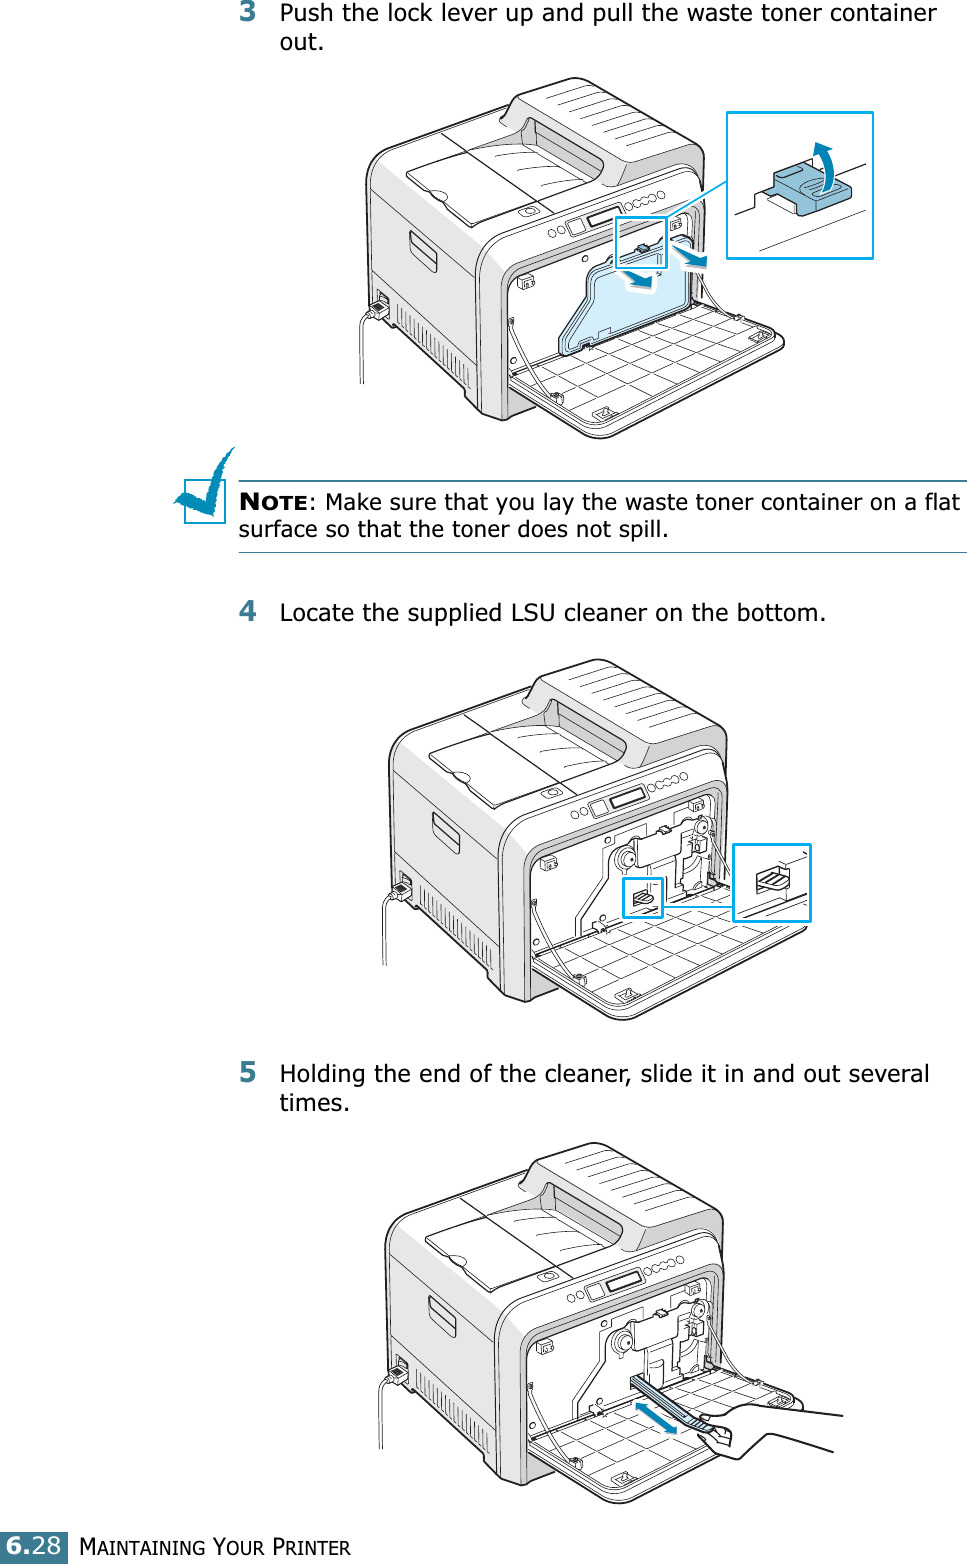
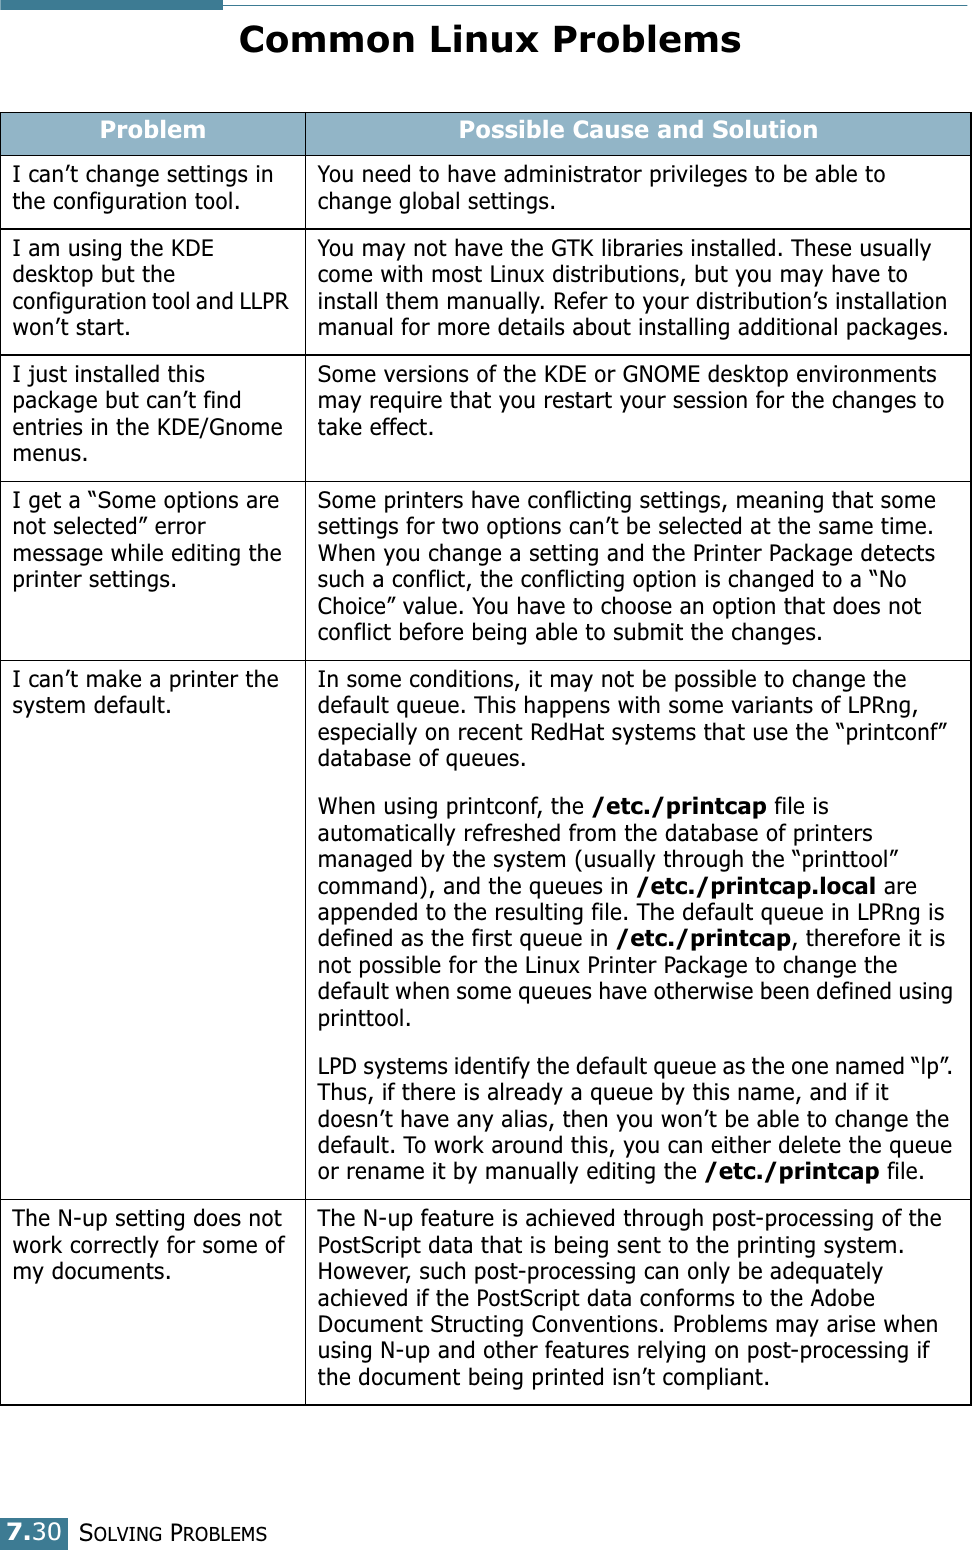
![MAINTAINING YOUR PRINTER6.566Press the scroll button ( or ) until the color of the toner cartridge you want to check displays on the bottom line.7Press the Enter button ( ).The display shows the percentage of the remaining toner.Redistributing the TonerWhen a toner cartridge is nearly empty, faded or light areas may appear on a printed page and ‘Ready [CMYK] Low Toner’ appears on the display. The printer can continue to print using the current toner cartridge until the control panel displays a message telling you to replace the cartridge.You may be able to temporarily improve the print quality by redistributing the toner. The control panel display tells you which color cartridge is low in toner.1Using the handle, open the left cover completely.2Pull the handle lightly first, and then holding the used toner cartridge, remove it.CAUTION: If you open the left cover for a long time, the drum cartridge can be exposed to light. This causes damage to the drum cartridge.](https://usermanual.wiki/Samsung-Electronics-Co/CLP500N.Users-Manual-2/User-Guide-339292-Page-3.png)
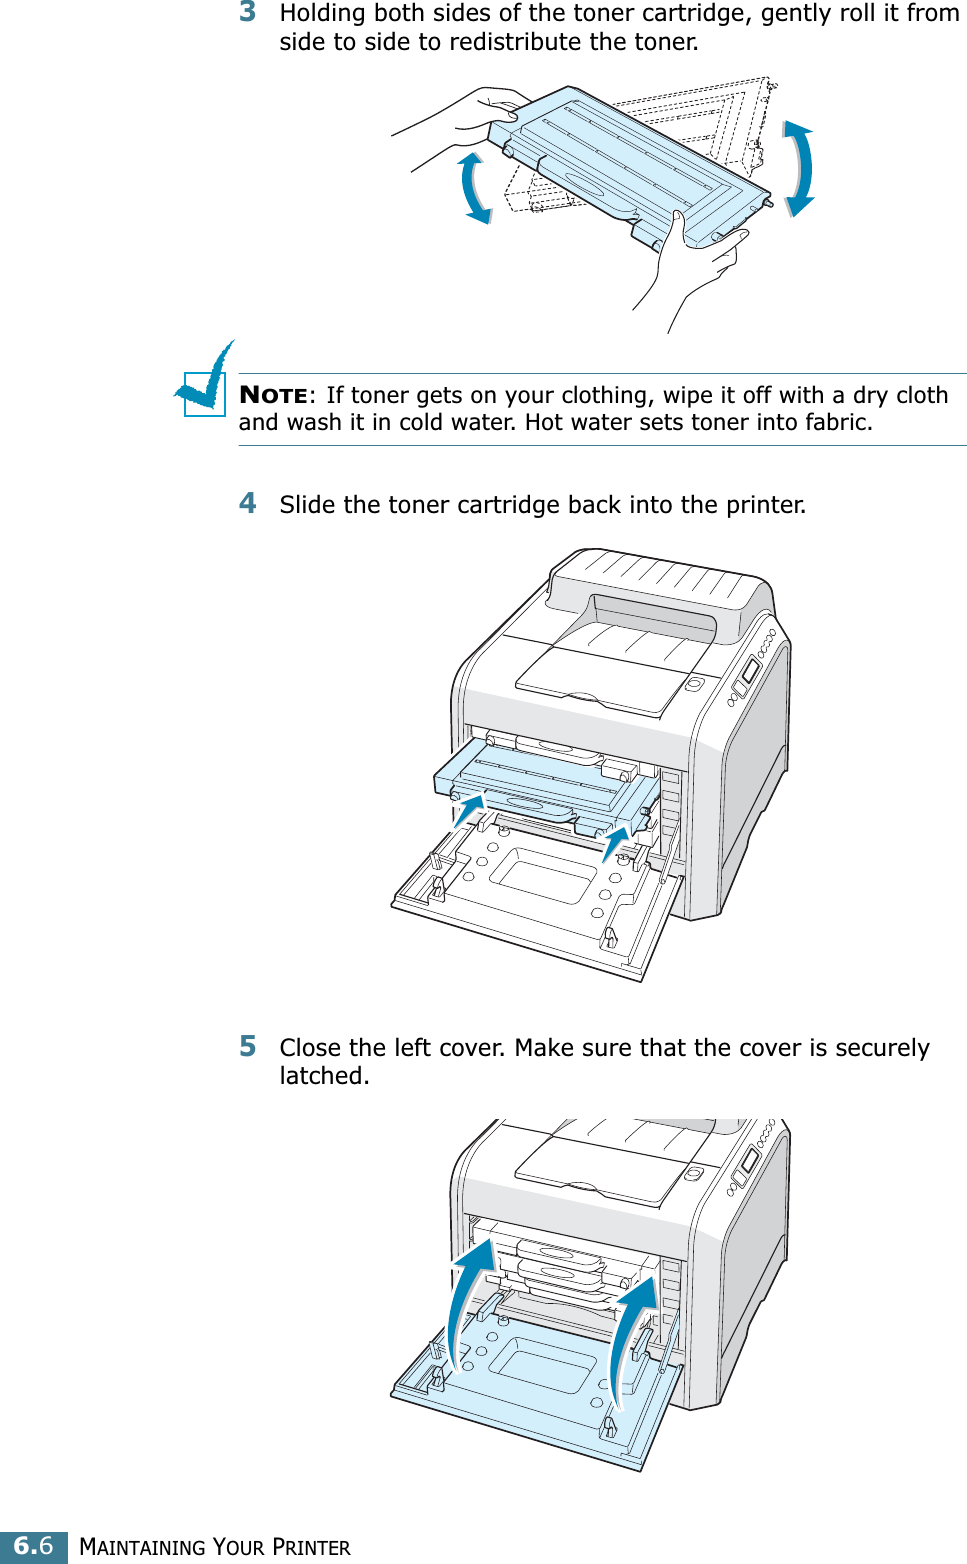
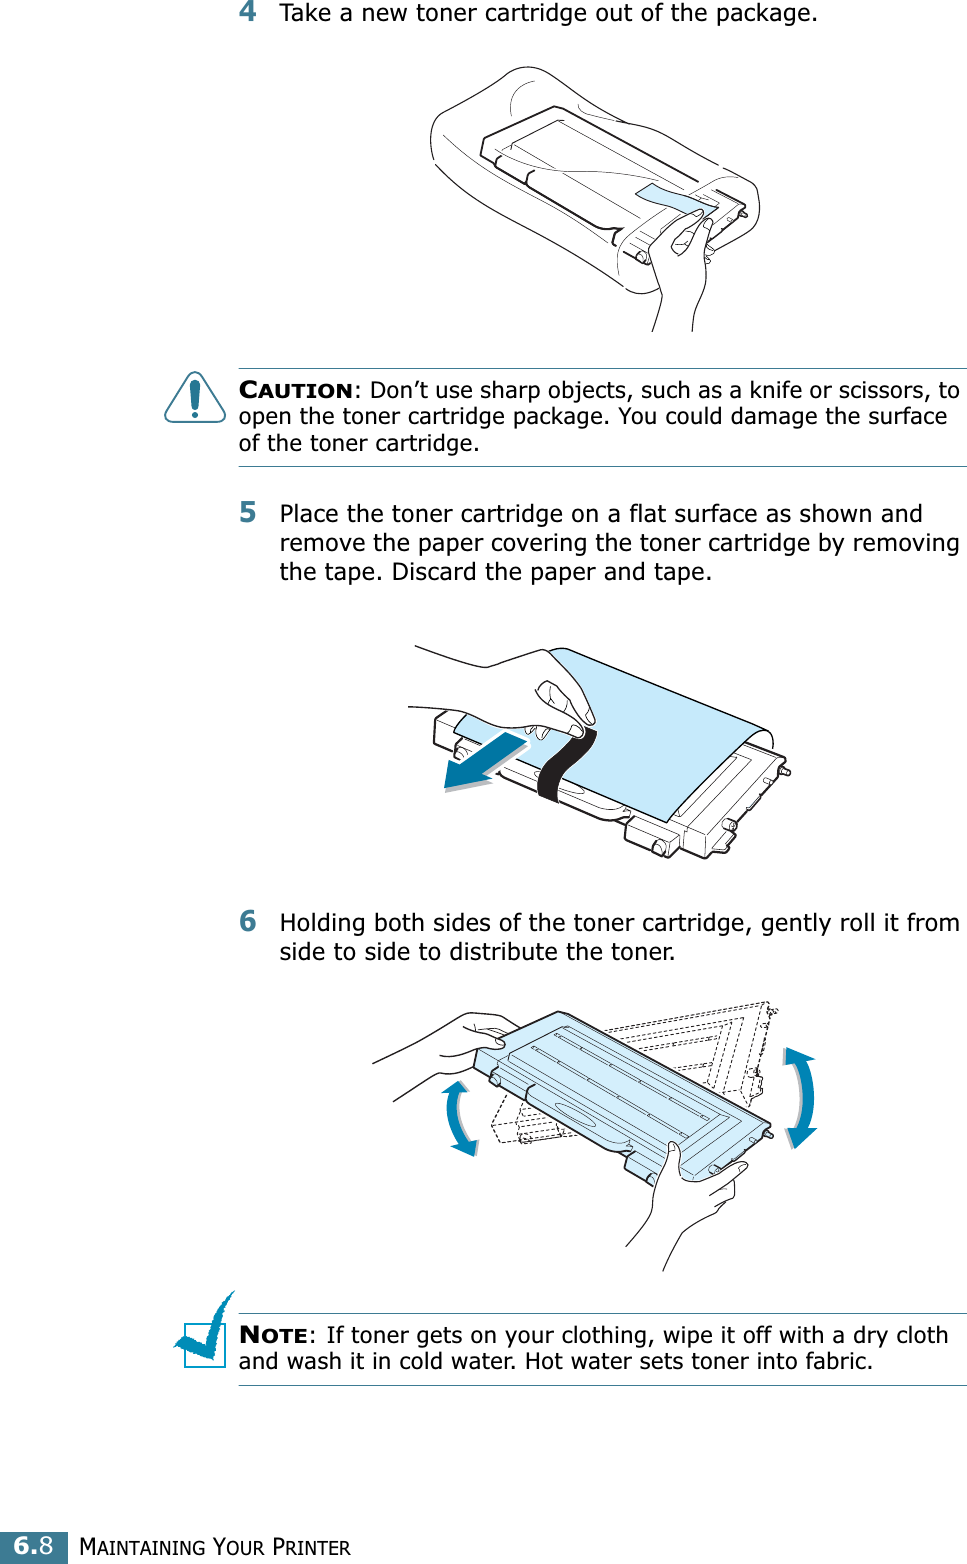
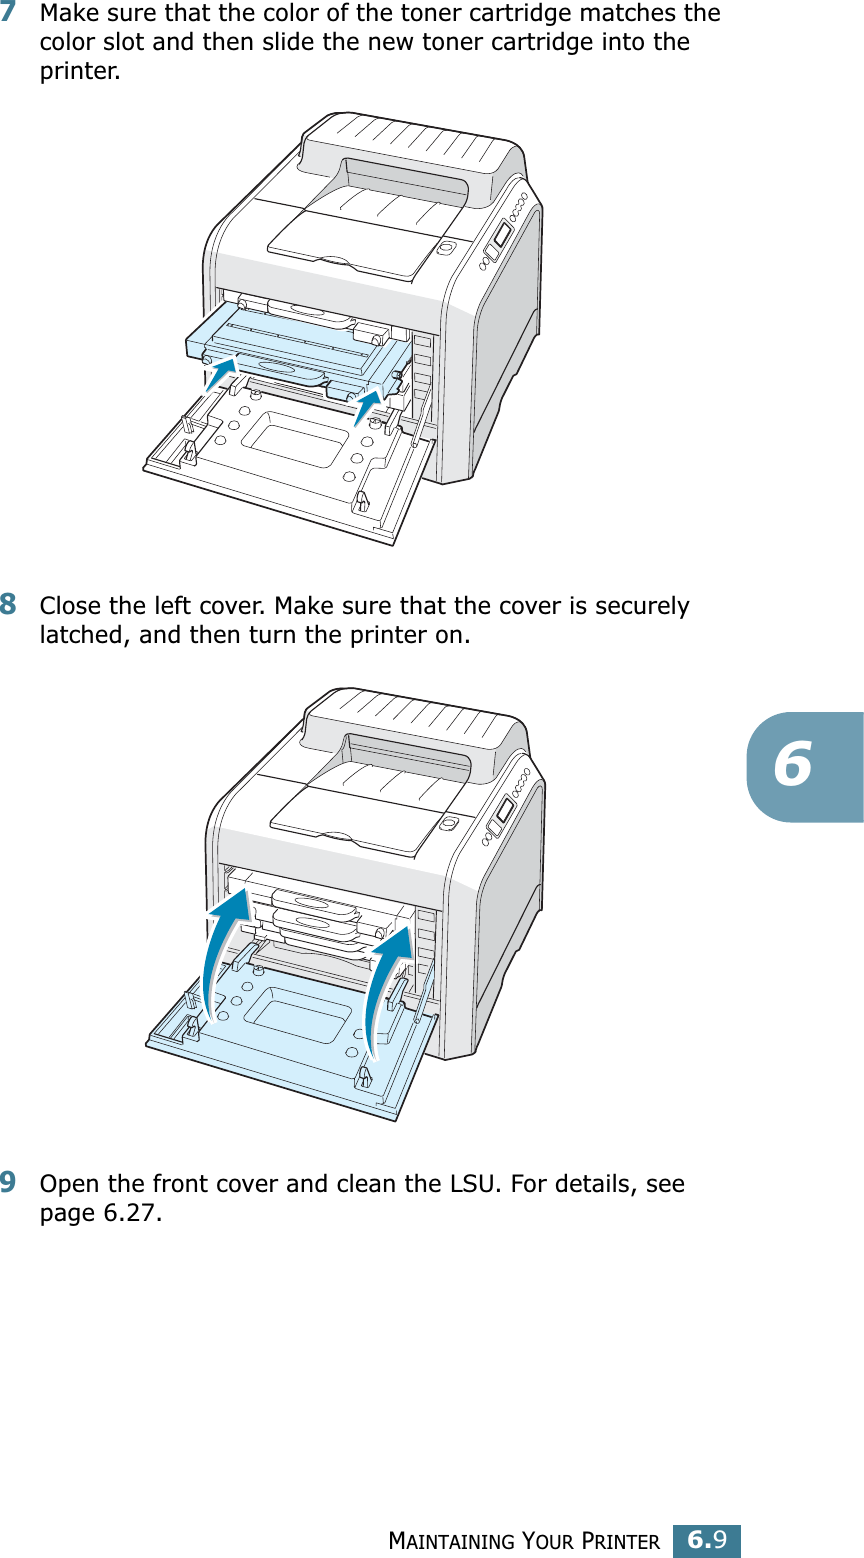
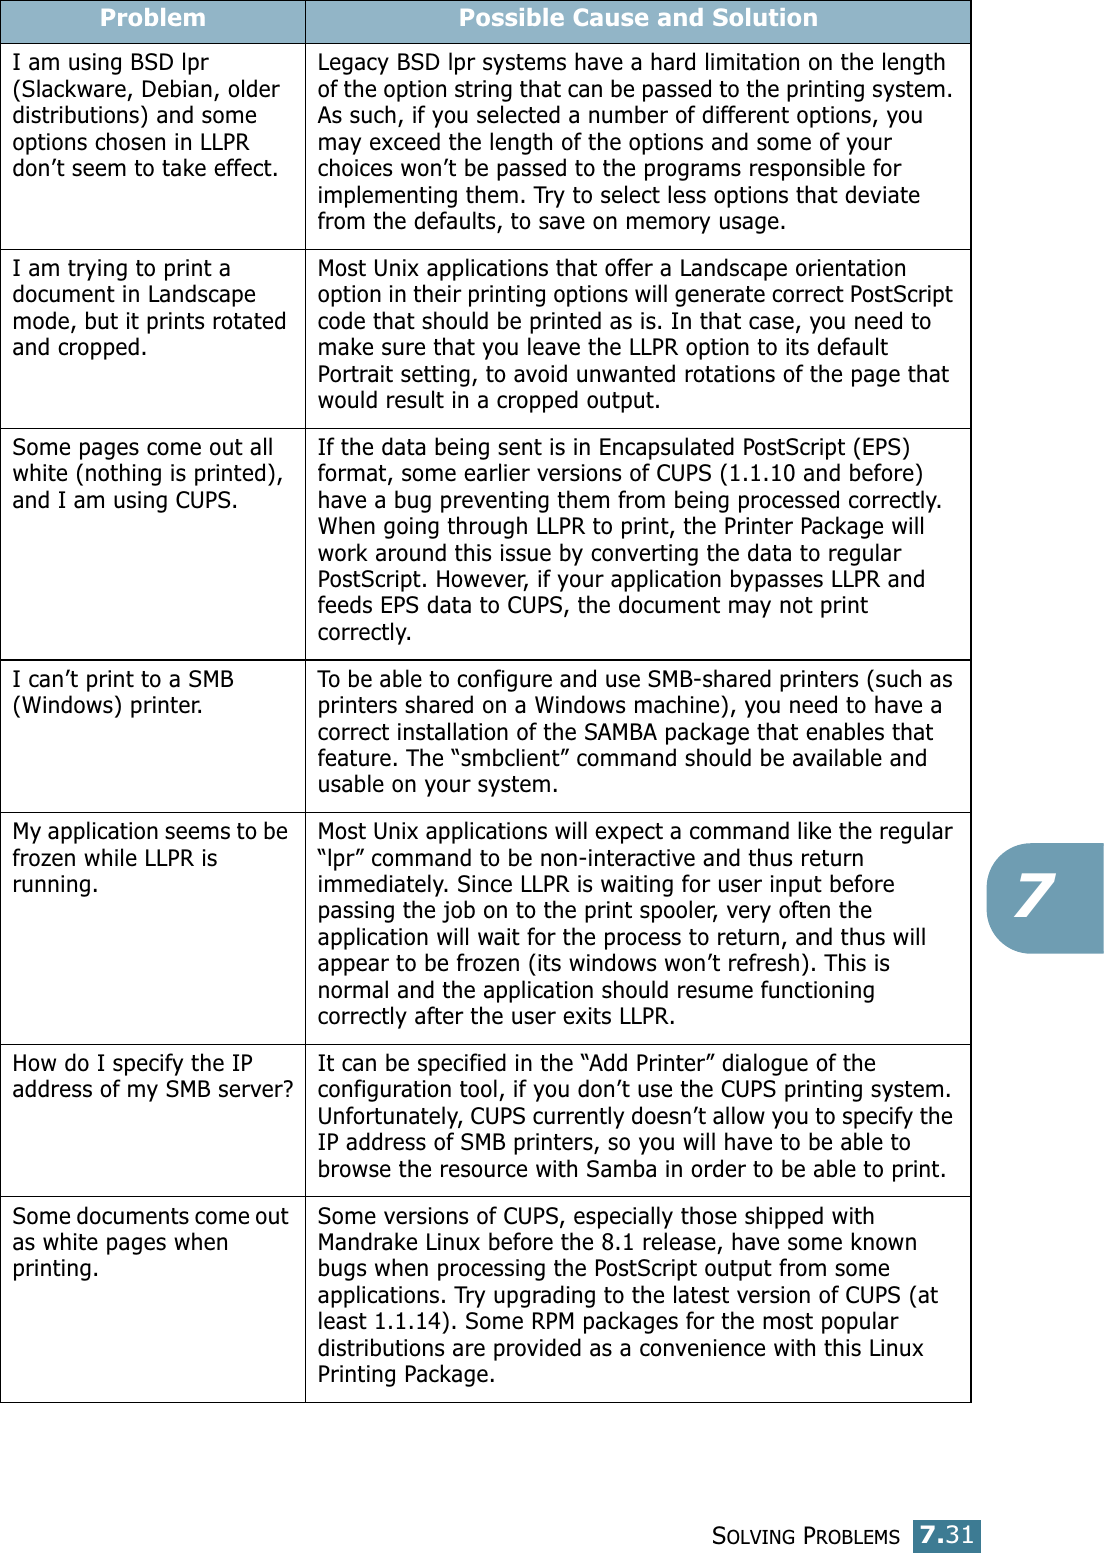
![MAINTAINING YOUR PRINTER6.76Replacing the Toner CartridgesThe printer uses four colors and has a different toner cartridge for each one: cyan (C), magenta (M), yellow (Y), and black (B).Replace a toner cartridge when the printer control panel displays ‘Replace Toner [Color]’. The control panel display tells you which color needs to be replaced. 1Turn the printer off.2Using the handle, open the left cover completely.3Pull the handle lightly first, and then holding the used toner cartridge, remove it.CAUTION: If you open the left cover for a long time, the drum cartridge can be exposed to light. This causes damage to the drum cartridge.](https://usermanual.wiki/Samsung-Electronics-Co/CLP500N.Users-Manual-2/User-Guide-339292-Page-5.png)

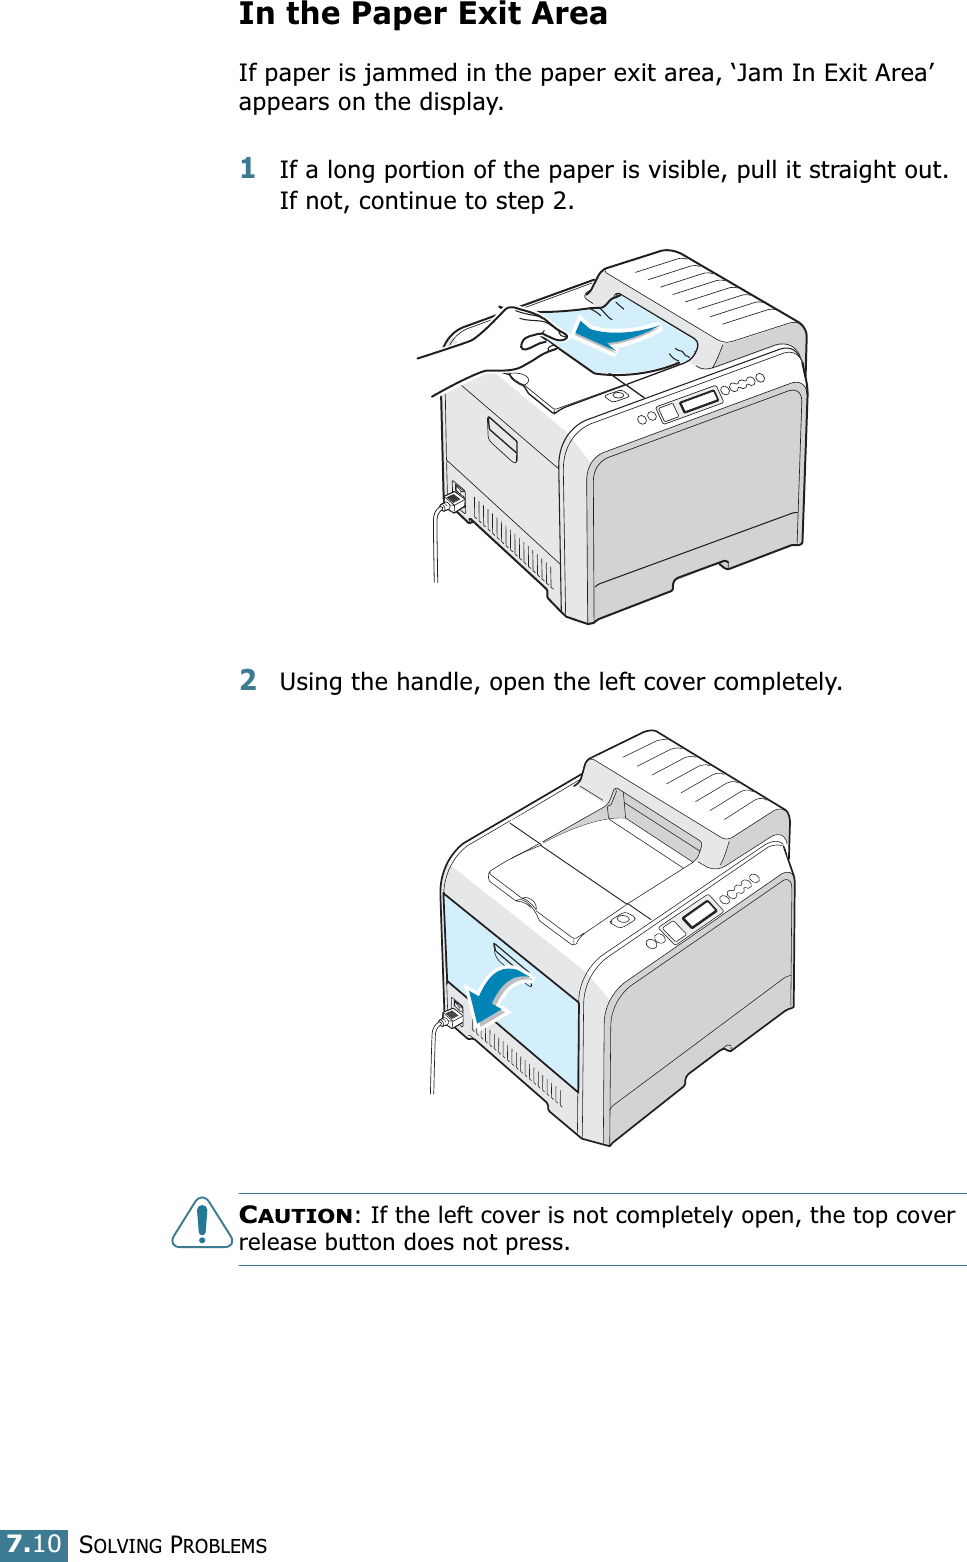
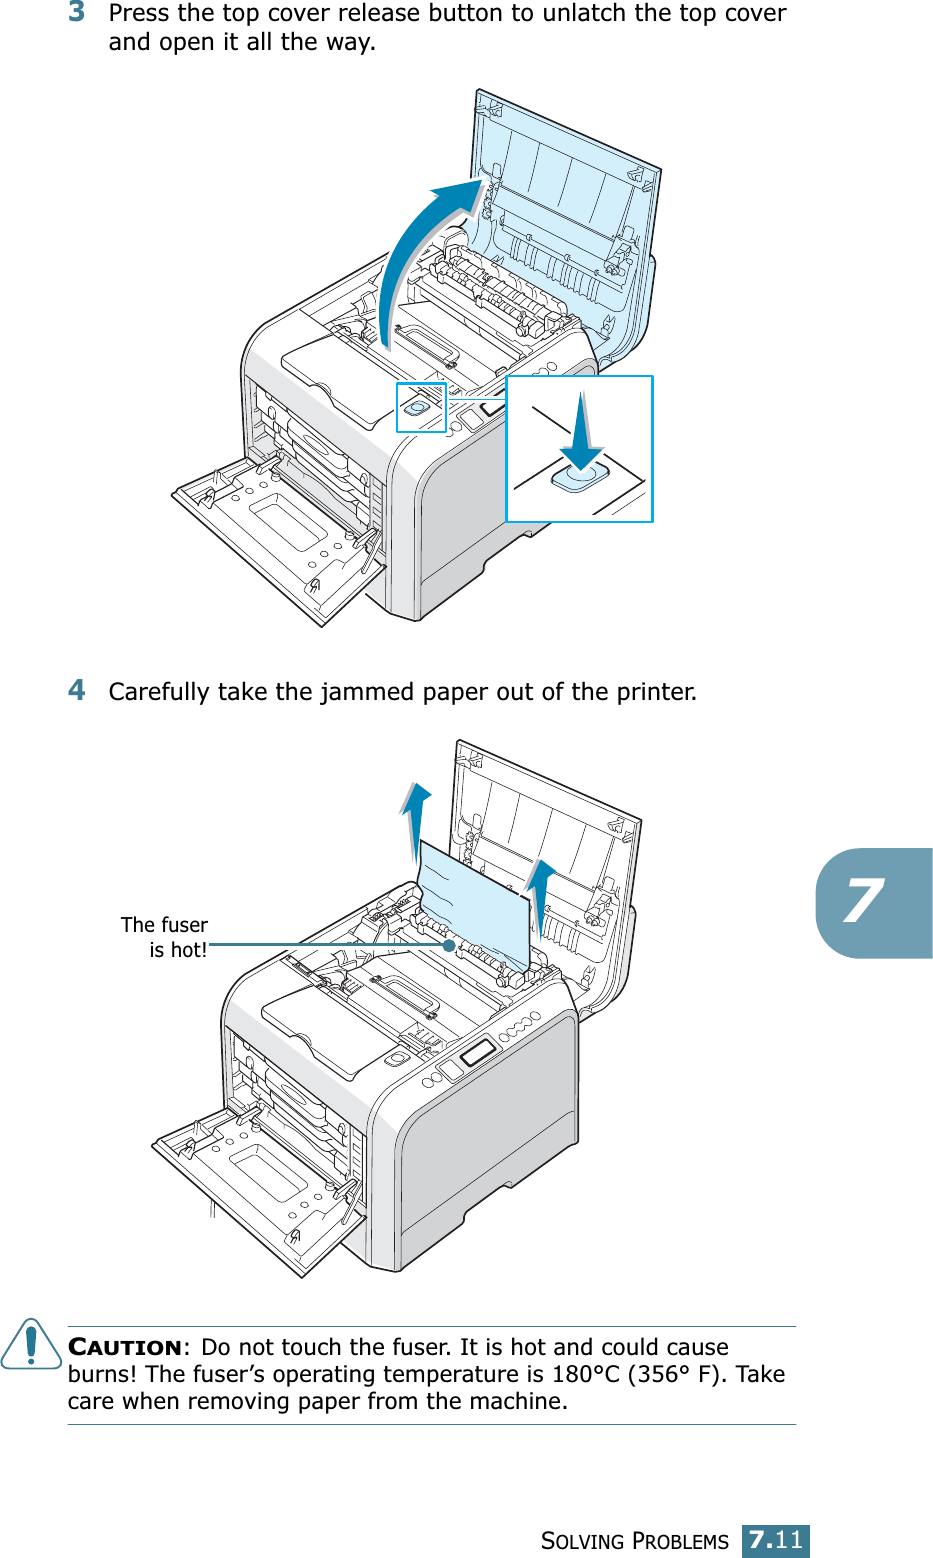

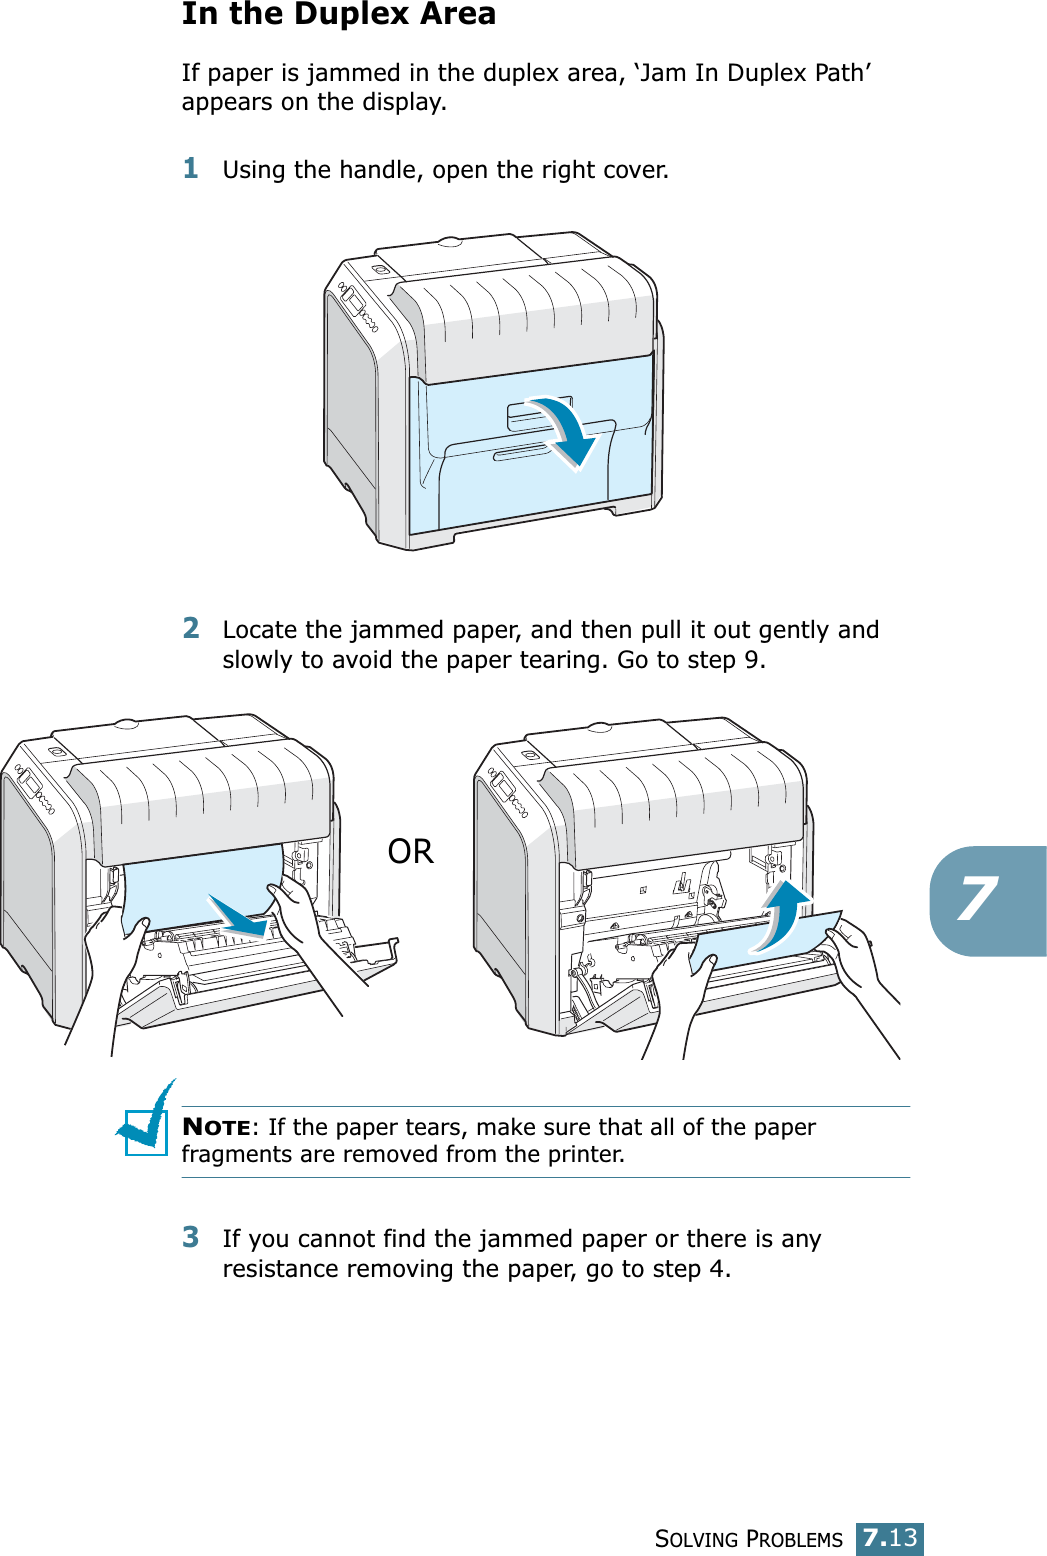
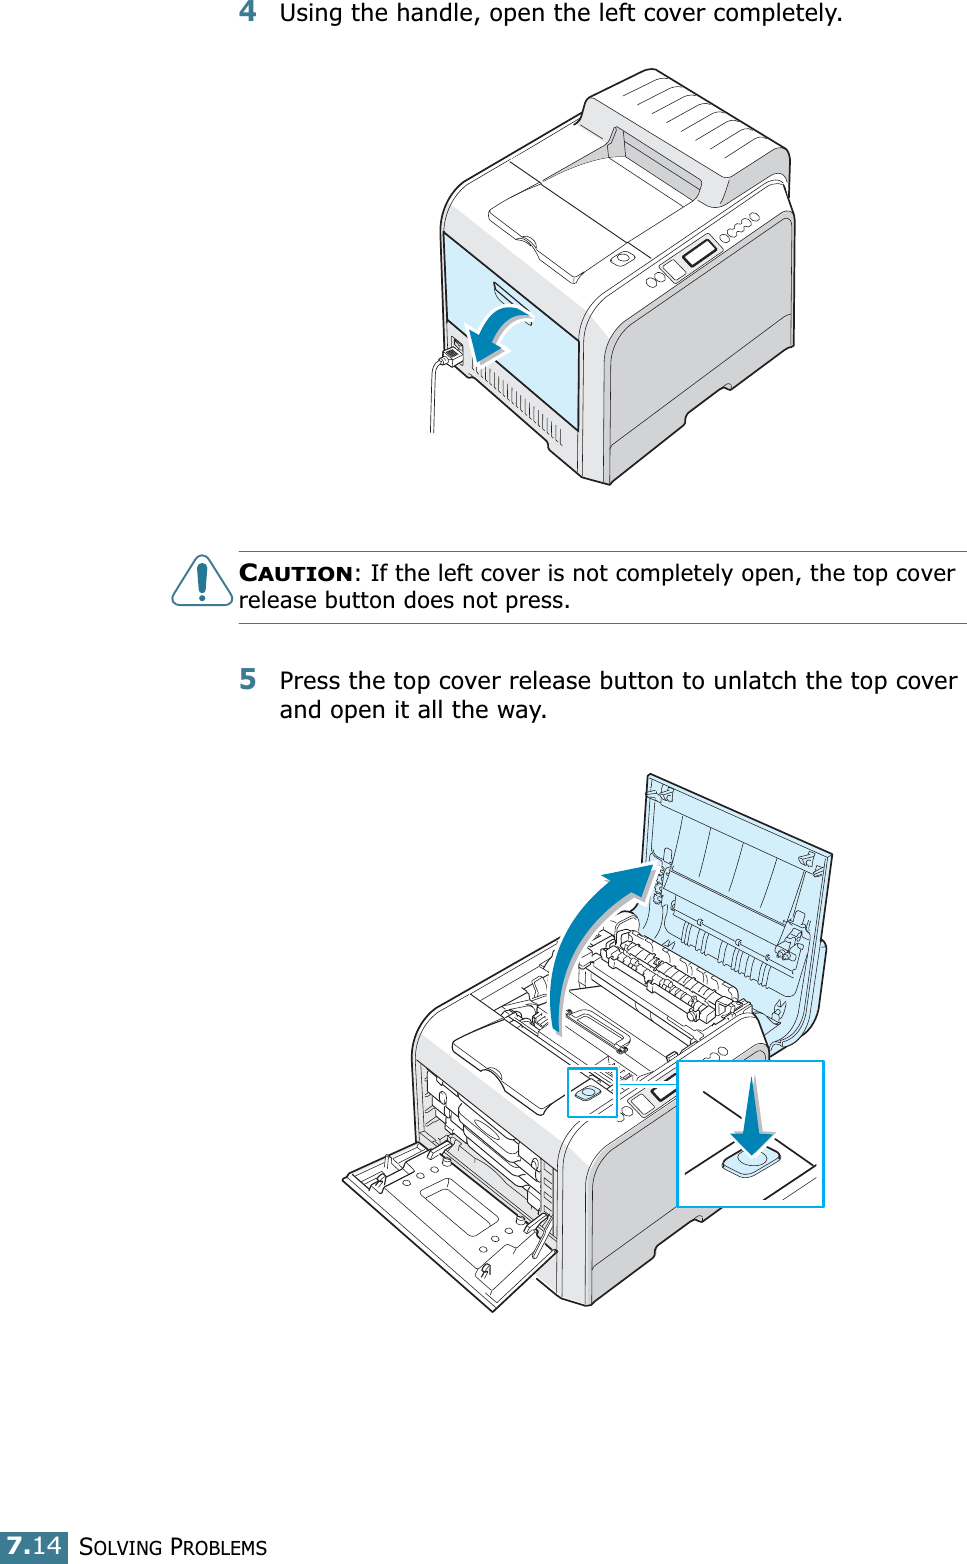
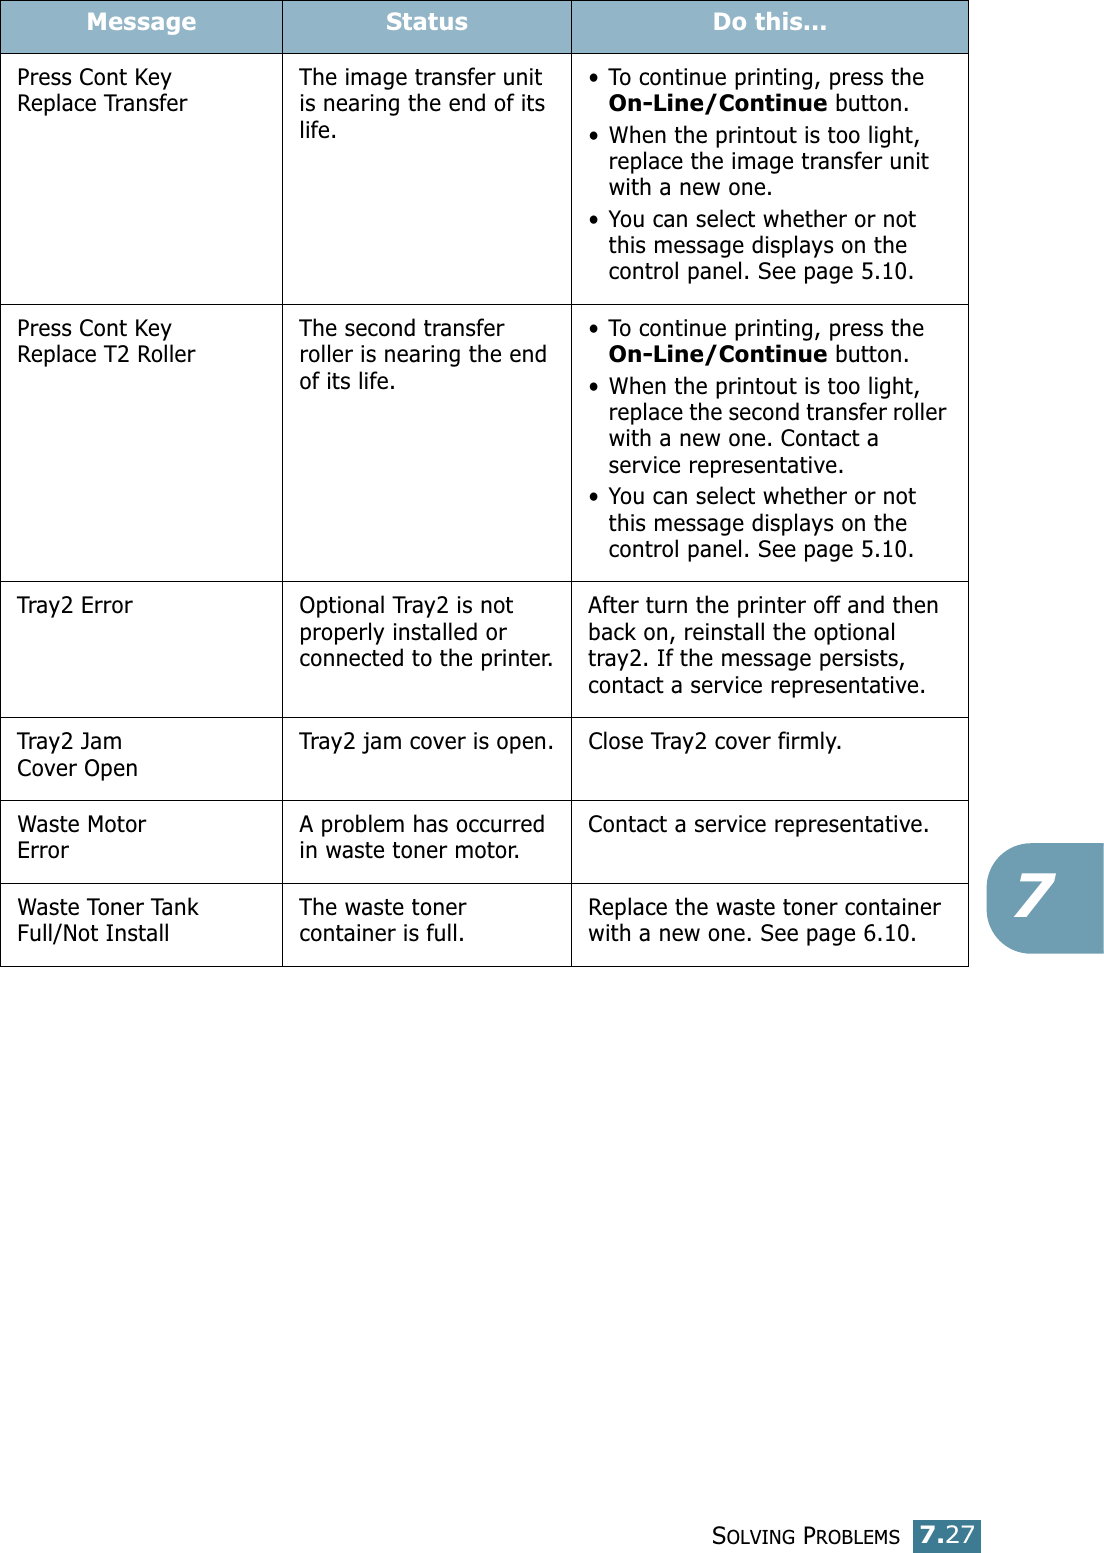
![SOLVING PROBLEMS7.257InvalidImage TransferAn invalid image transfer unit is installed.Only install a Samsung-approved image transfer unit, designed for your printer.Invalid New Toner[Color]An invalid new toner cartridge is installed.Only install a Samsung-approved toner cartridge, designed for your printer. If you install an approved toner cartridge, contact a service provider.Invalid Toner[Color]An invalid toner cartridge is installed.Only install a Samsung-approved toner cartridge, designed for your printer.Jam0 In [Tray] A paper jam has occurred from the indicated tray.Remove the jammed paper from the corresponding tray, referring to page 7.6.JamIn Duplex PathA paper jam has occurred while printing on both sides of the paper.Remove the jammed paper from the printer, referring to page 7.13.JamIn Exit AreaA paper jam has occurred in the paper exit area.Remove the jammed paper from the printer, referring to page 7.10.Jam Inside PrinterA paper jam has occurred inside the printer.Open the right cover and remove the jammed paper from the printer, referring to page 7.9.Load ManualPress Cont KeyThe Multi-purpose Tray is empty in the manual feed mode.Load a sheet of print material and press the On-Line/Continue button. You need to press the button for each page to be printed.Load[Size] In [Tray]The paper size specified in the printer properties does not match the paper you are loading.Load the correct paper in the tray.Main Motor ErrorA problem has occurred in the main motor of the printer.Unplug the power cord and plug it in again. If the problem persists, please call for service.Memory Overflow The printer does not have enough memory to print the current job.An error has occurred in the firmware program of the printer.The job automatically clears and the printer returns to Standby Mode.• Expand the memory in your printer. See “Installing Printer Memory” on page D.2.Message Status Do this...](https://usermanual.wiki/Samsung-Electronics-Co/CLP500N.Users-Manual-2/User-Guide-339292-Page-59.png)
![SOLVING PROBLEMS7.26Page Too Complex Too much complicated data was sent to the printer.Simplify the page layout and remove unnecessary graphics from your document.To expand the memory in your printer, see “Installing Printer Memory” on page D.2.ReadyIP ConflictAn IP address conflicts with only other devices on the network.Contact a service representative and choose an address within your subnet which will not conflict with any other devices.Ready [CMYK]Low TonerThe corresponding toner cartridge in your printer is nearly empty.Redistribute the toner in corresponding toner cartridge, referring to page 6.5.ReplaceDrum CartridgeThe drum cartridge is either not installed in the printer or is empty.Install the drum cartridge.ORReplace the drum cartridge with a new one. See page 6.13.ReplaceImage TransferThe image transfer unit is not installed in the printer or is empty.Install the image transfer unit.ORReplace the image transfer unit with a new one. See page 6.21.Replace Toner[Color]The indicated color toner cartridge is not installed in the printer or is empty.Install the corresponding color toner cartridge.ORReplace the corresponding toner cartridge with a new one. See page 6.7.Press Cont KeyReplace CartThe level of the toner in the toner cartridge is low and printing stops until you press the On-Line/Continue button.• To continue printing, press the On-Line/Continue button.• When the printout is too light, replace the toner cartridge with a new one.• You can select whether or not this message displays on the control panel when the toner is low. See page 5.10.Press Cont KeyReplace DrumThe drum cartridge is nearing the end of its life.• To continue printing, press the On-Line/Continue button.• When the printout is too light, replace the drum cartridge with a new one.• You can select whether or not this message displays on the control panel. See page 5.10.Message Status Do this...](https://usermanual.wiki/Samsung-Electronics-Co/CLP500N.Users-Manual-2/User-Guide-339292-Page-60.png)
![USING YOUR PRINTER IN LINUXB.3B3Insert the printer software CD-ROM. The CD-ROM automatically runs.NOTE: If the CD-ROM does not automatically run, click the icon at the bottom of the window. When the Terminal screen appears, type in:[root@local /root]# cd /mnt/cdrom (the CD-ROM directory) [root@local cdrom]# ./setup.sh 4Select the installation type, either Recommended or Expert, and then click Continue.Recommended is fully automated and no interaction is required. Expert installation allows you to select the install path or printing system.5If you selected Recommended, go to Step 6.For Expert, select an option and then click Begin Install.](https://usermanual.wiki/Samsung-Electronics-Co/CLP500N.Users-Manual-2/User-Guide-339292-Page-77.png)