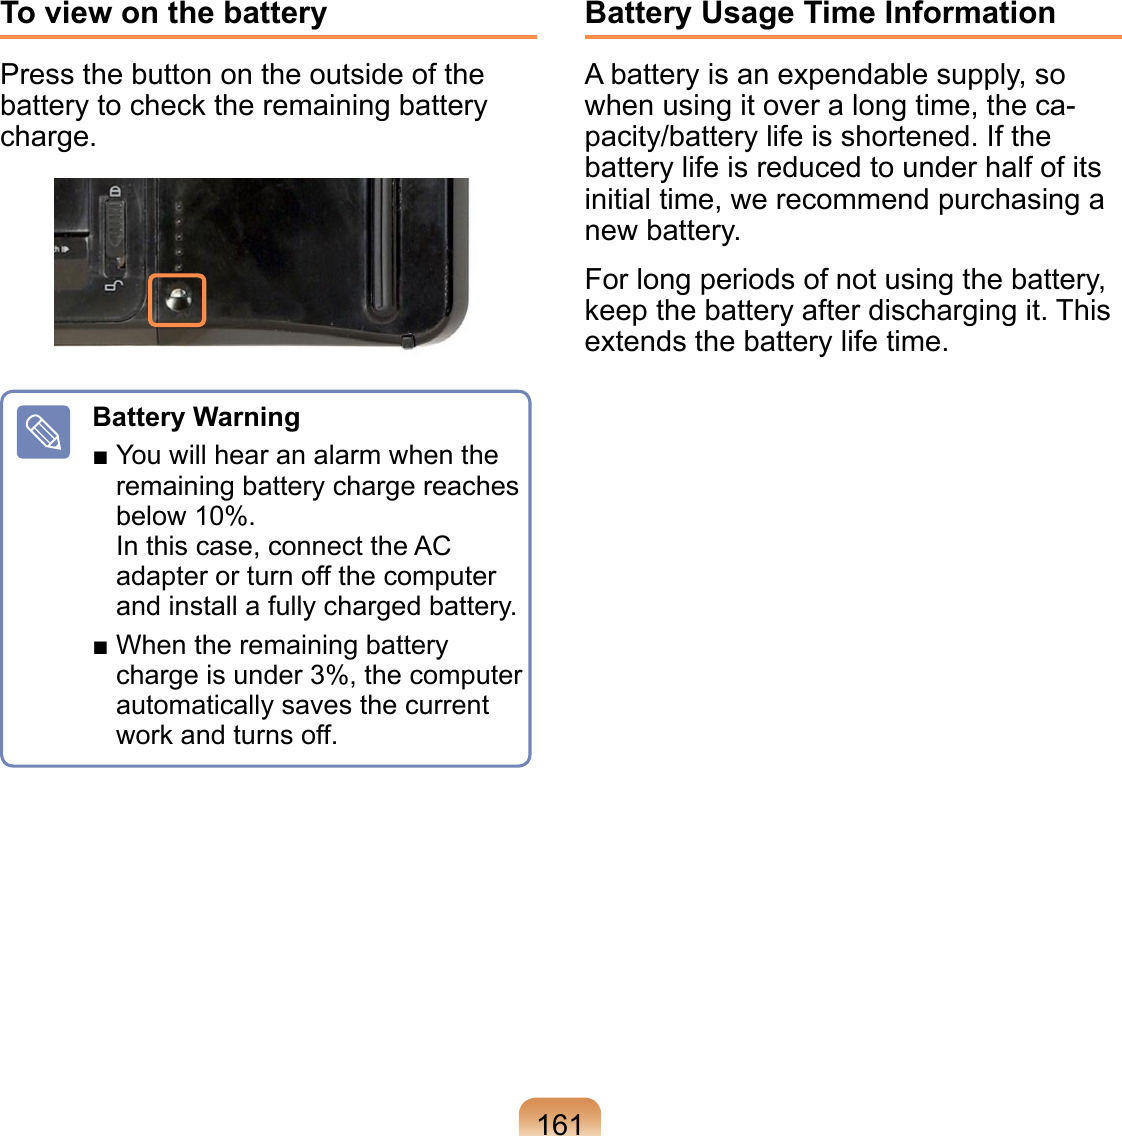
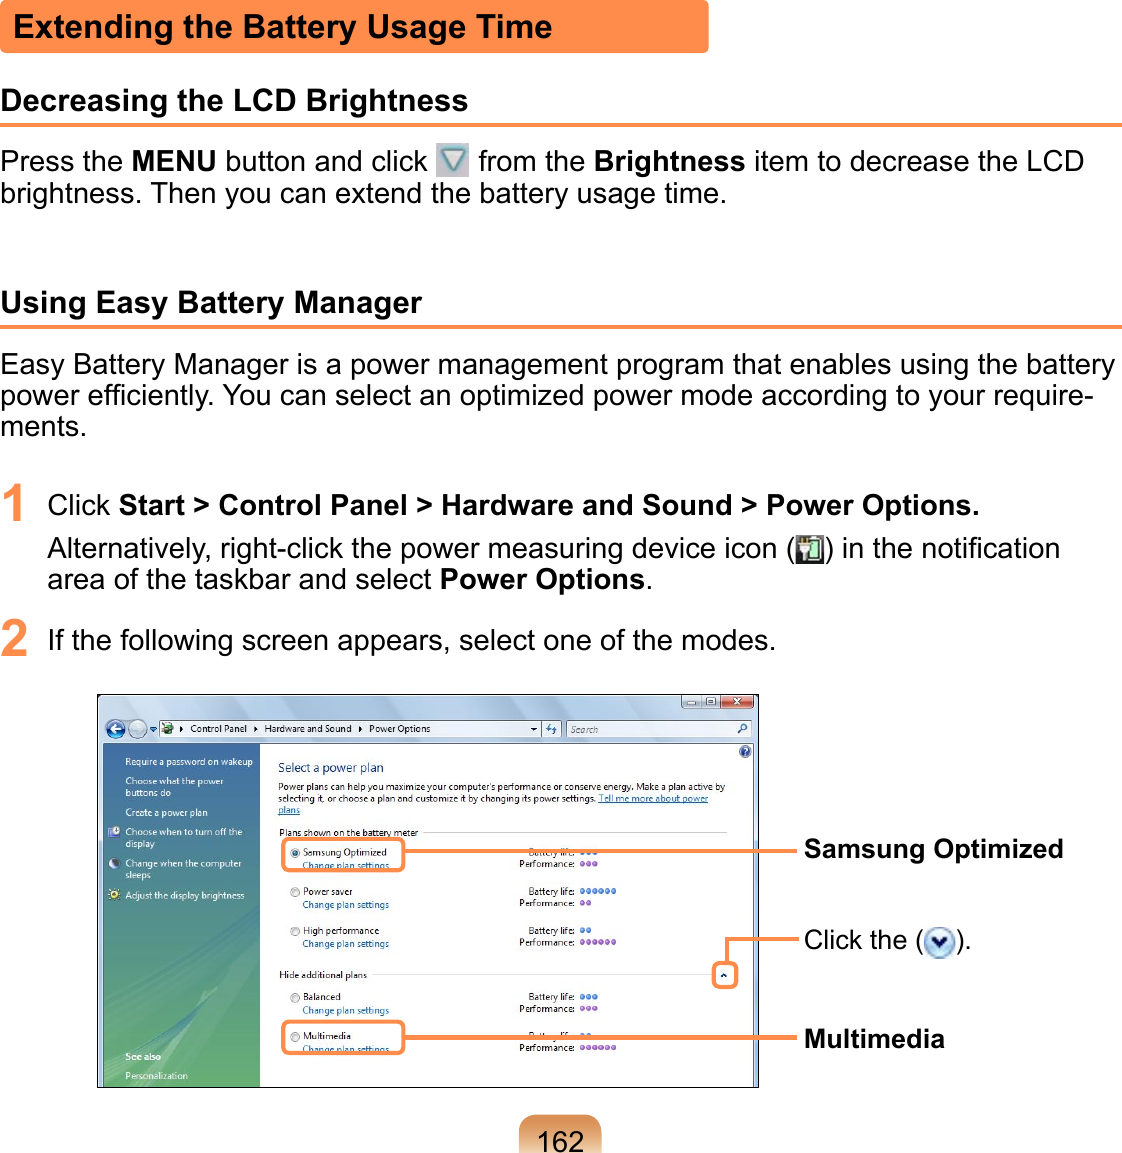
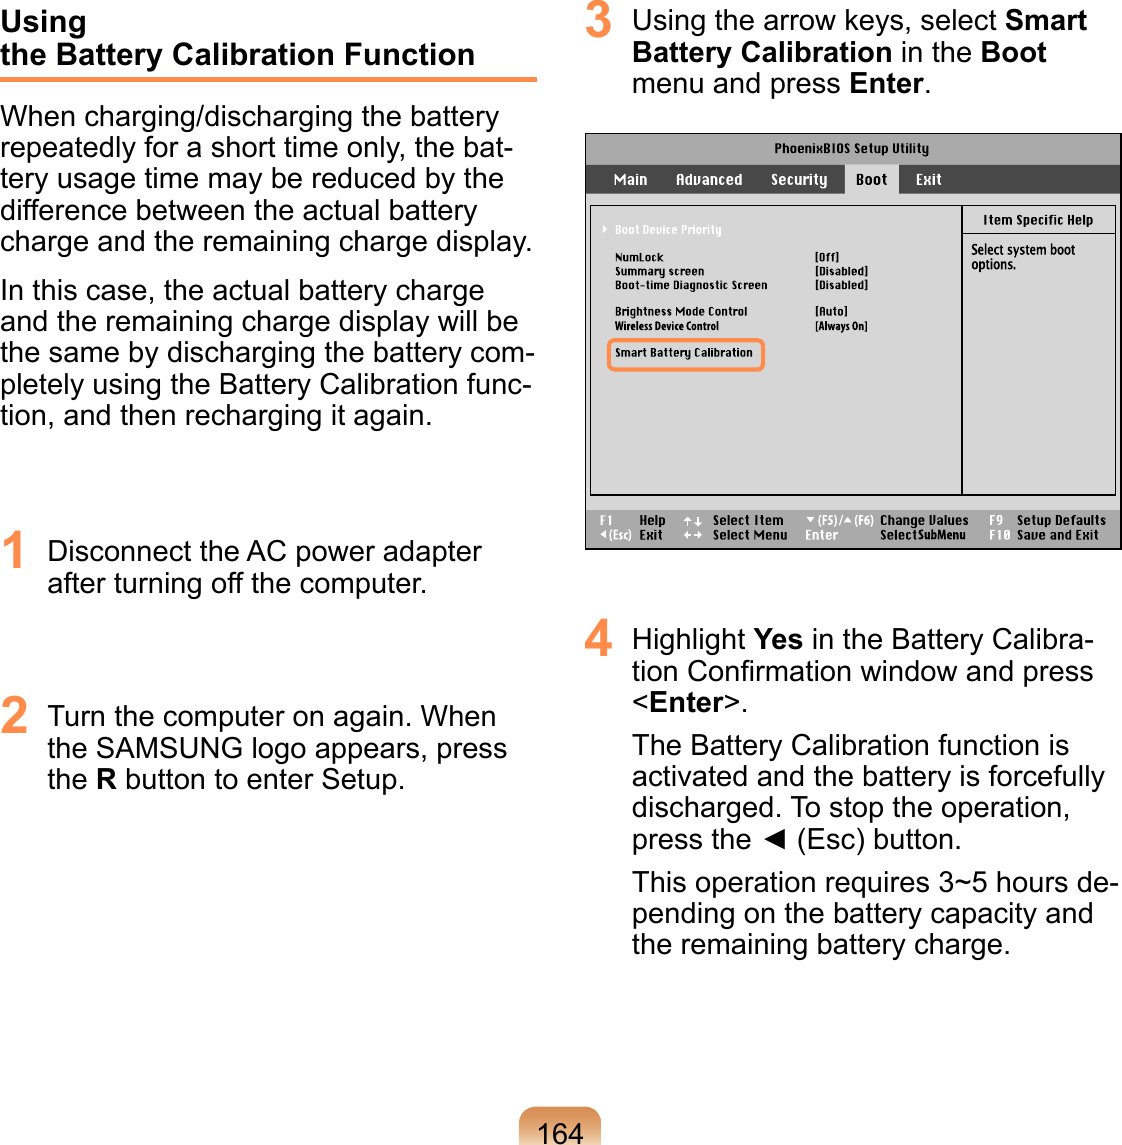
Samsung Electronics Co NP-Q1U Notebook PC User Manual Q1u Eng indb
Samsung Electronics Co Ltd Notebook PC Q1u Eng indb
UserManual.wiki
>
Samsung Electronics Co
>
NP-Q1U User Manual
>
User Manual 3
Contents
1.
User Manual 1
2.
User Manual 2
3.
User Manual 3
User Manual 3
Navigation menu
Upload a User Manual
Namespaces
Wiki Guide
HTML
PDF
Info
Views
User Manual
Discussion / Help
Navigation

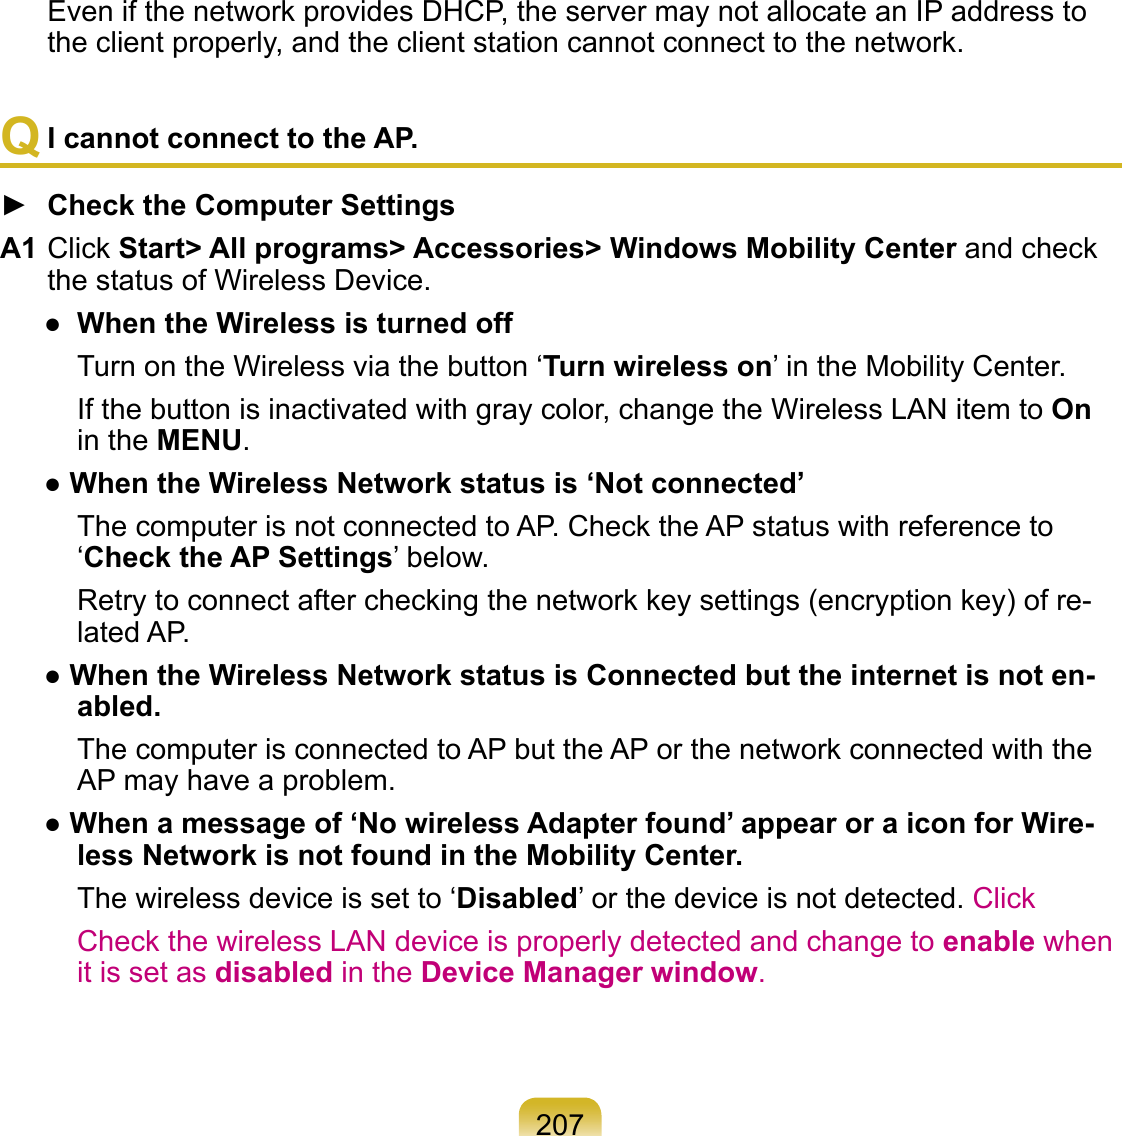
![1563 Enter the password with the keypad and press the Enter button. Reenter the password and press the Enter button. You can use up to 7 alphanumeric characters for a password but you cannot use special characters. The ← key on the keypad performs the role of Delete and the ◄ button performs the role of the Cancel (Esc) function.To enter a number, press Num Lock and then enter the number.If you do not press Num Lock, the characters of the corresponding keys are entered instead of digits.4 When a message confirming the password configuration appears in the [Setup Notice] window, press <Enter>.The supervisor password has been set. The supervisor password is re-quired to turn the computer on or to enter System Setup.Setting a User PasswordUsers can start the system with a user password, but cannot enter the System Setup. By doing this, you can prevent other users from entering Setup.Before configuring a user password, a supervisor password must have been configured. Deactivating the supervisor password also deactivates the user pass-word.In the Set User Password item, press <Enter> and complete the procedures of Step 3 of Setting a Supervisor Password. Activating the Booting PasswordBefore activating the booting password, a supervisor password must have been configured.Set the Password on boot option to En-abled. From now on, system booting will not proceed without the password.](https://usermanual.wiki/Samsung-Electronics-Co/NP-Q1U.User-Manual-3/User-Guide-776912-Page-11.png)
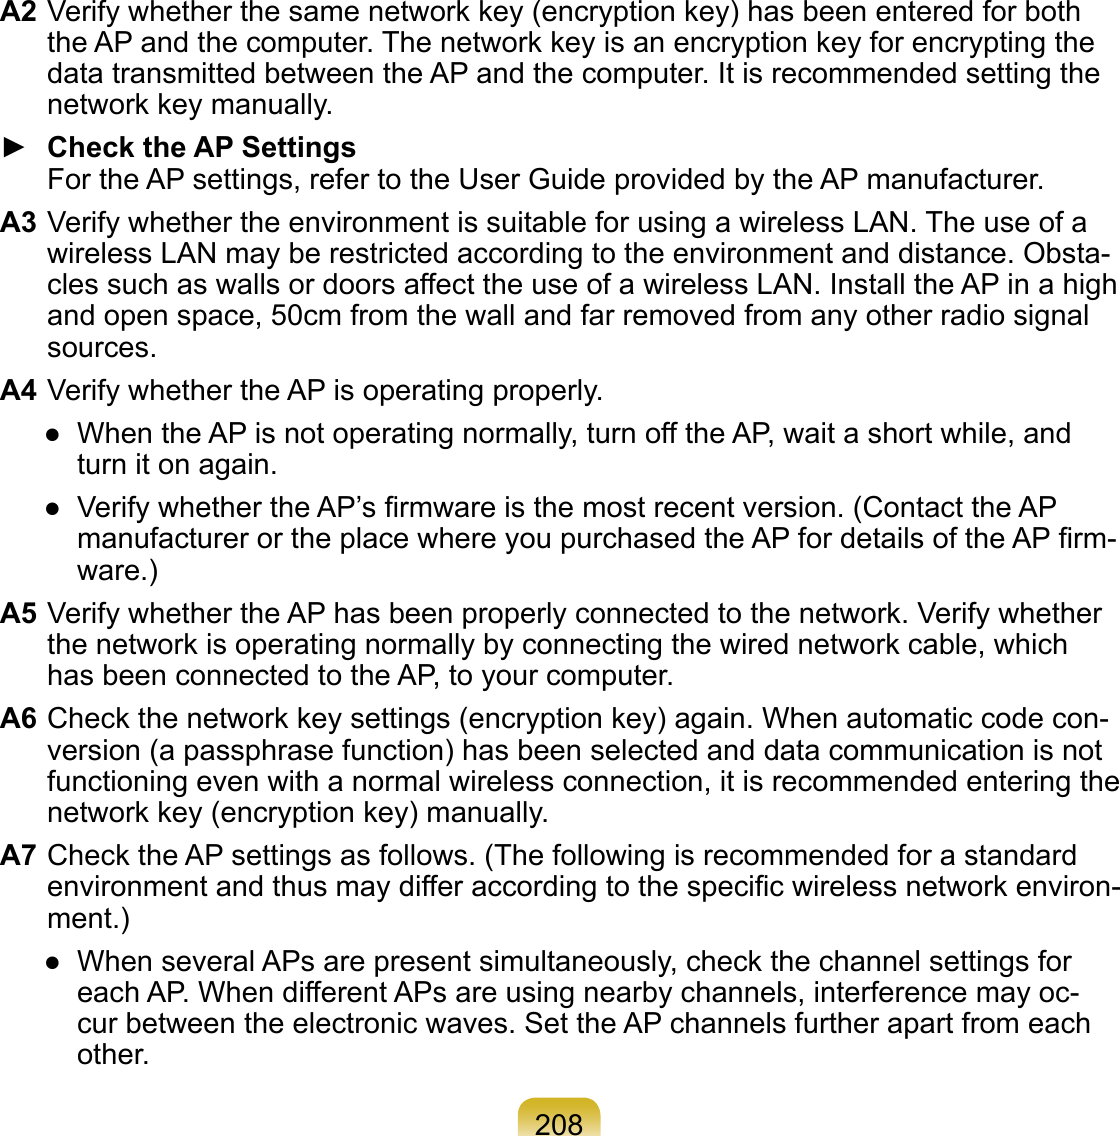
![157Deactivating the Password1 On the password to be deactivated, press <Enter>. For example, to de-activate a supervisor password in the Set Supervisor Password item, press <Enter>.2 In the Enter Current Password item, enter the currently configured pass-word and press <Enter>.3 Leave the Enter New Password item field empty, and press <Enter>.4 Leave the Confirm New Password field empty, and press <Enter>.5 In the [Setup Notice] window, press <Enter>.The password is deactivated.](https://usermanual.wiki/Samsung-Electronics-Co/NP-Q1U.User-Manual-3/User-Guide-776912-Page-12.png)

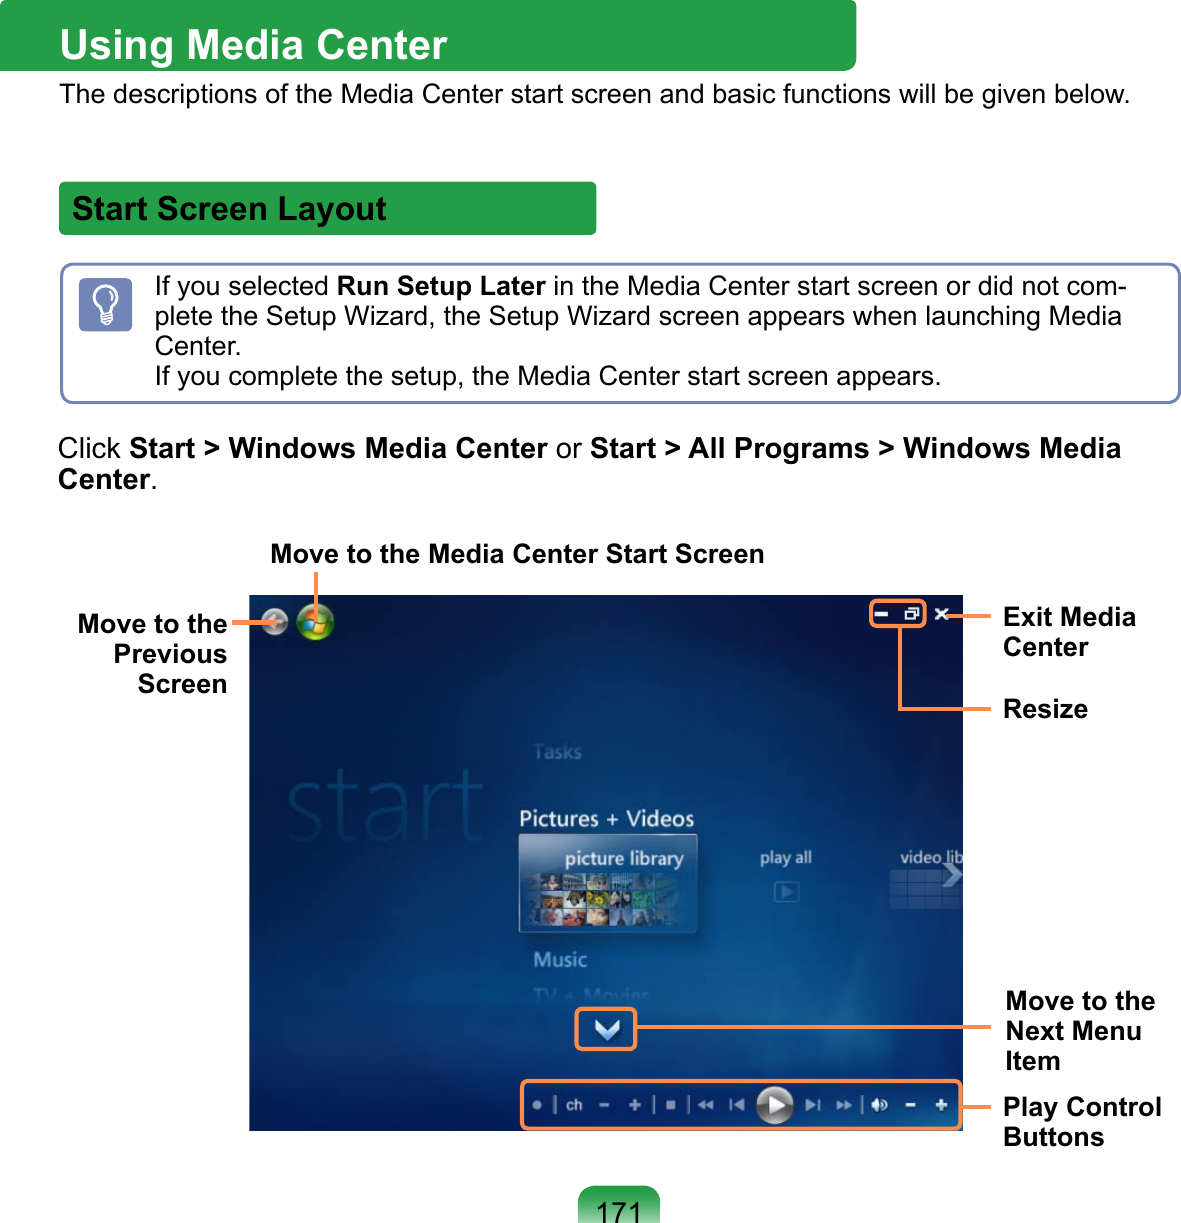
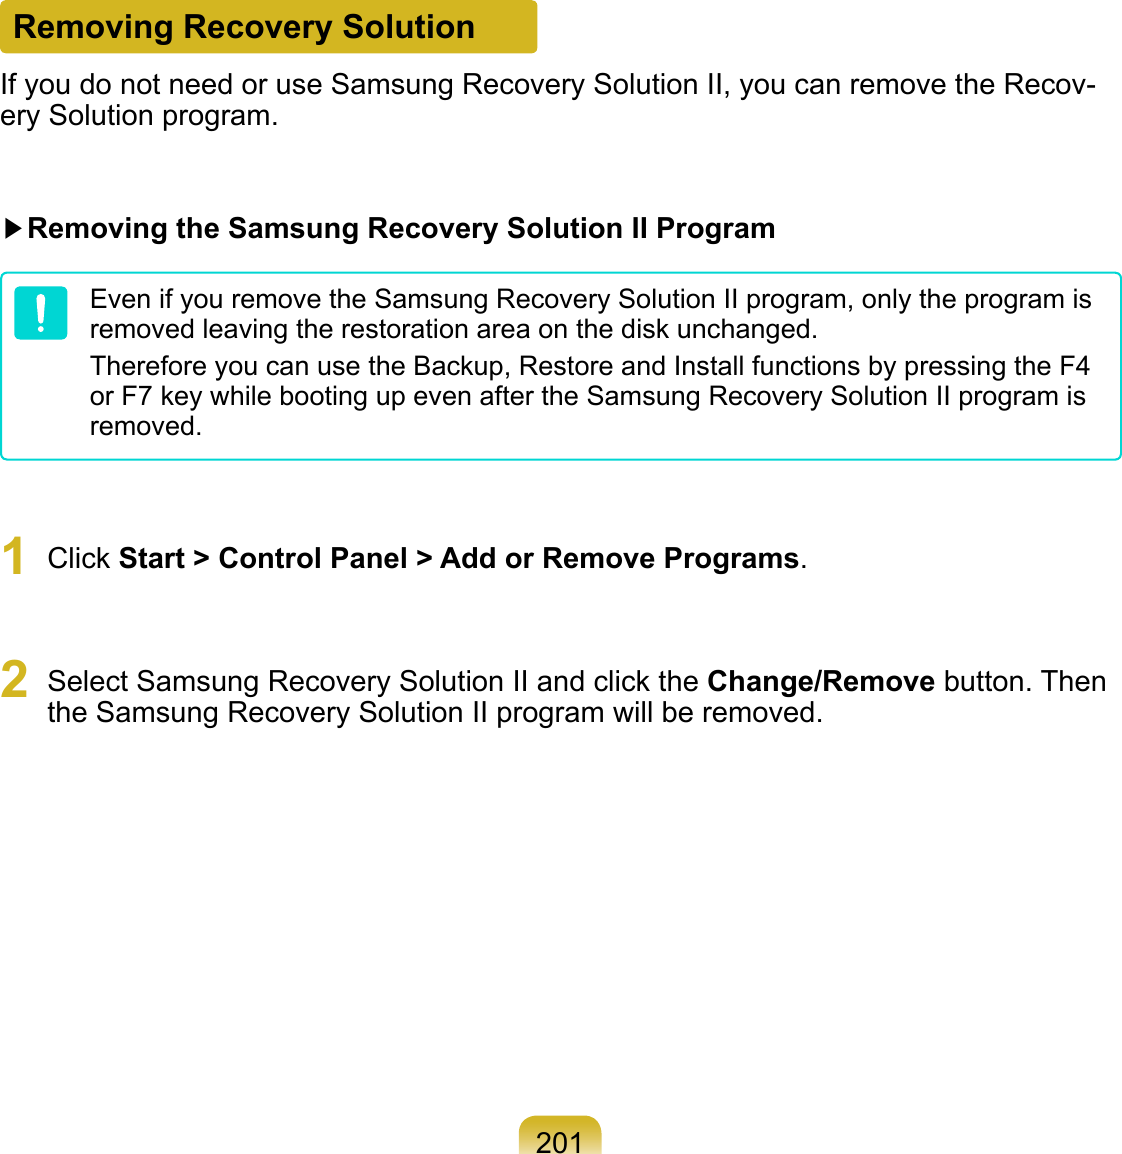
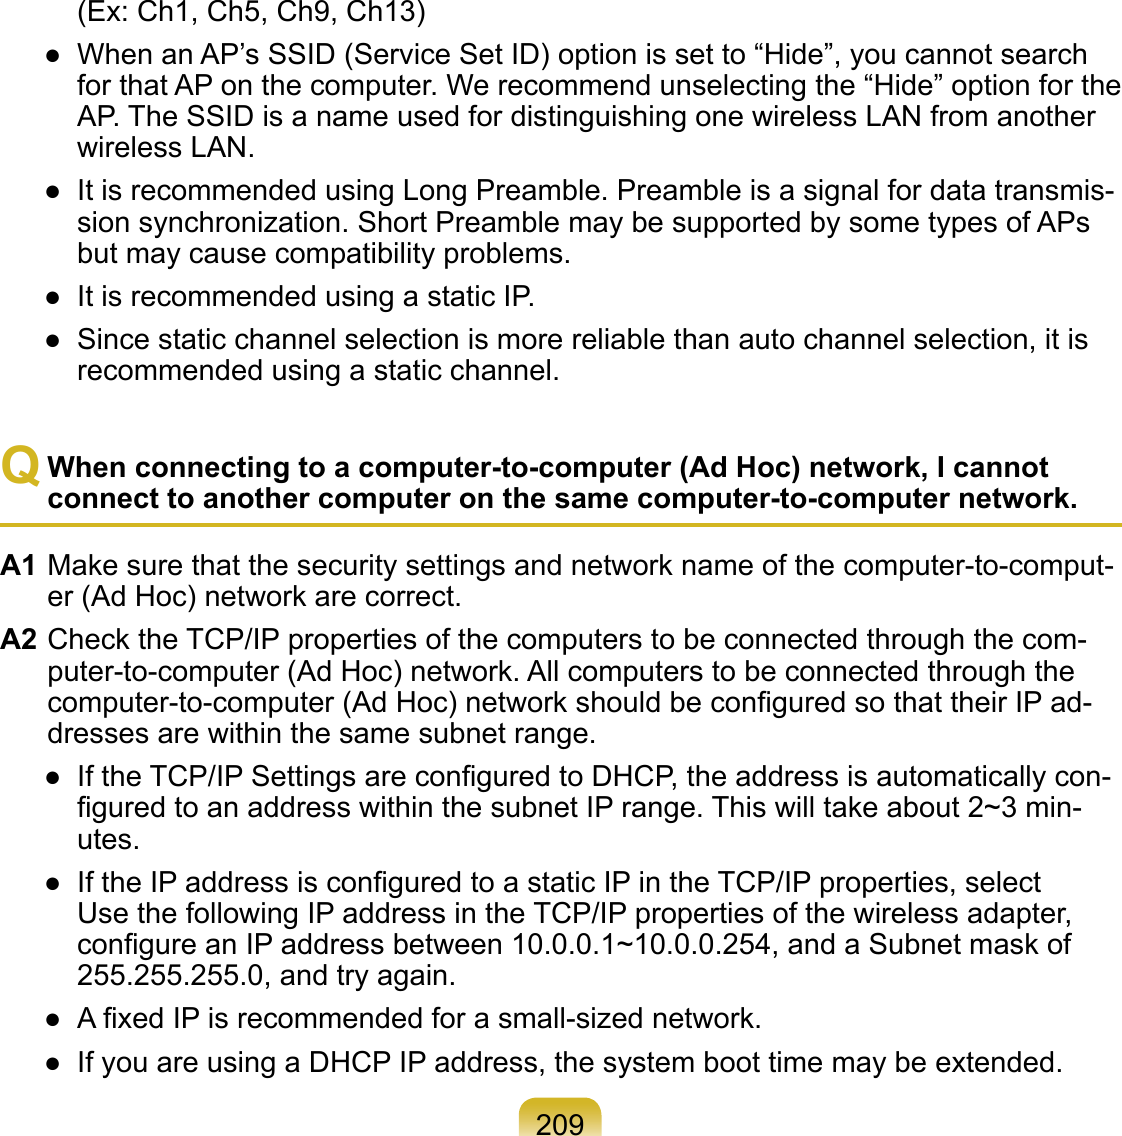
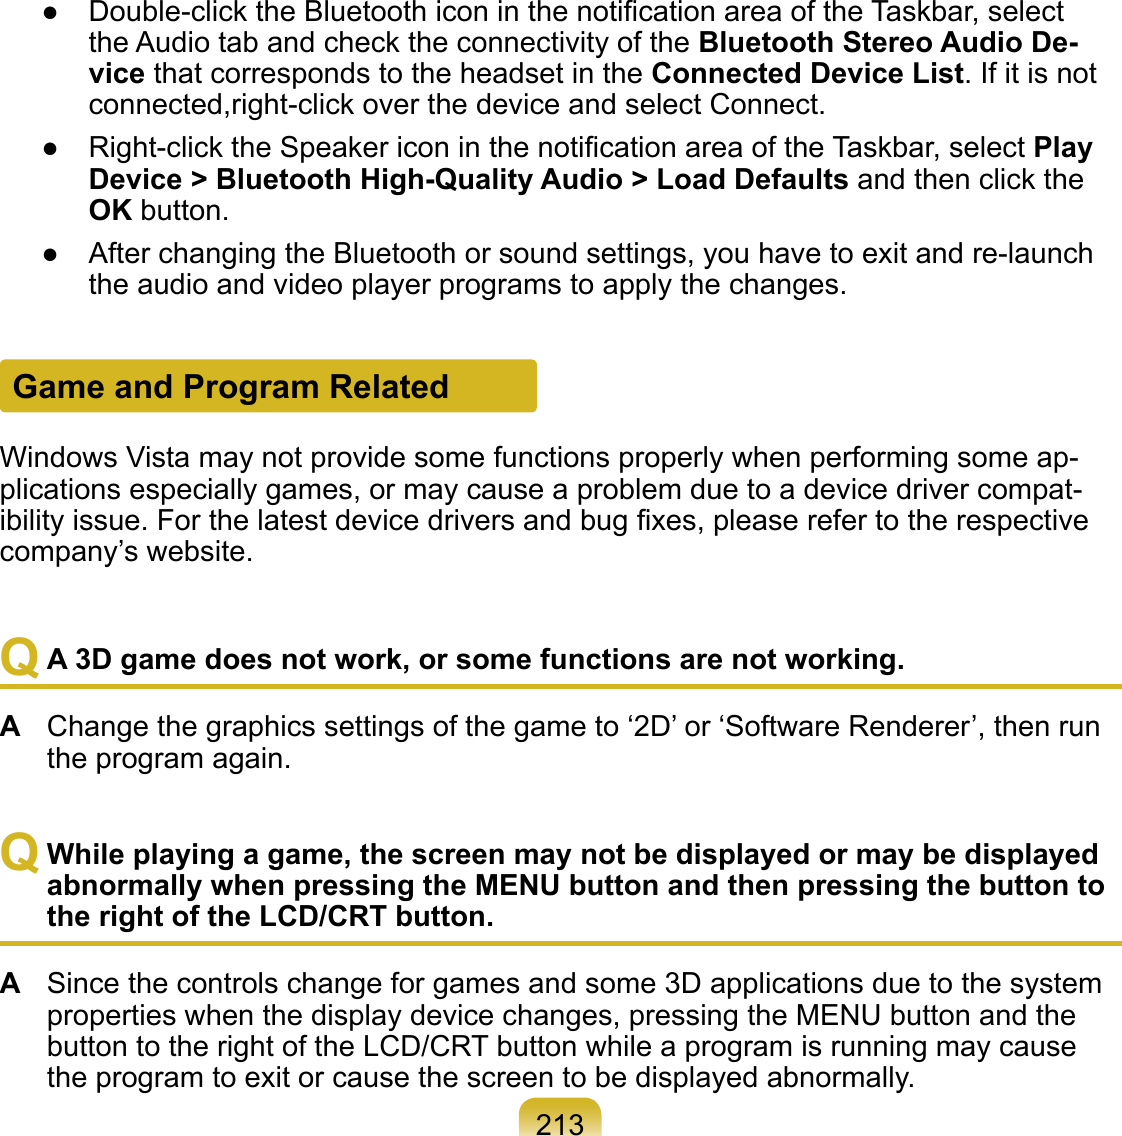
![167Connecting and Setting Up Media CenterThe basic usage of Media Center for Microsoft Windows Vista Home Premium is described below.Optional DevicesThe remote control, external-type remote control sensor and TV tuner card are not essential for using Media Center. Since these devices are not supplied with your Samsung computer, you have to pur-chase them additionally if necessary.Remote ControlUsing the Media Center remote control, you can use Media Center more conve-niently over a short distance.External-Type Remote Control SensorTo use Media Center using a remote con-trol, you have to install the remote control sensor on the computer. When purchasing a remote control, pur-chase an external-type remote control sensor at the same time.■ Connect the external-type remote control sensor to the USB port of the computer and turn the sensor so that it faces the remote control.External-Type Remote Control Sensor■ This manual will describe procedures assuming that you are using Media Center with a mouse. ■ Since Media Center supports the use of a mouse, keyboard and remote control, in this manual, [Select] means clicking with the mouse or pressing the corresponding button on the remote control.](https://usermanual.wiki/Samsung-Electronics-Co/NP-Q1U.User-Manual-3/User-Guide-776912-Page-22.png)


![215OtherQ I cannot run any functions.A1 This may happen when the computer is in the HOLD status. When pressing a but-ton or switch in the HOLD status, the Charge LED blinks for a moment. Slide the HOLD switch downwards and try again.A2 If the computer is running on battery power, check the battery charge status.Q The [Power Switch] do not work.A1 This may happen when the computer is in the HOLD status. When pressing a but-ton or switch in the HOLD status, the Charge LED blinks for a moment. Slide the HOLD switch downwards and try again.A2 If the computer is running on battery power, check the battery charge status.Q A 4GB memory capacity is not recognized by Windows.A Windows Vista cannot display more than 4GB of memory due to license problems and driver compatibility reasons. Although the memory capacity is displayed as 3GB in the system information, the 4GB memory is recognized and can be used normally.Q The User Controls window appears when installing or running a program in Windows Vista.A In this case, click Allow (or OK) to install or run the program. However, if you do not have an administrator account, you have to enter the administrator password in the User Controls window and then click Allow (or OK). If no administrator pass-word is set you can click Allow (or OK) without entering a password.](https://usermanual.wiki/Samsung-Electronics-Co/NP-Q1U.User-Manual-3/User-Guide-776912-Page-70.png)


![227Contact SAMSUNG WORLD WIDE[U.S.A. / U.K. / AUSTRALIA / HONG KONG / MALAYSIA / SINGAPORE] Contact SAMSUNG WORLD WIDEIf you have any comments or questions regarding a Samsung products, contact the SAMSUNG customer care center.Customer Care Center TEL Web SiteU.S.A. 1 800 SAMSUNG (7267864) www.samsung.comU.K. 0870-726-7864 www.samsung.com/ukAUSTRALIA 1300 362 603 www.samsung.com/auHONG KONG 2862 6001 www.samsung.com/hkMALAYSIA 1800-88-9999 www.samsung.com/mySINGAPORE 1800-SAMSUNG(7267864) www.samsung.com/sg[FRANCE] Comment contacter Samsung dans le mondeSi vous avez des suggestions ou des questions concernant les produits Samsung, veuillez contacter le Service Consommateurs Samsung.Customer Care Center TEL Web SiteFRANCE 0825 08 3260 www.samsung.com/fr[GERMANY] Kontakt zu SamsungFalls Sie Fragen oder Anregungen zu Samsung-Produkten haben, wenden Sie sich bitte an den Samsung-Kundendienst.Customer Care Center TEL Web SiteGERMANY 01805 121213 www.samsung.de0,14 EUR/Min aus dem Festnetz der T-Com](https://usermanual.wiki/Samsung-Electronics-Co/NP-Q1U.User-Manual-3/User-Guide-776912-Page-82.png)
![228 Rev.1.3[SPAIN] Contacte con SAMSUNG WORLD WIDESi tiene alguna pregunta o comentario referente a nuestros productos, por favor contacte con nuestro Servicio de Atencion al Cliente.Customer Care Center TEL Web SiteSPAIN 902 10 11 30 www.samsung.com/es[ITALY] Contatta SAMSUNGSe hai commenti o richieste sui prodotti Samsung contatta il nostro Servizio Clienti.Customer Care Center TEL Web SiteITALY 199 153 153 www.samsung.com/it/[RUSSIA / UKRAINE] Связывайтесь с SAMSUNG по всему мируЕсли у вас есть предложения или вопросы по продуктам Samsung, связывайтесь с информационным центром Samsung.Customer Care Center TEL Web SiteRUSSIA 8-800-200-0400 www.samsung.ruUKRAINE 8-800-502-0000 www.samsung.com/ur[CHINA] Customer Care Center TEL Web SiteCHINA 800-810-5858 / (010) 64751880 www.samsung.com.cn[THILAND] Customer Care Center TEL Web SiteTHAILAND 1800-29-3232 / 02-689-3232 www.samsung.com/thm rev1.1](https://usermanual.wiki/Samsung-Electronics-Co/NP-Q1U.User-Manual-3/User-Guide-776912-Page-83.png)