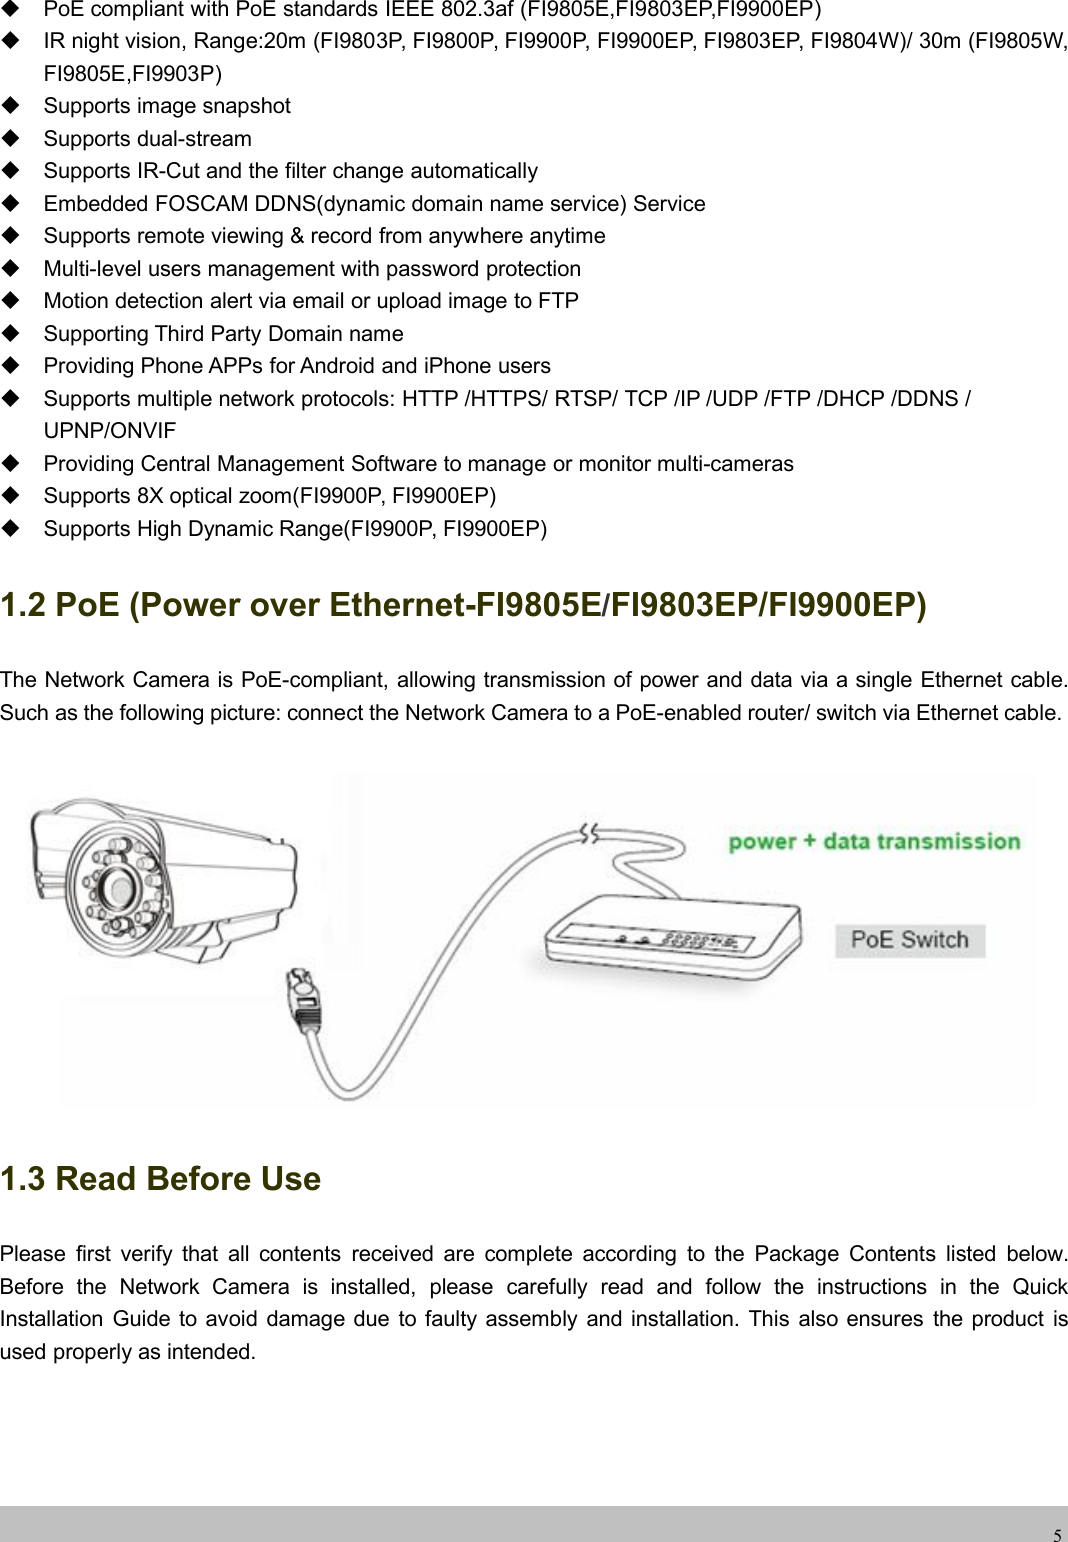
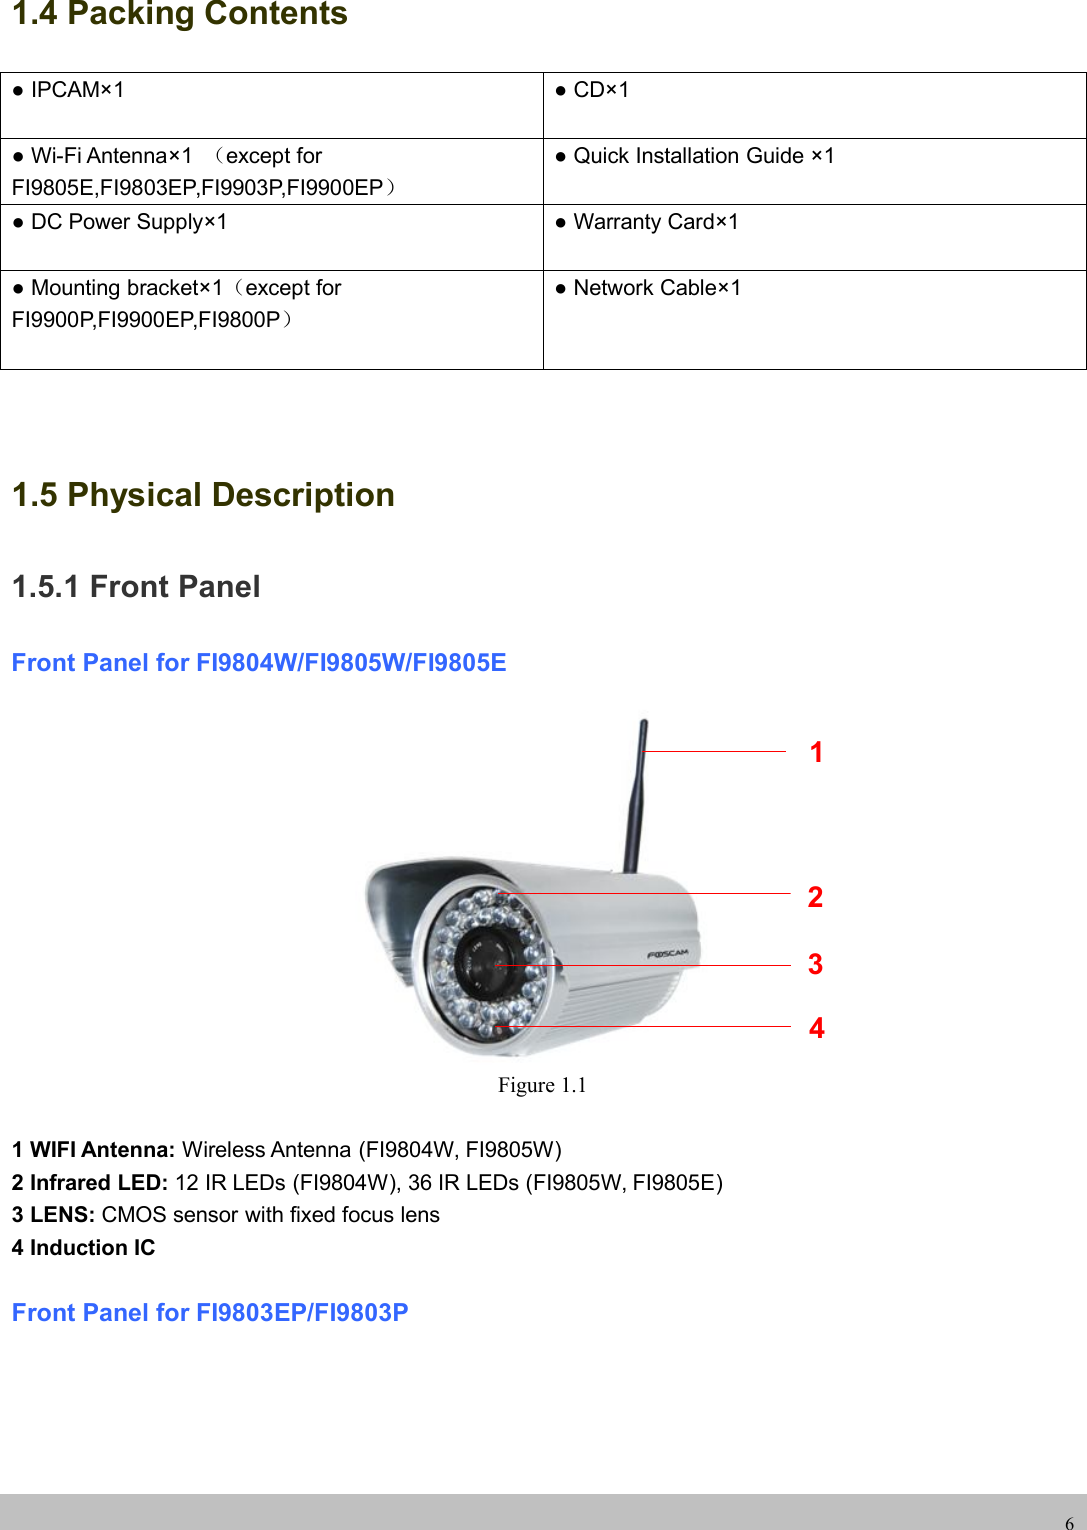
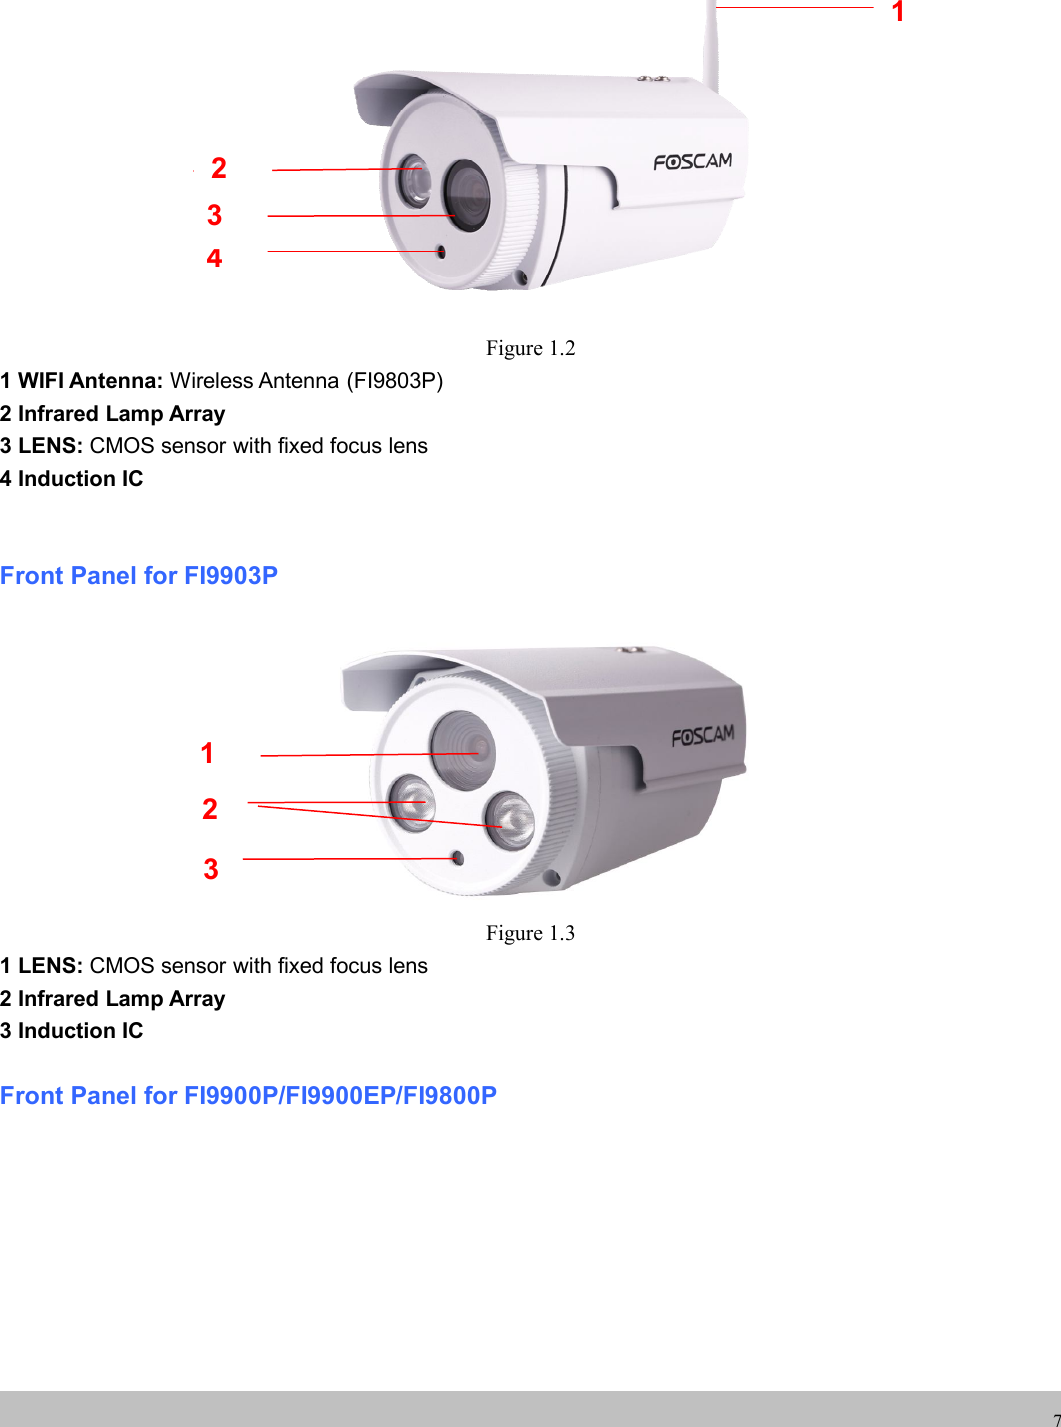
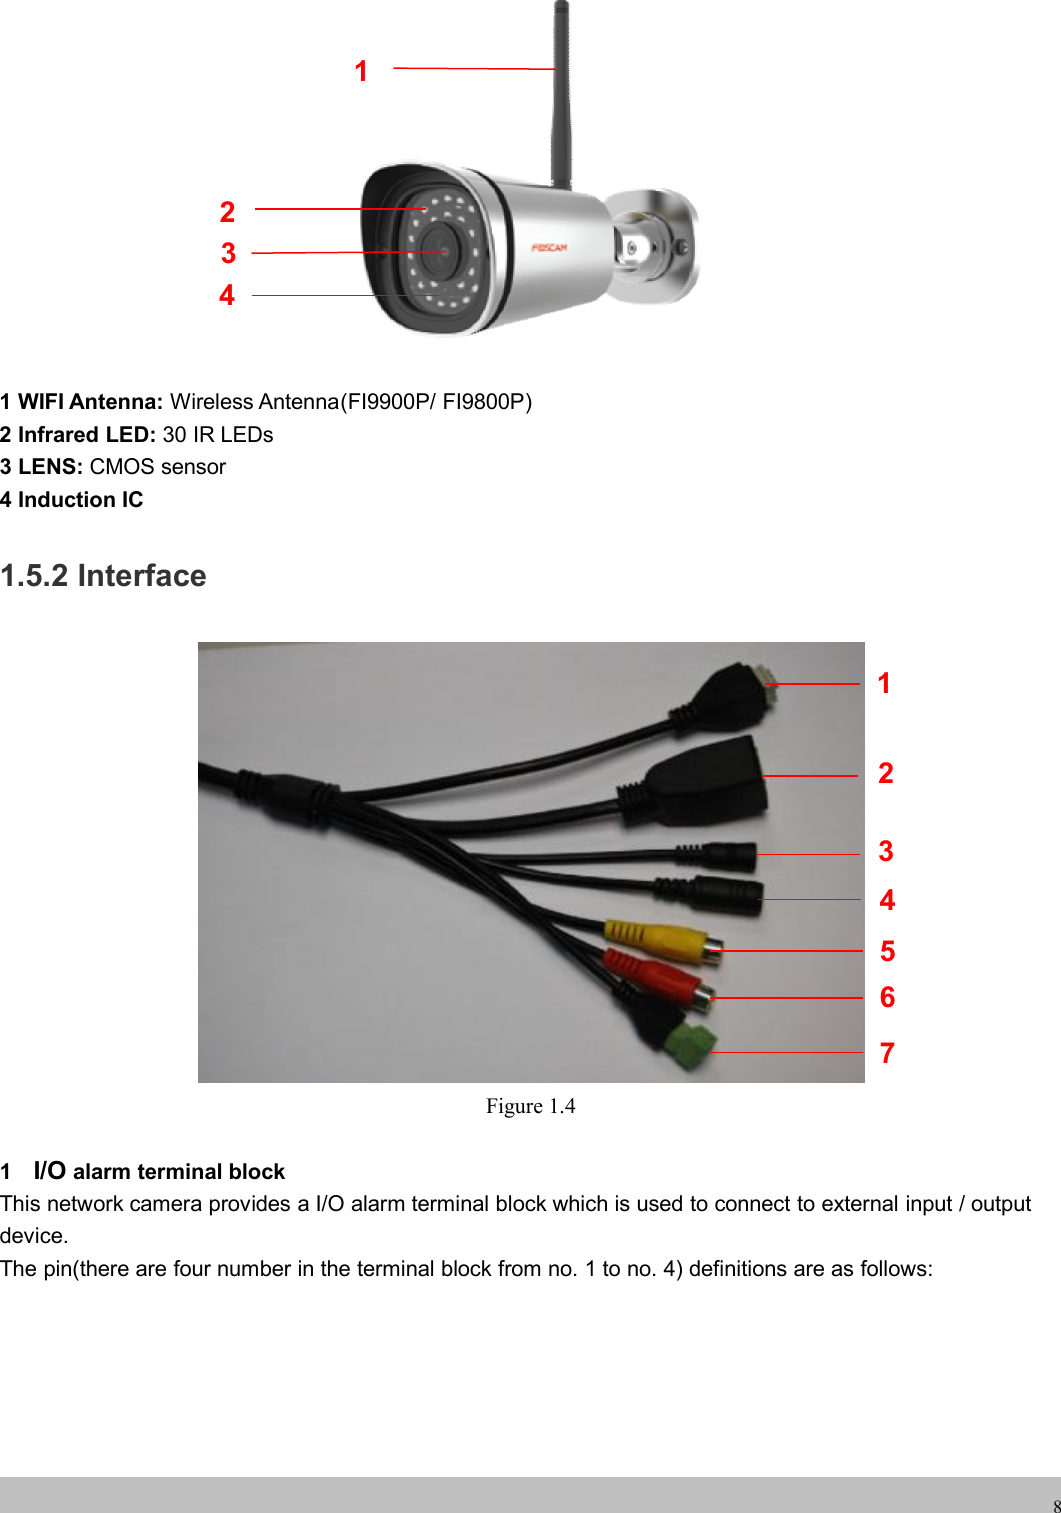
ShenZhen Foscam Intelligent Technology FI9800P Portable High Fidelity High Resolution Music Player) User Manual
ShenZhen Foscam Intelligent Technology Co., Ltd. Portable High Fidelity High Resolution Music Player) Users Manual
Contents
- 1. Users Manual
- 2. User Manual
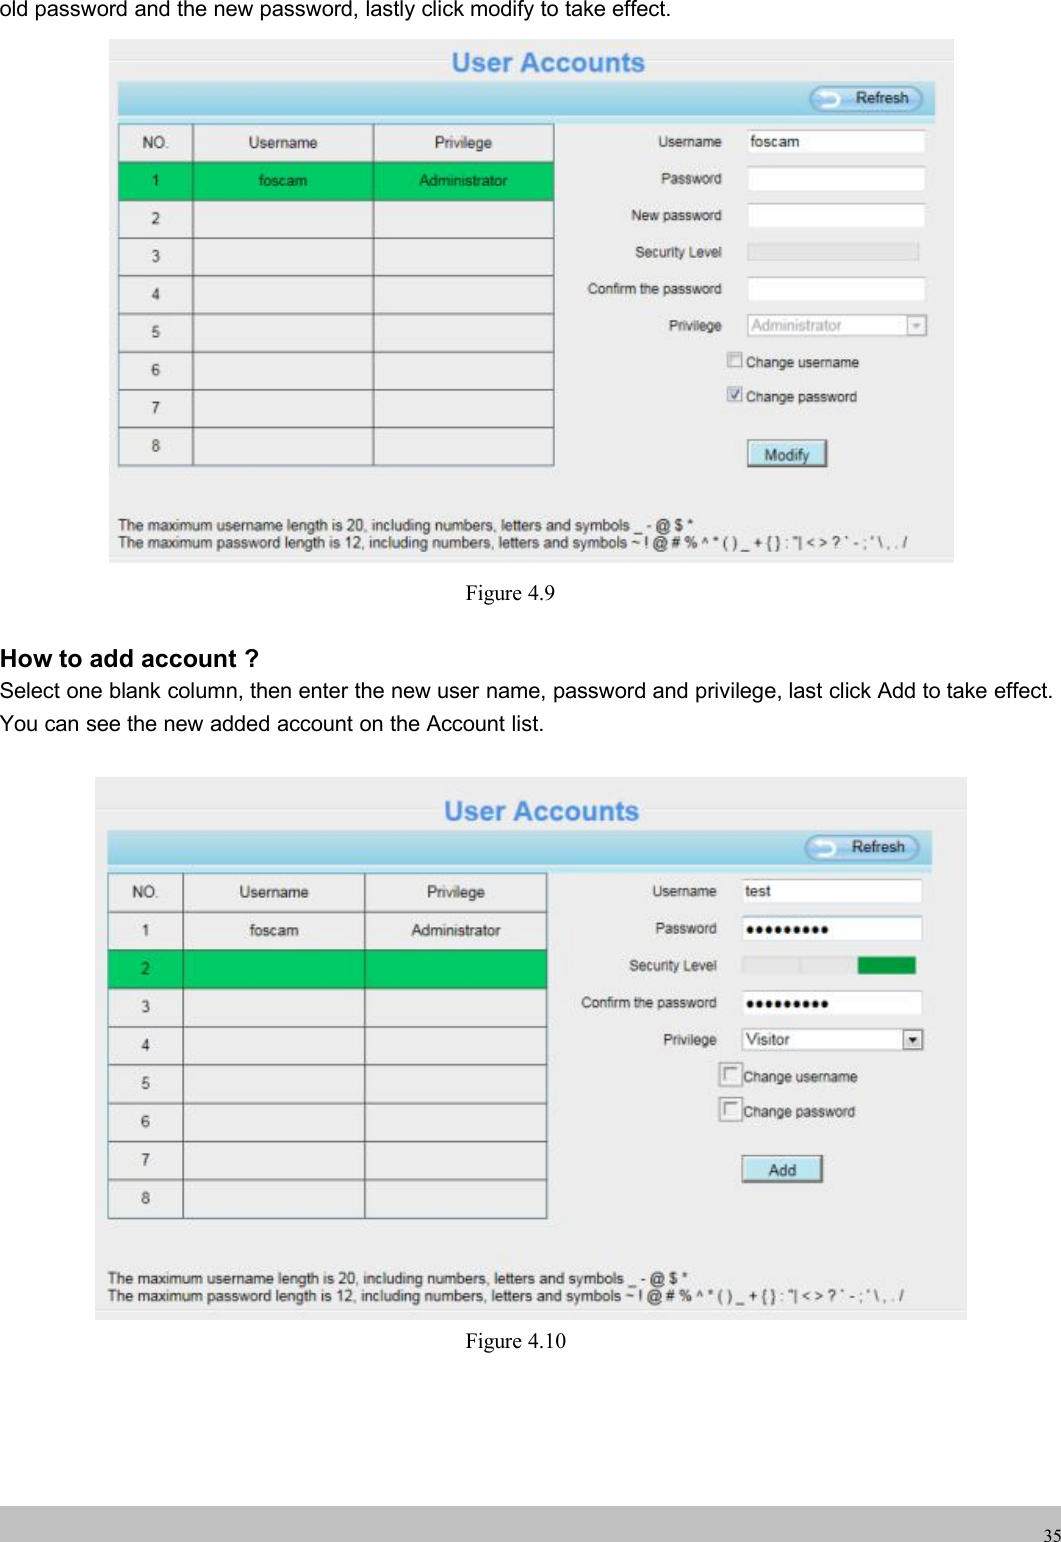
Users Manual


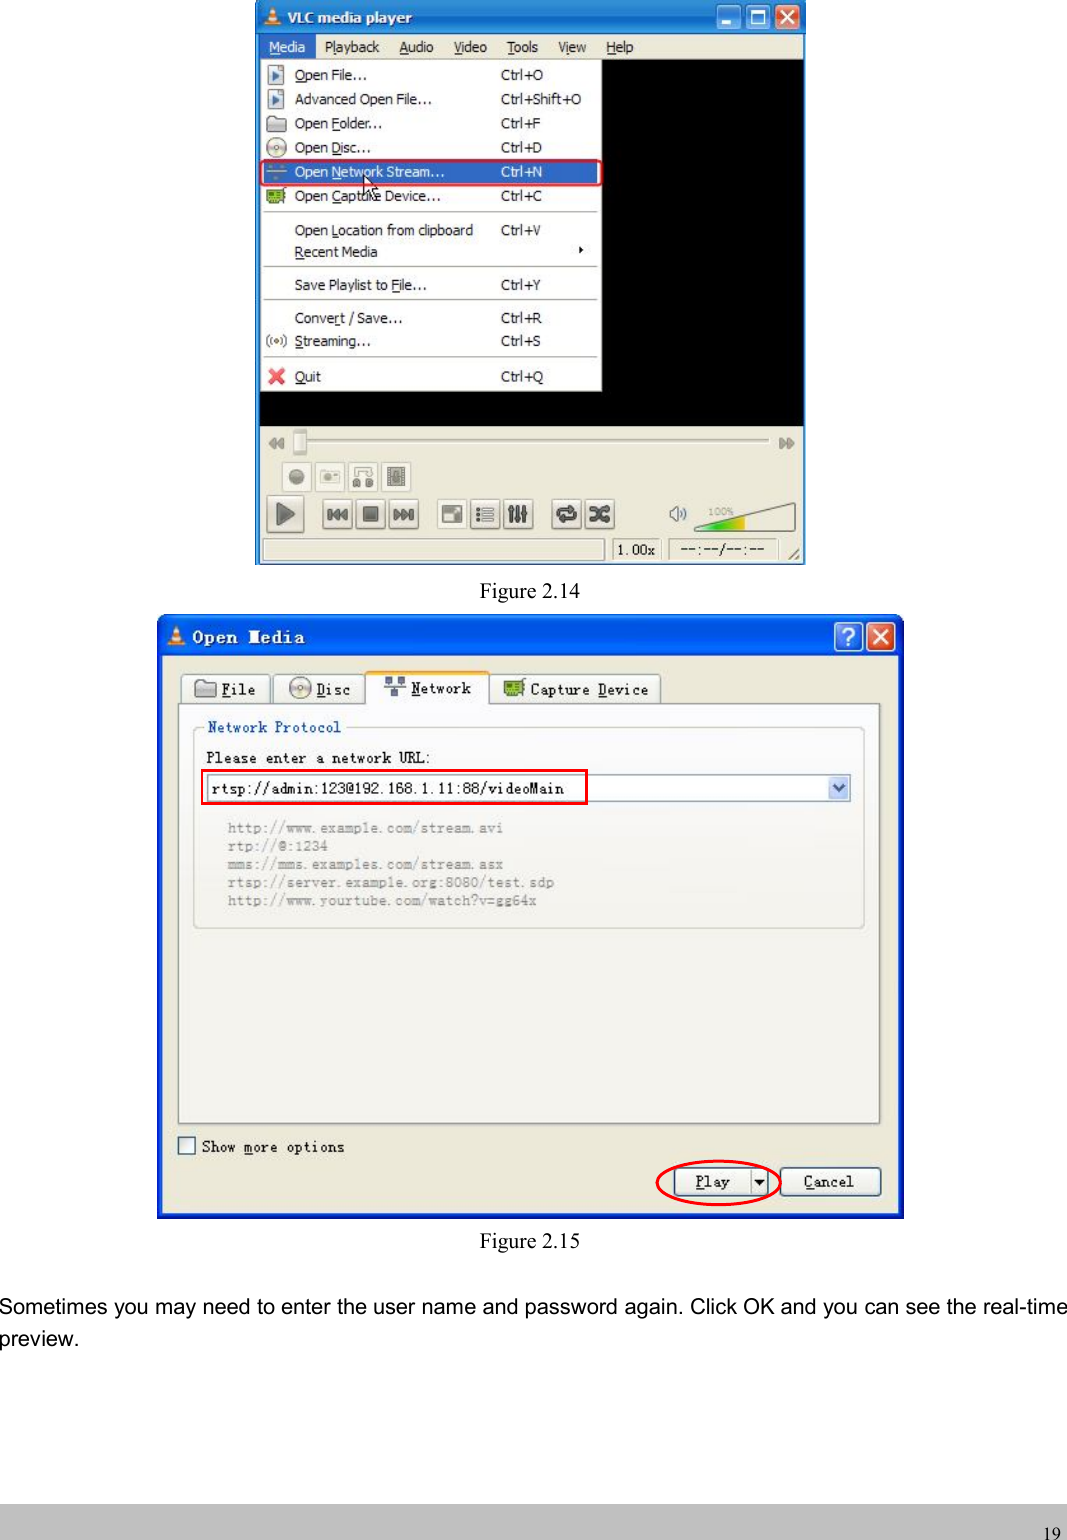
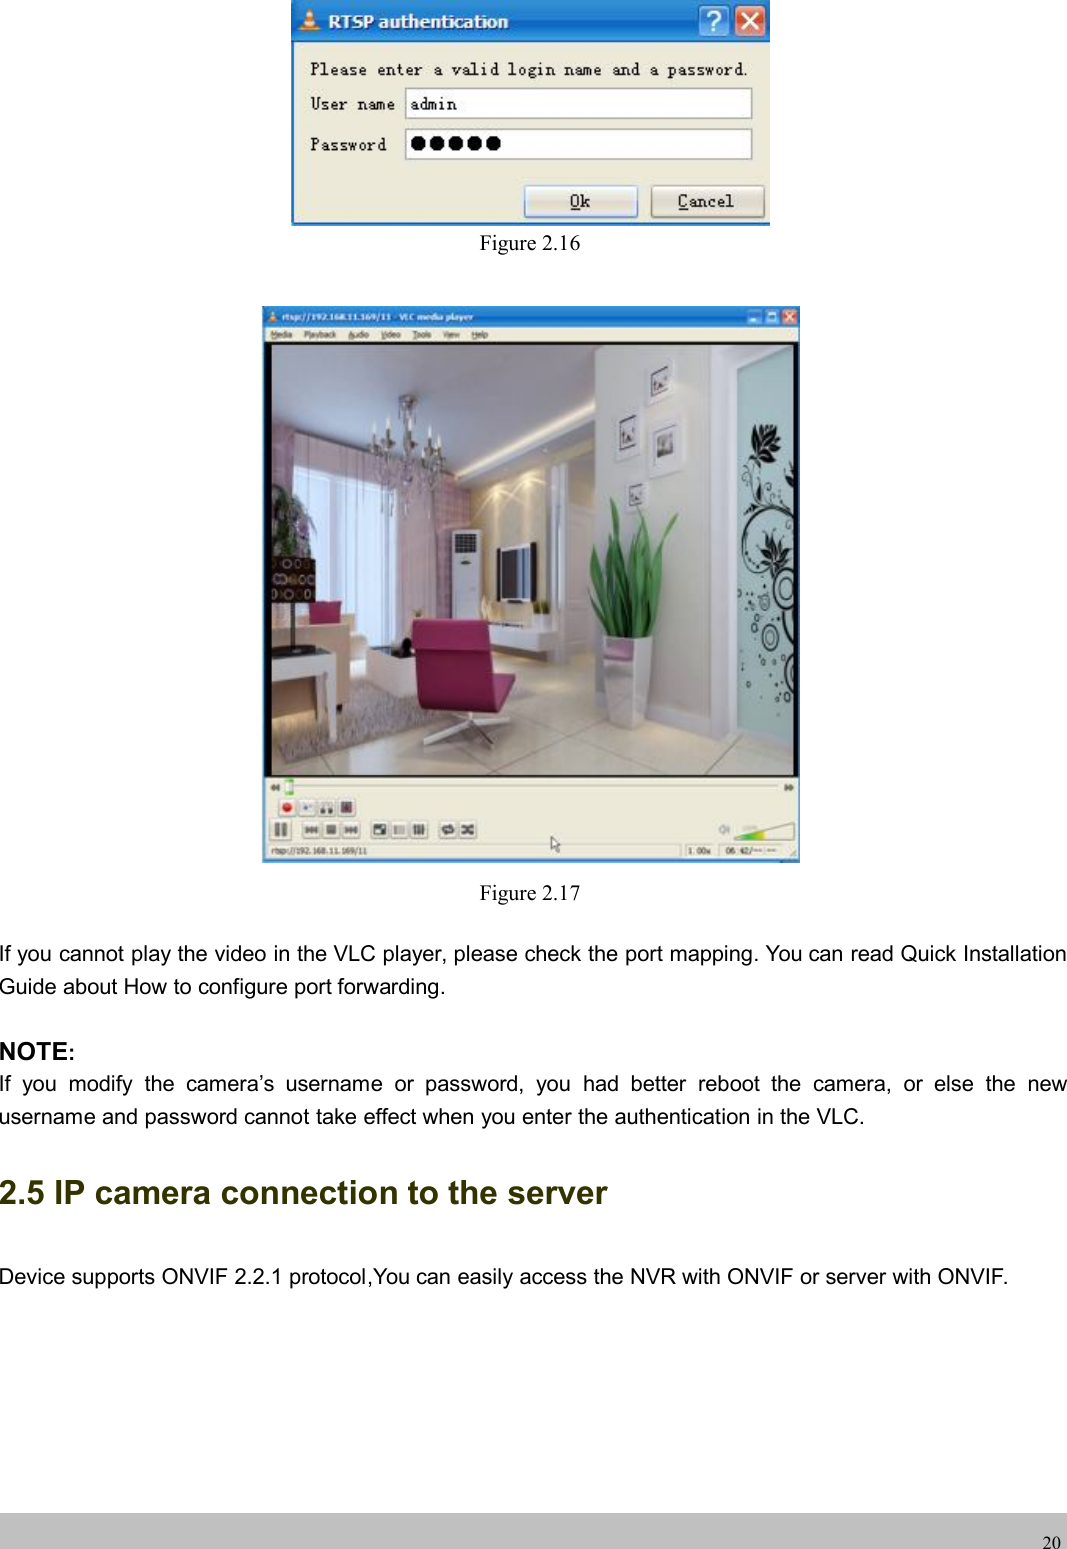
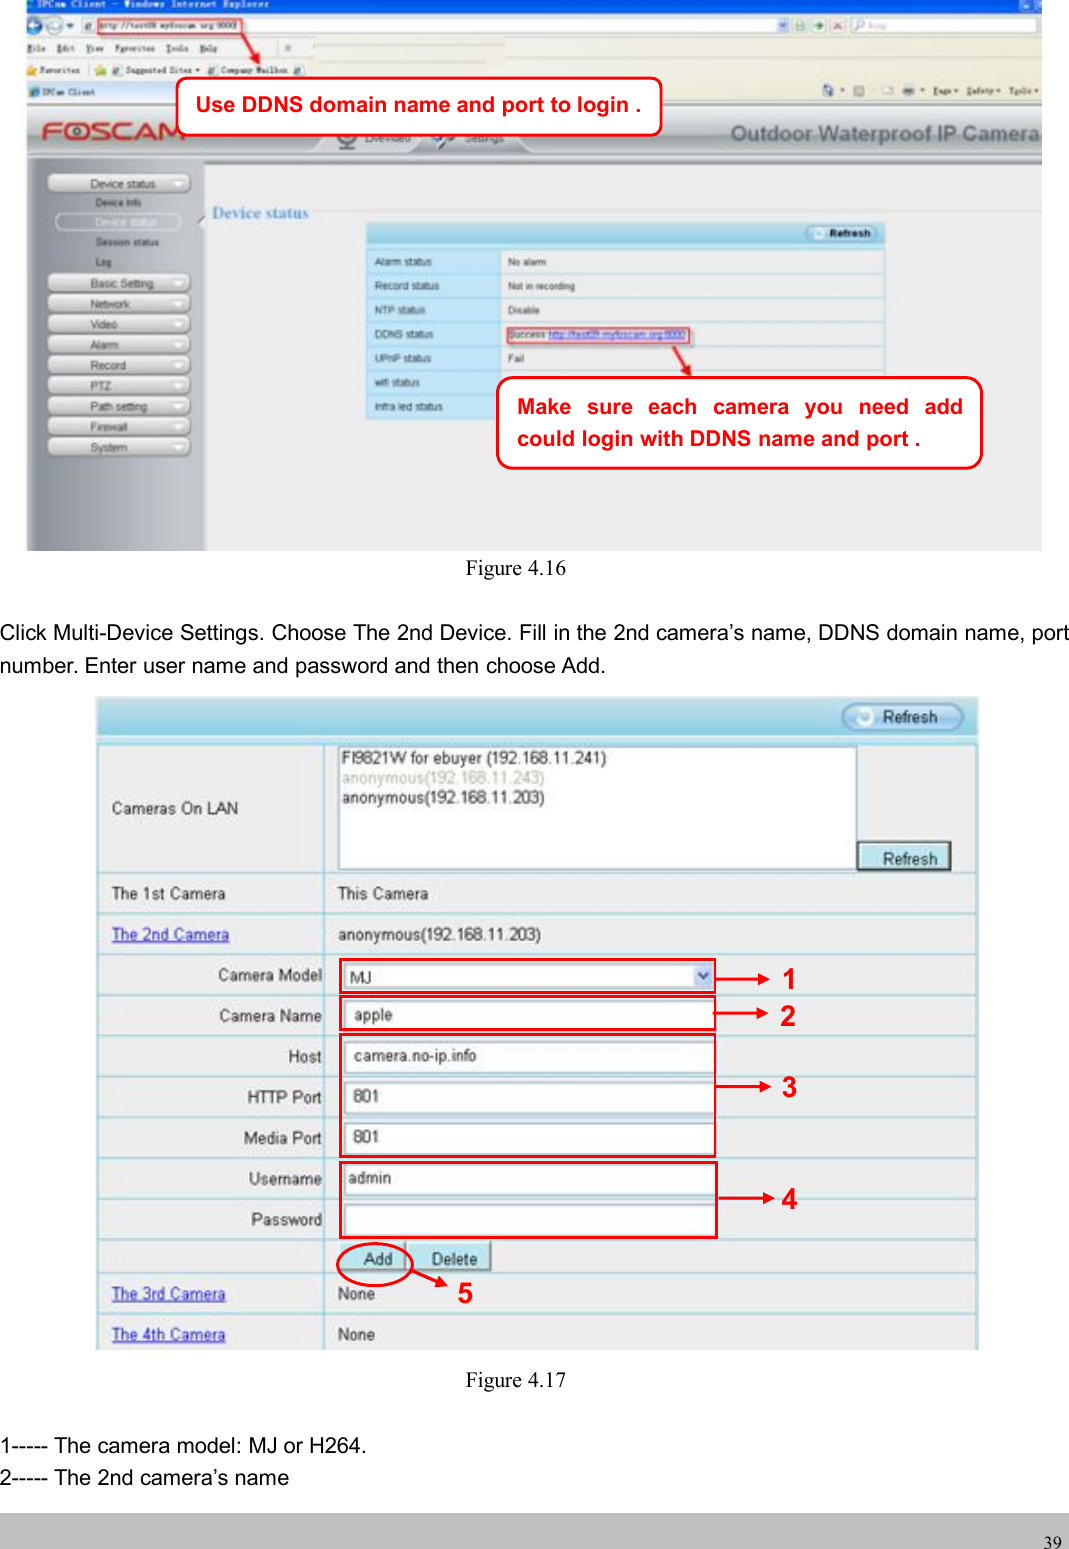
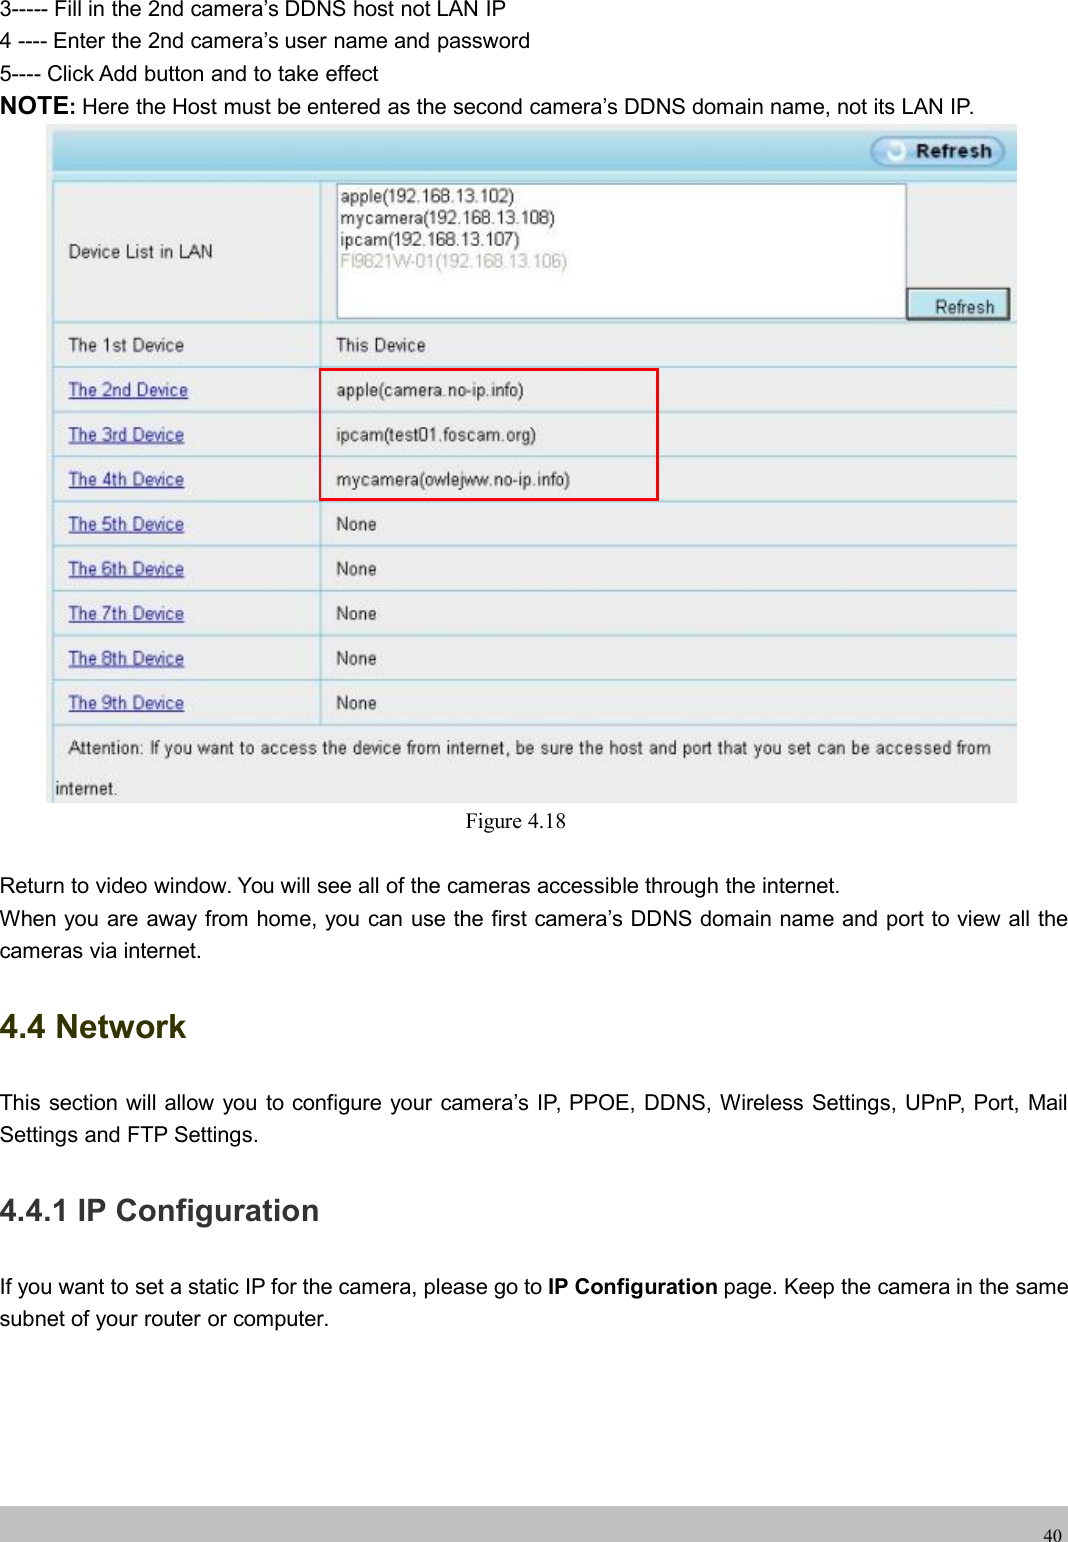
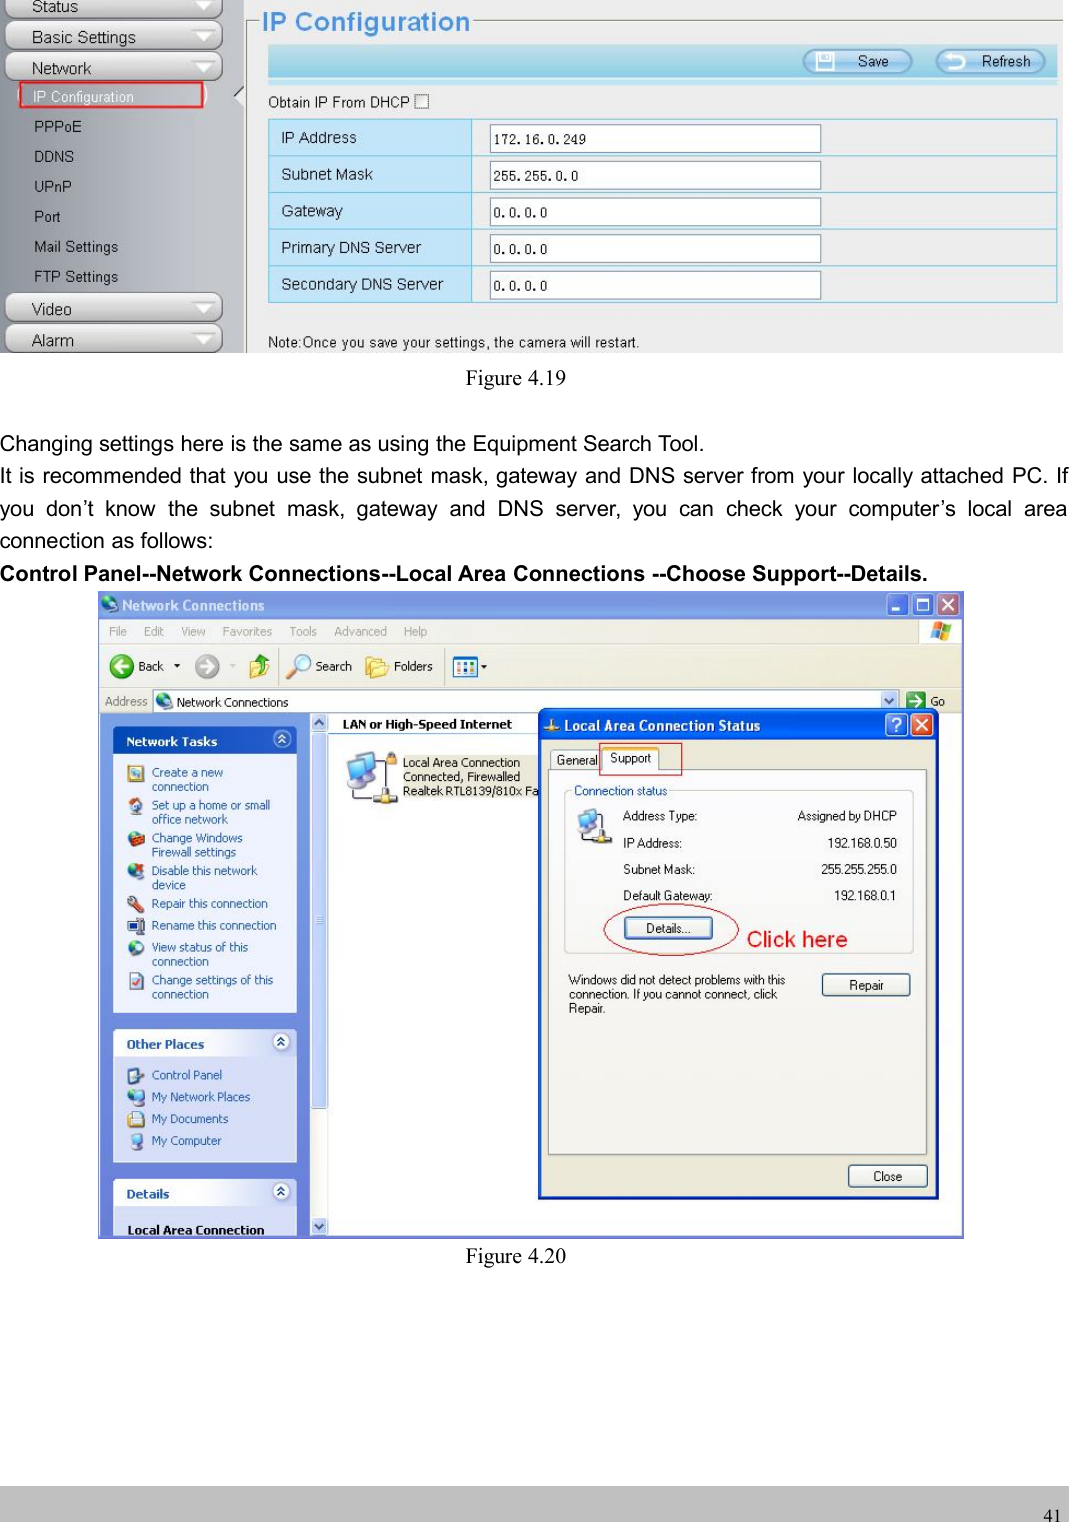
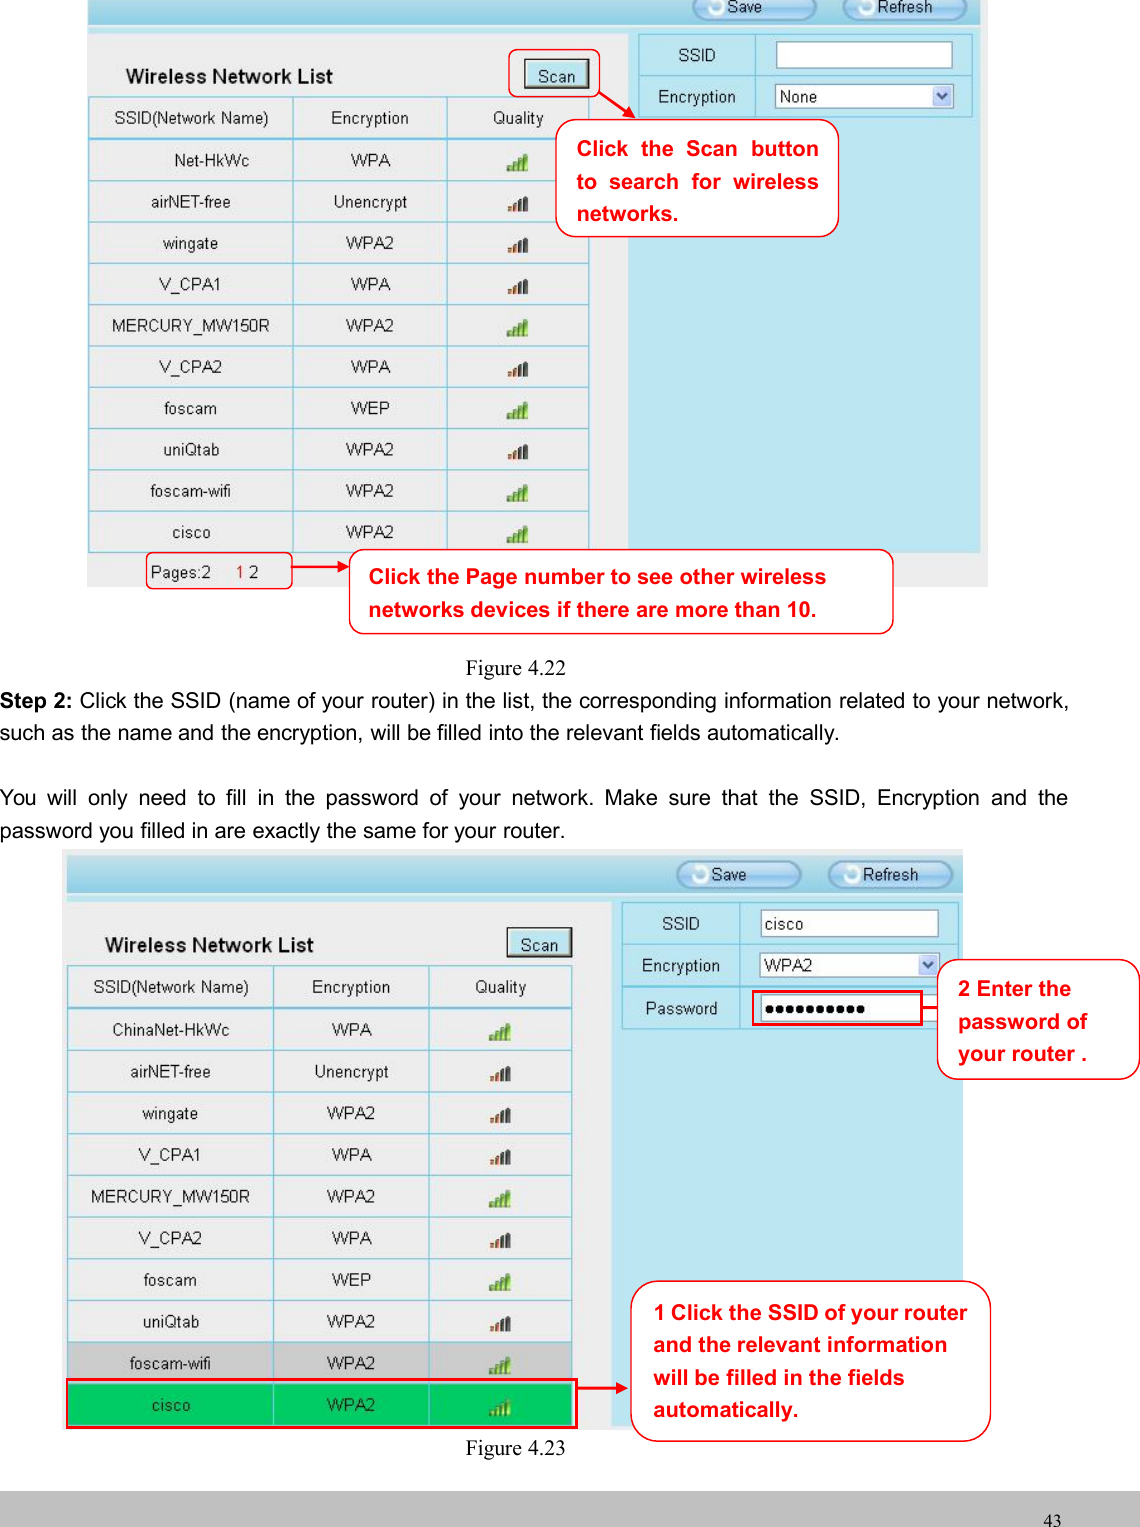
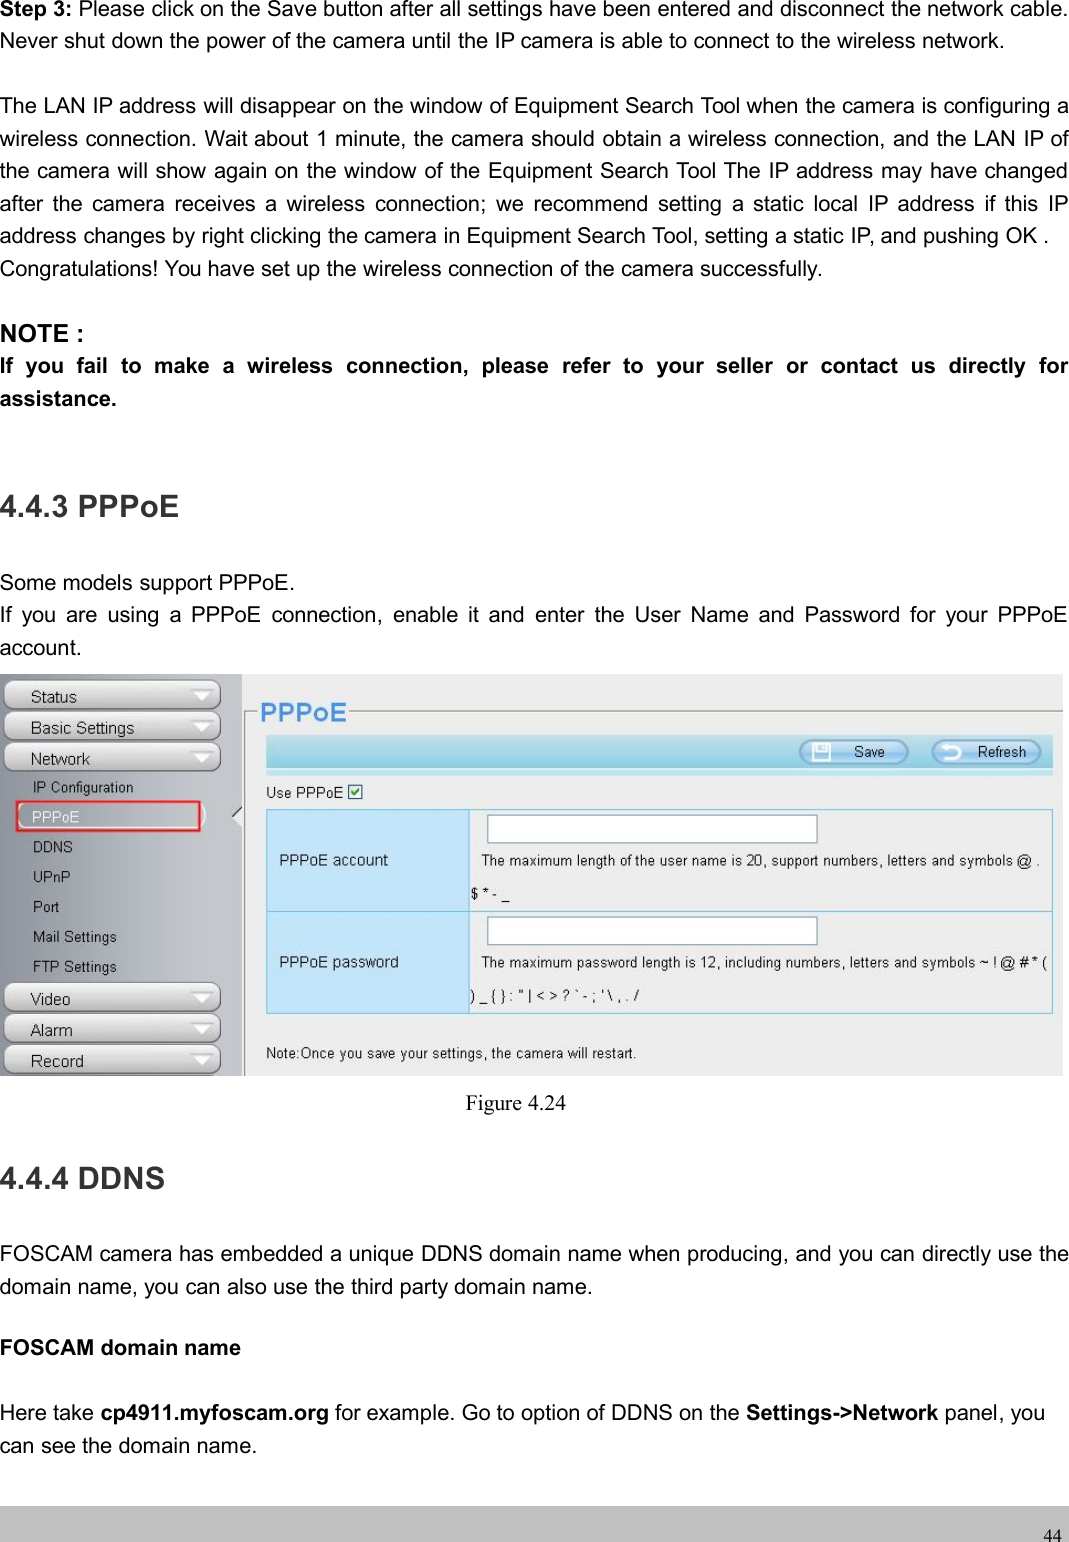
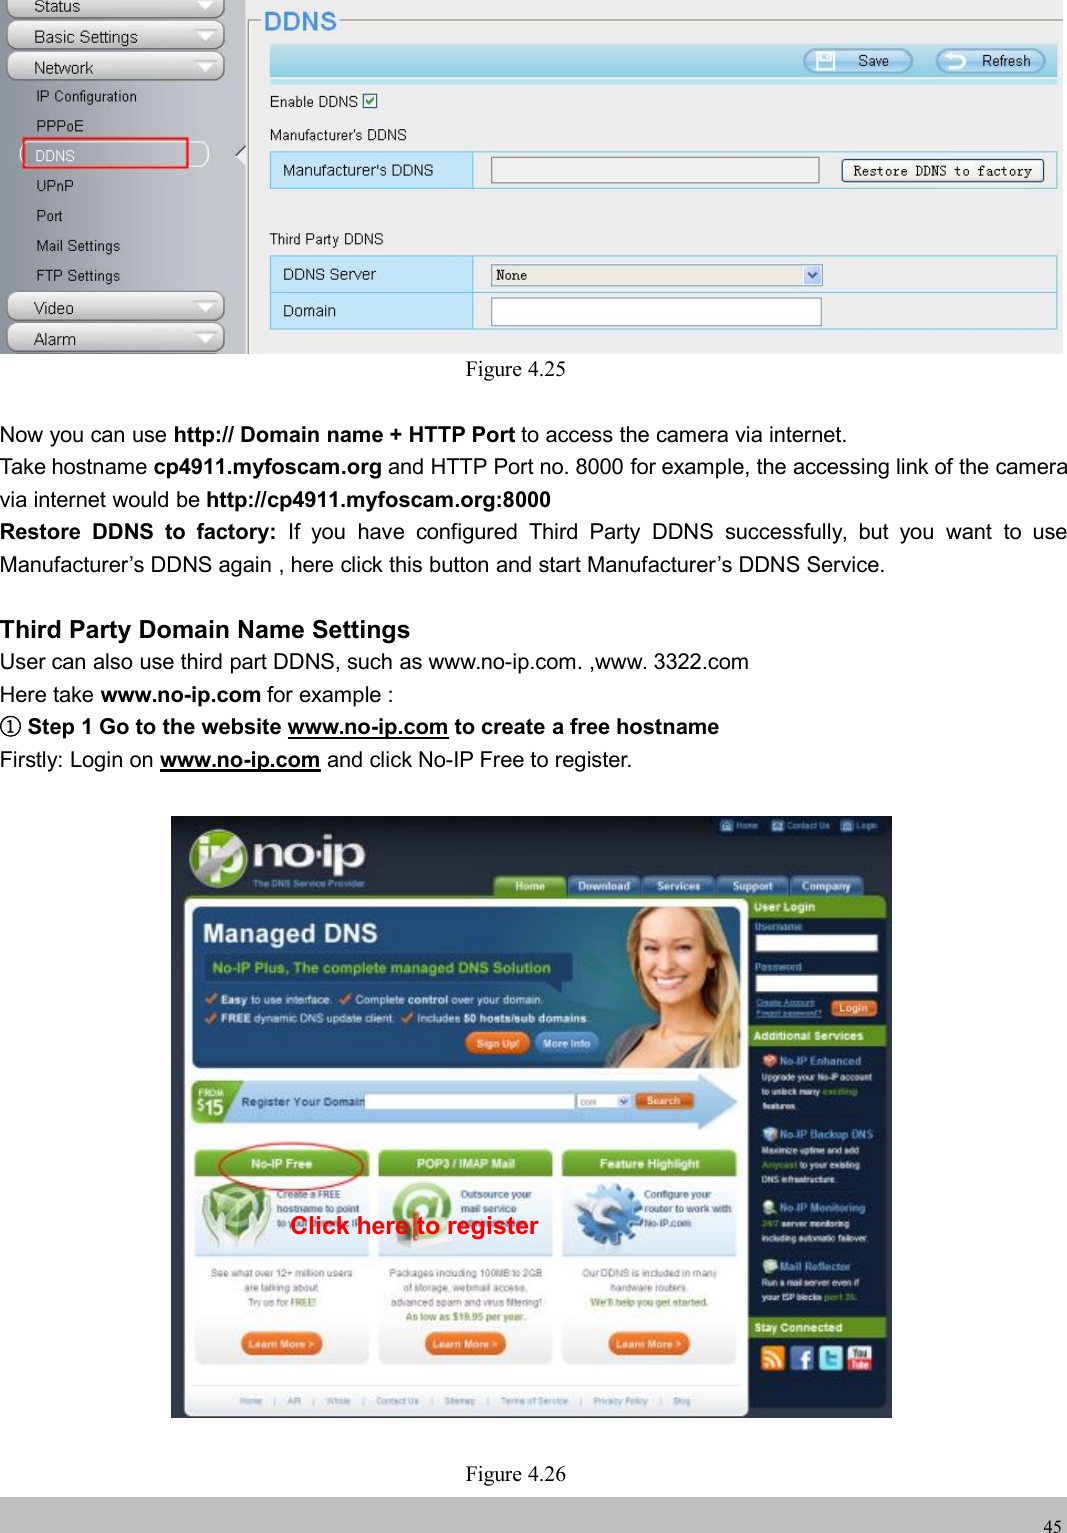
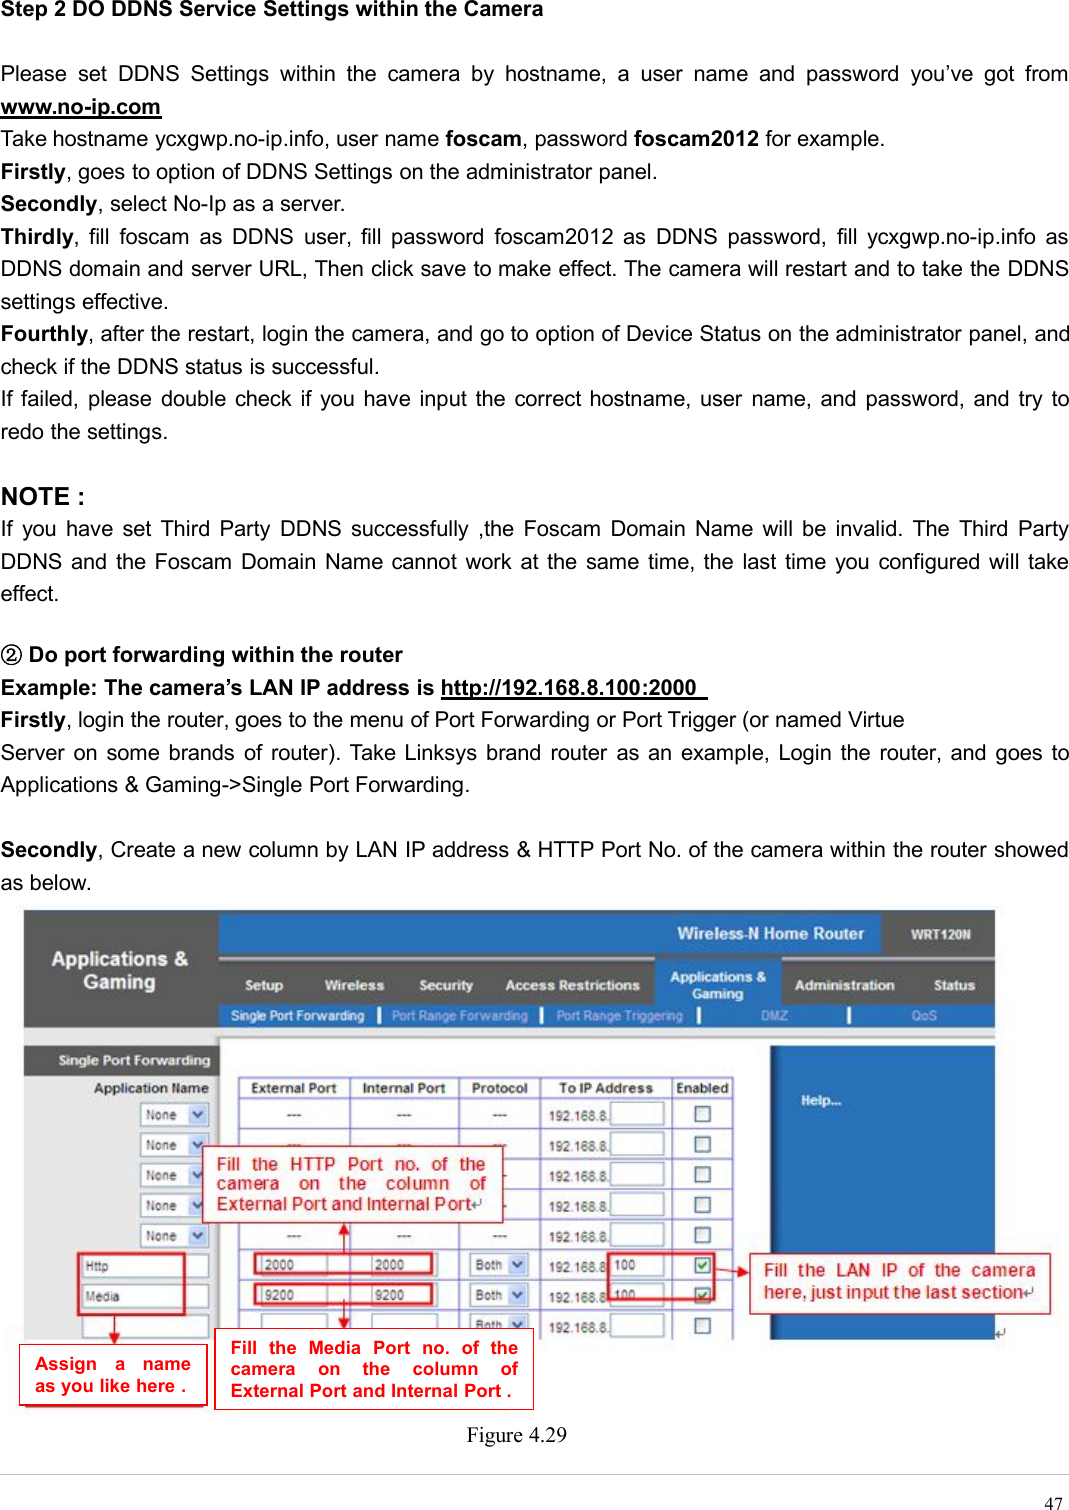
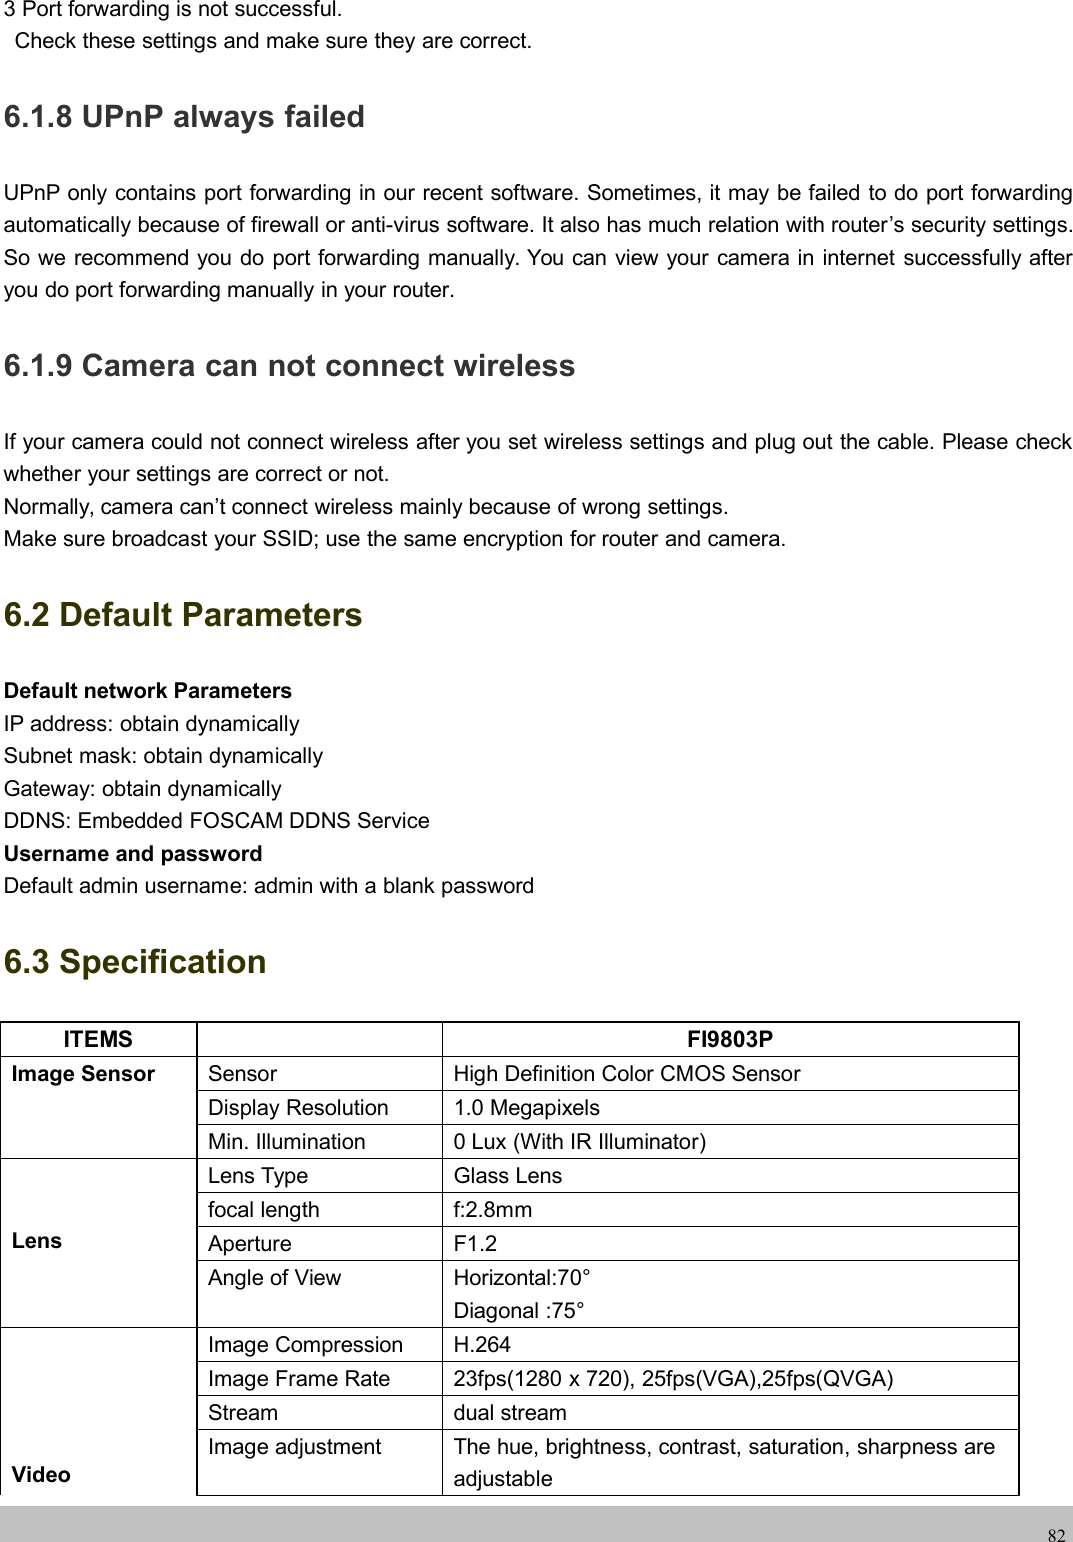
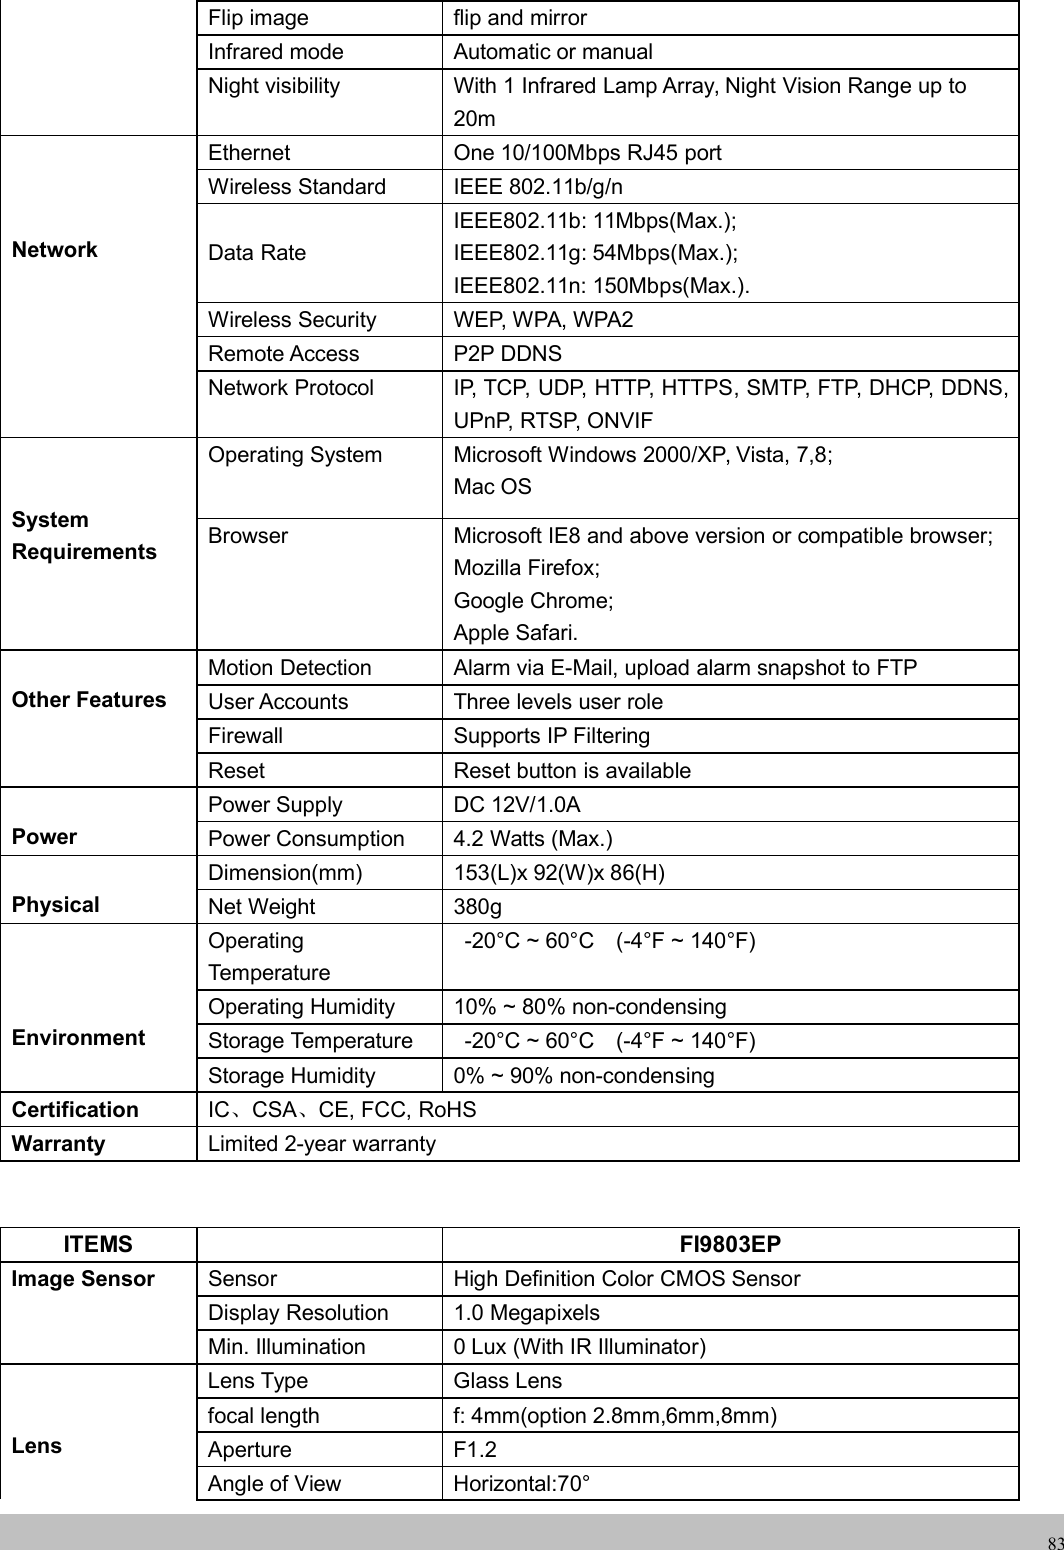
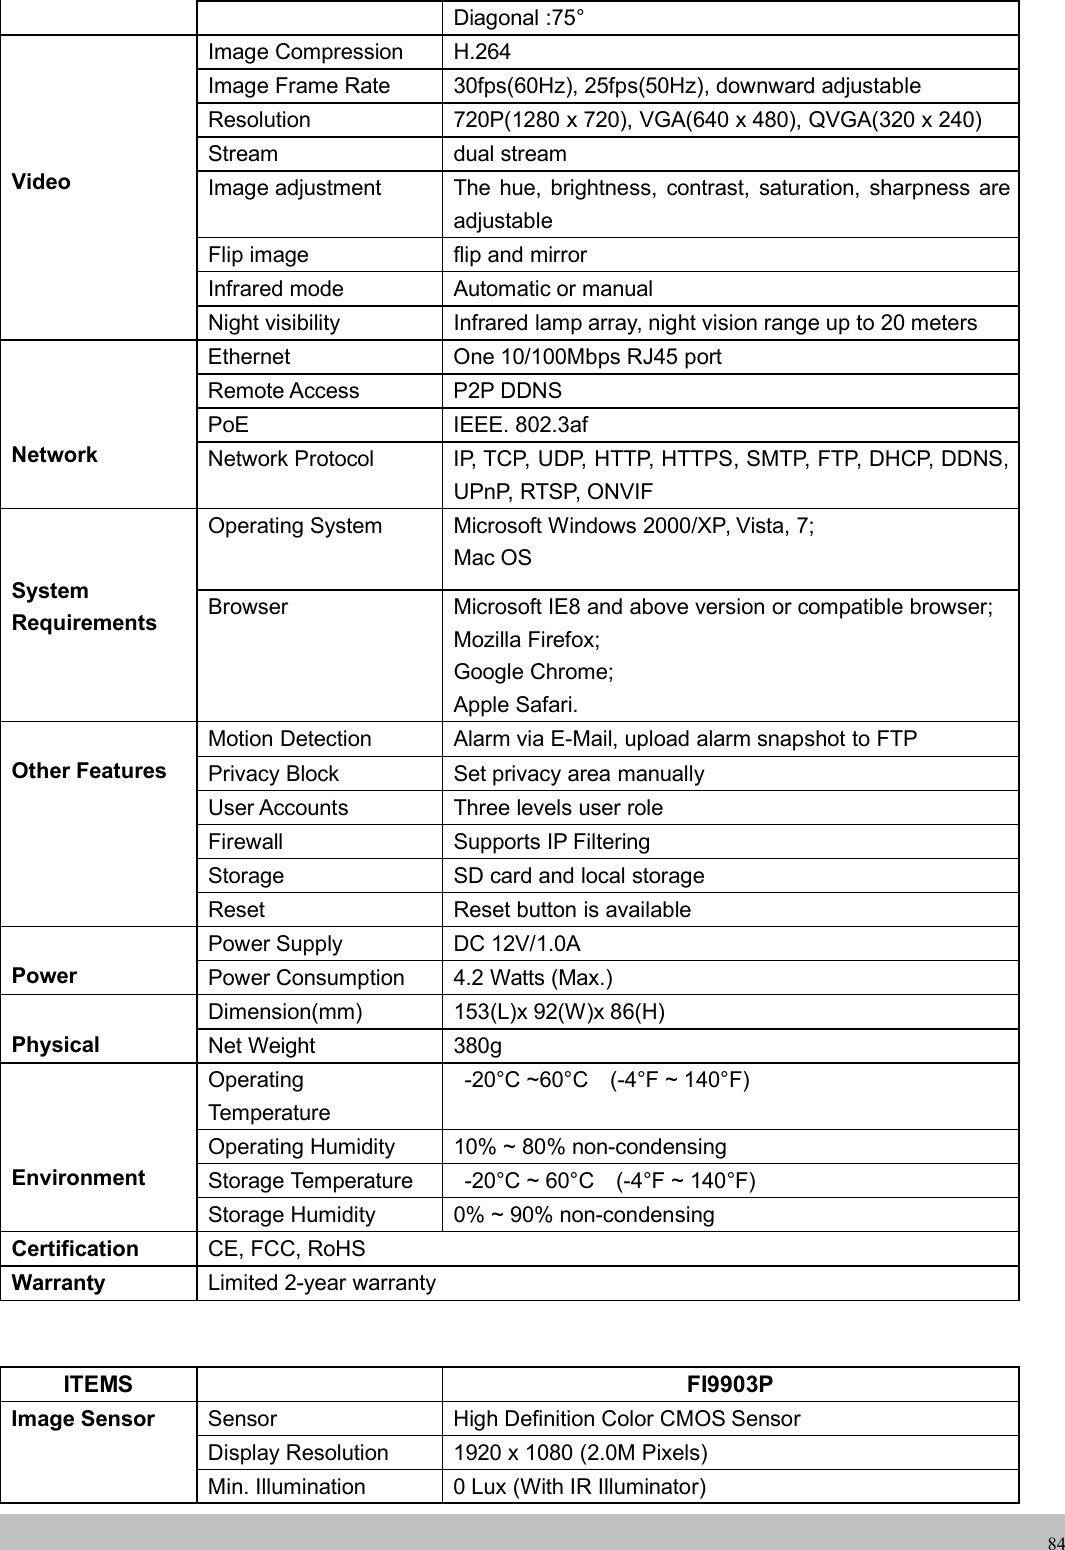
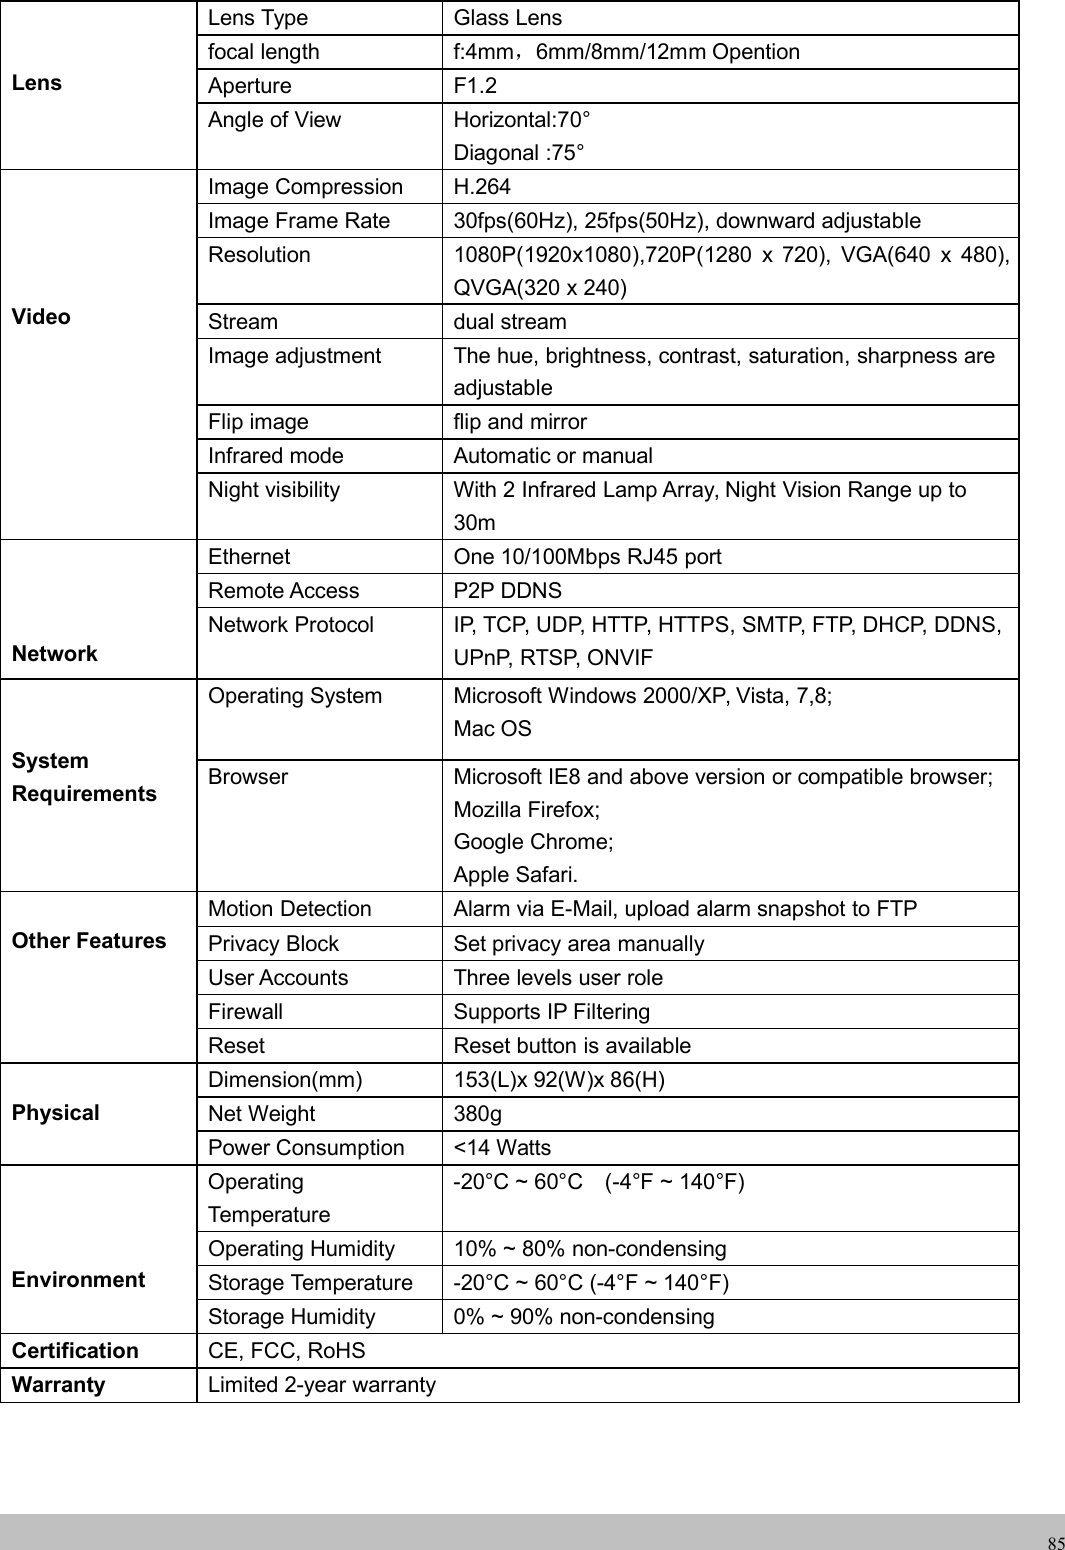
![wwwwww.foscam.co.foscam.comm18Figure 2.135. Now you can access your IP camera by https://domain name: HTTPS port via the Internet.2.4 Using the VLC playerThis camera supports RTSP streaming, here you can view the camera using VLC player.RTSP URL rtsp:// [user name][:password]@IP:port number/videosreamThe part in the square brackets may be omitted.user name & password:The user name and password to access the camera. This part can be omitted.IP: WAN or LAN IP address.port number:If there is the RSTP port number on the Port page, you must only use RTSP port number.otherwise, you must only use http port number.Videostream:Here support three modes: videoMain, videoSub and audio. When the network speed is bad,here you had better select videoSub. If you select audio, you can only hear the sound but cannot see thevideo.For example:IP: 192.168.1.11Port number: 88User name: adminPassword: 123Here I can enter one of the following URLs in the VLC.1.rtsp://admin:123@192.168.1.11:88/videoMain2.rtsp:// @192.168.1.11:88/videoMain3.rtsp://:123@192.168.1.11:88/videoMain4.rtsp://admin@192.168.1.11:88/videoMainOpen the VLC, and go to Media(Open Network Stream option, then enter the URL into VLC.Here you have finished thePort Forwarding setup.](https://usermanual.wiki/ShenZhen-Foscam-Intelligent-Technology/FI9800P.Users-Manual/User-Guide-2768291-Page-20.png)