ShenZhen Foscam Intelligent Technology FOSBABYP1 Wireless HD Baby Monitor User Manual
ShenZhen Foscam Intelligent Technology Co., Ltd. Wireless HD Baby Monitor Users Manual
UserManual.wiki
>
ShenZhen Foscam Intelligent Technology
>
FOSBABYP1 User Manual
Users Manual
Navigation menu
Upload a User Manual
Namespaces
Wiki Guide
HTML
PDF
Info
Views
User Manual
Discussion / Help
Navigation
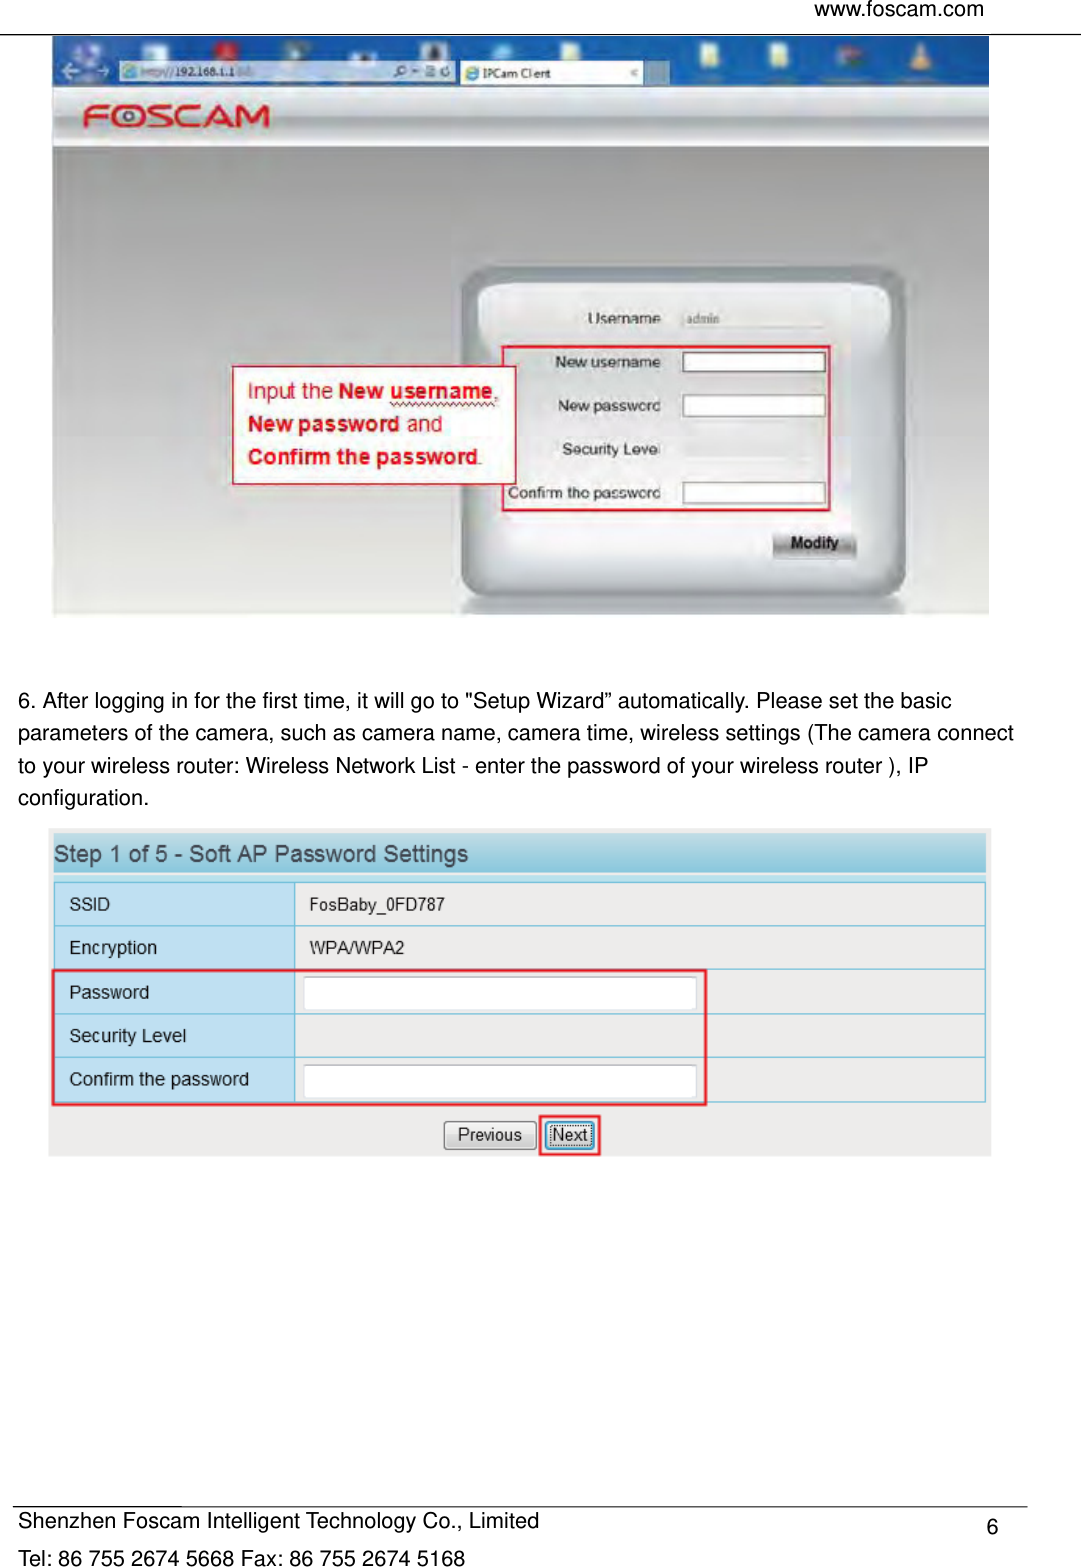
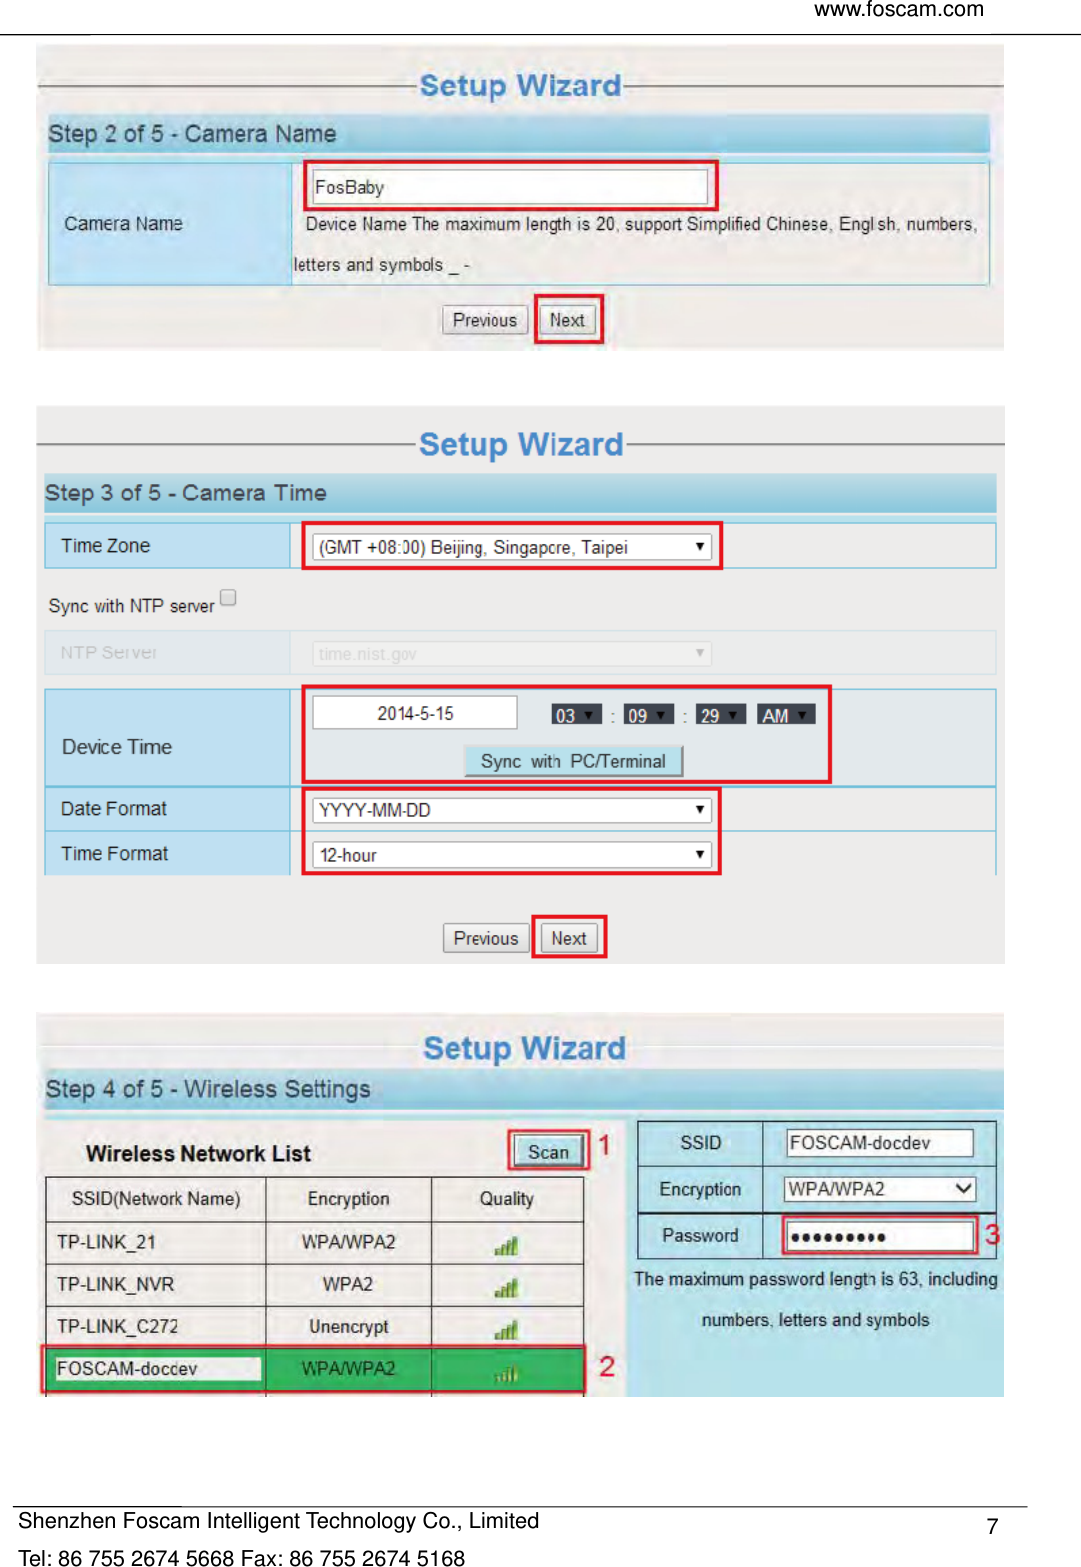
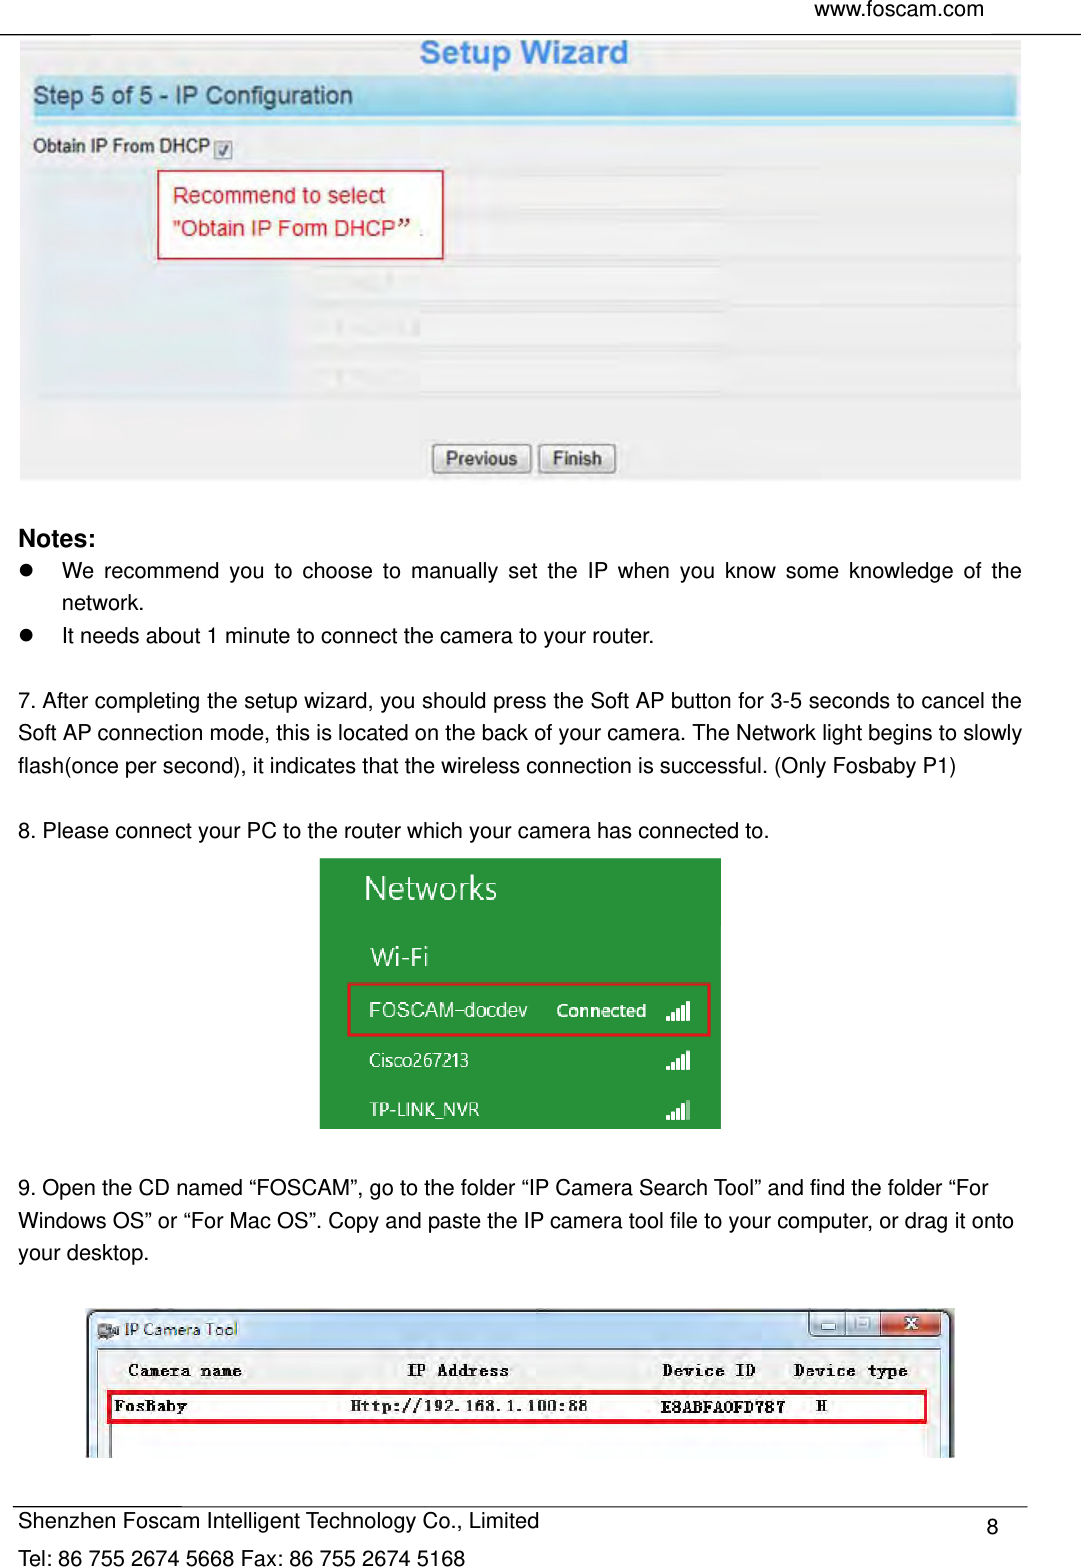
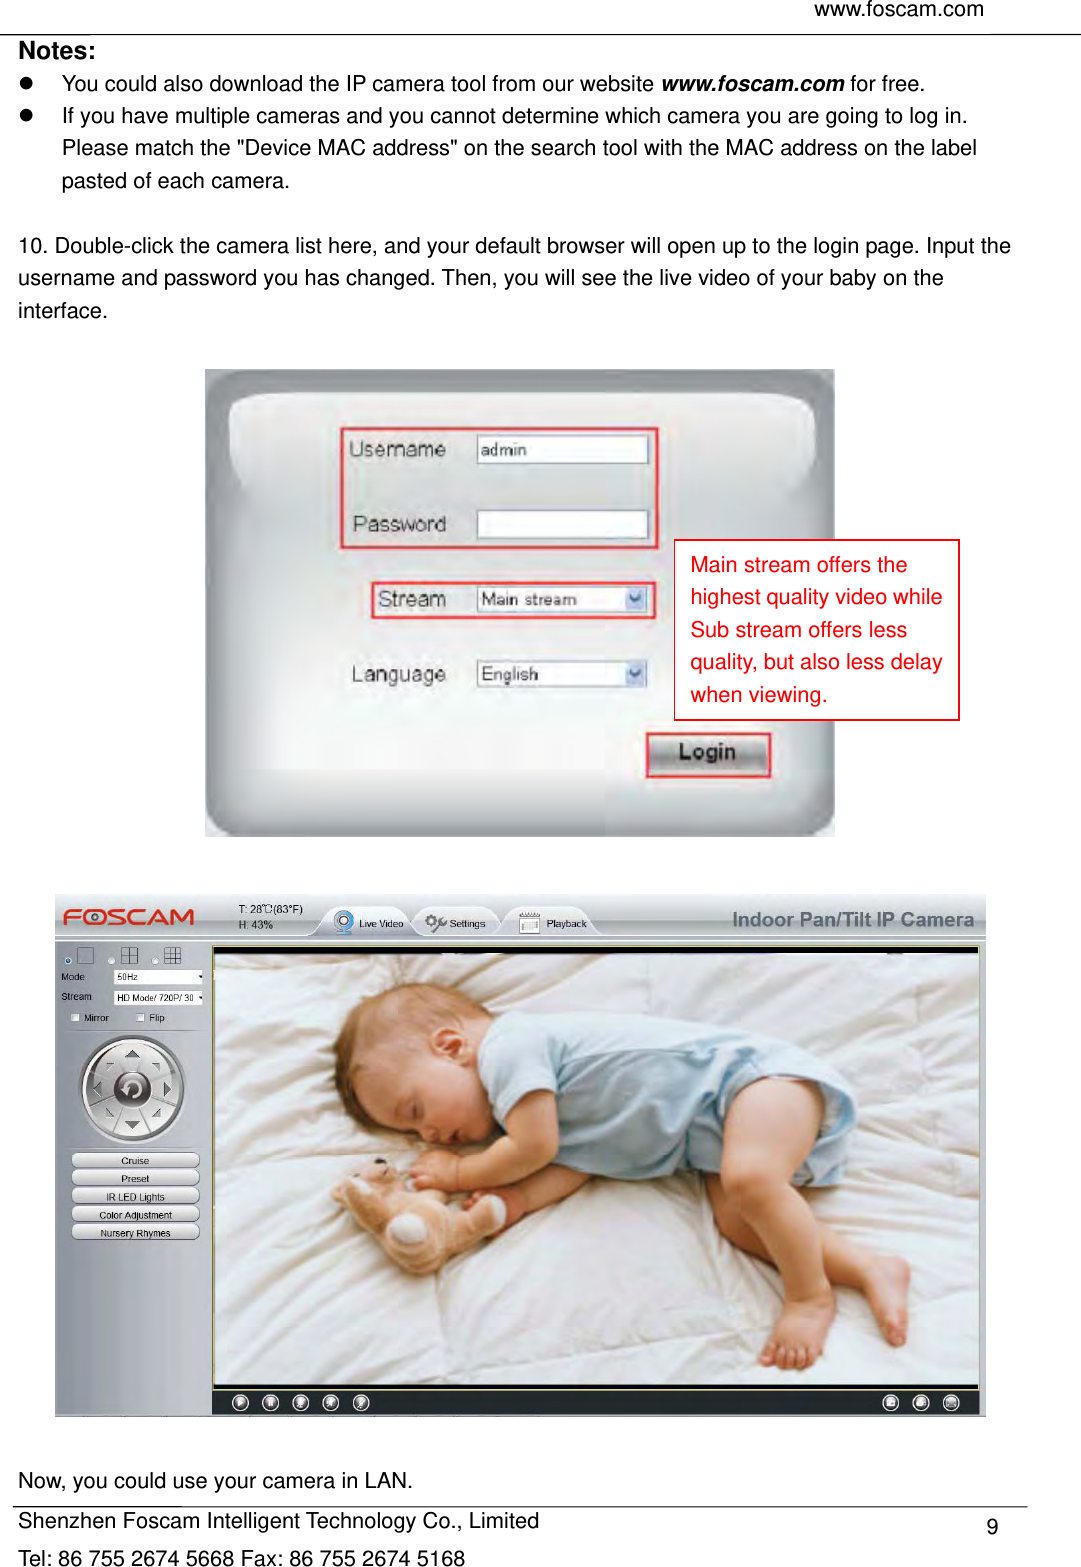

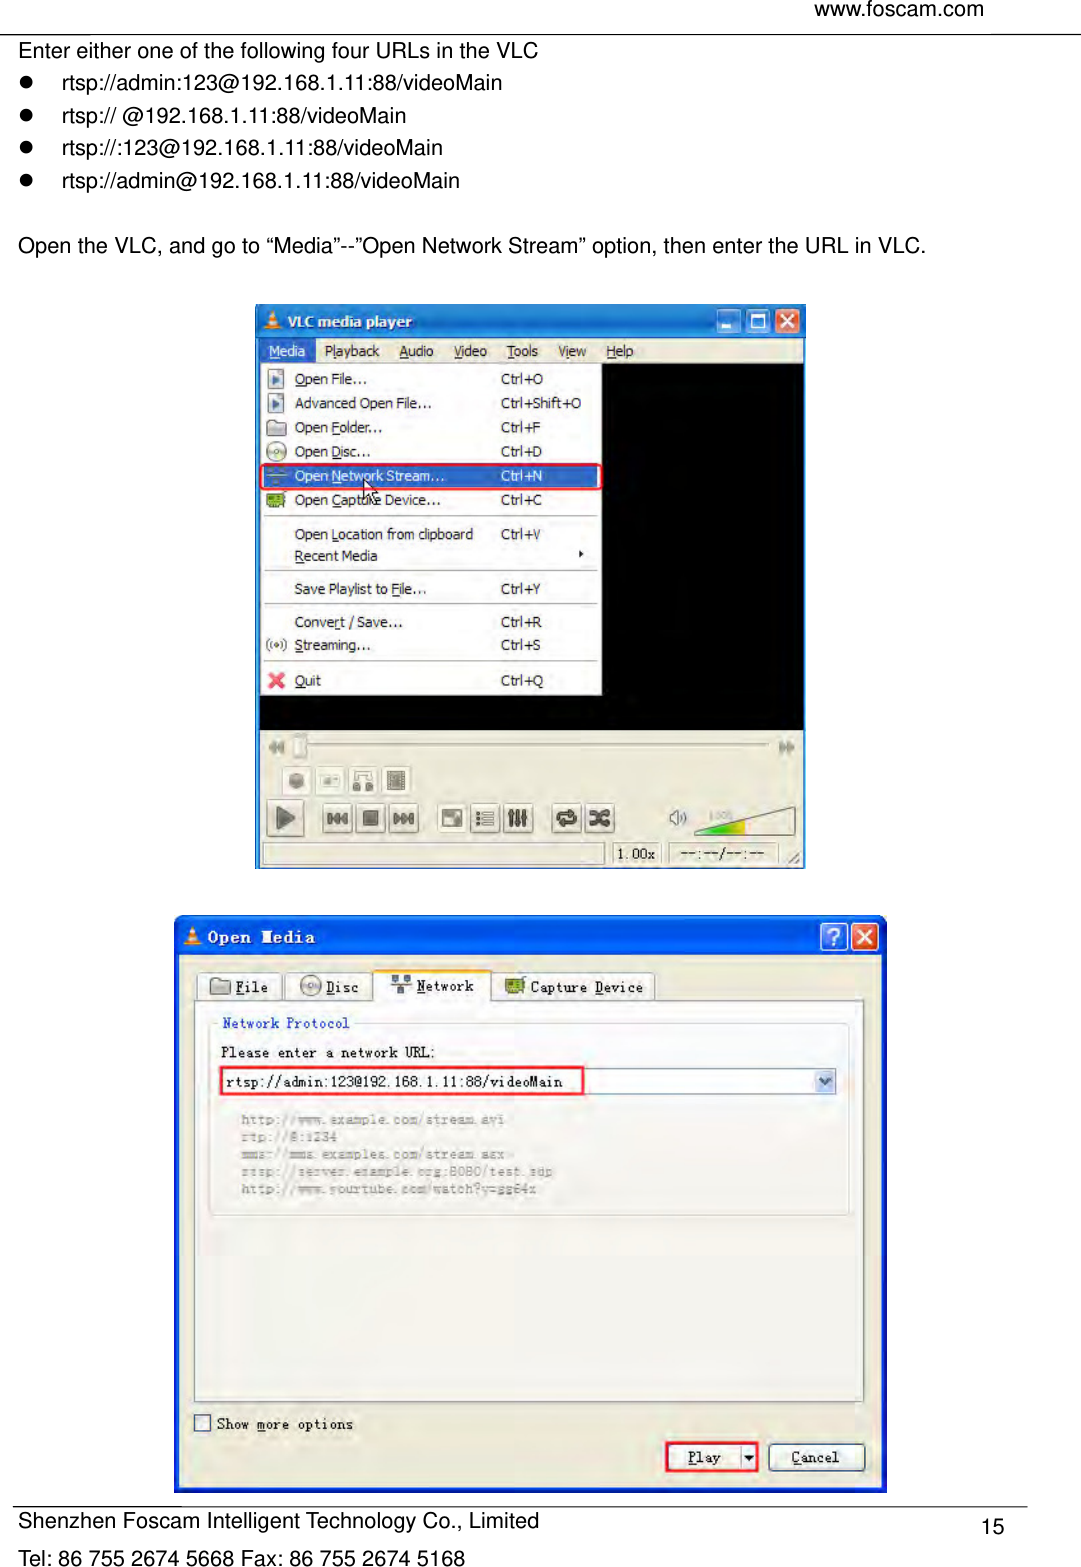
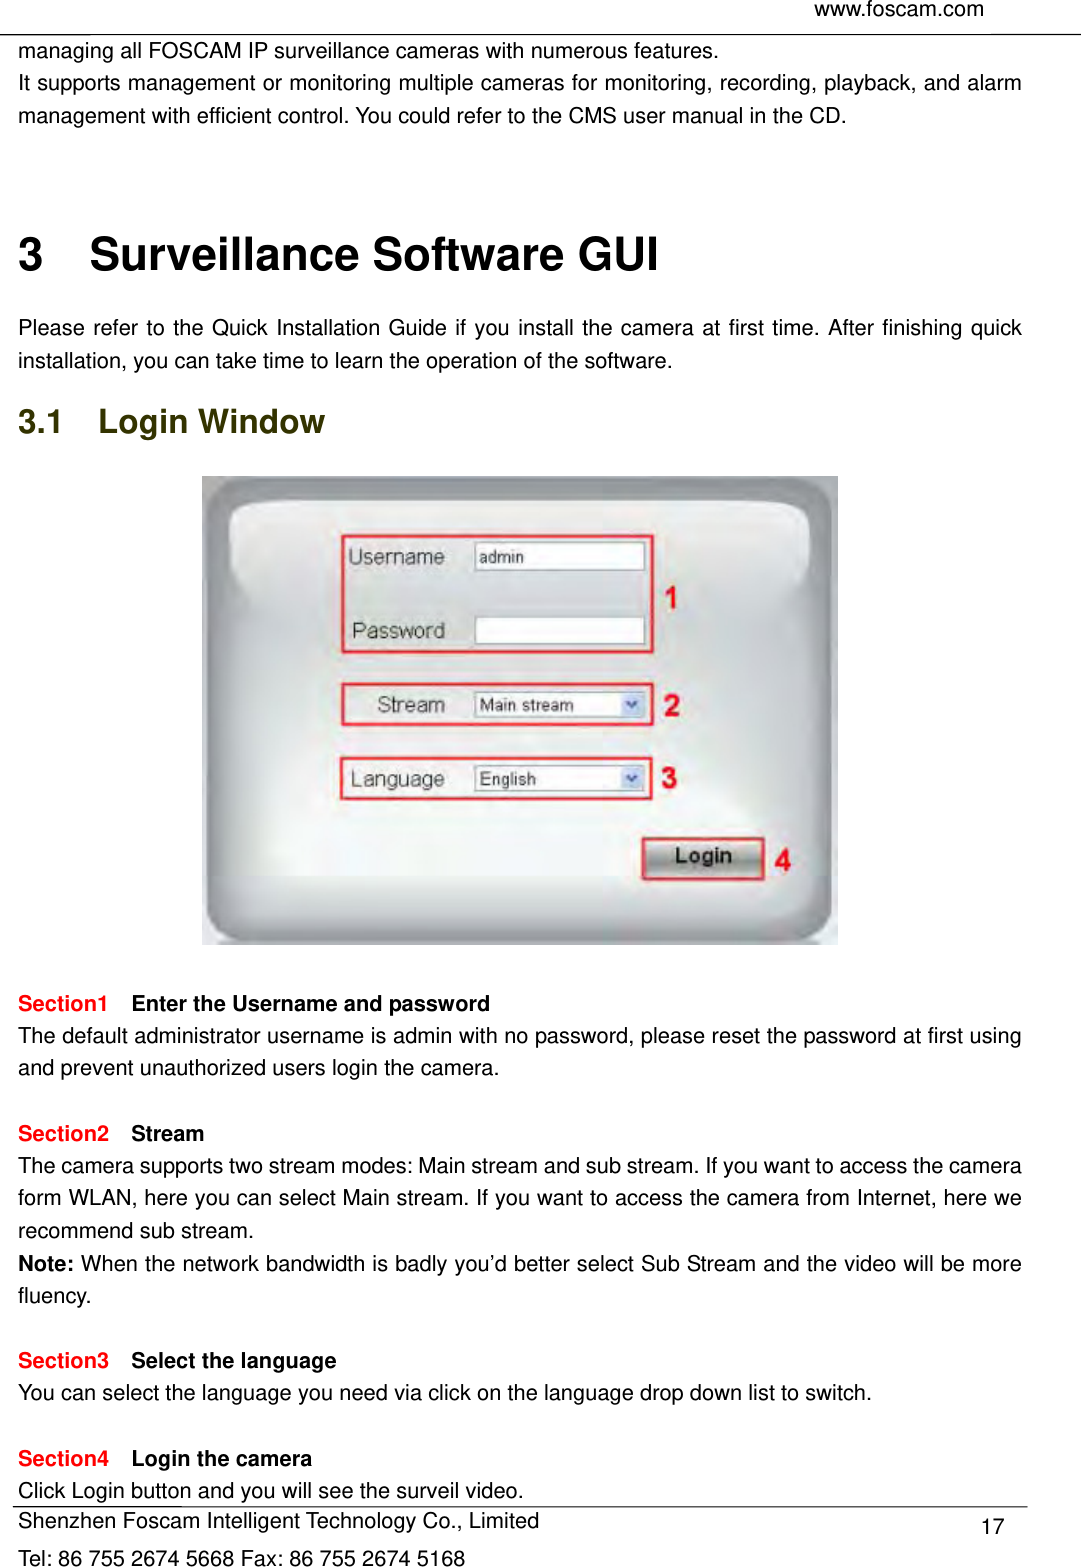
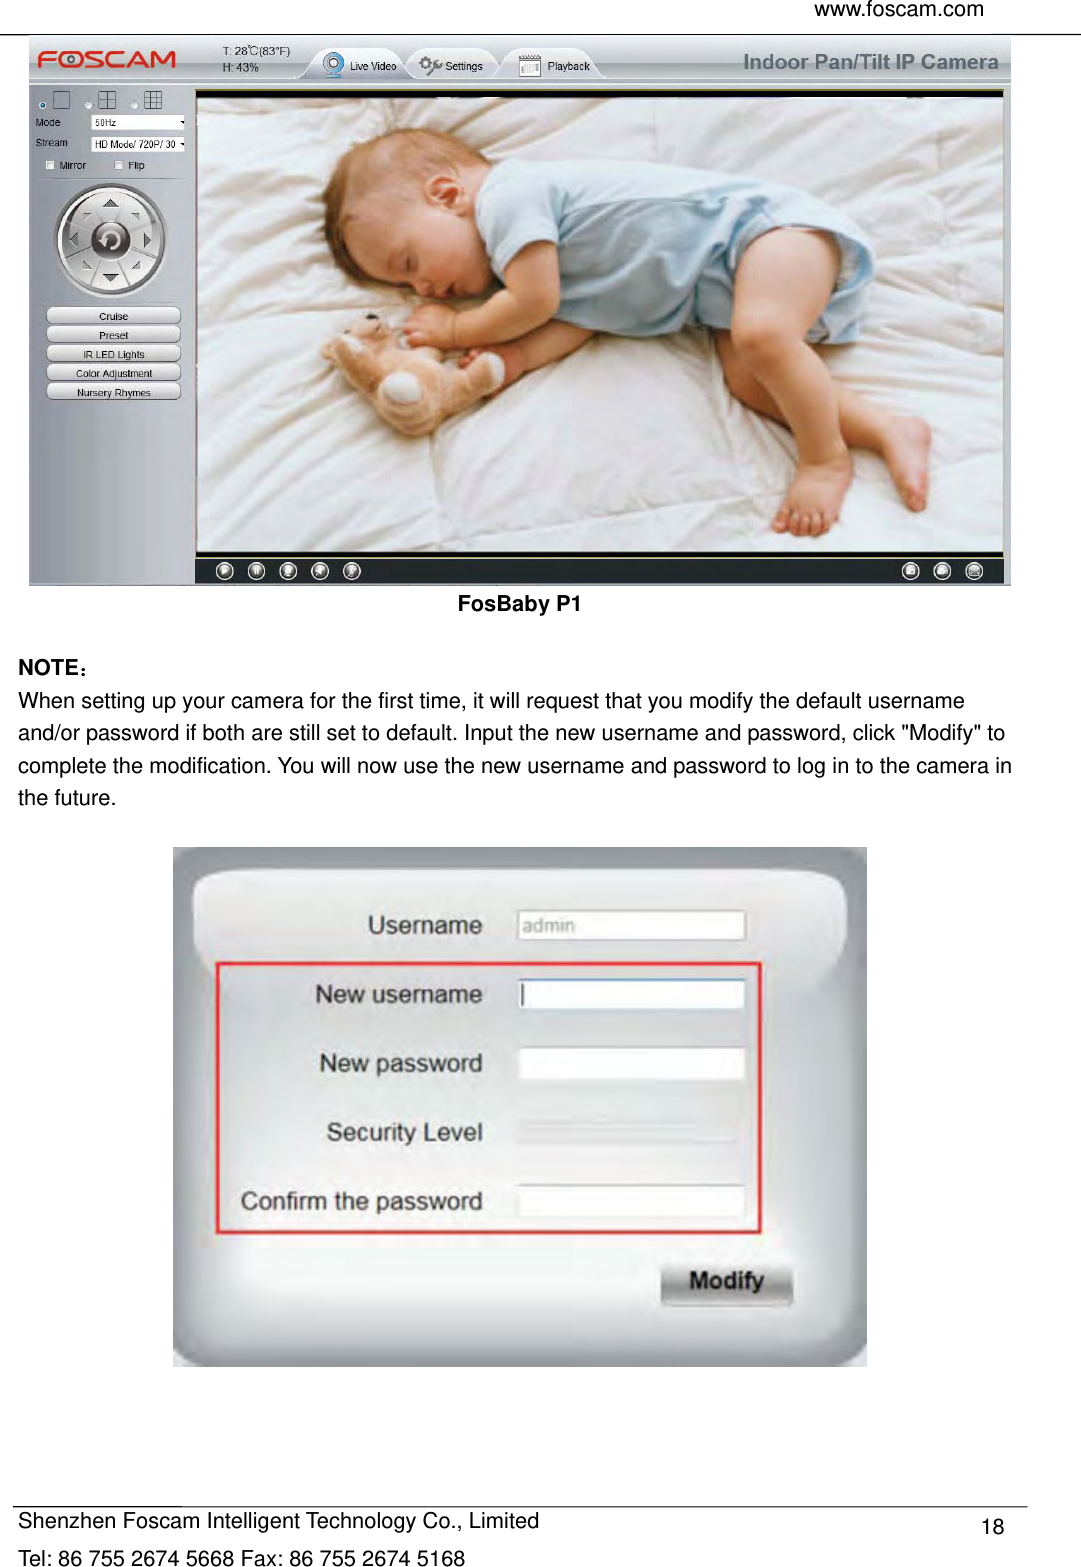
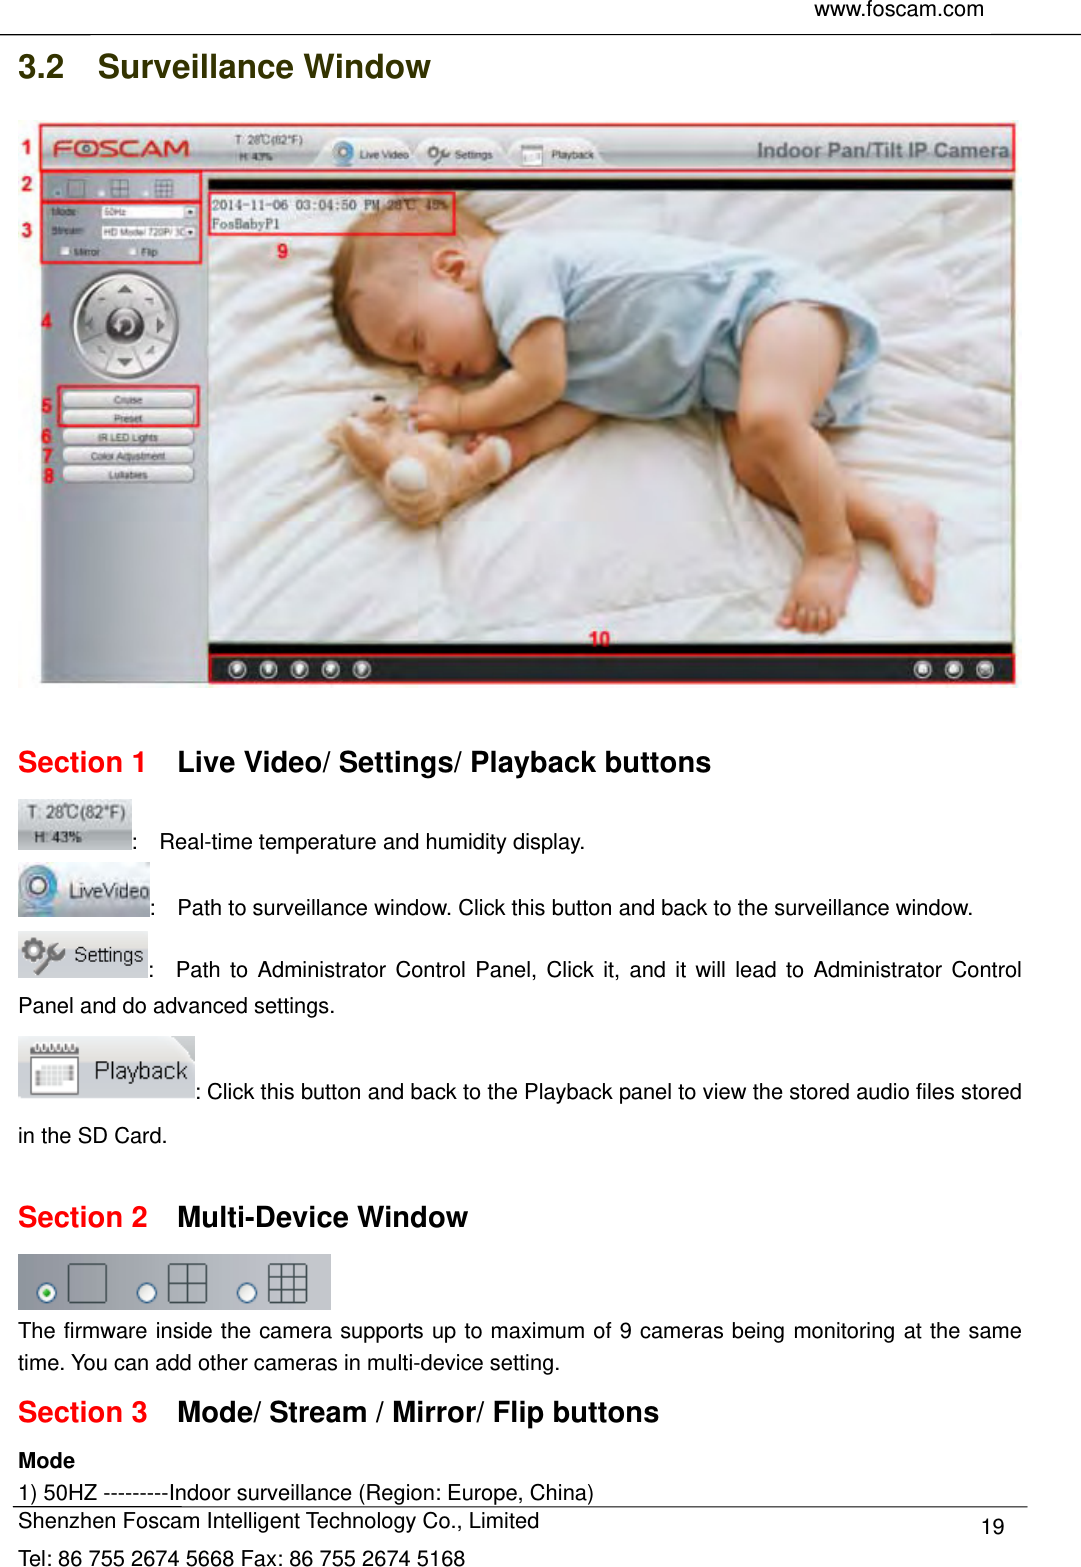
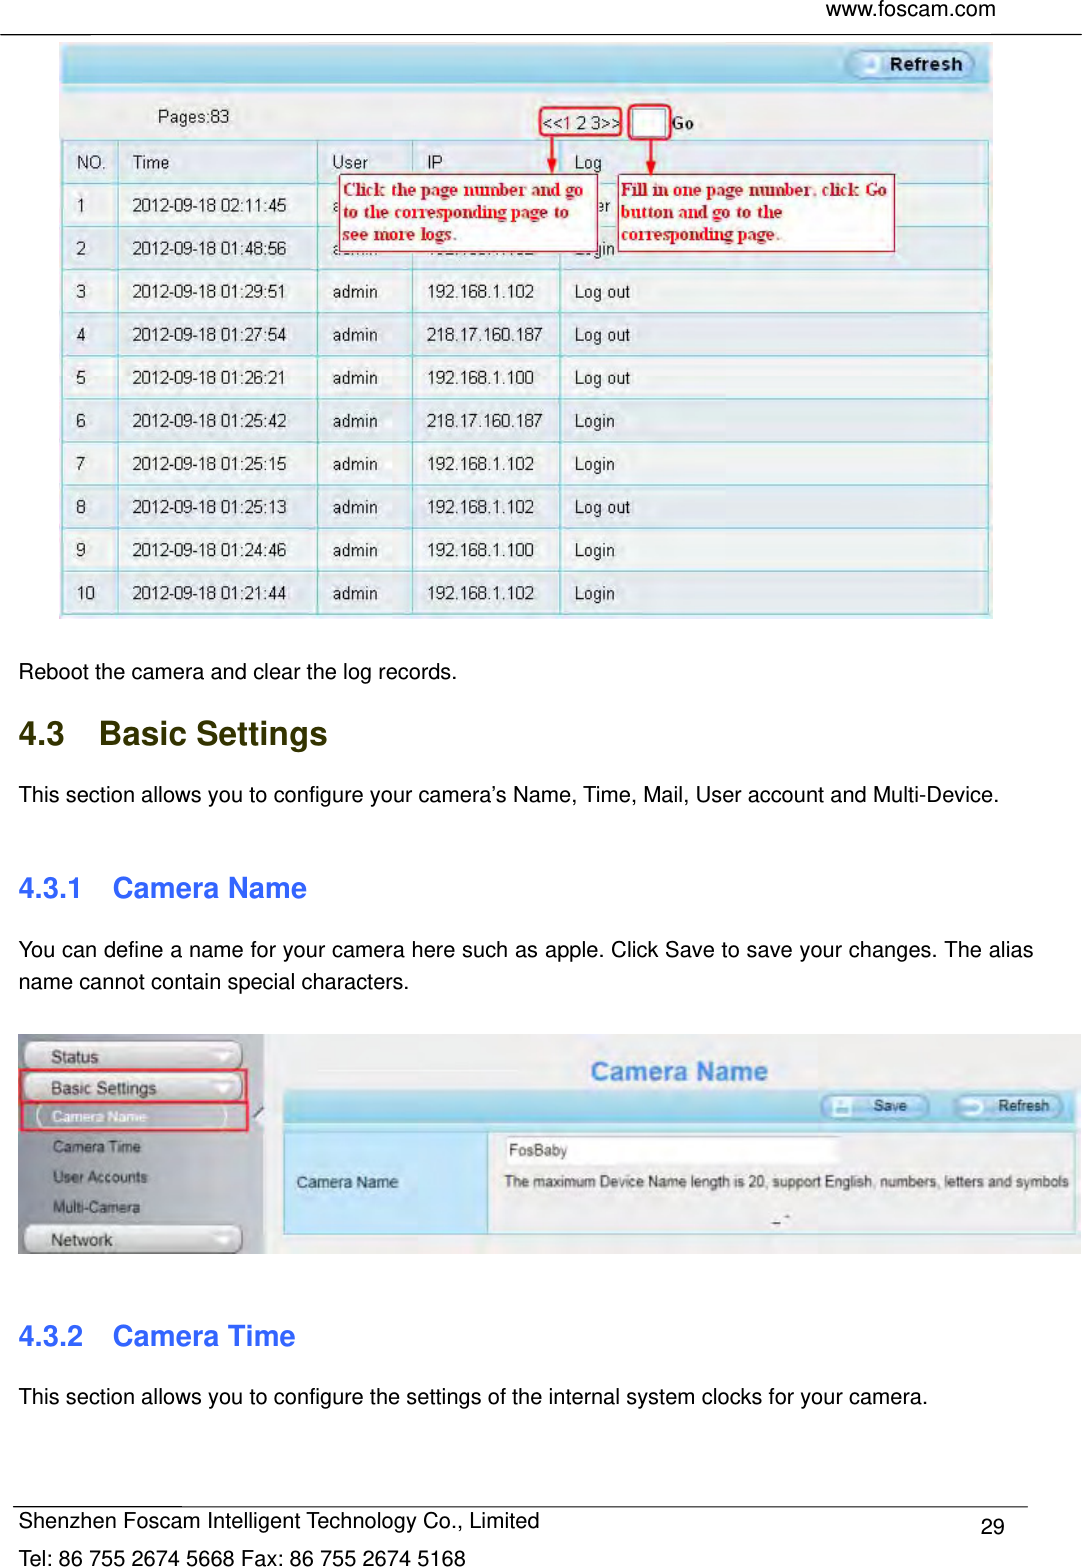
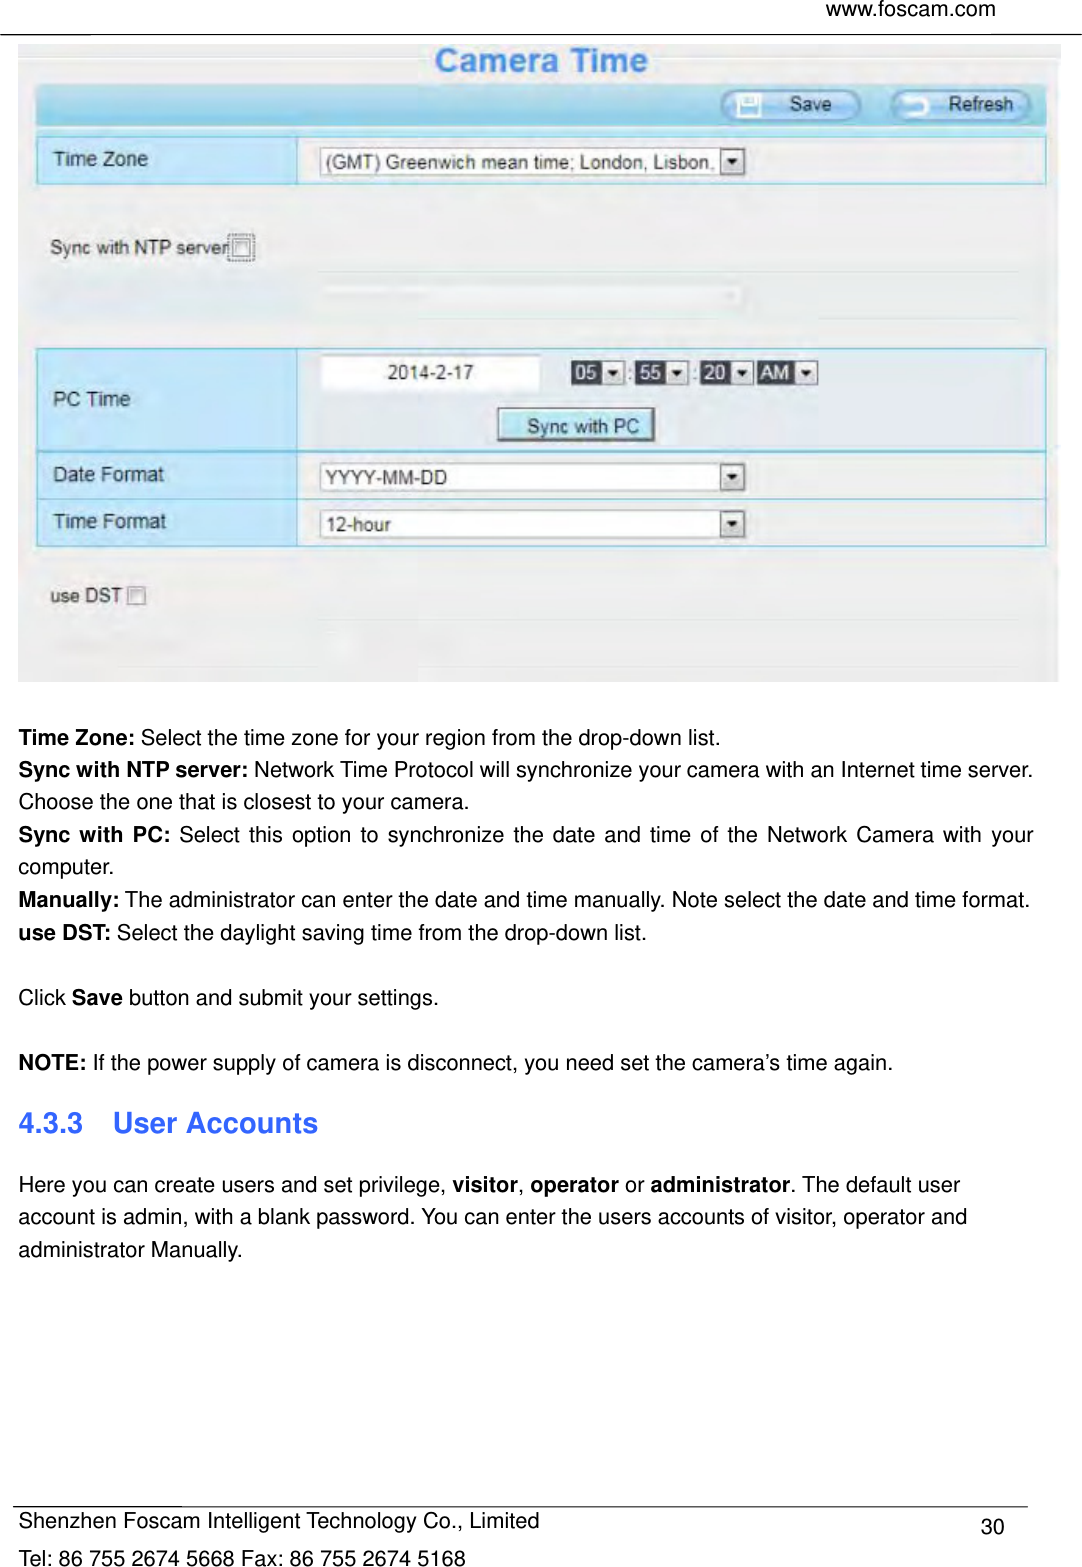
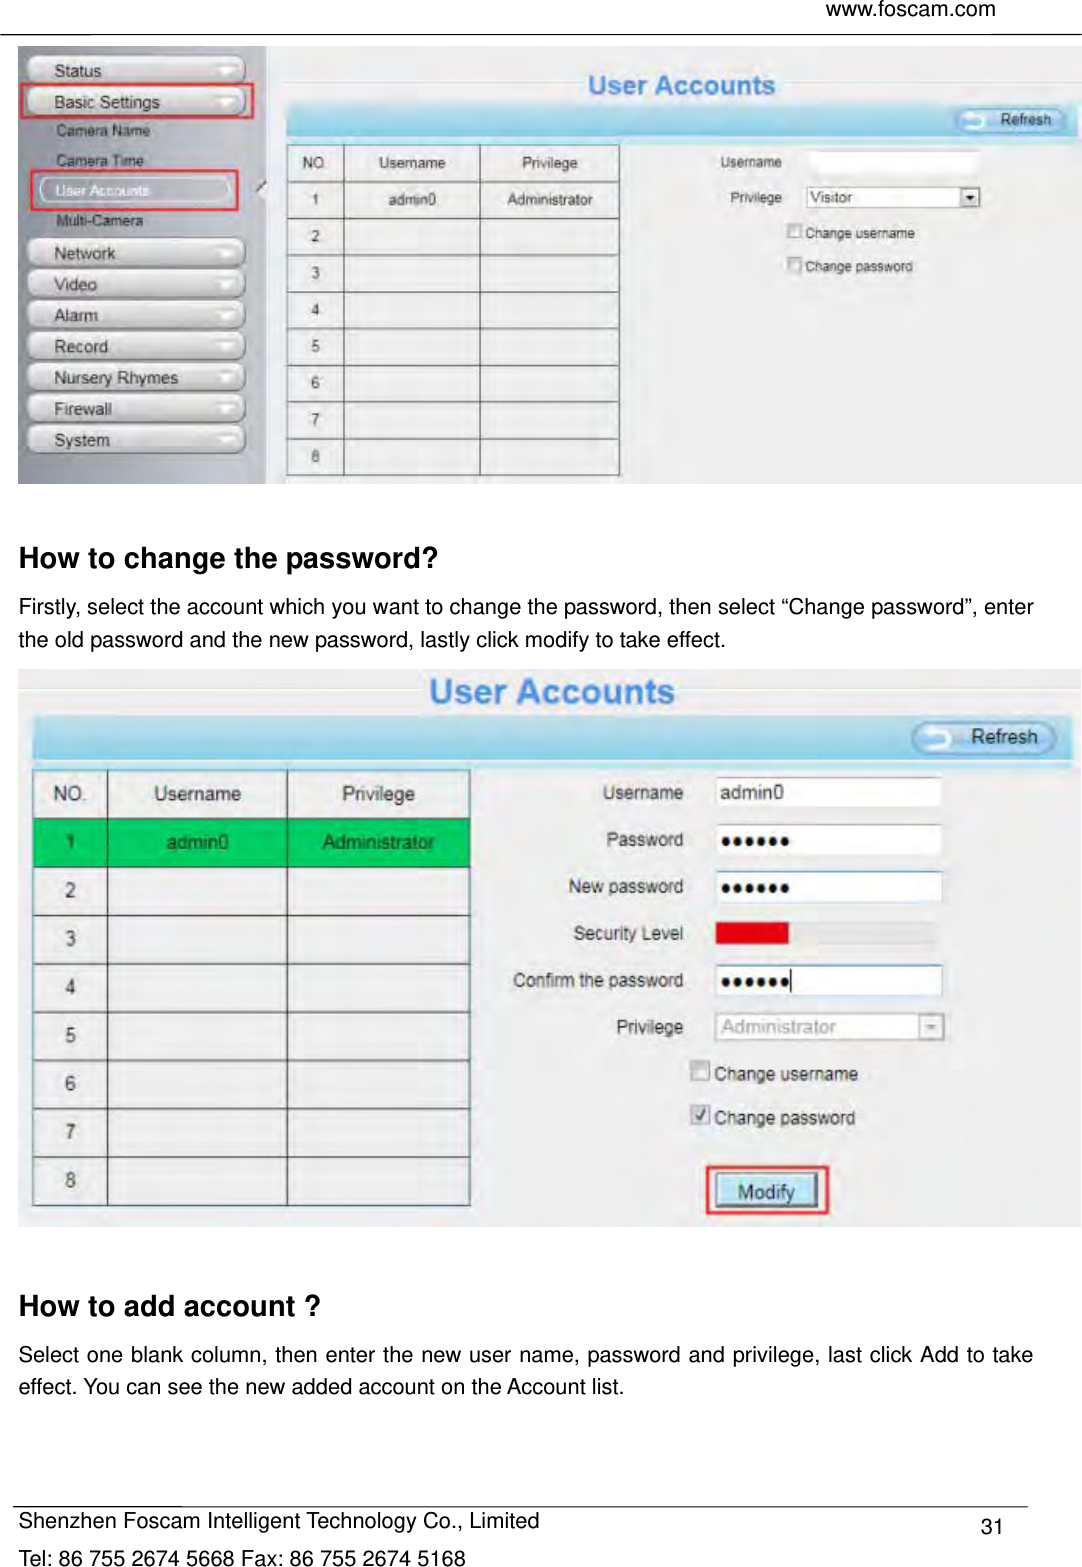
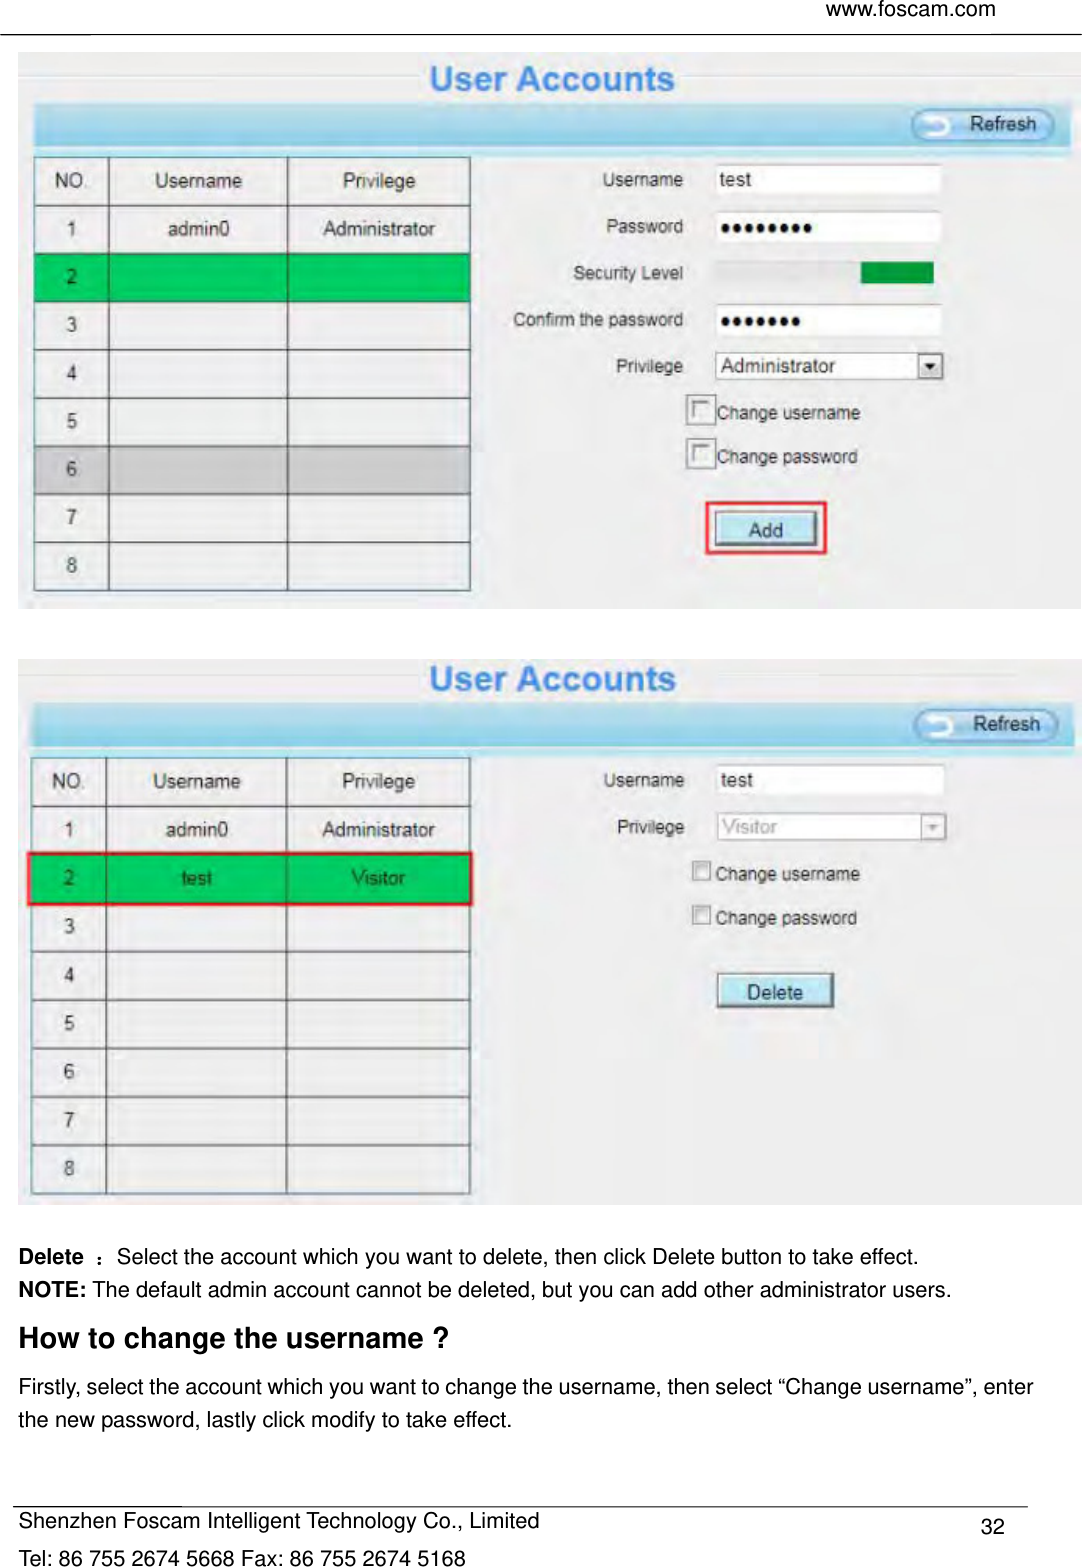
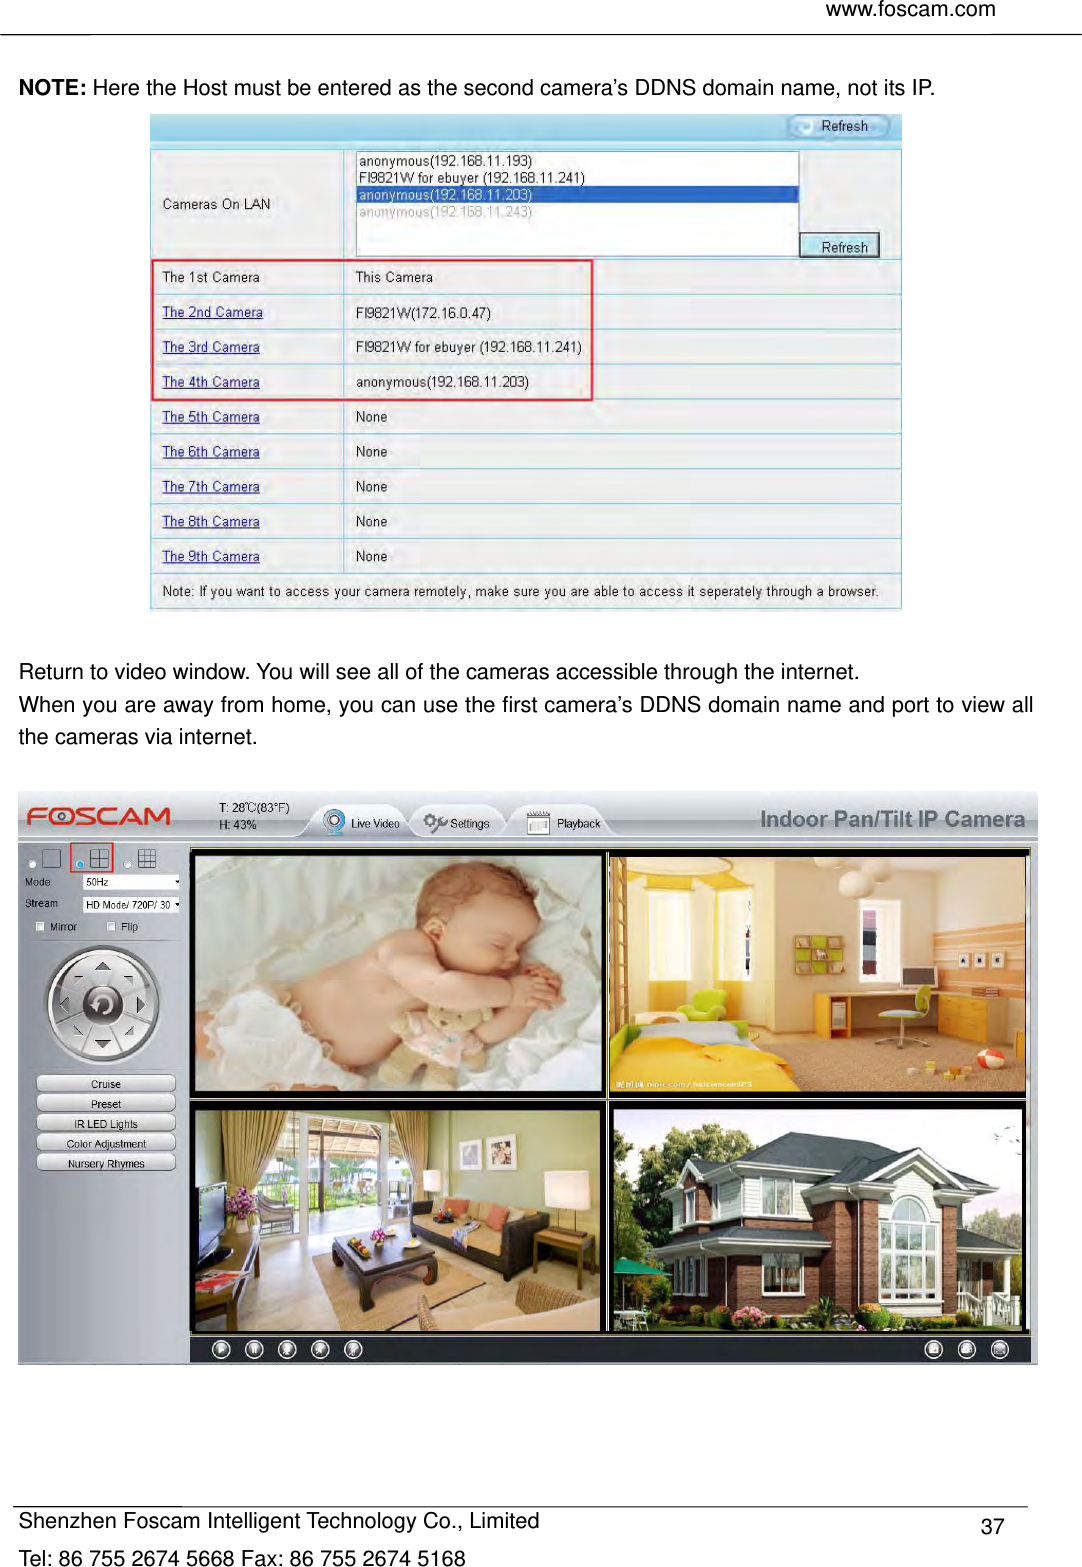
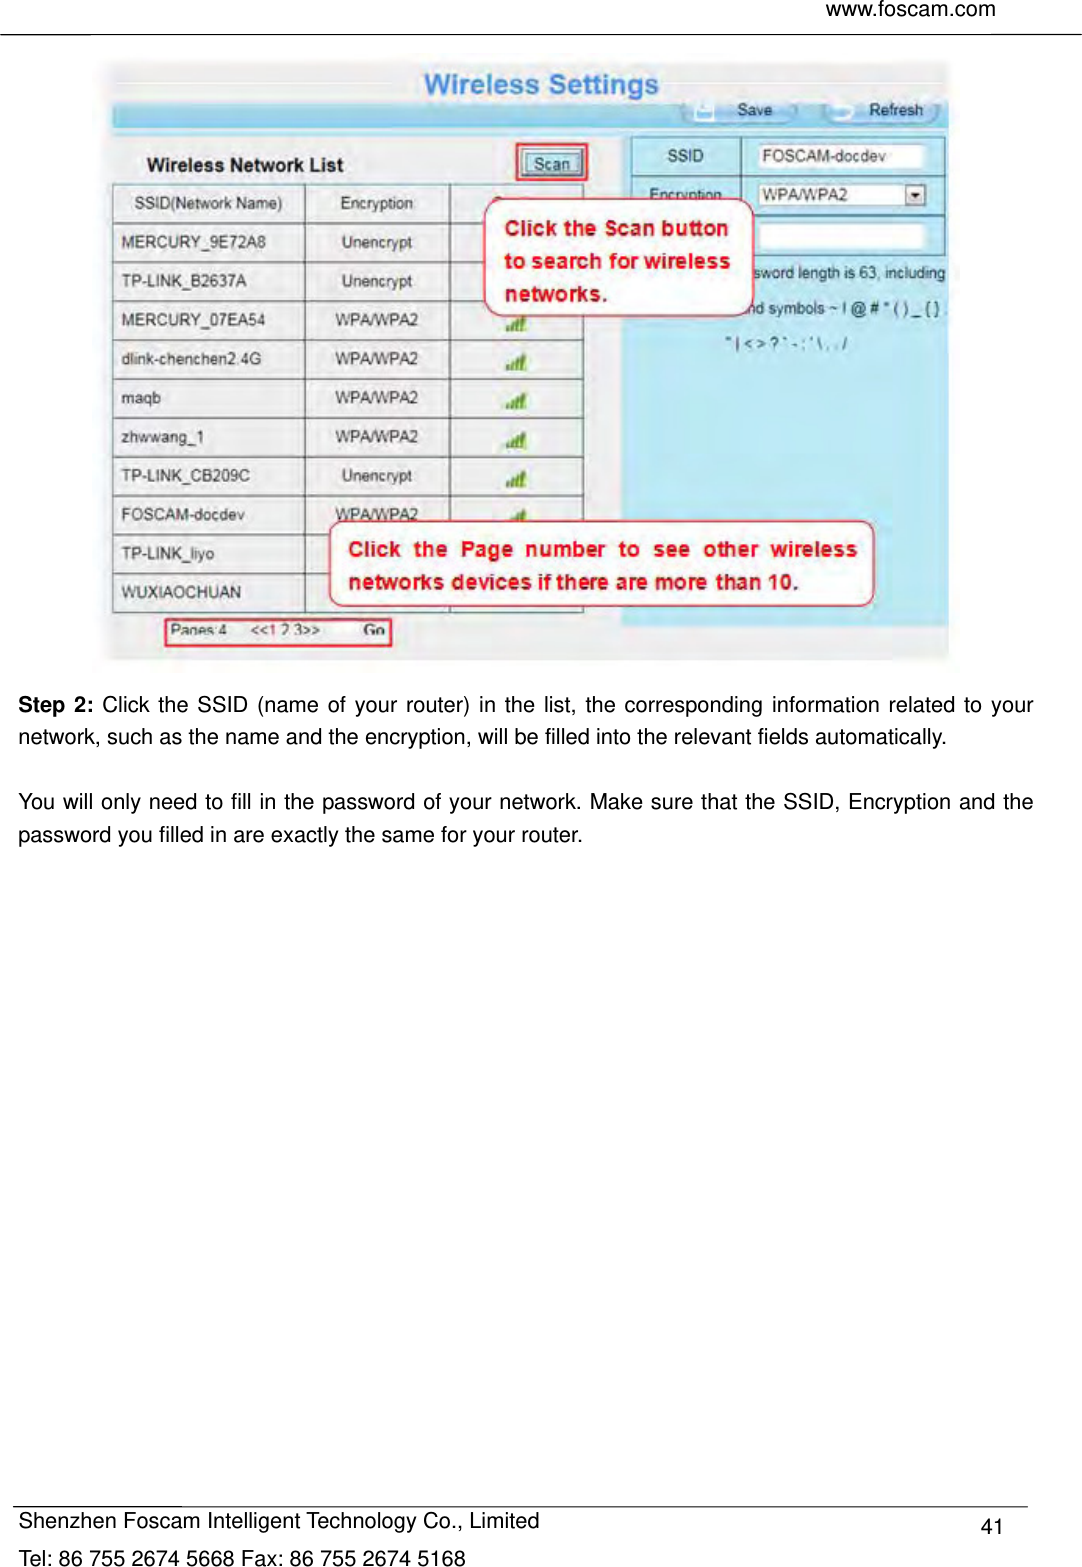
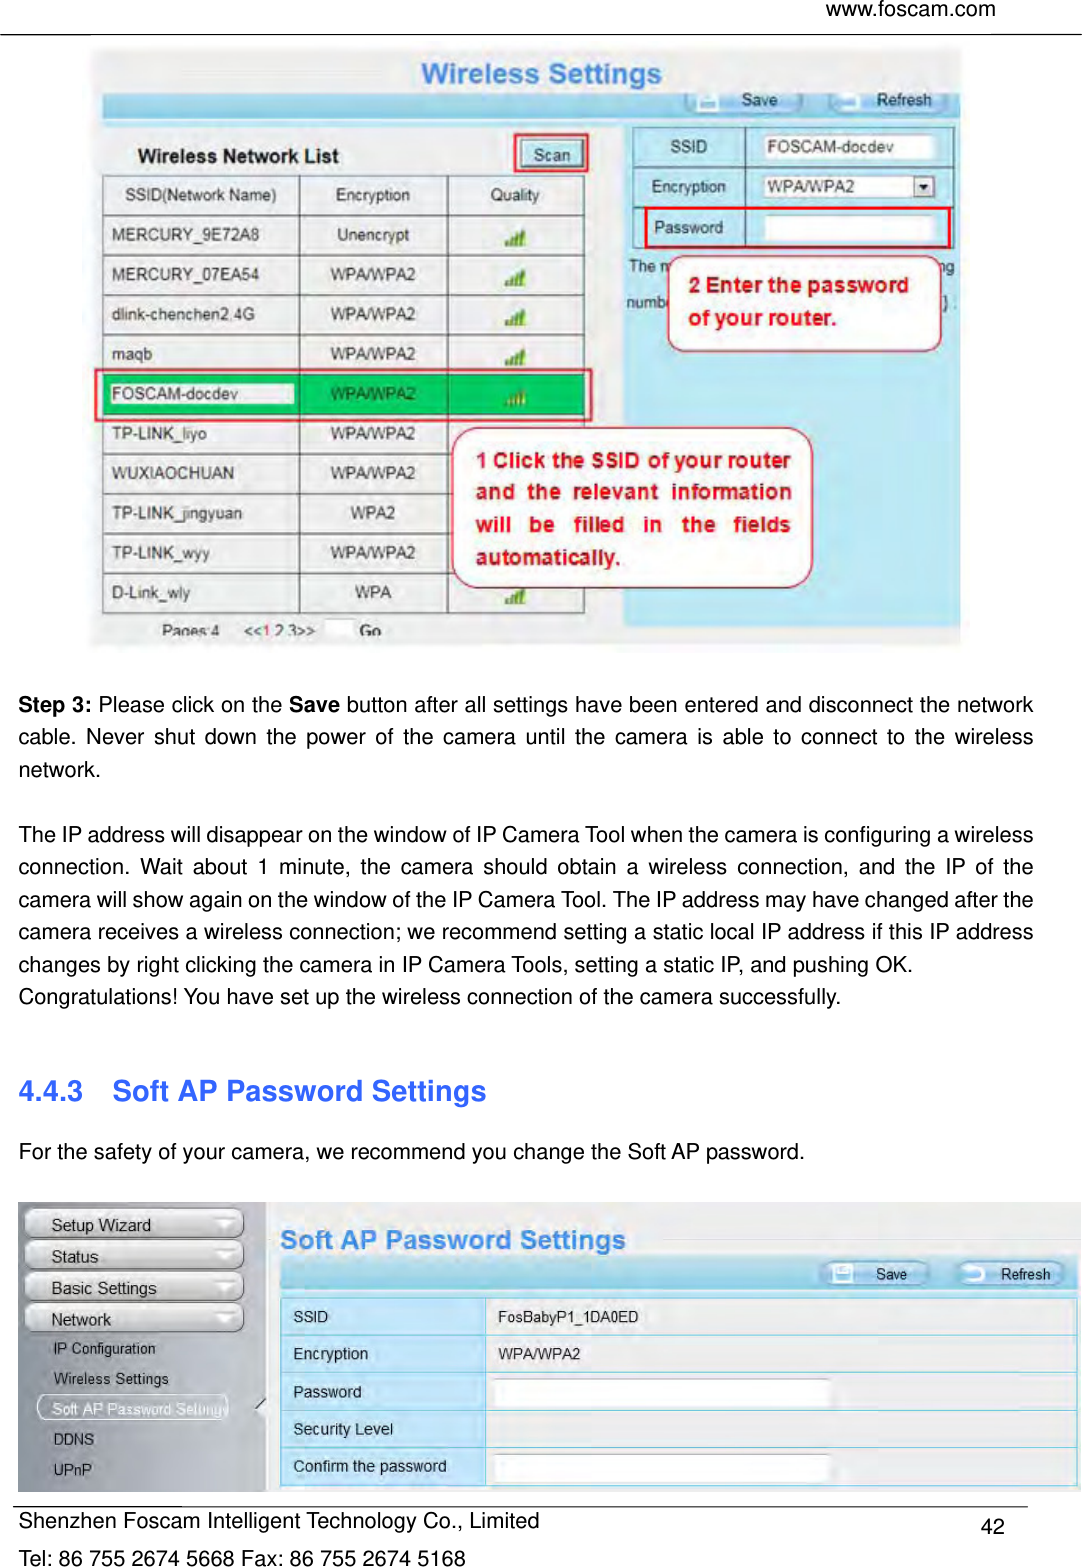
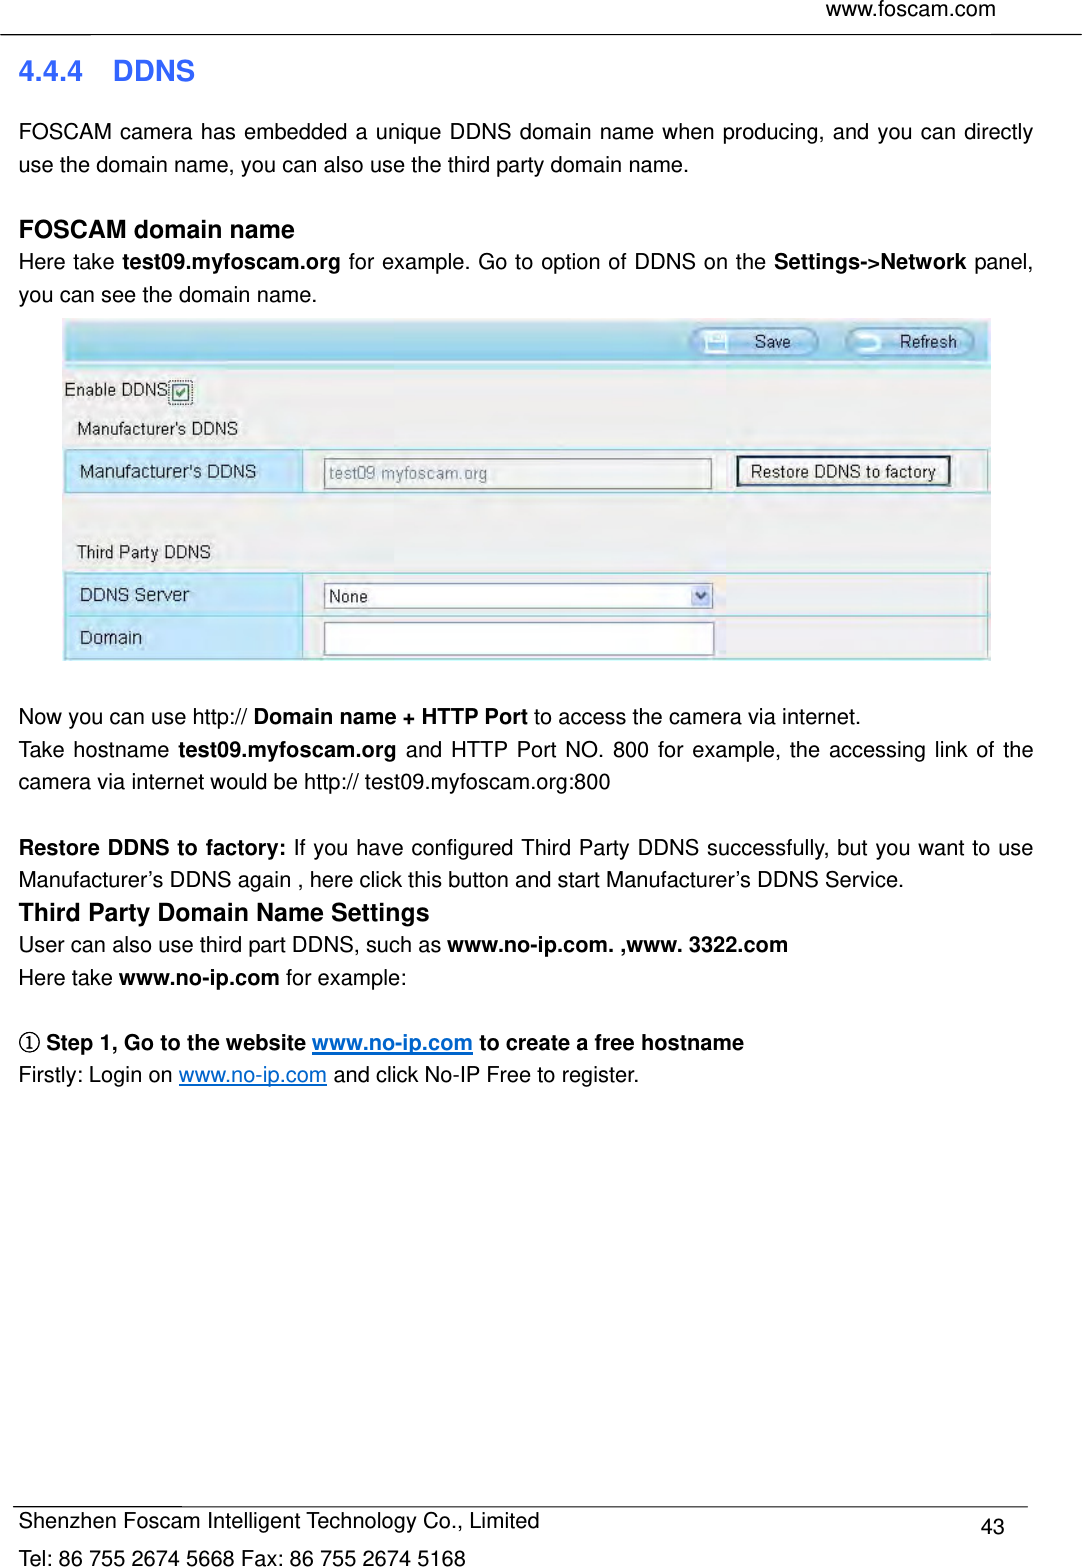
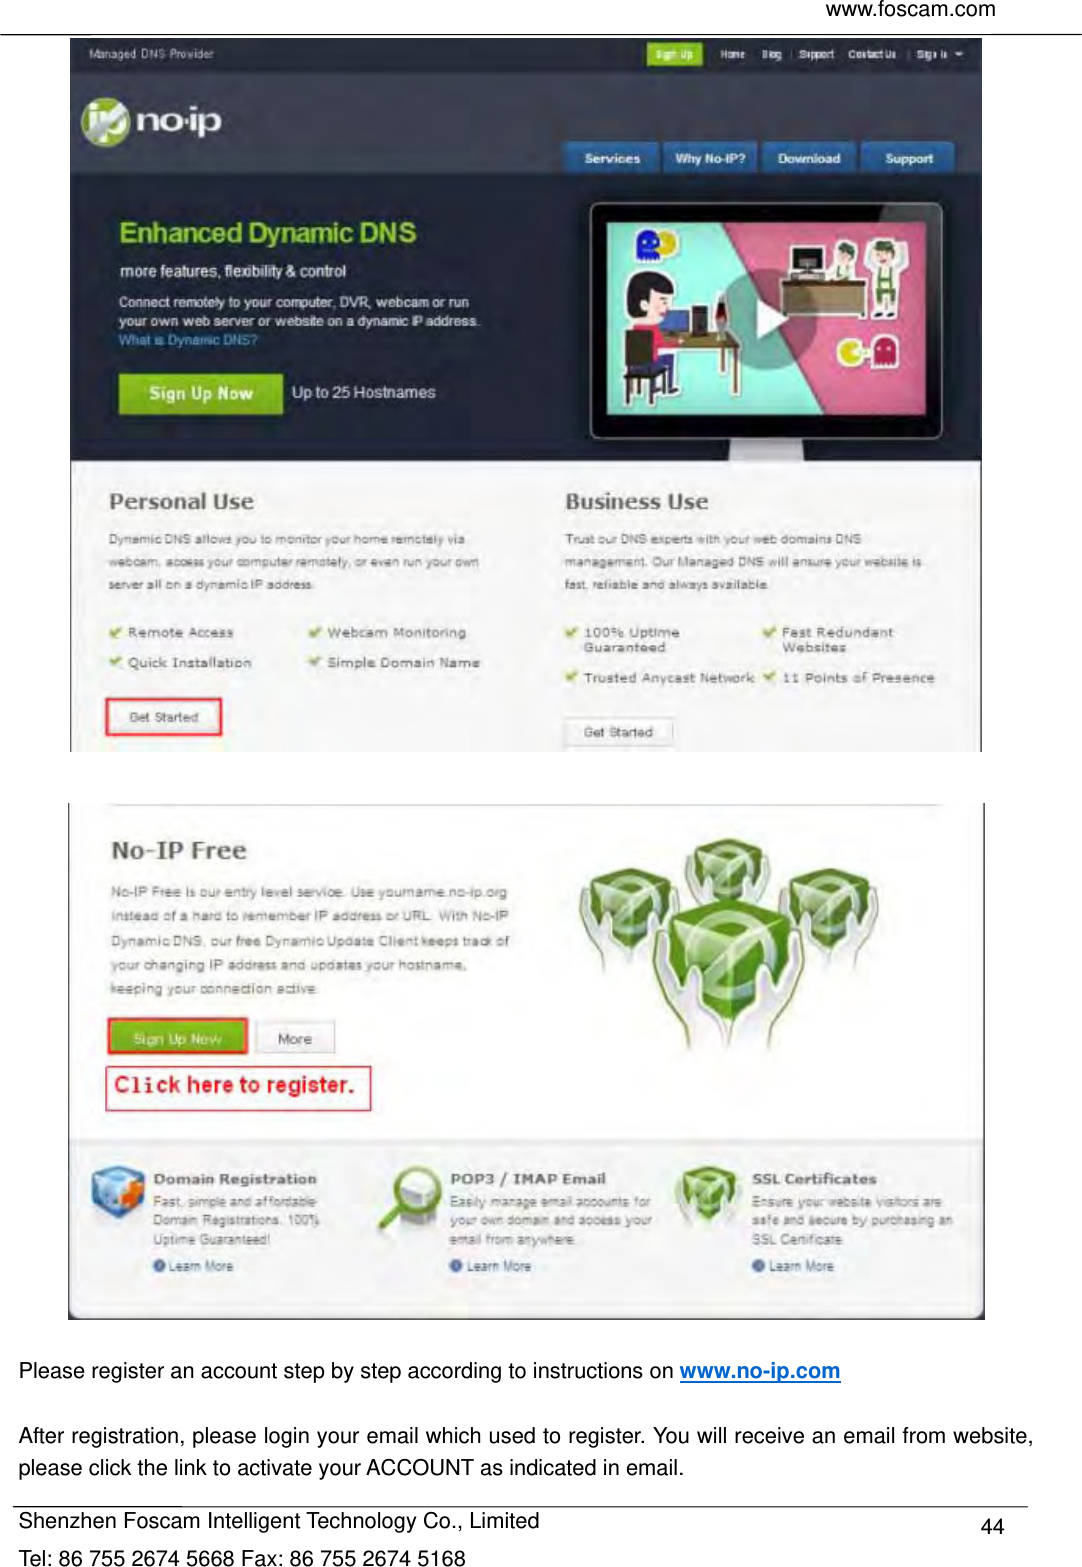
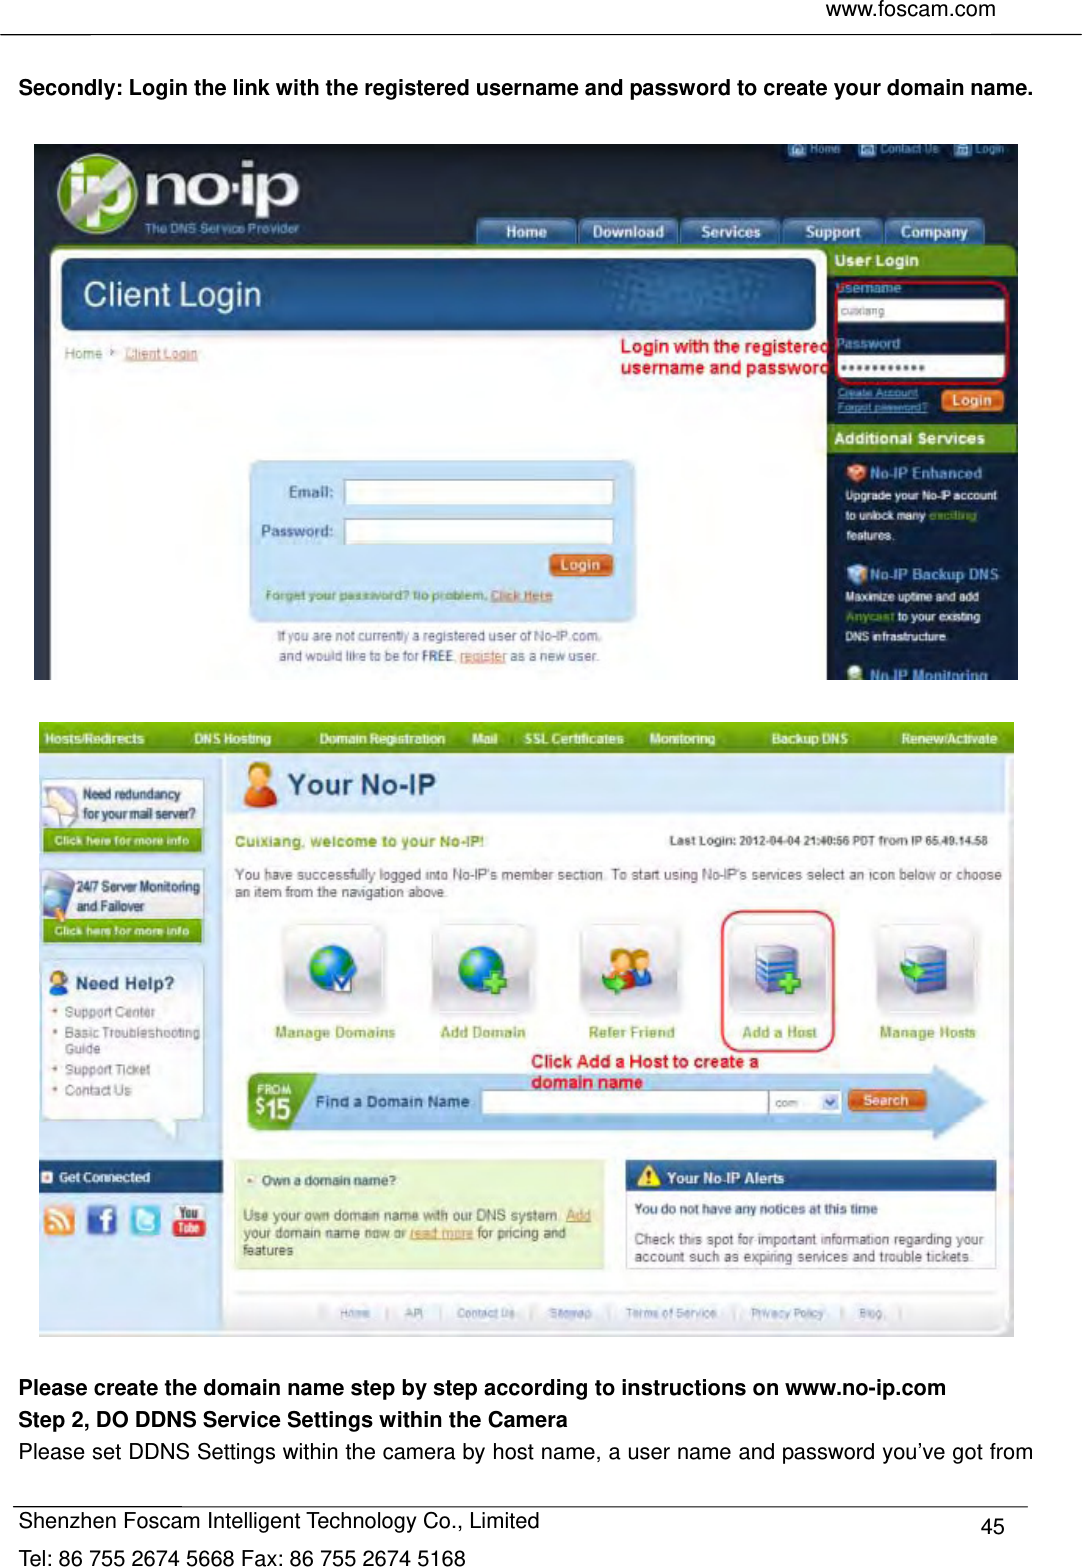
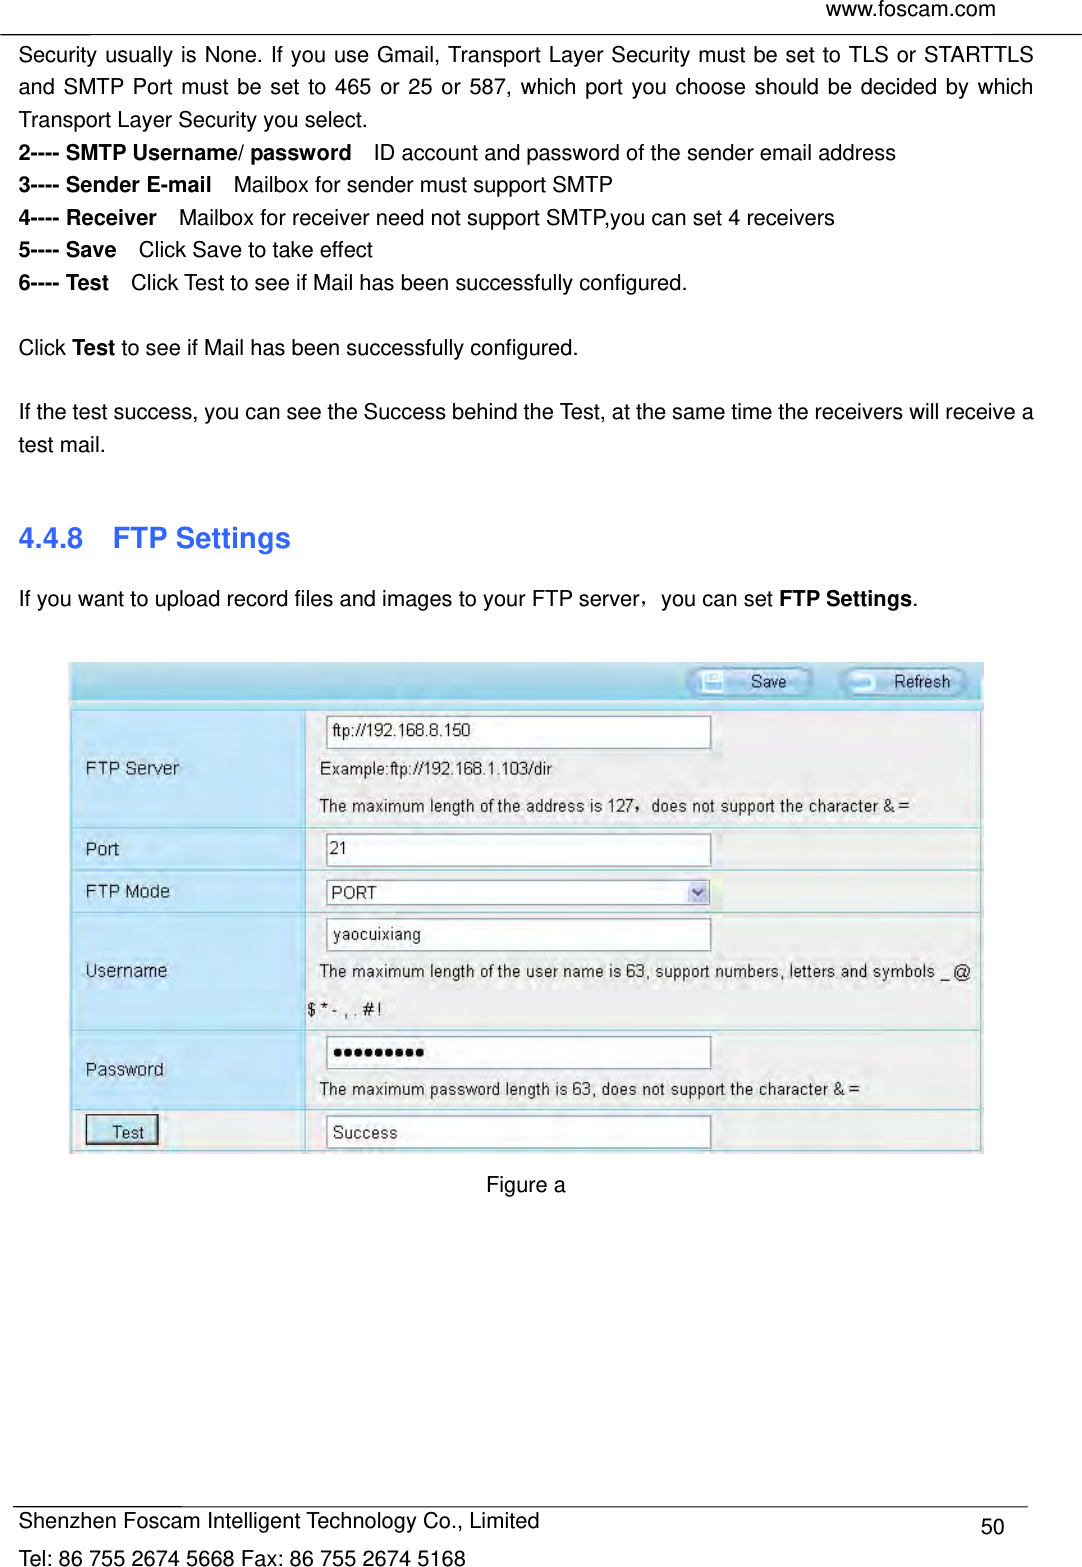
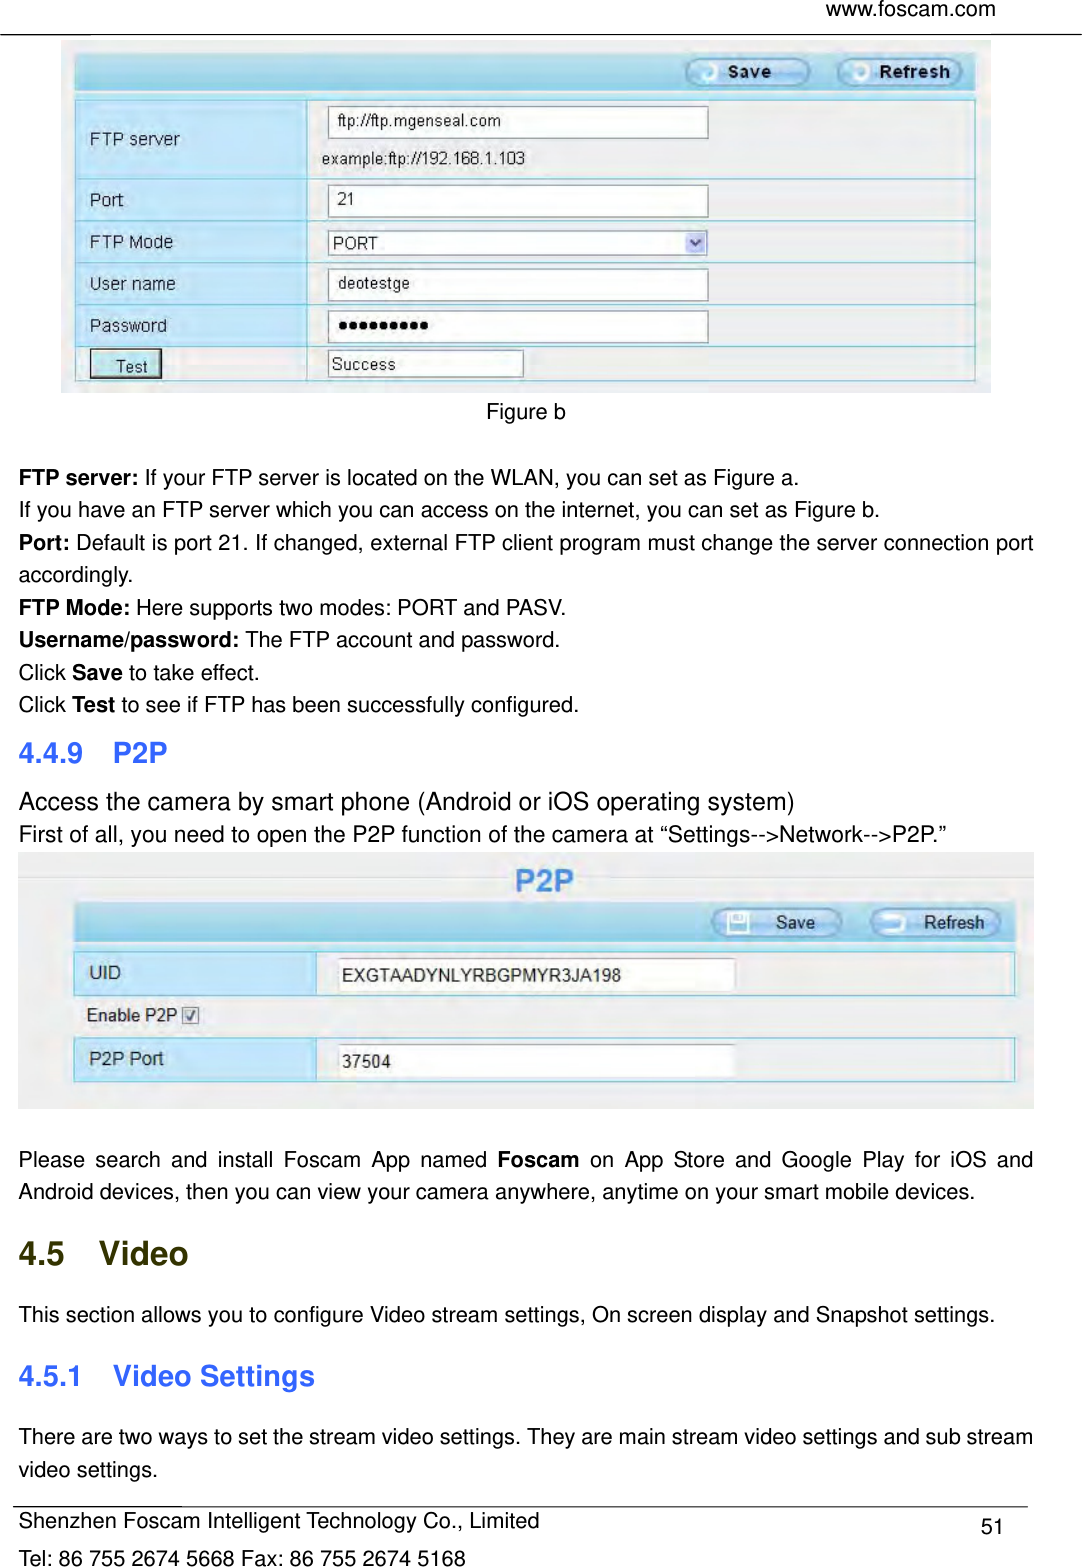
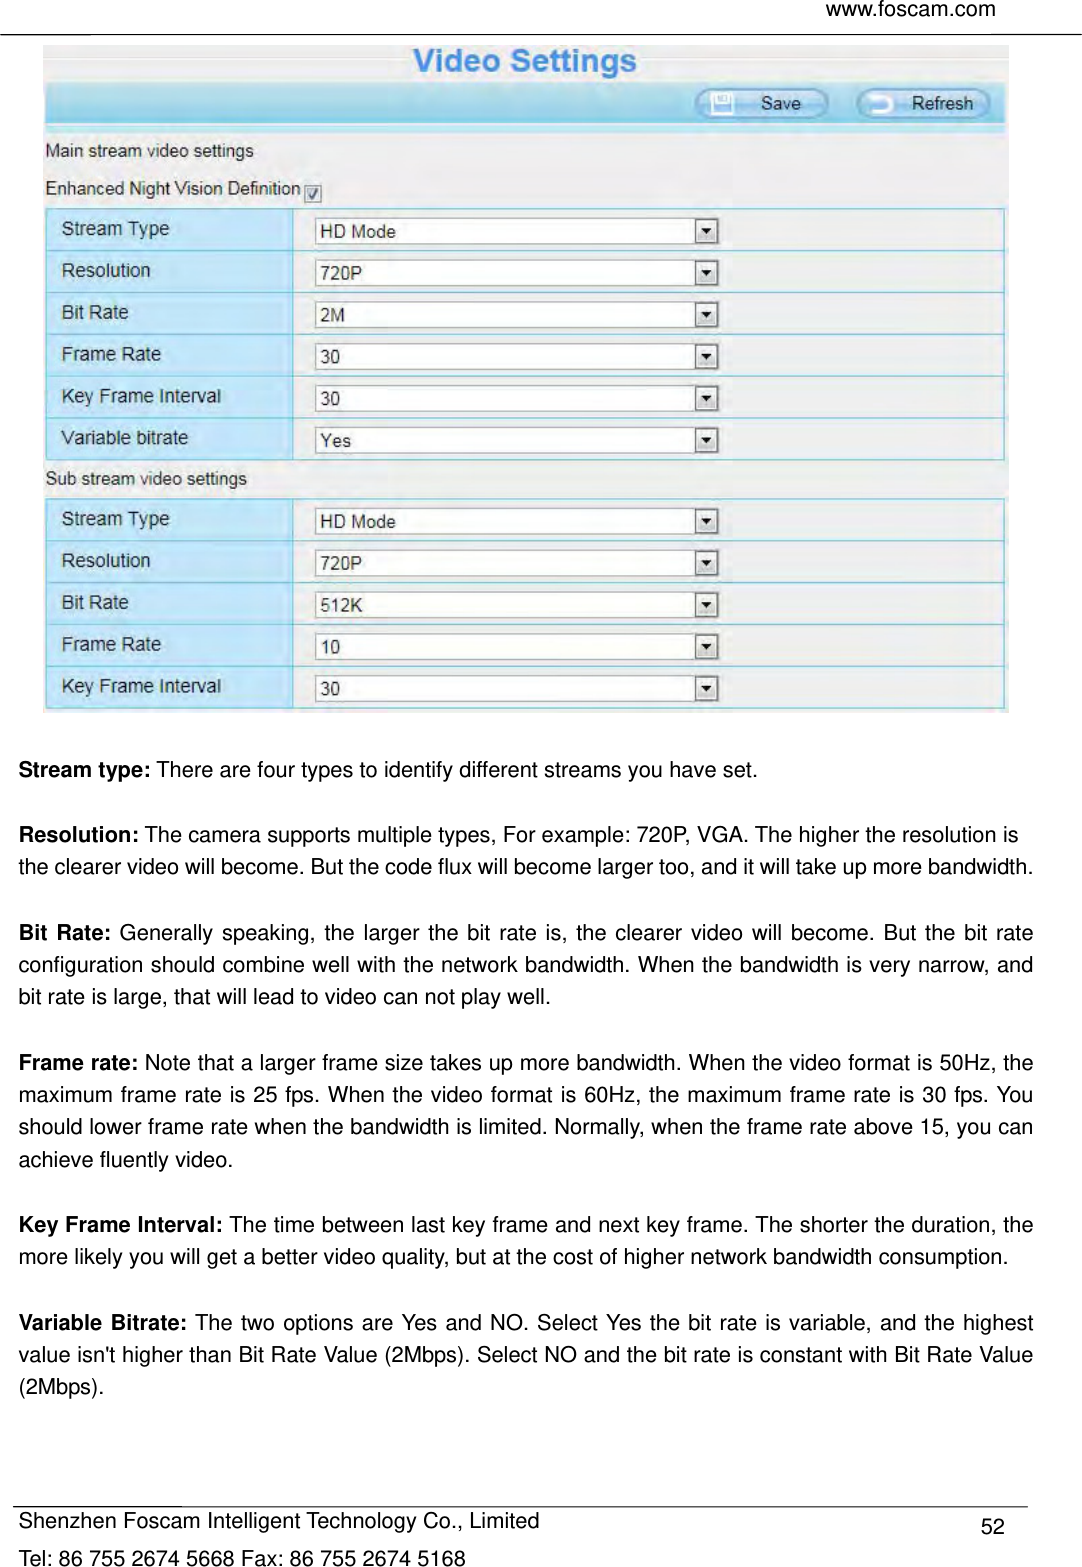
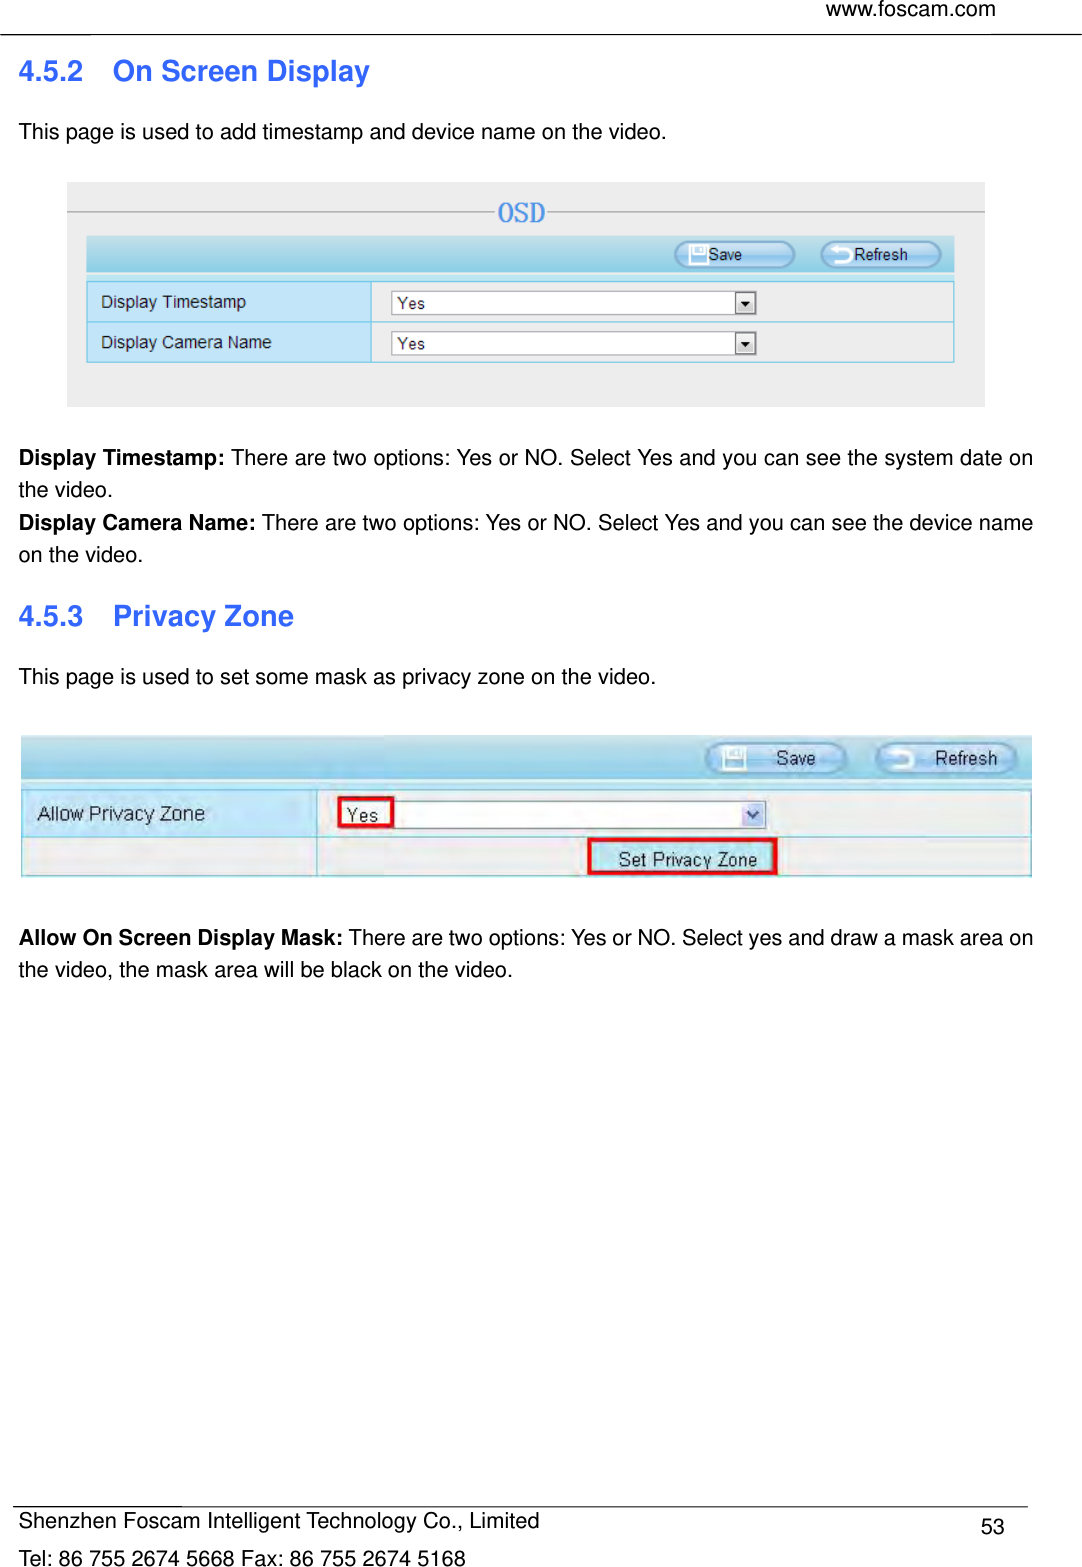
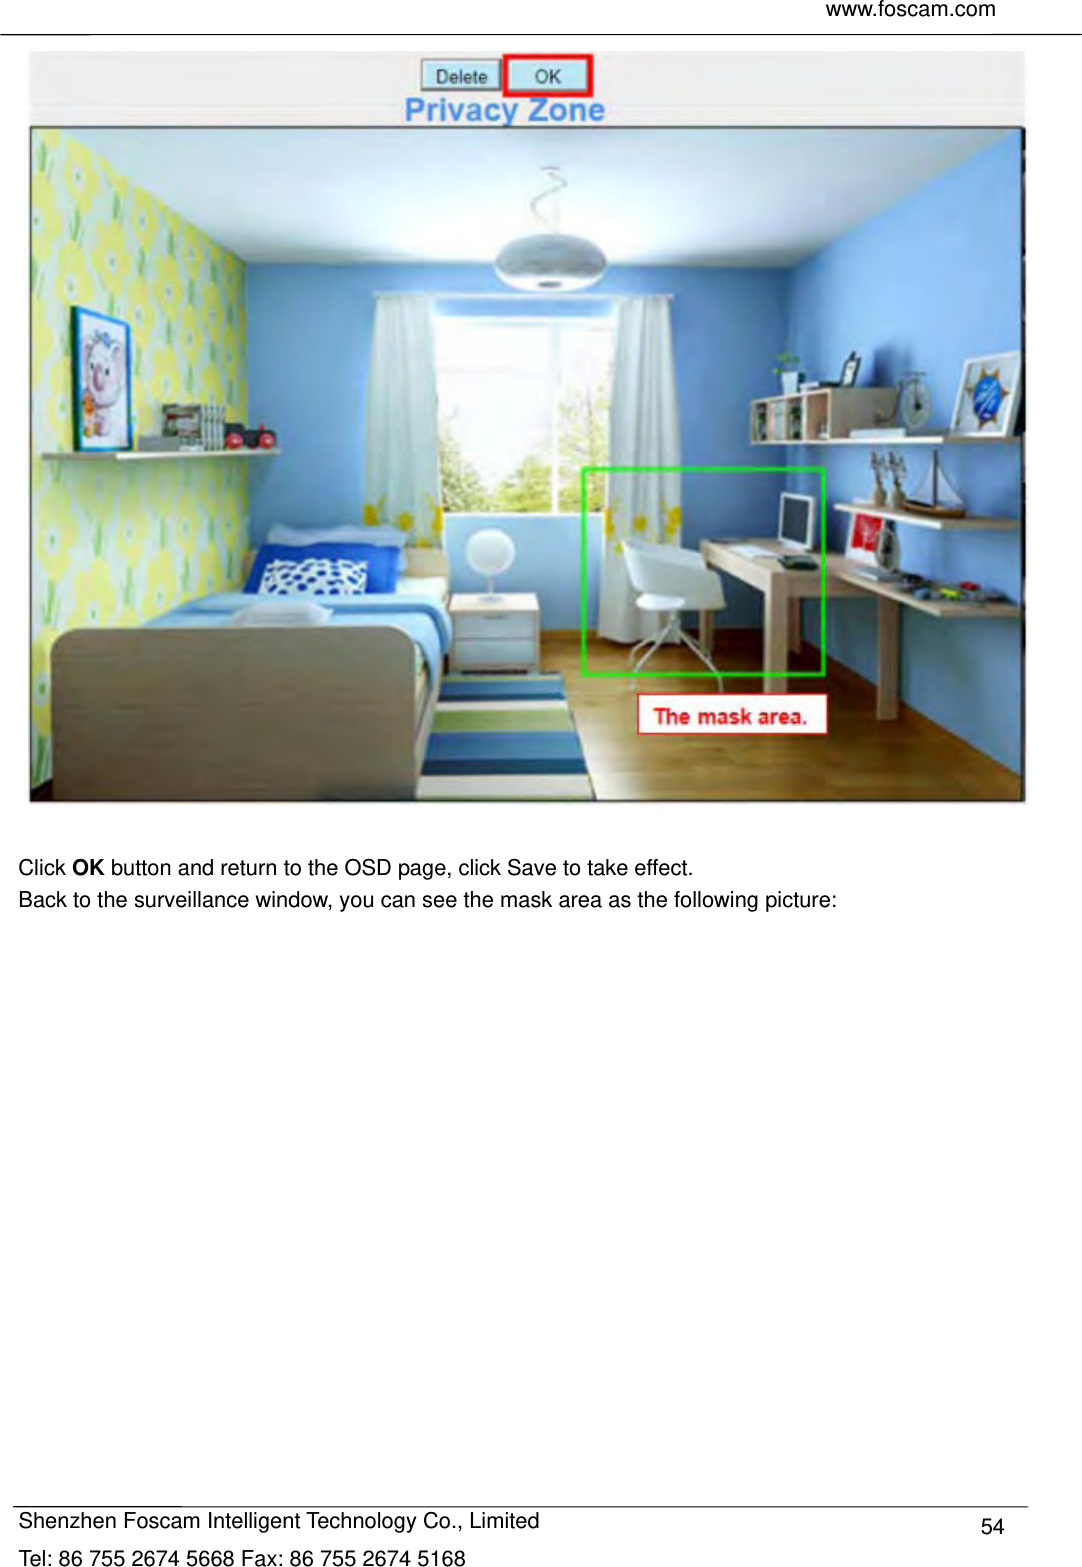
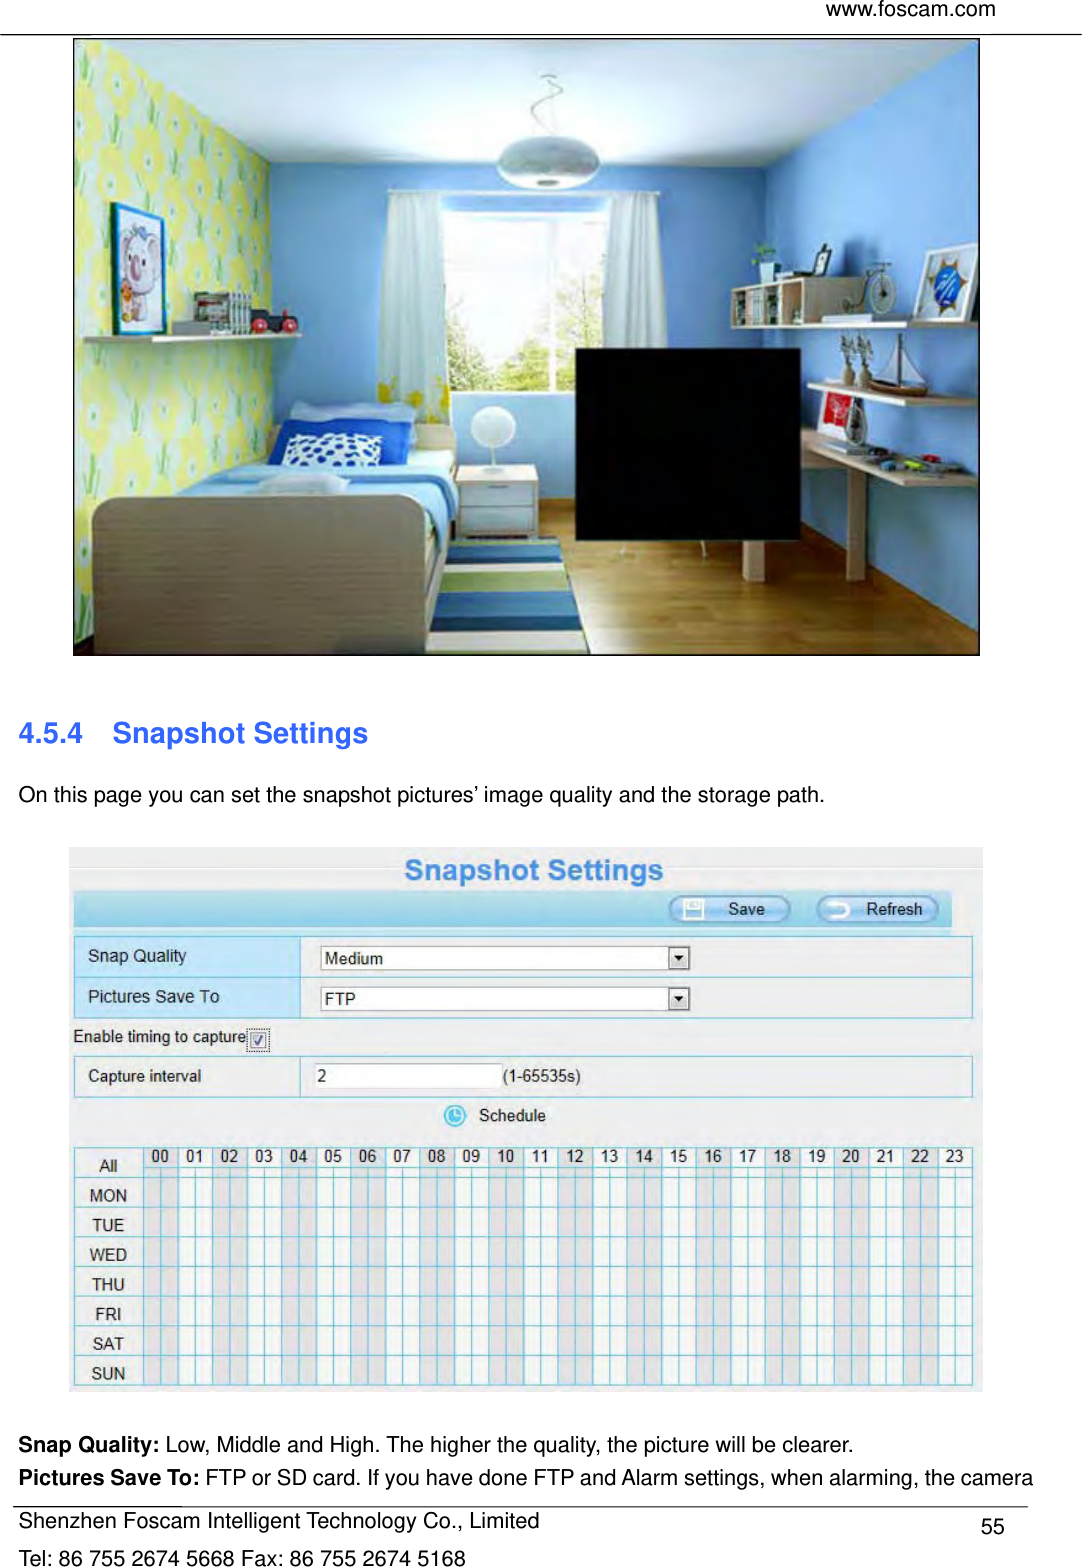
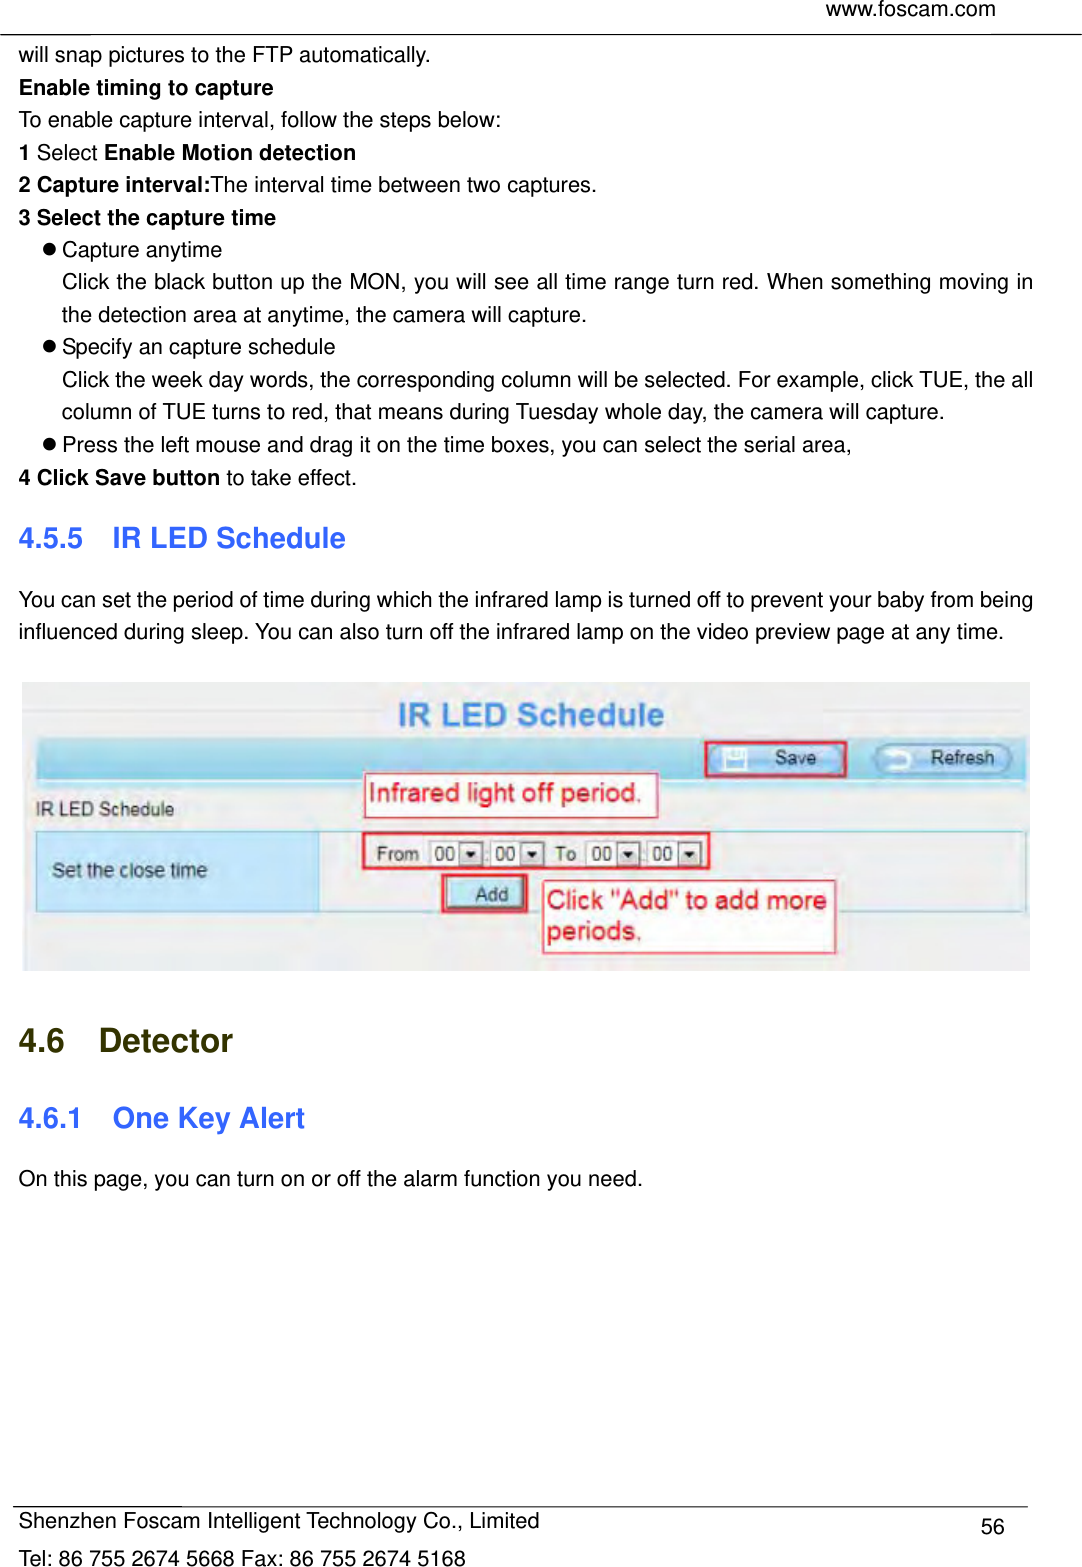
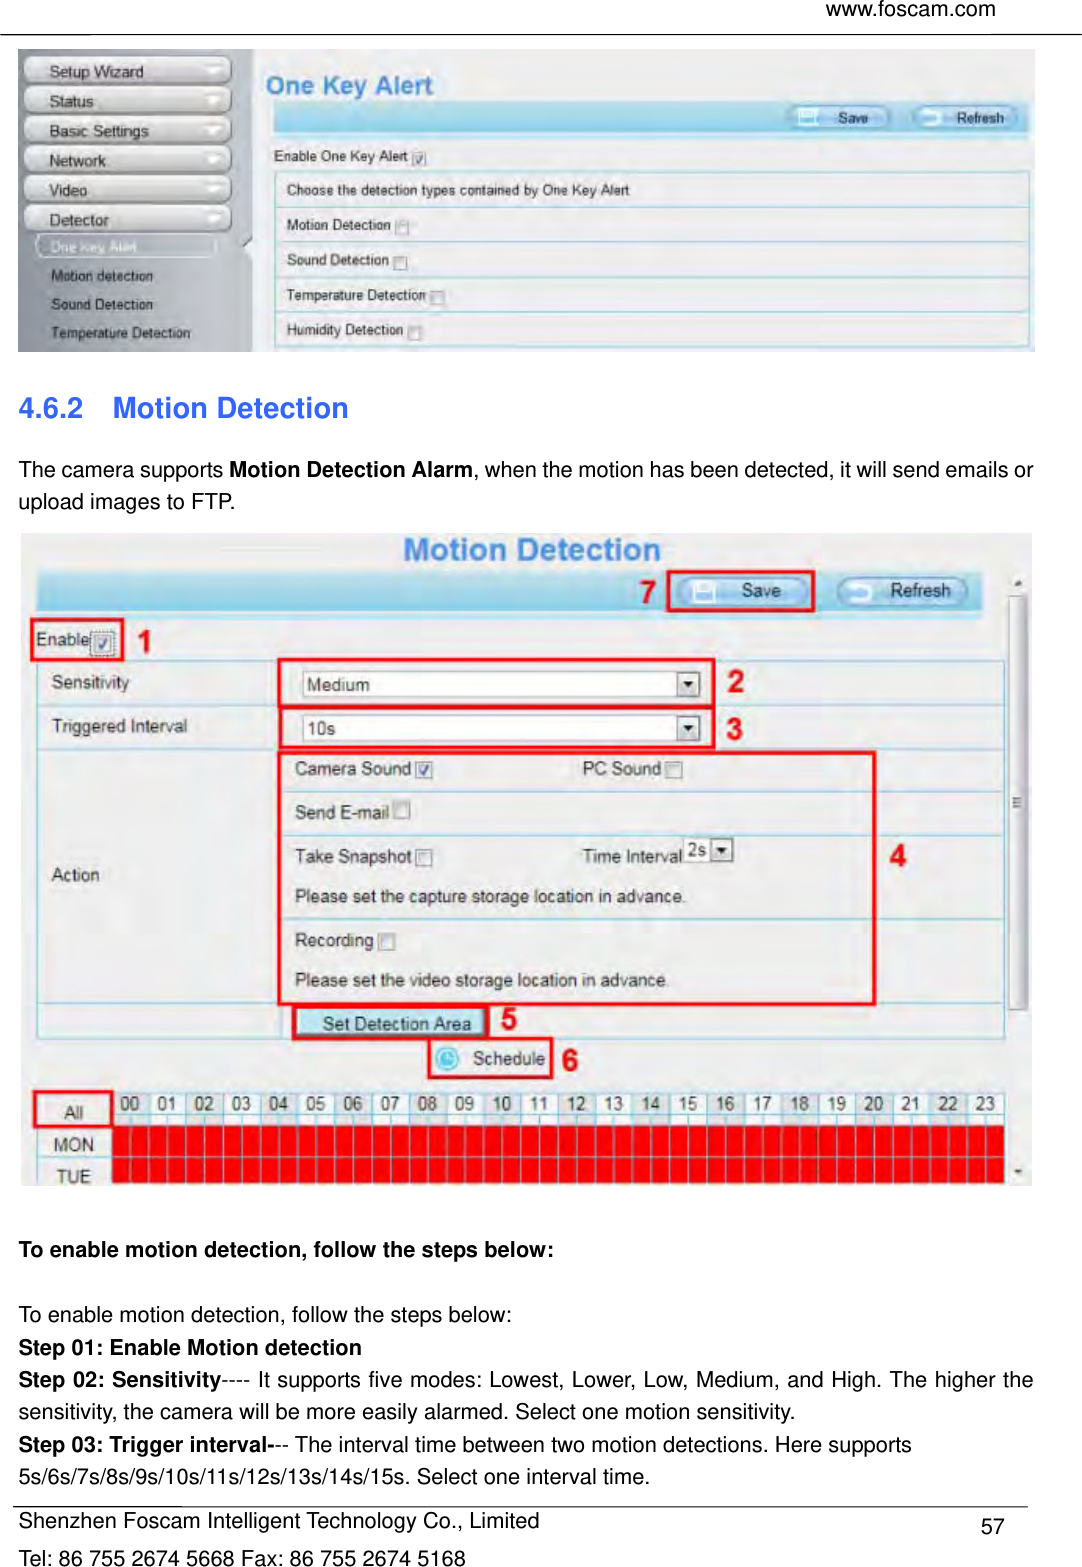
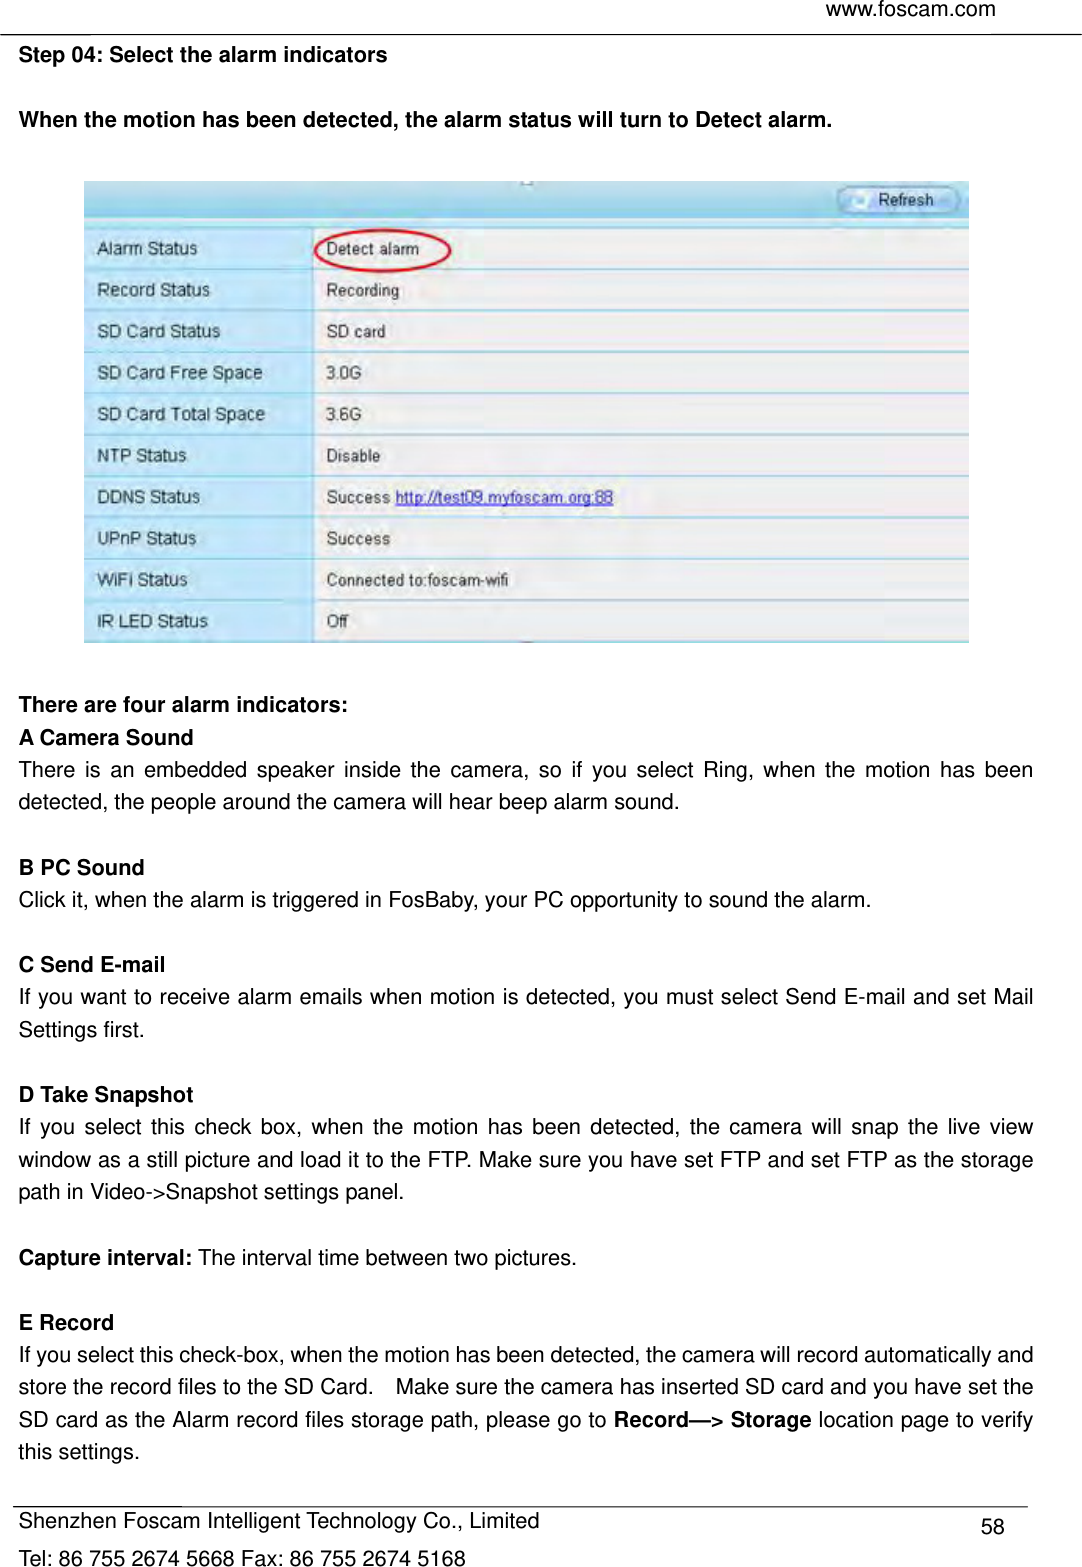
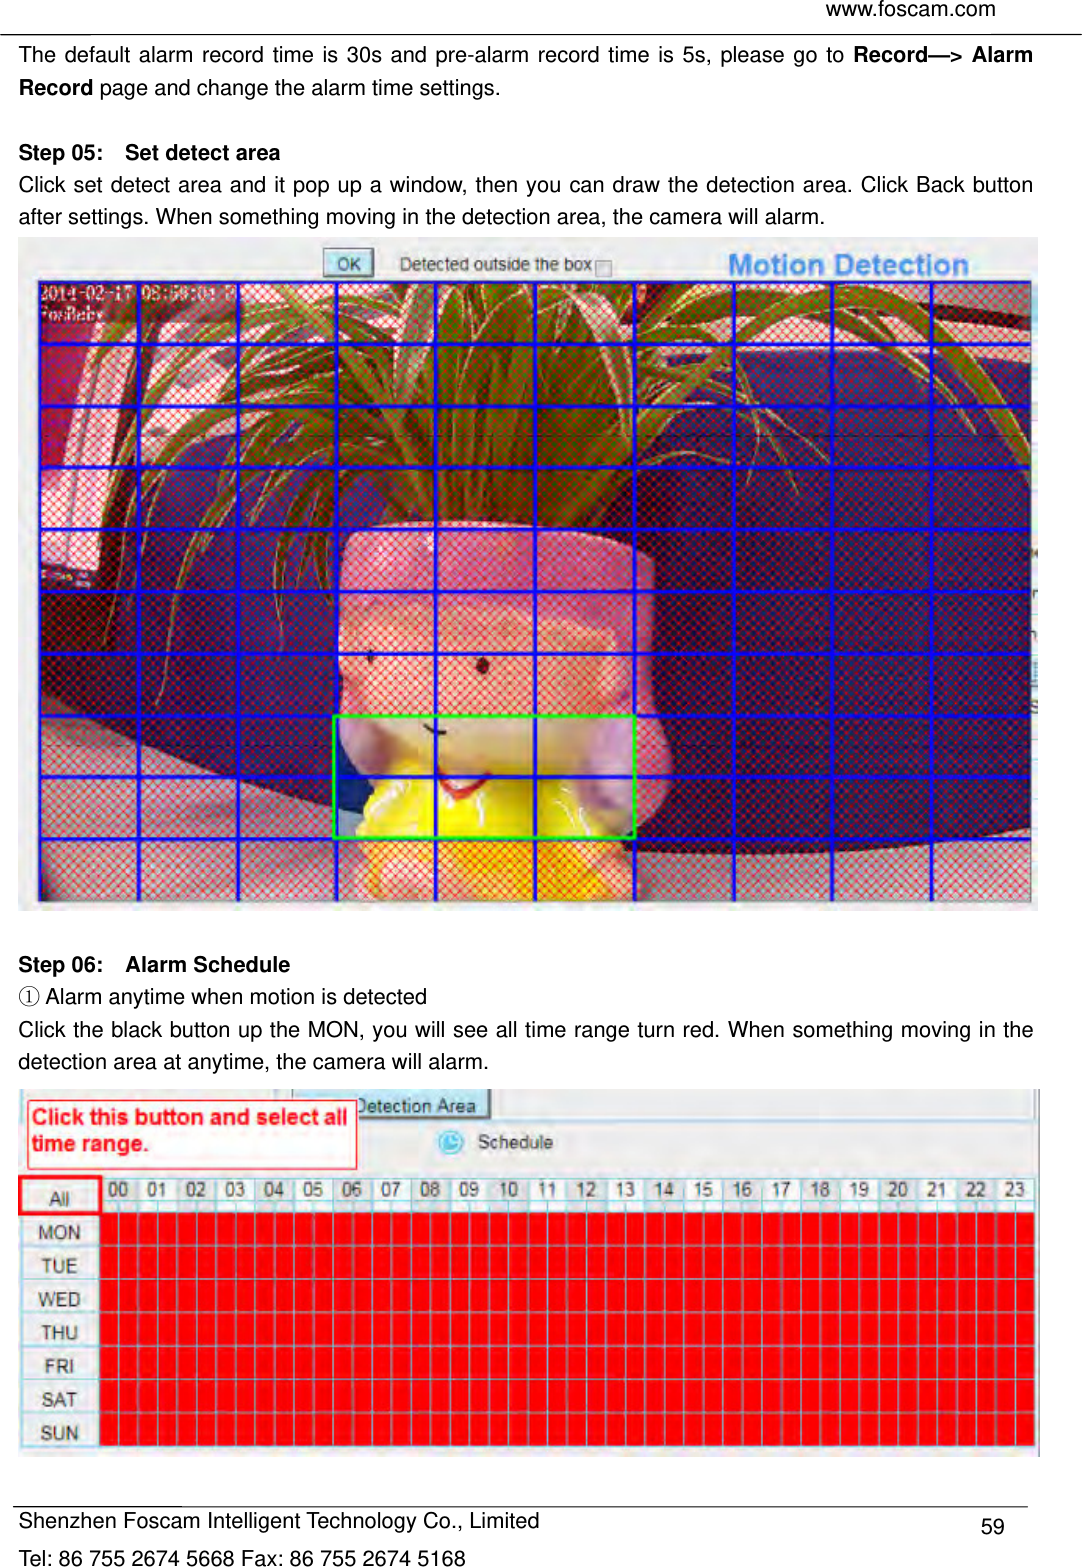
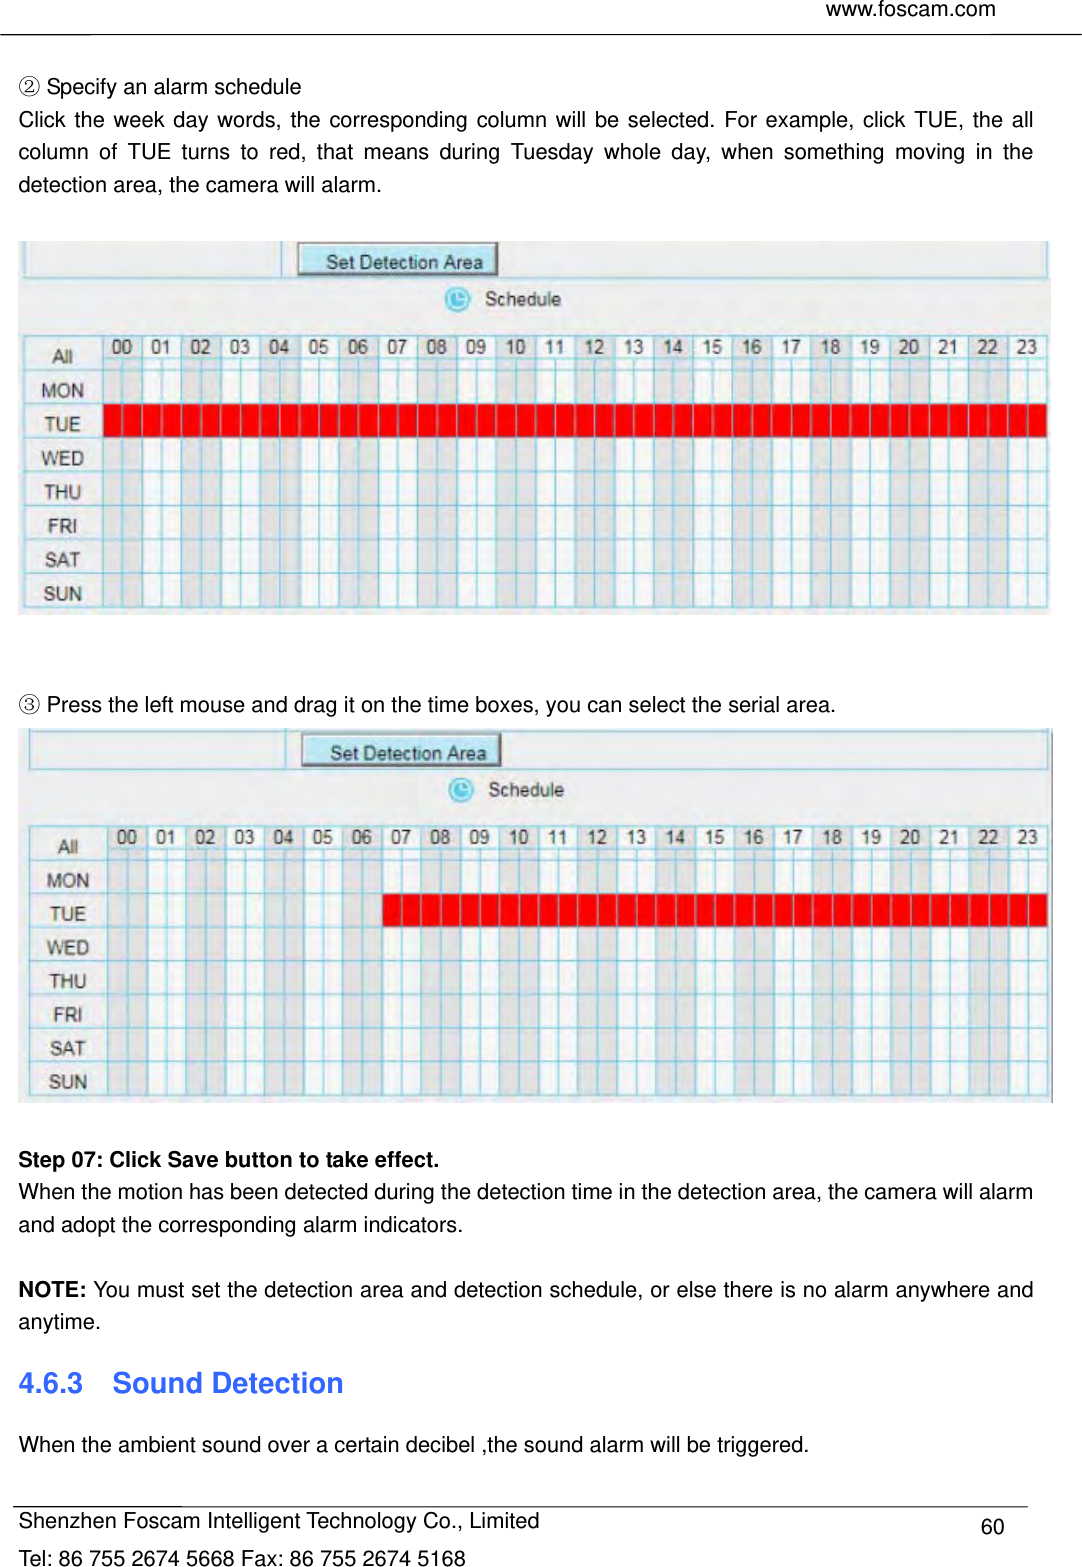
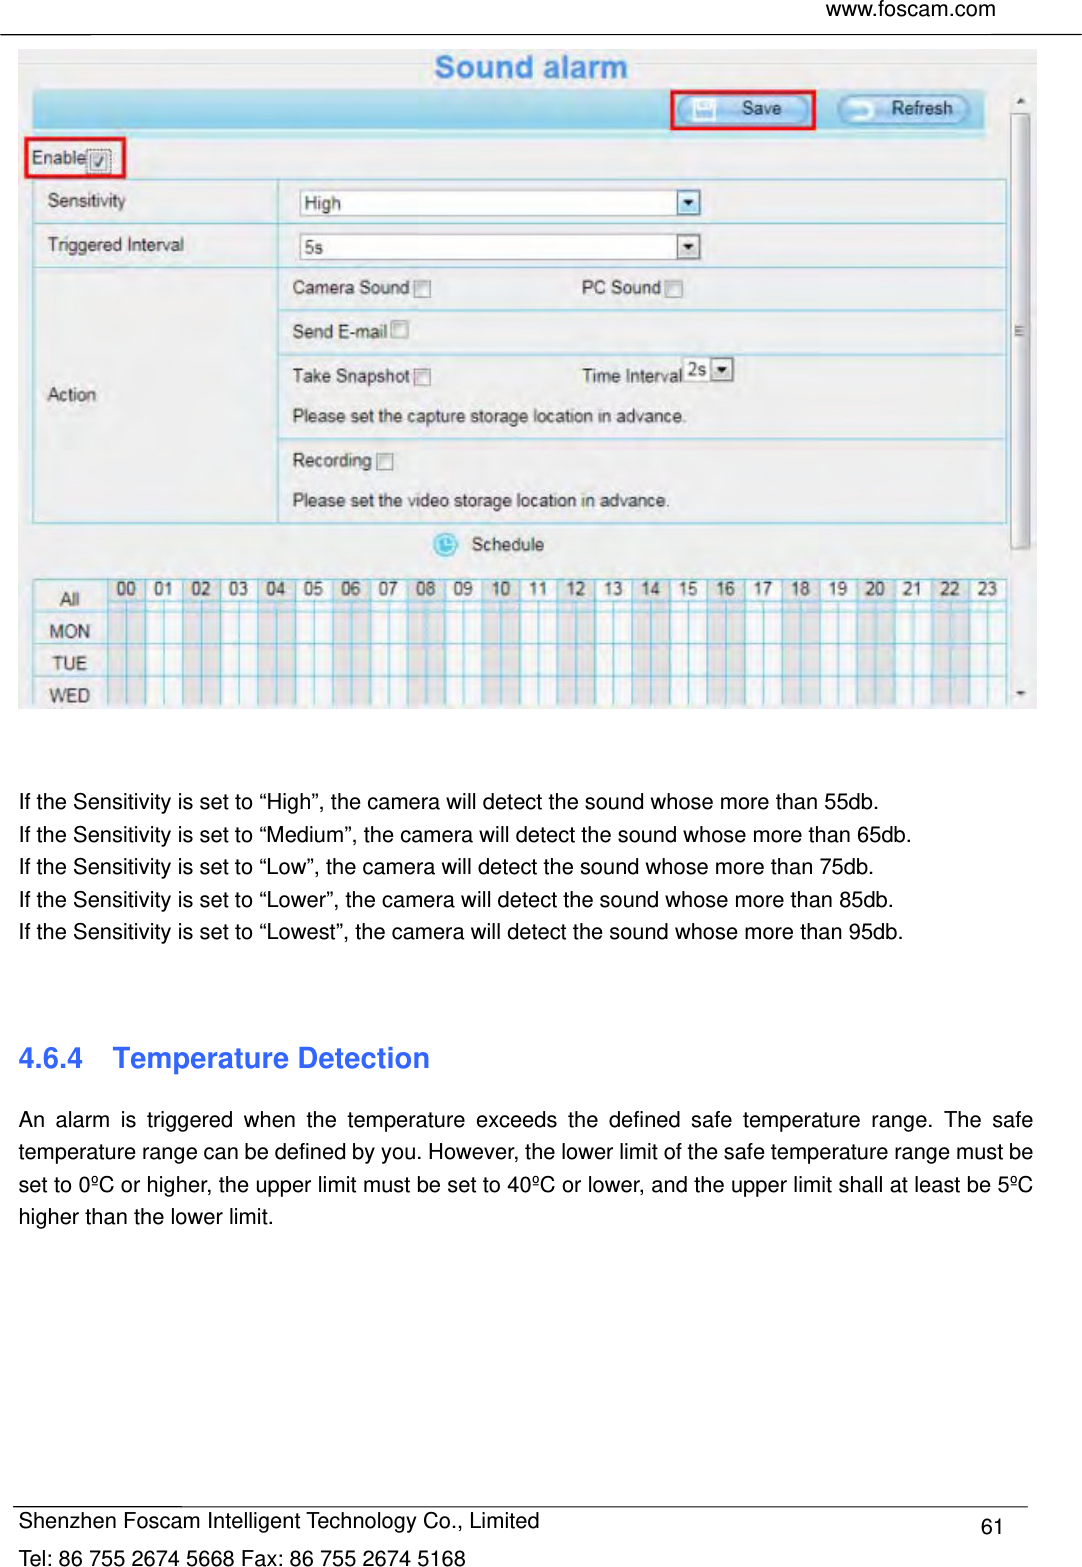
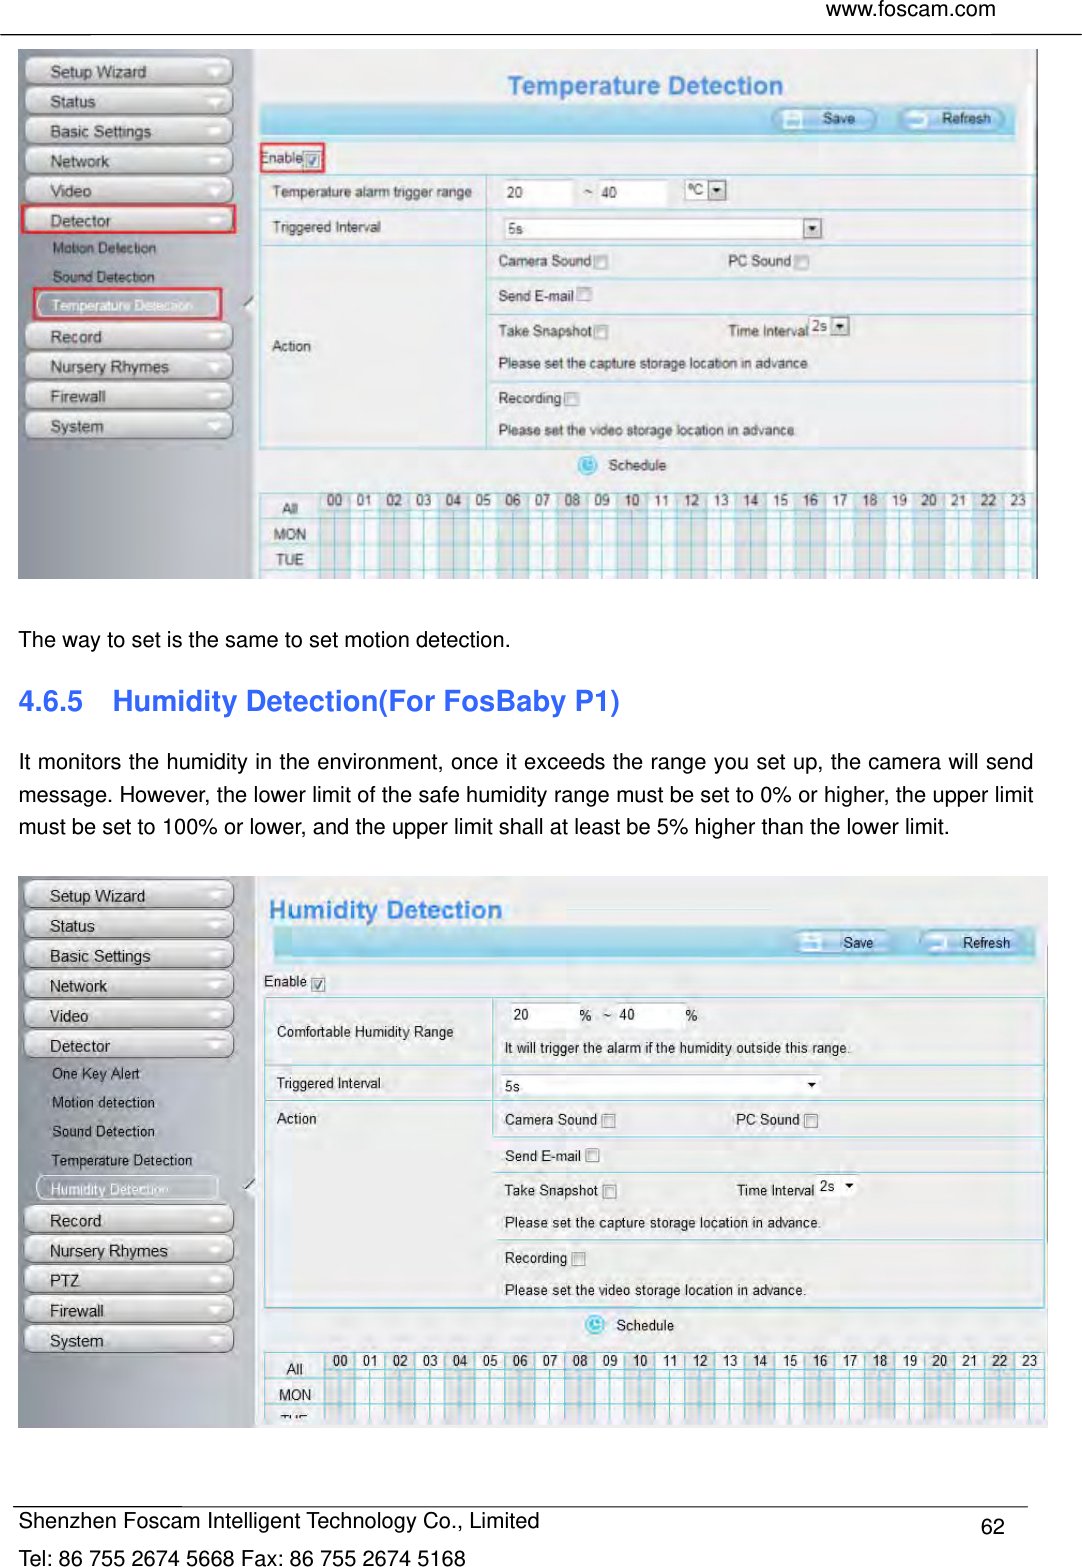
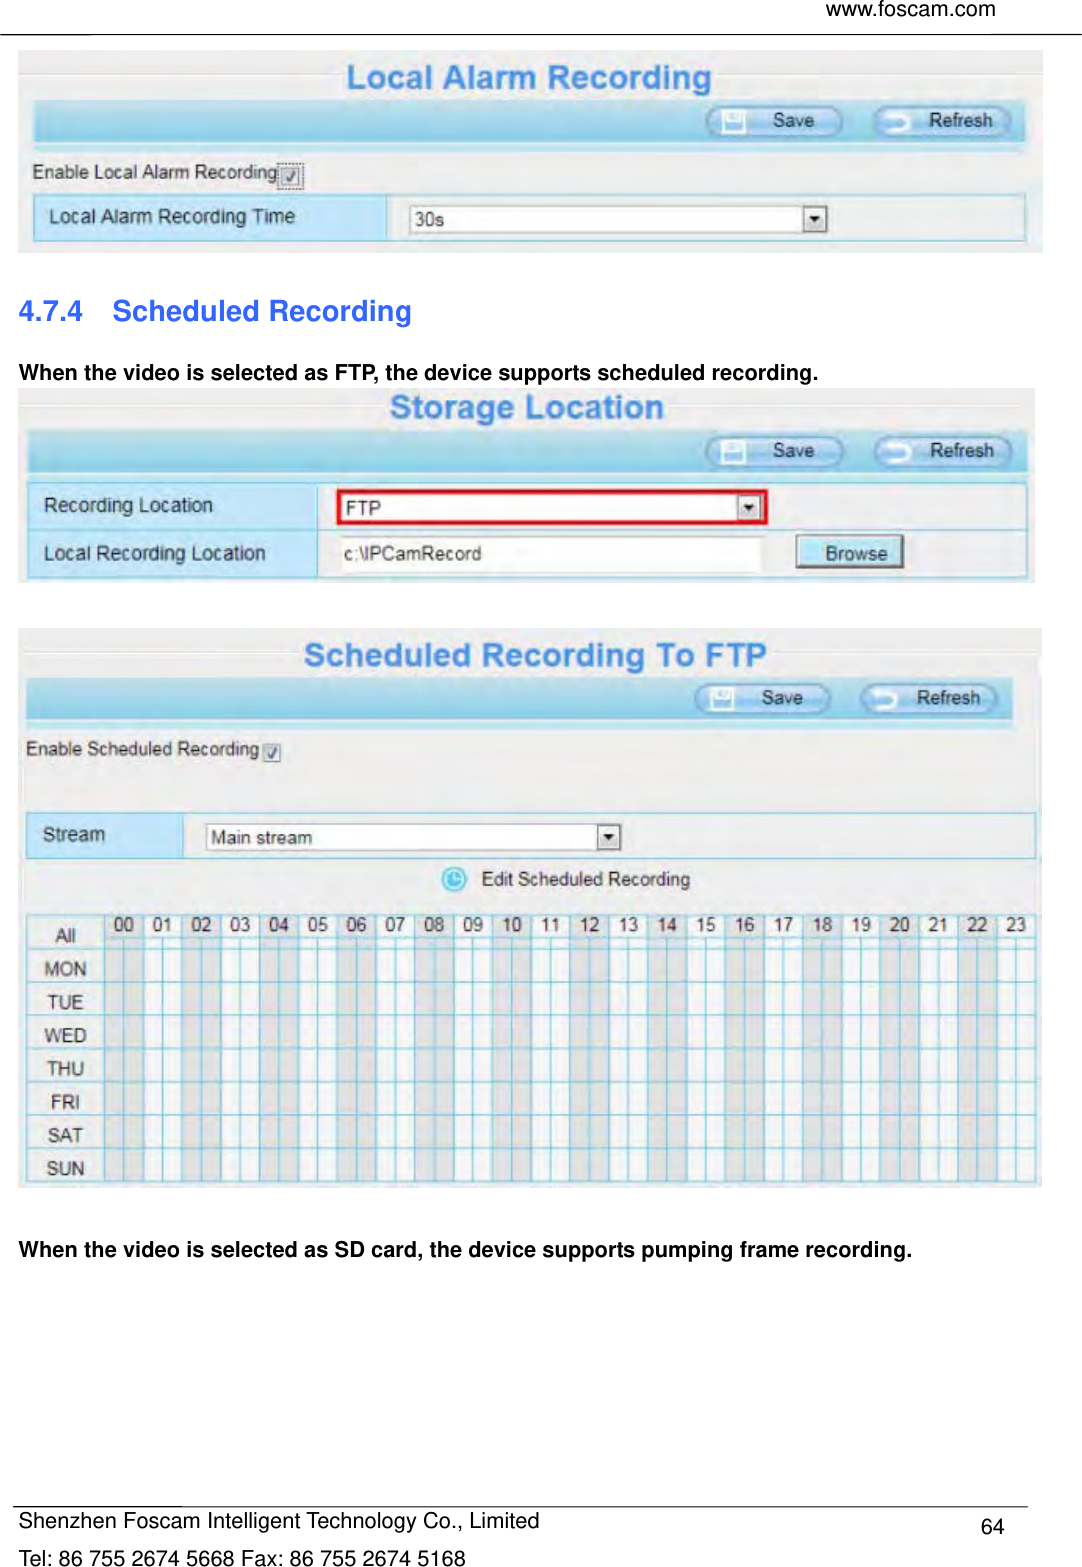
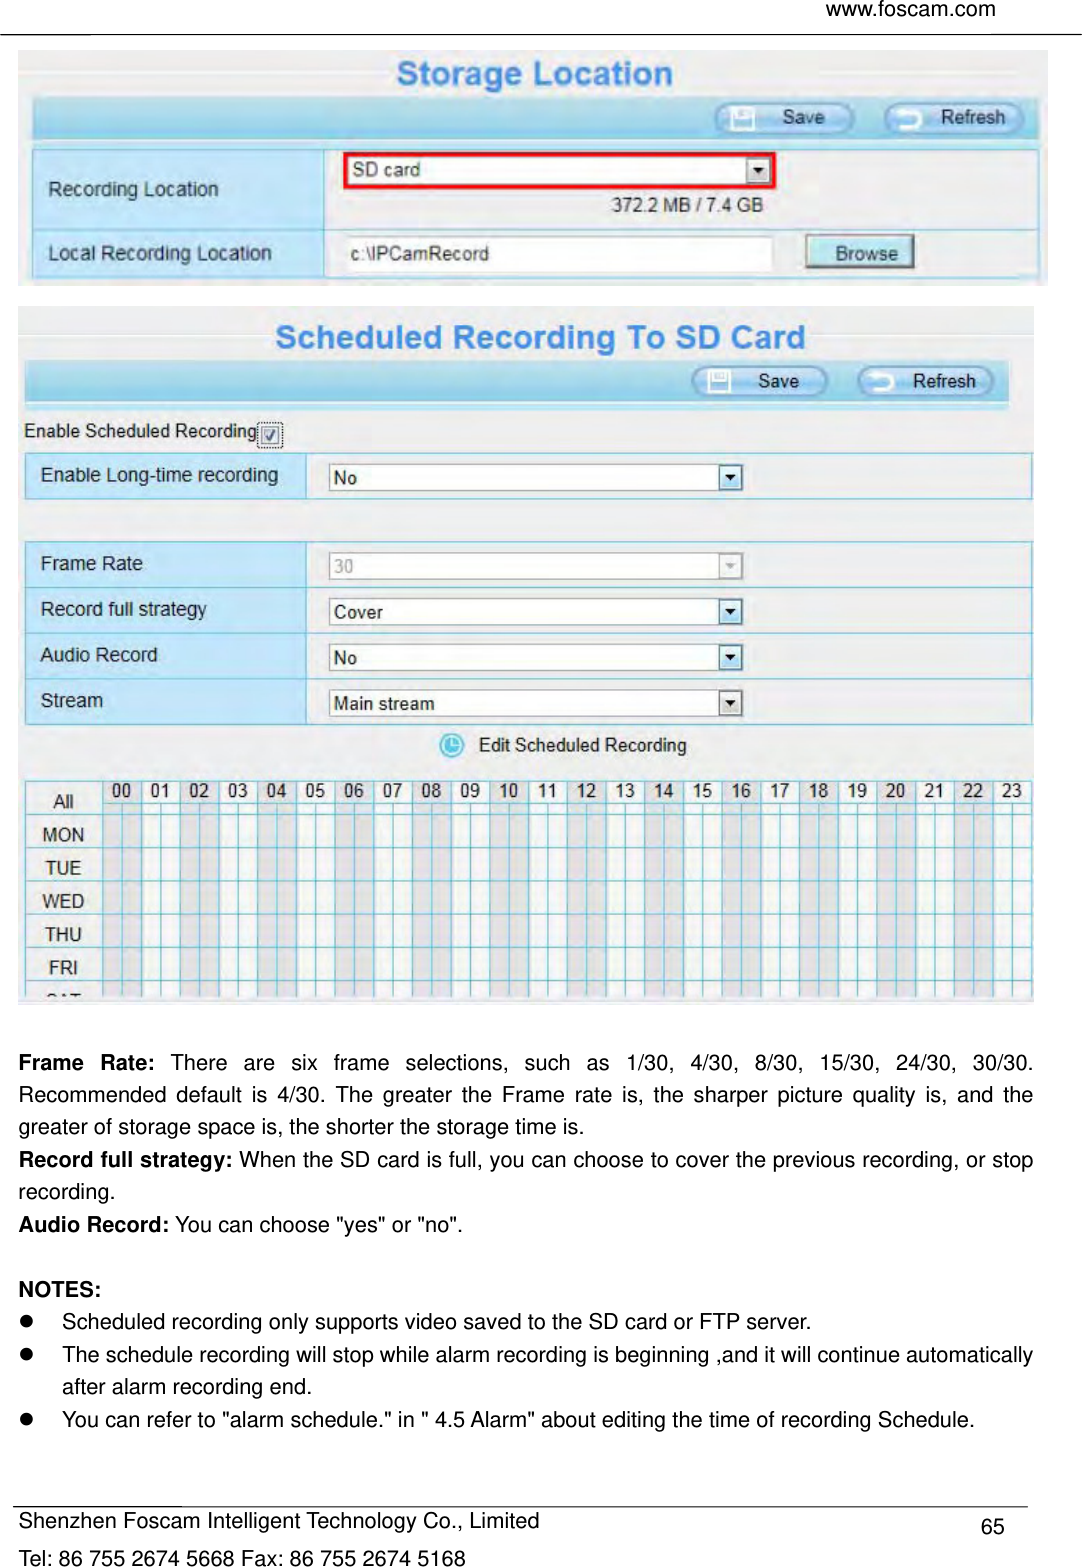
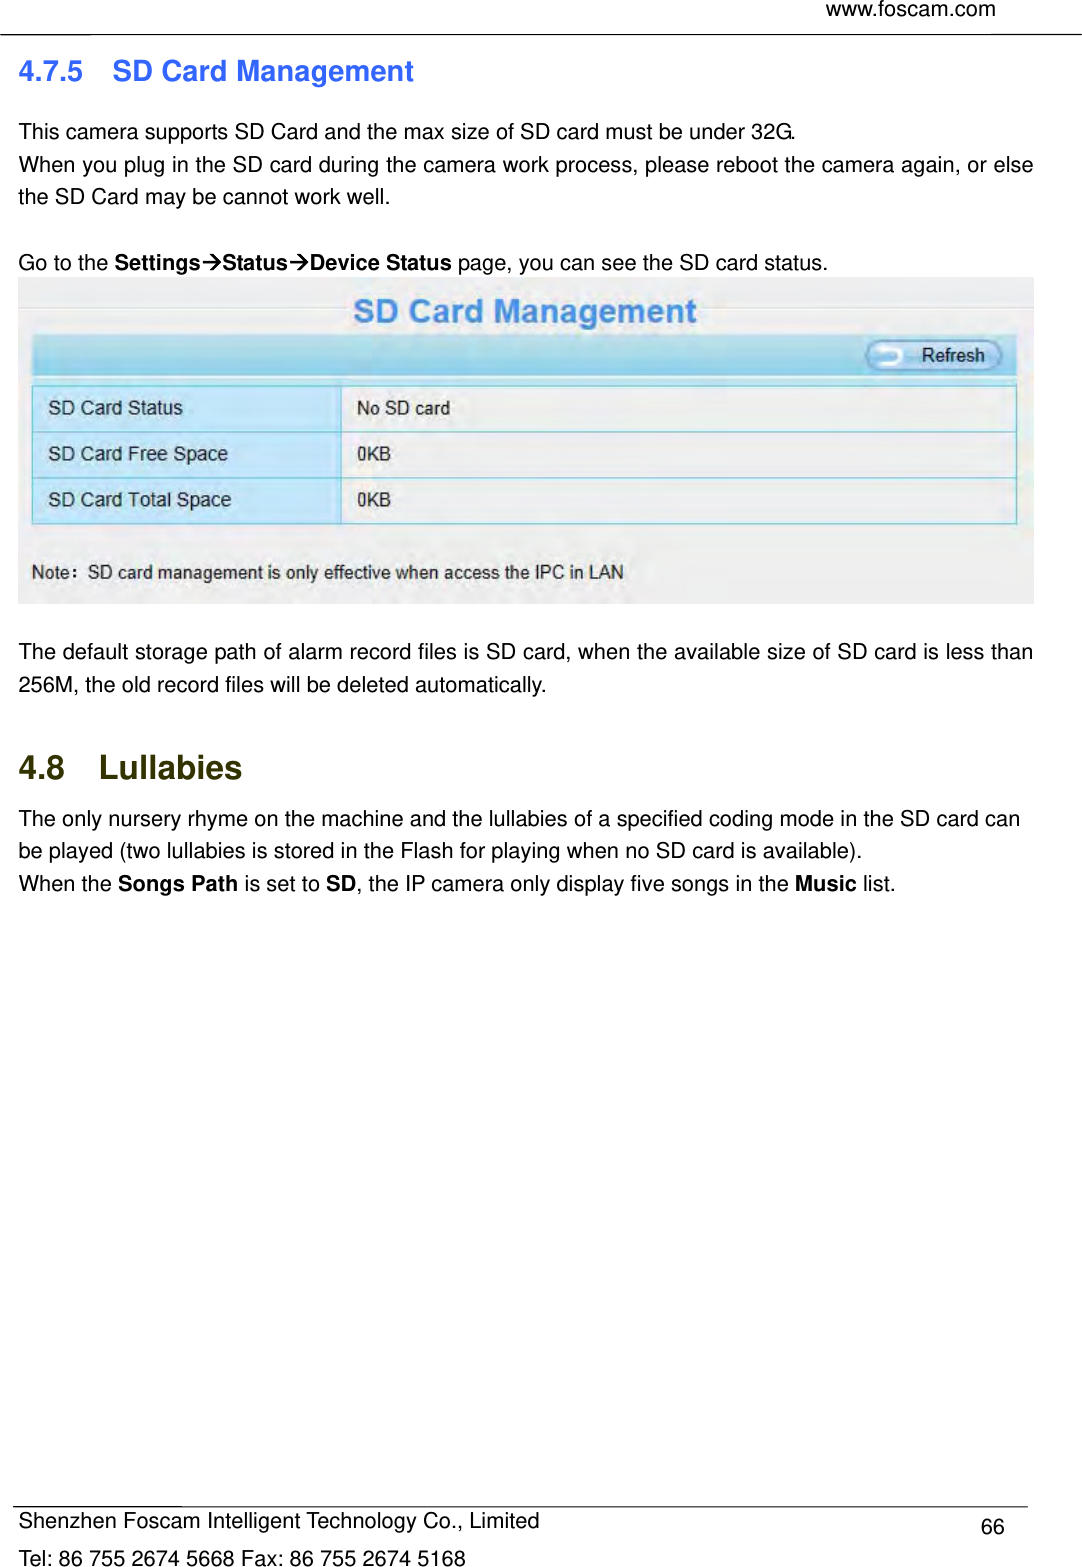
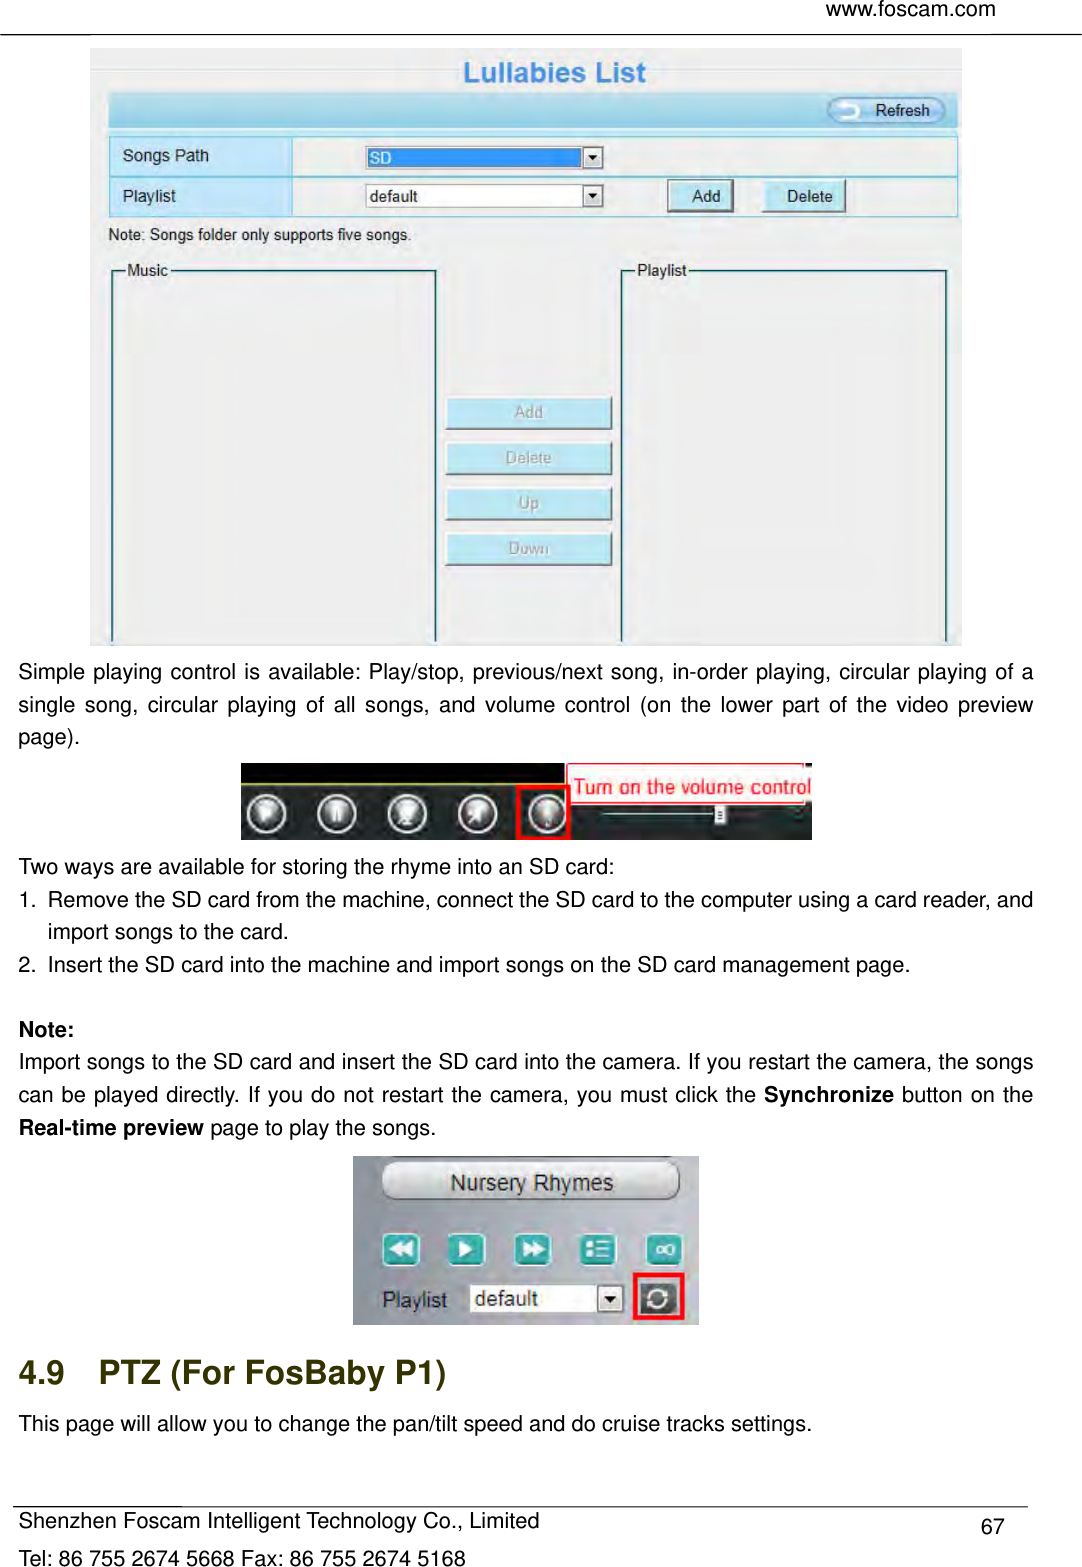
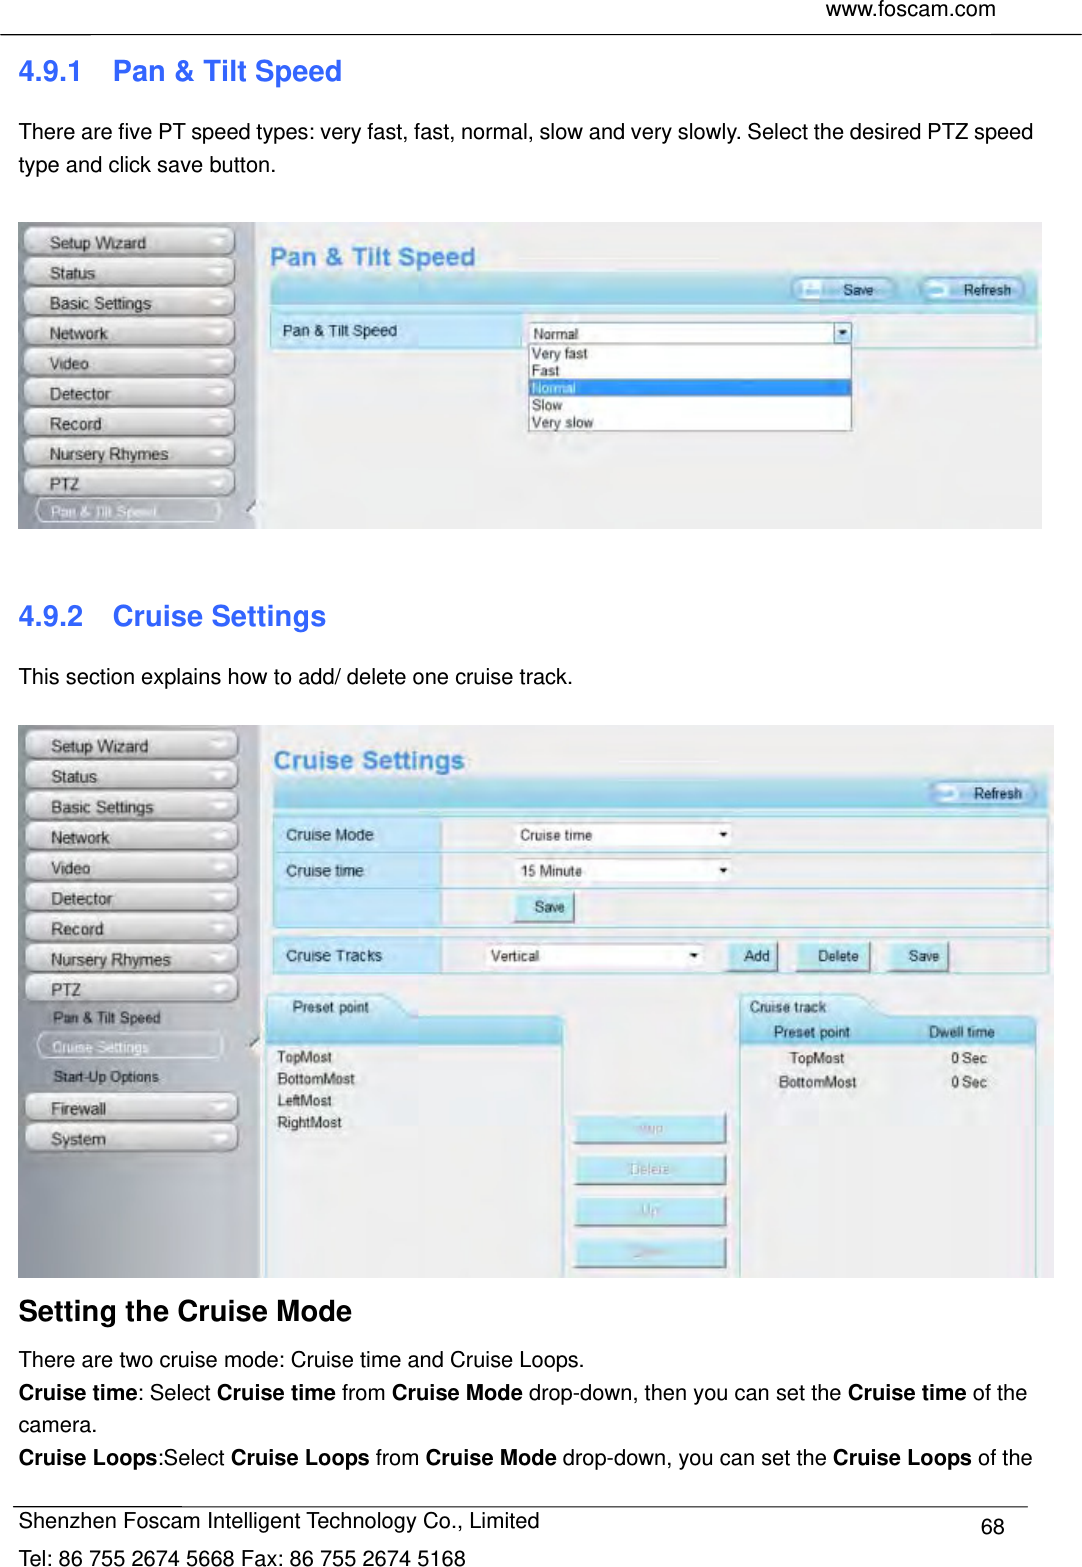
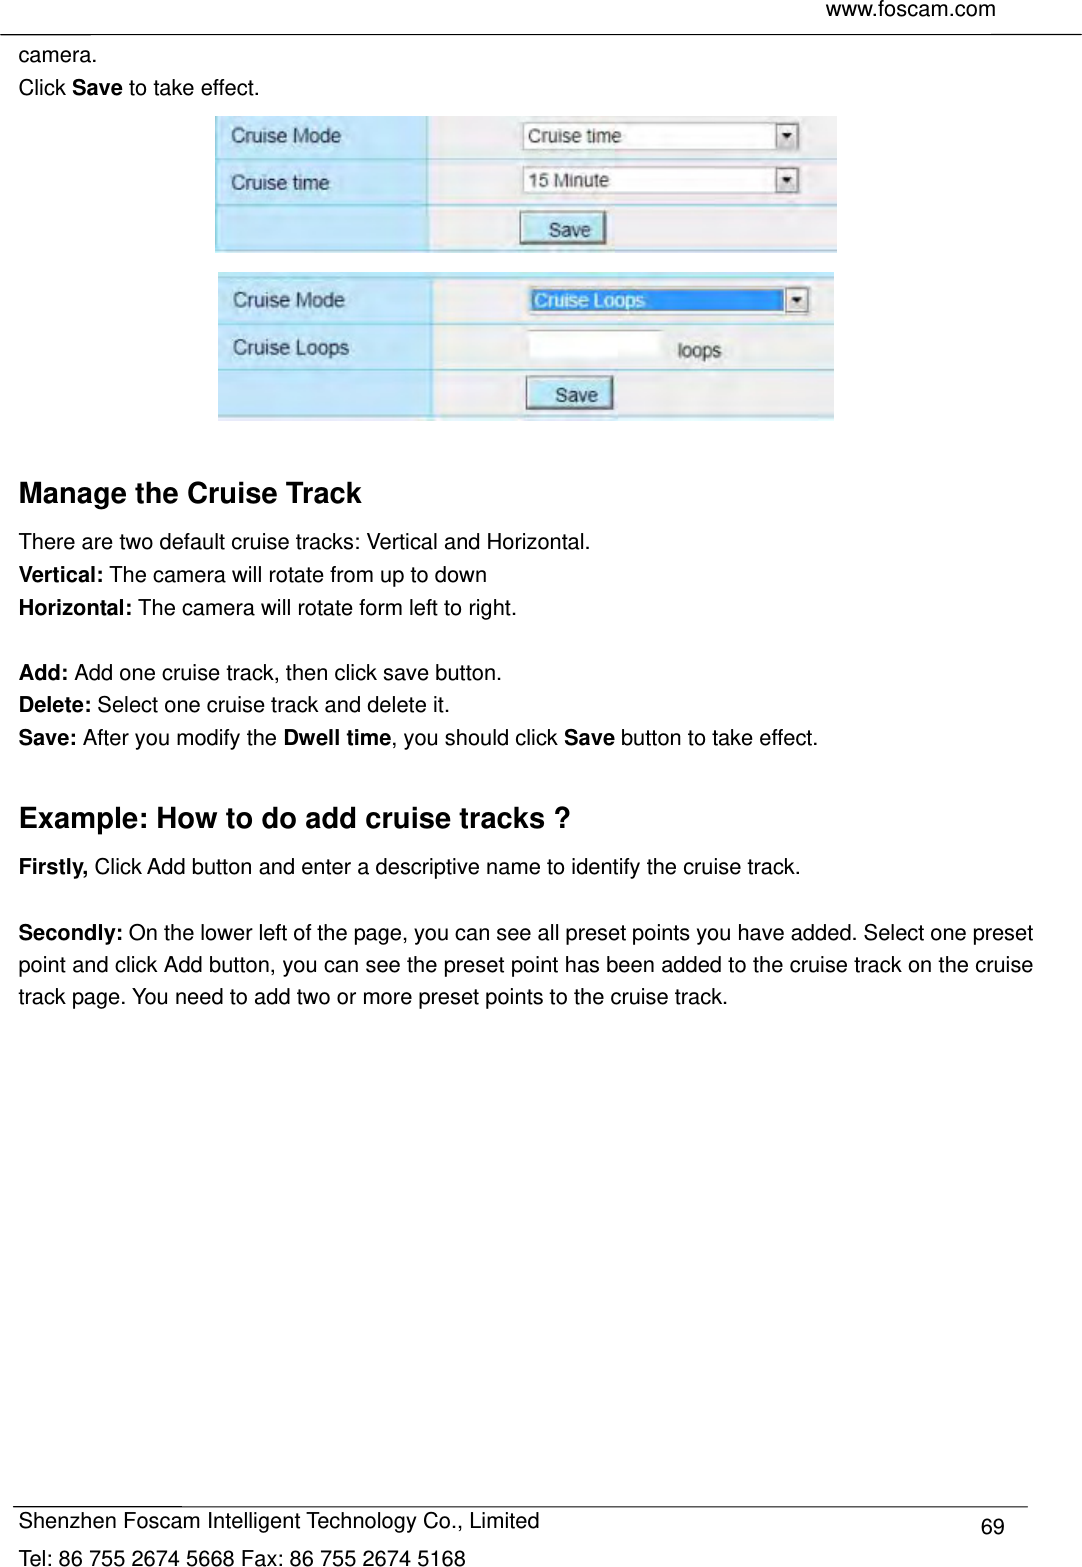
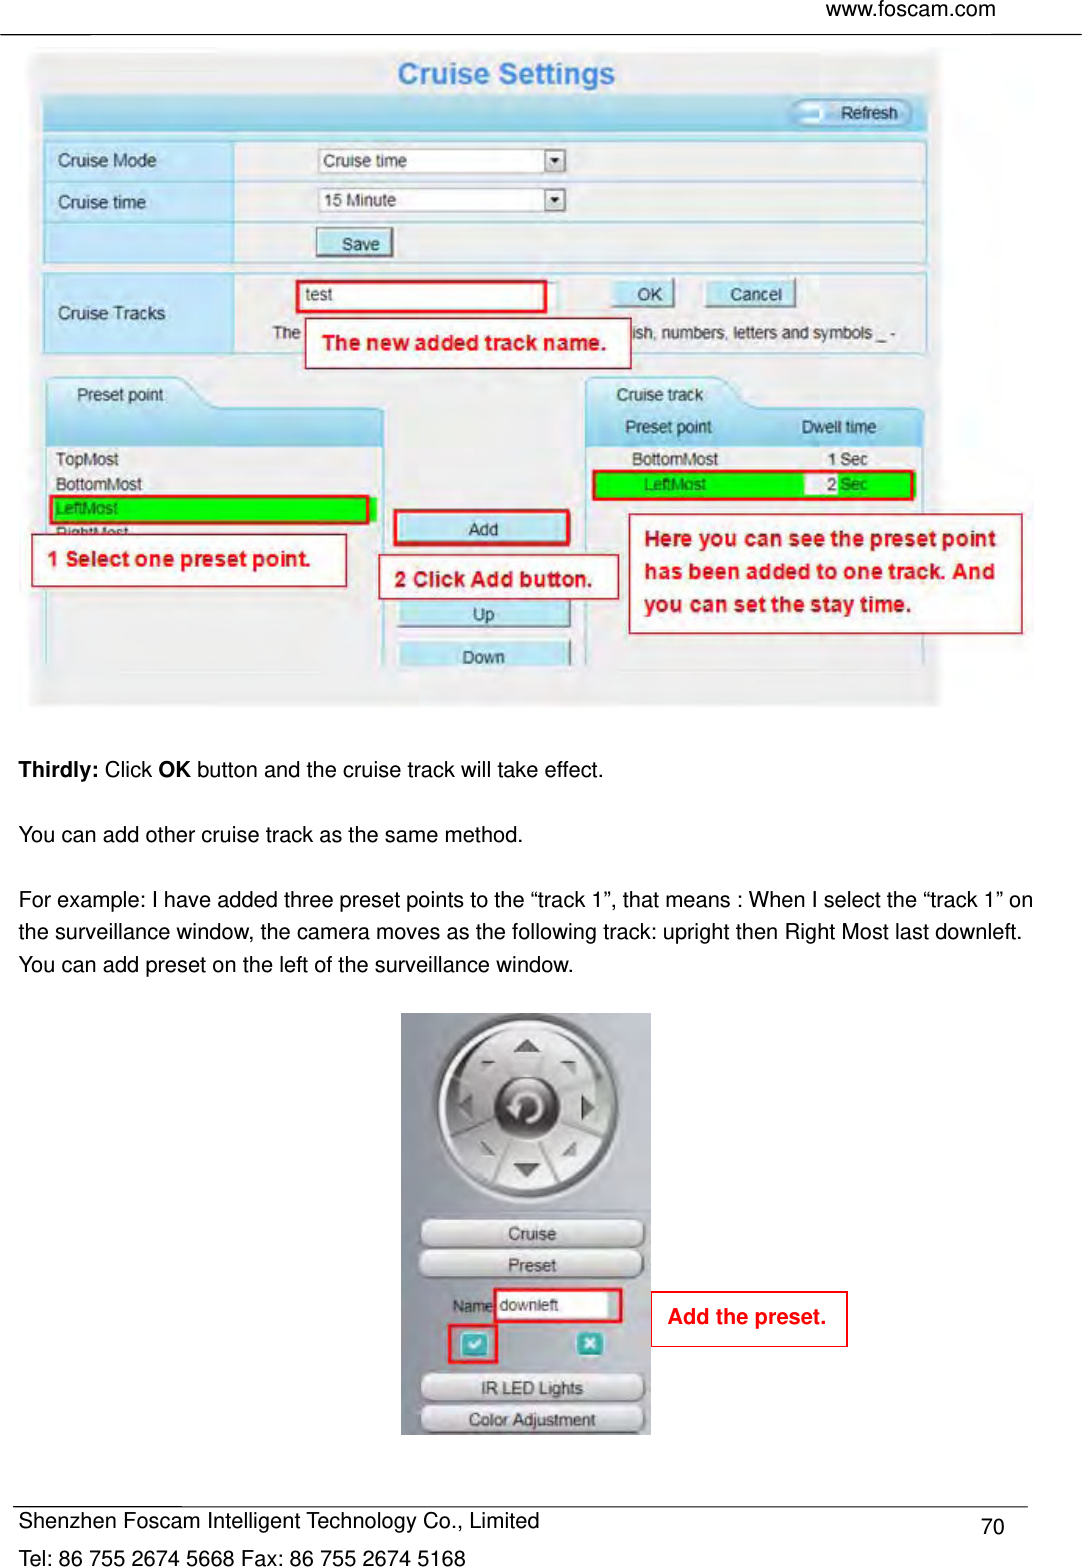
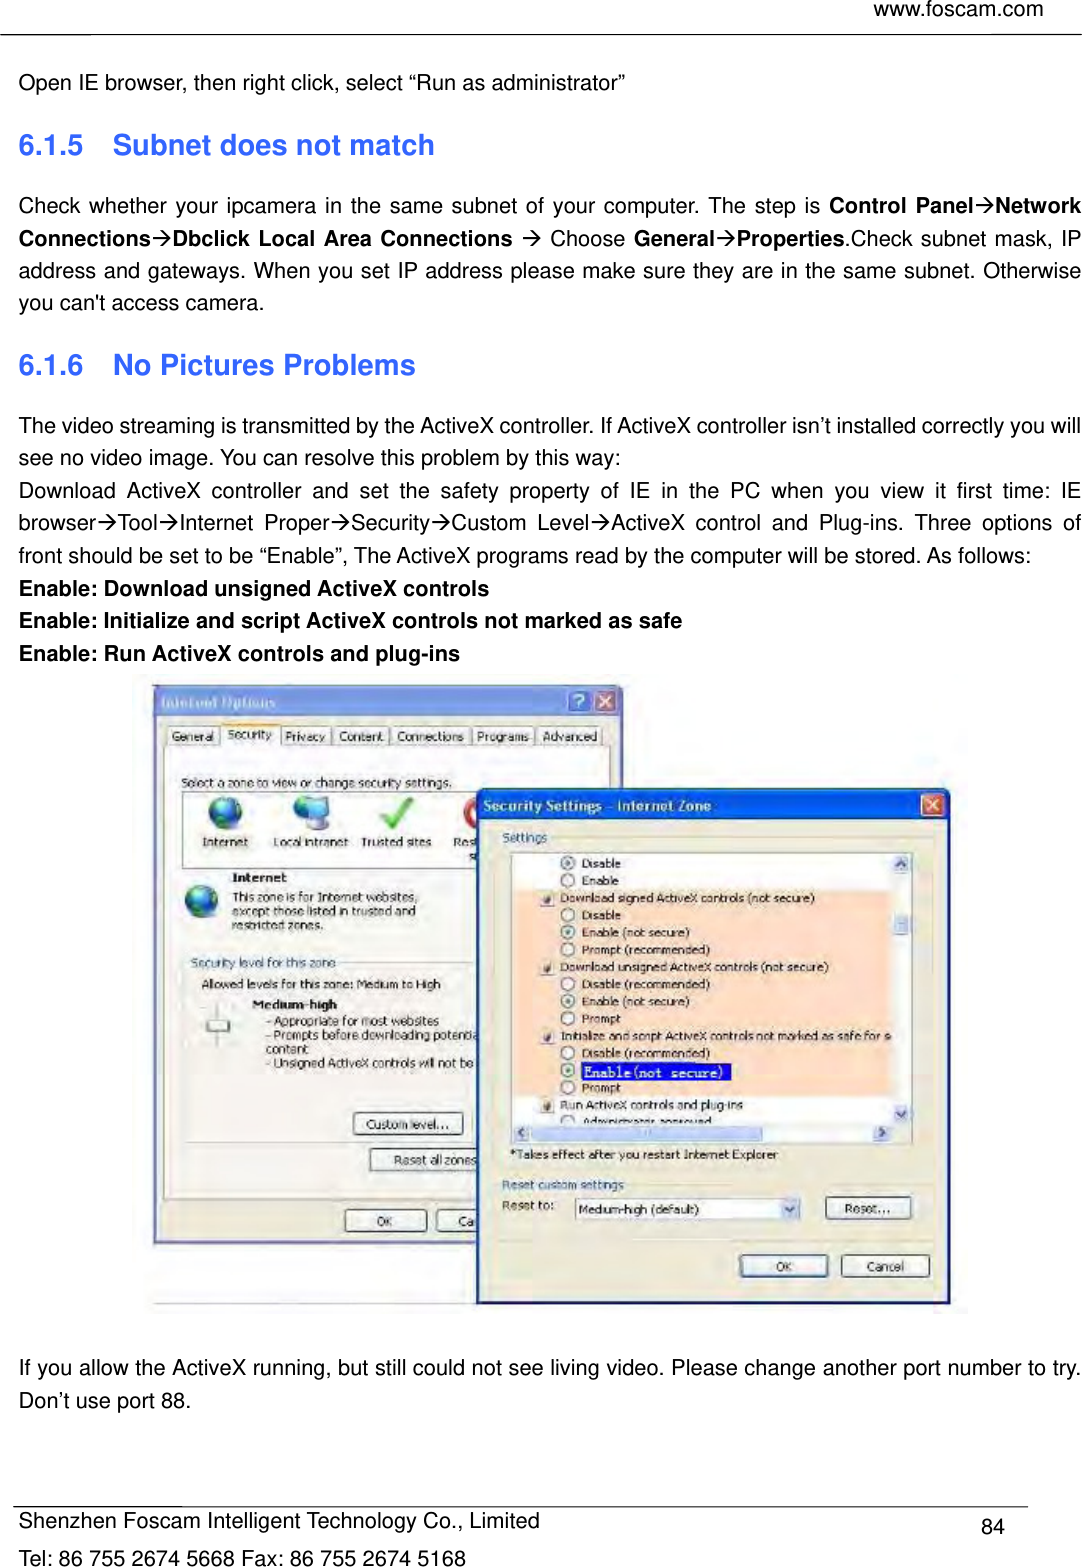
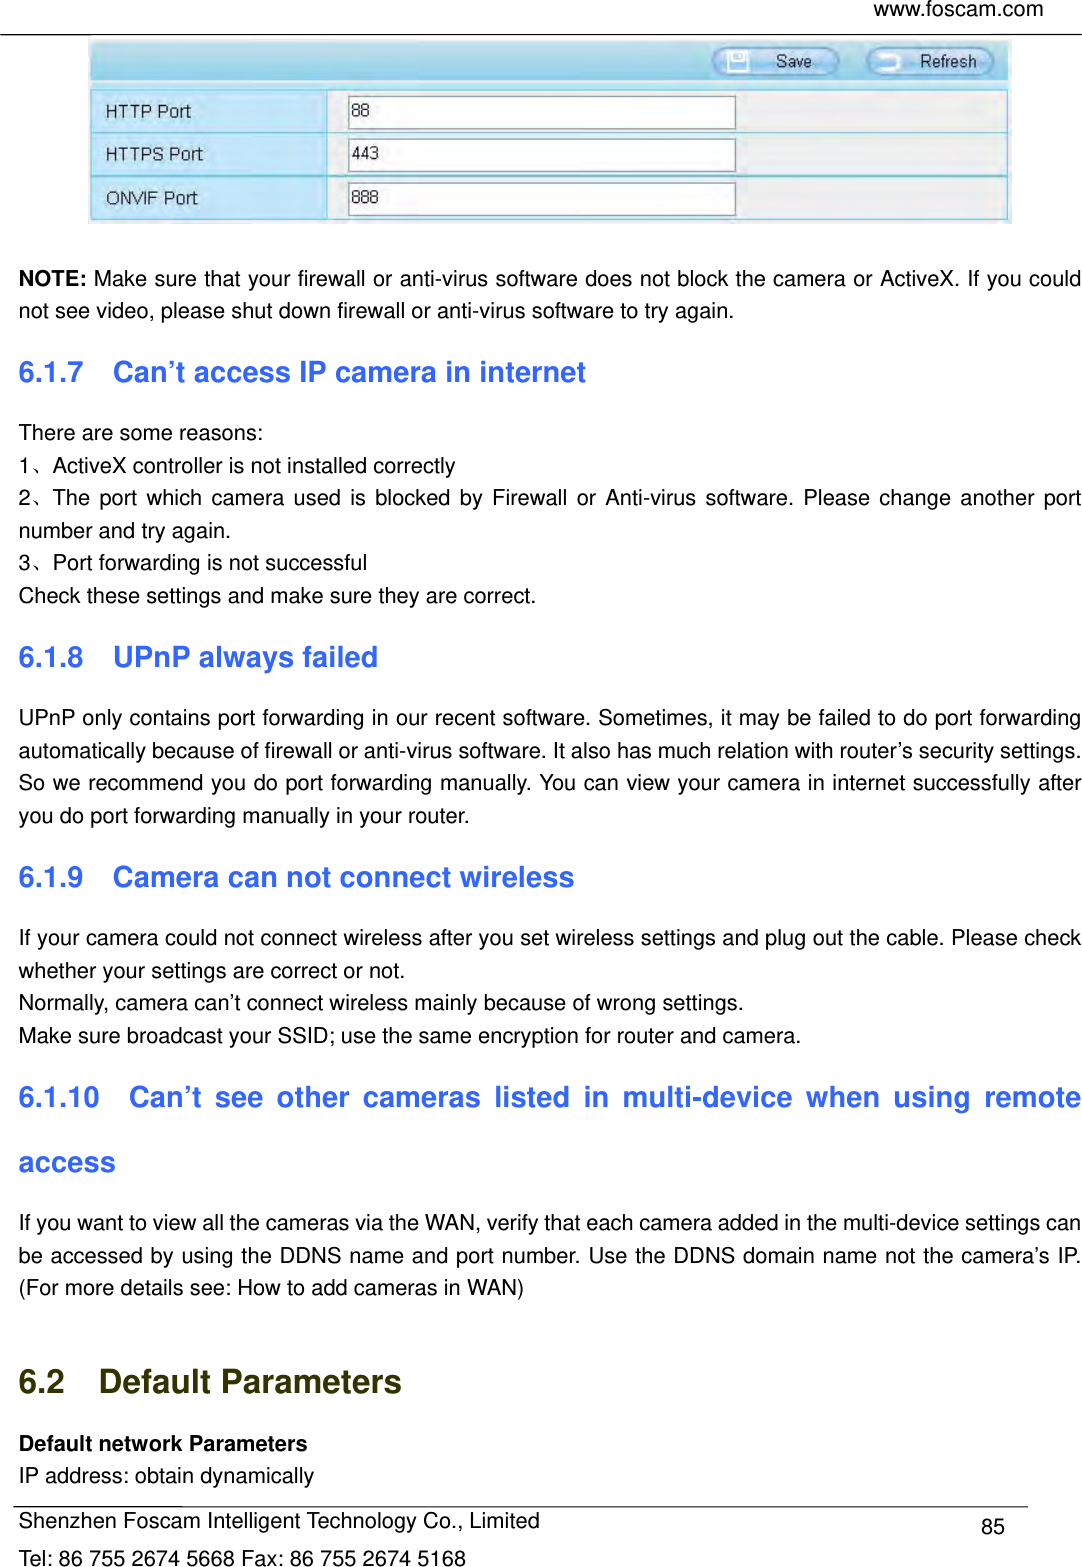
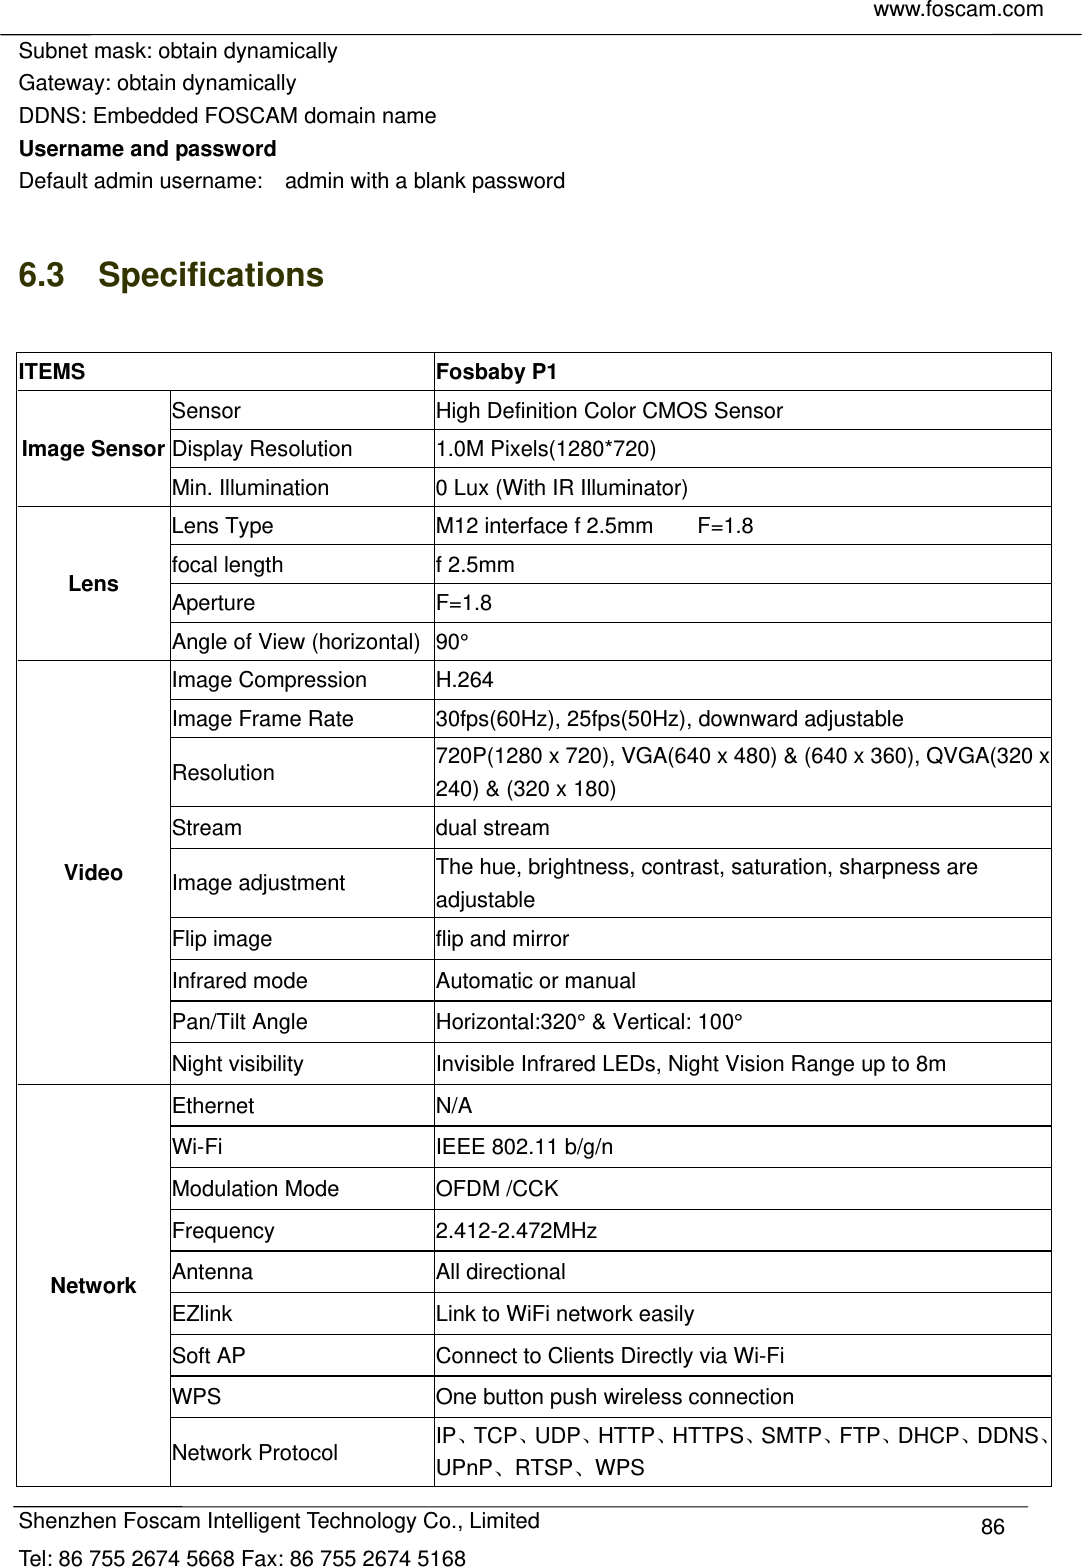
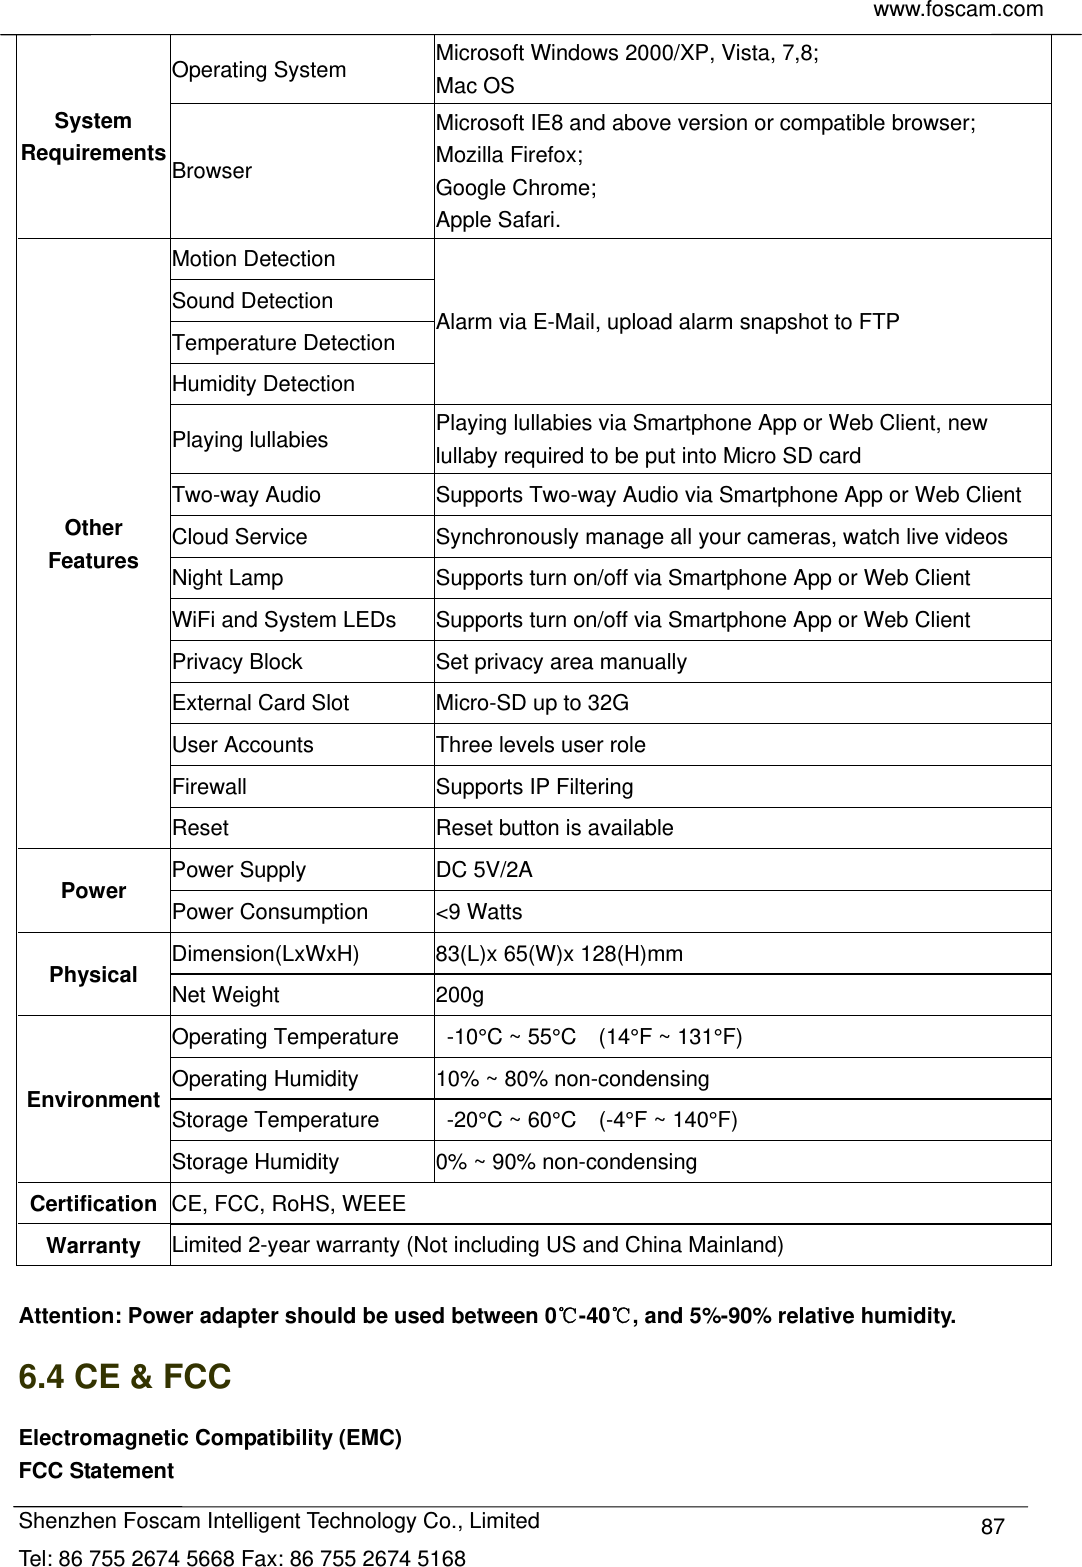
![www.foscam.com Shenzhen Foscam Intelligent Technology Co., Limited Tel: 86 755 2674 5668 Fax: 86 755 2674 5168 14 5. Now you can access your IP camera by https://domain name: HTTPS port via the Internet. 2.3 Using the VLC player The camera supports RTSP streaming, here you can view the camera by VLC player. RTSP URL rtsp:// [user name][:password]@IP:HTTP port number/videostream The part in the square brackets can be omitted. user name & password: The user name and password to access the camera. This part can be omitted. IP: WAN or LAN IP address. Video stream: Three modes are supported: video Main, video Sub and audio. Video Sub is a better choice in bad network condition. If you select audio, you can only hear sound without seeing picture. For example: IP: 192.168.1.11 HTTP Port number: 88 User name: admin Password: 123](https://usermanual.wiki/ShenZhen-Foscam-Intelligent-Technology/FOSBABYP1/User-Guide-2483379-Page-16.png)