Skylink Technologies ATOMS Residential Garage Door Opener User Manual MY5ATOMS UserMan R1
Skylink Technologies Inc Residential Garage Door Opener MY5ATOMS UserMan R1
UserManual.wiki
>
Skylink Technologies
>
ATOMS User Manual
MY5ATOMS UserMan R1
Navigation menu
Upload a User Manual
Namespaces
Wiki Guide
HTML
PDF
Info
Views
User Manual
Discussion / Help
Navigation
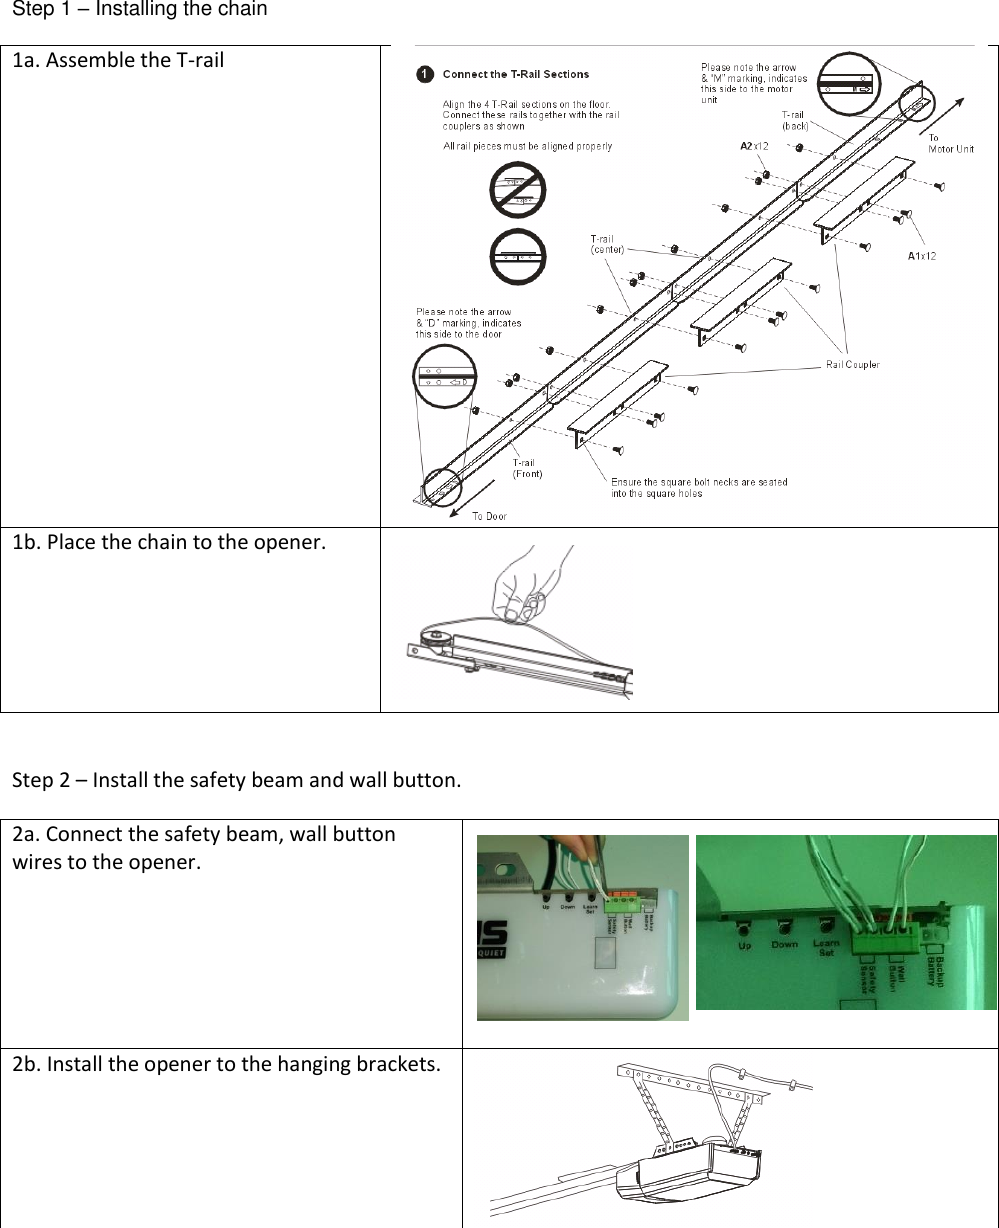
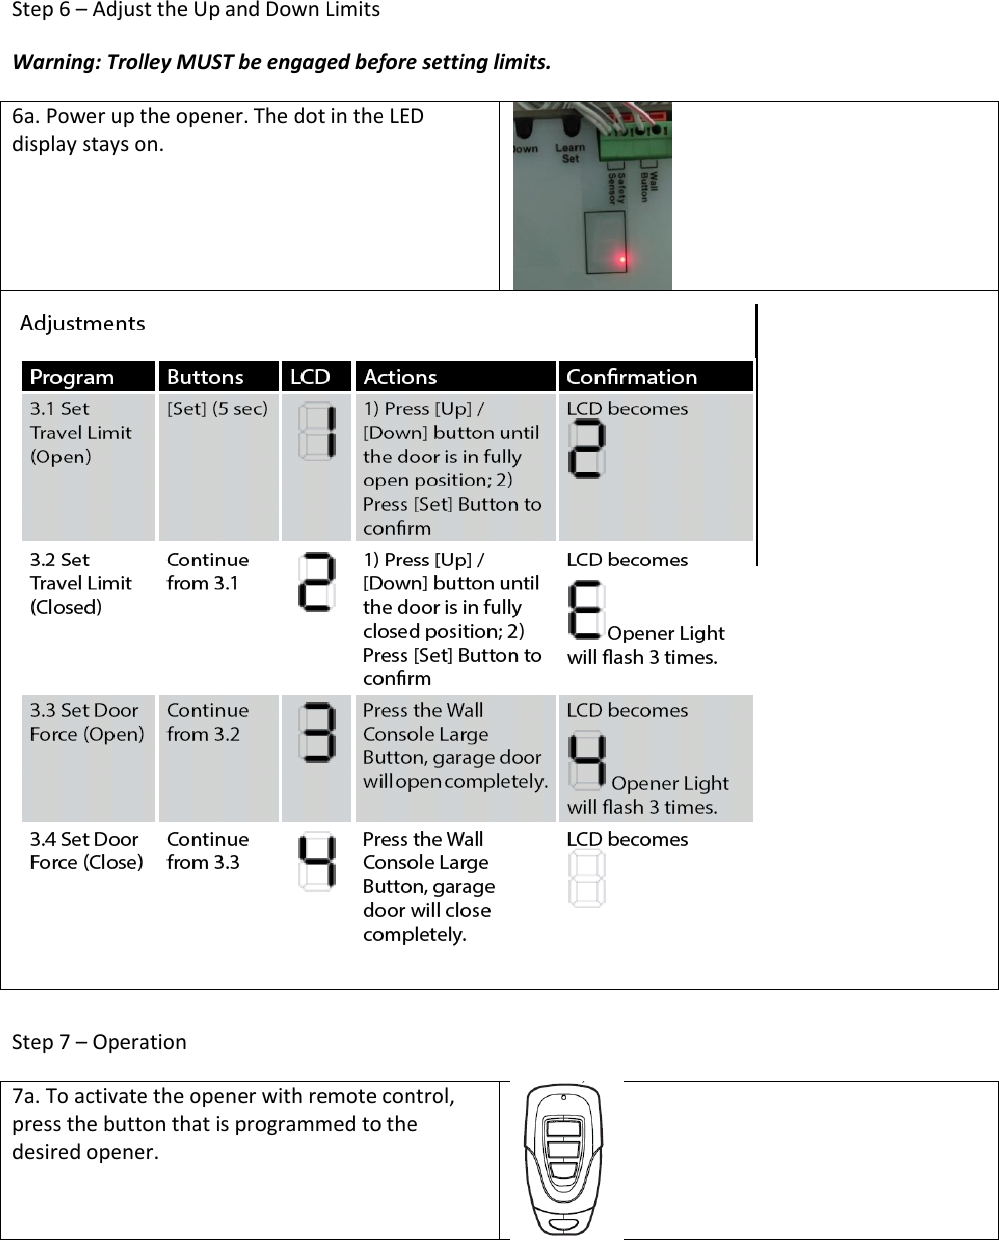
![Step 3 – Indication 3a. When power up the opener. The dot in the LED display stays on. 3b. When power up the opener. The red LED on the Wall Button stays on. 3c. When power up the opener. The red and green LEDs on the Safety Beam Sensors stays on once aligned properly. Step 4 – Programming the Remote Control 4a. Press and hold the [Set] button in the opener for 1 second, the LED shown [P] segments. 4b. Press the button on the remote. 4c. Once the button on the remote is programmed. The LED segment will off and emits one beep indicating the programming successfully. Step 5 – Erase all the Remote Control from opener Note: To erase any unwanted remote control, first erase all remotes. 5a. Press the [Set] button for 15 seconds, when the opener emits 4 beeps, release the Learn/Set button. The LED display shows “E”. 5b. Press the [Set] button again to erase all the programmed remotes. 5c. The LED segment will off indicating the erasing successfully.](https://usermanual.wiki/Skylink-Technologies/ATOMS/User-Guide-2826805-Page-3.png)