SofaWare Technologies SBX-166LHGE-5 Safe@Office/VPN-1 Edge User Manual Part 2
SofaWare Technologies Ltd. Safe@Office/VPN-1 Edge Users Manual Part 2
UserManual.wiki
>
SofaWare Technologies
>
SBX-166LHGE-5 User Manual
>
Users Manual Part 2
Contents
1.
Users Manual Part 1
2.
Users Manual Part 2
3.
Users Manual Part 3
Users Manual Part 2
Navigation menu
Upload a User Manual
Namespaces
Wiki Guide
HTML
PDF
Info
Views
User Manual
Discussion / Help
Navigation
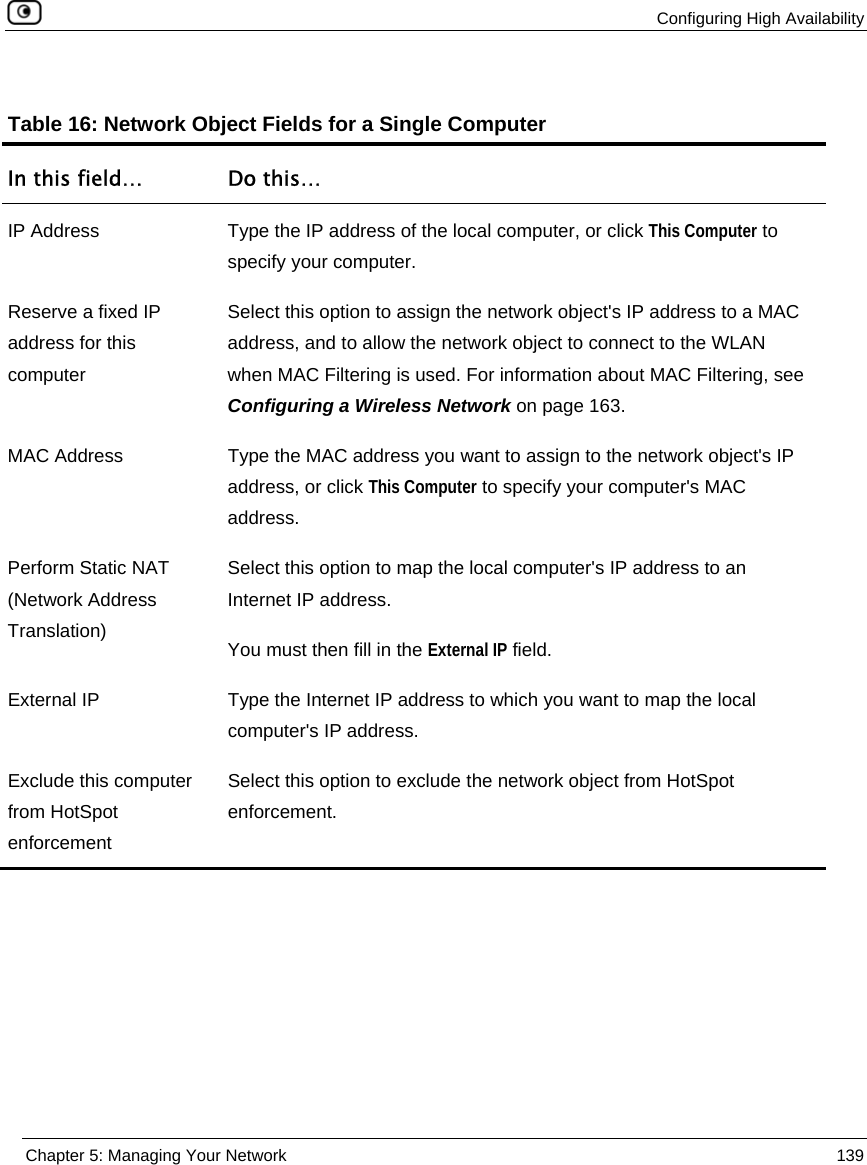
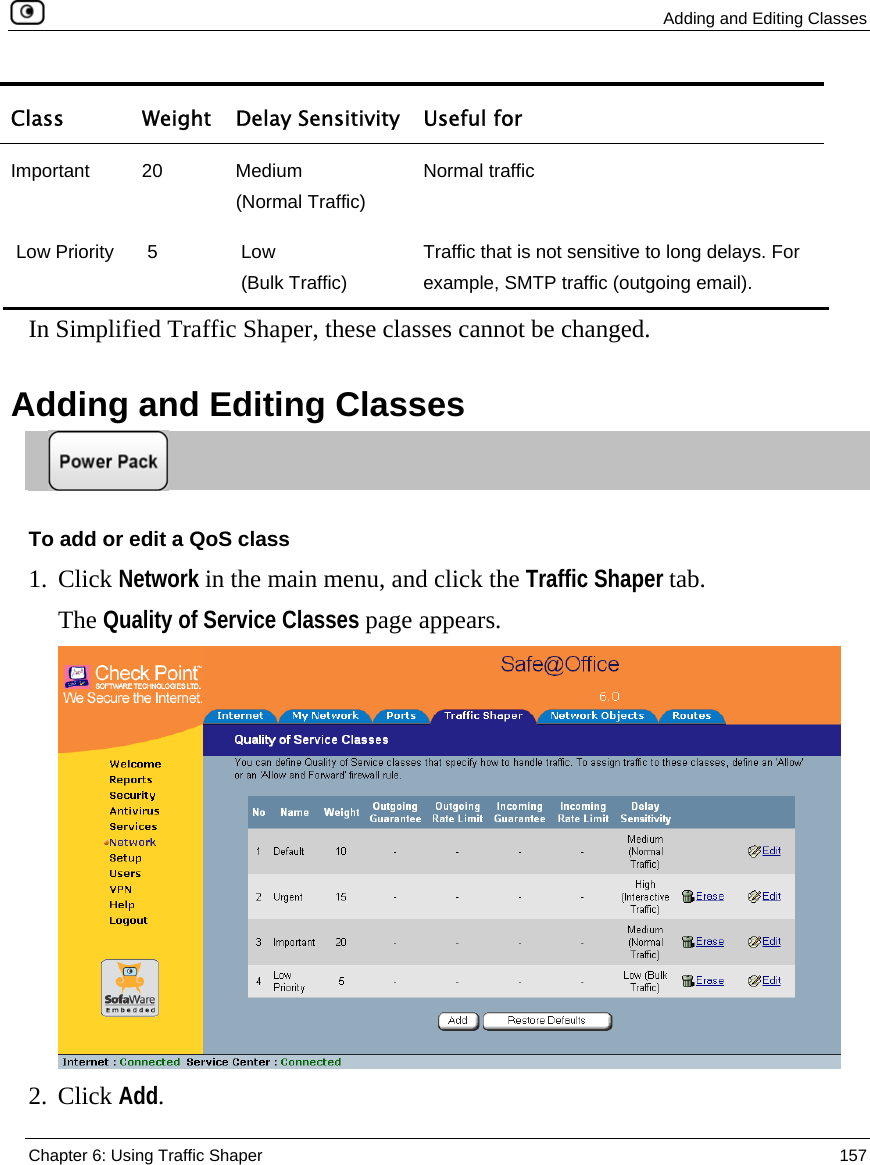
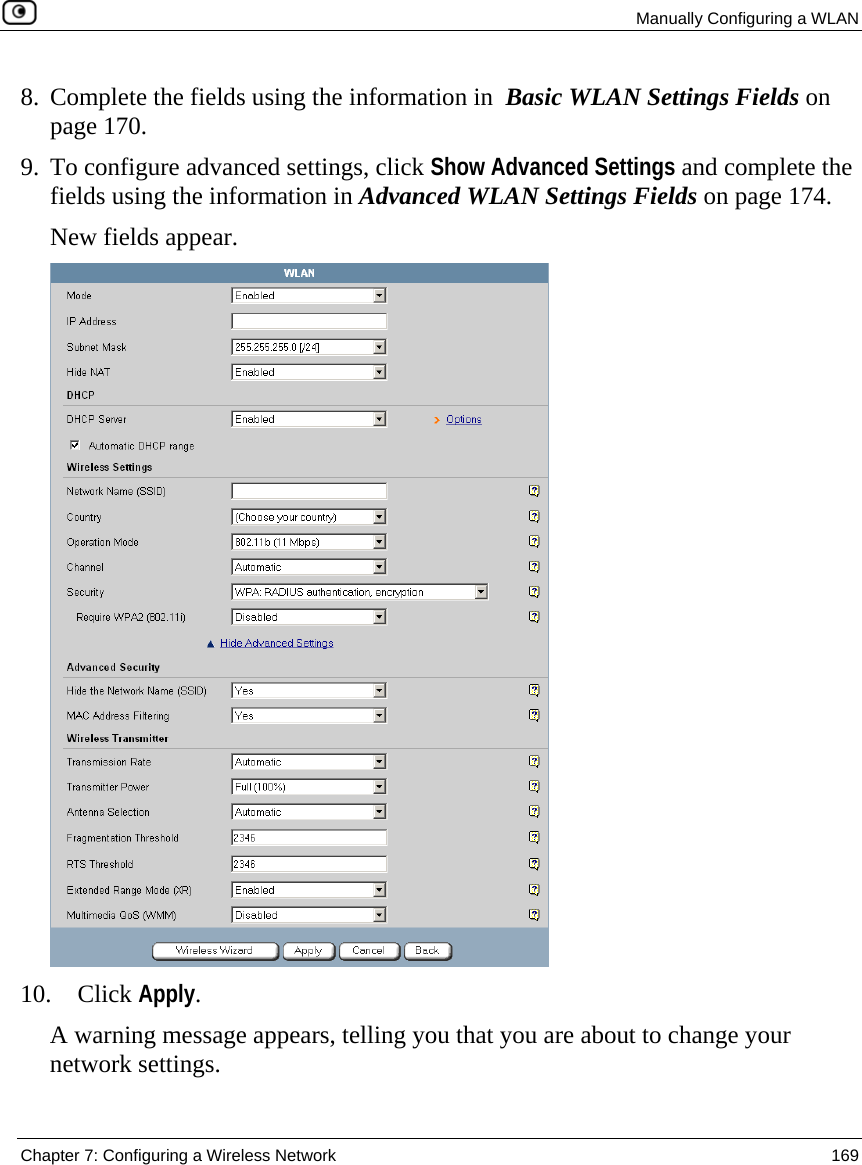


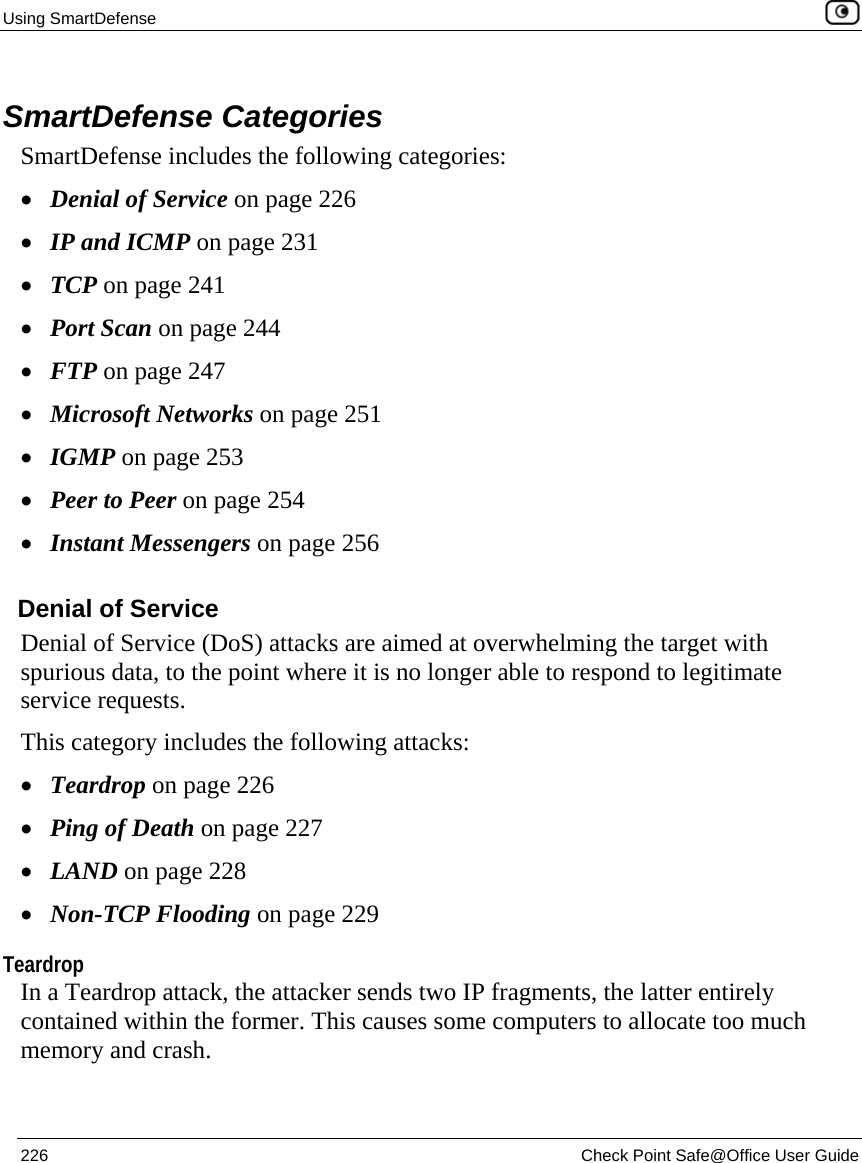

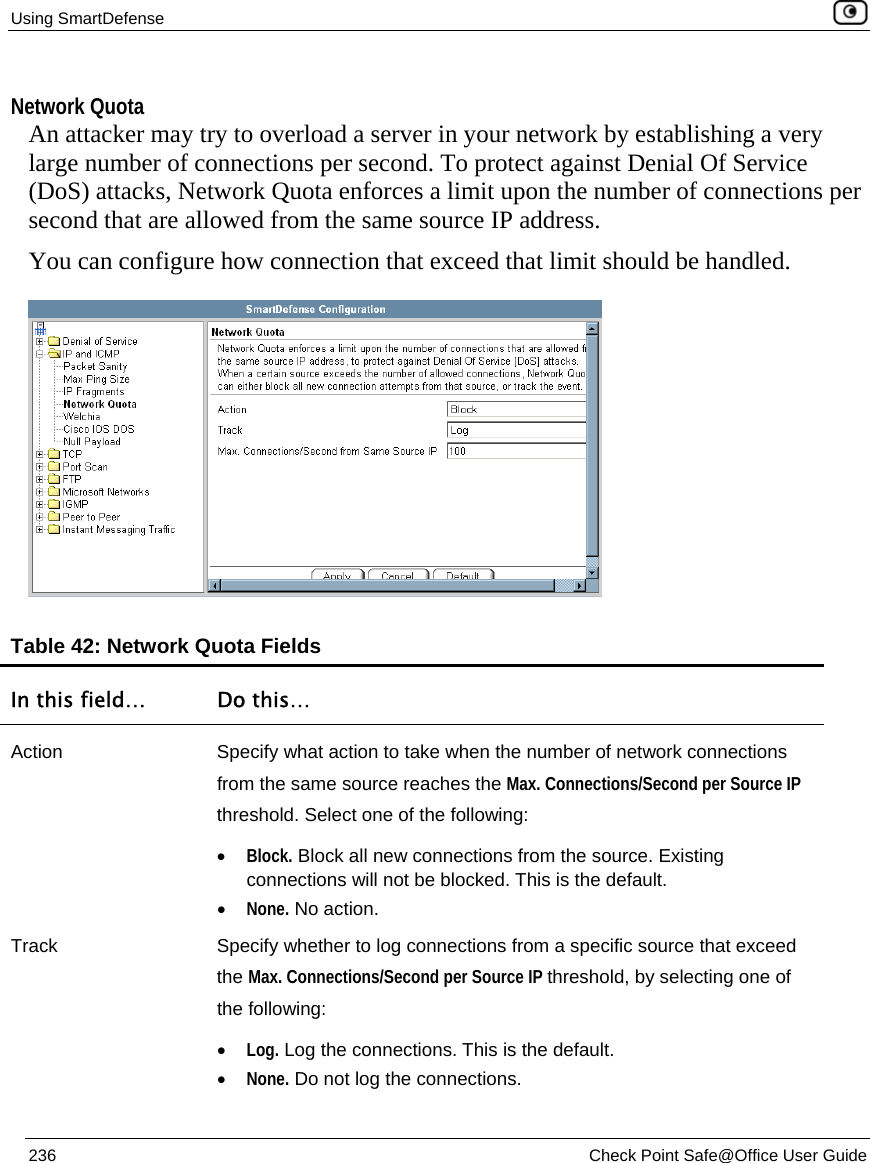
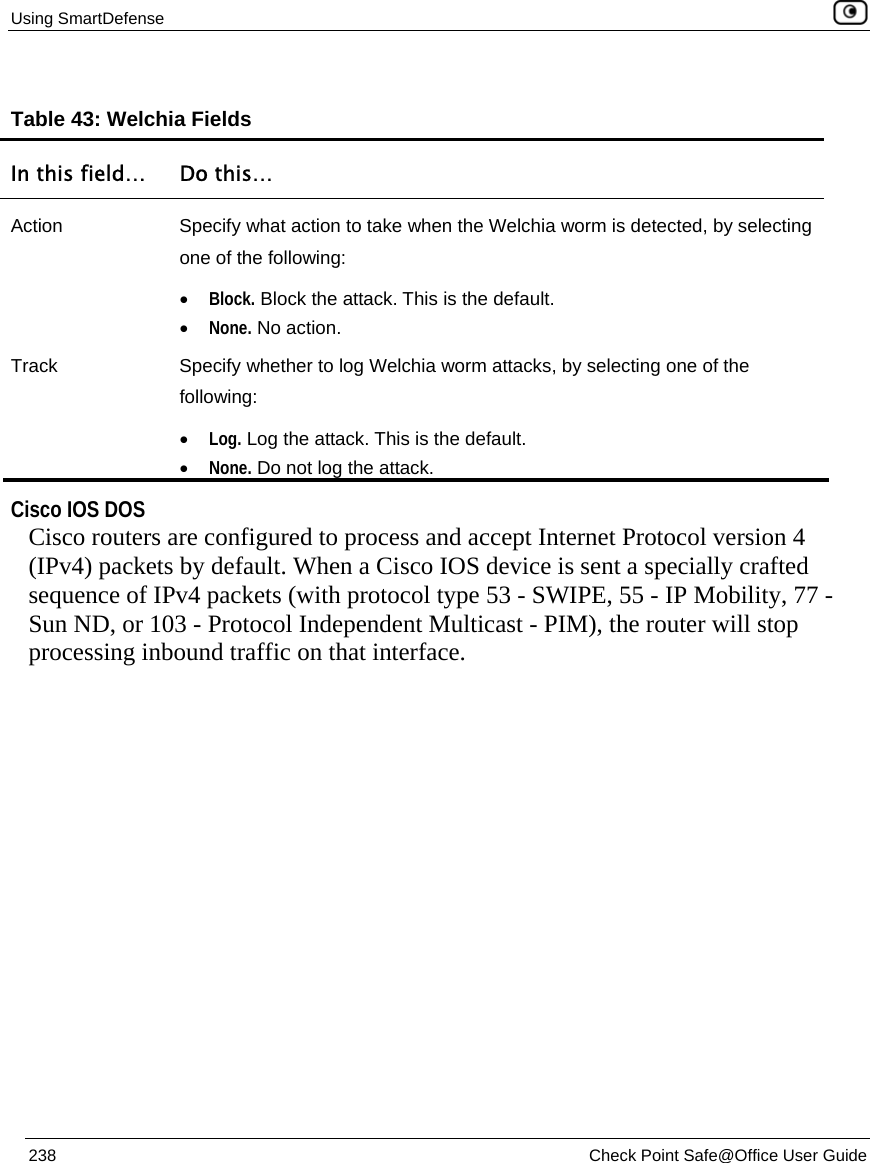
![Using SmartDefense Chapter 9: Setting Your Security Policy 245 Table 48: Port Scan Fields In this field… Do this… Number of ports accessed SmartDefense detects ports scans by measuring the number of ports accessed over a period of time. The number of ports accessed must exceed the Number of ports accessed value, within the number of seconds specified by the In a period of [seconds] value, in order for SmartDefense to consider the activity a scan. Type the minimum number of ports that must be accessed within the In a period of [seconds] period, in order for SmartDefense to detect the activity as a port scan. For example, if this value is 30, and 40 ports are accessed within a specified period of time, SmartDefense will detect the activity as a port scan. For Host Port Scan, the default value is 30. For Sweep Scan, the default value is 50.](https://usermanual.wiki/SofaWare-Technologies/SBX-166LHGE-5.Users-Manual-Part-2/User-Guide-728011-Page-111.png)
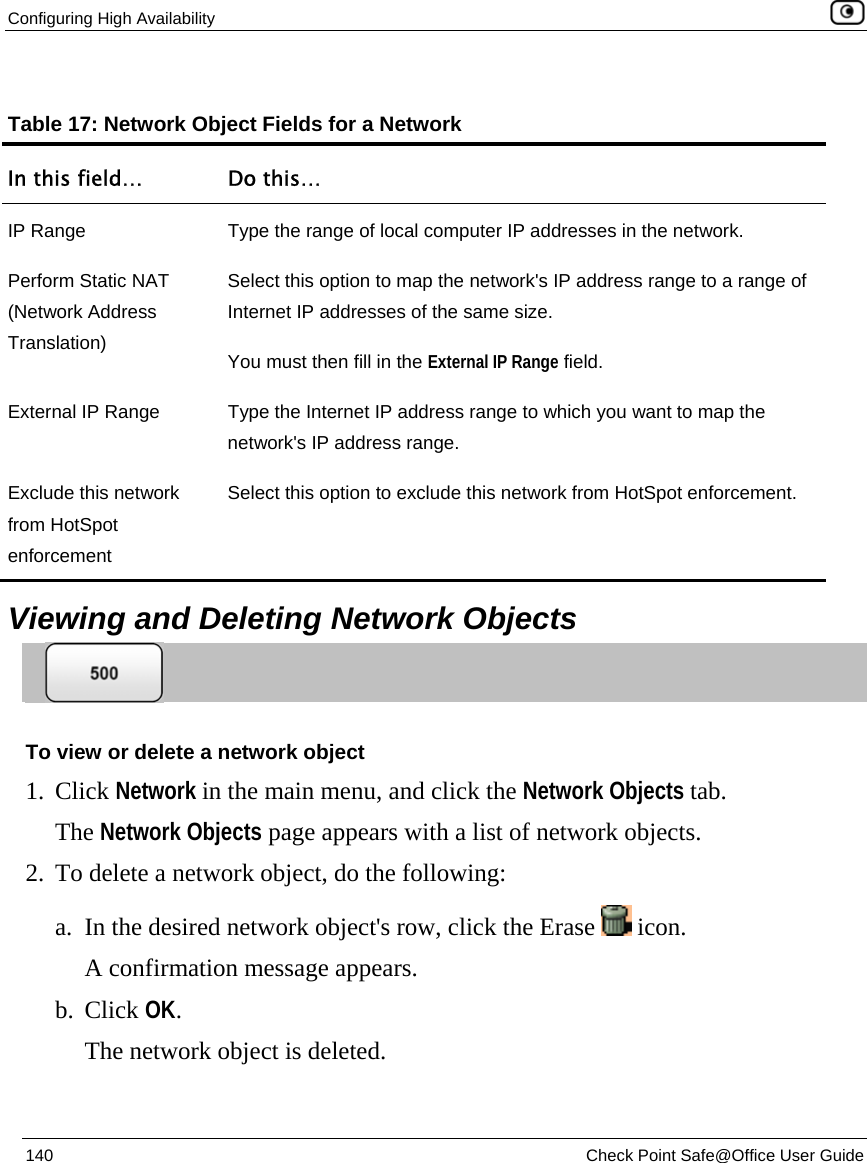
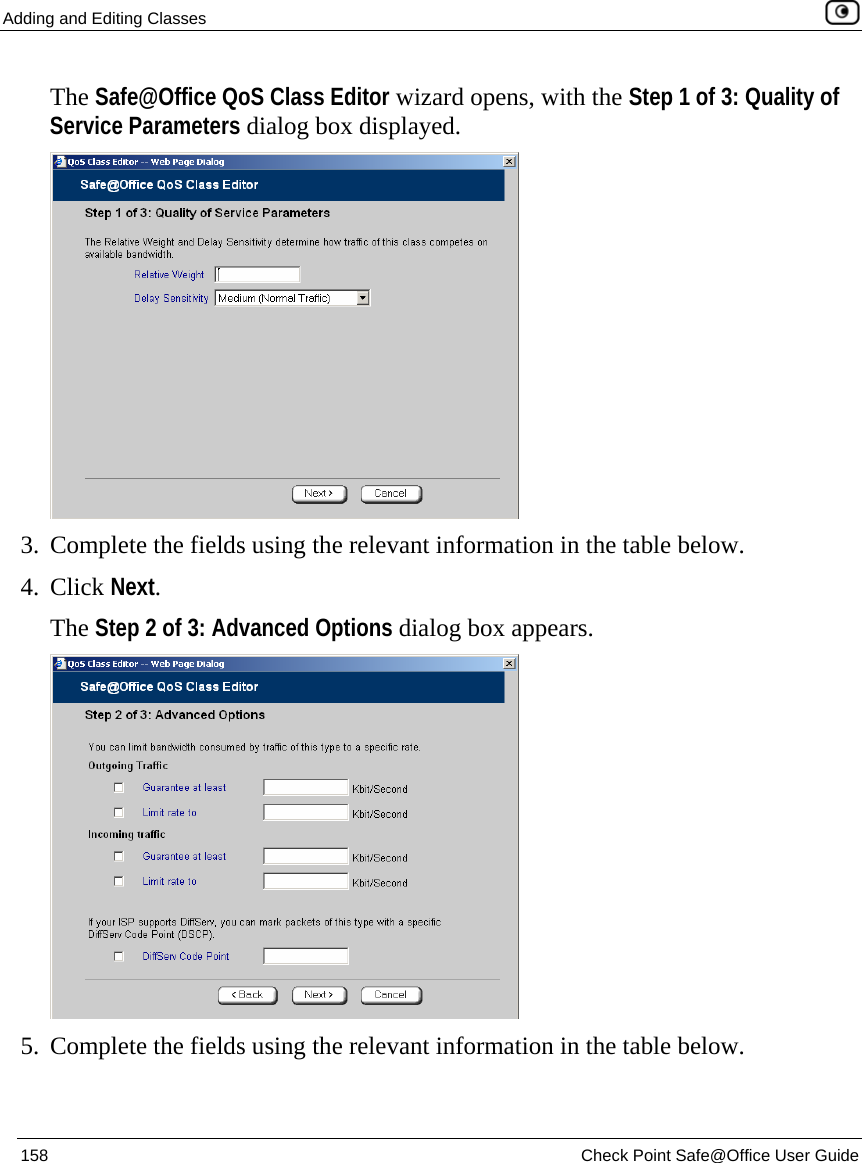
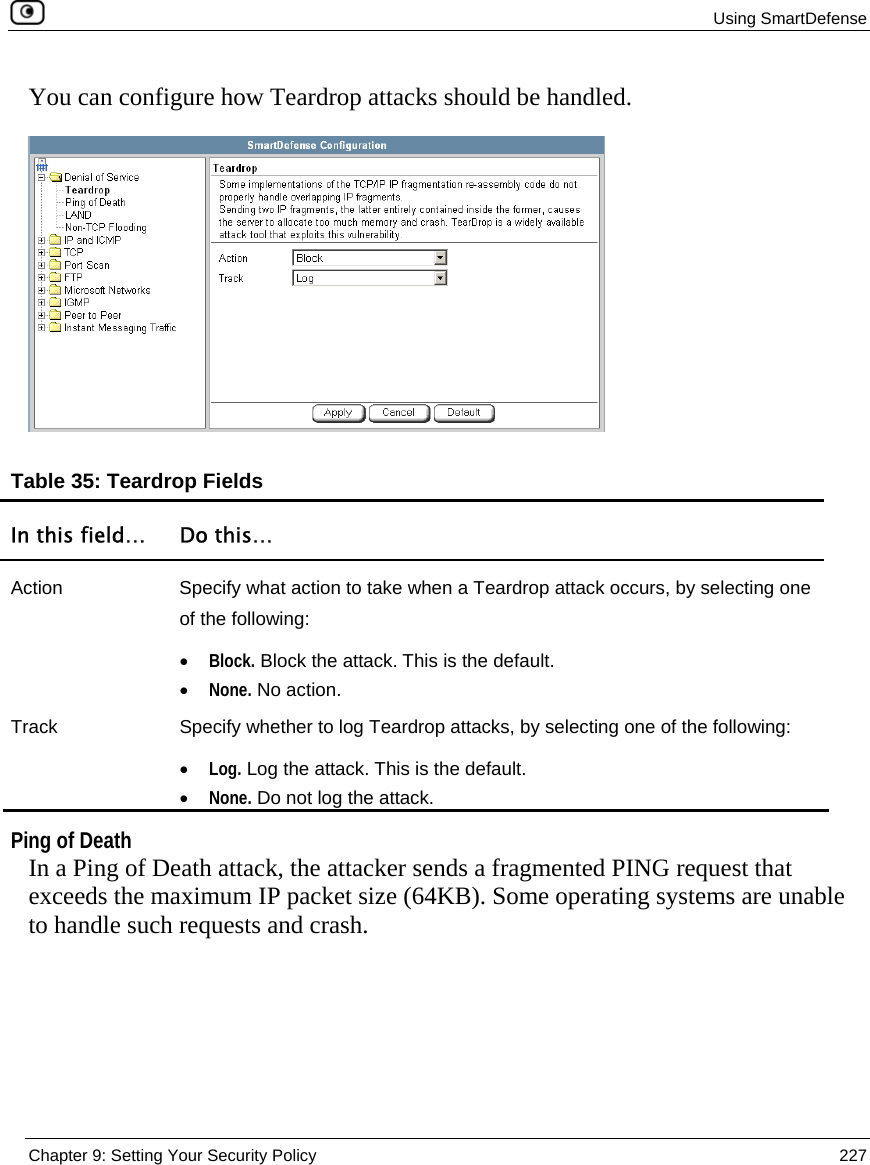
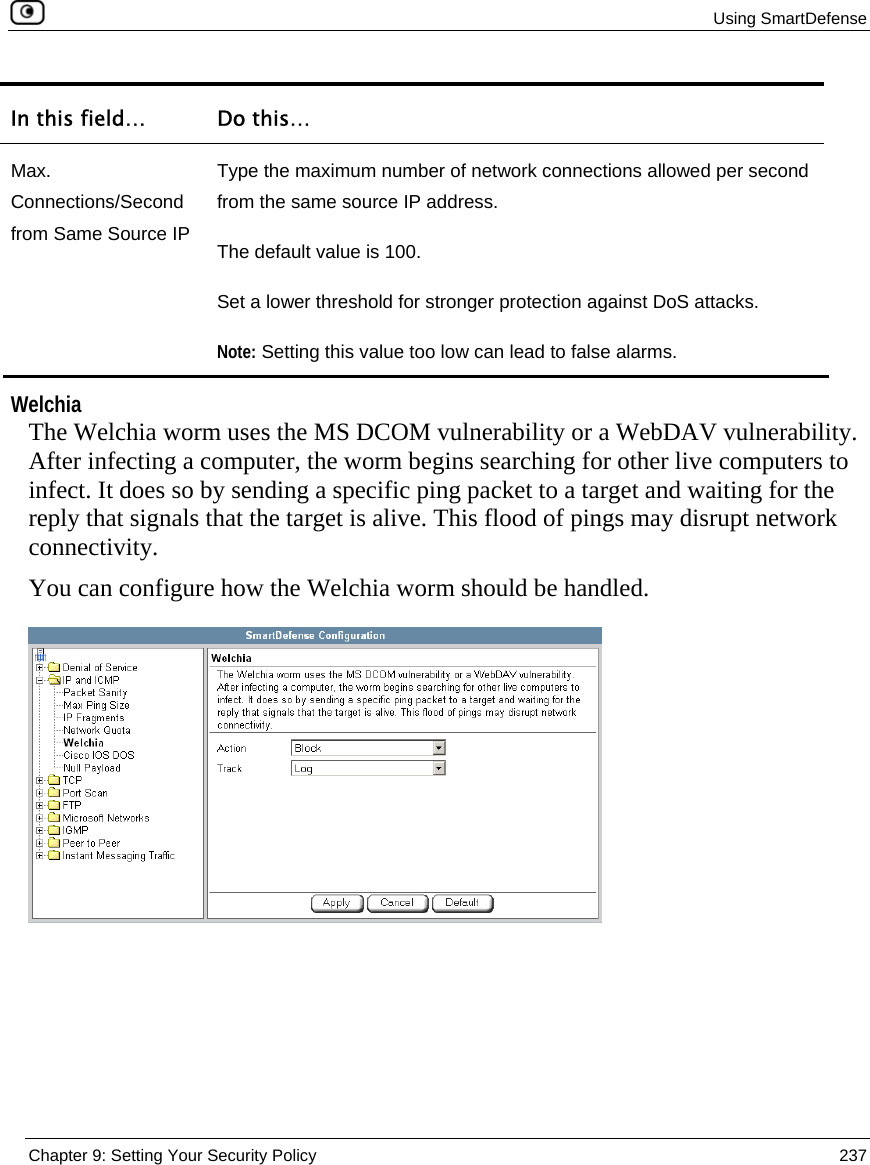
![Using SmartDefense 246 Check Point Safe@Office User Guide In this field… Do this… In a period of [seconds] SmartDefense detects ports scans by measuring the number of ports accessed over a period of time. The number of ports accessed must exceed the Number of ports accessed value, within the number of seconds specified by the In a period of [seconds] value, in order for SmartDefense to consider the activity a scan. Type the maximum number of seconds that can elapse, during which the Number of ports accessed threshold is exceeded, in order for SmartDefense to detect the activity as a port scan. For example, if this value is 20, and the Number of ports accessed threshold is exceeded for 15 seconds, SmartDefense will detect the activity as a port scan. If the threshold is exceeded for 30 seconds, SmartDefense will not detect the activity as a port scan. The default value is 20 seconds. Track Specify whether to issue logs for scans, by selecting one of the following: • Log. Issue logs. This is the default. • None. Do not issue logs. This is the default. Detect scans from Internet only Specify whether to detect only scans originating from the Internet, by selecting one of the following: • False. Do not detect only scans from the Internet. This is the default. • True. Detect only scans from the Internet.](https://usermanual.wiki/SofaWare-Technologies/SBX-166LHGE-5.Users-Manual-Part-2/User-Guide-728011-Page-112.png)