SofaWare Technologies SBXW-166LHGE-4 Wireless Broadband Router User Manual Internet Security Appliance
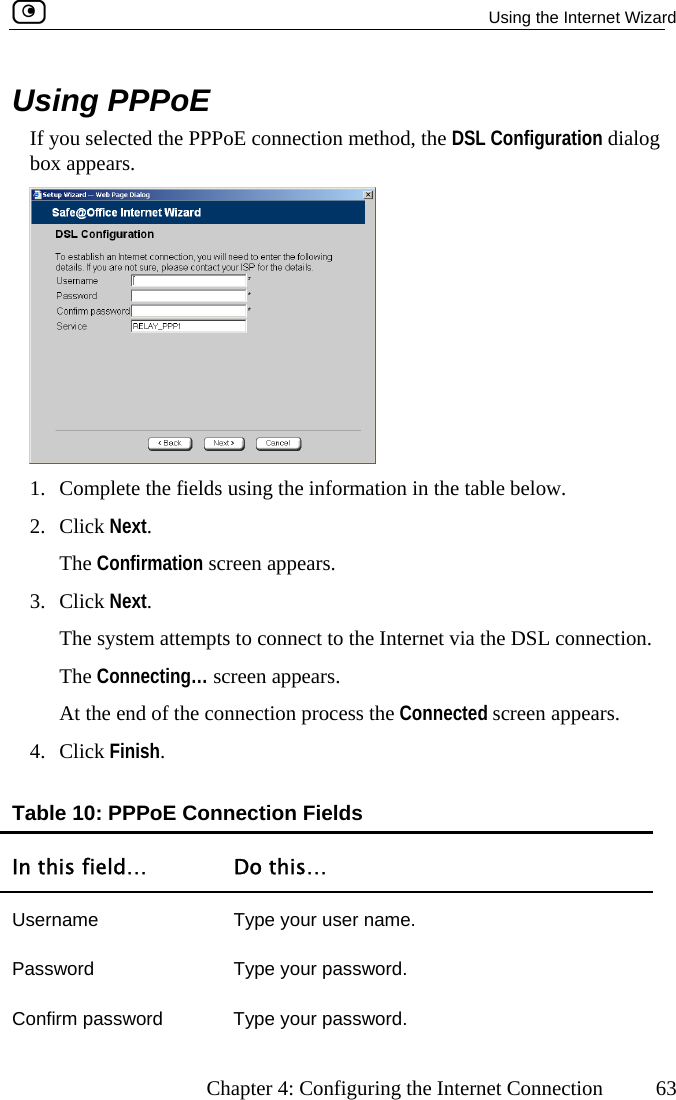
SofaWare Technologies Ltd. Wireless Broadband Router Internet Security Appliance
Contents
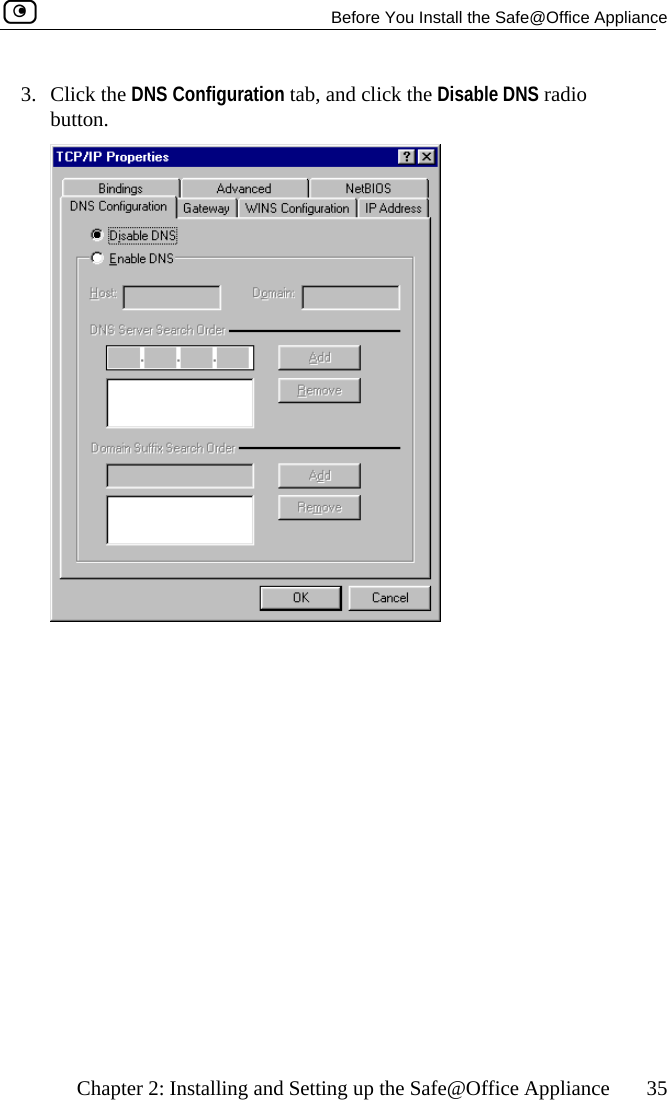
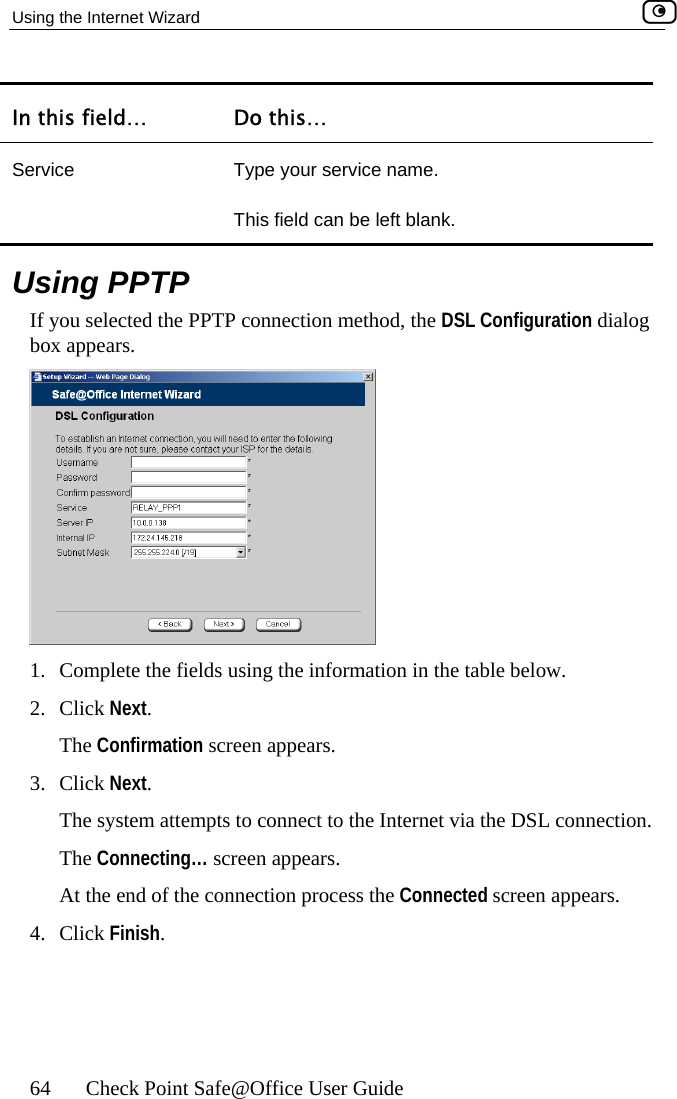
- 1. DoC Revised
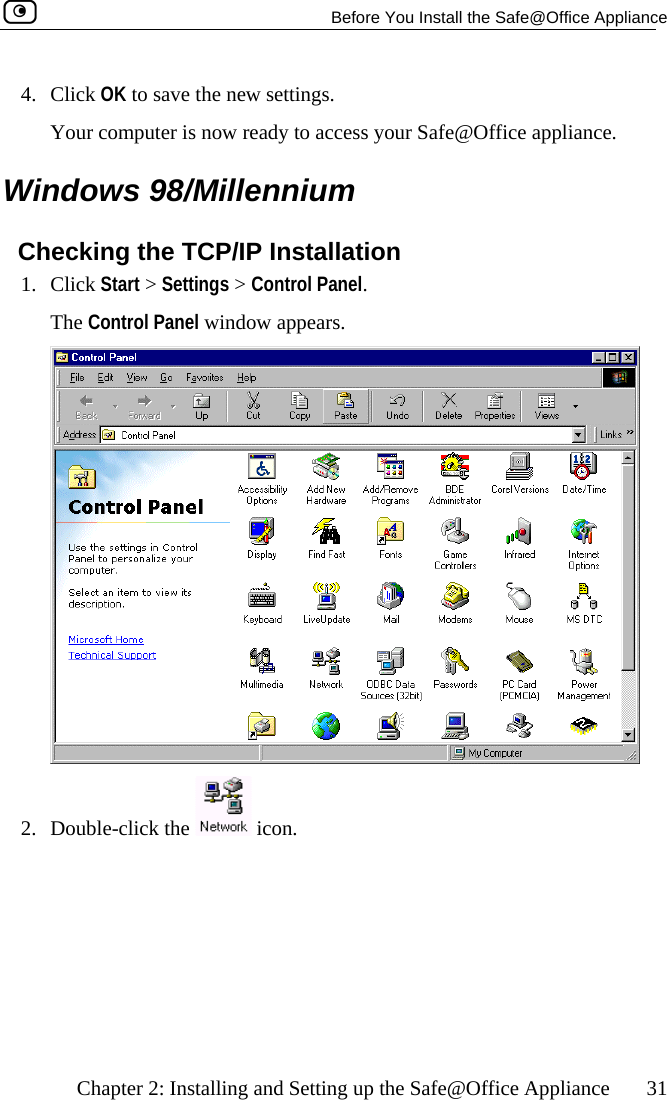
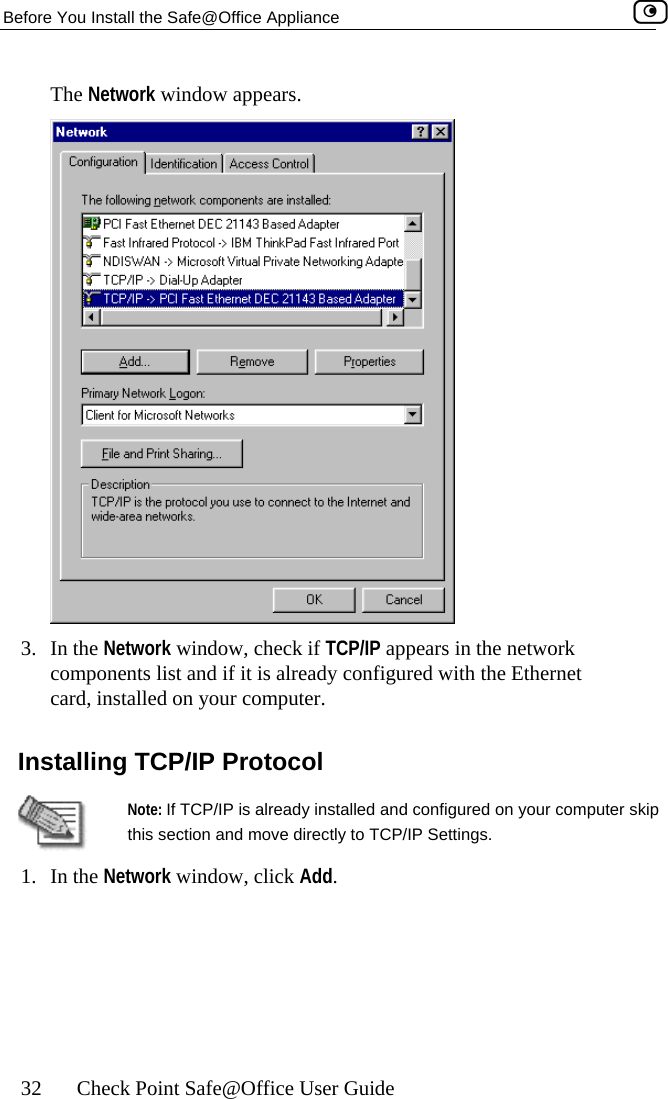
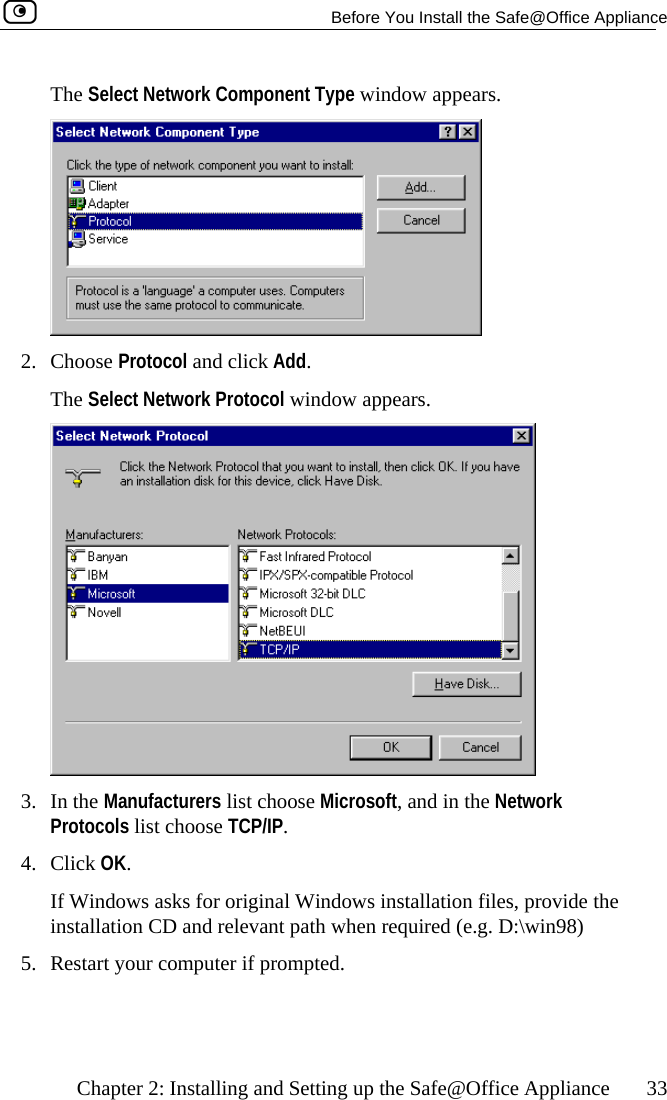
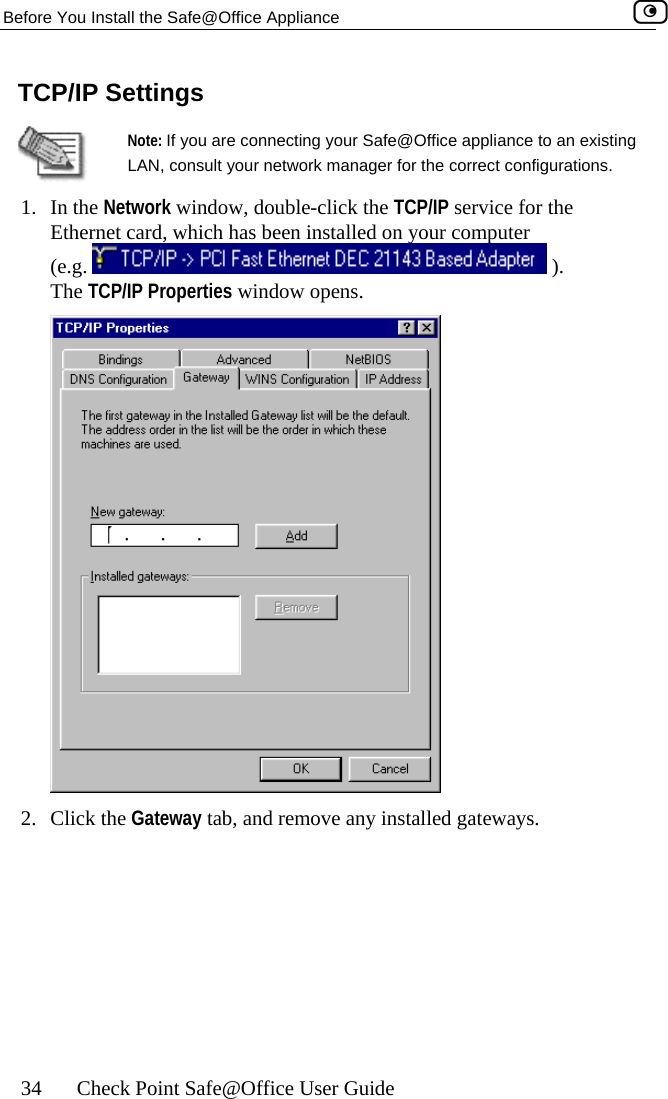
- 2. Users Manual Part 1
- 3. Users Manual Part 2
Users Manual Part 1


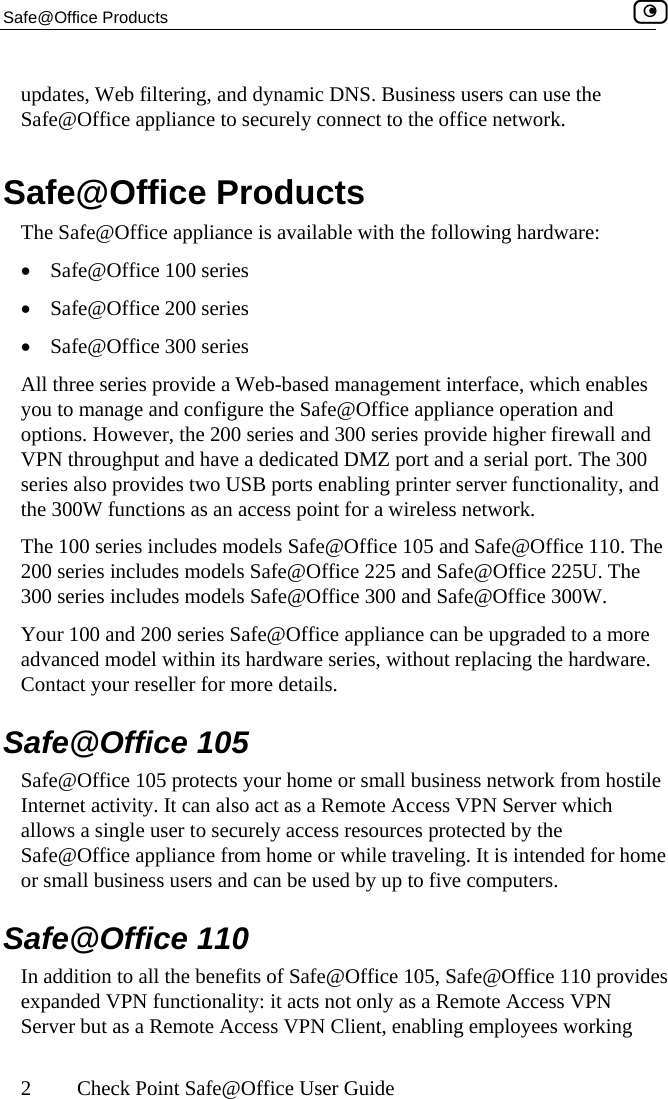

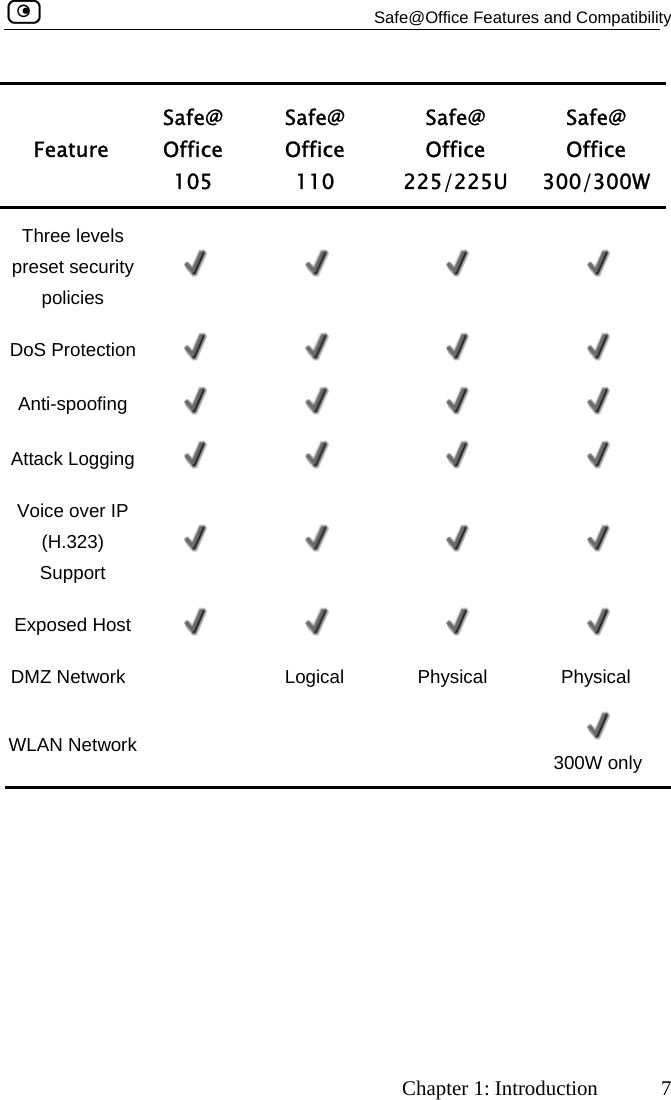

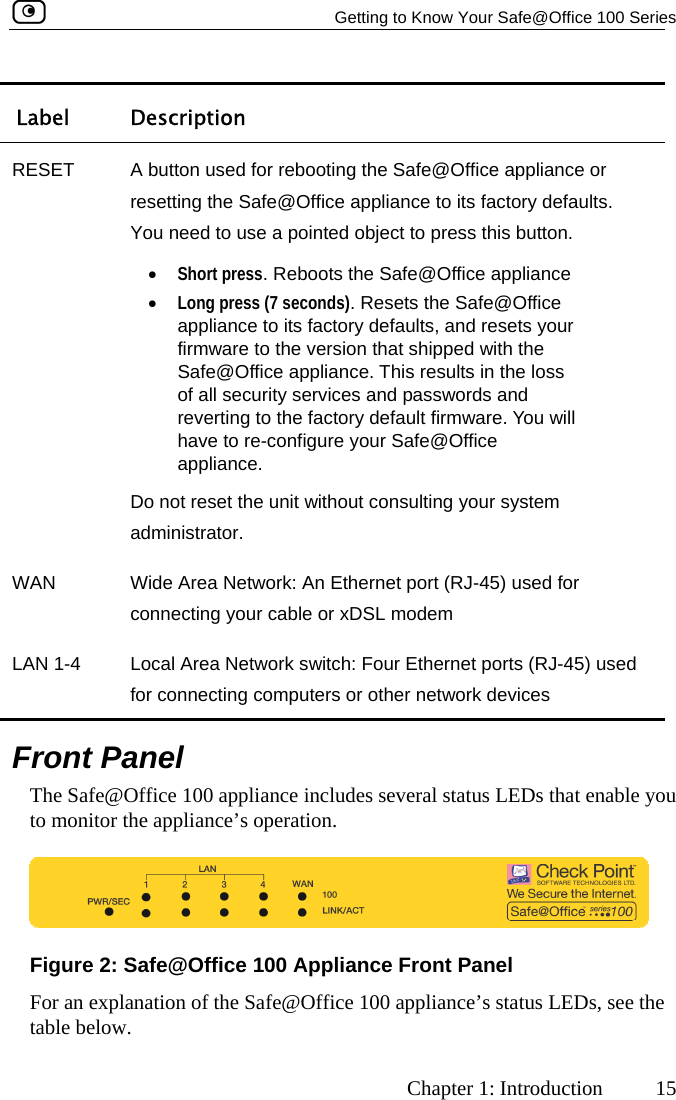

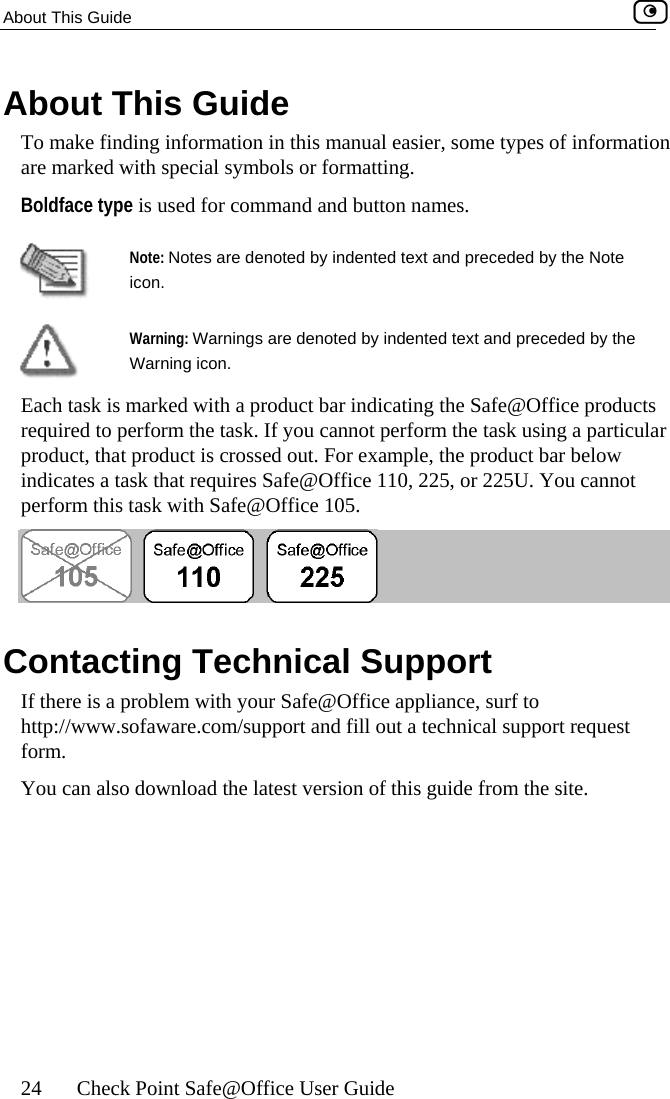


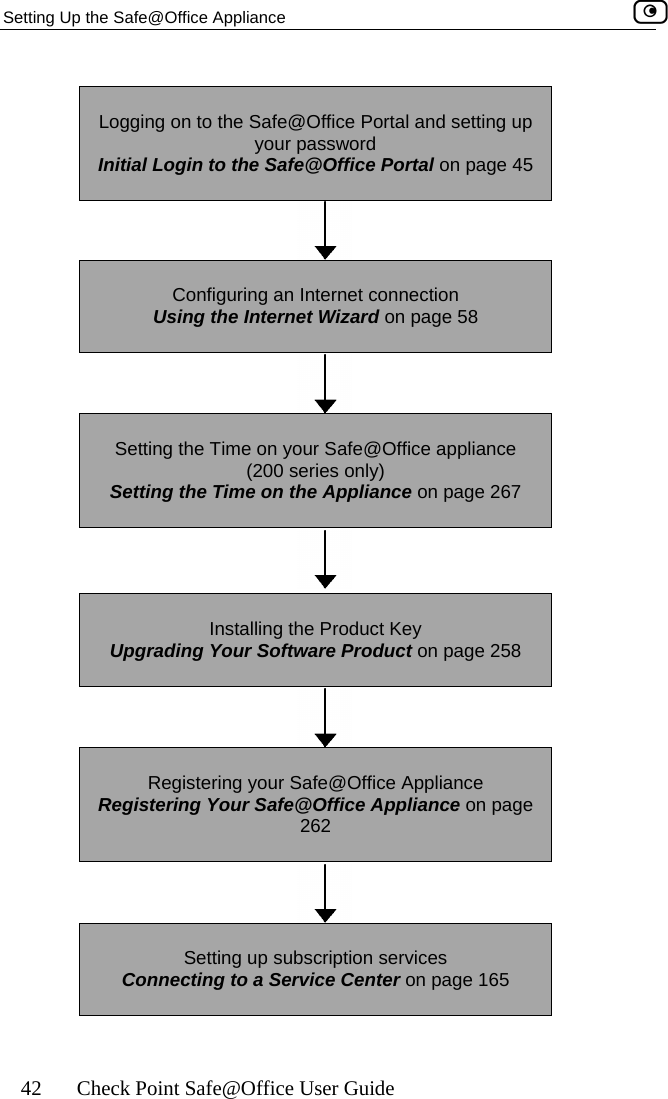
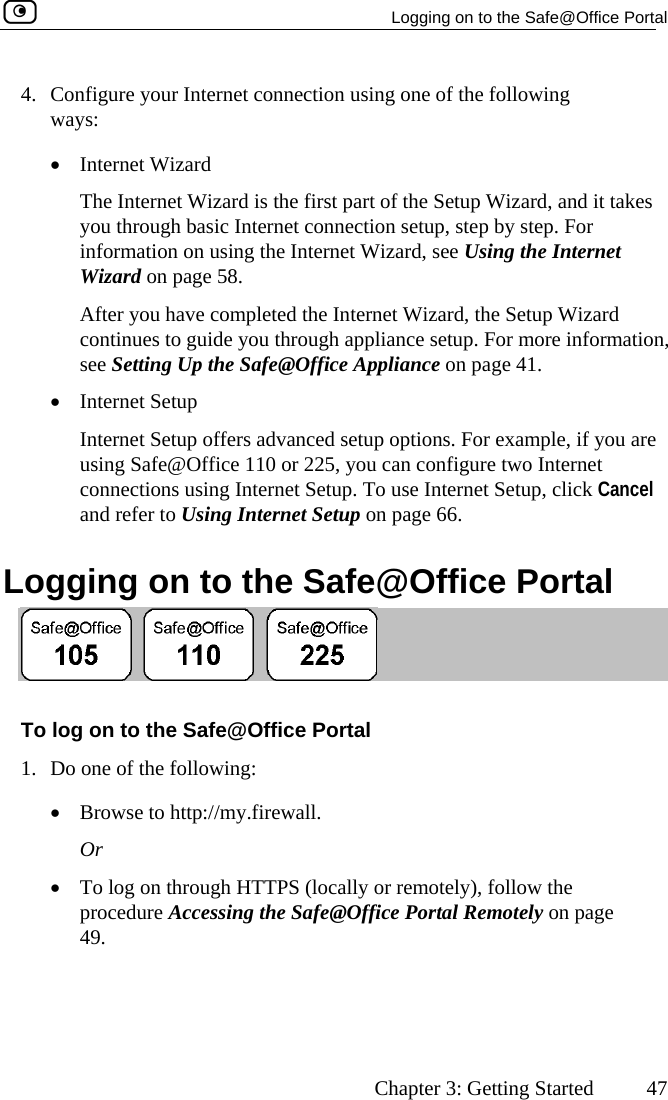
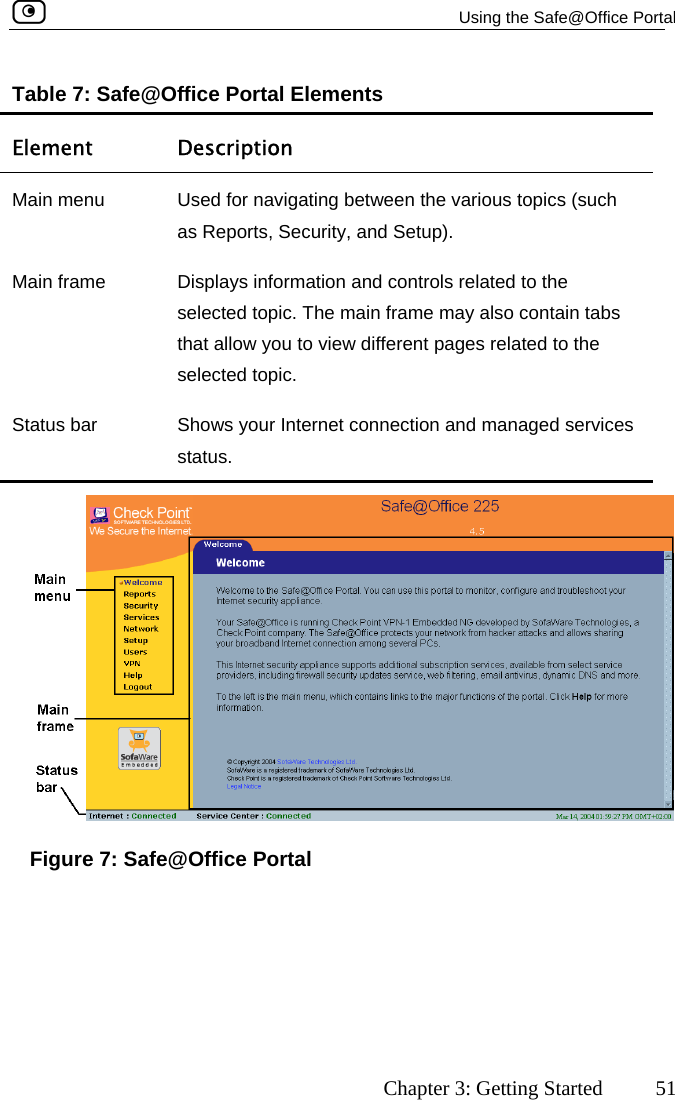
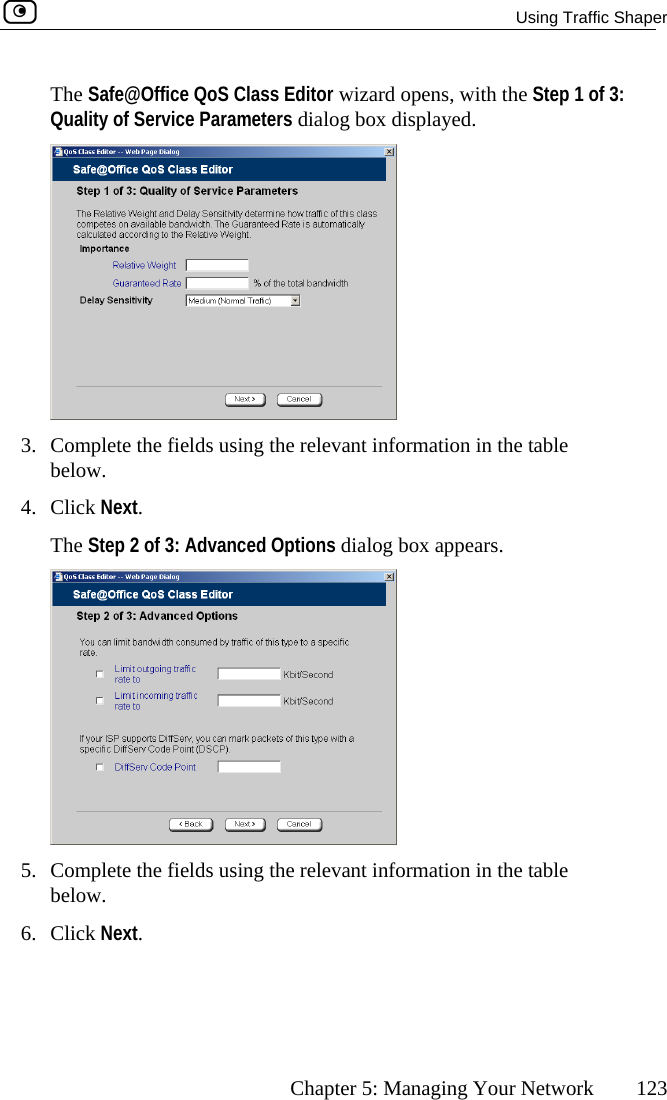
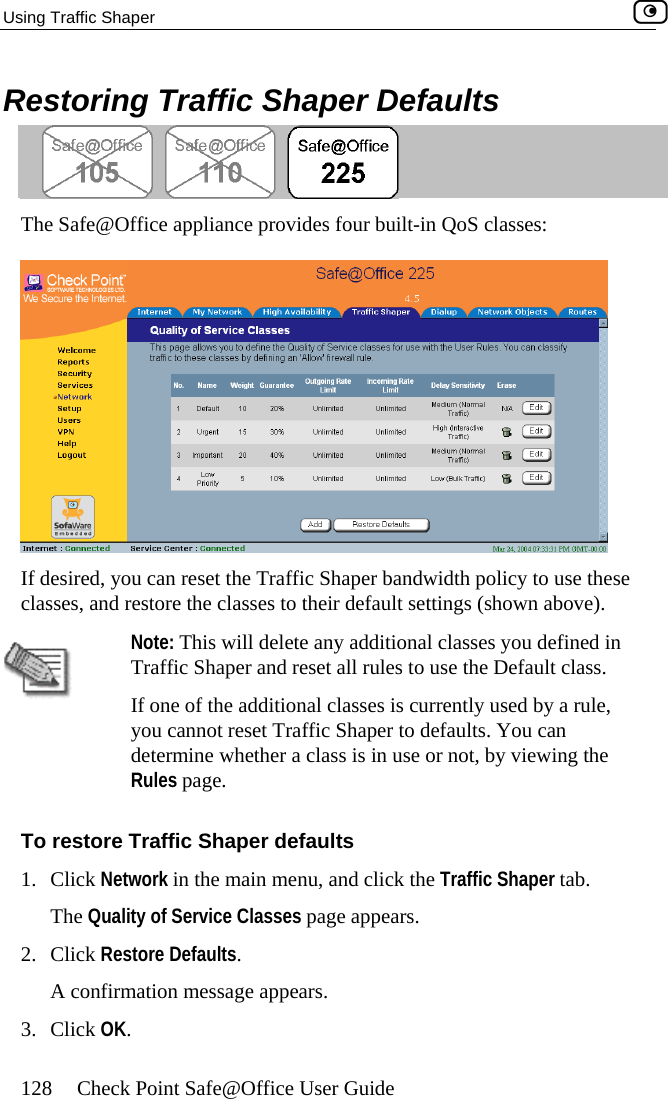
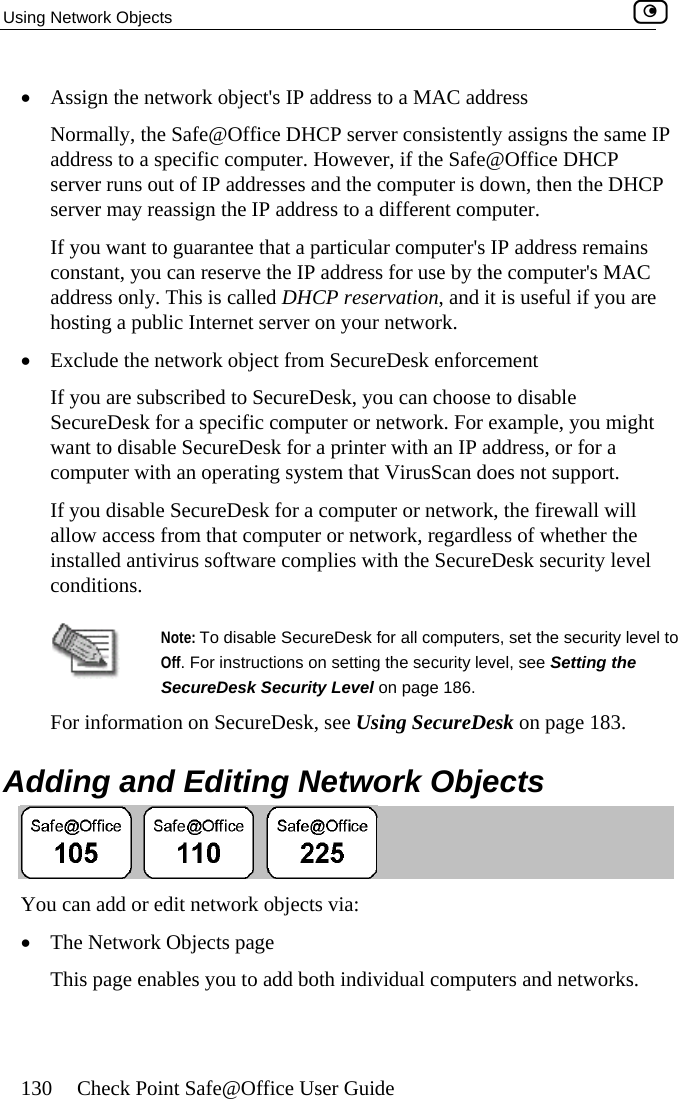
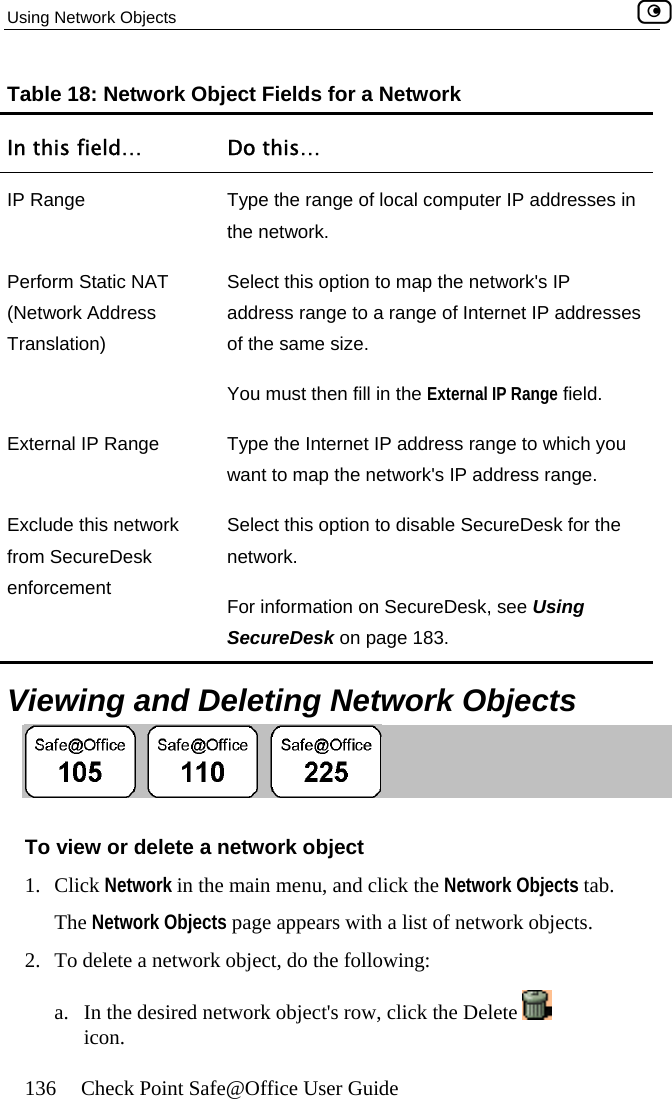
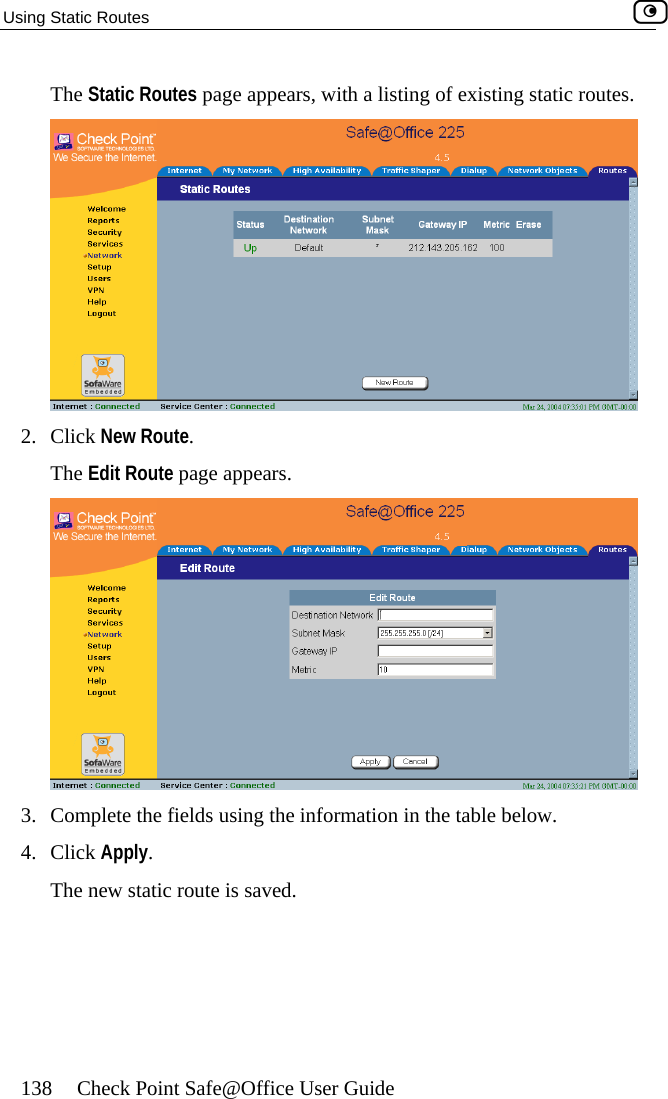
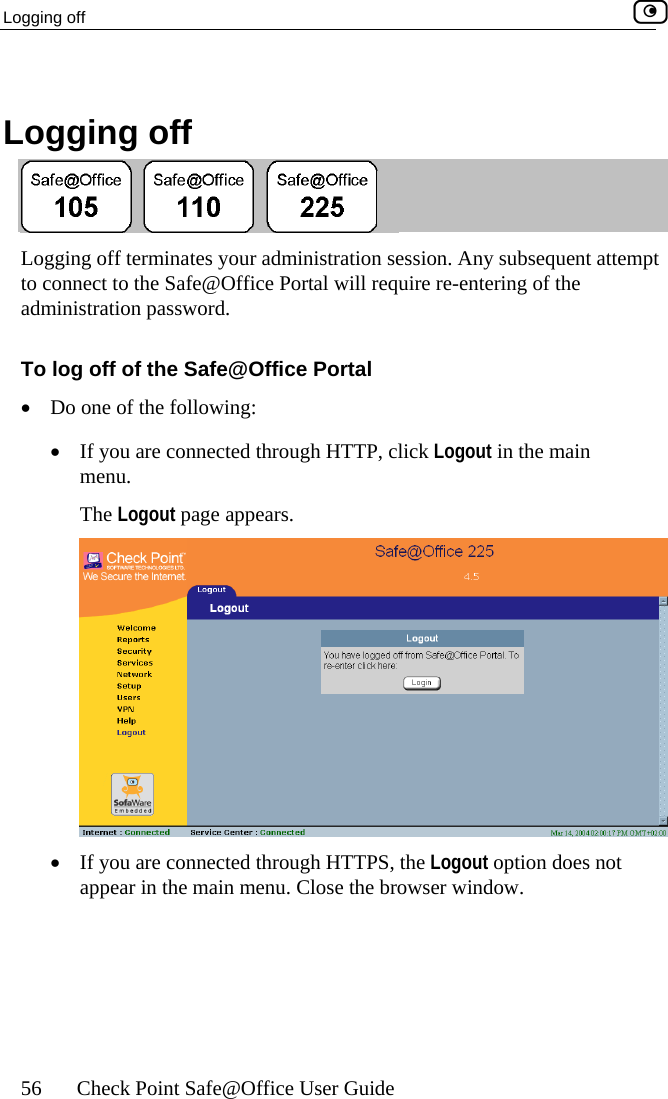
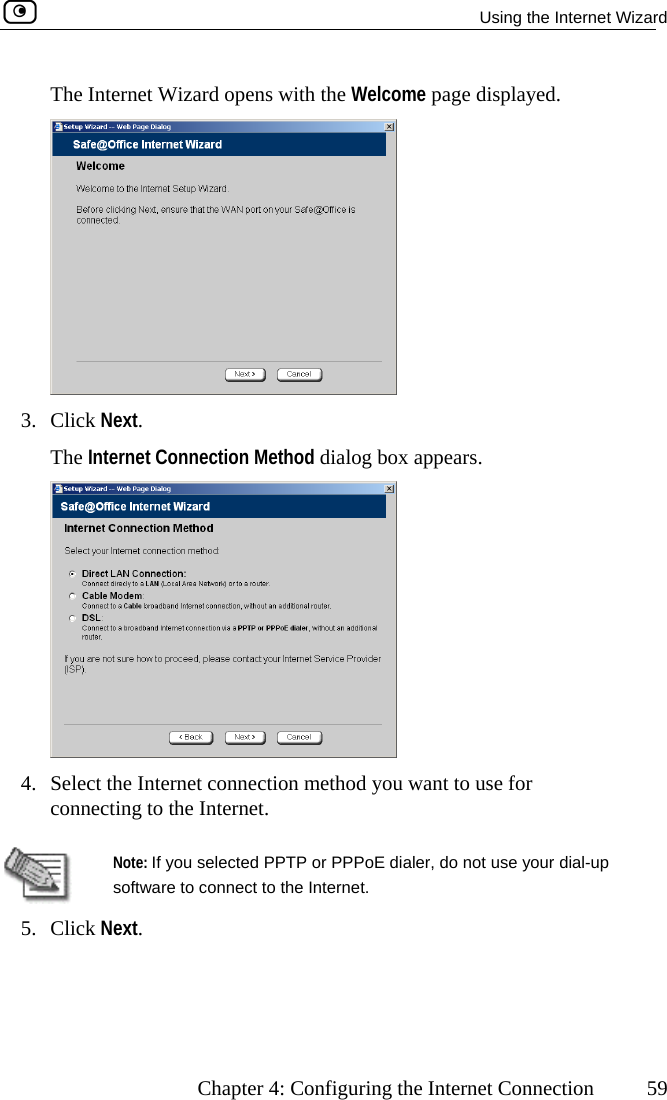
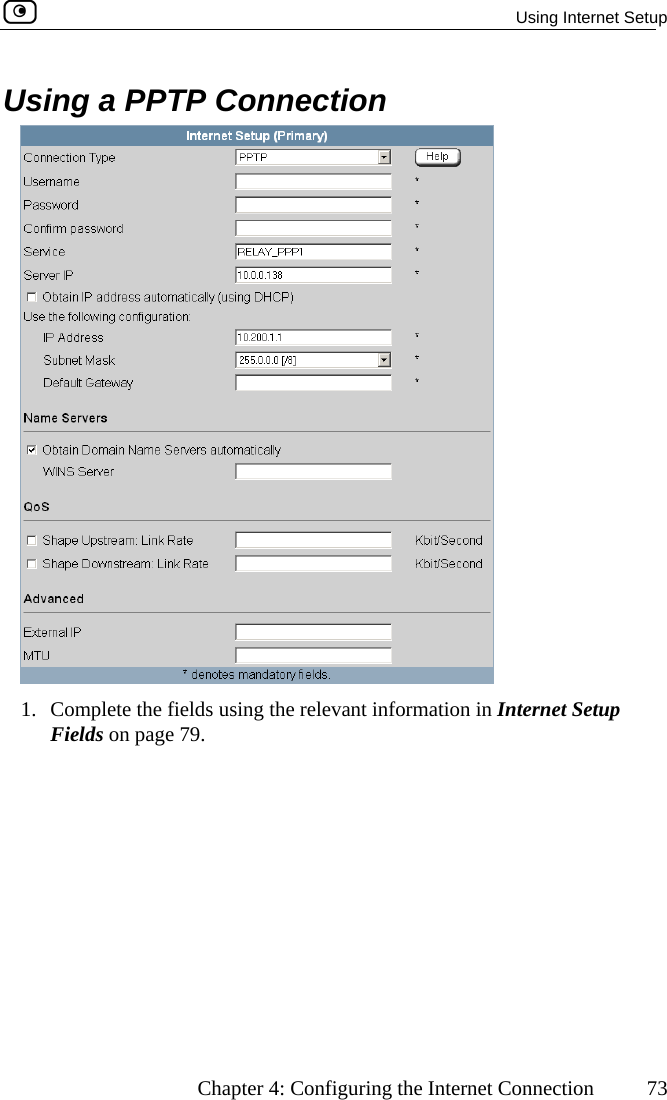
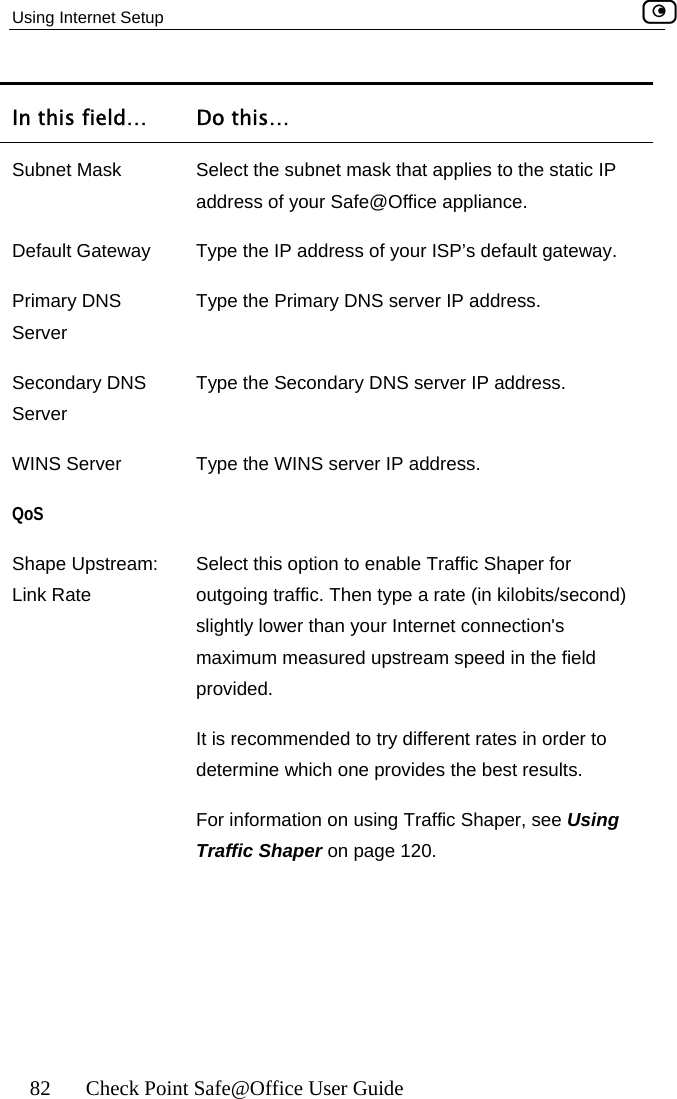
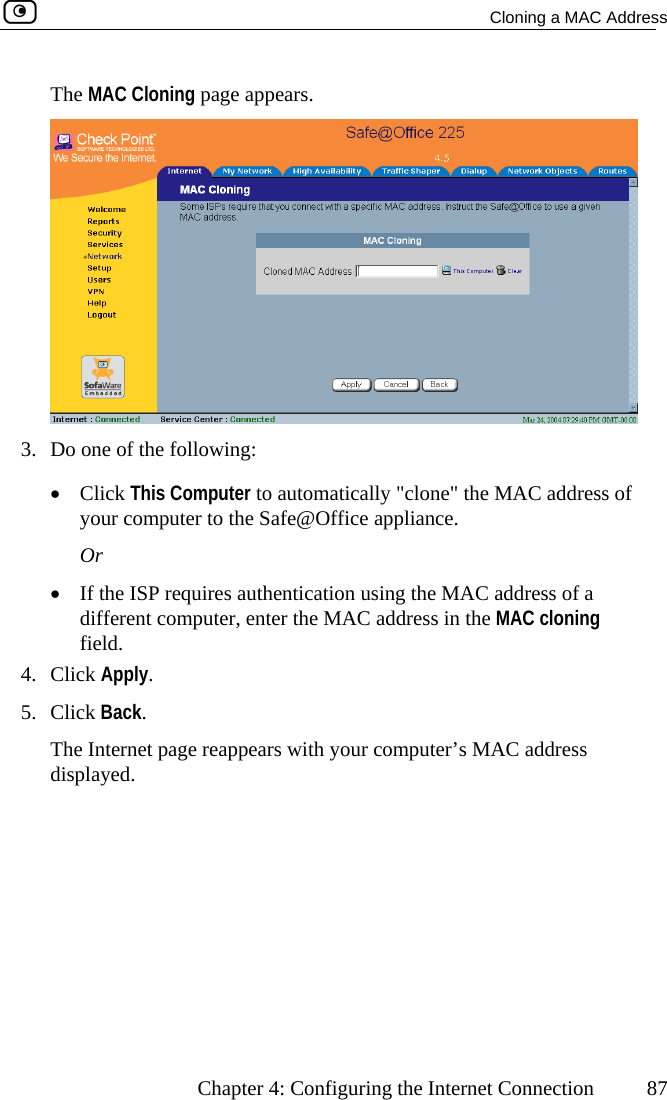
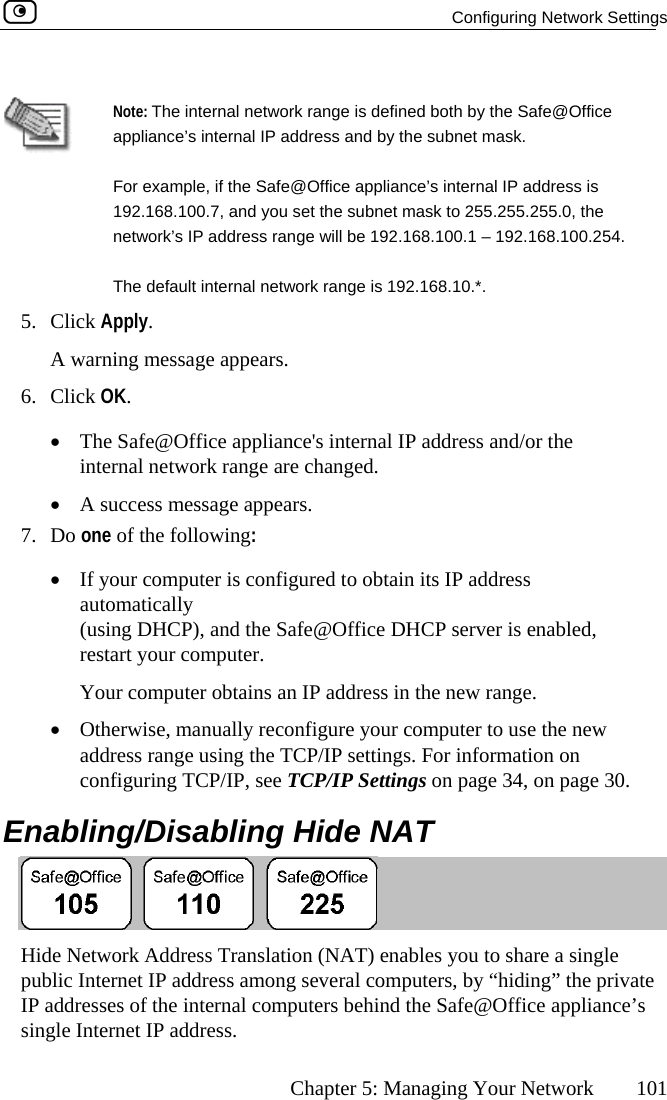
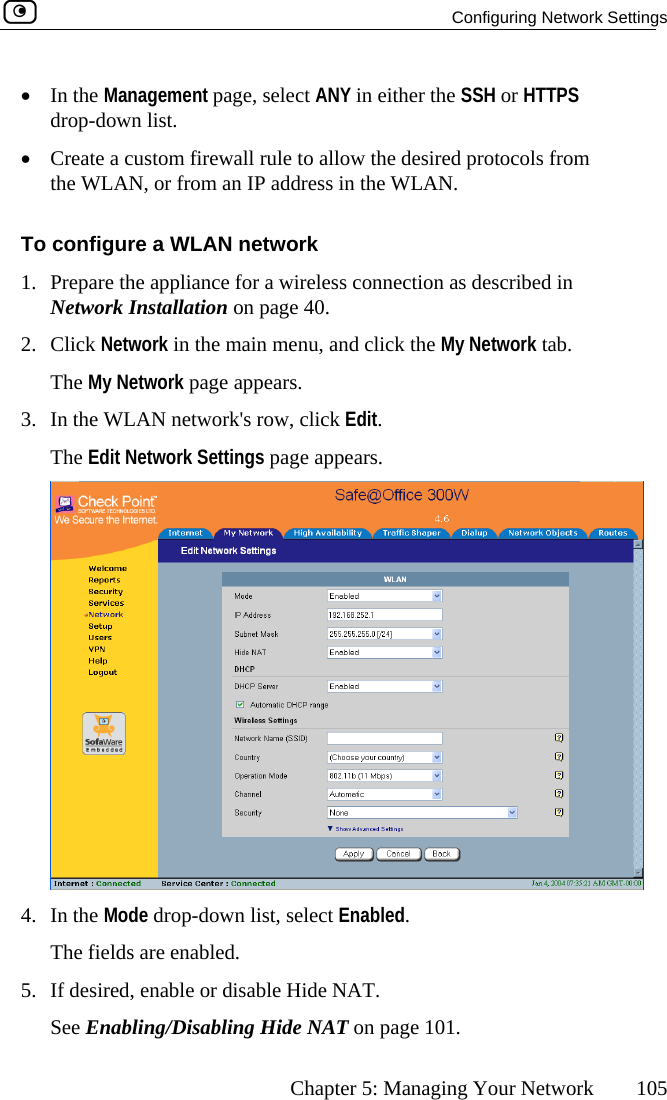
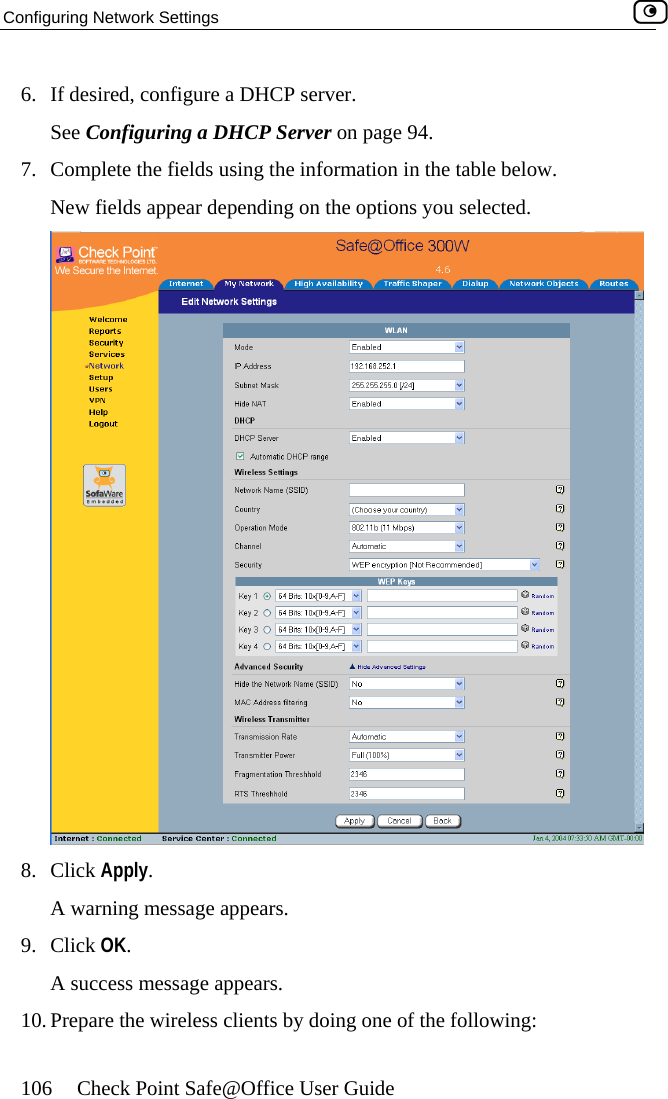
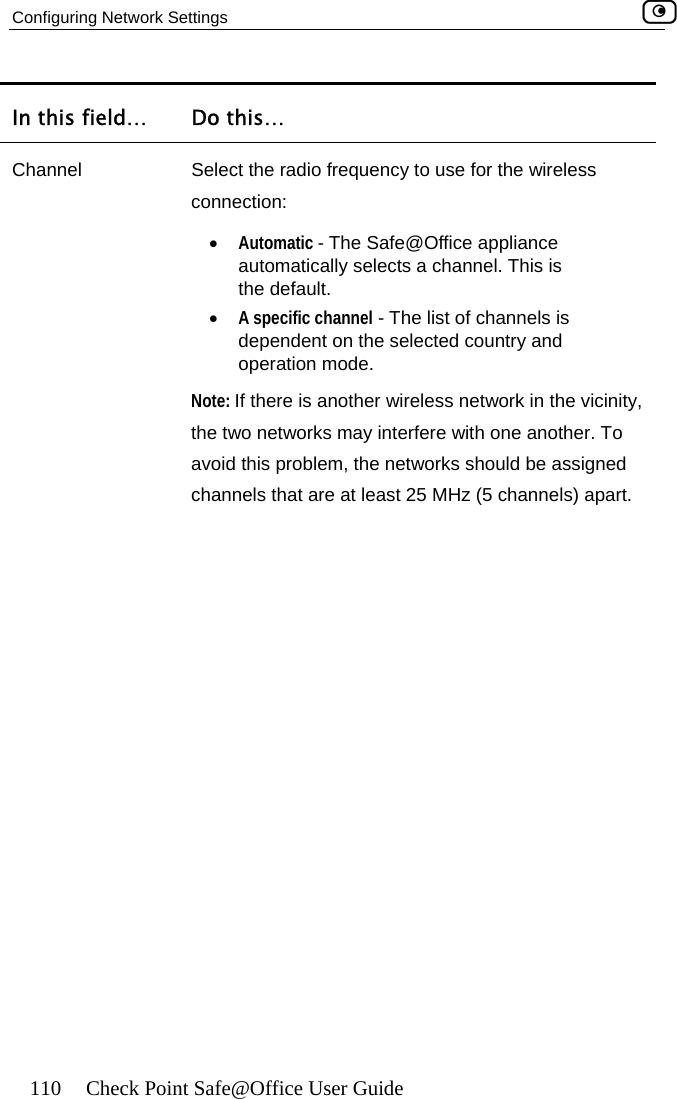
![Using the Safe@Office Portal 54 Check Point Safe@Office User Guide Table 9: Status Bar Fields ys this… This field… DisplaInternet Your Internet connection status. on is ing Connection. The Safe@Office appliance is connecting to the Internet. appliance is trying to contact the Internet ay. ection has been manually disabled. ction. When both connections are configured, the Status bar displays both statuses. For example “Internet [Primary]: Connected”. For information on configuring a secondary Internet connection, see Configuring the Internet Connection on page 57. The connection status may be one of the following: • Connected. The Safe@Office appliance is connected to the Internet. • Not Connected. The Internet connectidown. • Establish• Contacting Gateway. The Safe@Office default gatew• Disabled. The Internet connNote: Using Safe@Office 110 and 225, you can configure both a primary and a secondary Internet conne](https://usermanual.wiki/SofaWare-Technologies/SBXW-166LHGE-4.Users-Manual-Part-1/User-Guide-476792-Page-65.png)
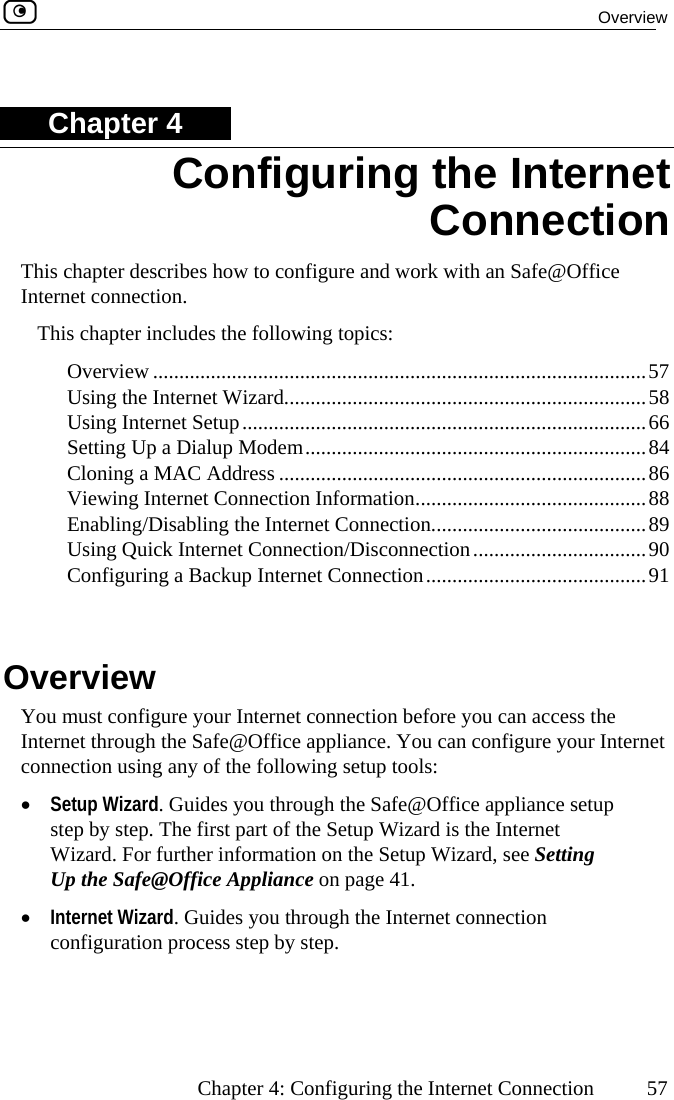
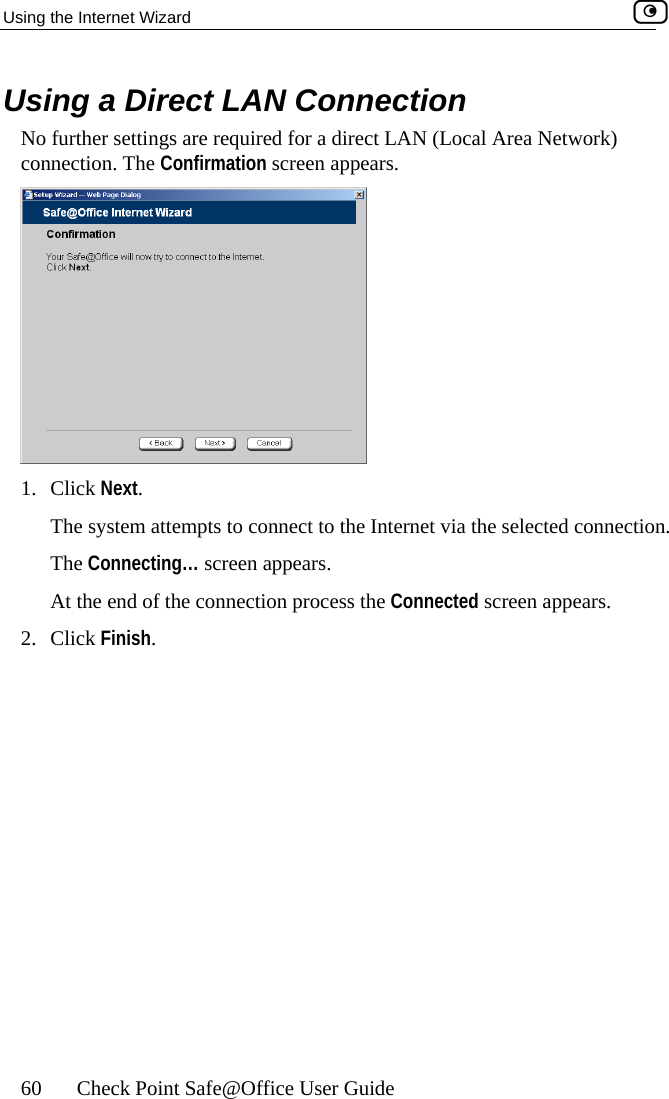


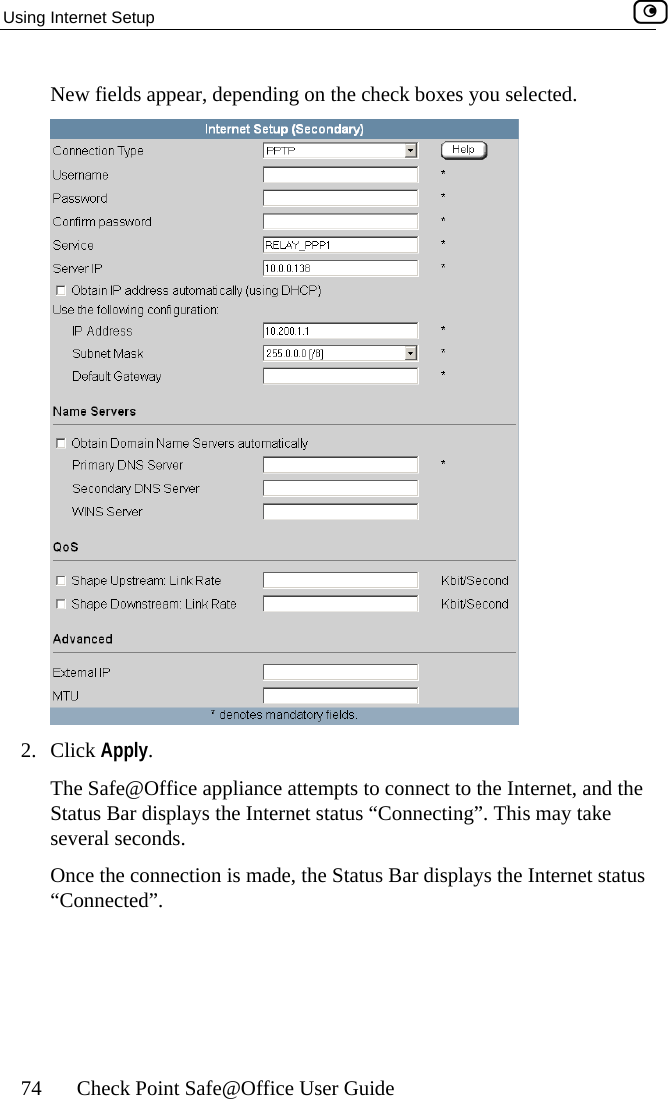

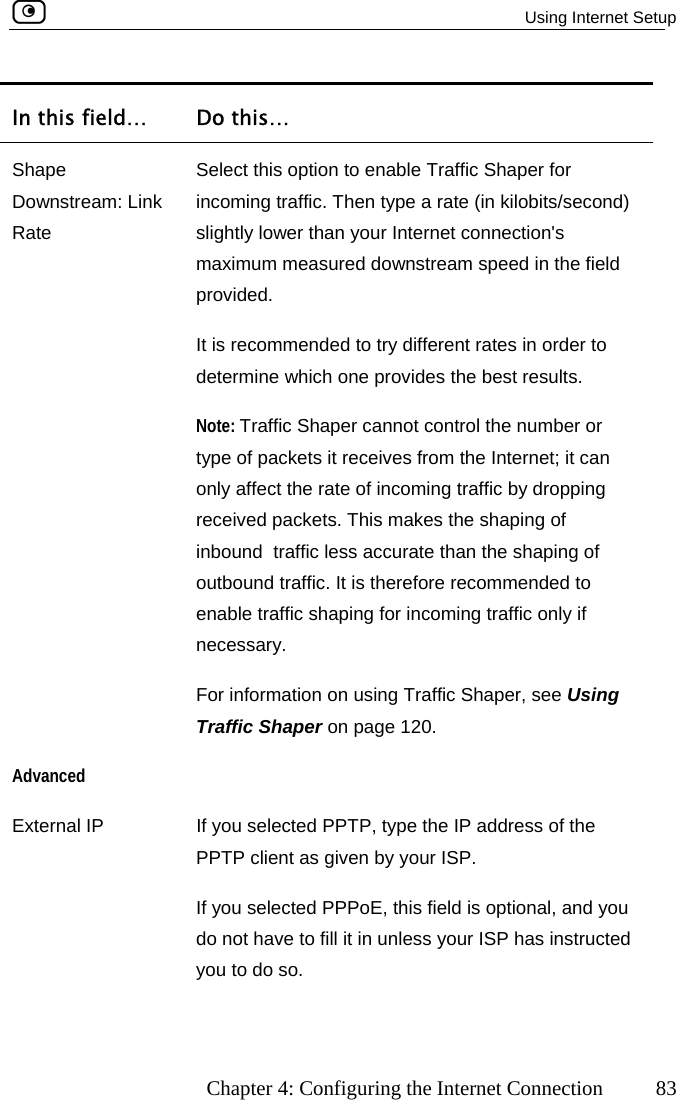
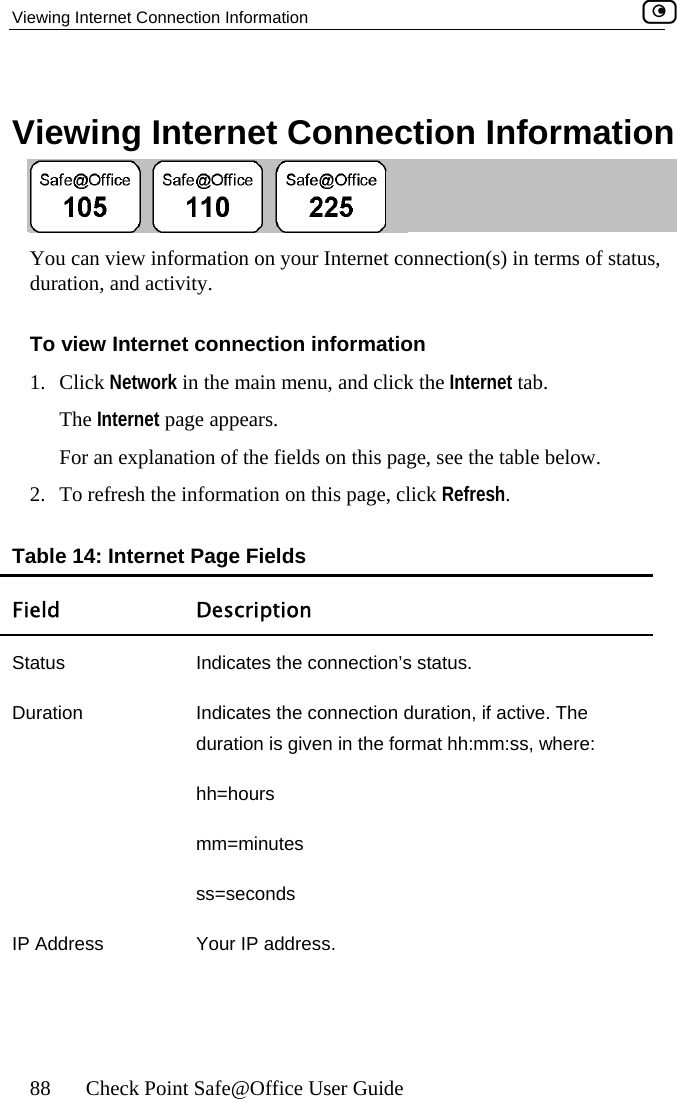

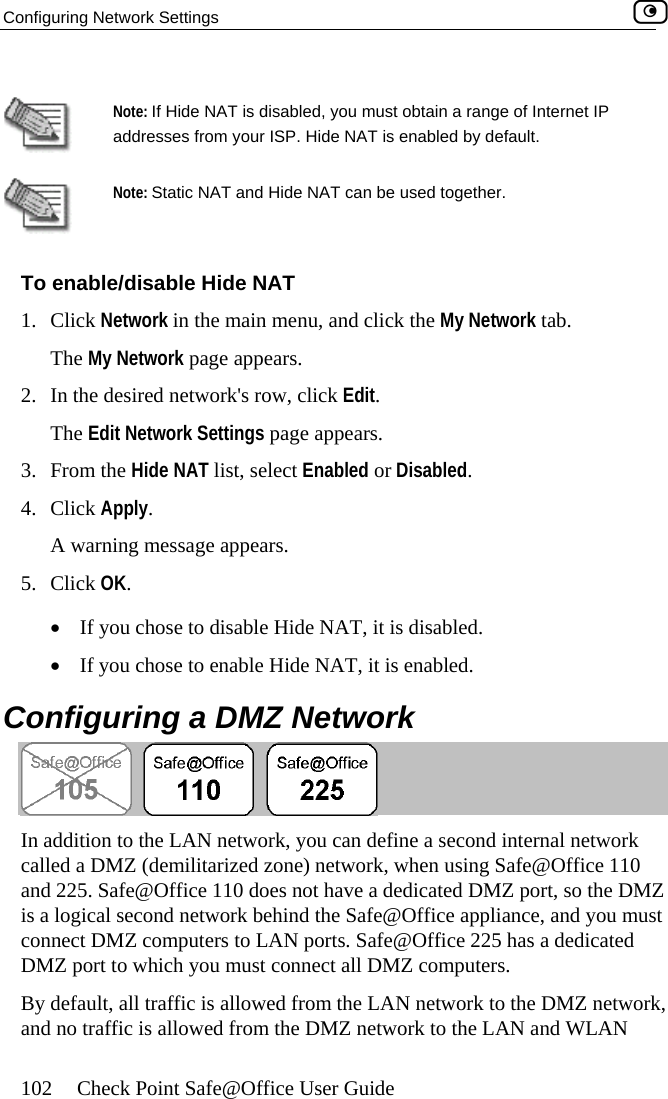


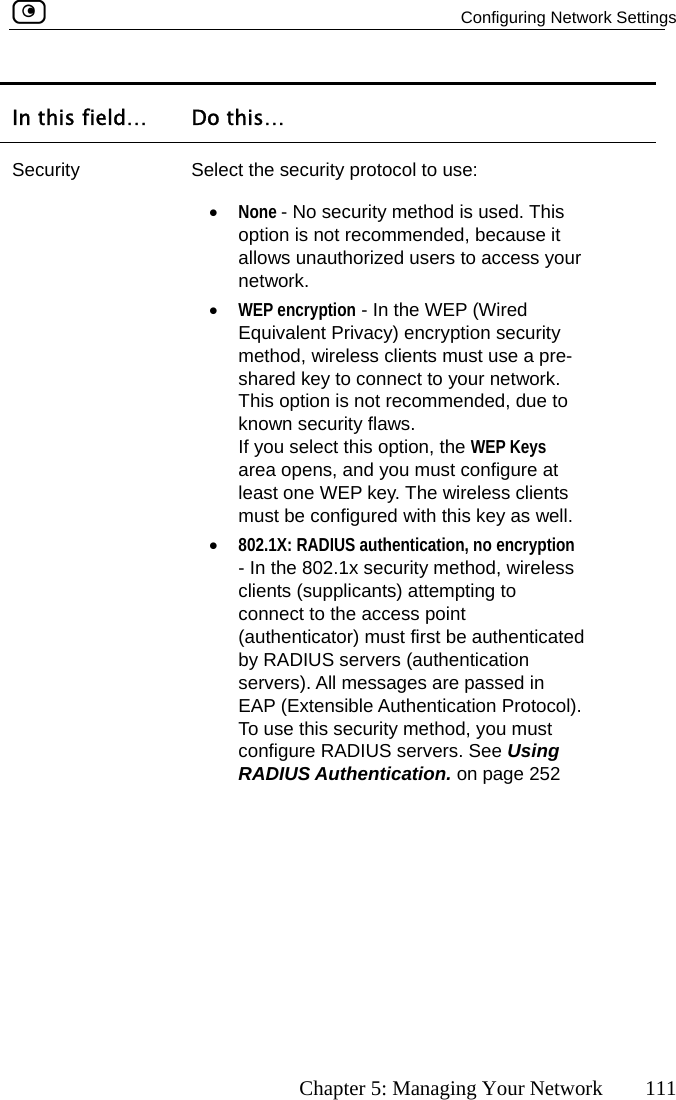
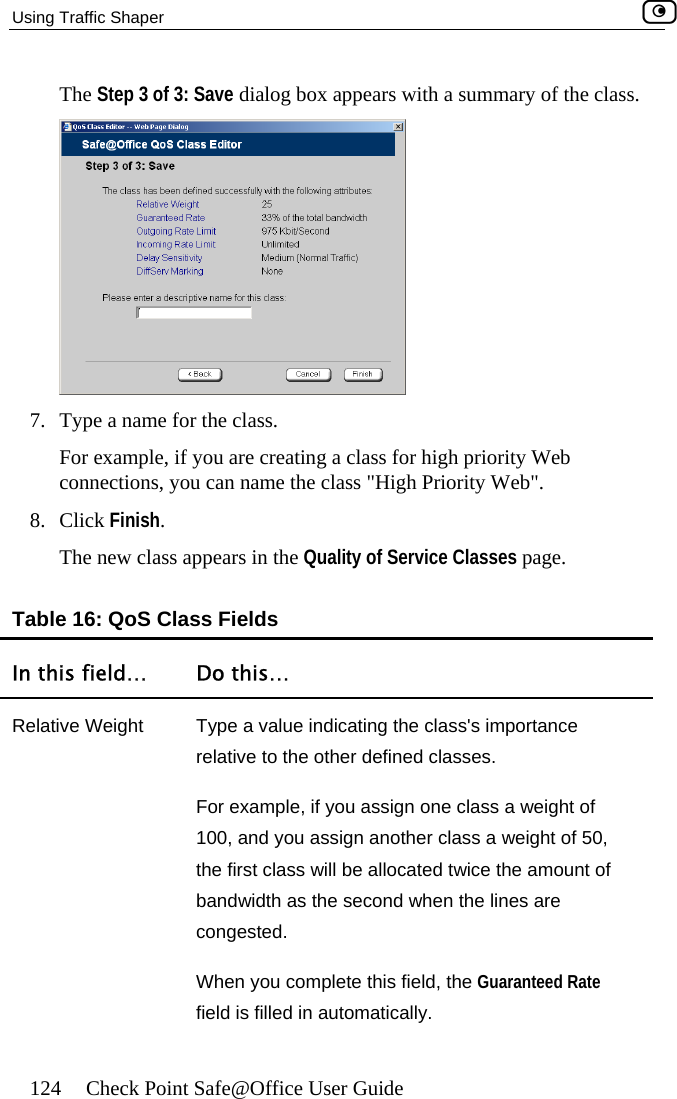
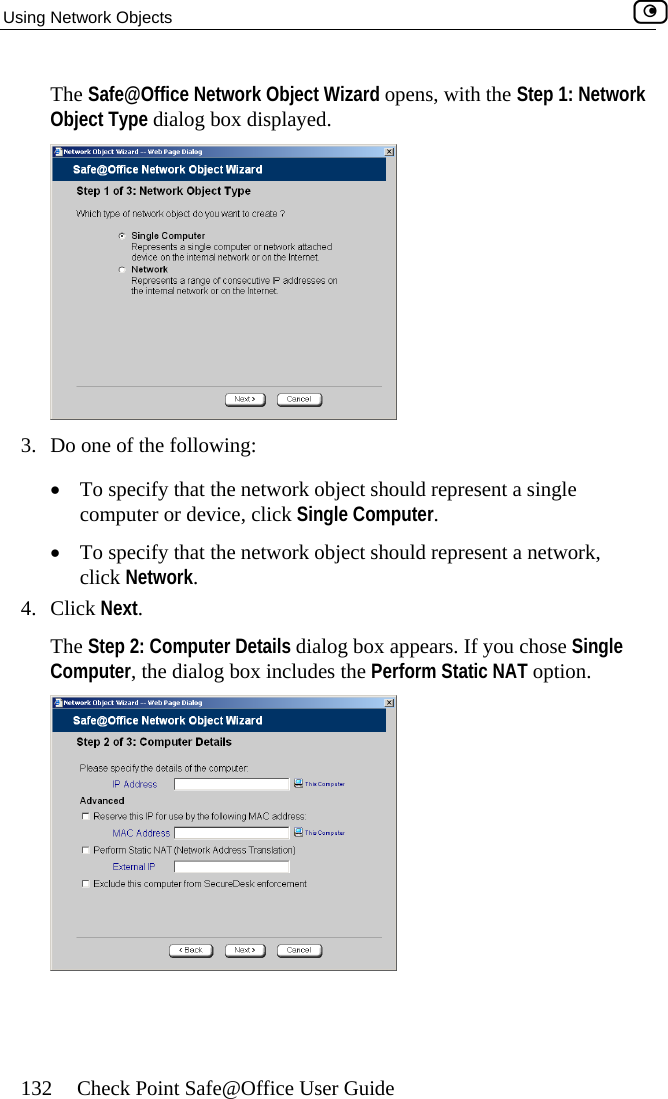
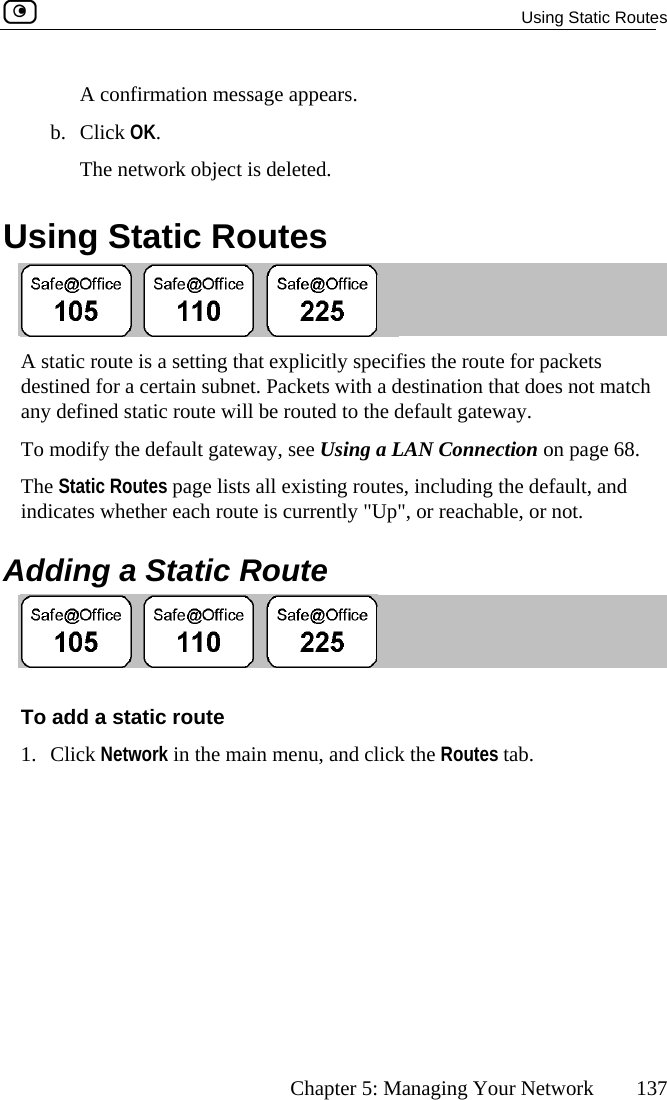
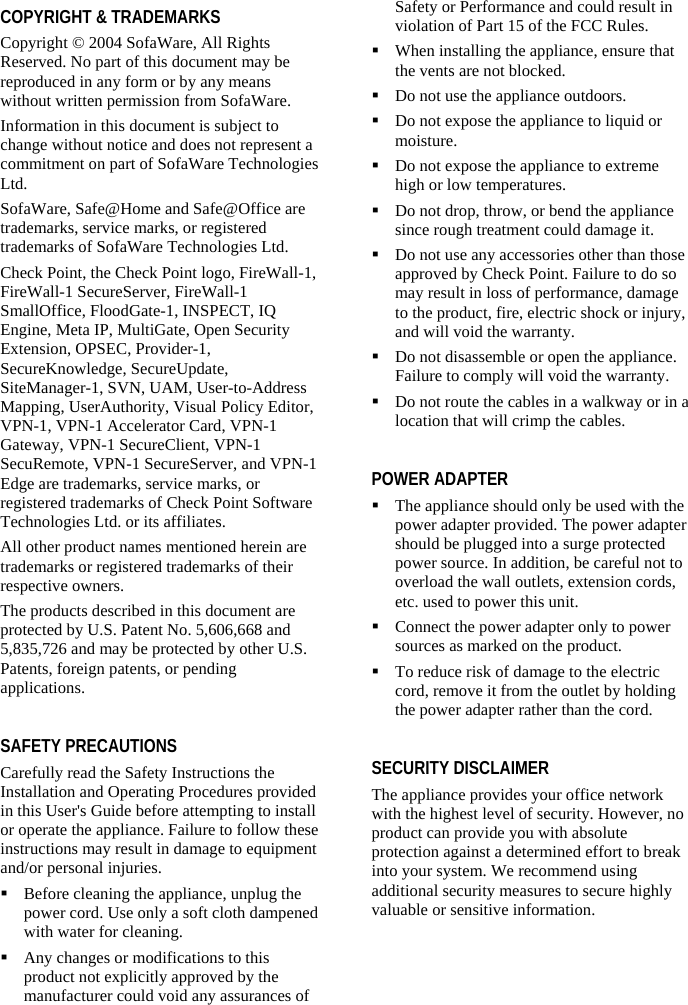
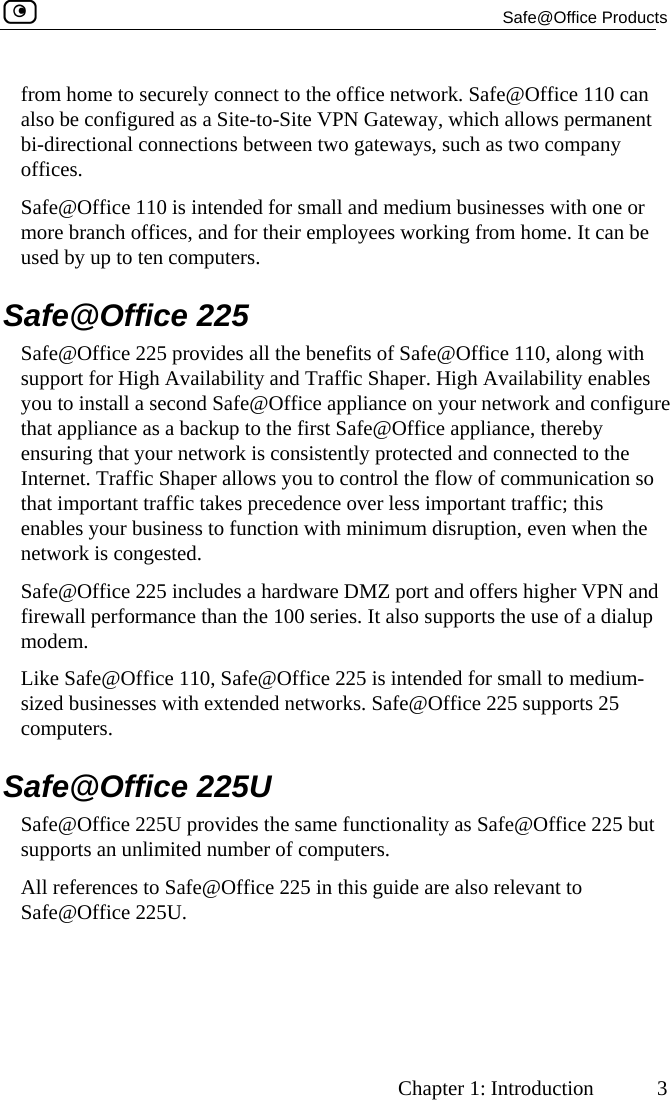
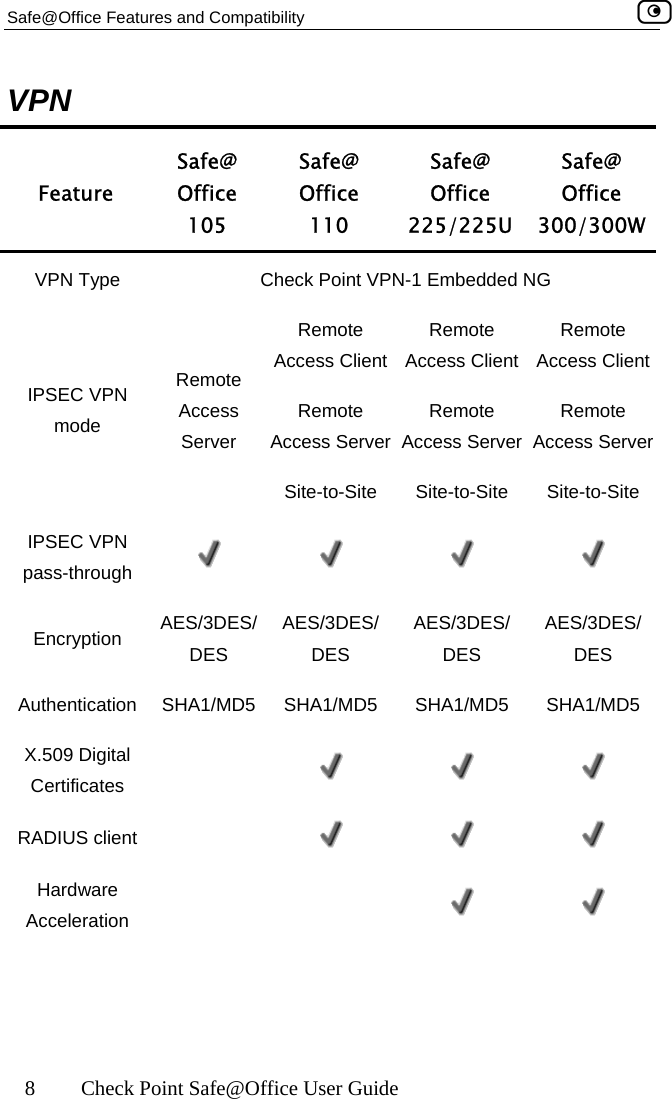
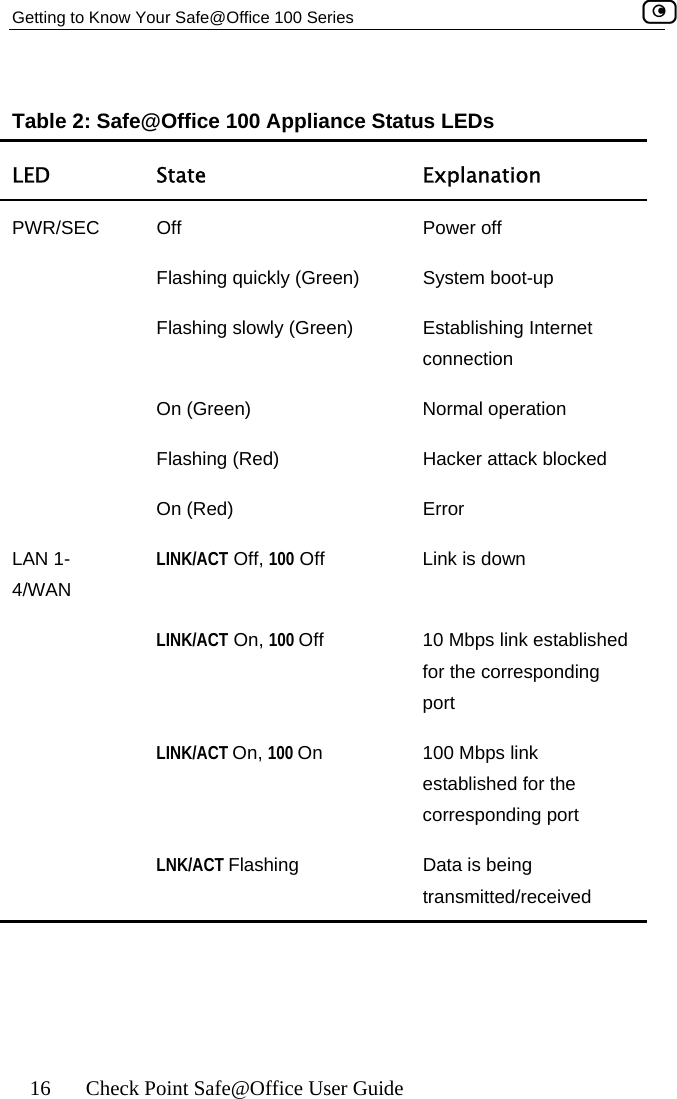
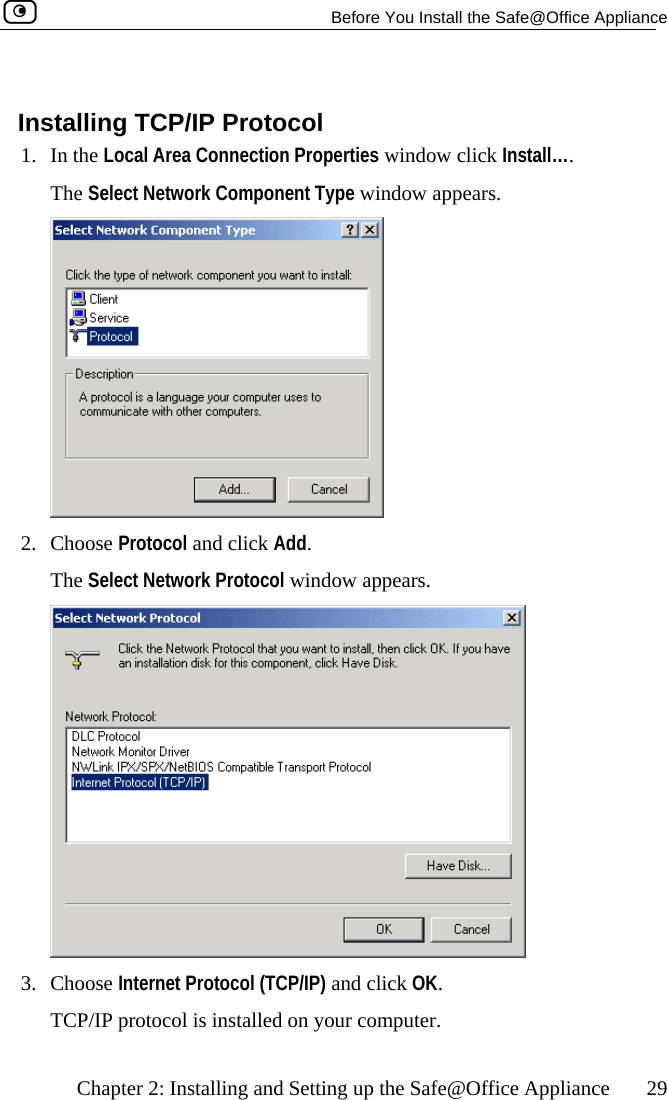
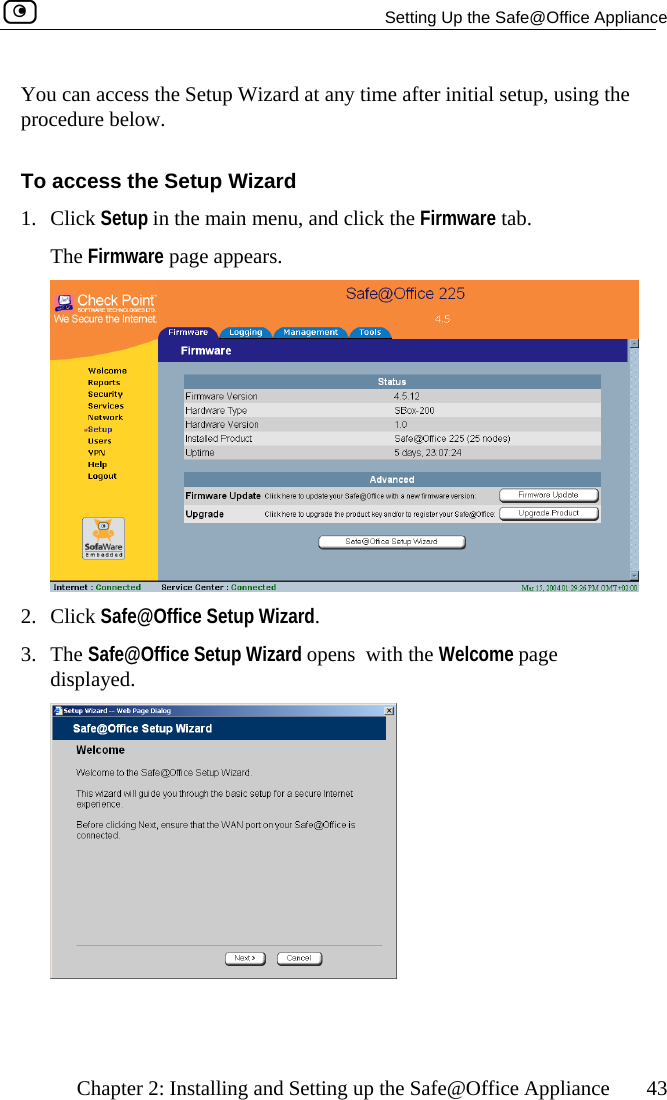
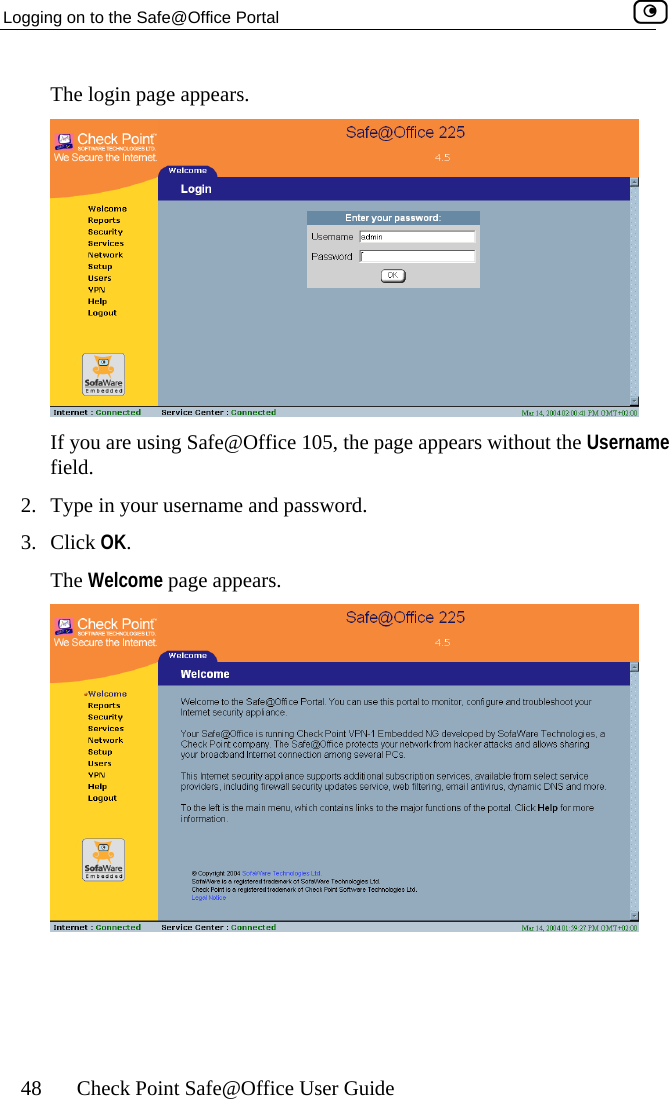
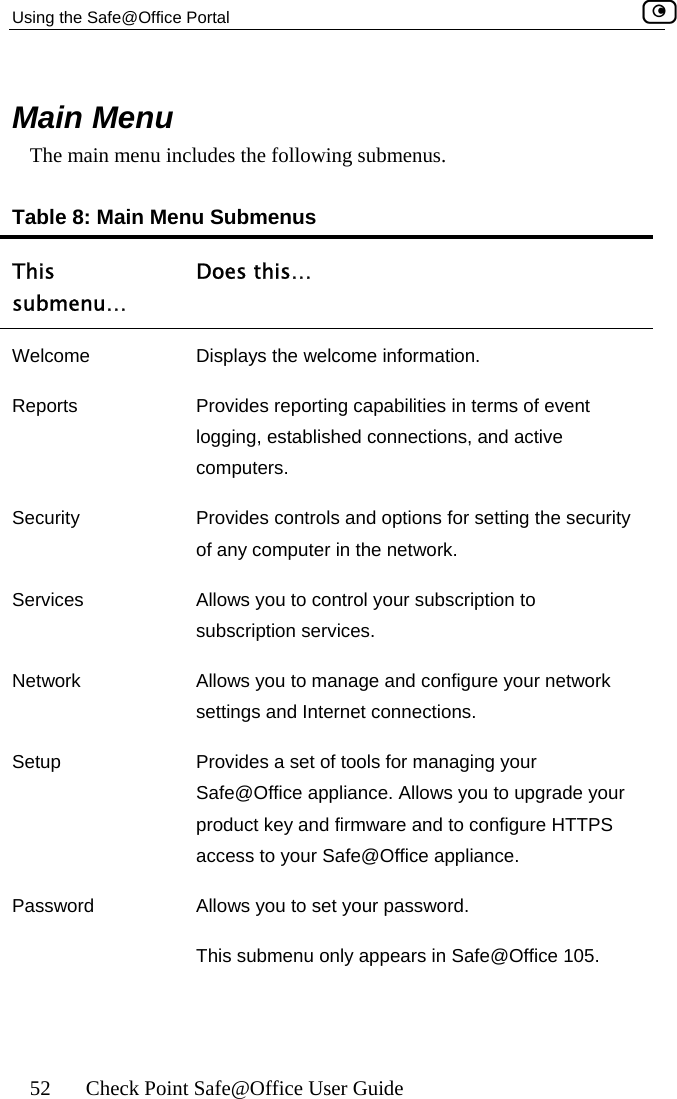
![Configuring Network Settings Chapter 5: Managing Your Network 113 In this field… Do this… WEP Keys Kbu64F] key length is 32 characters. Kboey 1, 2, 3, 4 radio tton Click the radio button next to the desired WEP key. Bits:10x[0-9, A- Select the WEP key length from the drop-down list. The possible key lengths are: • 64 Bits - The key length is 10 characters. • 128 Bits - The key length is 26 characters. • 152 Bits - TheNote: Some wireless card vendors call these lengths40/104/128, respectively. ey 1, 2, 3, 4 text x Type the WEP key, or click Random to randomly generate a key matching the selected length. The key is composed of characters 0-9 and A-F, and is not case-sensitive.](https://usermanual.wiki/SofaWare-Technologies/SBXW-166LHGE-4.Users-Manual-Part-1/User-Guide-476792-Page-124.png)