Star Systems PLATINO-WF2014 RFID Handheld Reader User Manual
Star Systems International Limited RFID Handheld Reader
UserManual.wiki
>
Star Systems
>
PLATINO WF2014 User Manual
User Manual
Navigation menu
Upload a User Manual
Namespaces
Wiki Guide
HTML
PDF
Info
Views
User Manual
Discussion / Help
Navigation

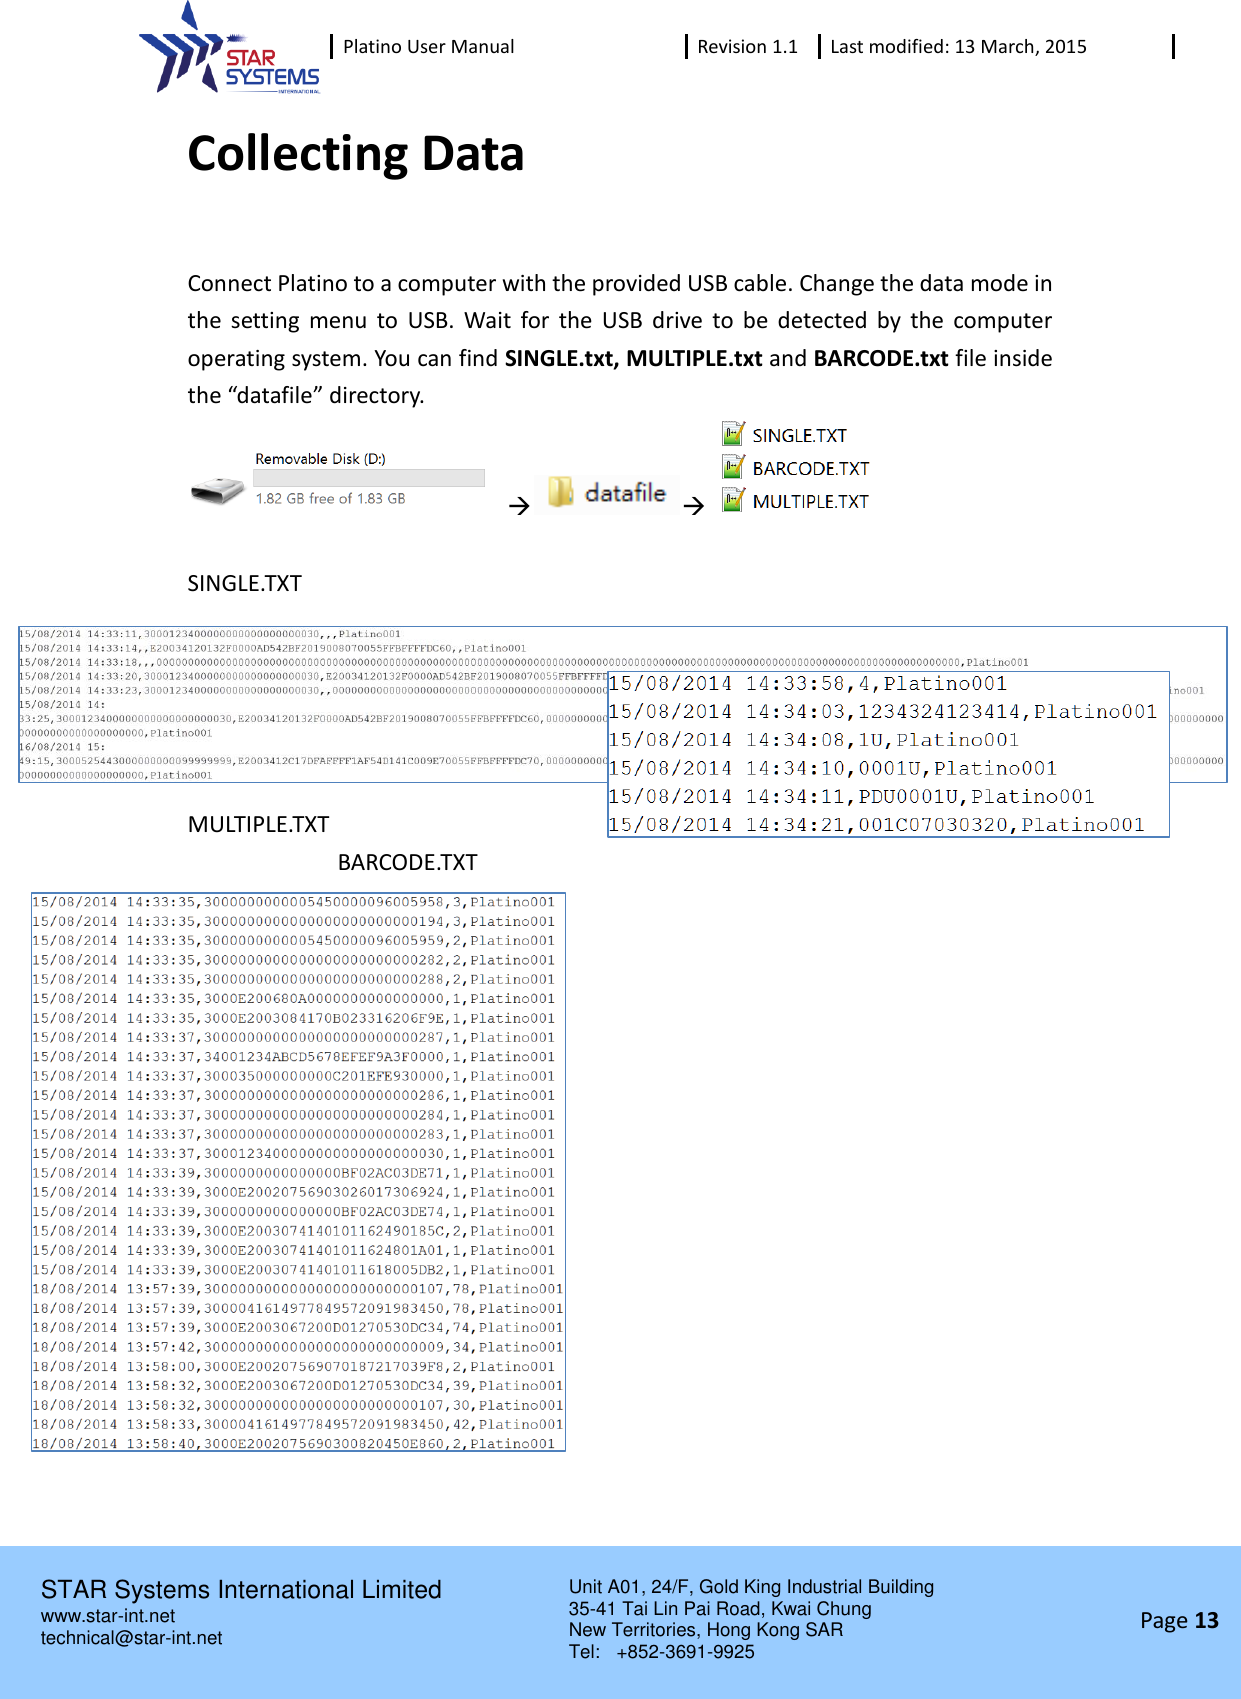
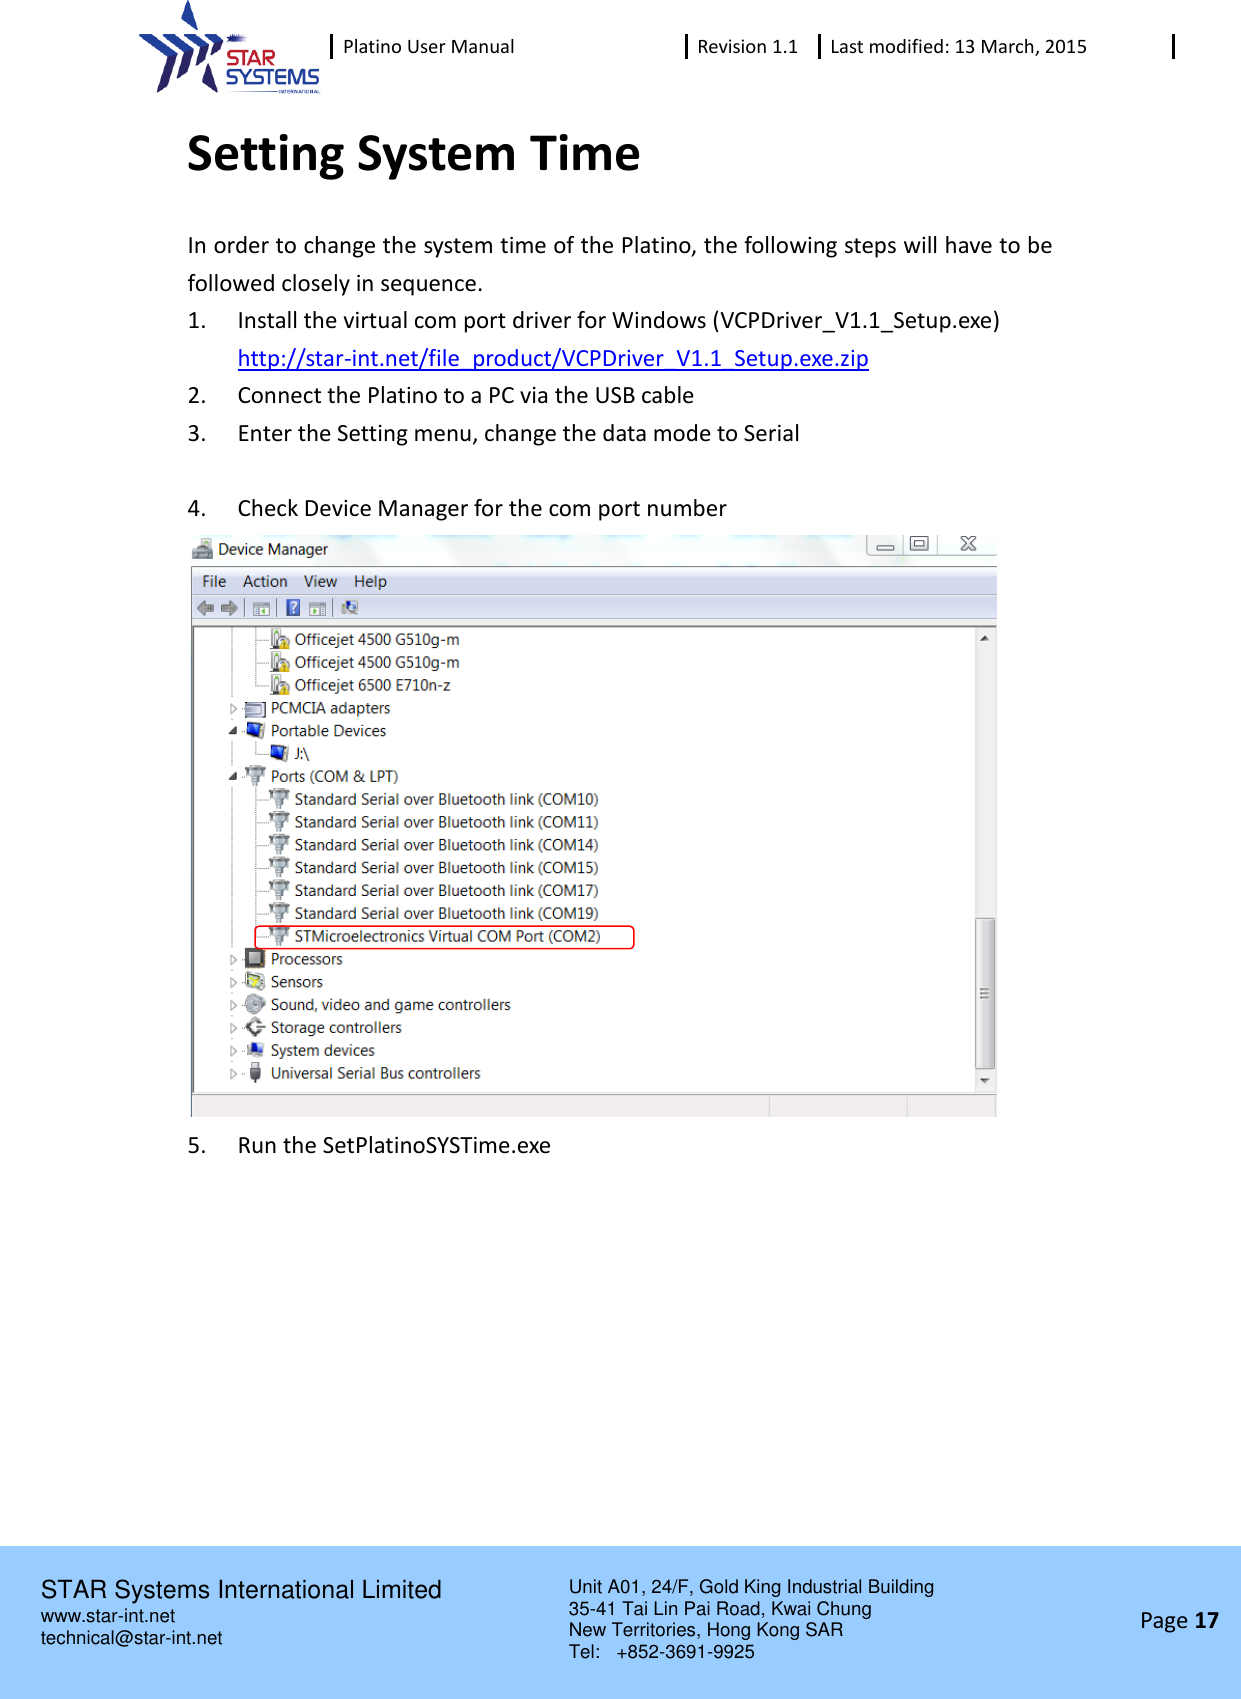
![Platino User Manual Revision 1.1 Last modified: 13 March, 2015 STAR Systems International Limited Unit A01, 24/F, Gold King Industrial Building 35-41 Tai Lin Pai Road, Kwai Chung New Territories, Hong Kong SAR Tel: +852-3691-9925 www.star-int.net technical@star-int.net Page 14 Collecting Data SINGLE.TXT Data Structure [Date] [Time], [EPC],[TID],[UserData],[SerialNo] Examples: Reading EPC 15/08/2014 14:33:11,3000123400000000000000000030,,,Platino001 Reading TID 15/08/2014 14:33:14,,E20034120132F0000AD542BF2019008070055FFBFFFFDC60,,Platino001 Reading User Data 15/08/2014 14:33:18,,,00000000000000000000000000000000000000000000000000000000000000000000000000000000000000000000000000000000000000000000000000000000,Platino001 Reading EPC+TID 15/08/2014 14:33:20,3000123400000000000000000030,E20034120132F0000AD542BF2019008070055FFBFFFFDC60,,Platino001 Reading EPC+USER DATA 15/08/2014 14:33:23,3000123400000000000000000030,,00000000000000000000000000000000000000000000000000000000000000000000000000000000000000000000000000000000000000000000000000000000,Platino001 Reading All Data 15/08/2014 14:33:25,3000123400000000000000000030,E20034120132F0000AD542BF2019008070055FFBFFFFDC60,00000000000000000000000000000000000000000000000000000000000000000000000000000000000000000000000000000000000000000000000000000000,Platino001](https://usermanual.wiki/Star-Systems/PLATINO-WF2014/User-Guide-2746217-Page-15.png)
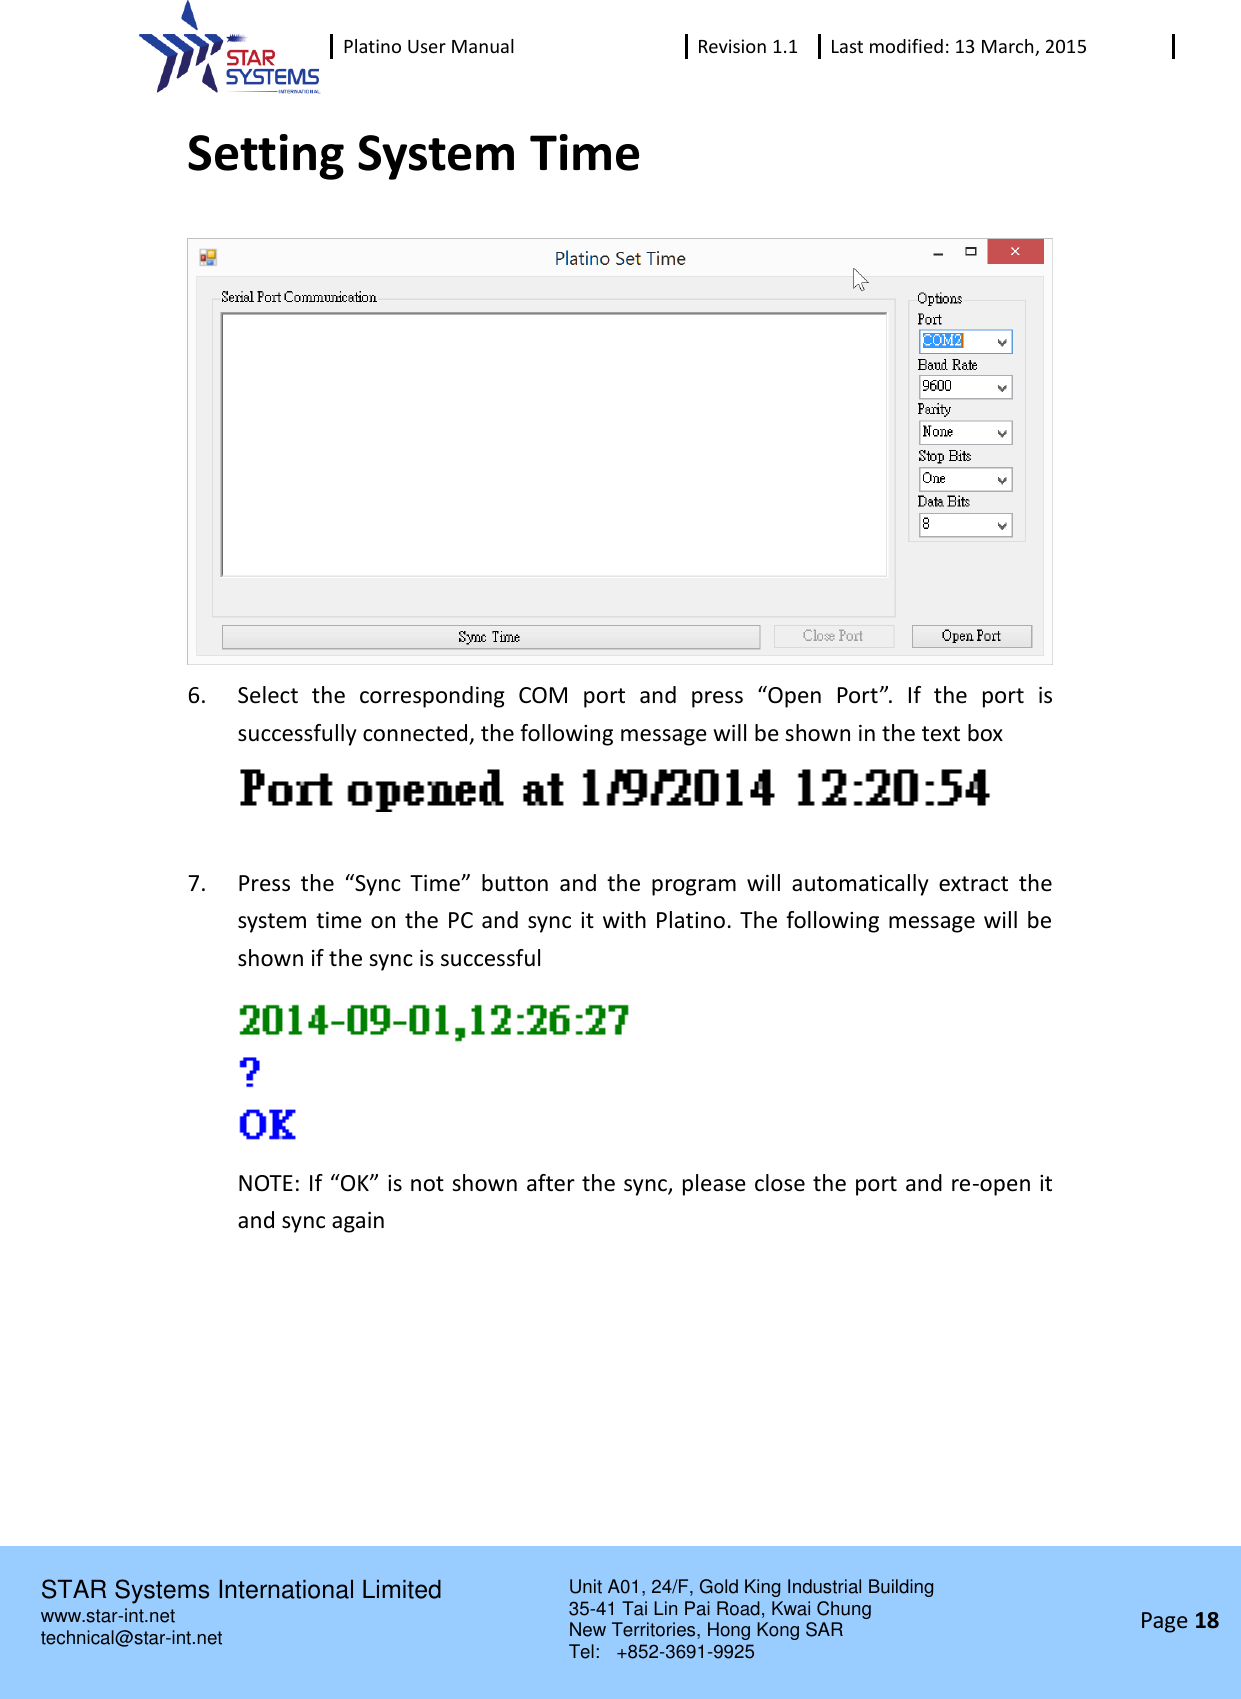
![Platino User Manual Revision 1.1 Last modified: 13 March, 2015 STAR Systems International Limited Unit A01, 24/F, Gold King Industrial Building 35-41 Tai Lin Pai Road, Kwai Chung New Territories, Hong Kong SAR Tel: +852-3691-9925 www.star-int.net technical@star-int.net Page 15 Collecting Data MULTIPLE.TXT Data Structure [Date] [Time],[EPC],[ReadCount],[SerialNo] Examples: 15/08/2014 14:33:35,3000000000005450000096005958,3,Platino001 Tag 3000000000005450000096005958 is bring read for 3 times BARCODE.TXT Data Structure [Date] [Time],[BARCODE],[SerialNo] Examples: 15/08/2014 14:34:21,001C07030320,Platino001](https://usermanual.wiki/Star-Systems/PLATINO-WF2014/User-Guide-2746217-Page-16.png)
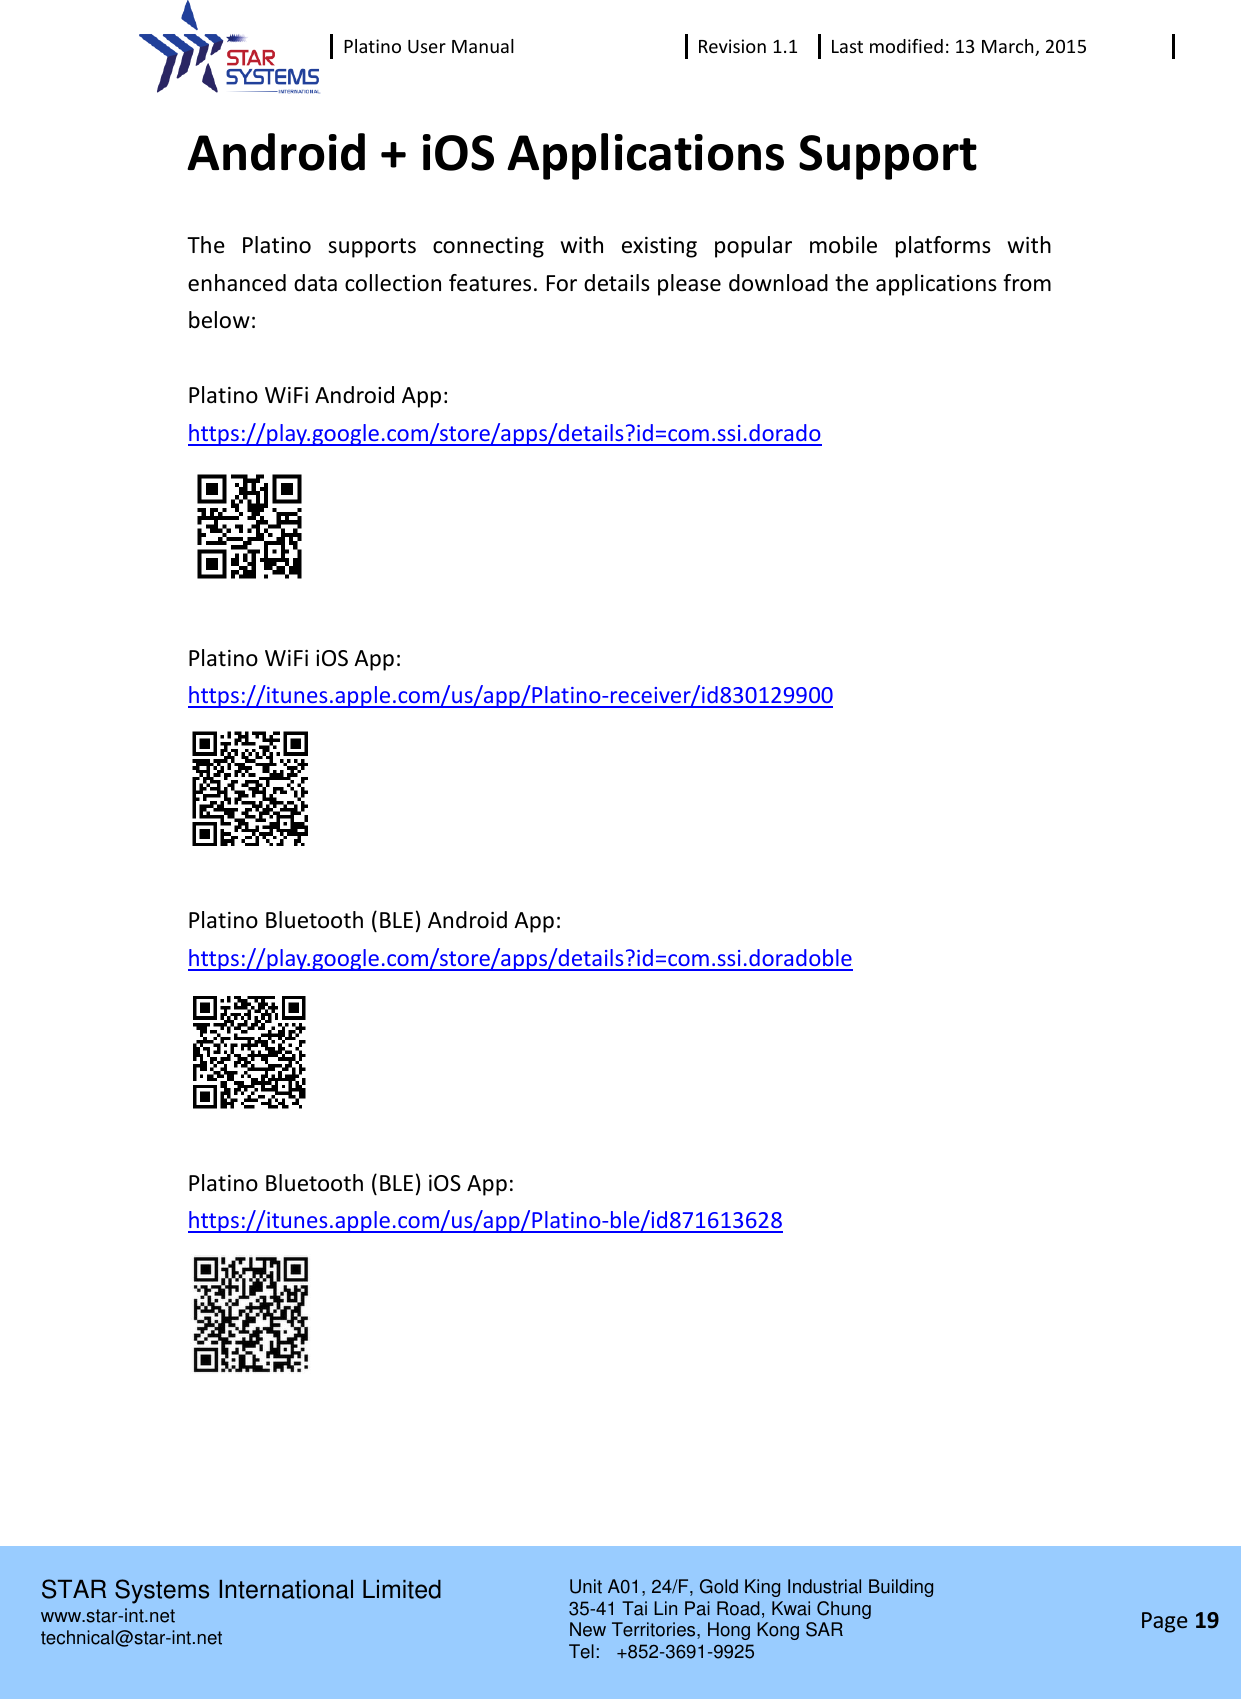
![Platino User Manual Revision 1.1 Last modified: 13 March, 2015 STAR Systems International Limited Unit A01, 24/F, Gold King Industrial Building 35-41 Tai Lin Pai Road, Kwai Chung New Territories, Hong Kong SAR Tel: +852-3691-9925 www.star-int.net technical@star-int.net Page 16 Parameter Configuration Through the USB port, you can also configure the following parameters of the reader by accessing SysPar.ini located in the Config folder Sample content of SysPar.ini Data Structure [SerialNo],[WiFi/BT Mode] SerialNo defines the Serial Number attached at the end of every record. The default serial number is PlatinoXXXXXX, but you may change the serial number to your own needs. WiFi/BT Mode defines if the unit is operating in WiFi or BT Mode 1 = BT Mode 2 = WiFi Mode NOTE: After changing the parameters in SysPar.ini, please save the setting in the file and reboot the reader for the settings to take effect](https://usermanual.wiki/Star-Systems/PLATINO-WF2014/User-Guide-2746217-Page-17.png)