TAIYO YUDEN WYSAAVDXB-E Wireless Module User Manual
Taiyo Yuden Co., Ltd. Wireless Module
UserManual.wiki
>
TAIYO YUDEN
>
WYSAAVDXB-E User Manual
>
User manual
Contents
1.
User manual (FCC)_WYSAAVDXB-E
2.
User manual_EN_H725A
3.
User manual_FR_H725A
4.
User manual (FCC)_WYSAAVDXB
5.
User manual
User manual
Navigation menu
Upload a User Manual
Namespaces
Wiki Guide
HTML
PDF
Info
Views
User Manual
Discussion / Help
Navigation
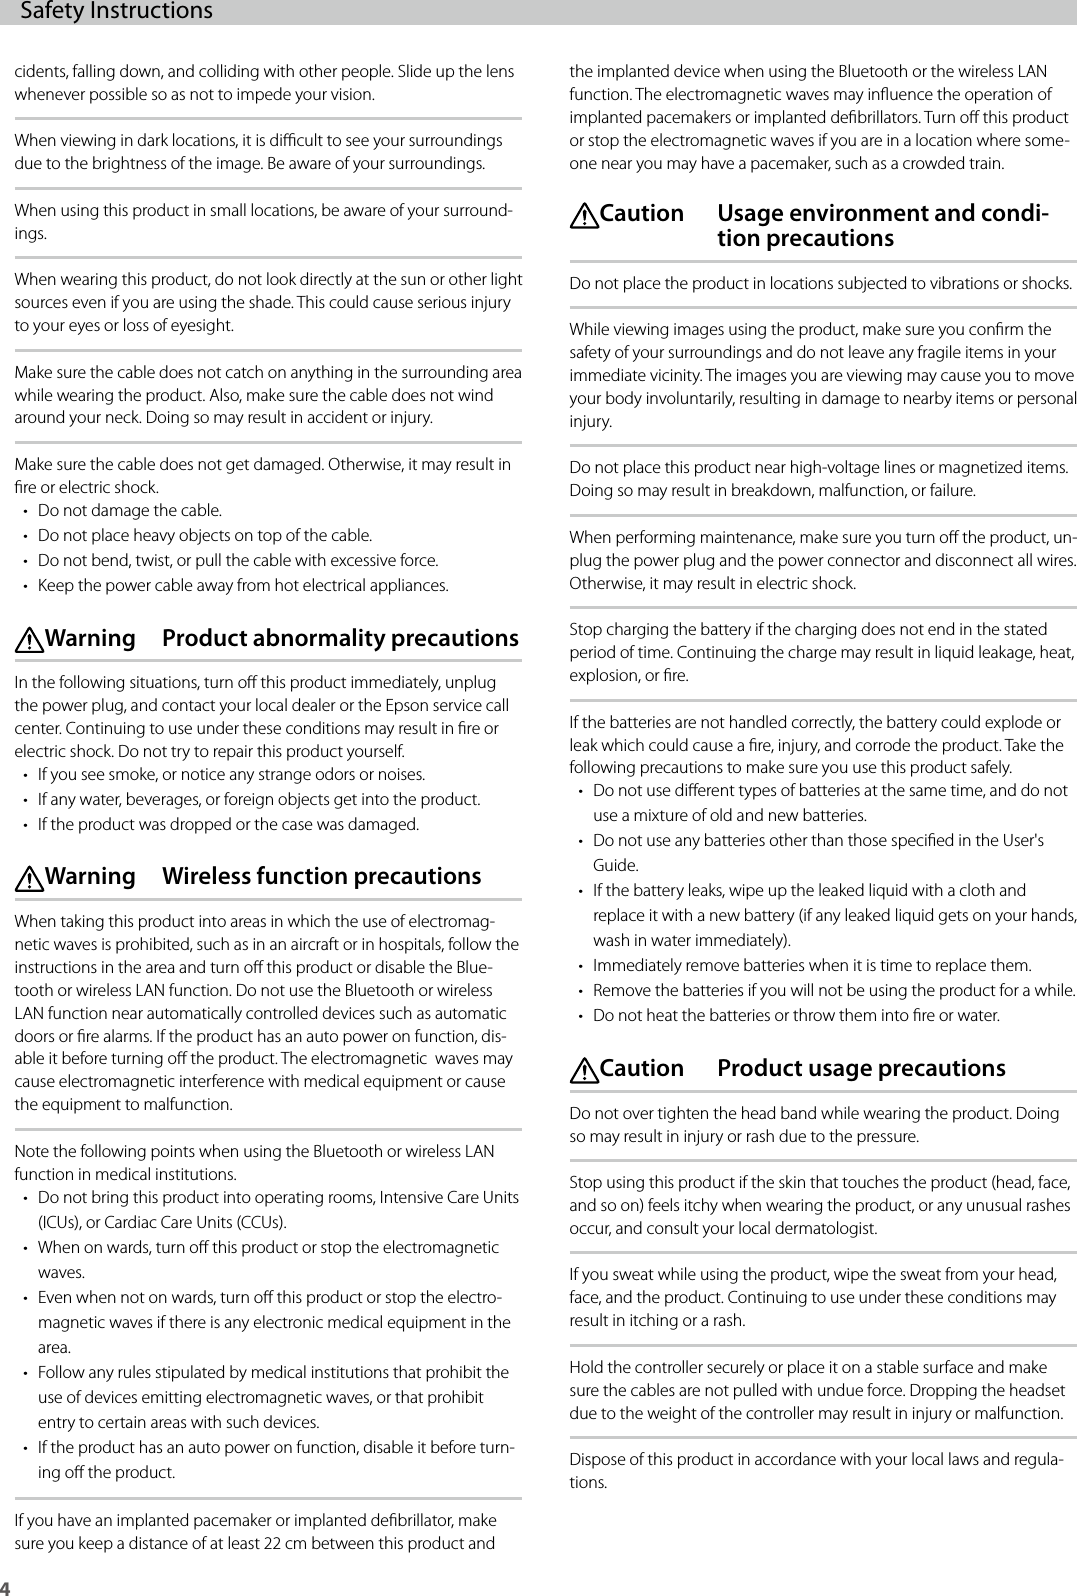
![3Safety InstructionsFor your safety, read the attached documents carefully to use the product correctly.After you have read the documents, save them for later reference.Safety symbols WarningThis symbol indicates information that, if ig-nored, could possibly result in serious personal injury or even death due to incorrect handling. CautionThis symbol indicates information that, if ig-nored, could possibly result in personal injury or physical damage due to incorrect handling. Warning Usage environment and condi-tion precautionsOnly use this product at the stated power-supply voltage.Only use the supplied AC cable and AC adapter. Using other power supply devices could result in heat, re, explosion, malfunction, or liquid leakage.Take the following precautions when handling the plug. Failure to com-ply with these precautions could result in re or electric shock.• Do not plug the AC adapter into an outlet being used by many other devices.• Do not insert the plug into a dusty outlet.• Insert the plug rmly into the outlet.• Do not hold the plug with wet hands.• Do not pull the power cable when disconnecting the plug.Do not use the supplied power cable if it is damaged. Doing so could result in re or electric shock.• Do not modify the supplied power cable.• Do not place heavy objects on top of the supplied power cable.• Do not bend, twist, or pull the power cable with excessive force.• Keep the power cable away from hot electrical appliances.For your safety, unplug the product when it is not being used. The insulation may deteriorate, which may result in electric shock, re, or malfunction.Do not touch the plug during a thunderstorm. Doing so could result in re or electric shock.Do not leave this product in locations subject to temperatures beyond the specied operating range, such as cars with the windows closed, in direct sunlight, or in front of air-conditioning or heater outlets. Also, avoid locations subject to sudden changes in temperature. Doing so may result in deformation due to heat, re, malfunction, failure, or dam-age.Do not use the product in locations where it may get wet or is subject to high levels of humidity such as in a bath or shower. Doing so could result in re or electric shock.Do not place this product in locations subject to smoke, steam, high humidity, or dust such as kitchen counters or near humidiers. Doing so may result in re, electric shock, or deterioration in image quality.Do not cover this product with a cloth or similar material during use. Doing so may change the shape of the case through heat, or re.Do not expose the camera lens to direct sunlight for a long time. Doing so may result in re or explosion due to condensed beams of light from the lens. Warning Product usage precautionsDo not start using this product at a high volume. Doing so may result in hearing impairment. Lower the volume before turning o the product, and gradually increase the volume after turning on the product. To prevent possible hearing damage, do not listen at high volume for prolonged periods of time.Do not allow any conductive foreign objects to touch the charging con-nector, external device connector, or earphone microphone socket, and do not put any conductive foreign objects into the connection ports. Doing so may cause a short circuit and result in re or electric shock.Do not allow solvents such as alcohol, benzene, or thinner to touch the product. Also, do not clean this product with a wet cloth or solvents. Doing so may warp or crack the product housing and may result in electric shock, malfunction, or re.The product housing should only be opened by qualied service per-sonnel unless you are explicitly instructed to do so in the User’s Guide. Also, do not disassemble or remodel the product (including consum-able items). Many of the parts inside the product carry a high voltage and could cause re, electric shock, accident, or poisoning.Do not subject the lens of the product to strong shocks or knock it against hard objects. If the lens is damaged, it could splinter and cause serious injuries to the eyes and face.Do not throw the product into a re and do not heat the product. Do not place objects with naked ames, such as candles, on this product. Doing so may result in heat, re, or explosion. Warning Viewing image precautionsDo not wear this product while driving a car, riding a motor bike or bi-cycle, cooking, or performing any other dangerous tasks. Doing so may result in accident or injury. Do not use this product in unstable locations such as stairs or at altitude. Also, do not use the product while walking in dangerous locations such as near machinery or equipment that might get caught on the cables, where there is a lot of trac, or where it is dark. Doing so may result in accident or injury.When walking while viewing images on the product, be aware of your surroundings. If you are too focused on the image, it could result in ac-General information symbolsCaution Indicates procedures which may result in damage or injury if sucient care is not taken.Note Indicates additional information and points which may be useful to know regarding a topic.[ ] Indicates controller keys and icons and menu items displayed on the screen.➡Indicates a reference to related topics.](https://usermanual.wiki/TAIYO-YUDEN/WYSAAVDXB-E.User-manual/User-Guide-2896233-Page-3.png)
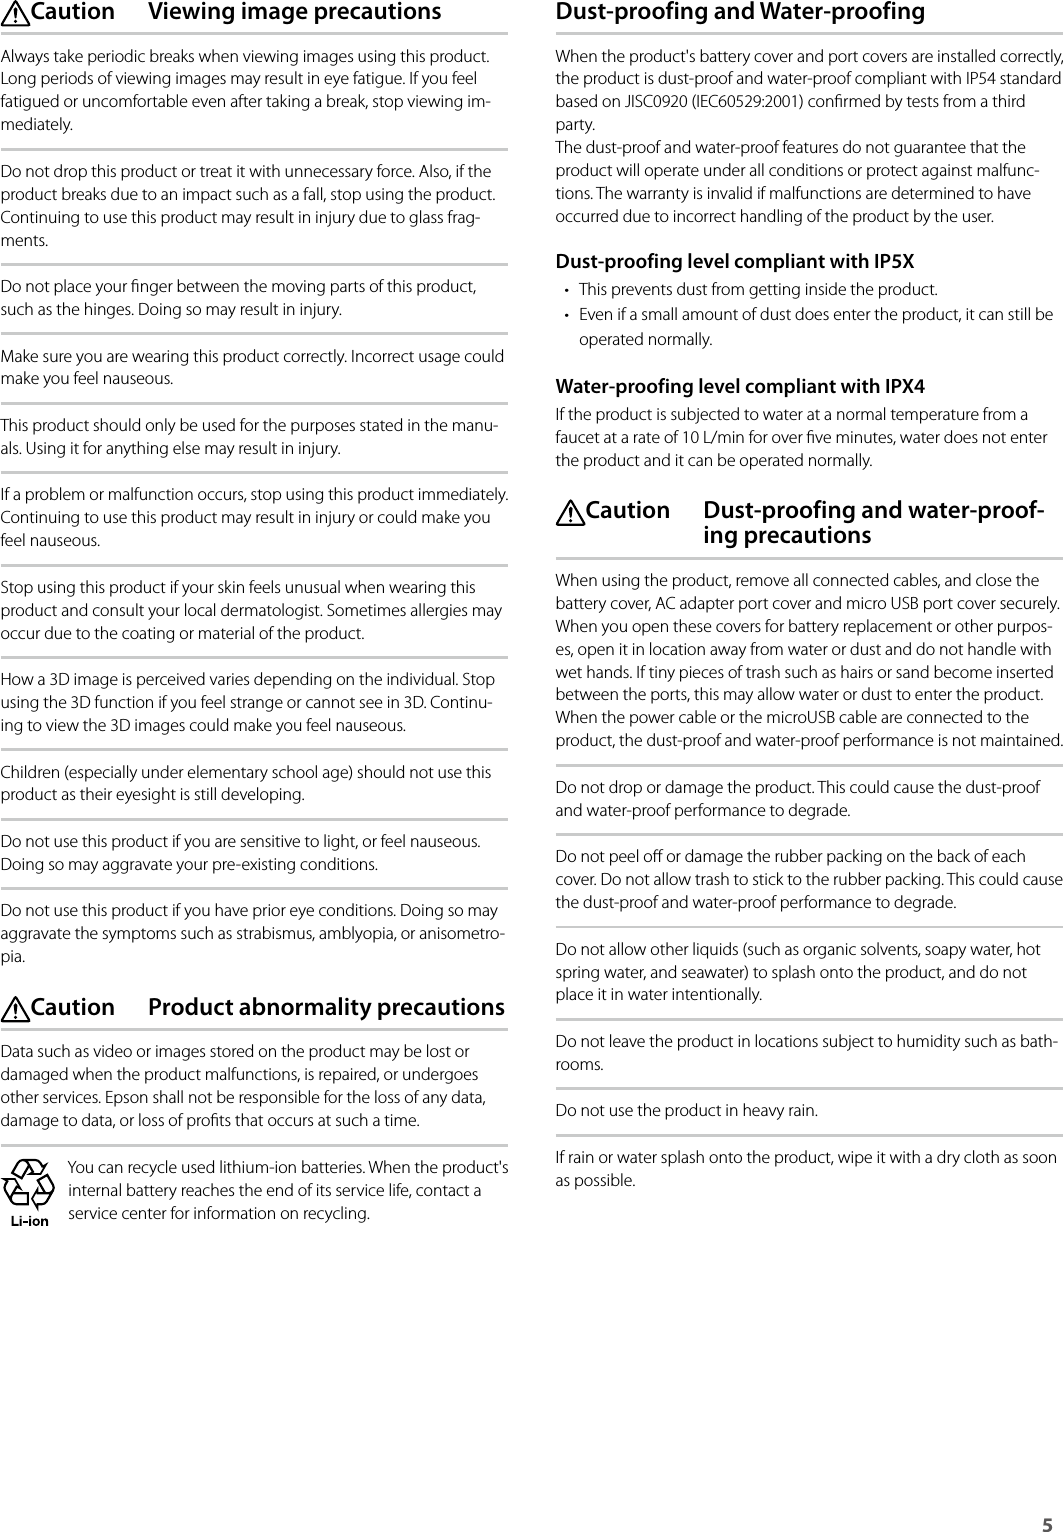
![7 ControllerThe illustrations show the controller when it has been removed from the controller holder.Amicro USB port*You can connect a commercially available USB cable to connect to a computer.BReset button*If the product stops working, press this button to force the product to turn o.CmicroSD card slot*You can insert a commercially available microSD card.GCross-keyHighlights items and moves the cursor when making settings or operating an application.H[ ] Key lockDisables controller operations (Key lock mode) to prevent ac-cidental operations. ➡“Disabling controller operations (Key lock)” p. 10IBattery cover*Remove when replacing the battery.JKey lock indicatorLit blue when the key lock is on.KPower indicatorYou can check the status of the product according to the color and lit status of the indicator.Indicator Status Product StatusLight blue OperatingFlashing light blue (one second intervals) Starting up / Shutting downFlashing light blue (once every three seconds) ChargingBlue Sleep modeFlashing red Battery running low/Startup errorFlashing red three times Insucient battery to start upFlashing red and blue alternately Battery replacement modeLEarphone socketConnects the supplied mono earphones with mic.MAC adapter portConnects the AC adapter to charge the product. ➡“Charging the Battery” p. 8D[ ] Power buttonTurns the product on or o. ➡“Turning On and O” p. 10EABXY keysThe key functions vary depending on the application being used. The following shows the default settings.Key FunctionA (Blue) key Displays the previous screen.B (Red) key Displays the Home screen.X (Green) key Displays available menus for the current screen.Y (Yellow) key Switches the operation performed when you press the cross-key between adjusting the volume, adjusting the brightness, and switching between 2D/3D mode.F[ ] Enter keySelects or conrms the item when making settings or operating an application.* You cannot use the feature when the controller is in the controller holder.](https://usermanual.wiki/TAIYO-YUDEN/WYSAAVDXB-E.User-manual/User-Guide-2896233-Page-7.png)
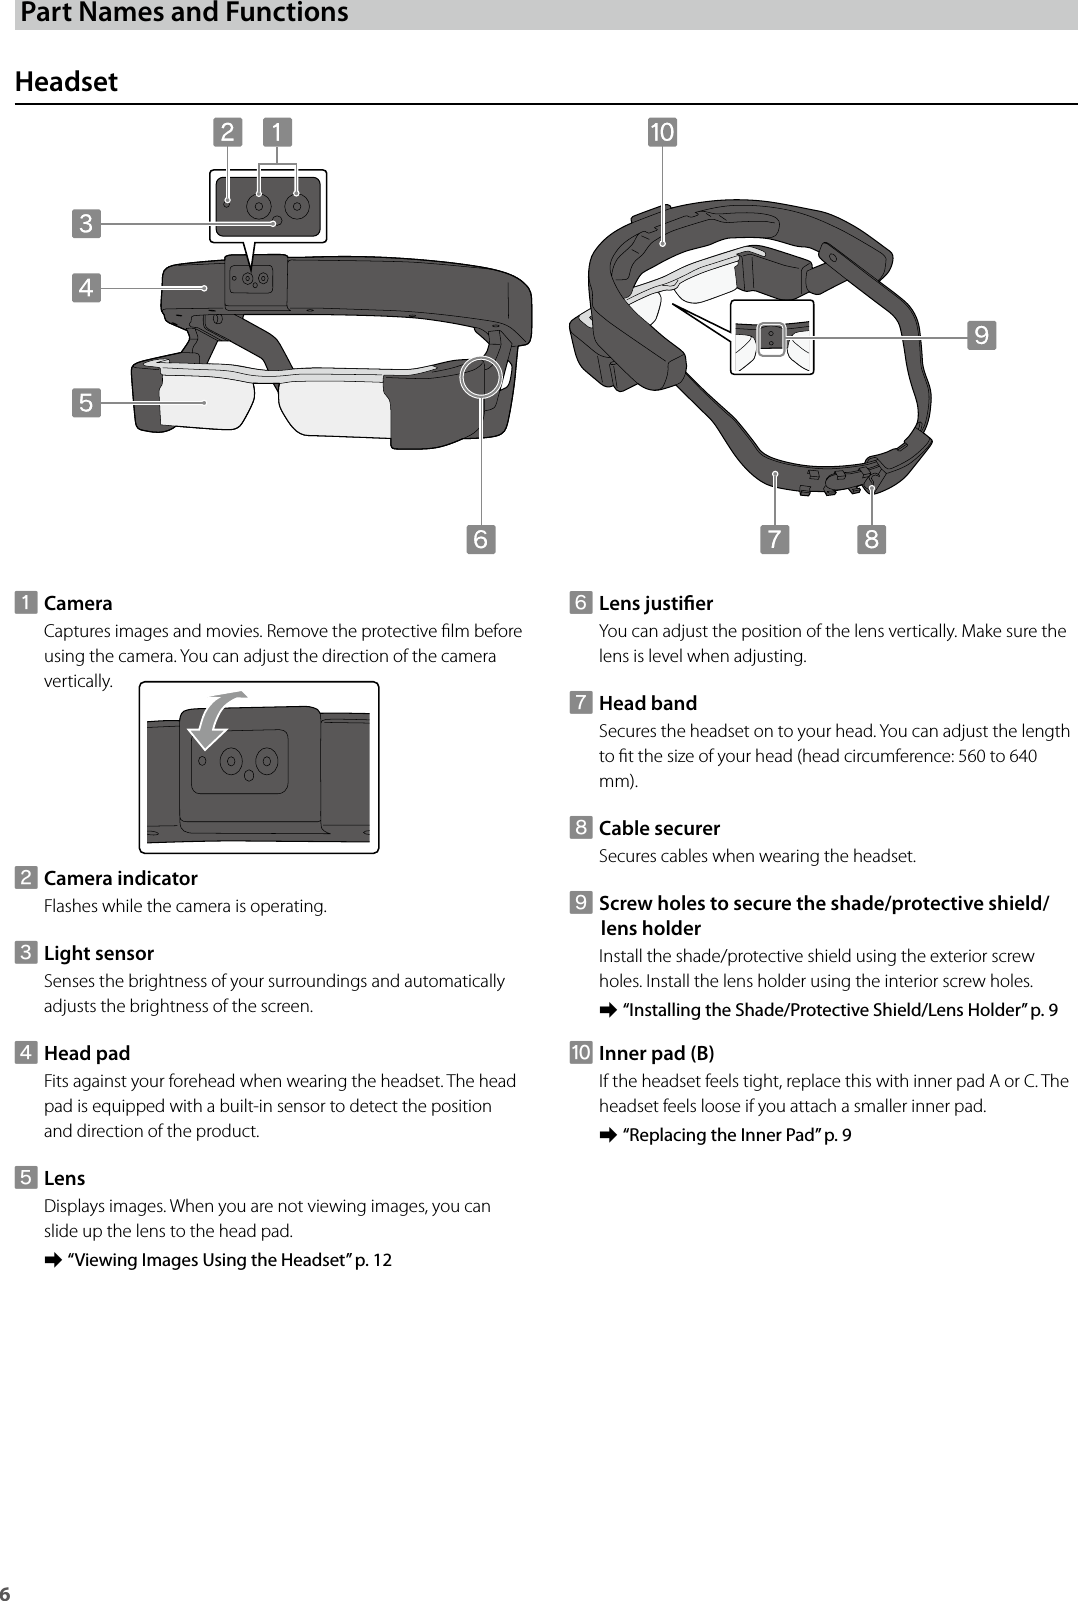
![8 Getting ReadyCharging the BatteryMake sure you charge the product when using it for the rst time.Initial charging takes approximately three hours.CautionMake sure you install two batteries when using the product.Replacing with Optional BatteriesThis section explains how to replace a battery with a fully charged battery. You need to purchase optional batteries and a battery char-ger for replacement.You can replace the batteries without turning o the product.CautionDo not remove two batteries at the same time when the product is on. Stored data and settings may be lost.NoteThe product guides you through replacing the batteries in Battery replacement mode. Press the [ ] power button and the [ ] key lock button at the same time, and then replace the batteries by fol-lowing the instructions displayed in the headset.ARemove the battery cover.EPlug in the AC cable.The power indicator ashes light blue. Charging is complete when the power indicator stops ashing and changes to lit light blue. Disconnect the AC adapter and the AC cable.NoteWhen charging is complete with two batteries installed, you can use the product for approximately four hours. Battery life may vary depend-ing on the environmental usage conditions and the applications being used.The battery indicator for the battery that is running low ashes red.BRemove one battery.While pressing the battery catch, lift out the battery.BInstall two batteries.Align the charging connectors on the battery with those on the product, and then press the battery down until you hear it click into place.ARemove the battery cover.CAttach the battery cover.DConnect the controller, AC adapter, and AC cable.NoteWhen the product is o, the battery indicator does not oper-ate.](https://usermanual.wiki/TAIYO-YUDEN/WYSAAVDXB-E.User-manual/User-Guide-2896233-Page-8.png)
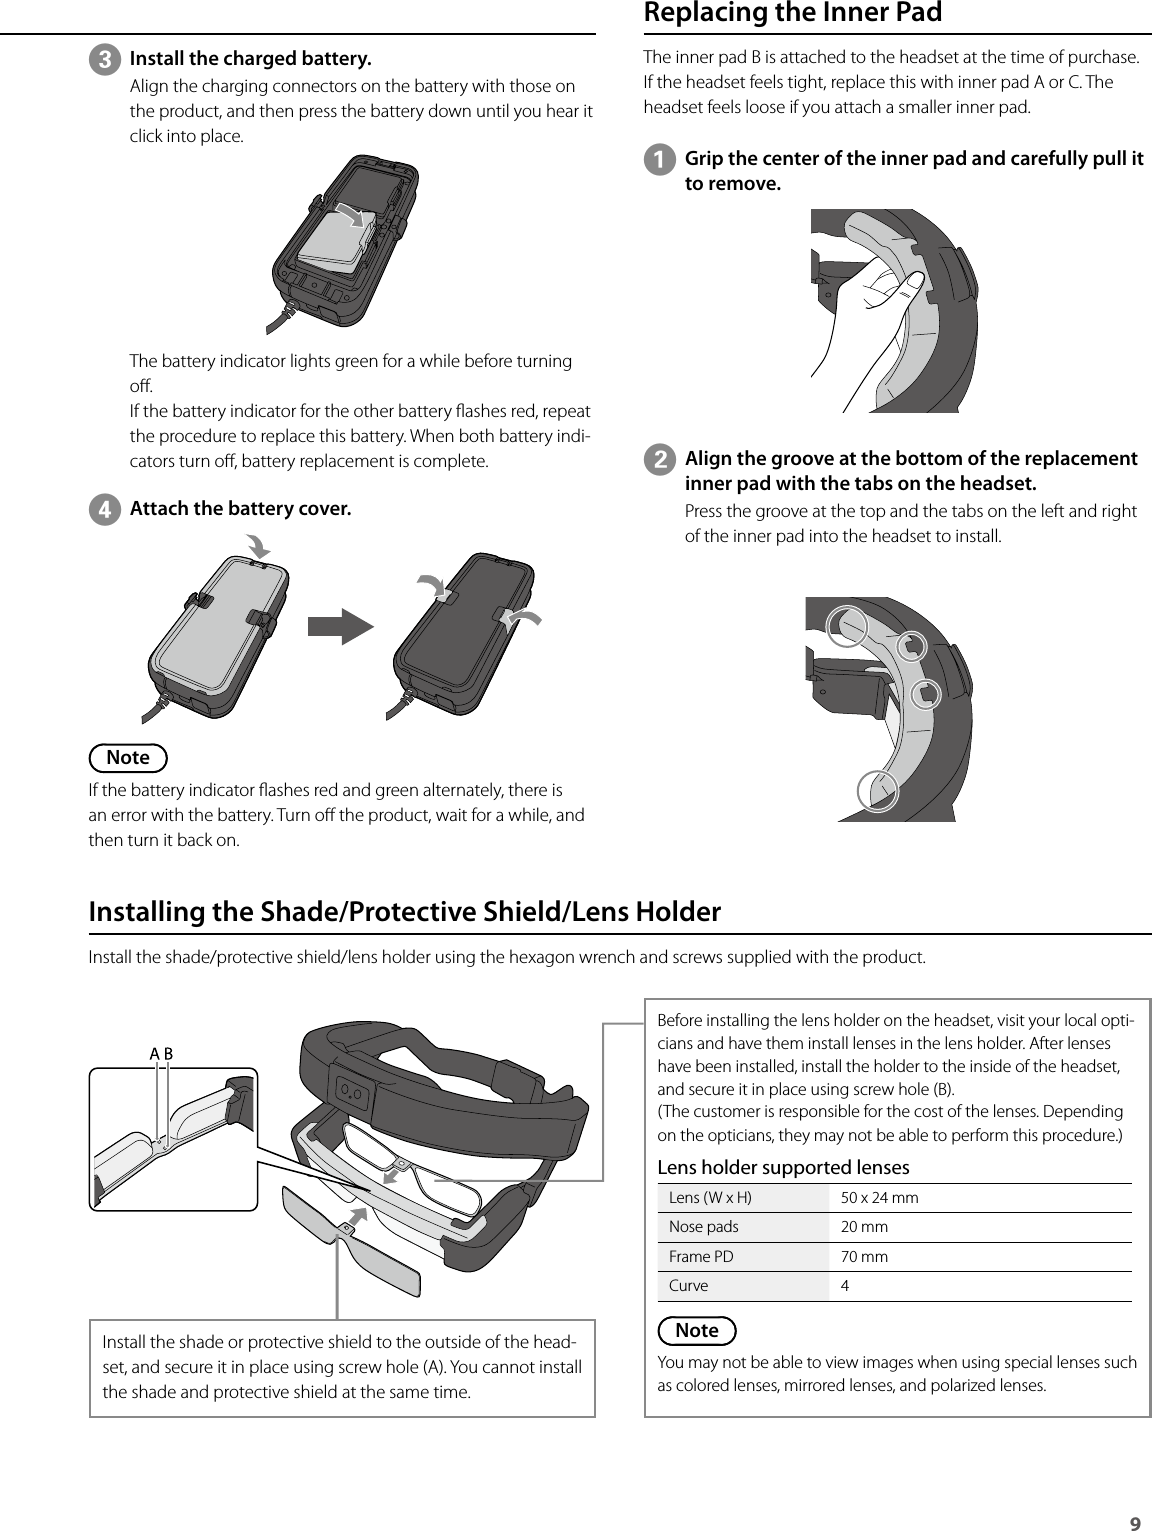
![10 Turning On and ONoteBefore turning on the product, check that the battery is charged. ➡“Charging the Battery” p. 8Note• To turn o the product, hold down the [ ] power button for more than one second, and then select [OK] in the message displayed in the headset.• If operations freeze, you can force the product to shutdown by using one of the following methods.• Hold down the [ ] power button for more than eight seconds.• Use something thin to press the reset button for at least two seconds.Turning onPress the [ ] power button until the power indicator is lit light blue.The power indicator ashes light blue when starting up. Startup is complete when the power indicator changes from ashing to lit light blue.Turning off the screen while the product is on (Sleep mode)When you press the [ ] power button briey, the power indica-tor turns blue, and the product enters sleep mode. Press the [ ] power button briey again to wake the product from sleep mode.Disabling controller operations (Key lock)When you hold down the [ ] key lock button, the key lock indi-cator is lit blue, and the key lock turns on. Press the [ ] key lock button again to release the key lock.CautionDo not force the product to shutdown unless operations freeze. Stored data and settings may be lost.Wearing the ProductWearing the ControllerThis section explains how to wear the controller on your arm using the armband.Note• You can also wear the controller on your waist using a commercially available belt (up to 50 mm thick) instead of the armband.• Before wearing the controller and headset, put on the supplied mono earphones with mic. Connect it to the earphone socket on the controller, and wear them as shown in the following illustration.AThread the armband through the controller holder, and create a loop that will t roughly to the size of your arm.BUnclip the tabs on the sides of the controller holder.CWind the cable around the controller holder and secure it in place with the tabs.Make sure the cable does not catch on anything in the sur-rounding area.DPlace the controller holder on your arm and secure it with the armband.NoteYou can also thread the armband through vertically.](https://usermanual.wiki/TAIYO-YUDEN/WYSAAVDXB-E.User-manual/User-Guide-2896233-Page-10.png)
![13TroubleshootingIf you think a malfunction has occurred, check the following.Cannot use the controller• You cannot perform controller operations when the key lock indica-tor is lit (Key lock enabled). Press the [ ] key lock button to release key lock. ➡“Disabling controller operations (Key lock)” p. 10• When the power indicator is blue (during Sleep mode), press the [ ] power button briey. ➡“Turning o the screen while the product is on (Sleep mode)” p. 10Cannot connect to the network• Check that the wireless LAN (Wi-Fi) environment can be accessed from where you are using the product.• Check that the product's network settings are correct. Contact your network administrator for more details.The product does not turn on• Check that the batteries are installed in the controller correctly.• Check that the batteries are fully charged.• If the product cannot turn on due to insucient power, the power indicator ashes red three times.• Press the [ ] power button until the power indicator is lit light blue. When the power indicator ashes light blue, the product is starting up. Startup is complete when the power indicator changes from ashing to lit light blue. ➡“Turning On and O” p. 10• When charging cannot be performed or operations are unrespon-sive, force the product to turn o, and then turn the product back on.• If the controller gets too hot due to prolonged use or the usage environment, the product may turn o for safety reasons. Also, if the controller gets too hot while charging, the charging could stop tem-porarily. Wait for the temperature to fall, and then turn the product back on.Cannot see imagesWhen images are not displayed when the power indicator is light blue, the images may be muted (the product temporarily hides the image).Tap the right-hand side of the product twice lightly to release the mute function.If you accidentally activate the mute knock function, you can set it to O.Cannot hear audioTo listen to audio from the product, use the mono earphones with mic supplied.](https://usermanual.wiki/TAIYO-YUDEN/WYSAAVDXB-E.User-manual/User-Guide-2896233-Page-13.png)