TR Controls M7L M7 LTE Vehicle Telematics Unit User Manual General
TR Controls Inc. M7 LTE Vehicle Telematics Unit General
UserManual.wiki
>
TR Controls
>
M7L User Manual
User Manual
Navigation menu
Upload a User Manual
Namespaces
Wiki Guide
HTML
PDF
Info
Views
User Manual
Discussion / Help
Navigation
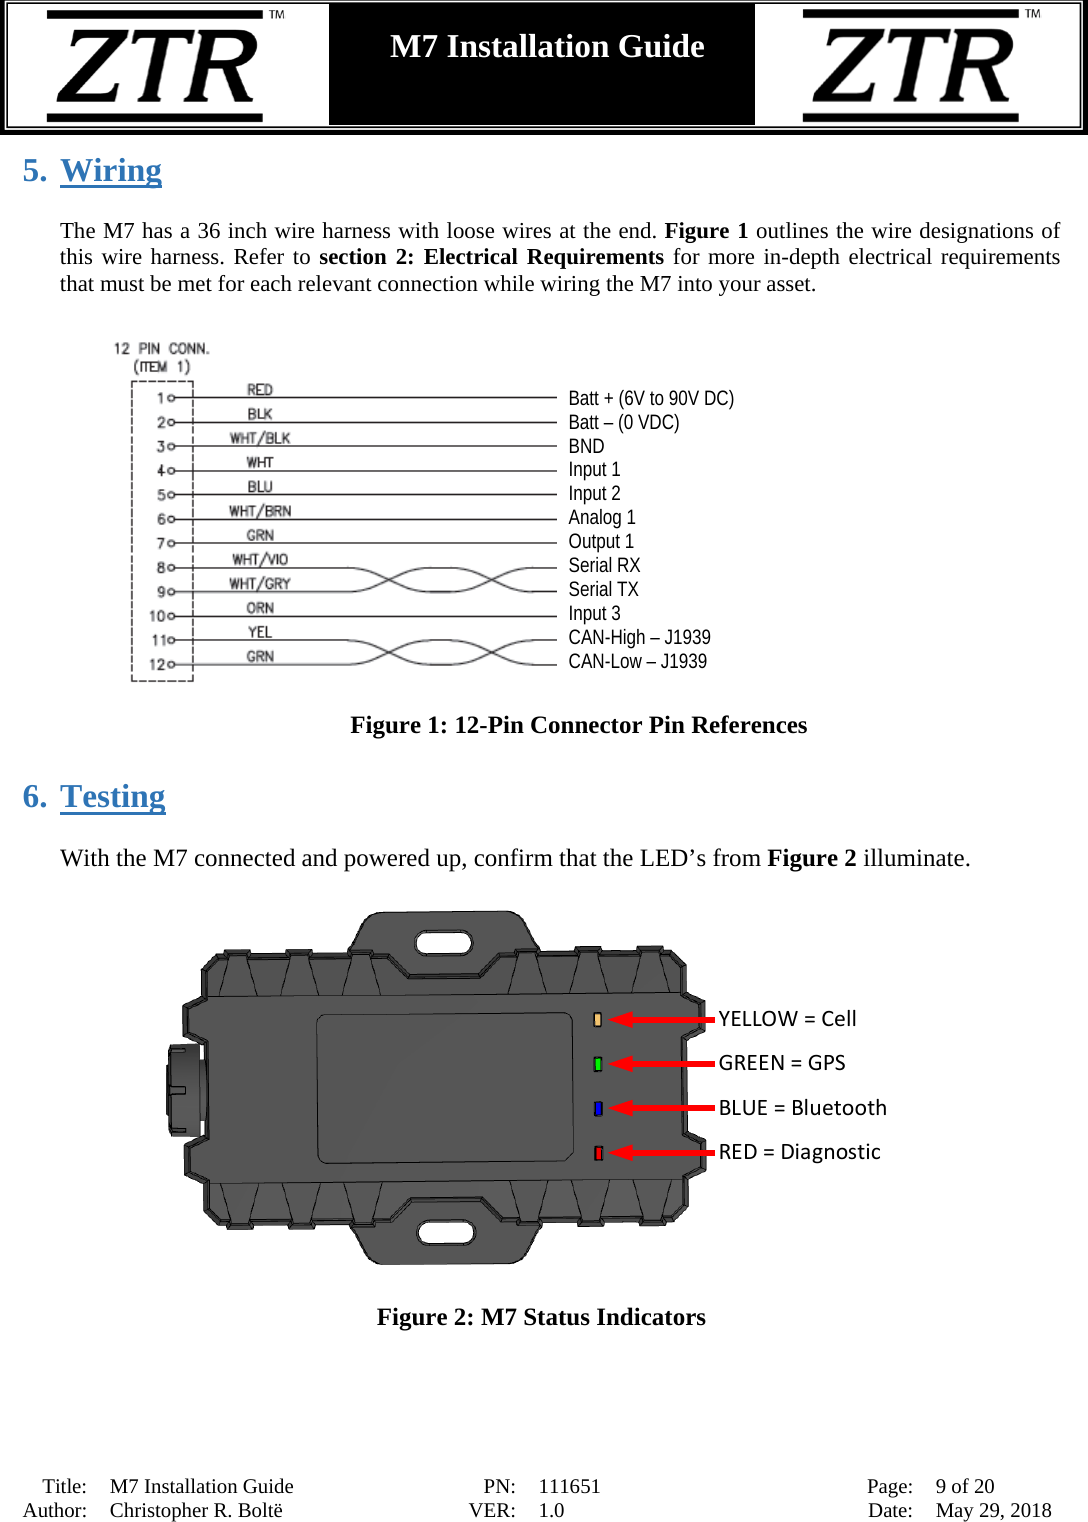
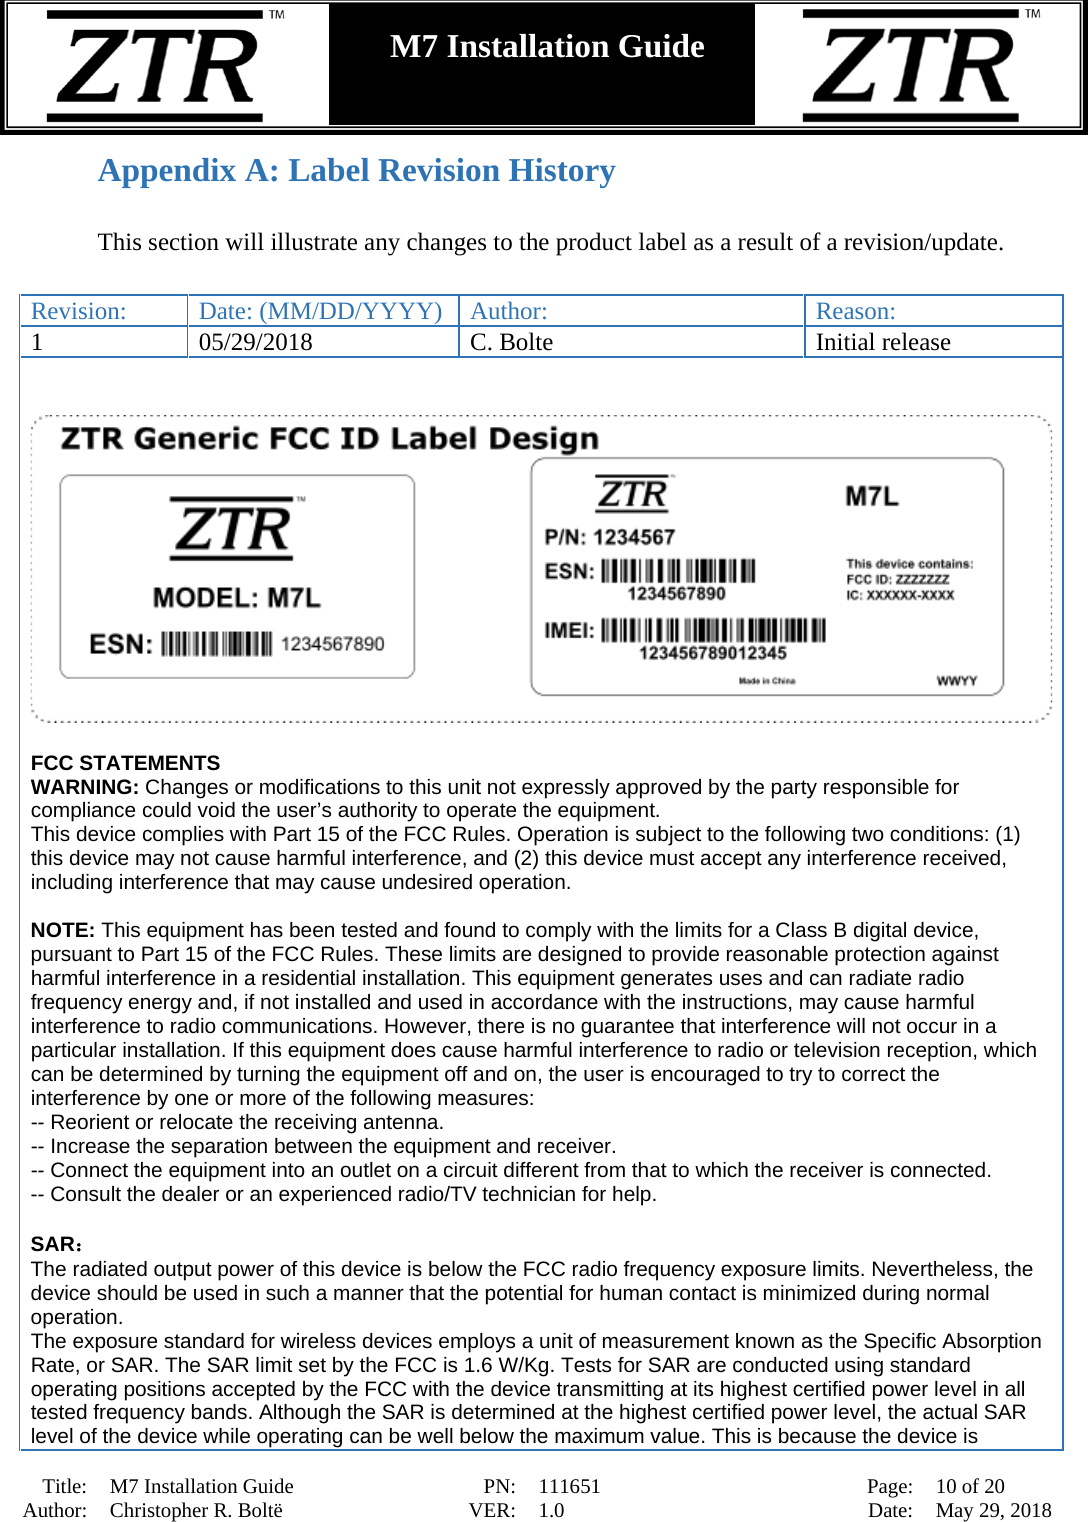
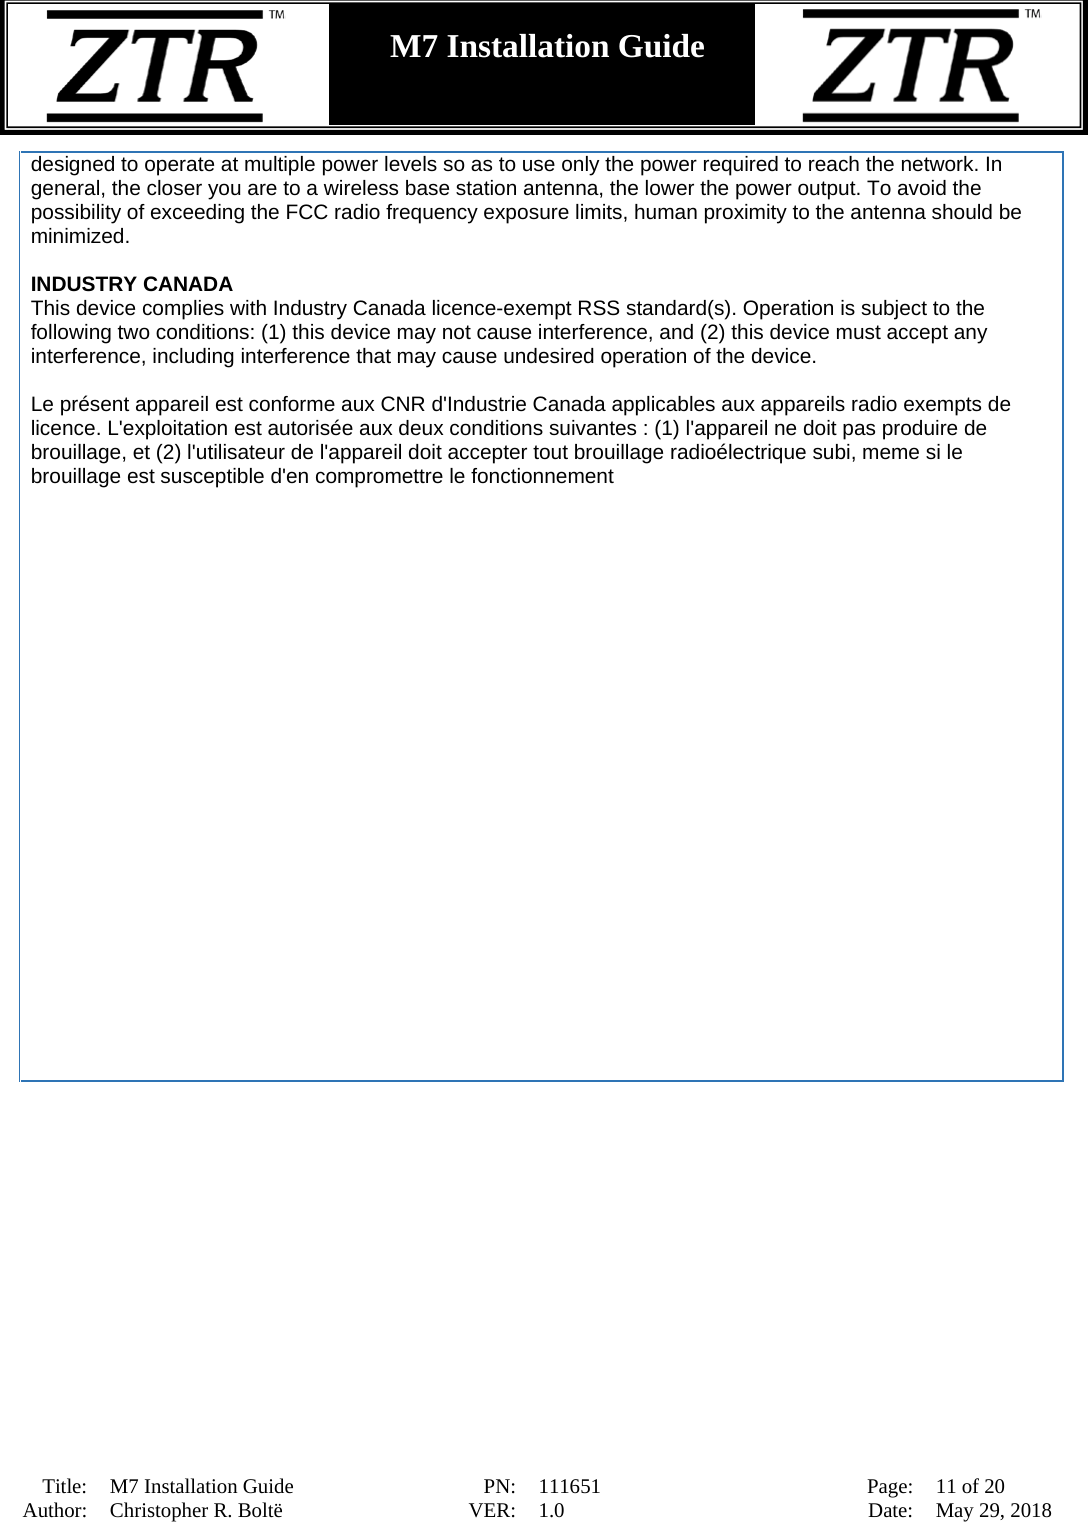
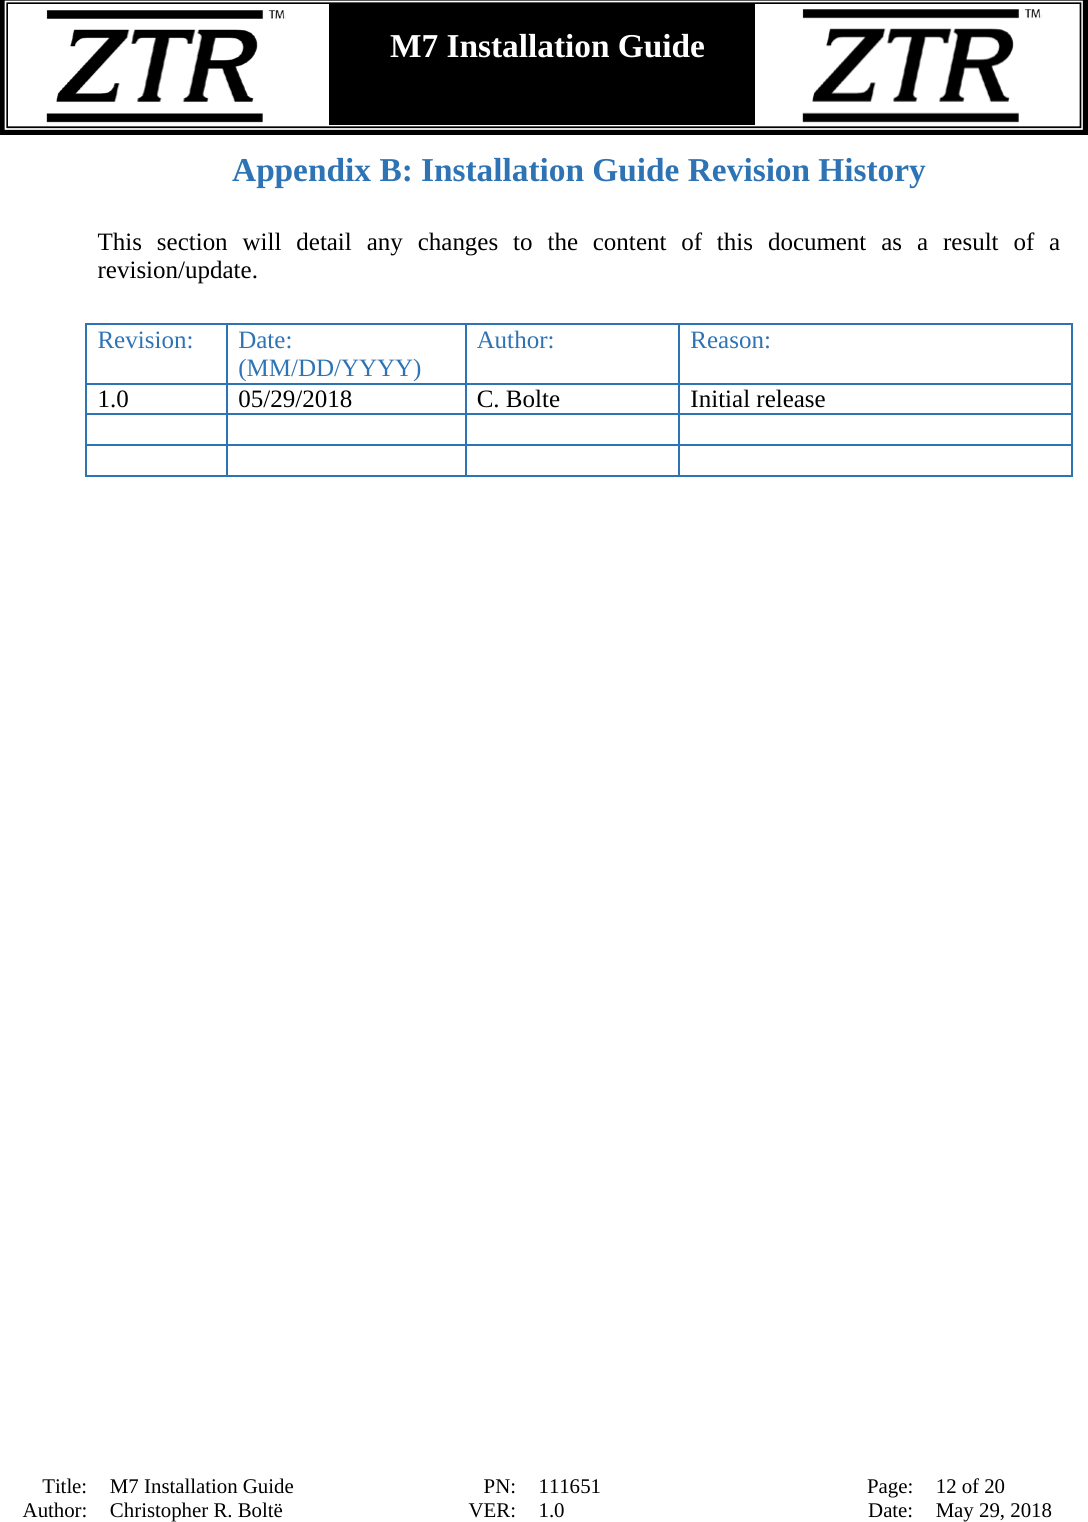
![Title: M7 Installation Guide PN: 111651 Page: 3 of 20 Author: Christopher R. Boltë VER: 1.0 Date: May 29, 2018 M7 Installation Guide ZTR Control Systems – M7 Device [Regulatory and Compliance Statement Goes Here]](https://usermanual.wiki/TR-Controls/M7L/User-Guide-3966994-Page-3.png)