Telcare TELCBGM02 CDMA 2000 1X BLOOD GLUCOSE METER User Manual
Telcare, Inc. CDMA 2000 1X BLOOD GLUCOSE METER
UserManual.wiki
>
Telcare
>
TELCBGM02 User Manual
User Manual
Navigation menu
Upload a User Manual
Namespaces
Wiki Guide
HTML
PDF
Info
Views
User Manual
Discussion / Help
Navigation

![TELCARE™ Blood Glucose Monitoring Systeme TELCARE™ Blood Glucose Monitoring system is intended for the quantitative measurement of glucose in fresh capillary whole blood samples drawn from the ngertips, forearm, or palm. It is intended for lay use by persons with diabetes to aid in diabetes management. It is indicated for use at home (over the counter [OTC]) and should be used only by a single patient and should not be shared. Test results are plasma-calibrated for easy comparison to clinical laboratory methods. Testing is done outside the body (in vitro diagnostic use). e TELCARE™ Blood Glucose Monitoring System consists of the Telcare BGM™ Blood Glucose Meter, TELCARE™ Blood Glucose Test Strips, and TELCARE™ Glucose Control Solutions. e TELCARE™ Blood Glucose Monitoring system is not indicated for the diagnosis or screening of diabetes or for neonatal use. Palm and forearm testing should be done only during steady-state times when glucose is not changing rapidly. e Telcare BGM™ Blood Glucose Meter uses cellular data transmission to send test results to TELCARE™’s remote database, Telserve, and to receive messages from Telserve. e TELCARE™ Blood Glucose Monitoring System is not intended to provide automated treatment guidance or decisions, nor is it to be used as a substitute for professional healthcare judgment. Intended Use(i)](https://usermanual.wiki/Telcare/TELCBGM02/User-Guide-1954151-Page-2.png)


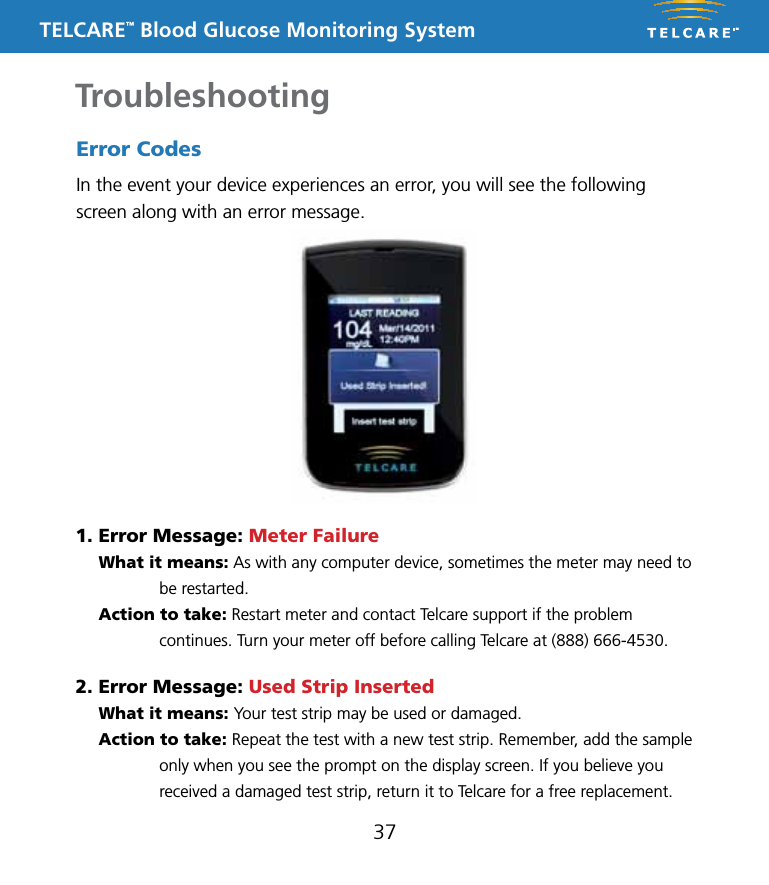
![TELCARE™ Blood Glucose Monitoring System3. Error Message: Not Enough Blood What it means: There is not enough blood or too much blood or control solution on the test strip to give a reliable reading. Action to take: Remove the test strip and repeat the test with a new test strip.4. Error Message: Temp. Too Low / Temp. Too High What it means: The meter is too hot or too cold. Action to take: Move the meter into an area that is between 50˚F and 104˚F. IMPORTANT: After receiving this error, allow the meter to be at room temperature for at least 30 minutes before testing blood or control solution.38If your meter displays a “Low Battery” icon, charge the battery. Other MessagesHigh / Low DisplayedIf you see either High or Low displayed on your device, your blood sugar level may be out of range (either in excess of 600 mg/dL [High] or lower than 20 mg/dL [Low]).](https://usermanual.wiki/Telcare/TELCBGM02/User-Guide-1954151-Page-42.png)