Telian FTD8800 Dual mode TDMA Desktop Phone User Manual
Telian Corporation Dual mode TDMA Desktop Phone Users Manual
UserManual.wiki
>
Telian
>
FTD8800 User Manual
Users Manual
Navigation menu
Upload a User Manual
Namespaces
Wiki Guide
HTML
PDF
Info
Views
User Manual
Discussion / Help
Navigation

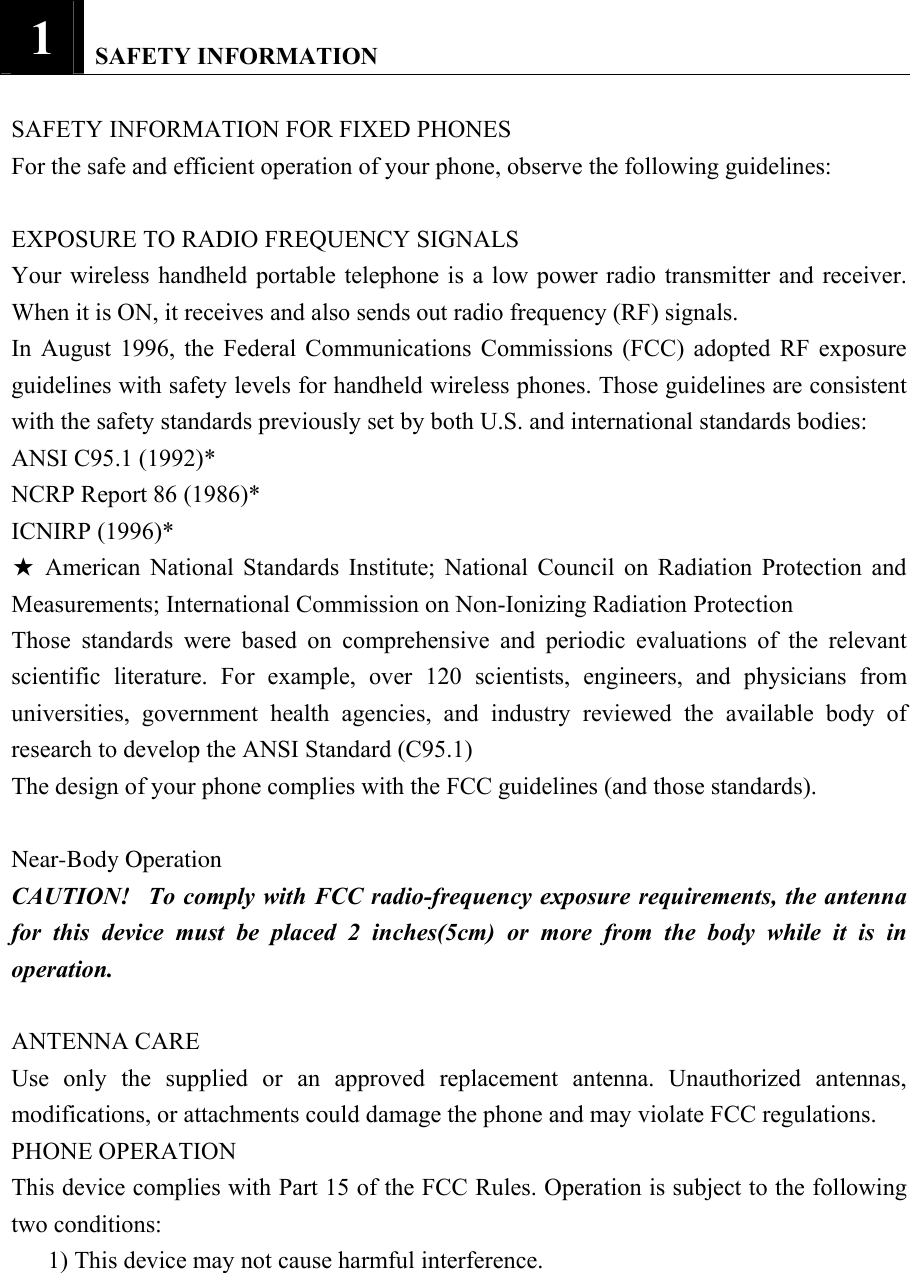
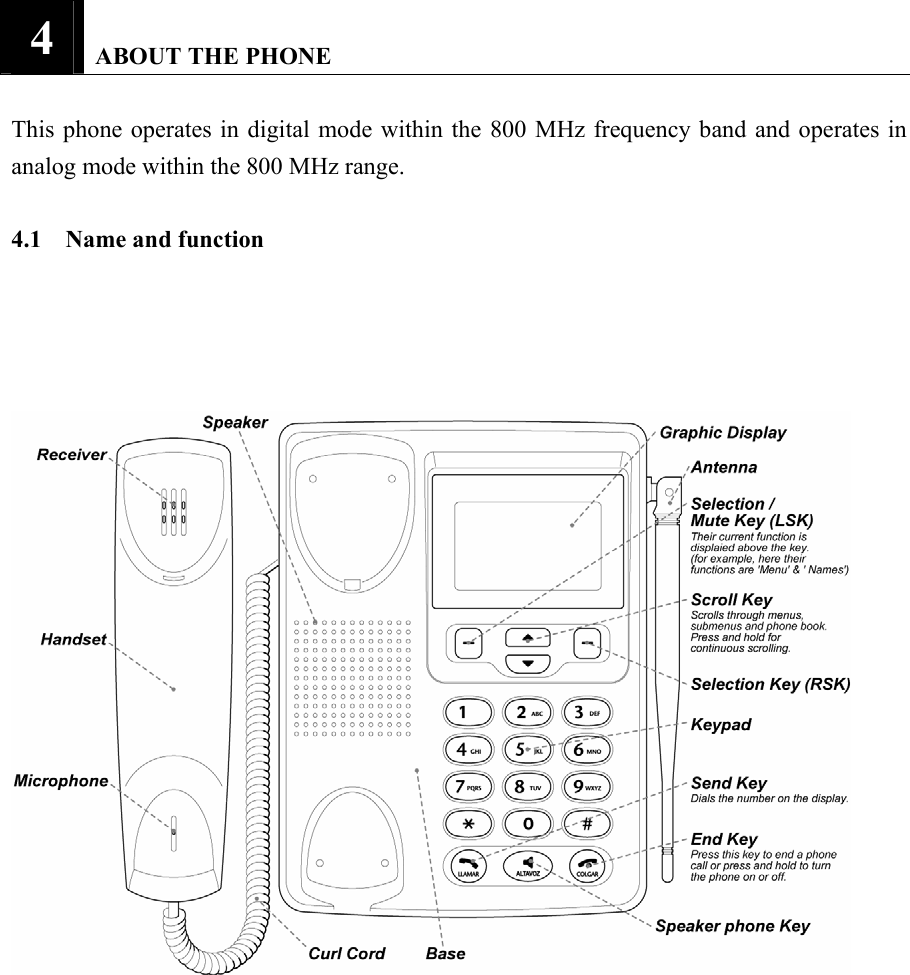
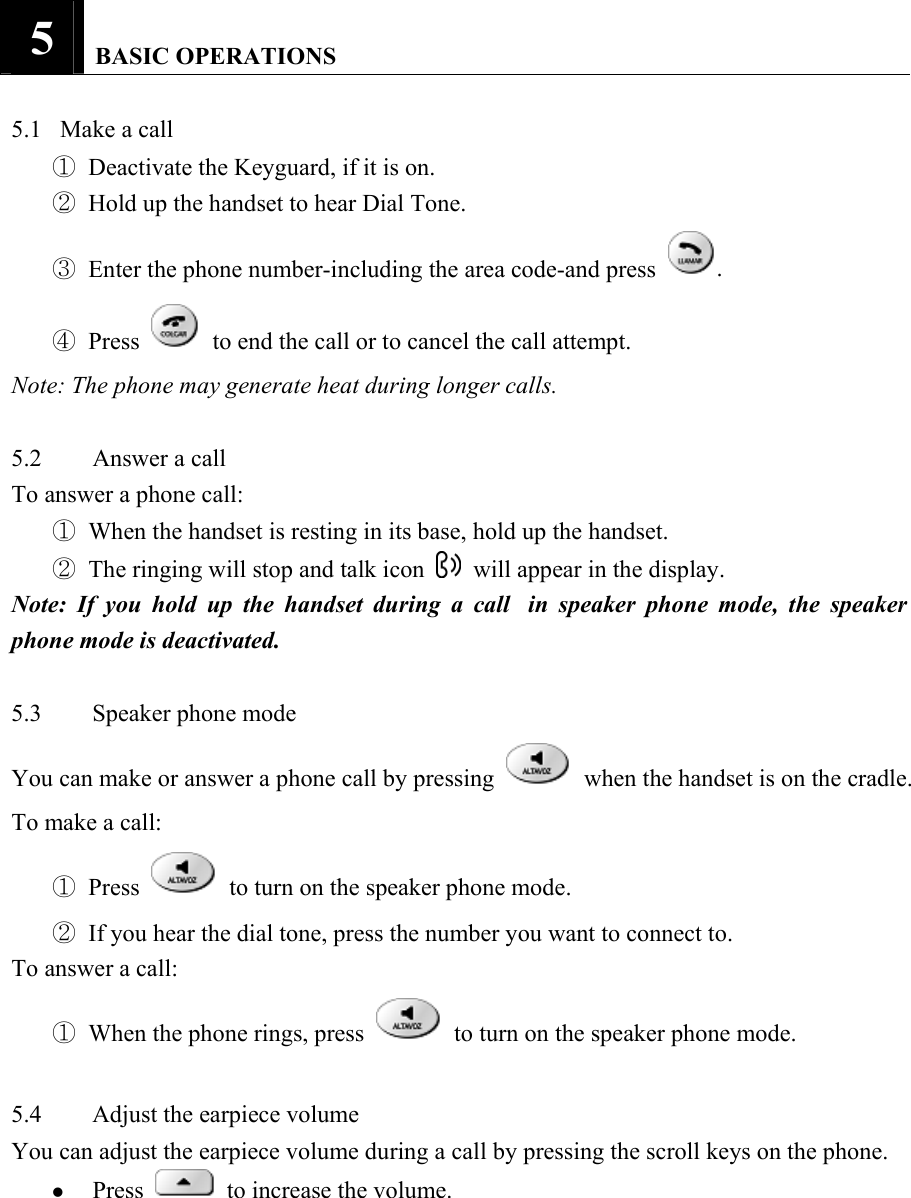

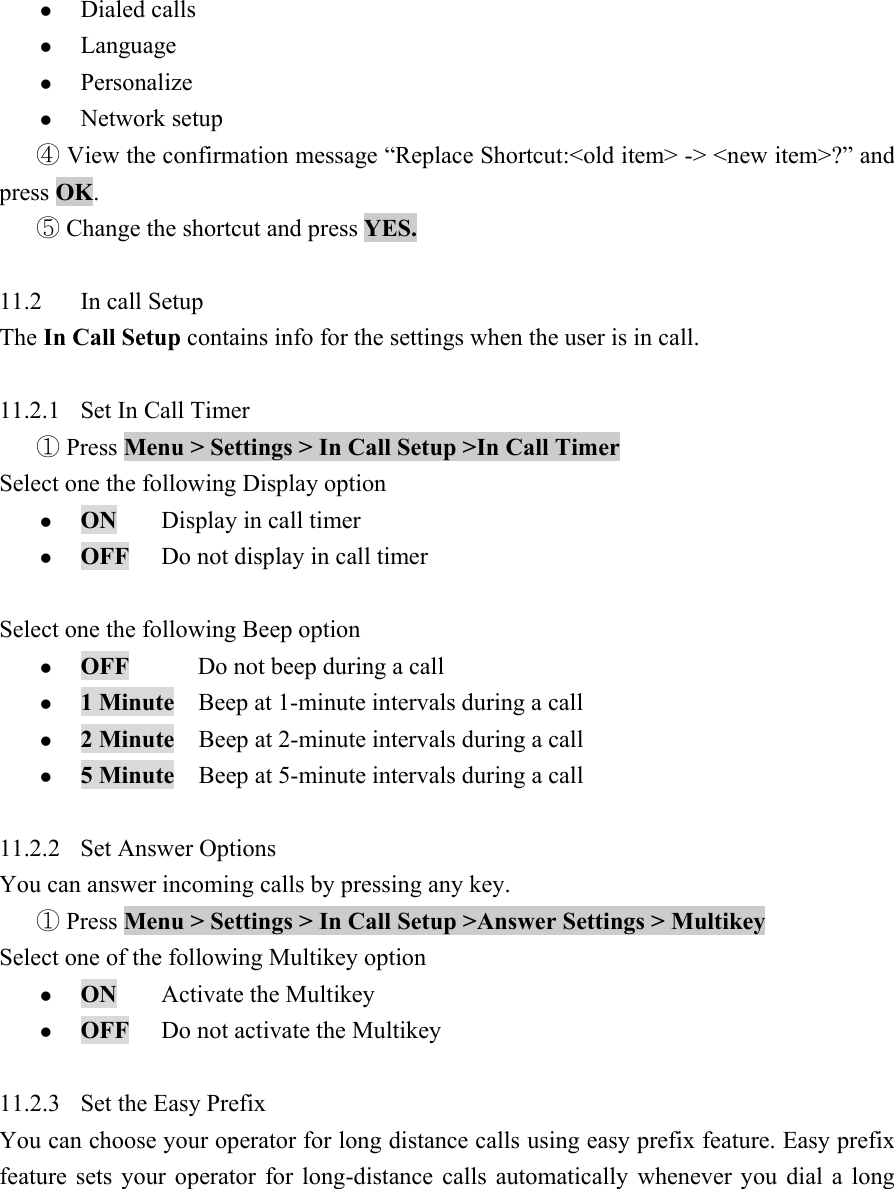
![6. Ph Book Capacity 7. Delete All 8. Sort By <…entry 2…> <…entry N…> [New Entry] [Delete All] 2. Recent Calls 1. Missed Calls 2. Received Calls 3. Dialed Calls 4. Notepad 5. Call times 1. Last Call 2. Dialed Calls 3. Received Calls 4. All Calls 6. Life Time 7. Delete all call log 3. Messages 1. Create Message 2. Voice mail 3. Inbox <…message 1…> 1. Create Message 2. Delete 3. Call back 4. Reply 5. Forward 6. Lock 7. Store Number <…message 2…> <…message N…>](https://usermanual.wiki/Telian/FTD8800/User-Guide-514053-Page-19.png)
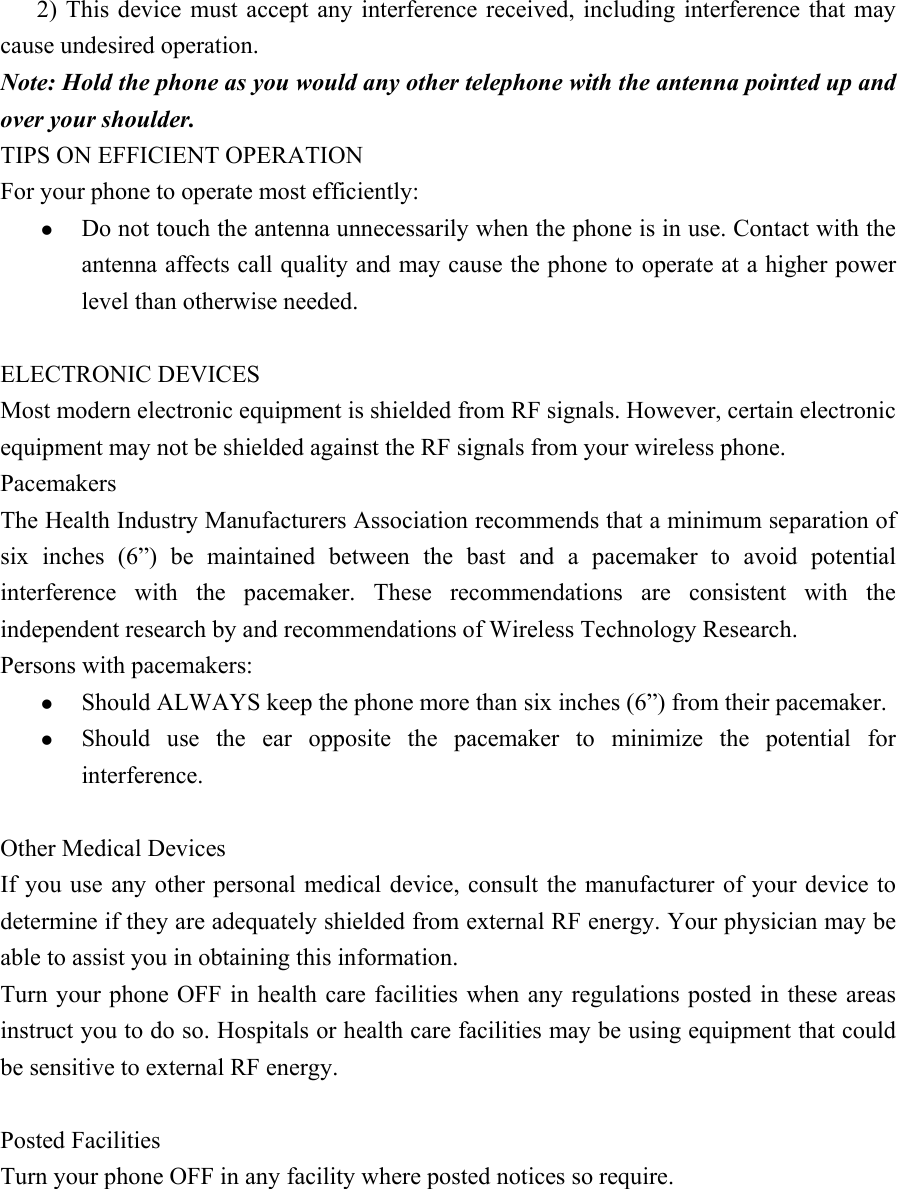
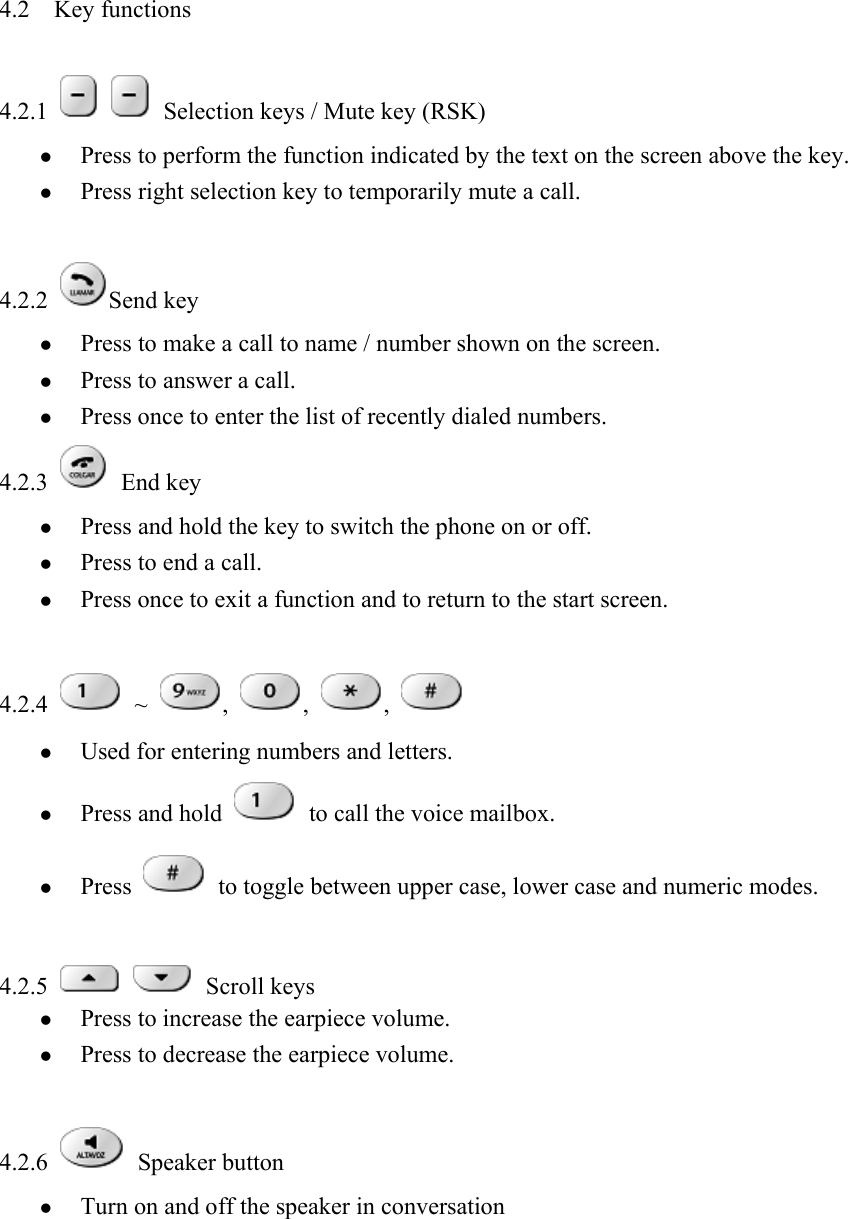
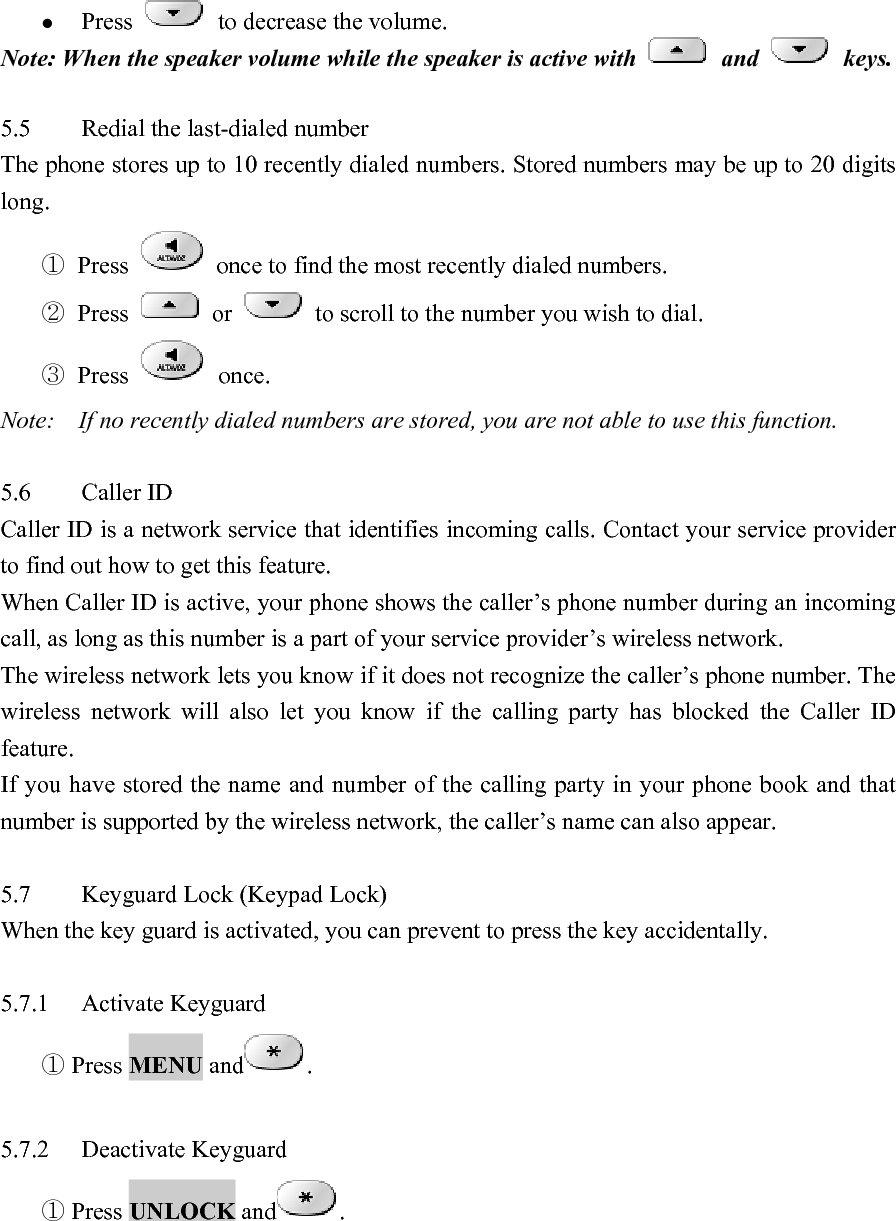
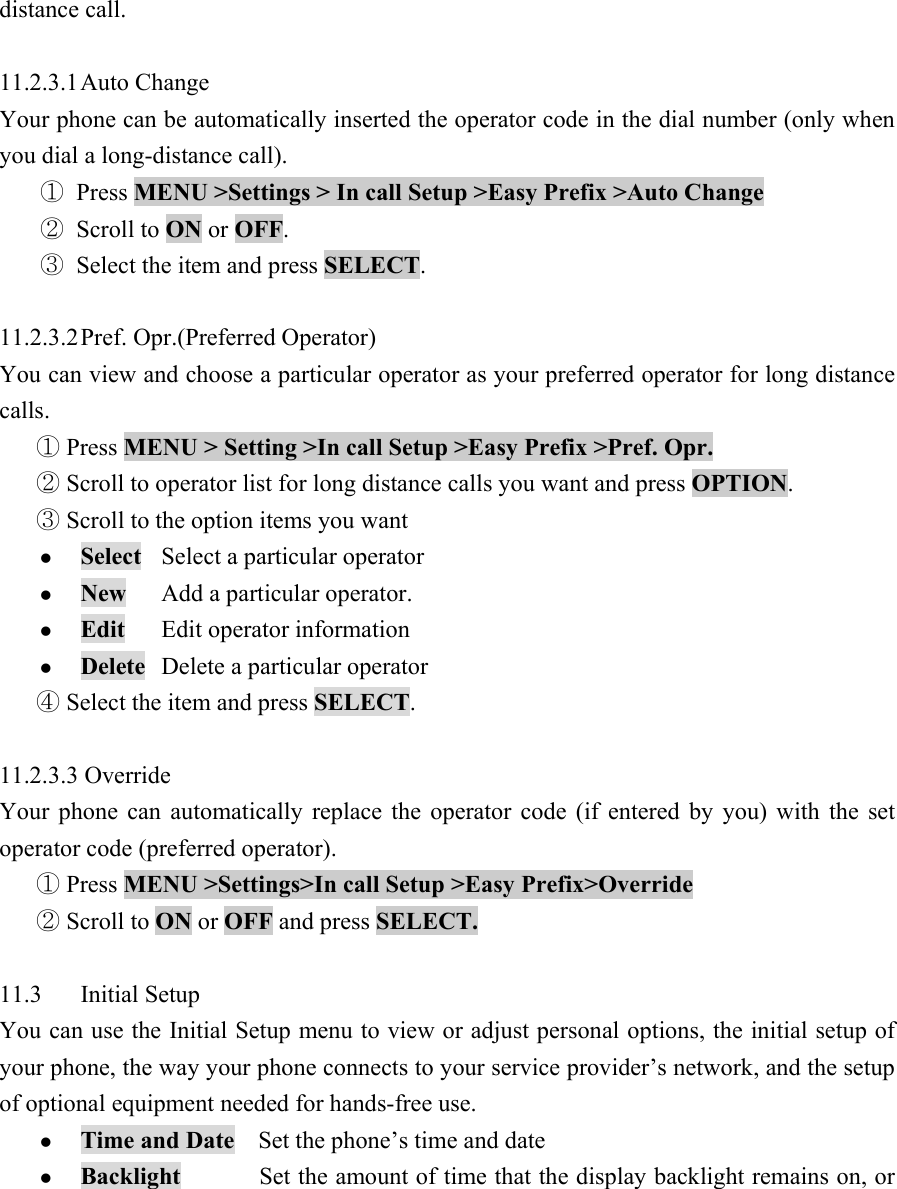
![[Create Message] [Delete All] 4. Quick Notes <…Quicknote 1…> 1. New 2. Edit 3. Delete 4. Send <…Quicknote 2…> <…Quicknote N…> [New Quick Note] [Delete All] 5. Outbox <…message 1…> 1. Create Message 2. Delete 3. Re-send 4. Forward 5. Message Status 6. Cleanup Message <…message 2…> <…message N…> [Create Message] [Delete All] 6. Drafts <…message 1…> 1. Create 2. Send 3. Cleanup Message <…message 2…> <…message N…> [Create Message] [Delete All]](https://usermanual.wiki/Telian/FTD8800/User-Guide-514053-Page-20.png)
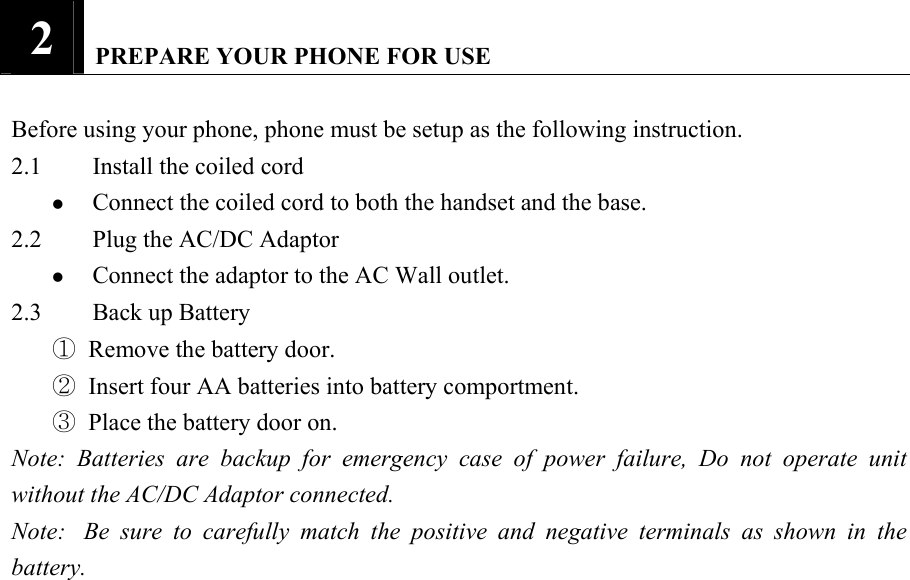
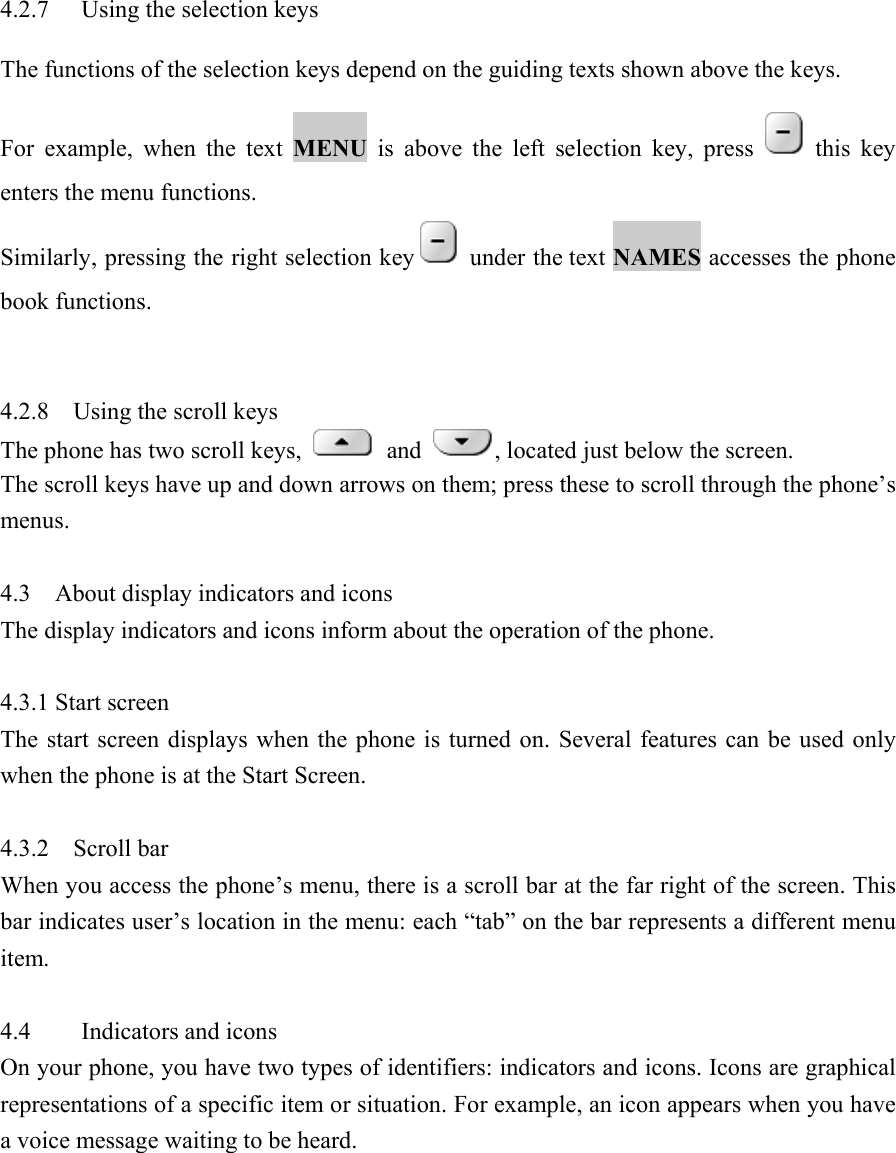
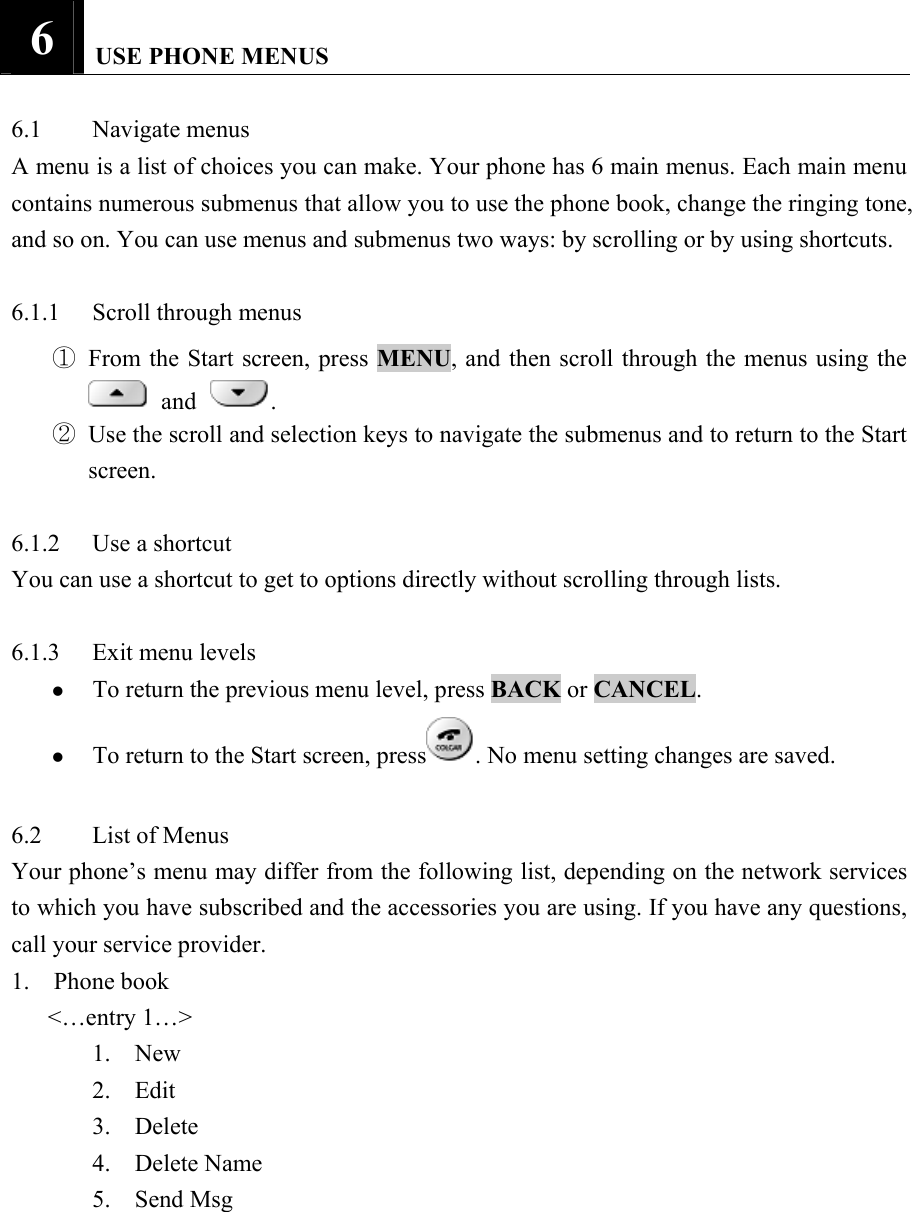
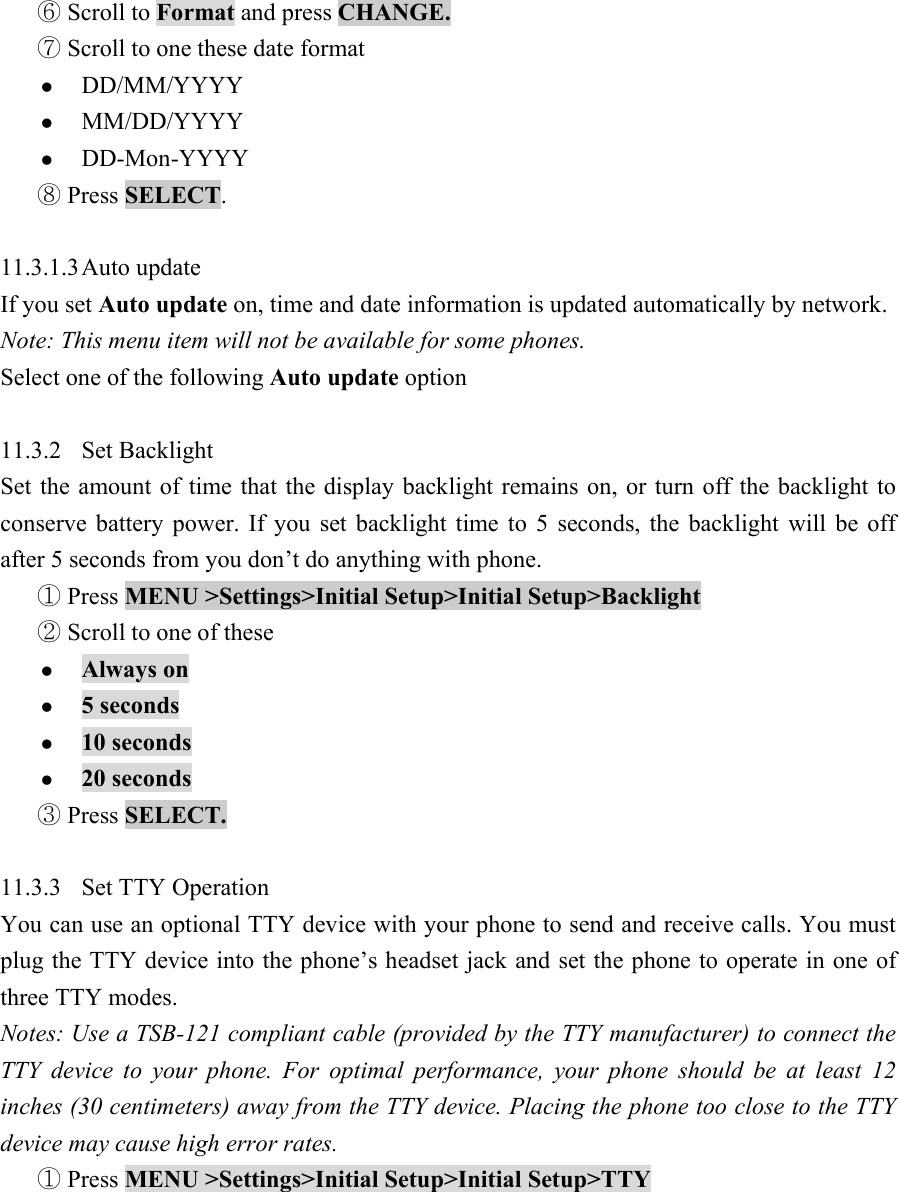
![1. Talk security 2. Restrict call 3. New password 5. Ring Styles 1. Style 1. Loud 2. Soft 3. Silent 2. Style Details 1. Ring Volume 2. Calls 3. Text Messages 4. Voicemail 5. Alarms 6. Reminders 6. Alarms <…Alarm 1…> 1. Disable/Enable 2. New 3. Edit 4. Delete 5. Delete All <…Alarm 2…> <…Alarm N…> [New Alarm] [Delete All]](https://usermanual.wiki/Telian/FTD8800/User-Guide-514053-Page-22.png)
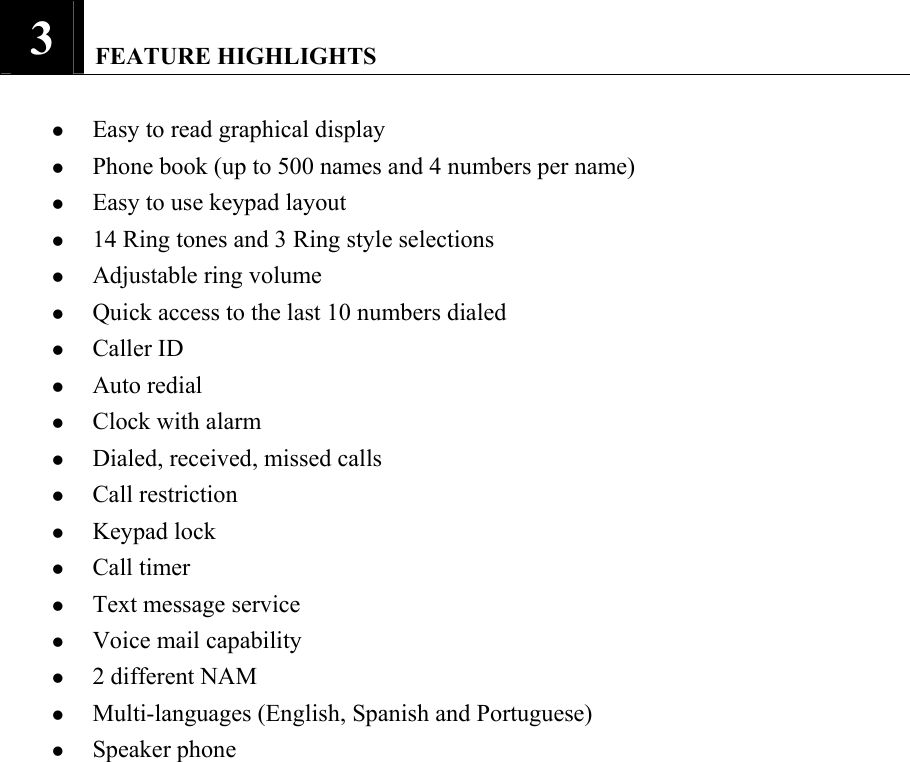
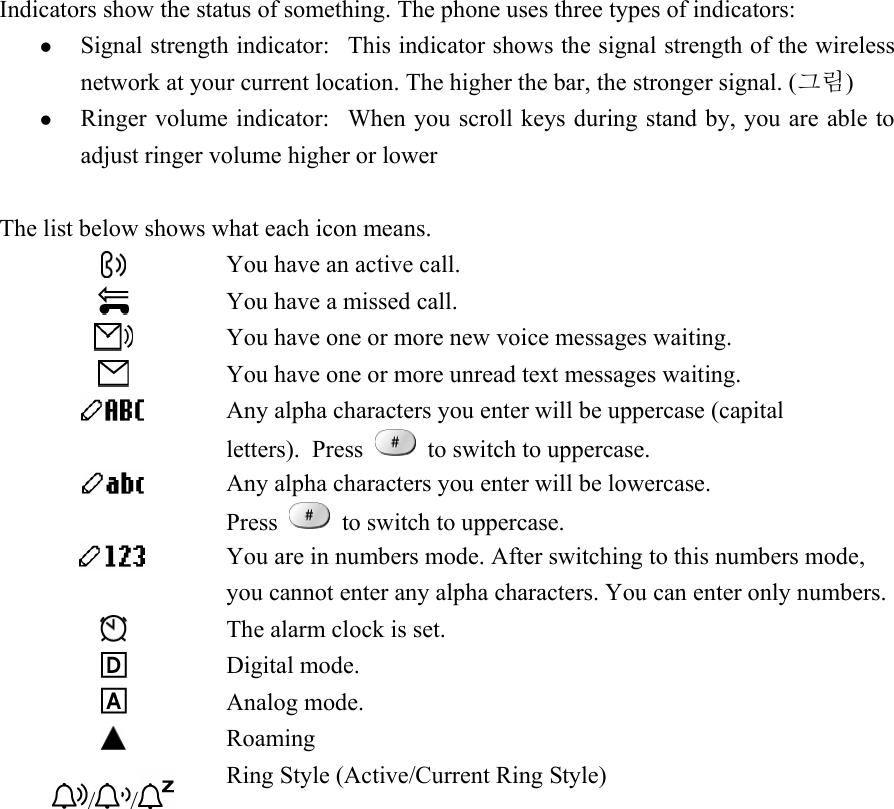
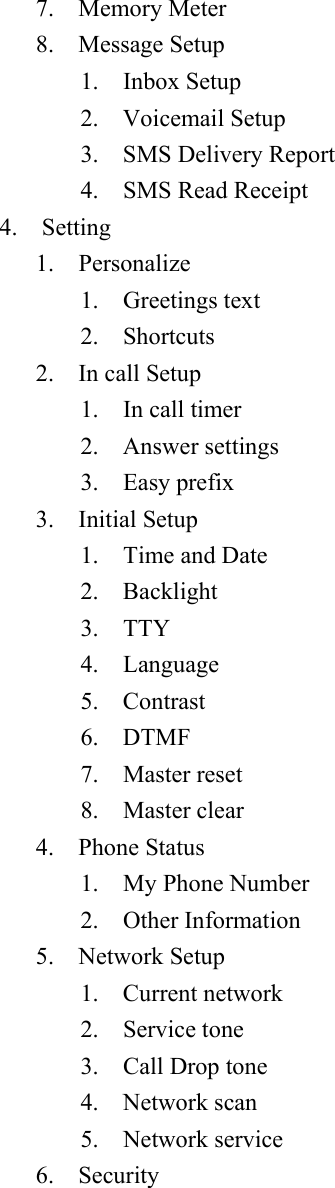
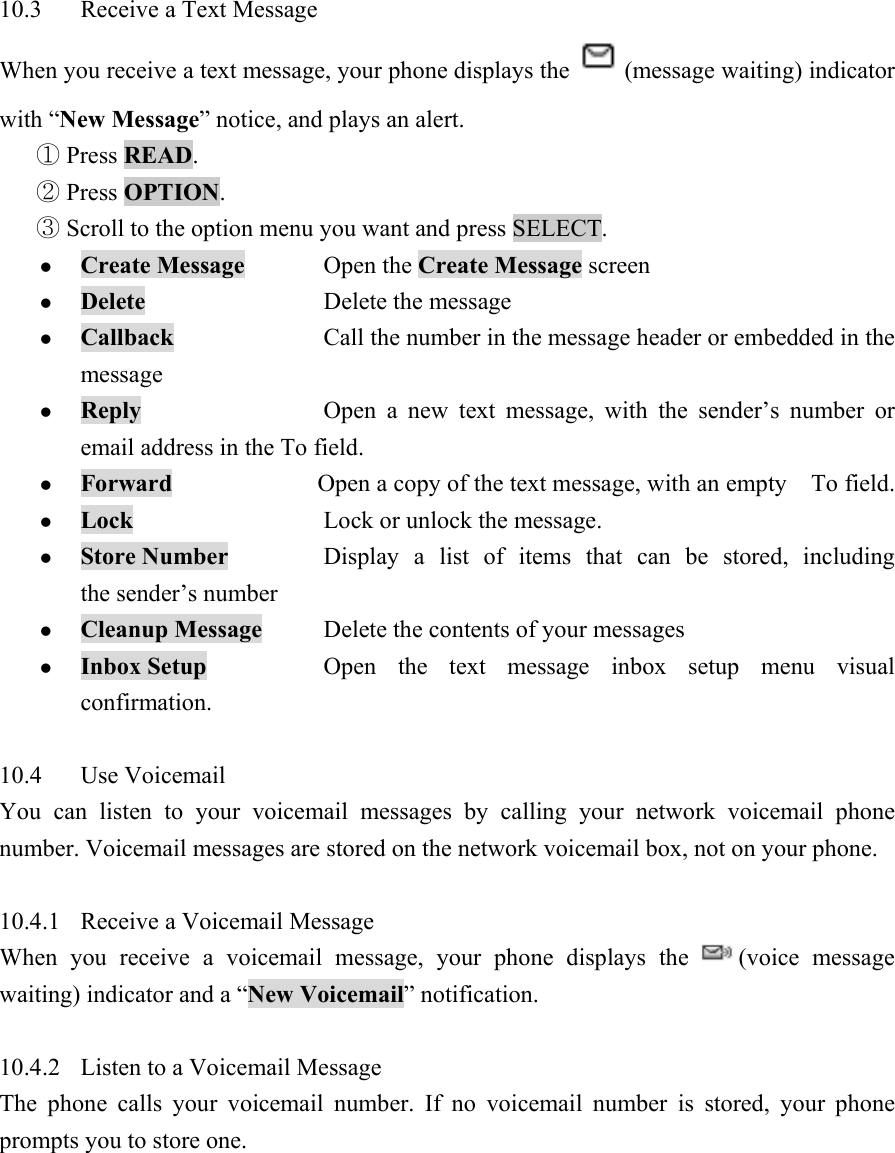
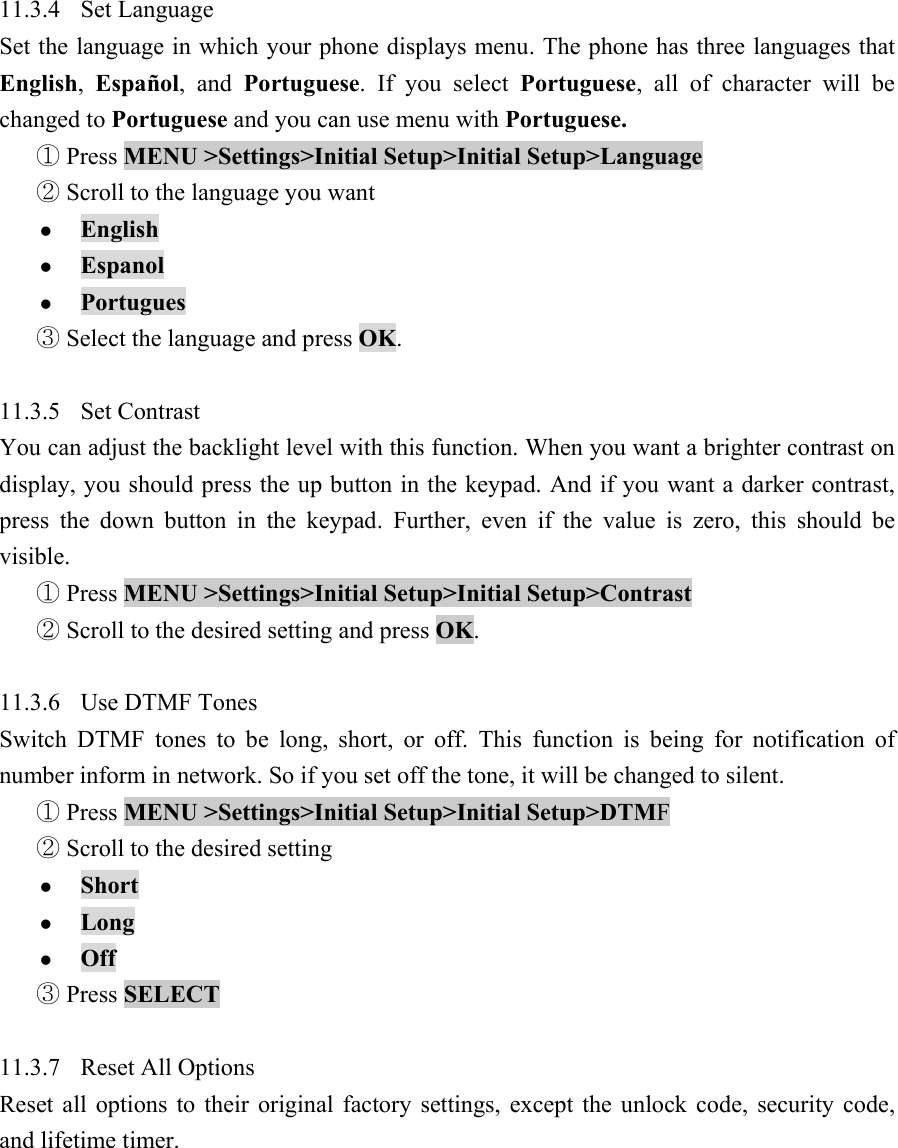
![7 ENTER LETTERS AND NUMBERS You can enter letters, as well as numbers, when storing information into your phone by using your phone’s keypad. To enter letters, press the key associated with the letter you wish to enter until it appears on the screen (numbers also appear). 7.1 Enter Letters When you want to add new names or when you view names in the phone book, your phone automatically switches to the ABC mode and displays the ABC icon. Key Characters Key Characters space . 1 @ ? ! , & : ; ( ) ‘ % $ _ P Q R S 7 A B C 2 À Á Â Ã ç T U V 8 Ú Ù Ü D E F 3È É Ê W X Y Z 9 G H I 4 Í + - 0 * / = > < # [ ] J K L 5 ? M N O 6 Ň ò ó ô ŏ Change letter case Press a key once or several times to enter the letter(s) you want. For example, press three times to enter the letter C. 7.1.1 Edit name To edit a name in the phone book: z Use to scroll the cursor to the left. z Use to scroll the cursor to the right. z Press Delete to correct any mistakes.](https://usermanual.wiki/Telian/FTD8800/User-Guide-514053-Page-23.png)
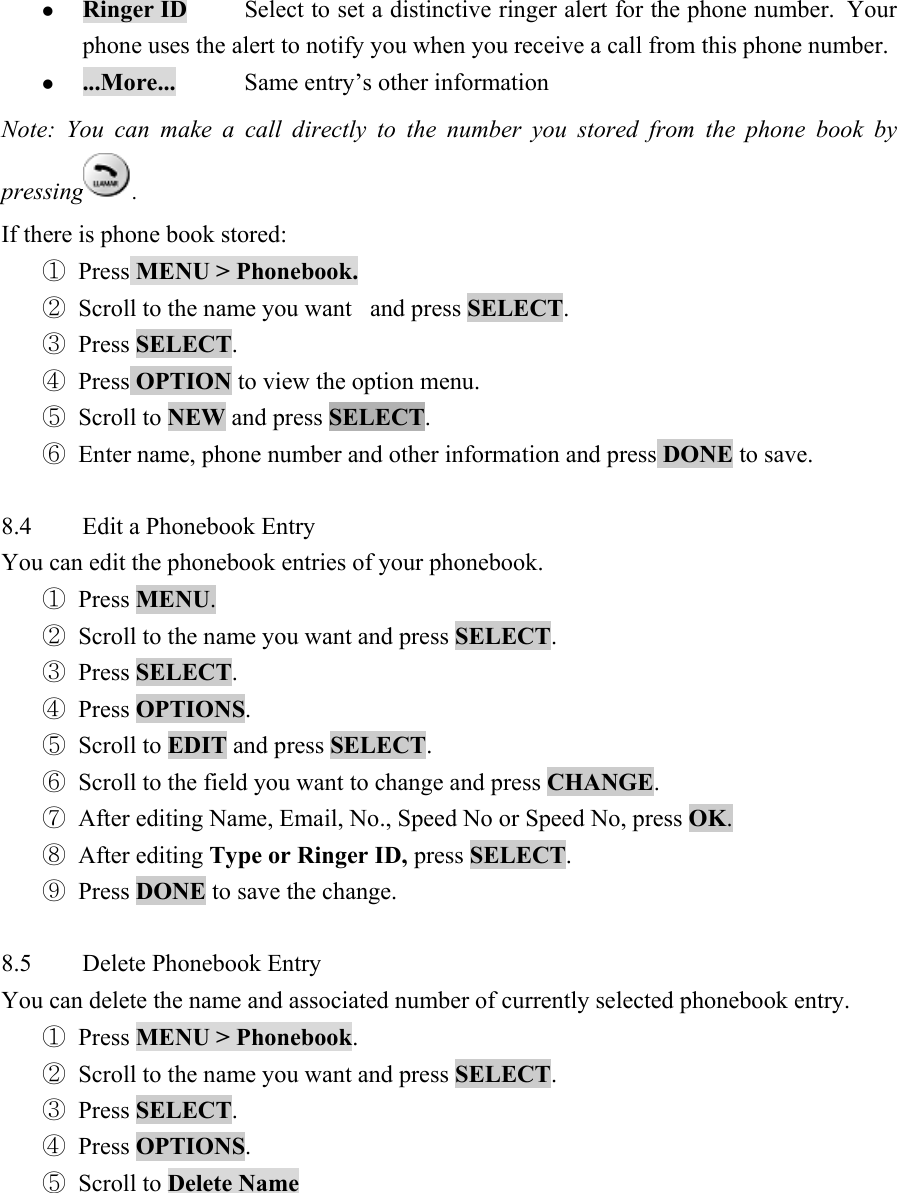
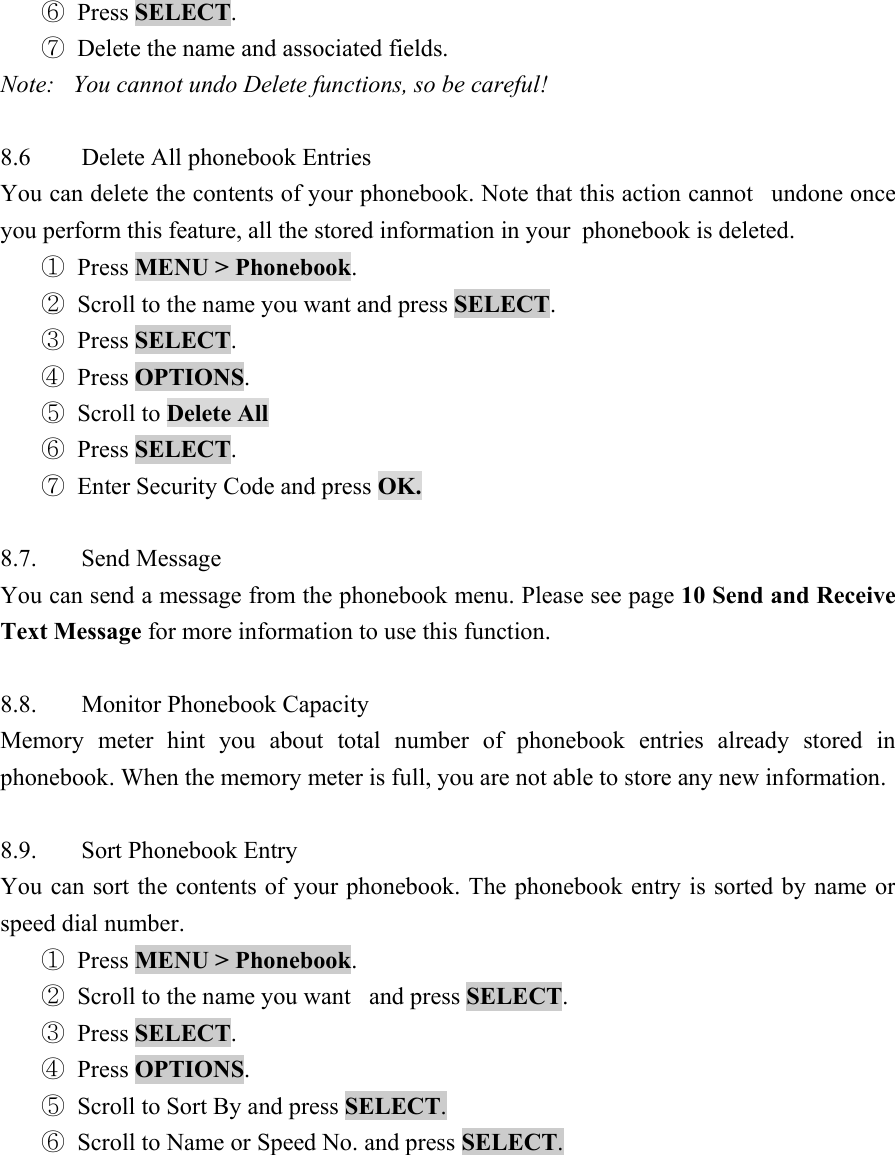
![8 USE THE PHONE BOOK 8.1 About the phone book You can store up to 500 names and 4 numbers per name. You can sort the entries of phone book by name or speed dial number. 8.2 Use phone book menus The phone book has several menus to select from. These menus appear when you press NAMES or [NEW ENTRY]. Use to scroll to the menu you want to use. z NEW Enter new name, e-mail and number z EDIT Edit an entry z DELETE Delete single entry z DELETE NAME Delete the complete entry of the selected name. z SEND Msg Send a SMS message. z Ph book Capacity Show the memory meter which fills up as entries are made. z Delete All Delete all phone book entries z Sort By Sort entries by name or speed dial number. 8.3 Create a phone book Entry To create a phonebook entry: ① Press MENU > Phonebook. ② Scroll to [New Entry] and press SELECT. ③ Press CHANGE and enter a name, an email and phone number you want to store. ④ Press OK to save the change. ⑤ Set Type, Speed No. and Ringer ID if you want to. ⑥ Press DONE to save the change. z NAME Entry’s name (Maximum 32 characters). z E-MAIL Entry’s e-mail address (Maximum 48 characters). z NO. Entry’s phone number (Maximum 40 characters). z TYPE Work / Home / Main / Mobile z Speed No. Entry’s default speed dial number.](https://usermanual.wiki/Telian/FTD8800/User-Guide-514053-Page-25.png)


![13 ALARM Your phone includes an alarm clock, which you can set up according to your own need. Your phone can store up to 5 alarms. Notes: z The alarm clock setting does not display in the datebook day view, and is not synchronized with datebook settings. Your phone must be turned on to use the alarm 13.1 Set the Alarm The Alarm clock icon will appear on the idle display to indicate that an alarm is set. Press ①MENU >Alarm>[New Alarm] Select ②Name and press CHANGE Enter the alarm name and press ③DONE Scroll to ④Time and press CHANGE Enter the time you want to set (using HH:MM 24H format) ⑤ Press ⑥DONE to save the time. Scroll to ⑦Alert/Volume and enter necessary information. You can set the alert tone and volume Save the alarm setting and press ⑧DONE 13.2 Edit, Enable or Delete an Alarm Press ①MENU >Alarm Scroll to the stored alarm and press ②SELECT. View the Details screen and press③ OPTION. Scroll to ④Disable/Enable, New, Edit, Delete or Delete All Press ⑤SELECT and follow the display. 13.3 Respond To an Alarm When the alarm is activated, your phone rings or vibrates (depending on the alarm setting), and displays the time and alarm title. The alarm is programmed to ring for 3 minutes, or until you perform one of the following](https://usermanual.wiki/Telian/FTD8800/User-Guide-514053-Page-51.png)