Telian RFM2000 900MHZ Transmitter User Manual
Telian Corporation 900MHZ Transmitter Users Manual
UserManual.wiki
>
Telian
>
RFM2000 User Manual
Users Manual
Navigation menu
Upload a User Manual
Namespaces
Wiki Guide
HTML
PDF
Info
Views
User Manual
Discussion / Help
Navigation


![307 ENTER LETTERS AND NUMBERS You can enter letters, as well as numbers, when storing information into your phone by using your phone’s keypad. To enter letters, press the key associated with the letter you wish to enter until it appears on the screen (numbers also appear). 7.1 Enter Letters When you want to add new names or when you view names in the phone book, your phone automatically switches to the ABC mode and displays the ABC icon. Key Characters Key Characters . , ? ! ’ “ : ; @ _ S 1 P Q R S 7 A B C 2 T U V 8 D E F 3 W X Y Z 9 G H I 4 9 0 ()+ 『- * = # % J K L 5 \ / ~ < > f$ ¥§ £※[ ] ( ) M N O 6 Change letter case Press a key once or several times to enter the letter(s) you want. For example, press three times to enter the letter C. The selection displays. 7.1.1 Edit name To edit a name in the phone book: z Use to scroll the cursor to the left. z Use to scroll the cursor to the right. z Press Clear to correct any mistakes.](https://usermanual.wiki/Telian/RFM2000/User-Guide-587004-Page-31.png)
![33② Scroll to [ Add New Entry] and press Ok. ③ Press To SIM or To phone where you want to store the phone entry. ④ Press Edit to chose Name and number ⑤ Add Name and number ⑥ Press Ok to complete input ⑦ Press Done to save the change. 8.5 Delete All You can delete all phonebook entries : ① Press Menu > Phonebook ② Scroll to [ Delete all ] and press Ok. ③ Press To SIM or To phone where you want to delete all phone book entries. ④ Press Ok ⑤ Select Yes if you want to delete. Otherwise, select No to go back to previous menu. Caution : Note that this action cannot undone once you perform this feature, all the stored information in your phonebook is deleted. 8.6 Copy All Entries You can use this function to Copy numbers in the SIM card to your fixed phone, or vice versa : ① Press Menu > Phonebook ② Scroll to [ Delete all ] and press Ok. ③ Press From SIM or From phone where you want to copy all phone book entries from. ④ Press Ok ⑤ Select Yes if you want to copy. Otherwise, select No to go back to previous menu. 8.7 Owner Number You can check, edit, erase and save your Owner Number : ① Press Menu > Phonebook ② Scroll to [ Owner number ] and press Ok. ③ Press option to chose Edit or Erase](https://usermanual.wiki/Telian/RFM2000/User-Guide-587004-Page-34.png)
![34 8.8 Check Memory Status You can check out memory status for phone book : ① Press Menu > Phonebook ② Scroll to[ Memory status ] and Press Ok ③ Check the memory status. For example, if you see “36/100”, it means the capacity is 100 entries and there are 36 entries saved. ④ Press Back to return to phone book menu. Note : You can send a message from the phonebook menu. Please see 9.2.](https://usermanual.wiki/Telian/RFM2000/User-Guide-587004-Page-35.png)
![359 SEND AND RECEIVE TEXT MESSAGES You can send or receive text messages with your phone. Text messages that you receive can contain ring tones that you can store on your phone. It supports 450 characters and you can insert Use Template (already installed in your phone) to shorten the editing time. After complete a message’s contents, you can choose to send it out right away, or to save it as a draft. z Write Message z Inbox z Outbox z Template z Message Settings z Voice Mail z Broadcast Message 9.1 Send a Text Message You can send a text message to one or more recipients. You can manually enter each recipient’s phone number, or you can select the numbers from the phonebook. Note: The maximum length of a text message differs depending on the capabilities of the network from which it originated. Also, text messages may appear different at different times because messages can originate in networks other than your own. Contact your service provider for more information about this feature. ① Press MENU > Messages ② Scroll to the [Write Message] and press Ok. ③ You can create the message. ④ When you press OPTIONS, you can scroll to one of the message options: z Done Finish creating a message. z Use Template Use stored message. - Call me Now](https://usermanual.wiki/Telian/RFM2000/User-Guide-587004-Page-36.png)
![36- How about lunch? - Be right back - I am busy now… - Sorry - Thank you - How was the day? - “Long time, we met” - Lots of fun - How are you? ⑤ Scroll to DONE and press Ok. ⑥ Scroll to send options : z Send only Send message to only one number z Save and Send Save and send message to only one number z Save Save a message as a draft z Send to many Send message to maximum 10 numbers. Note : You need to enter phone number or search the number from the phone list. 9.2 View Inbox / Outbox When a message arrived, a pop-up message displays and a new message icon appears. You can read it right away, or ignore it and later check it in Inbox. Outbox stores messages sent and saved. ① Press MENU > Messages ② Scroll to the [Inbox] or the [Outbox] and press Ok. ③ From the list, highlight the one you need and press Ok ④ When you press Option, you can scroll to one of the message options: z Reply (Inbox) Reply the chosen message. z Send(Outbox ) Send the chosen message. z Forward(Inbox) Forward the chosen message. z Edit Edit the chosen message. z Delete Delete the chosen message. z Delete All Delete all Inbox or Outbox messages.](https://usermanual.wiki/Telian/RFM2000/User-Guide-587004-Page-37.png)
![37z Use Number Extract and then dial or save the number(s) embedded in the message. 9.3 Use Template The template consists of predefined or self-edit canned messages. ① Press MENU > Messages ② Scroll to the [Template] and press Ok. ③ From the list, select one you need and press Option z Edit Edit the original template and continue to compose it. After finish editing, press Ok to Save directly. z Erase Remove the template. 9.4 Message Settings The configure settings of message include: Profile Setting, Common Setting and Memory status. ① Press MENU > Messages ② Scroll to the [Message Settings] and press Ok. ③ From the list, select one option you need and press Ok z Profile Setting Each profile has a unique set of settings: Profile Name, Message Center (network service), Valid Period (Set the duration that your message is stored at the message center. Select 1 hour, 12 hours, 1 day, 1 week or maximum) and Message Type (Text/Fax/Page/E-mail). 9 MSC(Message Service Center) No : The SMS Center Number is required to send messages. Ask your service provider for this number. 9 Validity : Set the period of time the message is stored in the service center. You can set the period for 1 hour, 12 hours, 1 day, 1 week, maximum. When the set period expires, the service center will delete all messages, even if the user does not receive the message. 9 Type : When you set the message type, the network will convert the message to the type you have set. z Common Setting Delivery Report (to receive the delivery report informing you when a message is delivered) and Reply Path (lets the recipient of your message send you a reply message through your message center if provided by](https://usermanual.wiki/Telian/RFM2000/User-Guide-587004-Page-38.png)
![38your network.). z Memory Status Check out memory status in SIM and in Phone. It shows percentage remaining free space. For example, SIM : 30% means 30% capacity remains in SIM card out of 100%. 9.5 Use Voicemail (Network Service) You can listen to your voicemail messages by calling your network voicemail phone number. Voicemail messages are stored on the network voicemail box, not on your phone. ① Press MENU > Messages ② Scroll to the [Voice mail] and press Ok. If there is no network service numbers listed, “Empty” is displayed; press Ok and then select Edit to create one. ③ From the list, select one option you need and press Ok z Empty & Edit Enter or modify the network service number. z Erase Delete all pre-saved info of the chosen Voice Mail Server. z Connect to Voice Dial the network service number and connects you to the voice mail service. 9.6 Broadcast Message (Network Service) You can receive broadcast message regularly from your service provider. ① Press MENU > Messages ② Scroll to the [Broadcast Message] and press Ok. ③ From the list, select one option you need and press Ok or Change z Receive Mode On/Off. z Languages Select the languages of the broadcast message. It has two selections All Languages and English. z Channels You can either Select, Add, Edit or Delete broadcast channels. You can set upto 10 channels which has 3 digits and save those in the SIM. In the factory setting, the default is “Off” so you need to turn it “On” if you want to use this option.](https://usermanual.wiki/Telian/RFM2000/User-Guide-587004-Page-39.png)
![3910 USE CALL HISTORY The Call History keeps track of: z Missed Calls z Dialed Calls z Received Calls z Delete Call Log z Call Time z Call Cost Note : Your phone can store up to 30 call numbers including missed, received and dialed call. When you miss a call(s), the message Missed calls appears on your phone’s screen. You can press Read to view Missed Calls list or press Back to ignore the message and go back to Standby. The records will be stored in Call History. You are notified of missed calls only when your phone is turned on in the service area from which the missed call originated. 10.1 Check Missed / Dialed / Received Calls ① Press MENU > Call History ② Select [Missed Calls] or [Received] or [Missed Calls] and press Ok. ③ From the list of records, select one that you need and press Ok ④ Screen shows Call Info. Including Number, Date, Time and Counter. ⑤ Press Option for the following options. z Delete Delete the chosen record. z Save Save this number into to SIM Card or to Phone. You can choose to save this entry to the SIM card or to the Phone. z Dial Dial the chosen number. z Edit Edit the number and then save it to Phone Book or SIM card. You can chose to save this entry to the SIM card or to the Phone.](https://usermanual.wiki/Telian/RFM2000/User-Guide-587004-Page-40.png)
![40Note : In Standby, the icon indicates there are unread missed call records. 10.2 Delete Call Log You can choose to delete Missed Calls, Dialed Calls or Received Calls and delete All. ① Press MENU > Call History ② Select [Delete Call Log] and press Ok. ③ Select [Missed Calls], [Dialed Calls], or [Received Calls] and press Ok. ④ Press Yes to delete or press No to quit. You can also delete all with selection [Delete All] and Press Ok. Caution : Note that this action cannot undone once you perform this feature, all the stored information in your phonebook is deleted. 10.3 Track / Reset Time Records. In Call time menu, you can check : z Last Call Time Check the duration of the last call. z Total Sent Check the total duration of all outgoing calls. z Total Received Check the total duration of all received calls. You can select Reset All Time to reset the timer. ① Press MENU > Call History and Ok ② Select [Call Time] and press Ok. ③ Scroll to the [Reset All Time] and press Ok. ④ Delete? Message pops up. Press Yes to reset or No to quit. Caution : Note that this action cannot undone once you perform this feature, all the stored information in your phonebook is deleted. 10.4 Check / Set / Reset Call Cost. In Call Cost, you can check:](https://usermanual.wiki/Telian/RFM2000/User-Guide-587004-Page-41.png)
![41z Last Call Cost Check the cost of the last call. z Total Cost Check the cost of all calls. z Reset Cost Reset the cost record. You need to enter the PIN2 number to use this function. z Max Cost This menu sets the maximum call cost you can use. ① Select Max Cost, then a message appears asking you to enter PIN2 in the screen. ② Enter the PIN2 in the screen. ③ Then, the screen appears where you can enter the max credit. ④ Enter the new max credit. Caution : if PIN2 is entered incorrectly three times, you cannot start this function. Refer to the section 16, Trouble shooting to solve this problem. z Price Per Unit Enable you to input the current unit price so the phone can estimate the cost.PIN2 code is required. ① Press MENU > Call History ② Press [Call Cost] and Press Ok ③ Scroll to the follow options : ① Select [Last Call Cost] to view the cost of the last call and Press Ok ② Select [Total Cost] to view the cost for all calls Press Ok ③ Select [Reset Cost] and press Ok. Input PIN2 code and press Ok. Contact service provider for detailed operations if necessary. ④ Select [Max Cost] and press Set. Input PIN2 code and press Ok. Contact service provider for detailed operations if necessary. ⑤ Select [Price Per Unit] and press Set. Input PIN2 code and press Ok. Contact service provider for detailed operations if necessary.](https://usermanual.wiki/Telian/RFM2000/User-Guide-587004-Page-42.png)
![4211 SETTINGS Setting menu includes : z Phone Setup z Call Setup z Network Setup z Security Setup z Restore Factory Settings 11. 1 Phone Setup 11.1.1 Set Time and Date / Home City This menu guides you to set Home City, Time/Date. z Home City Set the correct city where you are using this phone, so you can ensure the correction of World Clock. z Time/Date Set the correct date and time to ensure the Alarm is working correctly. Set Home City : ① Press MENU > Settings ② Press [Phone Setup] and Press Ok ③ Select [Time and Date], and then press Ok. ④ Select [Set Home City] and press Ok. ⑤ Scroll to the city where you are using this phone and Press Ok Set Time / Date : ① Press MENU > Settings ② Press [Phone Setup] and Press Ok ③ Select [Time and Date], and then press Ok. ④ Select [Set Time / Date] and press Ok.](https://usermanual.wiki/Telian/RFM2000/User-Guide-587004-Page-43.png)
![43⑤ Press Change and use numeric keys to input current date and time and Press Ok. ⑥ After finishing, Press Done ⑦ Save? message pops up. Press Yes to complete or No to quit. 11. 1. 2 Select Language You can select the language you need. The phones currently support three languages (English, Spanish, and Portuguese) ① Press MENU > Settings ② Press [Phone Setup] and Press Ok ③ Select [Language], and then press Ok. ④ Select the language you need and press Ok 11.1. 3 Input Method The chosen input method will be used as the main input method while editing. ① Press MENU > Settings ② Press [Phone Setup] and Press Ok ③ Select [Input Method], and then press Ok. ④ Scroll up and down arrow key to select one method and press Ok z Multitap ABC z Multtap acb z Numeric 11.1.4 Change display setup In Display menu, you can set your favorite Display Characteristic to show Date and time or Owner Number. Show Date and Time : You can choose whether to display date and time in Standby screen or not. ① Press MENU > Settings ② Press [Phone Setup] and Press Ok](https://usermanual.wiki/Telian/RFM2000/User-Guide-587004-Page-44.png)
![44③ Select [Display], and then press Ok. ④ Toggle Show Date and Time and press Ok Show Owner Number You can choose whether to display your phone number (or name) in Standby screen or not. ① Press MENU > Settings ② Press [Phone Setup] and Press Ok ③ Select [Display], and then press Ok. ④ Toggle Show Owner Number and press Ok 11.1.5 Set Contrast There are 15 levels for LCD Contrast. ① Press MENU > Settings ② Press [Phone Setup] and Press Ok ③ Select [Contrast], and then press Ok. ④ Adjust contrast using , and key ⑤ Press Ok to complete. 11.1. 6 Greeting Text The Greeting phrase is shown after power-on animation. On / Off status : ① Press MENU > Settings ② Press [Phone Setup] and Press Ok ③ Select [Greeting Text], and then press Ok. ④ Select On or Off depending on your current greeting text status and press change. ⑤ Toggle On or Off using and key to set Status to On or Off ⑥ Press Ok to complete. Change Text : ① Press MENU > Settings ② Press [Phone Setup] and Press Ok ③ Select [Greeting Text], and then press Ok.](https://usermanual.wiki/Telian/RFM2000/User-Guide-587004-Page-45.png)
![45④ Press to highlight the Greeting Text and press Edit. ⑤ Edit the greeting text and then press Ok. 11.1.7 Auto update of date and time This is a network or subscription dependent service. If the function is enabled, the phone pops you NITZ(Network Identity Time Zone) messages and inquires you to change the date and time for the phone. ① Press MENU > Settings ② Press [Phone Setup] and Press Ok ③ Select [Auto Update of date and time], and then press Ok. ④ Toggle On or Off. 11.2 Call Setup 11.2.1 Caller ID You can choose to send/hide your phone number to/from the calling party. ① Press MENU > Settings ② Press [Call Setup] and Press Ok ③ Press [Caller ID] and Press Ok ④ Toggle [Set by Network], or [Hide Id] or [Send Id] and then press Ok. ⑤ Toggle On or Off. z Set By Network Accept the default value set by Network. z Hide Id Not to show your phone number to the calling party. z Send Id Show your phone number to the calling party. 11.2.2 Call waiting Call Waiting is a network or subscription dependent service. If set to Activate, Call Waiting feature enables the network to remind you other incoming calls during a call in progress.](https://usermanual.wiki/Telian/RFM2000/User-Guide-587004-Page-46.png)
![46 ① Press MENU > Settings ② Press [Call Setup] and Press Ok ③ Press [Call Waiting] and Press Ok ④ Select [Activate], or [Deactivate] or [Query Status] and then press Ok. z Active Activate Call Waiting function. z Deactivate Deactivate Call Waiting function. z Query Status Check current Call Waiting setting status. 11.2.3 Call Divert Call Divert is a network or subscription dependent service. It allows you to forward a call to another number, based on different conditions. ① Press MENU > Settings ② Press [Call Setup] and Press Ok ③ Press [Call Divert] and Press Ok ④ Select One of options below and then press Ok. z All Voice Calls Divert all incoming calls when you don’t answer. z If Unreachable Divert all incoming calls when the phone is not reachable due to some network error or other reasons. z If No Answer Divert the incoming call if it is not answered. z If Busy Divert all incoming calls when there is at least one call in progress. z All Data Calls Divert all incoming data calls. z Cancel All Divert Deactivate Call Divert function. ⑤ Select Active, Deactivate or Query Status and press Ok. z Activate Activate the chosen Call Divert option. Type the number you want a call to be forwarded to. You can also chose the number from your phone book pressing Searching. z Deactivate Deactivate the chosen Call Divert option. z Query Status Check current Call Divert setting status.](https://usermanual.wiki/Telian/RFM2000/User-Guide-587004-Page-47.png)
![4711.2.4 Call Barring Call Barring is a network or subscription dependent service. This feature allows you to restrict or bar certain or all types of calls to and from your phone. ① Press MENU > Settings ② Press [Call Setup] and Press Ok ③ Press [Call Barring] and Press Ok ④ Select One of options below and then press Ok. Outgoing Calls : z All Calls Bar all outgoing calls. z International Calls Bar all outgoing international calls. z International Except Home Prevent users from making any international calls other than to home PLMN. Incoming Calls: z All Calls Bar all incoming calls. z When Roaming Bar all incoming calls when the phone is roaming. Cancel All : Password is required. ⑤ Select [Active], [Deactivate] or [Query Status] and press Ok. z Activate Aactivate the chosen Call Barring option. z Deactivate Deactivate the chosen Call Barring option. z Query Status Check current Call Barring setting status. Note : To active and Deactive Outgoing, Incoming, and cancel calls, password which is provided by SIM company is required. 11.2.5 Line Switching This feature allows you to switch different lines base on your needs. ① Press MENU > Settings ② Press [Call Setup] and Press Ok ③ Press [Line Switching] and Press Change ④ Toggle Line 1 or Line 2 and press Ok to switch different lines.](https://usermanual.wiki/Telian/RFM2000/User-Guide-587004-Page-48.png)
![4811.2.6 Call Time Reminder Call Time Reminder alerts every specific time period to remind you the call duration. ① Press MENU > Settings ② Press [Call Setup] and Press Ok ③ Press [Call Time Reminder] and Press Ok ④ Toggle One of options below and then press Ok. z Off Set Call Time Reminder to Off. z Single Reminder beeps once. You have to set reminder time value (1-3000 sec.) z Periodic Reminder beeps periodically every minute at the number of seconds you set. You have to set reminder time value (30-60 sec.). ⑤ For Single and Periodic option, you need to type time value through numeric numbers and press Ok. 11.2.7 Auto Redial Set Auto Redial to On enables the phone to keep trying dialing if the called party is not available. ① Press MENU > Settings ② Press [Call Setup] and Press Ok ③ Press [Auto Redial] and Press Change ④ Toggle On or Off and then press Ok. 11.2.8 Closed User Group This feature allows you to program specific call-out and call-in rules. This is especially suitable for use in offices and restrict phones to company use. You can create up to 5 groups. ① Press MENU > Settings ② Press [Call Setup] and Press Ok ③ Press [Closed User Group] and Press Ok ④ Screen shows Group List. Select one group you need and press Option (if there is no group listed, press Add to create group list. ⑤ Select one of options listed below and press Ok](https://usermanual.wiki/Telian/RFM2000/User-Guide-587004-Page-49.png)
![49z Edit Edit the group name. z Add Add one new group. z Activate Activate the chosen group. z Deactivate Deactivate the chosen group. z Delete Delete the chosen group. 11.3 Network Set up 11.3.1 Network Selection You can set the phone to automatically search the most suitable network to camp on; or set to manually select the network you need. ① Press MENU > Settings ② Press [Network Setup] and Press Ok ③ Press [Network Selection] and Press Ok ④ Select [Automatic] or [Manual] and press Ok. If Manual is selected, the phone starts searching available networks. Use up and down key to find out the network list, and press Ok to set the highlighted network. 11.3.2 Band Selection There are 3 options available: 900, 1800 and Dual Band (900&1800). Or 850, 1900 and Dual Band (850&1900) ① Press MENU > Settings ② Press [Network Setup] and Press Ok ③ Press [Band Selection] and Press Ok ④ Select the option you need and press Ok 11.4 Security Setup There are 6 options available: z SIM Lock Prevent unauthorized use of SIM card. z Phone Lock Prevent unauthorized use of the phone. z Auto Keypad Lock Prevent accidentally pressing the keypad in Standby. z Fixed Dial The phone can dial out only the numbers set in Fixed Dial](https://usermanual.wiki/Telian/RFM2000/User-Guide-587004-Page-50.png)
![50list. z Barred Dial The phone cannot dial out the numbers set in Barred Dial list. z Change Password Change PIN, PIN2 or Phone Lock passwords. 11.4.1 SIM Lock ① Press MENU > Settings ② Press [Security Setup] and Press Ok ③ Press [SIM Lock] and Press Ok ④ Toggle On or Off to lock or unlock SIM card ⑤ Enter 8 digits PIN number and press Ok. 11.4.2 Phone Lock The default password is “0000”. ① Press MENU > Settings ② Press [Security Setup] and Press Ok ③ Press [Phone Lock] and Press Ok ④ Toggle On or Off to lock or unlock phone. ⑤ Enter 4~8 digits password and press Ok. 11.4.3 Auto Keypad Lock If you don’t press the key for the certain period of time you set, key is automatically locked in order to prevent accidentally pressing keys. ① Press MENU > Settings ② Press [Security Setup] and Press Ok ③ Press [Auto KeyLock] and Press Ok ④ Toggle None to deactivate Auto Keypad Lock; or select timer duration: 5 sec., 30 sec., 1 min. or 5 min and Press Ok Note : When key is locked, screen shows “unlock” in left bottom side. Press Unlock key then, message “Press # to unlock”. Press # to unlock. 11.4.4 Fixed Dial Fixed Dial is a network or subscription dependent feature.](https://usermanual.wiki/Telian/RFM2000/User-Guide-587004-Page-51.png)
![51① Press MENU > Settings ② Press [Security Setup] and Press Ok ③ Press [Fixed Dial Press Ok ④ Select [Mode] and toggle On or Off to activate or deactivate Fixed Dial feature. ⑤ Enter PIN2 code and press Ok. ⑥ Select [Fixed Dial List] and press Ok. ⑦ Screen shows FDN List. Press Add and then Edit to create new entries in FDN list. Note : Please get PIN2 code from your Network Service Provider. 11.4.5 Barred Dial Barred Dial is a network or subscription dependent feature. ① Press MENU > Settings ② Press [Security Setup] and Press Ok ③ Press [Barred Dial] Press Ok ④ Contact your service provider for detailed operations to finish Barred Dial setup. 11.4.6 Change Password This feature allows you to change PIN code, PIN2 code or Phone Lock password. ① Press MENU > Settings ② Press [Security Setup] and Press Ok ③ Press [Change Pwd] Press Ok ④ Select one option you need (PIN, PIN2, Phone Lock) and press Ok ⑤ Enter the old and new codes and press Ok 11.5 Restore Factory Settings This feature resets the current settings to factory default values. The default password is “0000”. ① Press MENU > Settings ② Press [Restore Factory Settings] and Press Ok ③ Press [Change Pwd] Press Ok ④ Enter 4 digit password and press Ok](https://usermanual.wiki/Telian/RFM2000/User-Guide-587004-Page-52.png)
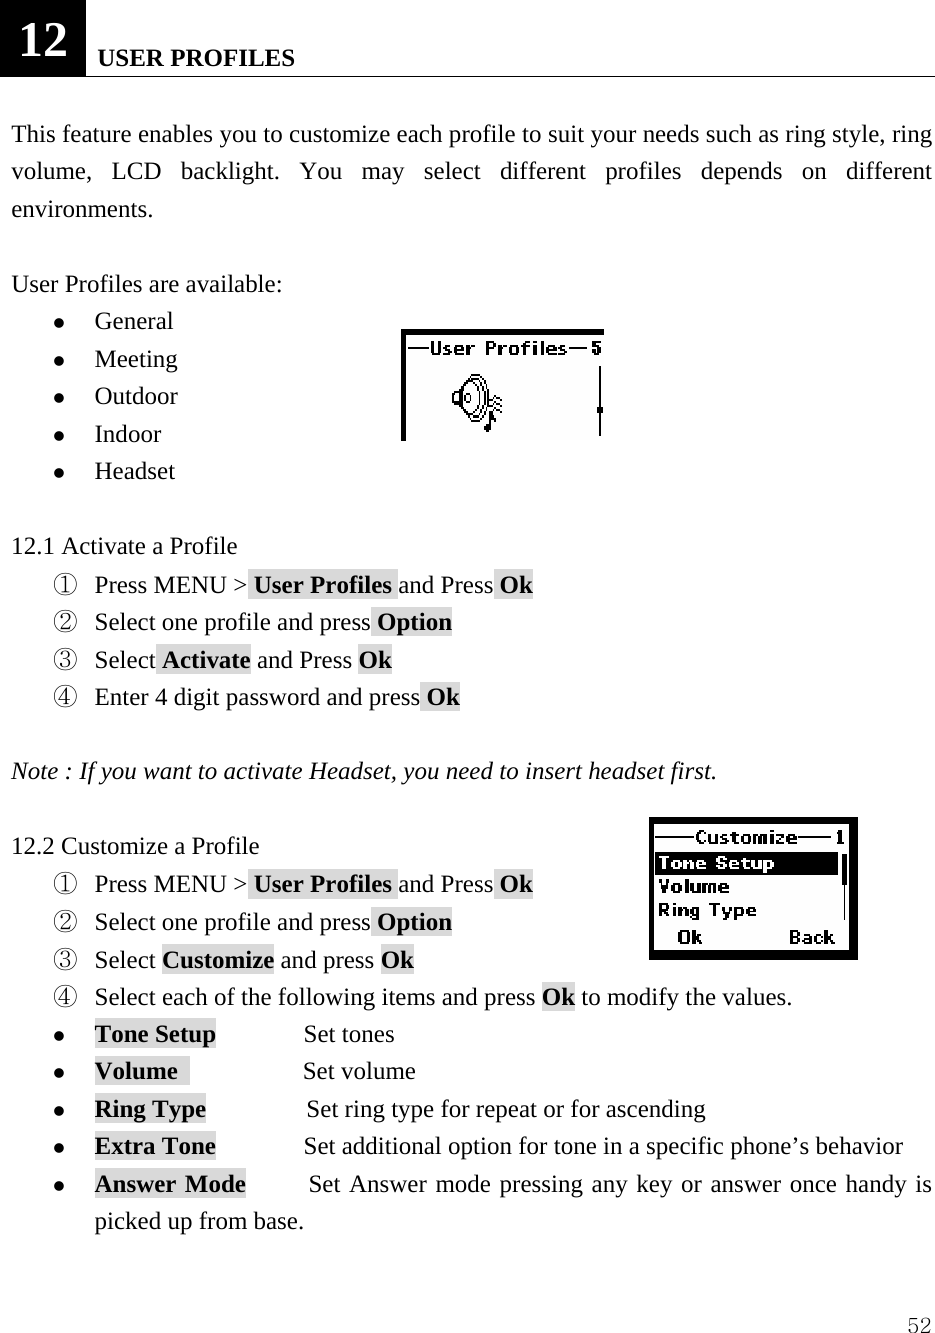
![53z LCD Backlight Set Specific LCD and Keypad Backlight time. 12.2.1 Tone setup Sets tones for Incoming Call, Alarm, Power On, Power Off, Message Tone and Keypad Tone. Note : For each set tone setup, you can choose one from 10 sing Rings and 6 MIDI tones. 12.2.2 Volume 7 volume levels are available for Ring Tone and Key Tone. Adjust the volume per your preference. 12.2.3 Ring Type You can set the ringer to play repeatedly or to play in ascending. ⑤ Select [Ring Type] and Press Ok ⑥ Toggle Repeat or Ascending and Press Ok 12.2.4 Extra Tone Extra Tone includes Warning, Error, Camp on and Connect tones. ⑤ Toggle On or Off to following options to mark or clear the check box and press Done. If Camp on is set to On, the tone rings when camp on a network. If Connect is set to On, tone rings when an outgoing call is established successfully. z Warning z Error z Camp on z Connect 12.2.5 Answer Mode This allows user to set answer mode. If any key is marked, user can answer an incoming call pressing any key. If lift answer is marked, when handy is in a cradle, if user picks up handy, call can be automatically answered without pressing any key.](https://usermanual.wiki/Telian/RFM2000/User-Guide-587004-Page-54.png)
![54⑤ Select [Answer Mode] and Press Ok ⑥ Toggle Any Key or Lift Anser and Press Ok 12.2.6 LCD backlight Set Specific LCD and Keypad Backlight time. ⑤ Select [LCD Backlight] and Press Ok ⑥ Toggle 5 sec, 15sec, 30 sec or 45sec and Press Ok](https://usermanual.wiki/Telian/RFM2000/User-Guide-587004-Page-55.png)
![5513 ORGANIZER Organizer includes : z To Do List z Alarm z Calculator 13.1 View / Edit / Add Tasks You can memorize the date, time and task as an alarm. ① Press MENU > Organizer and Press Ok ② Select [To Do List] and press Ok ③ Press up and down key to browse the list. Highlight the task you need and press Option. The following options is shown. z Add Add new task. Press Change and Input Date, Time, Note, set Alarm(On, Off, Once, Every Day), and then press Done and Yes to save the new added task. z Edit Edit the current task Press Change and Input Date, Time, Note, set Alarm(On, Off, Once, Every Day), and then press Done and Yes to save the modifications z Delete Task Delete the chosen task. z Delete All Delete all tasks. 13.2 Alarm When Alarm is set, the icon appears on Standby screen. ① Press MENU > Organizer and Press Ok ② Select [Alarm] and press Ok ③ Press Change to select On, Off, Once, and Everyday. Toggle one of them and press Ok. ④ Select alarm time and Press Change ⑤ Set time you wish to alarm using numeric keys and Press Ok](https://usermanual.wiki/Telian/RFM2000/User-Guide-587004-Page-56.png)
![56⑥ Press Done and Yes to save the alarm time. 13.3 Calculator You can calculate upto 8 digits. Key description: +, -, /, x : Use up and down arrow keys to select. Back / Clear : Press once to clear one digit. Hold to clear all values except memory values. ① Press MENU > Organizer and Press Ok ② Select [Calculator] and press Ok ③ Start calculation](https://usermanual.wiki/Telian/RFM2000/User-Guide-587004-Page-57.png)