TiVo Solutions d b a TiVo AN0100 Wireless 11n AP User Manual NADA installation guide 097 indd
TiVo Inc. Wireless 11n AP NADA installation guide 097 indd
UserManual.wiki
>
TiVo Solutions d b a TiVo
>
AN0100 User Manual
user manual
Navigation menu
Upload a User Manual
Namespaces
Wiki Guide
HTML
PDF
Info
Views
User Manual
Discussion / Help
Navigation
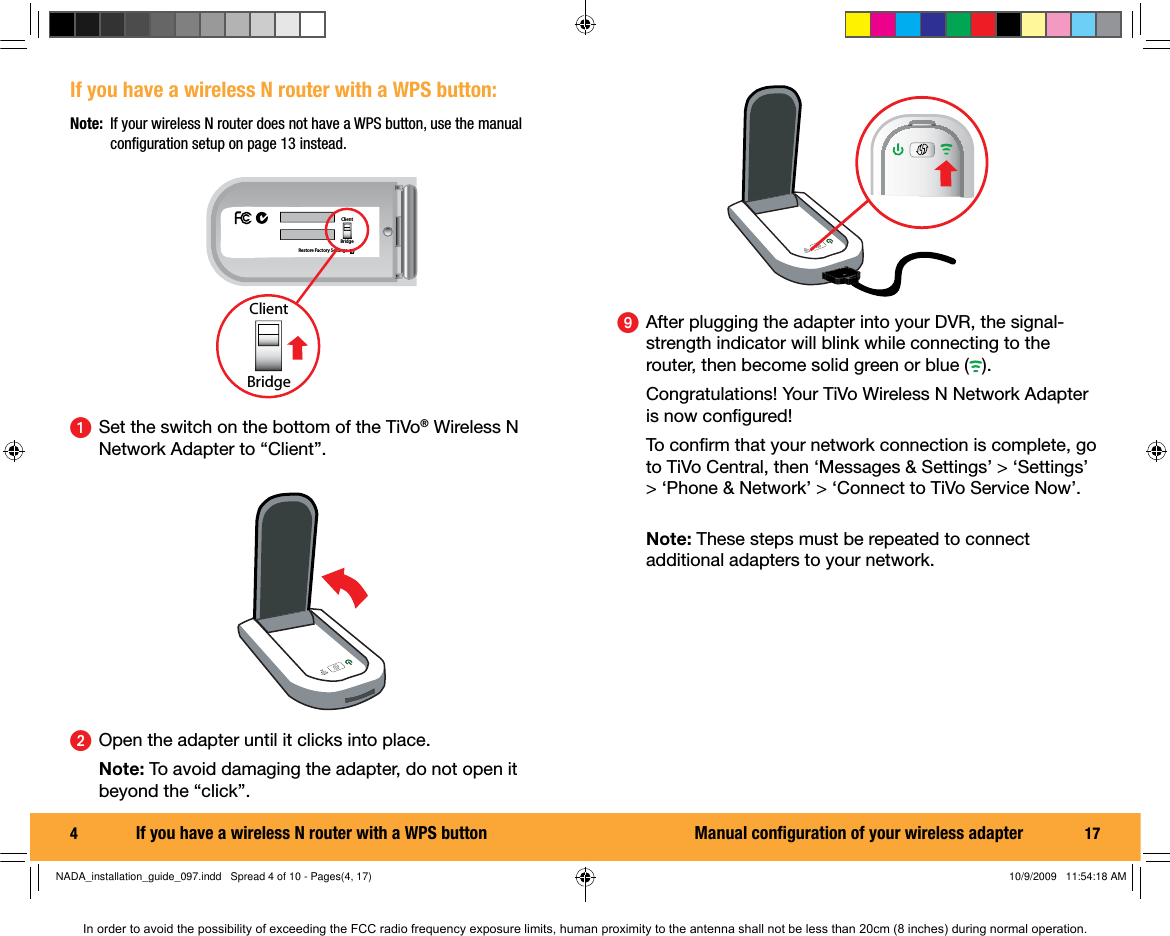
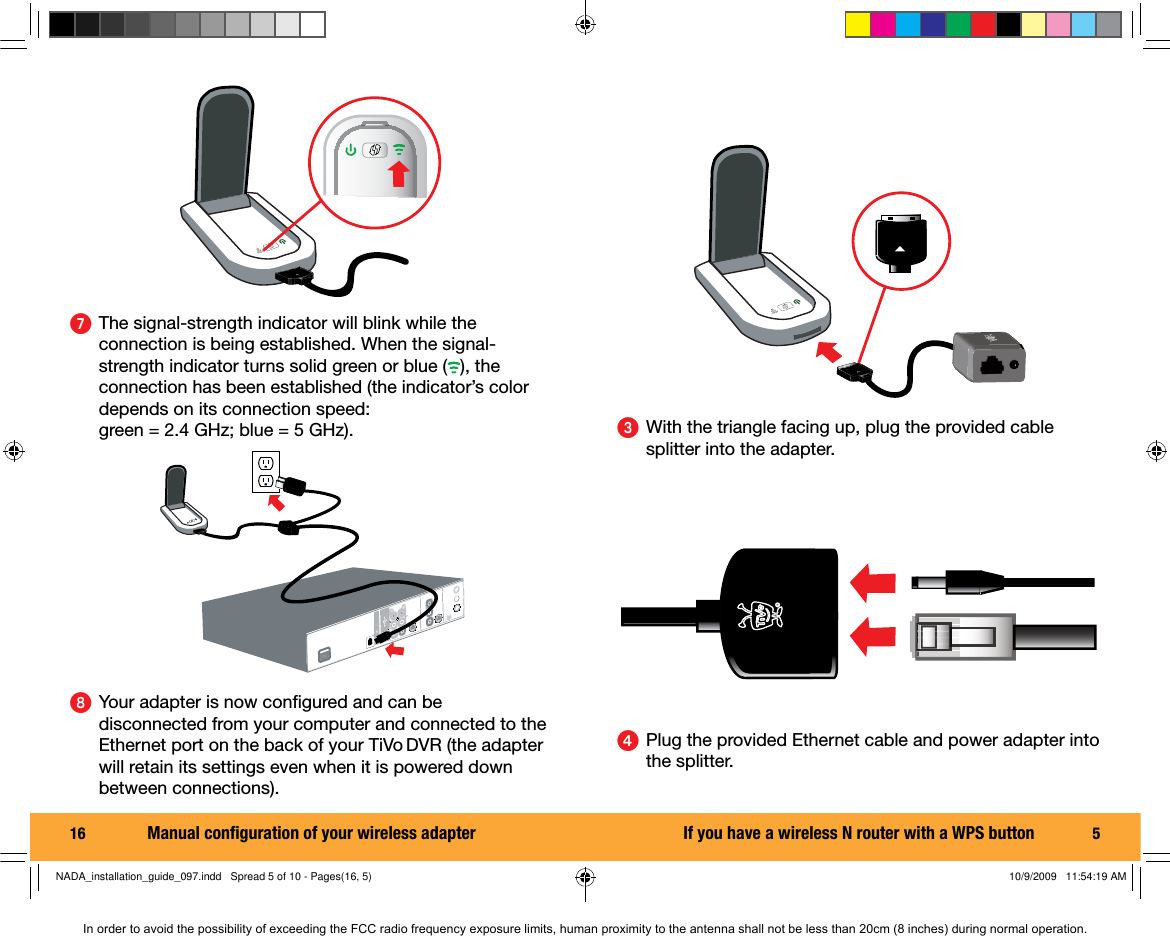
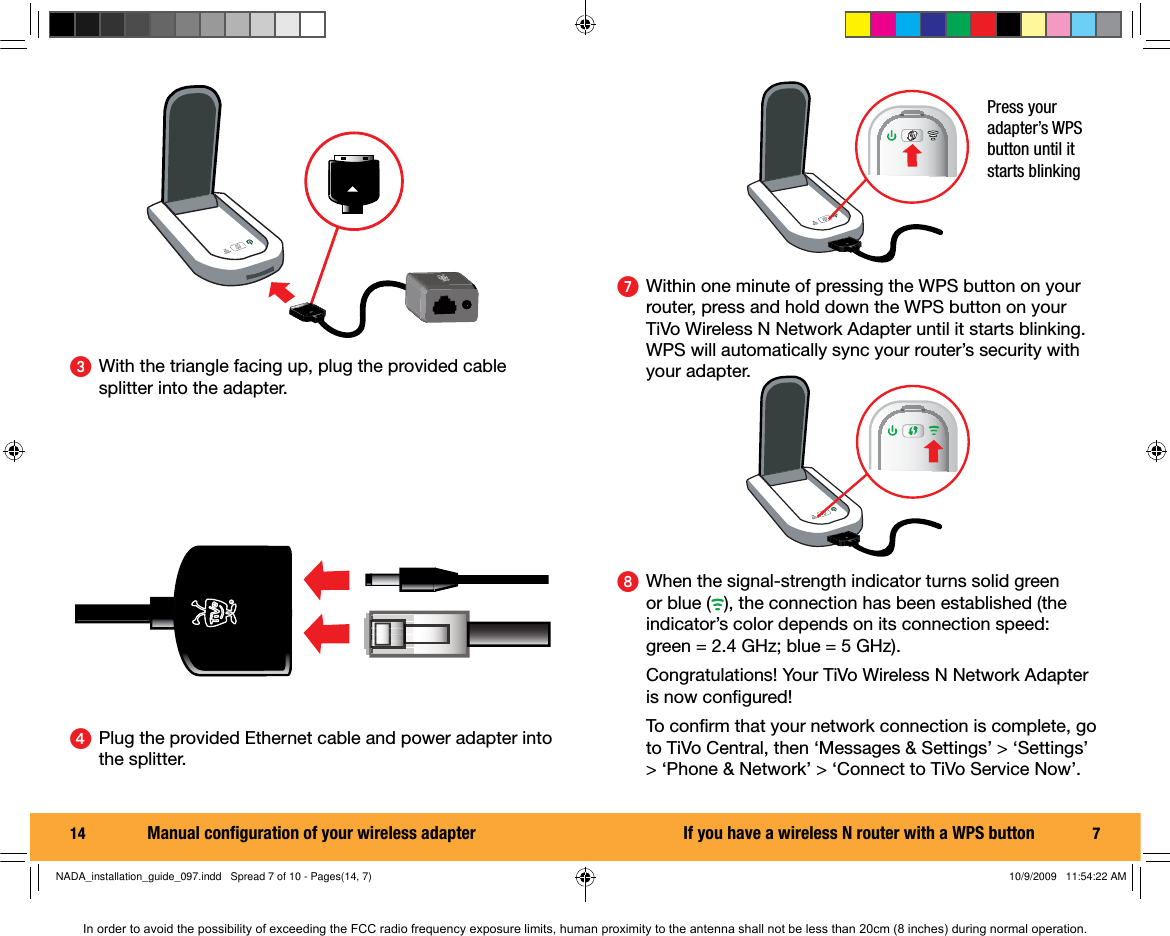
![6 ᕥ Plug the adapter’s power cord into an AC outlet, then connect the Ethernet cable to the back of your TiVo DVR (wait until the power indicator LED [] is solid green before continuing).ᕦ Press and hold down the WPS button on your wireless N router until it starts blinking. Wireless - NPress your router’s WPS button until it starts blinkingIf you have a wireless N router with a WPS button 15ᕥ Plug the power cord from the splitter into an AC outlet, wait until the adapter’s power indicator LED is solid green [] then connect the Ethernet cable to your computer. Note: You may need to disable your computer’s wireless connection before proceeding.ᕦ In a web browser, go to 192.168.10.1 where the setup wizard will guide you through a series of confi guration steps.TiVo Network AdapterSetup WizardManual confi guration of your wireless adapterNADA_installation_guide_097.indd Spread 6 of 10 - Pages(6, 15)NADA_installation_guide_097.indd Spread 6 of 10 - Pages(6, 15) 10/9/2009 11:54:20 AM10/9/2009 11:54:20 AMIn order to avoid the possibility of exceeding the FCC radio frequency exposure limits, human proximity to the antenna shall not be less than 20cm (8 inches) during normal operation.](https://usermanual.wiki/TiVo-Solutions-d-b-a-TiVo/AN0100/User-Guide-1195154-Page-6.png)
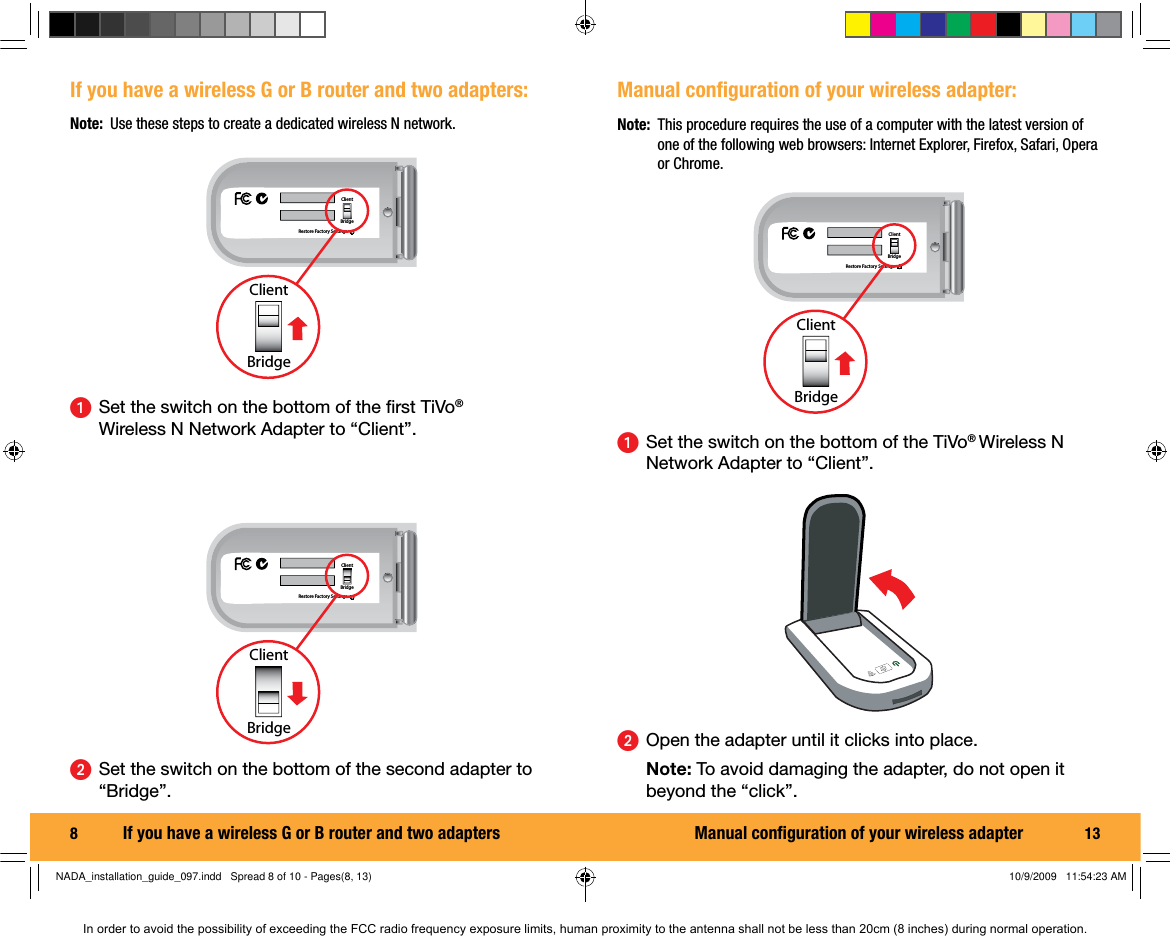
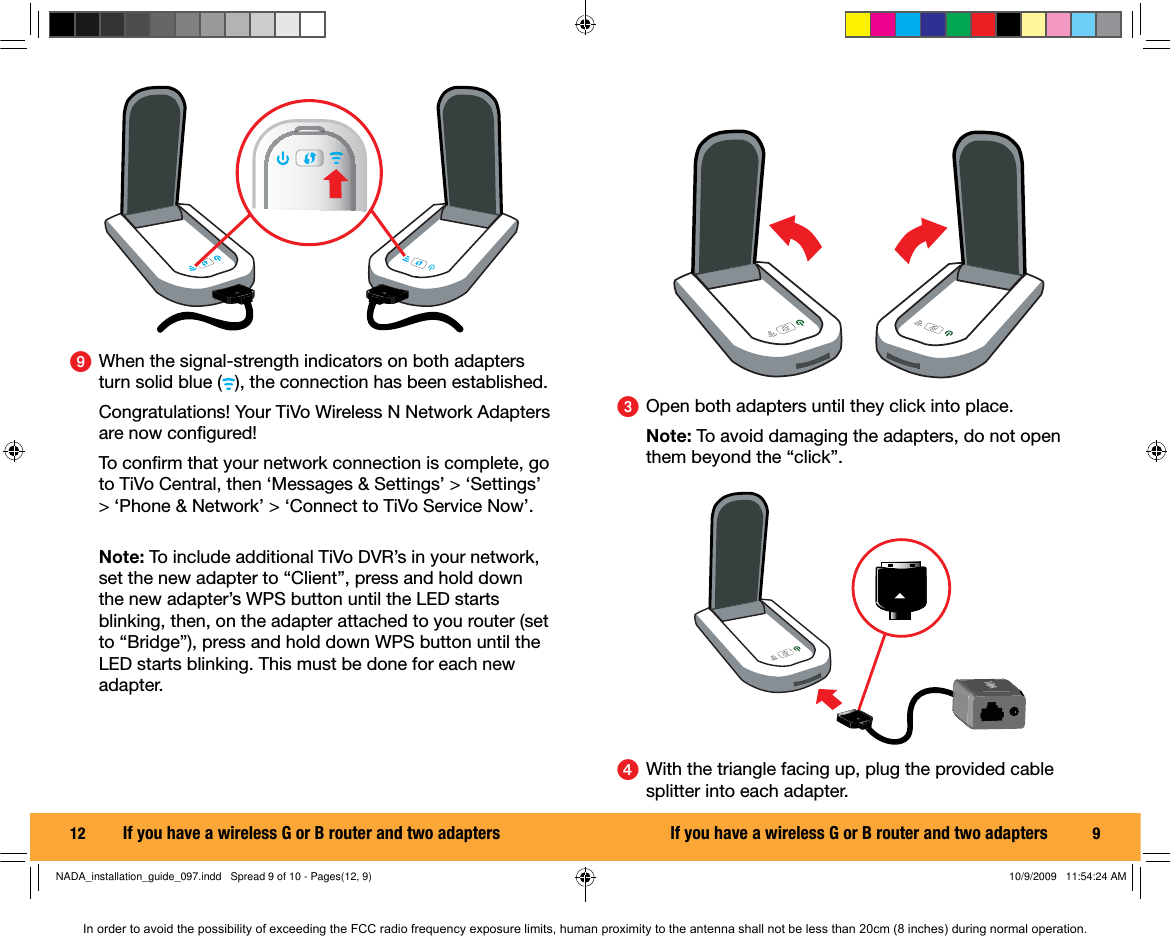
![10 ᕦ Plug the power cord from the fi rst adapter (set to “Client”) into an AC outlet, then connect the Ethernet cable to the back of your TiVo DVR (wait until the power indicator LED [] is solid green before continuing).ᕥ Plug the provided Ethernet cable and power adapter into each splitter.If you have a wireless G or B router and two adapters 11ᕧ Plug the power cord from the second adapter (set to “Bridge”) into an AC outlet, then connect the Ethernet cable to your router (the adapter is ready when the power indicator LED [] is solid blue).Wireless - Nᕨ On the fi rst adapter, press and hold down the WPS button until it starts blinking, then, within one minute, press and hold down the WPS button on the second adapter until it starts blinking. Press your adapter’s WPS button until it starts blinkingIf you have a wireless G or B router and two adaptersNADA_installation_guide_097.indd Spread 10 of 10 - Pages(10, 11)NADA_installation_guide_097.indd Spread 10 of 10 - Pages(10, 11) 10/9/2009 11:54:25 AM10/9/2009 11:54:25 AMIn order to avoid the possibility of exceeding the FCC radio frequency exposure limits, human proximity to the antenna shall not be less than 20cm (8 inches) during normal operation.](https://usermanual.wiki/TiVo-Solutions-d-b-a-TiVo/AN0100/User-Guide-1195154-Page-10.png)