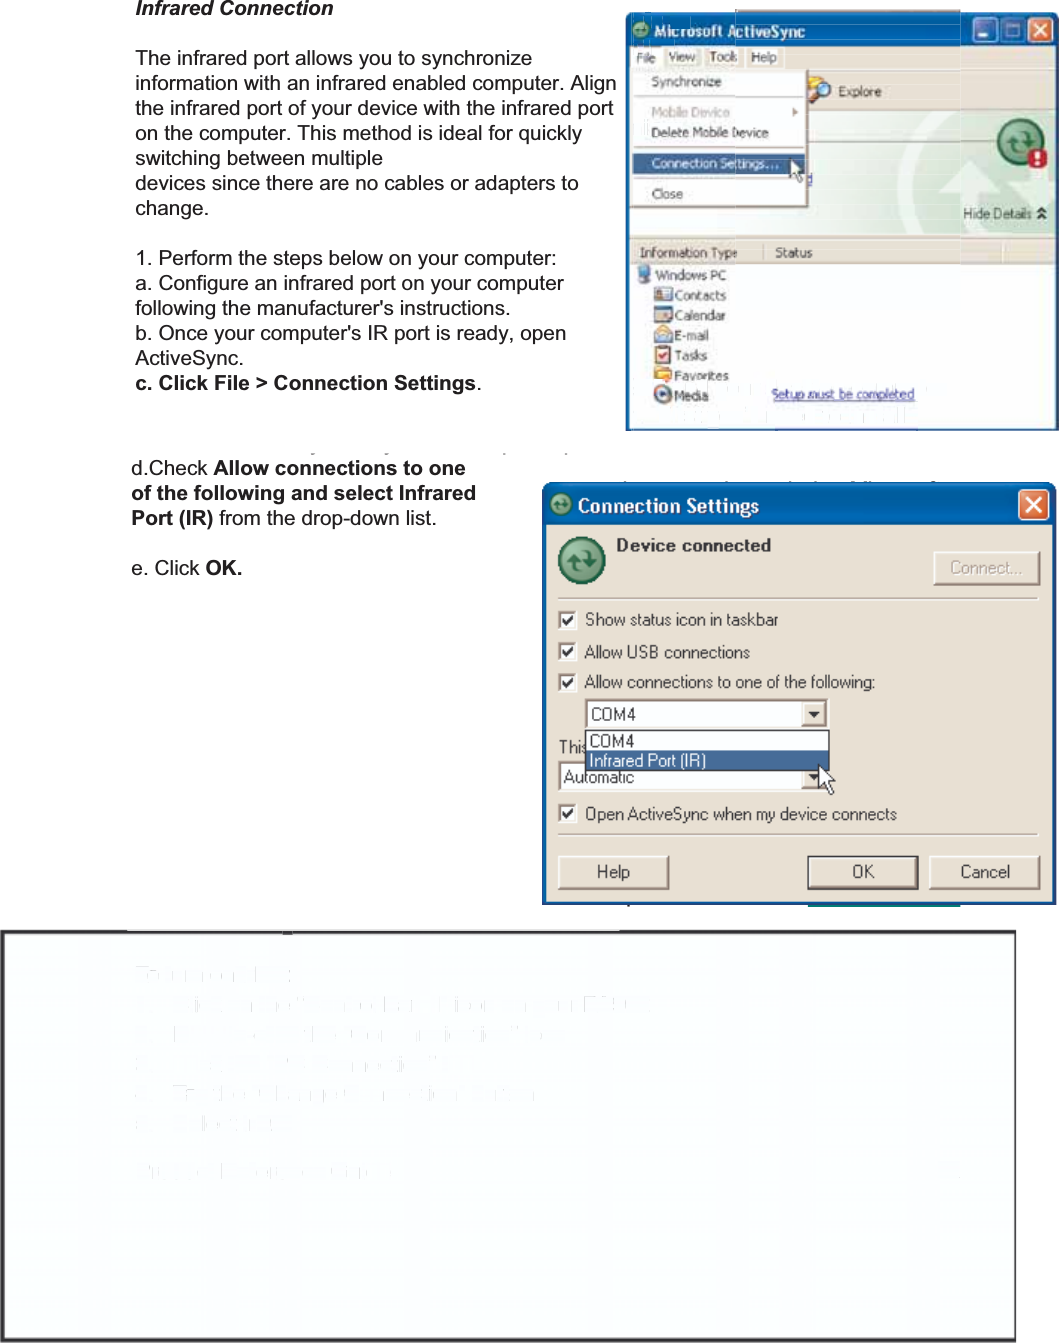
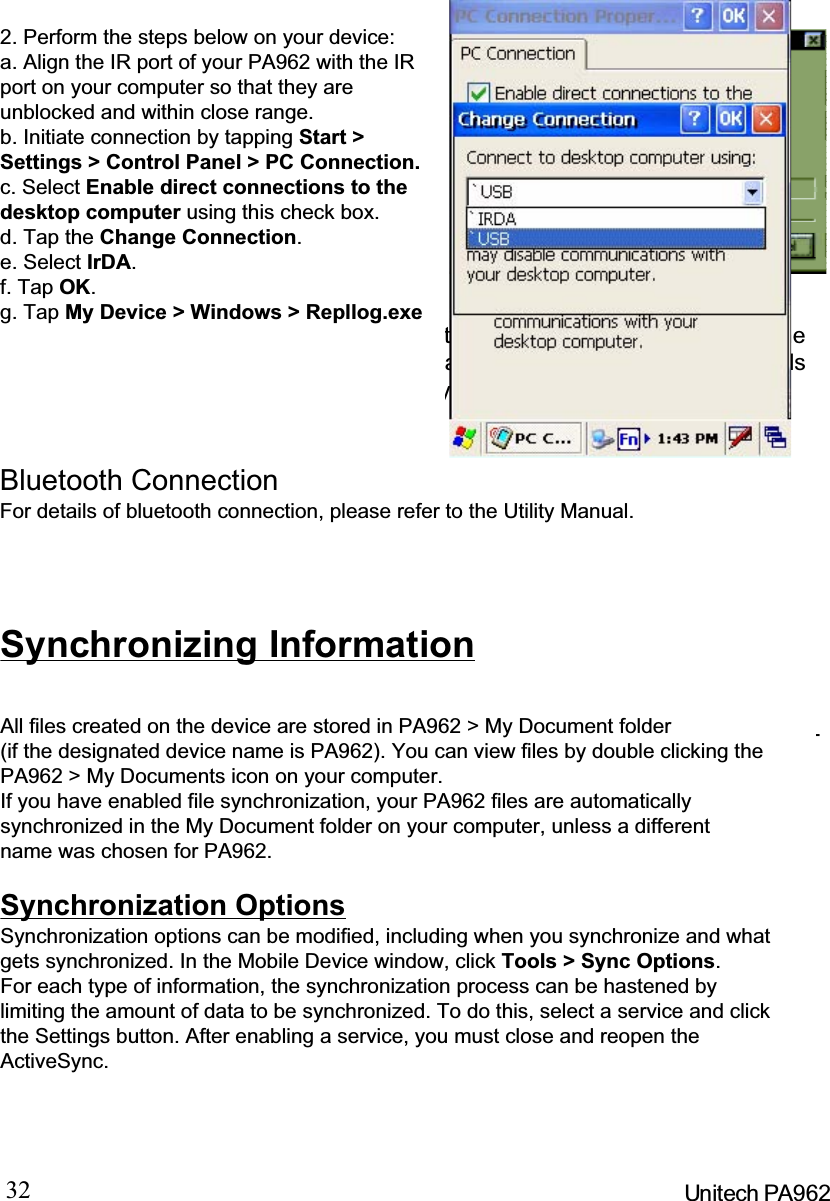
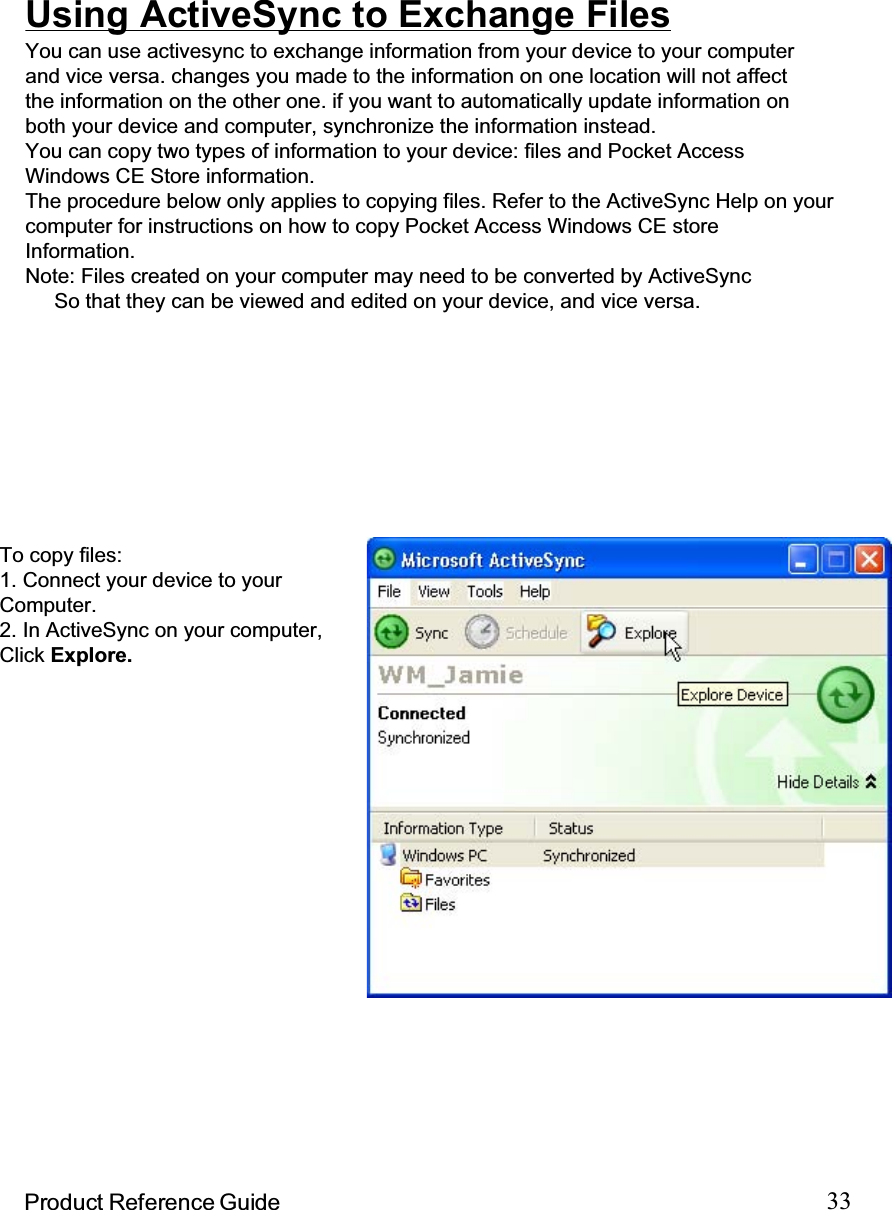
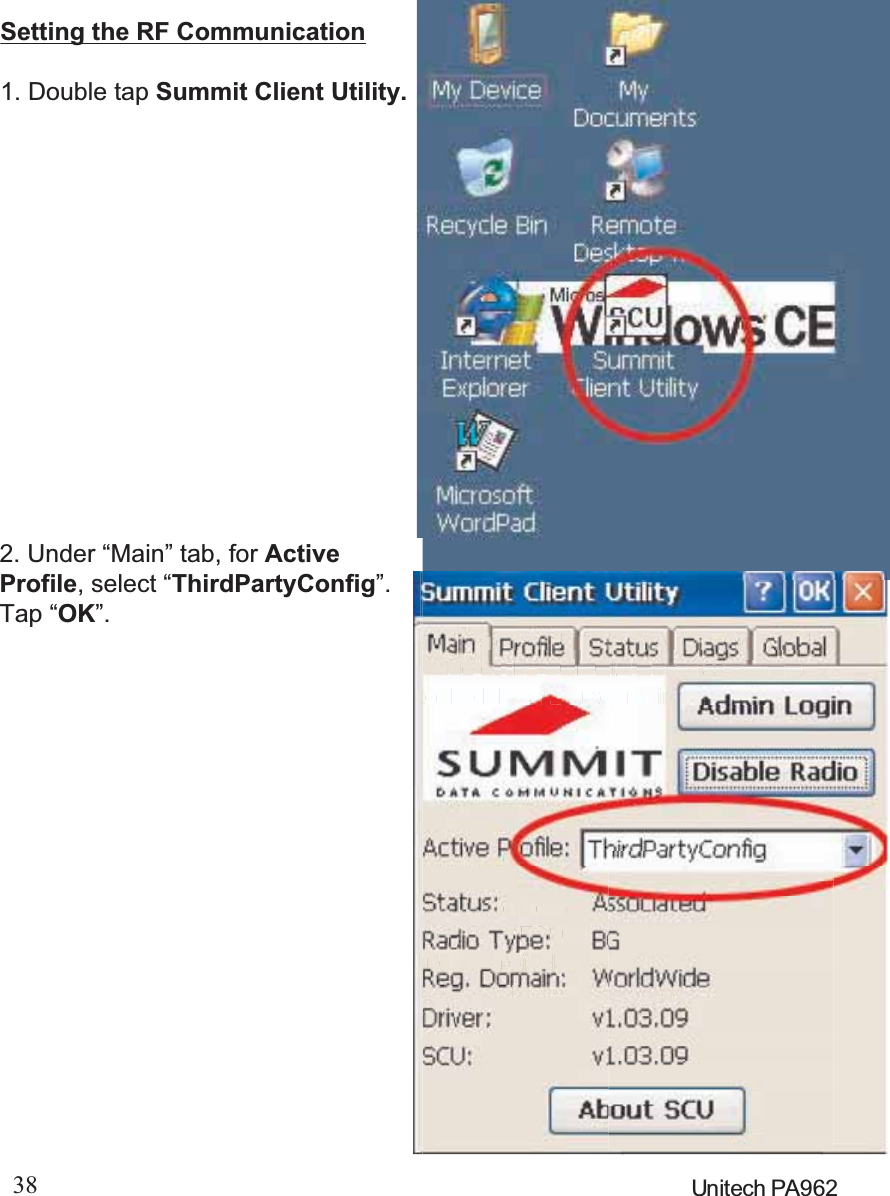
Unitech Electronics PA962BTG Industrial PDA User Manual C s and Settings Kelly
Unitech Electronics Co., Ltd. Industrial PDA C s and Settings Kelly
UserManual.wiki
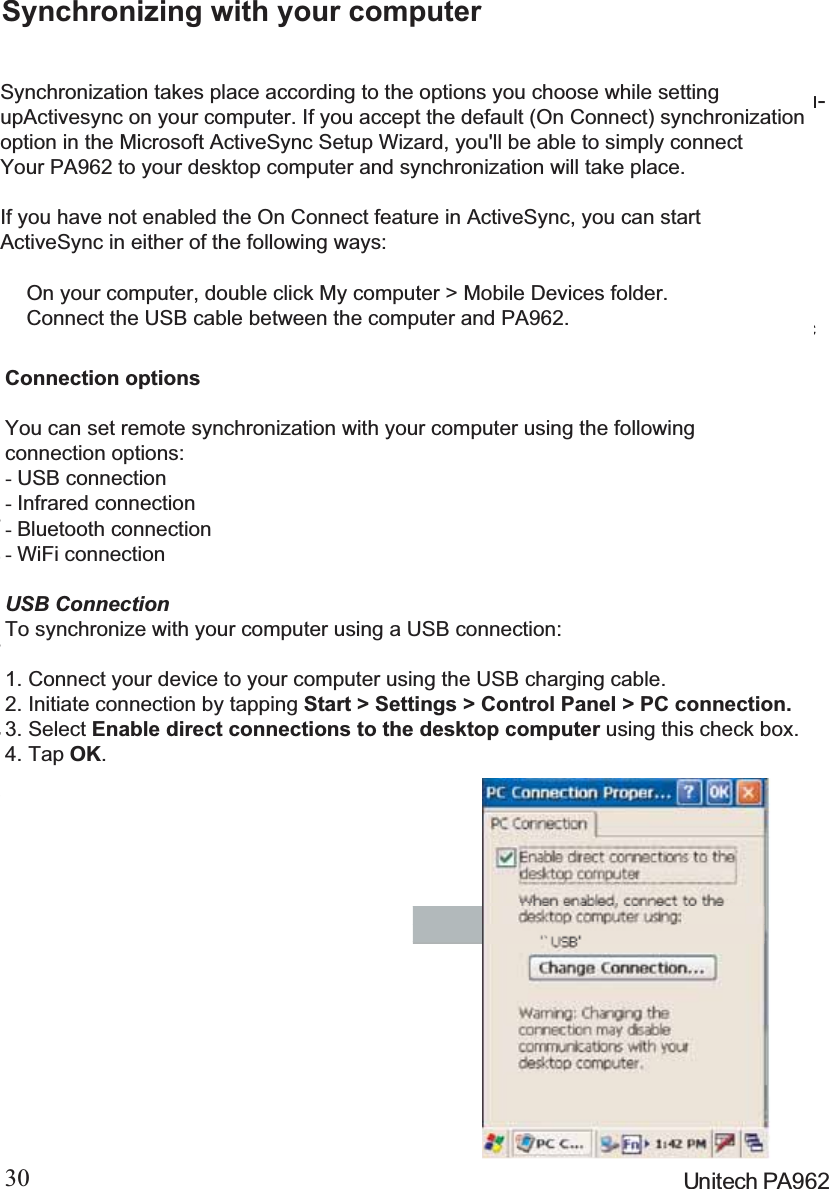
>
Unitech Electronics
>
PA962BTG User Manual
Users Manual
Navigation menu
Upload a User Manual
Namespaces
Wiki Guide
HTML
PDF
Info
Views
User Manual
Discussion / Help
Navigation

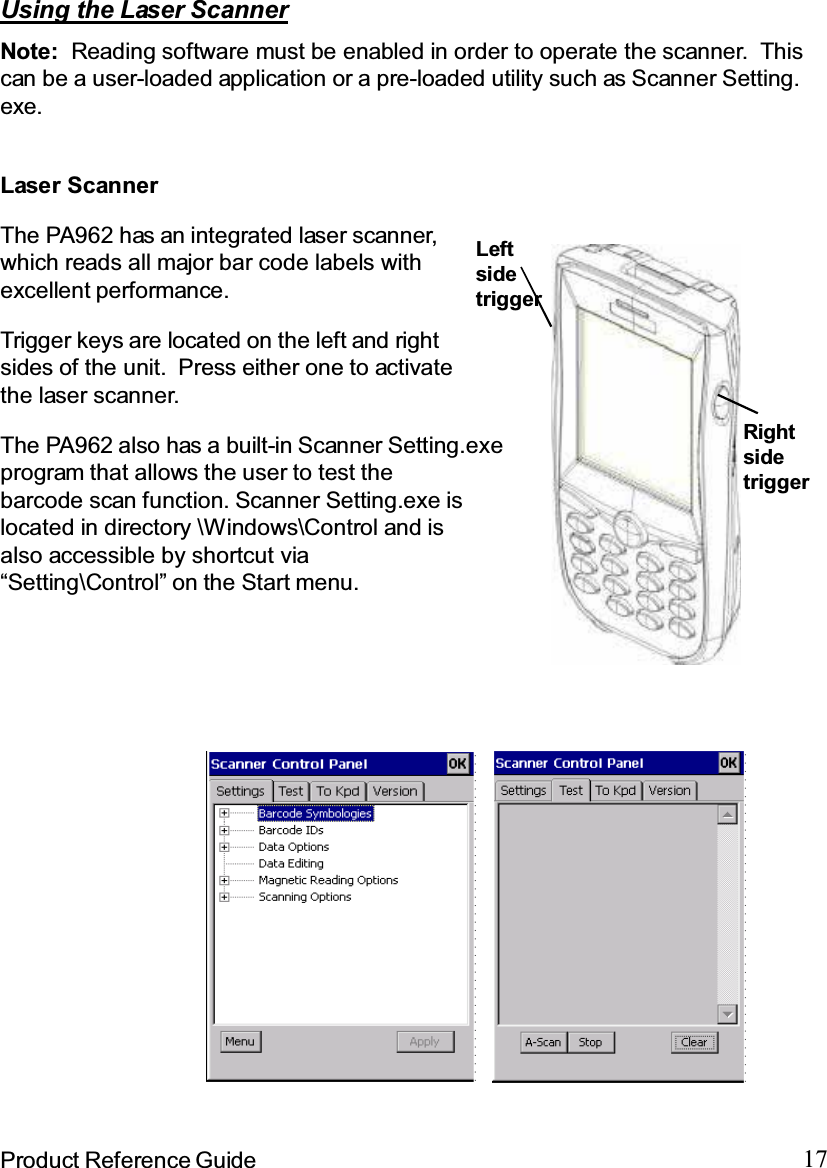
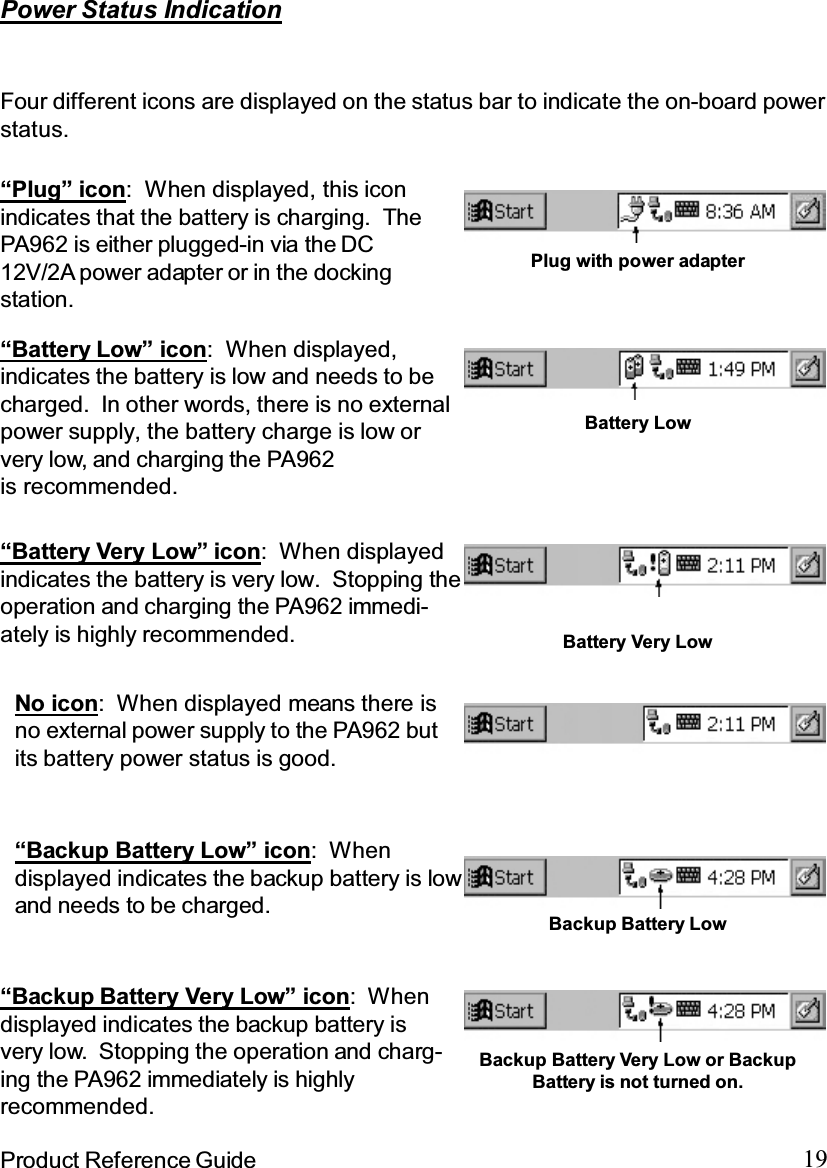
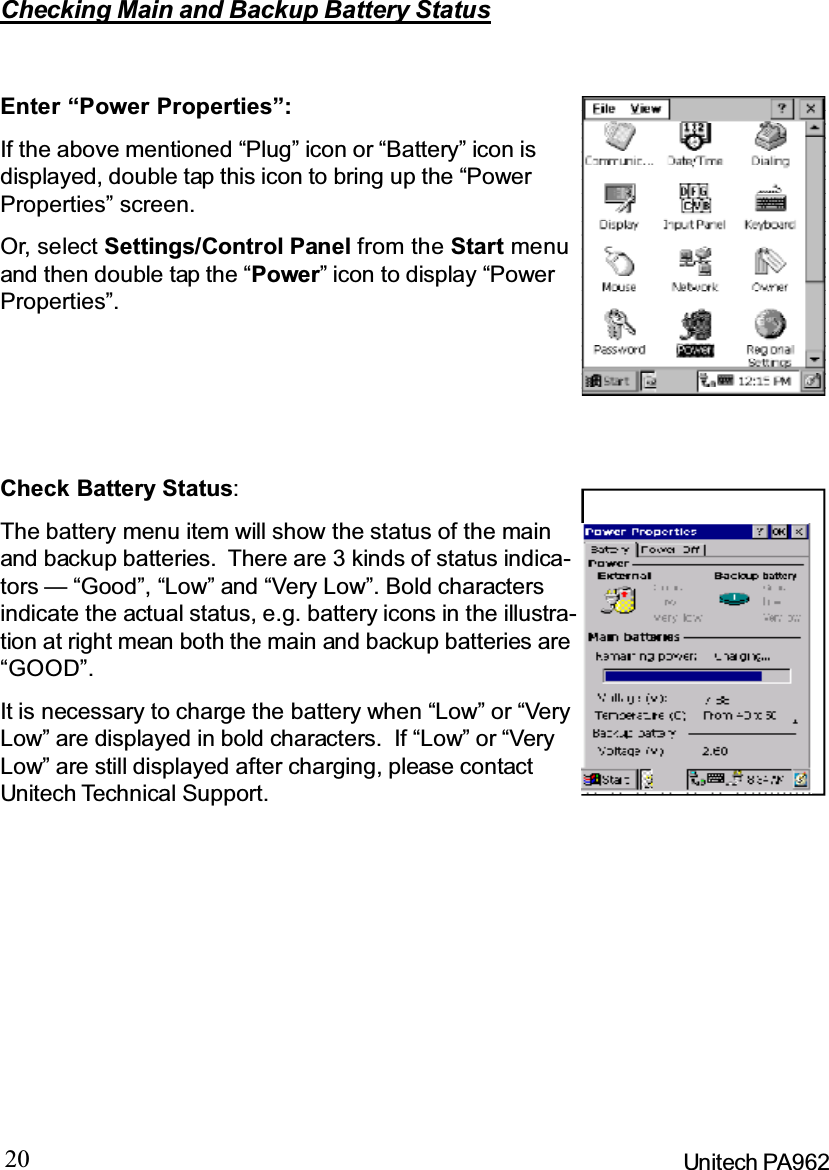
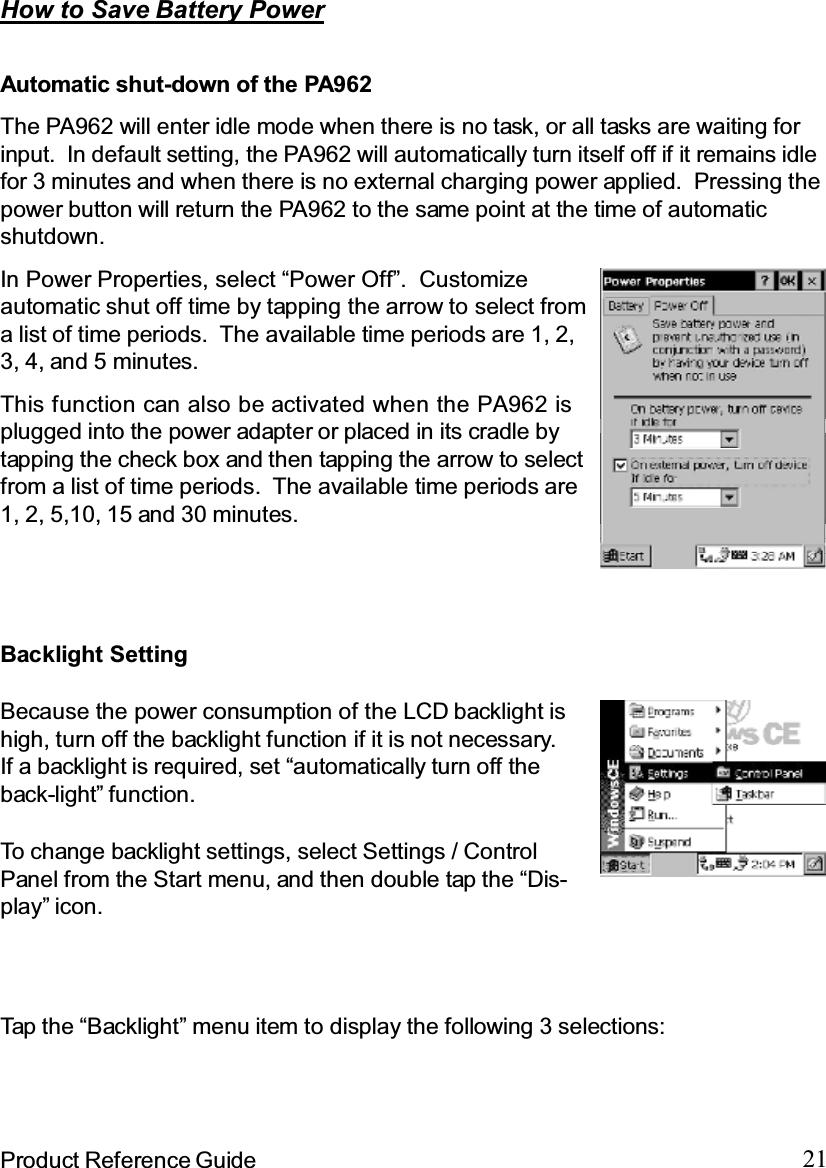
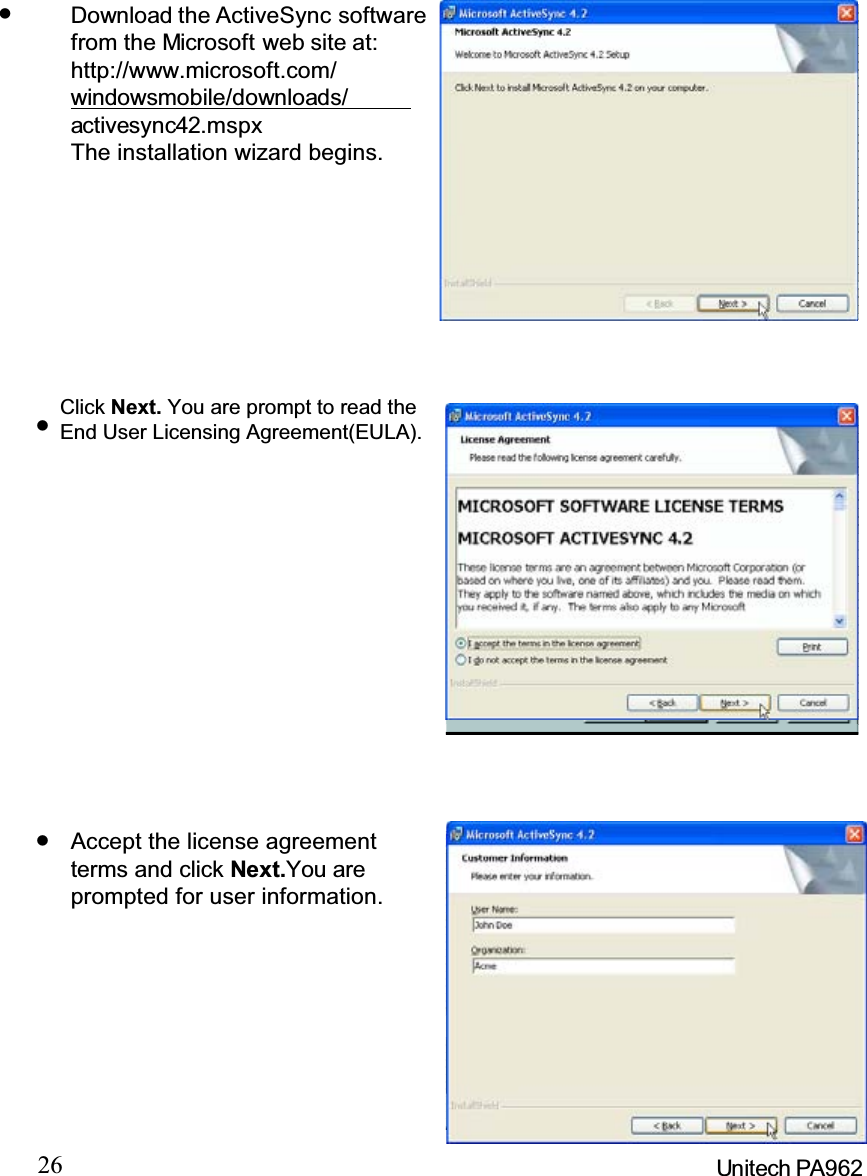
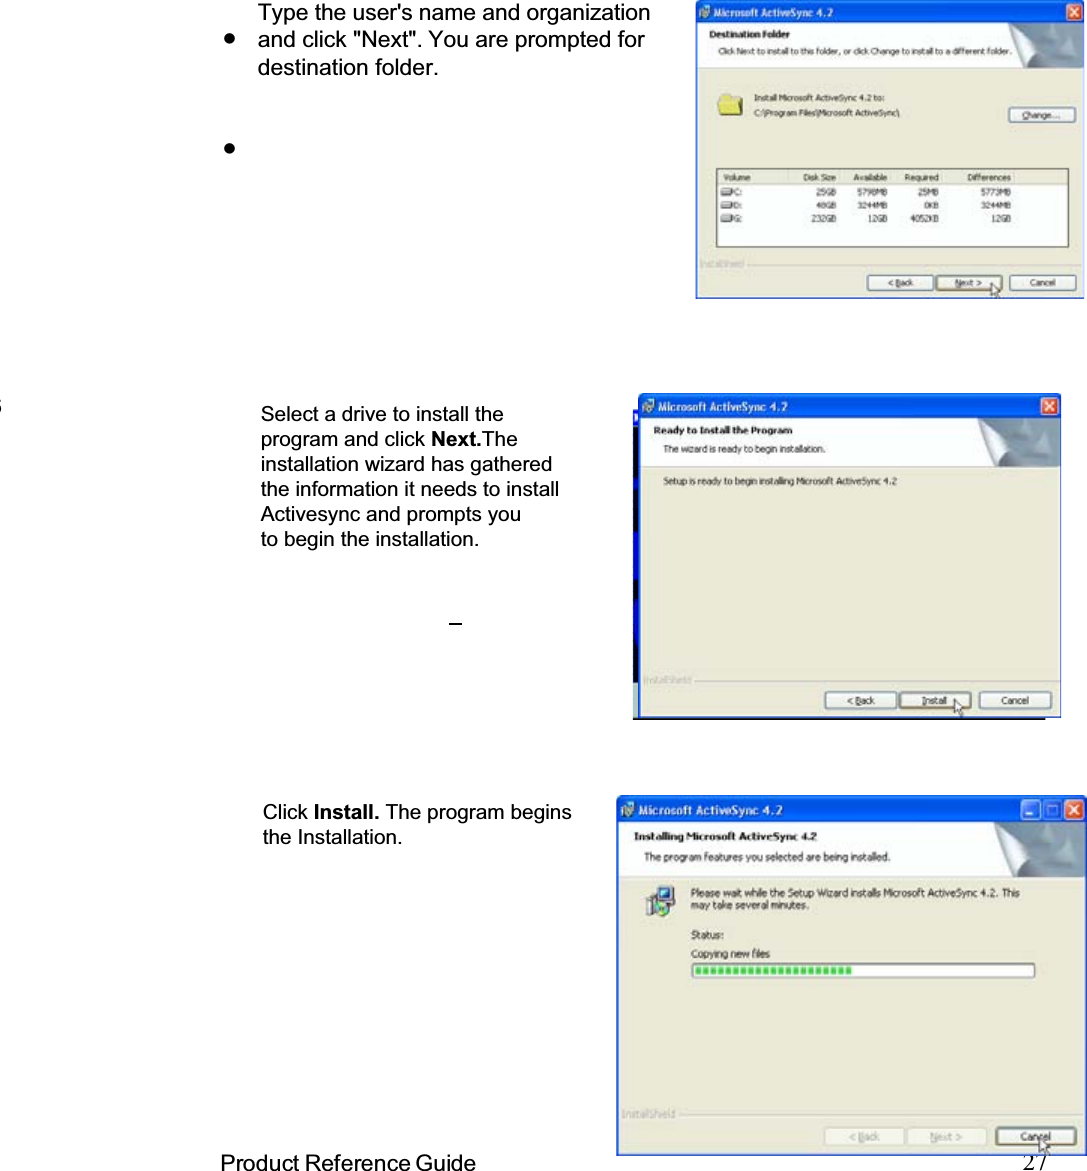
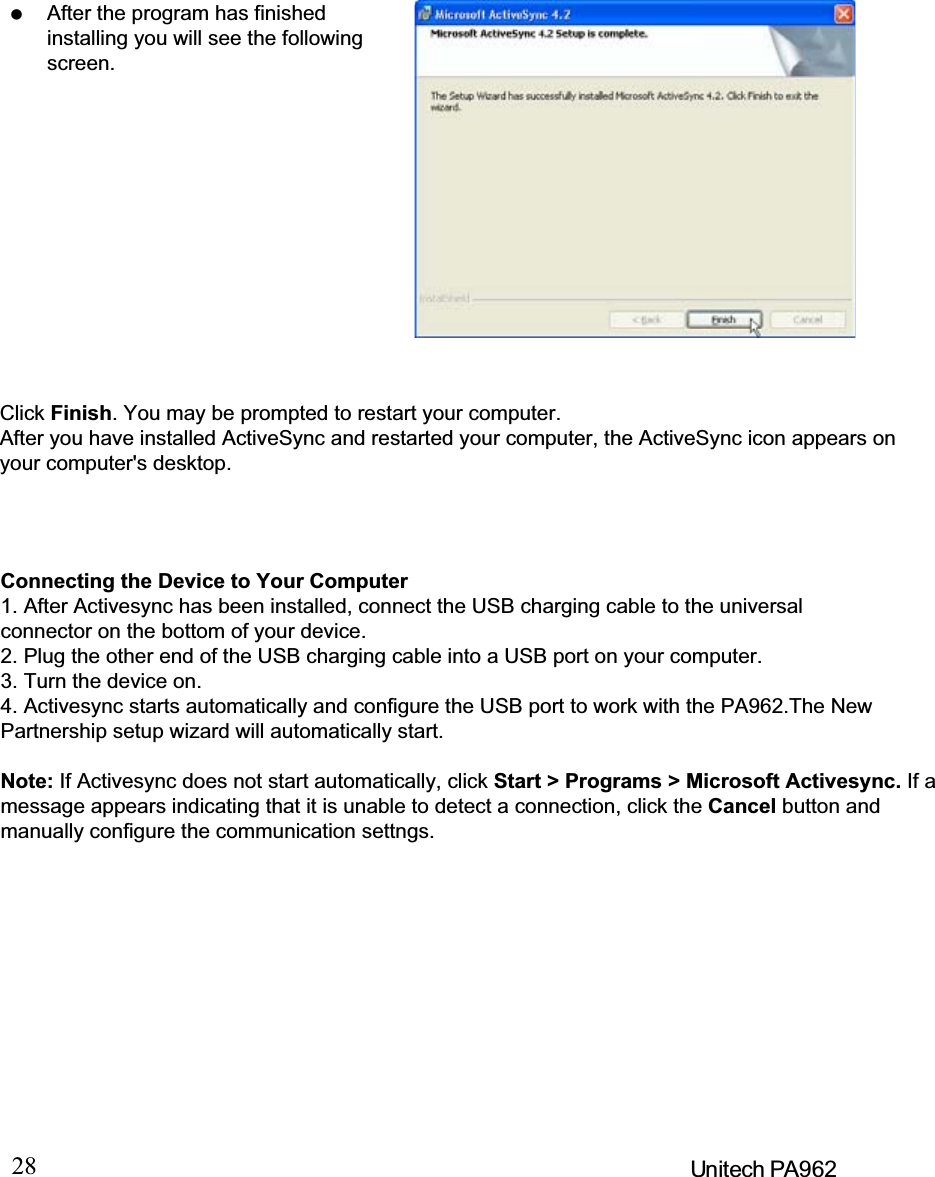
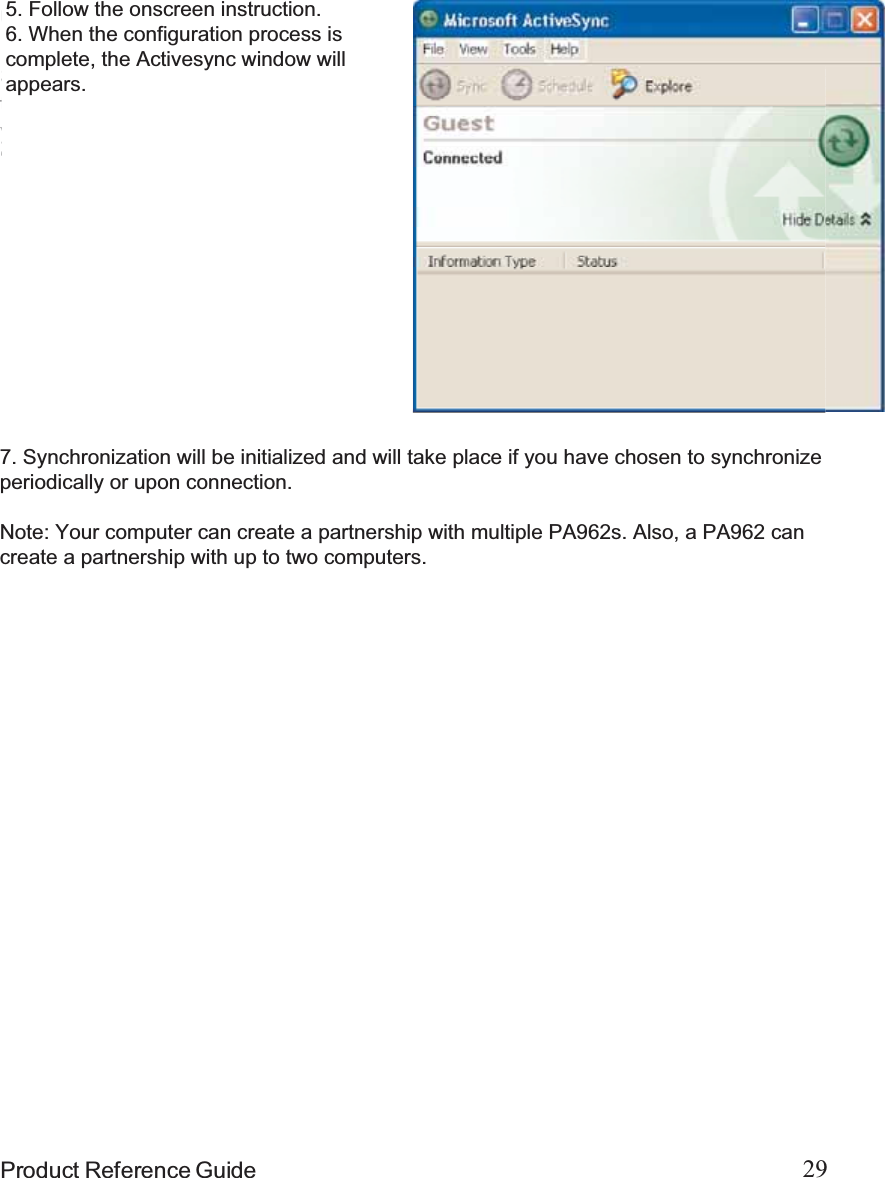
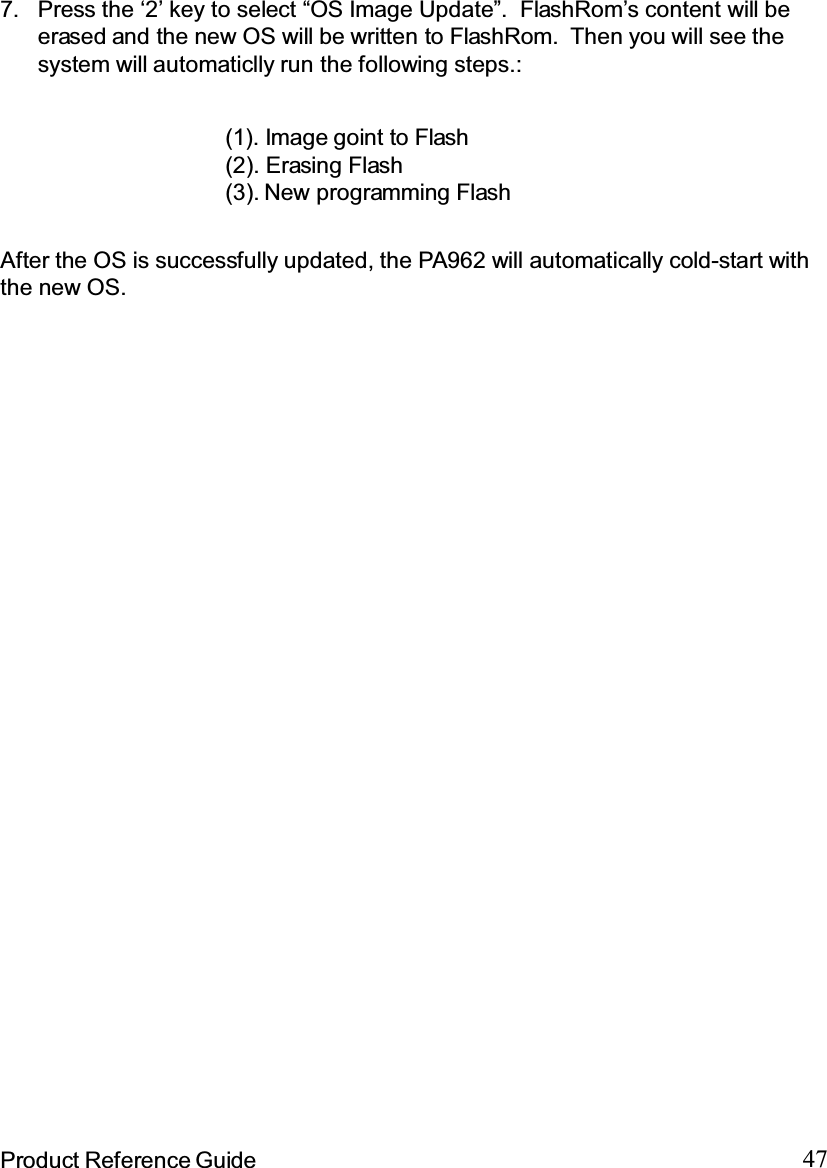
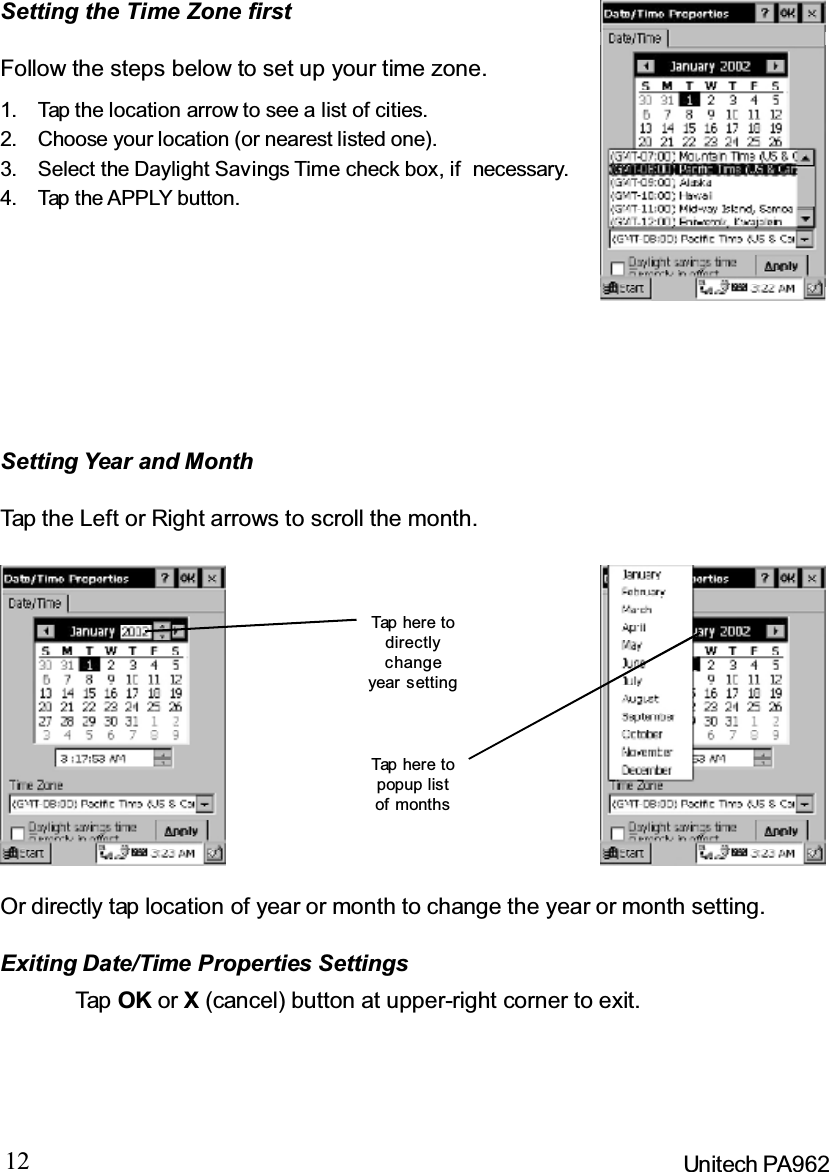
![11Product Reference GuideFirst Operation of the Unitech PA962Pressing the ON/OFF KeyThe Unitech PA962 welcome screen appears. TheWindows CE®screen will appear shortly.Adjusting Screen BrightnessPress [FUNC] key and Cursor key to decreaseor increase screen brightness.Calibrating the PA962The PA962 will prompt you to calibrate the unit bytapping a sequence of screen locations. Tapgently but firmly. When you have completed theseries of taps, press the [ENT] key to confirm it orpress the [ESC] key to cancel it.This screen will automatically appear when theunit is powered-on for the first time or after thesystem is reset. This screen can also be ac-cessed at any time by pressing the hot key[FUNC] and the [ESC]key.Setting Time Zone, Date, and TimeAfter Calibrating the PA962, the “Date/Time Prop-erties” dialog box will appear. Follow the stepsbelow to set the date and time.Protective Screen FilmThe PA962 screen ships with a protective plastic film. You may remove this ifdesired by peeling from one corner. The screen will be more susceptible toscratching without the film, but will be more readable.](https://usermanual.wiki/Unitech-Electronics/PA962BTG/User-Guide-869409-Page-11.png)
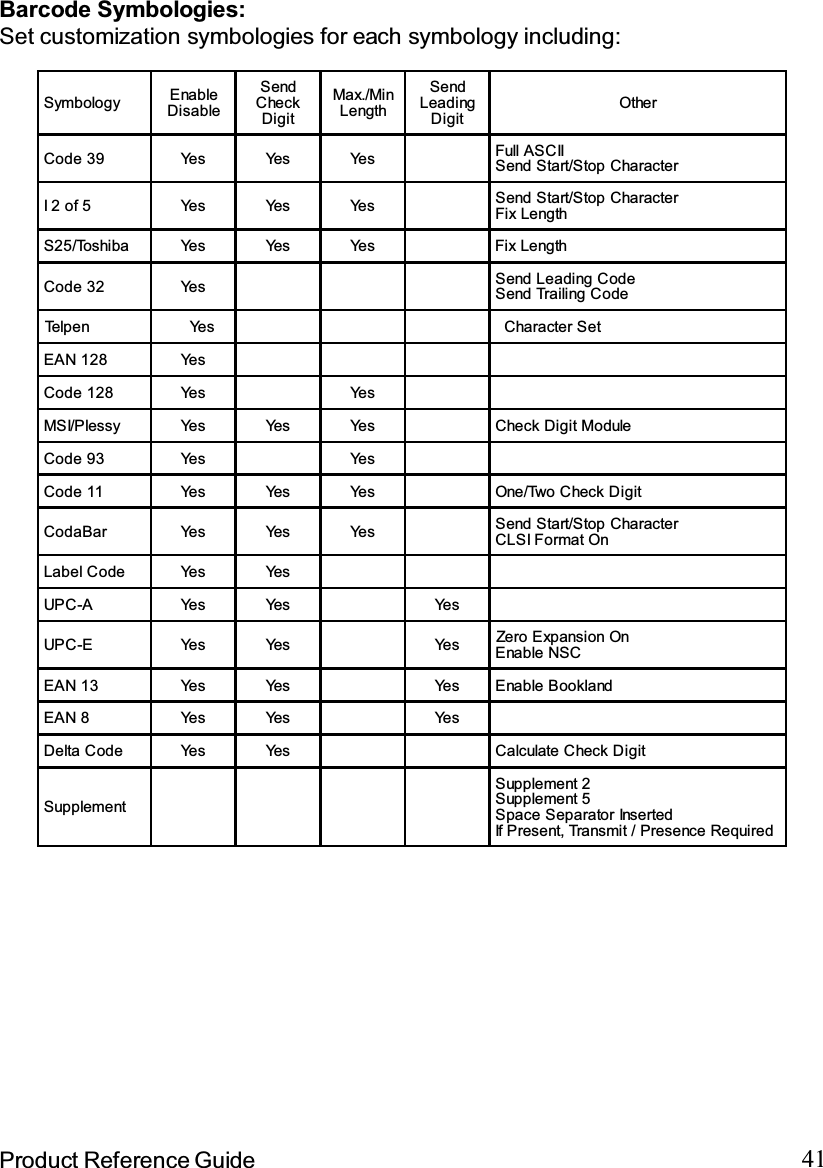
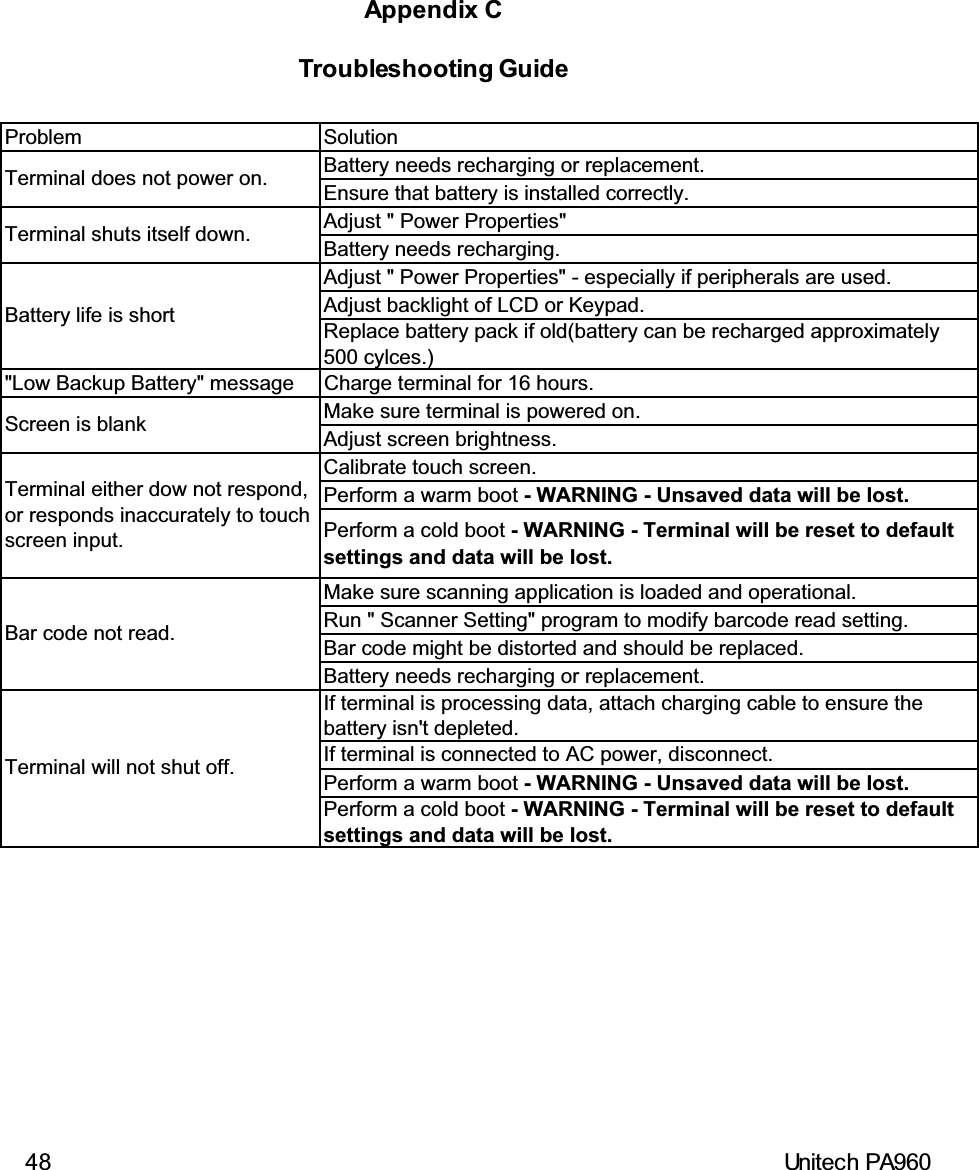
![14 Unitech PA962Chapter 2. Using the Keypad and ScannerKeypadThe PA962 series keypad contains 19 keys, including Cursor key, 0~9, Alpha key,ON/OFF, Function, Escape, Backspace, and Enter key. Please refer to thepicture below.[ENT] The Enter key is used to initiate a process or confirm a selectionmade by the user.[TAB] The Tab key is used to toggle between data fields or to place thecursor at pre-determined places in a programming or word pro-cessing application.[FUNC] The Function key is used to perform alternative key functions.[ Back space] The Backspace key is used to erase previously input characters.[ESC] The Escape key will perform the same function as tapping theCANCEL button or the Xbutton on the touch screen.ON/OFF When the unit is off, pressing the On/OFF key will turn the unit on.Alternatively, when the unit is on, this key must be pressed andheld down for about two seconds in order to turn the unit off.[Alpha] This Alpha key is used to toggle between Numberic & Alpha Mode.This Apha key is also used to toggle CAPS at Alpha Mode.BackspacePower On/OffTABFunction[Cursor] This Cursor key is used to navigate among applications.AlphaCursor](https://usermanual.wiki/Unitech-Electronics/PA962BTG/User-Guide-869409-Page-14.png)
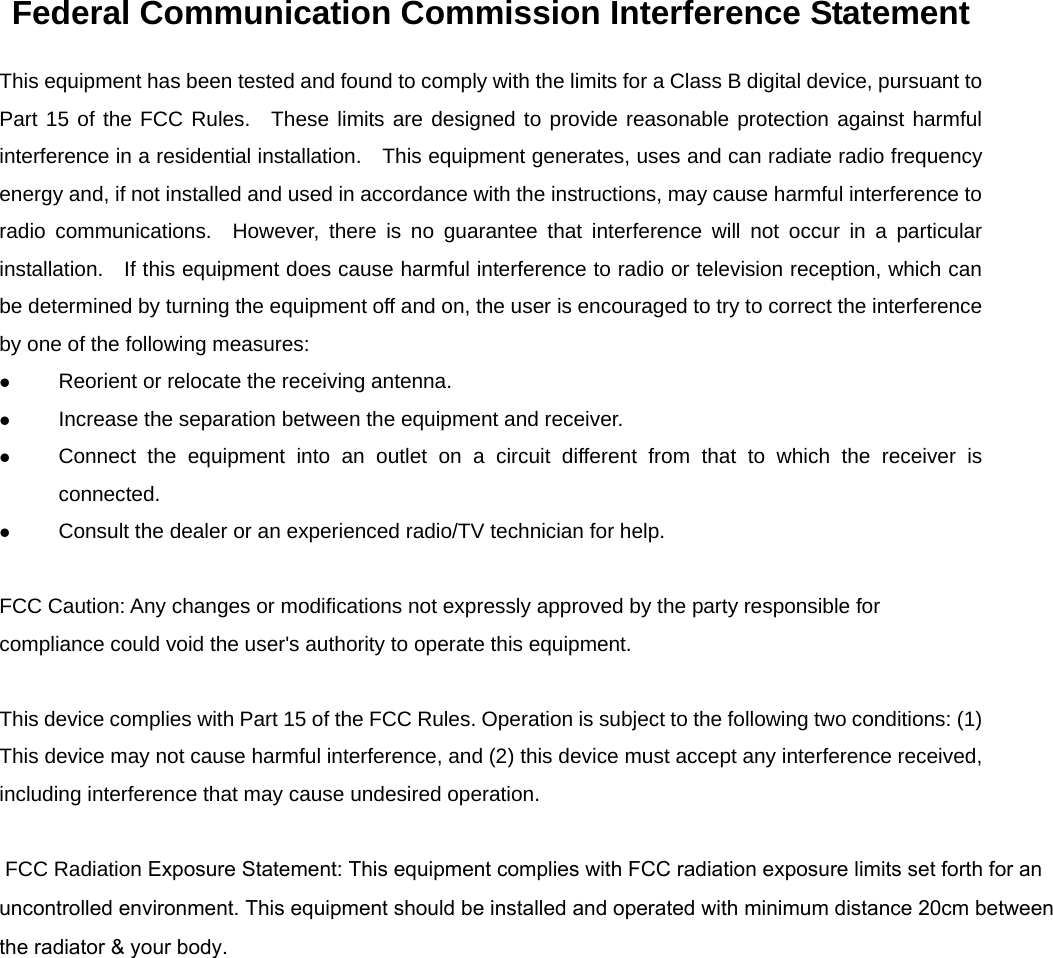
![15Product Reference GuideUseful hotkeysThe PA962 provides eight combination hot keys to activate specified screensetting functions or programs. These hotkeys are useful for calibrating the touchscreen, toggling the backlight, and adjusting screen contrast when the menu-driven operation is disabled. Below is the list of hotkeys. To use them, press andhold the [FUNC] key in combination with the corresponding second key.[FUNC] + [ Decrease screen brightness.[FUNC] + [7] Scanner Setting.exe[FUNC] + [6] Task manager[FUNC] + [TAB*] Toggle screen & LCD backlight.[FUNC] + []Increase screen brightness.[FUNC] + [ESC] Check Stylus properties & Re-Calibrate the PA962’s touch screen.[FUNC] + [8] Power Properties[FUNC] + [9] System Information[FUNC] + [Cursor] Use Function key & Cursor “UP” to Toggle Display BacklightAlpha KeyAlpha Mode Press alpha to alpha mode, the default condition is CAPS off.CAPS Press Apaha key twice to toggle CAPSWhen the PA962 boots, the default condition is Numeric Mode on. When youtoggle to Aphal Mode, the default condition is CAPS mode off. [FUNC] + [0] Space [FUNC] + [Cursor] Use Function key & Cursor “Down” to Toggle Keypad LED Backlight](https://usermanual.wiki/Unitech-Electronics/PA962BTG/User-Guide-869409-Page-15.png)
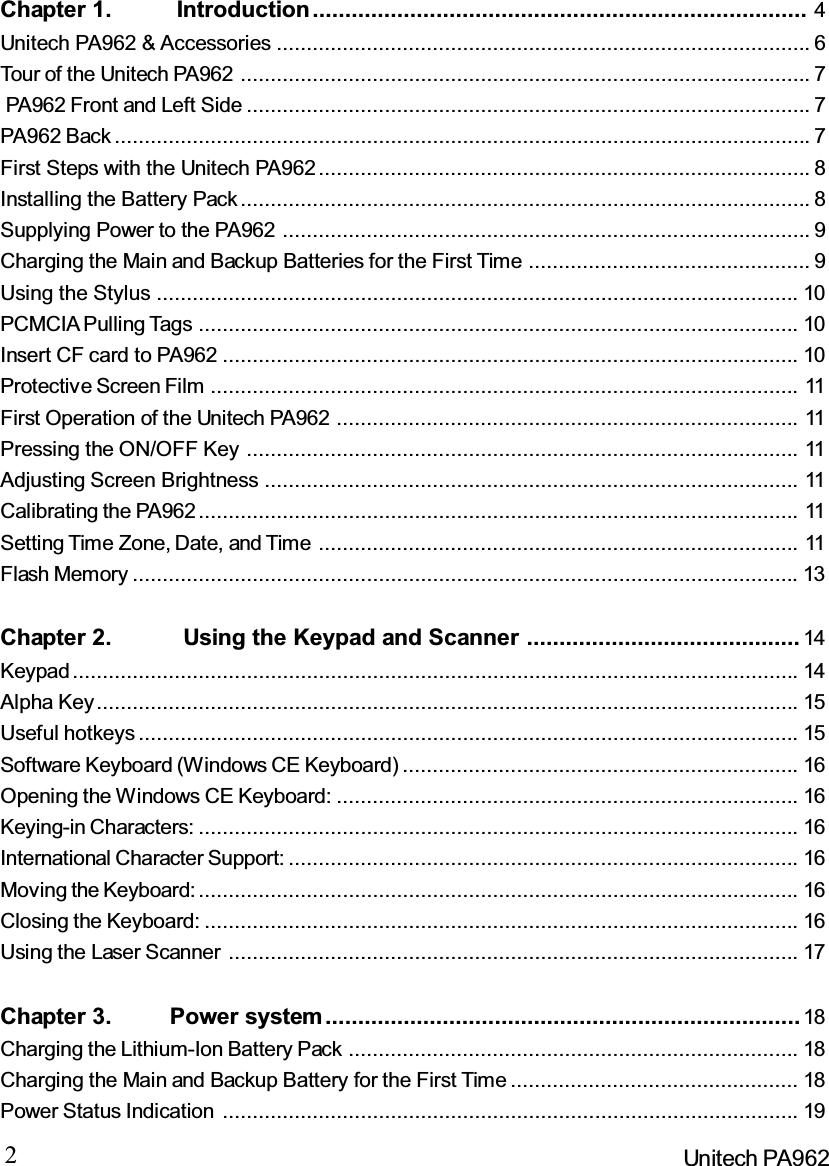
![16 Unitech PA962Keying-in Characters:After tapping the “keyboard” icon, the Windows CE keyboard pops up. Characterinput is the same as on a standard PC. Simply tap the on-screen button corre-sponding to the character you want to input.Software Keyboard (Windows CE Keyboard)Since the PA962’s keypad allows input of numeric characters only, the WindowsCE Software provides a touch screen keyboard for input of other characters. TheWindows based keyboard replicates the layout of a standard PC keyboard.Closing the Keyboard:Tap the keyboard icon to close the Windows CE keyboard.Moving the Keyboard:Use the stylus to point to the title bar (the bar displaying“Input panel”) and then move the stylus without lifting itfrom the screen.International Character Support:Tap the [áü] button to switch from the standard Englishkeyboard to the European keyboard.Opening the Windows CE Keyboard:The Windows CE keyboard can be opened by tapping the “keyboard” icon on thetask bar. (Refer to picture).Double-tap hereTitle Bar](https://usermanual.wiki/Unitech-Electronics/PA962BTG/User-Guide-869409-Page-16.png)