Wavesystec DP-1300 MP3 Player User Manual mp3 English
Wavesystec Co., Ltd. MP3 Player mp3 English
UserManual.wiki
>
Wavesystec
>
DP 1300 User Manual
User Manual
Navigation menu
Upload a User Manual
Namespaces
Wiki Guide
HTML
PDF
Info
Views
User Manual
Discussion / Help
Navigation

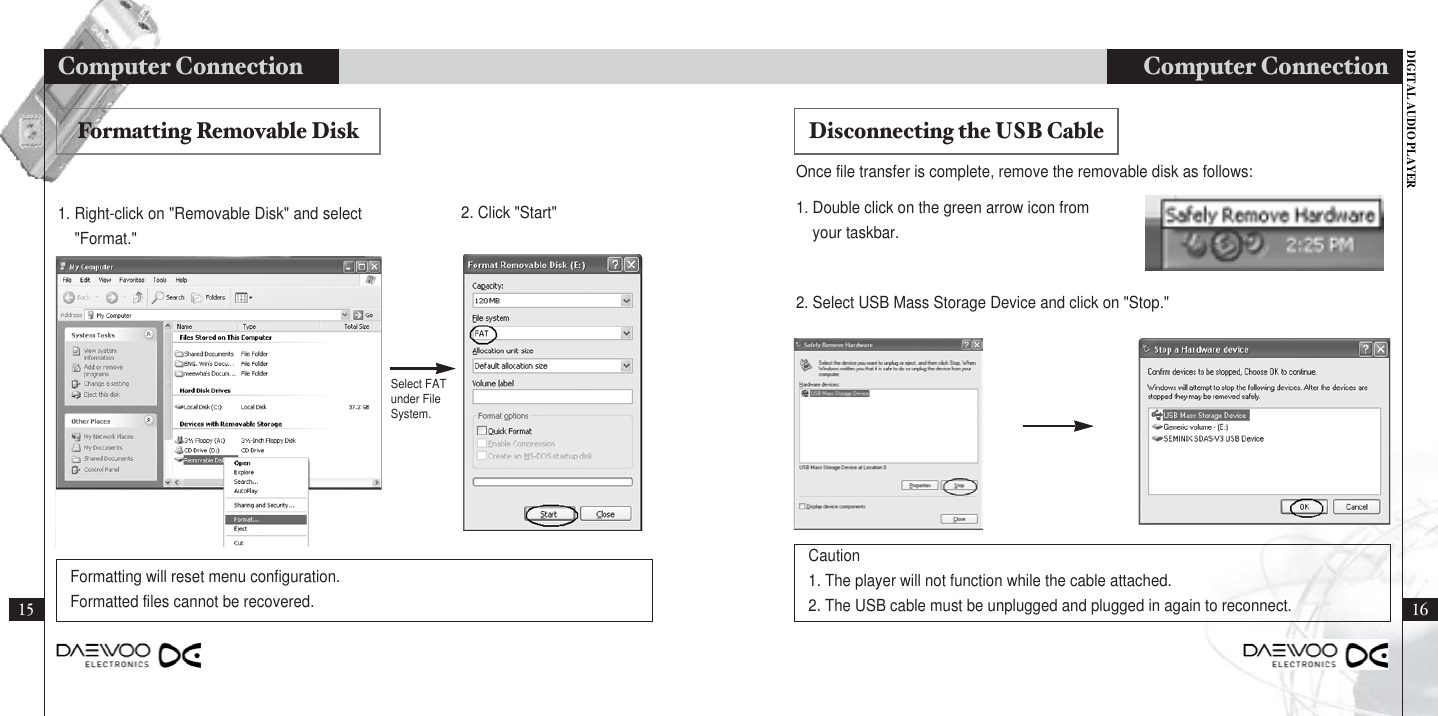

![DIGITAL AUDIO PLAYERBasic FeaturesBasic FeaturesAuto Seek Channel StoringThis feature automatically detects thenext or previously available channel.Save your favorite channels for quickaccess in the future.1. Press "PLAY/STOP" to accessFrequency Mode.2. Use the Jog key (left/right) to selecta channel to store.3. Press "NAVI/MENU."4. Use the Jog key to find anotherchannel to store..5. Press "NAVI/MENU" to terminatechannel storing.6. Up to 20 channels can be saved.1. After setting to Frequency mode bypressing the PLAY/STOP button, Pushand hold the Jog key to the left orright.2. Auto Seek will automatically stop atthe next available channel.[Manual Setting]Radio Modes (PRESET, FREQUENCY)[PRESET MODE][FREQUENCY MODE]1. Use the Jog key (left/right) to scan radio frequency.Frequency Scan25 261. Toggle between Preset and Frequency Modes by pressing "PLAY/STOP."](https://usermanual.wiki/Wavesystec/DP-1300/User-Guide-441094-Page-13.png)
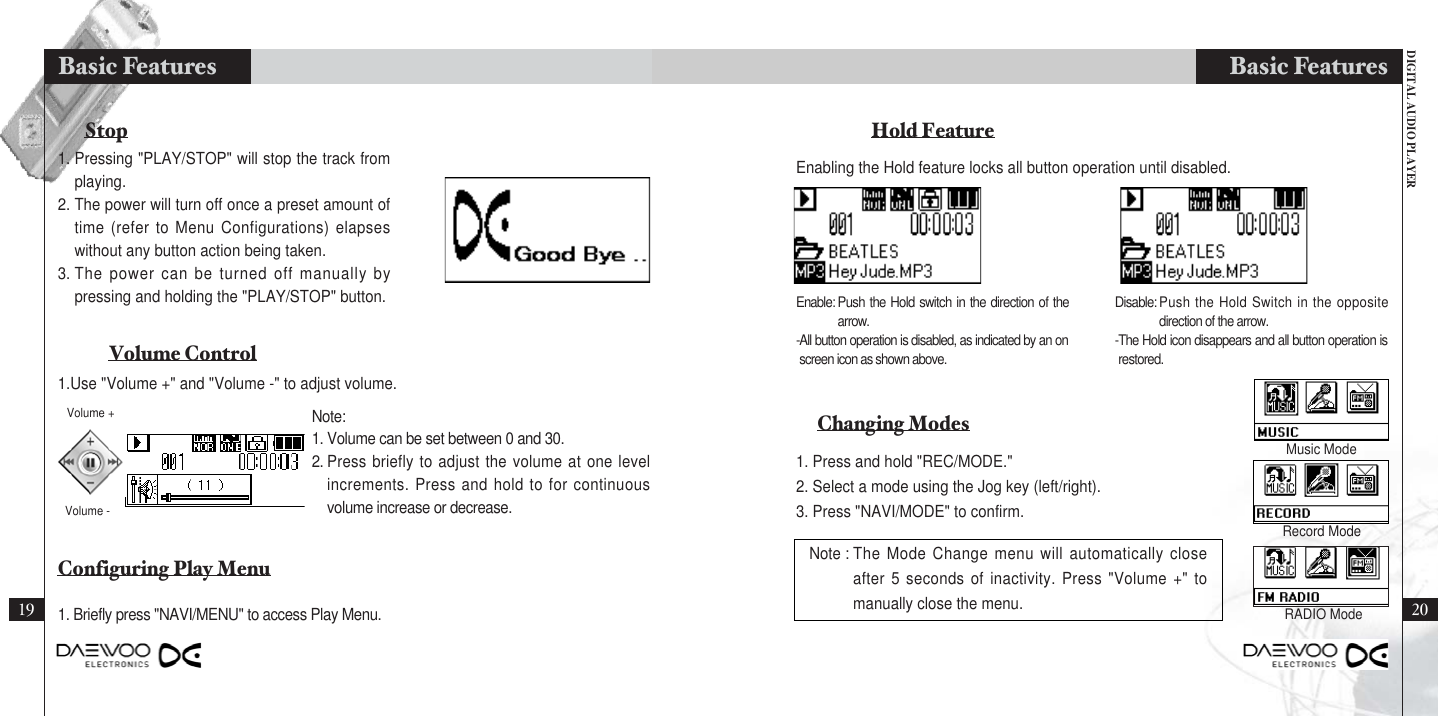
![DIGITAL AUDIO PLAYERAdditional Features2827Basic FeaturesMenu Configuration Playback SupportPress and hold "NAVI/MENU" to accessMenu Selection Mode.1. Play Menu →Additional Features2. Equalizer: Normal, Classic, Live, Pop, andRock3. Repeat: Normal, Repeat All, Repeat One,Shuffle, and IntroChannel Storing Recording FM RadioSave your favorite channels for quickaccess in the future.Use this feature to automatically seekchannels and store their frequencies inmemory.1. Press "REC/MODE" to startrecording.1. Press "PLAY/STOP" to accessPreset Mode.2. Press and hold the Jog key(left/right).The player will automaticallyseek for signals and store thefrequencies.2. Press "REC/MODE" again to pauserecording. Press once more toresume.3. Pressing "PLAY/STOP" stops therecording process and reverts theplayer back to Radio Mode.4. Recorded files are stored as"RADIOxx.MP3" or "RADIOxx.WAV"in the RADIO folder.3. Certain channels may not bedetected and stored in areas withweak signal strength.[Automatic Setting] 1. Press and hold "NAVI/MENU" toaccess the following menu:2. Menu Selection: Move the Jog key(left/right) to scroll through the options.3. Menu Confirm: Press "NAVI/MENU" toconfirm your selection.4. Previous Menu: Push the Jog key up.](https://usermanual.wiki/Wavesystec/DP-1300/User-Guide-441094-Page-14.png)