Welcat XIT100BW Barcode Reader with 802.11b&Bluetooth; Transmitters User Manual
Welcat, Inc. Barcode Reader with 802.11b&Bluetooth; Transmitters Users Manual
Welcat >
Contents
- 1. User Manual 1 of 2
- 2. User Manual 2 of 2
User Manual 2 of 2
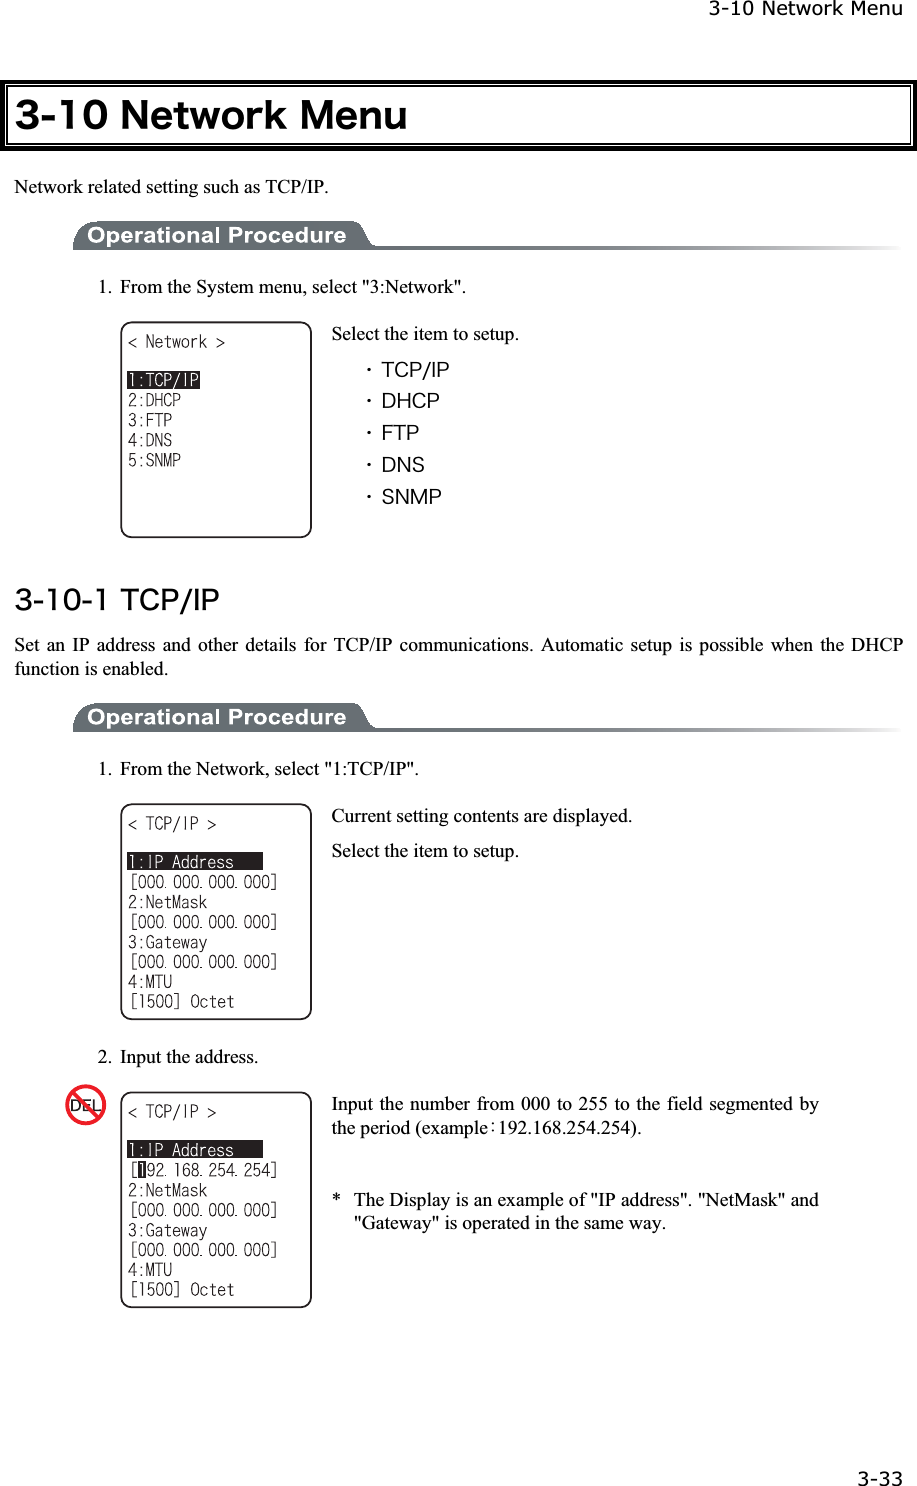
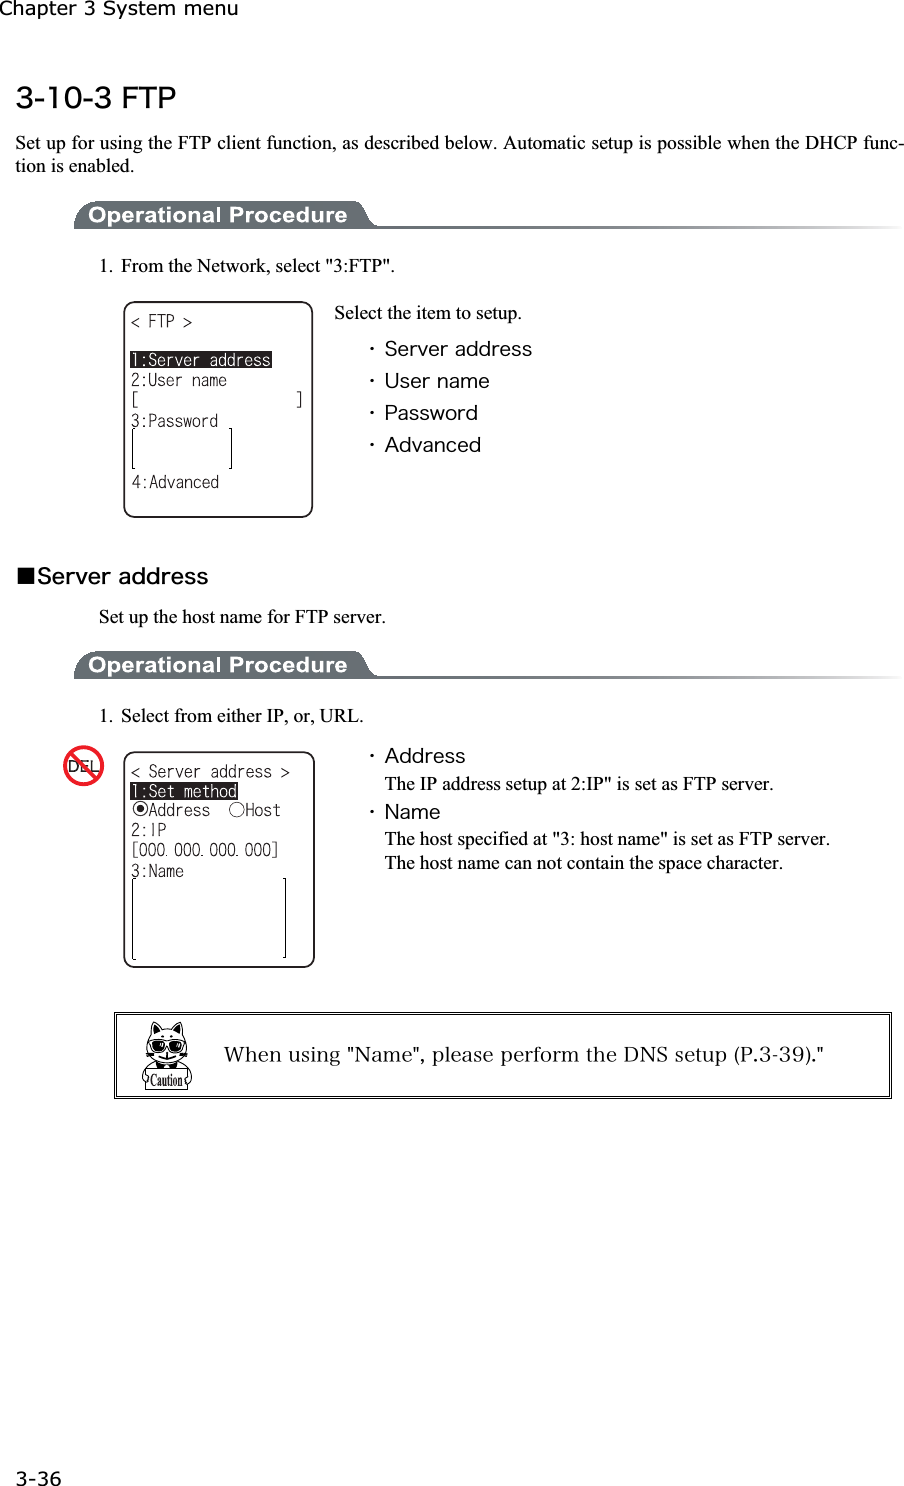
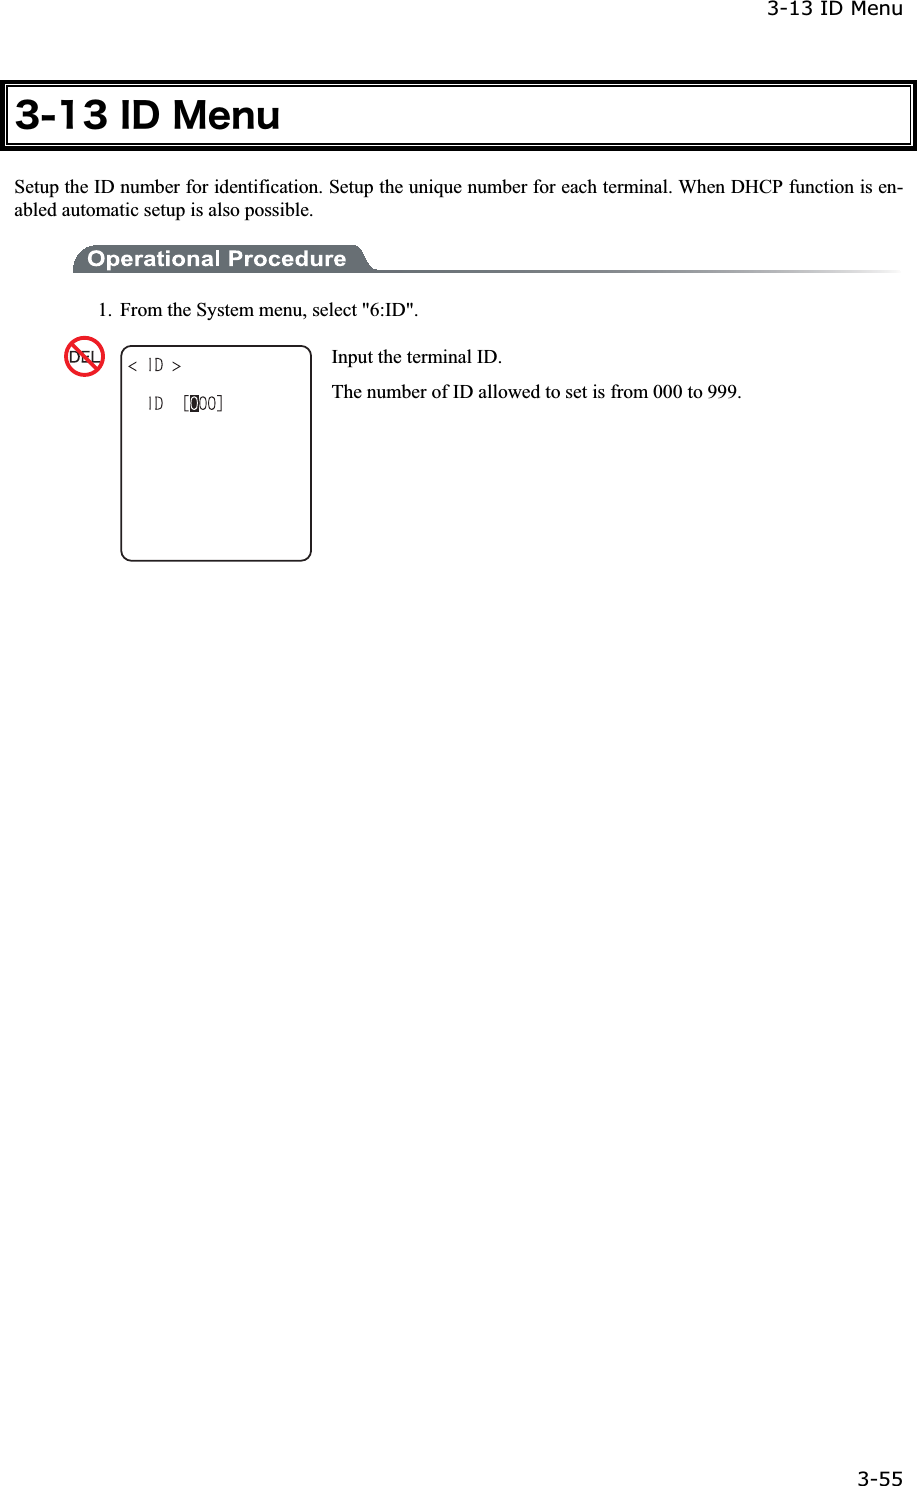
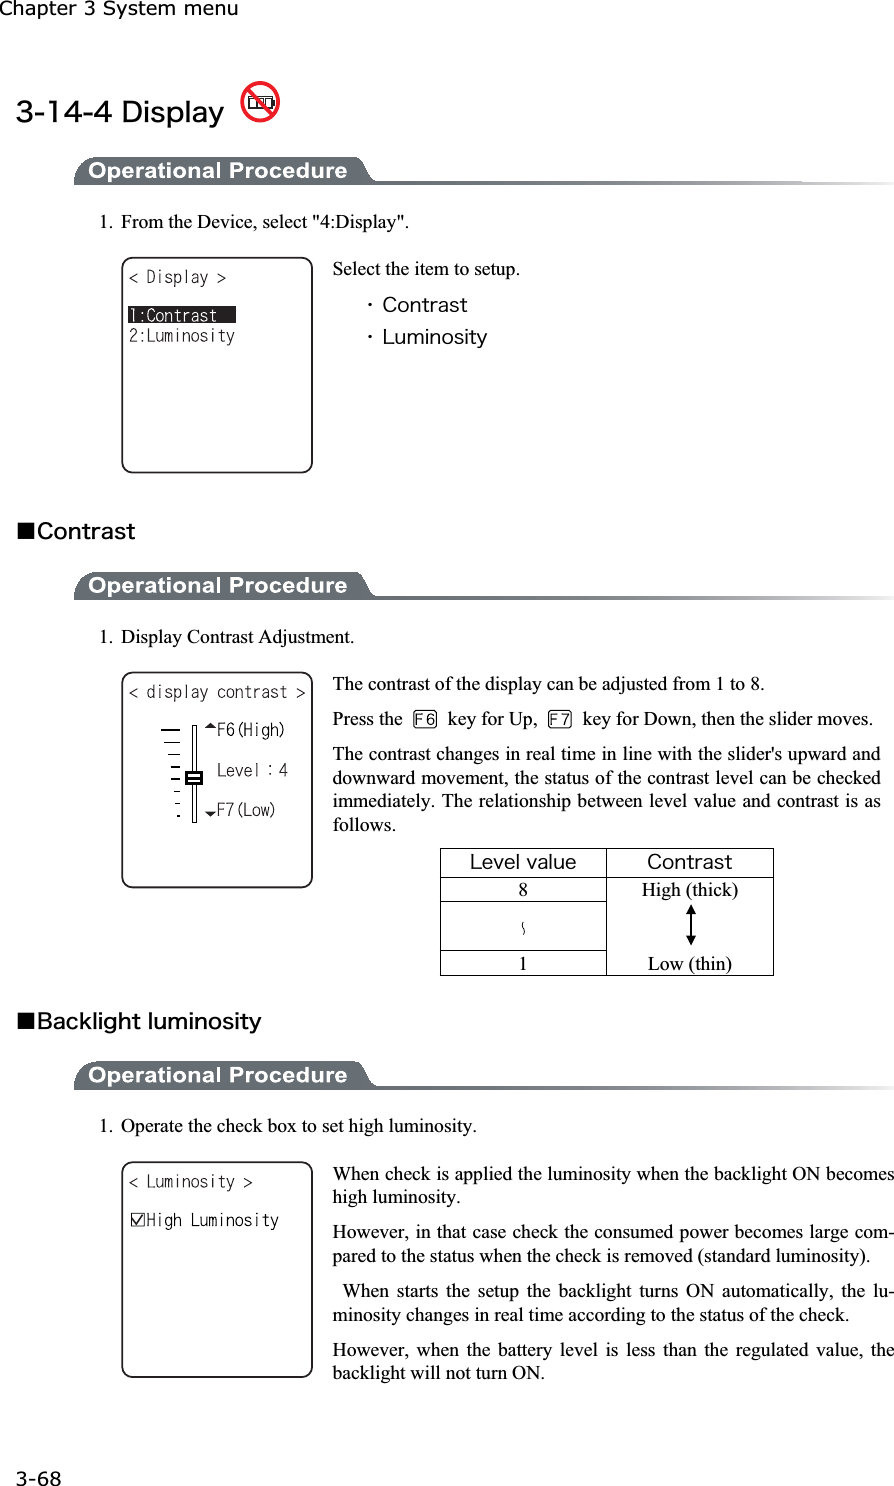
![3-10 Network Menu 3-35ġǪÓôáòôõðôùðå 1. Select the item to setup. ˁÄéóáâìåä¨Æáãôïòùóåôõð©DHCP is not executed when the terminal started up. ˁÁððìéãáôéïîâïïôDHCP is executed before the application is executed. The application file is selected from <System menu>[1:System], and then[2:Auto execute], DHCP function is executed before application , after the terminal started up. In addition, when the application is started up from <File menu>, DHCP is not executed. ˁÓùóôåííåîõâïïôDHCP is executed before System menu is started up. The Sys-tem menu is selected from <System menu>[1:System], and then[1:Auto execute], DHCP function is executed before Sys-tem menu is started up , after the terminal started up. ǪÕðäáôåðòïôåãôFollowing information unique to the terminal is setup so as not to be modified, before executing DHCP function. ˁÉÐáääòåóóˁÎåôÍáóëˁÇáôå÷áùˁÉÄÉîôèåãáóå÷èåîôèåãèåãëéóáððìéåäôïÉÐáääòåóó¨ÉÐáääòåóóõðäáôåéóðòïèéâéôå䩬ôèåÉÐáääòåóó¬÷èéãèèáóóåôõðáôôèåôåòíéîáì¬éóîïôíïäéæéåä®Âåóõòåôïõóåãïîæéòíéîçôèáôôèåôèåòåéóîïèïóô÷éôèôèåóáíåÉÐáääòåóóïîôèåÎåô÷ïòë®ǪÓåòöåòðïòôîõíâåòDHCP server port is setup (Factory setupȇ08067). If you do not execute the automatic setup, which is unique to the XIT-100-BW, and want to use exist-ing server only to perform the assigning of IP address, the value is modified (the well known port is 67). ÔèåðïòôîõíâåòïæôèåÄÈÃÐóåòöåòïæ¢×åâÇìéäåòØ¢Îåô÷ïòëíáîáçåòéó°¸°¶·áóäåæáõìô®Ôèéóéóôï áöïéäáãïíðåôéôéïî÷éôèïôèåòÄÈÃÐóåòöåòó÷ïòëéîçéîôèåóáíåîåô÷ïòë®ǪÅøåãõôåPress the key, and, DHCP is executed immediately, regardless of "Startup type"(P.3-35).](https://usermanual.wiki/Welcat/XIT100BW.User-Manual-2-of-2/User-Guide-613366-Page-3.png)
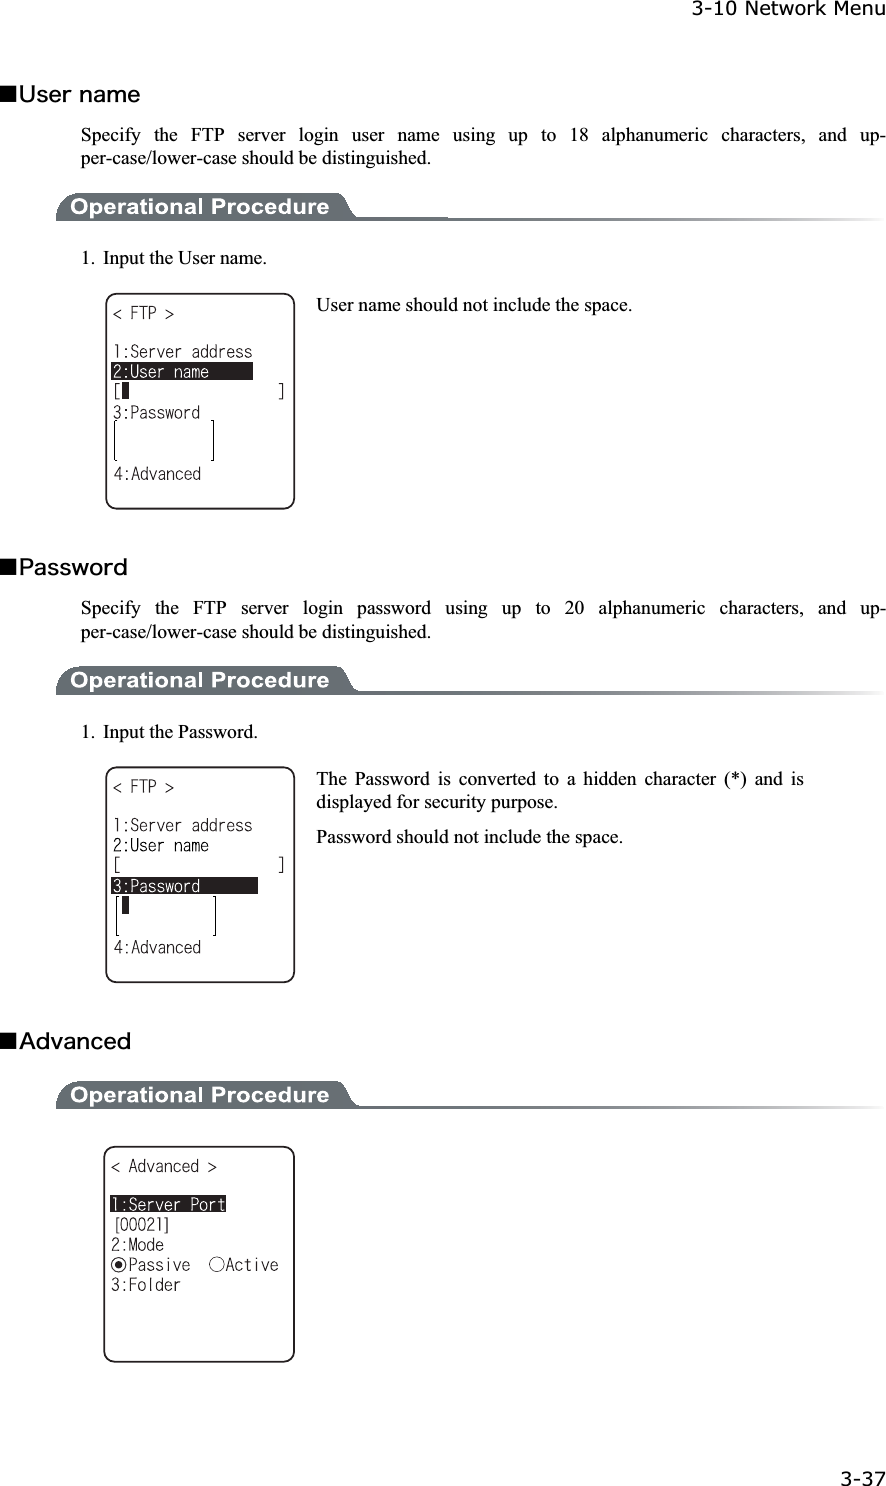
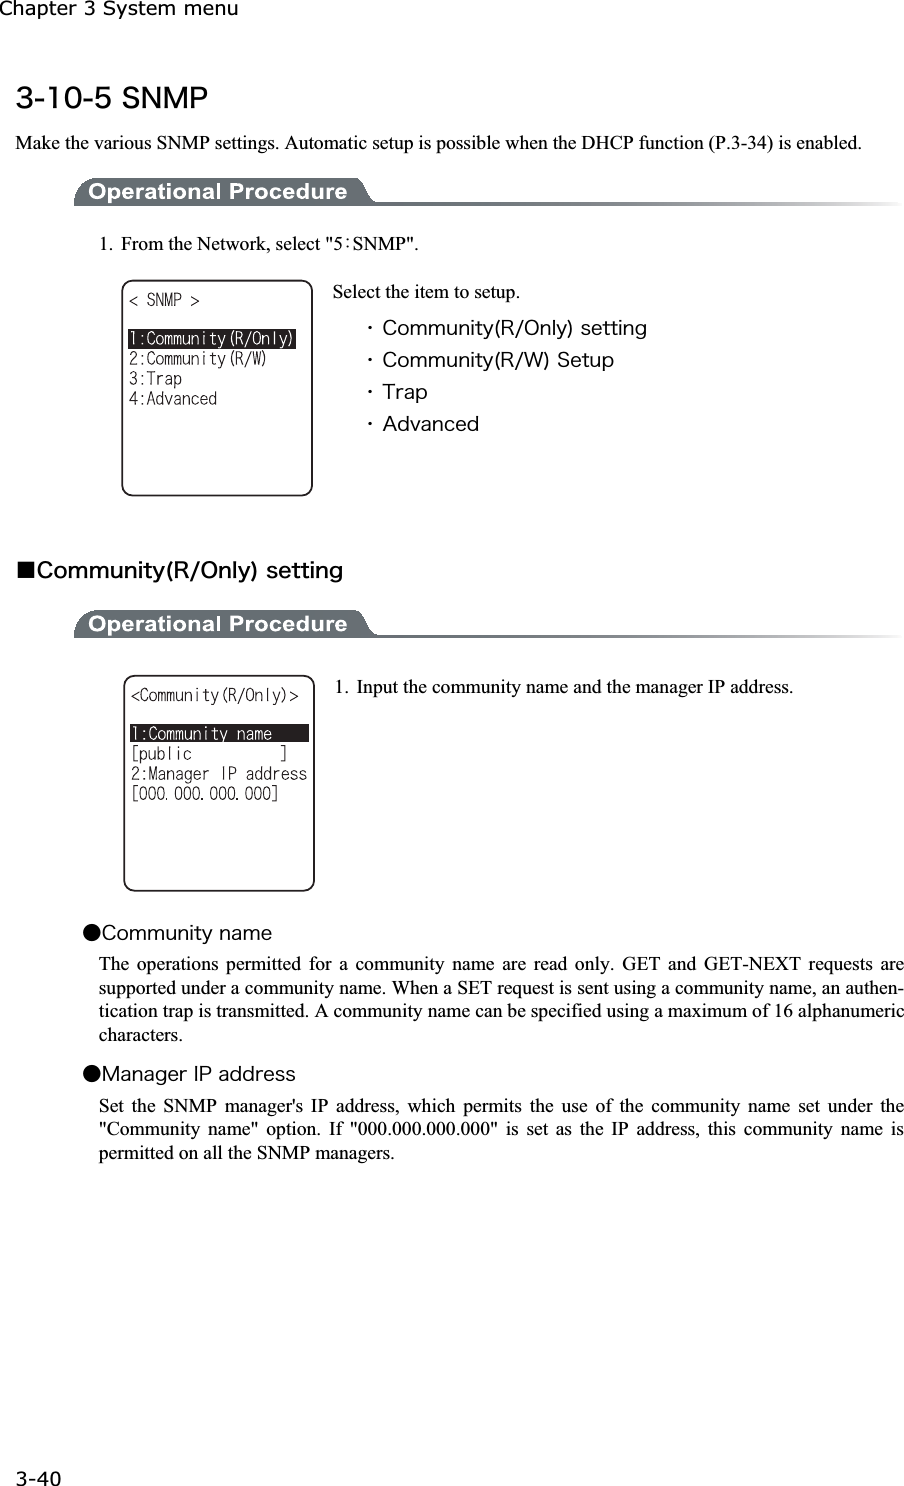
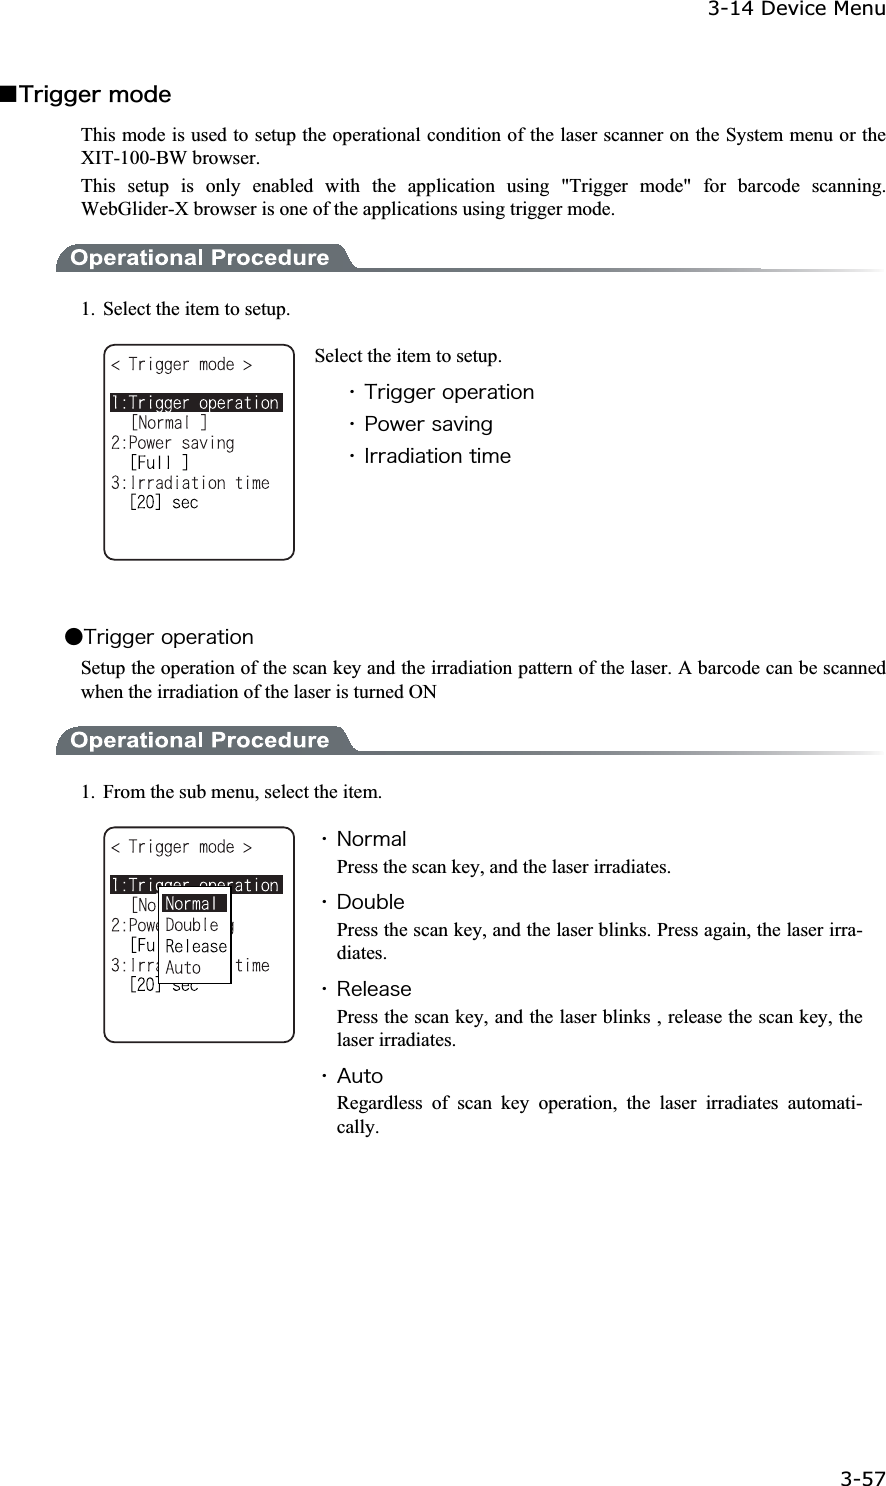
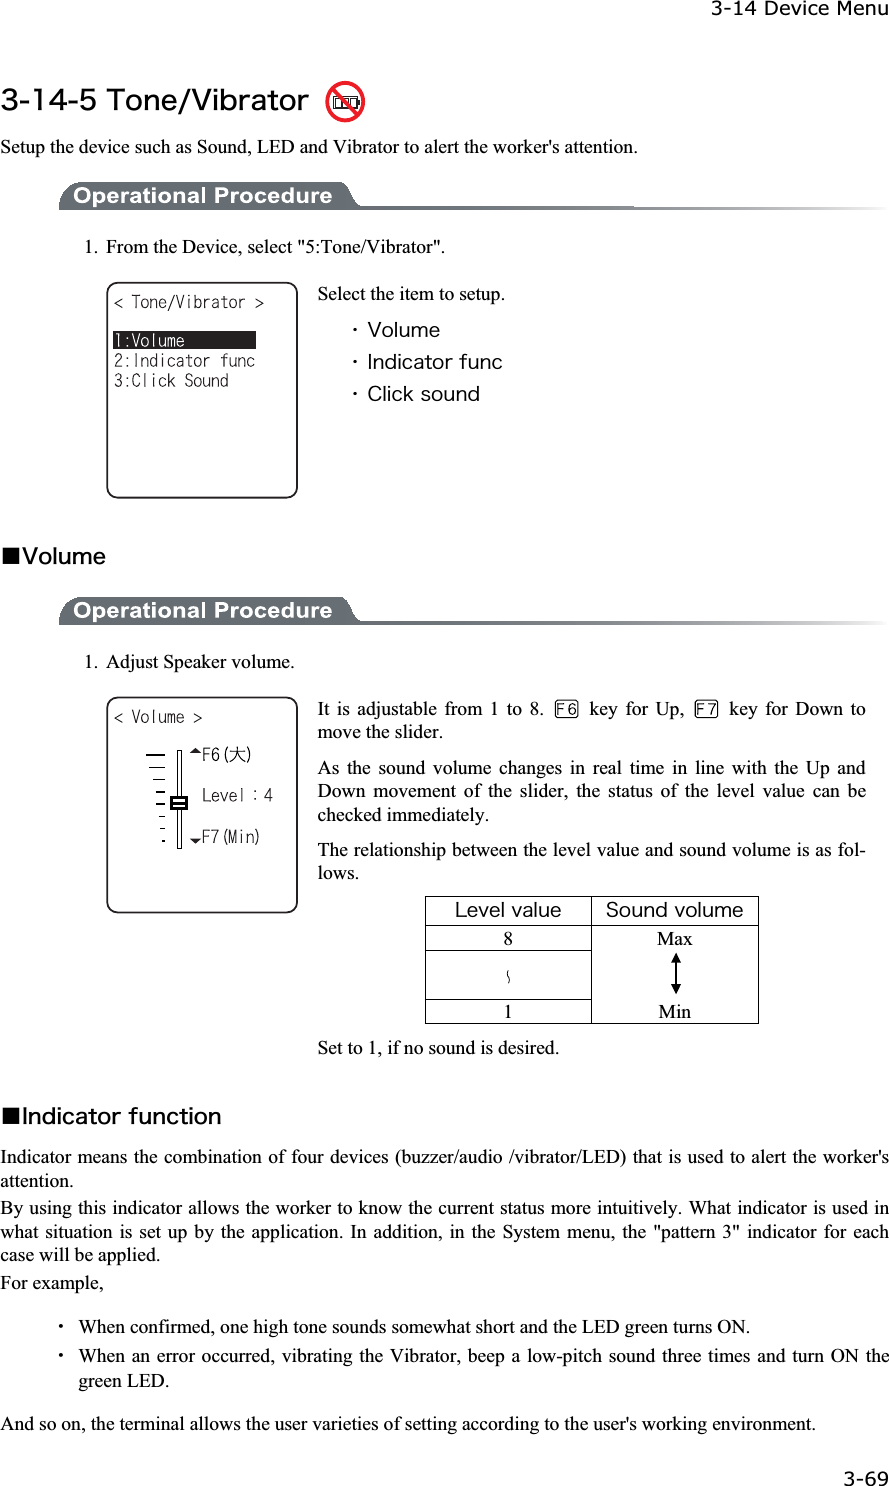
![3-10 Network Menu 3-41ġǪÃïííõîéôù¨Ò¯×©Óåôõð1. Input the community name and the manager IP address. ǴÃïííõîéôùîáíåThe operations permitted for the community name are "Read-Write". GET, GET-NEXT and SET request are supported under a community name. The community name can be specified using a maximum of 16 alphanumeric characters. ǴÍáîáçåòÉÐáääòåóóSet the SNMP manager's IP address, which permits The use of the community name set under the [community name]option. If "000.000.000.000" is set as the SNMP manager's IP address, this com-munity name is permitted on all the SNMP managers. ǪÔòáðóåôôéîç1. Input a community name and a manager IP address. ǴÃïííõîéôùîáíåSet a community name for the Trap. A community name can be specified using a maximum of 16 alphanu-meric characters. ǴÍáîáçåòÉÐÁääòåóóSet the SNMP manager's IP address to which the Trap should be transmitted. Trap is not transmitted if the IP address of "000.000.000.000" has been set.](https://usermanual.wiki/Welcat/XIT100BW.User-Manual-2-of-2/User-Guide-613366-Page-9.png)
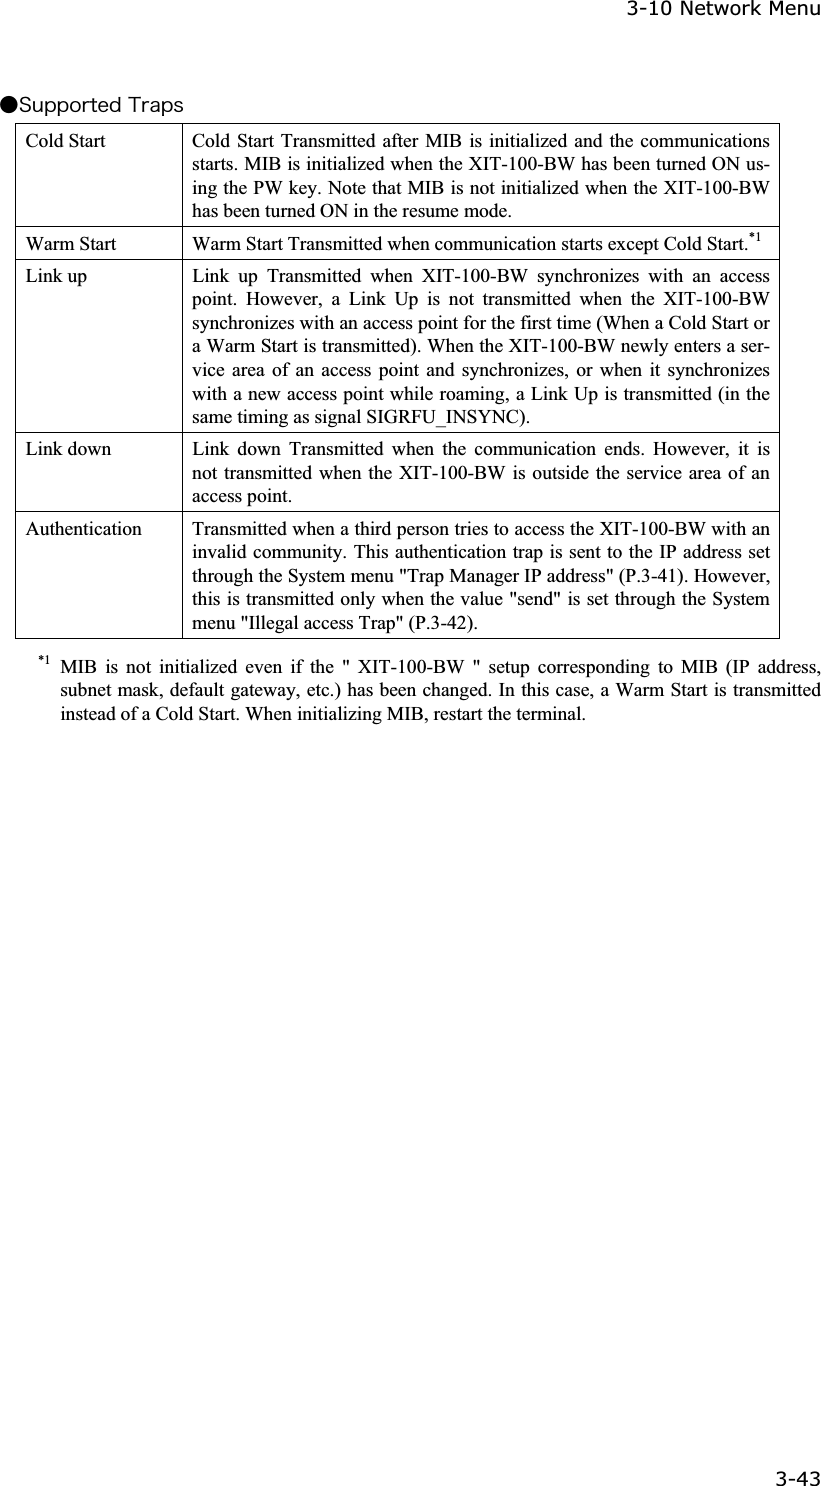
![Chapter 3 System menu 3-42ġǪÁäöáîãåäǴÁõôèåîôéã®ôòáðSet the action of authentication trap to either "send" or "don't send" when access is recognized except from the community name and SNMP manager's IP address set in "1: Community (R/Only)" and "2: Community (R/W)." This Trap is sent to the SNMP manager, which is set in "2:Target address." ǴÁçåîôðïòôThe port number to communicate with SNMP manager. The well-known port is 161. ǴÔòáððïòôThe port number to transmit the Trap. The well-known port is 162. ǴÔòáðòåôòùThe number of times Trap transmission retrial. ǪÁâïõôÓÎÍÐȆ XIT-100-BW can be managed by using Our "WebGlider-X"(WBG-001W). Ȇ SNMP-PDU(Protocol Data Unit) conforms to SNMPv1. Ȇ XIT-100-BWsupports the management of the objects in the following MIB group. [1.3.6.1.2.1.1] MIB2-System [1.3.6.1.2.1.2] MIB2-Interfaces [1.3.6.1.2.1.4] MIB2-IP [1.3.6.1.2.1.5] MIB2-ICMP [1.3.6.1.2.1.6] MIB2-TCP [1.3.6.1.2.1.7] MIB2-UDP [1.3.6.1.2.1.11] MIB2-SNMP [1.3.6.1.4.1.12392] Welcat Enterprise MIB Welcat Enterprise MIB is described by ASN.1 format. Welcat Enterprise MIB is included in the optional "WebGlider-X". (About details, please con-tact our sales department.)](https://usermanual.wiki/Welcat/XIT100BW.User-Manual-2-of-2/User-Guide-613366-Page-10.png)
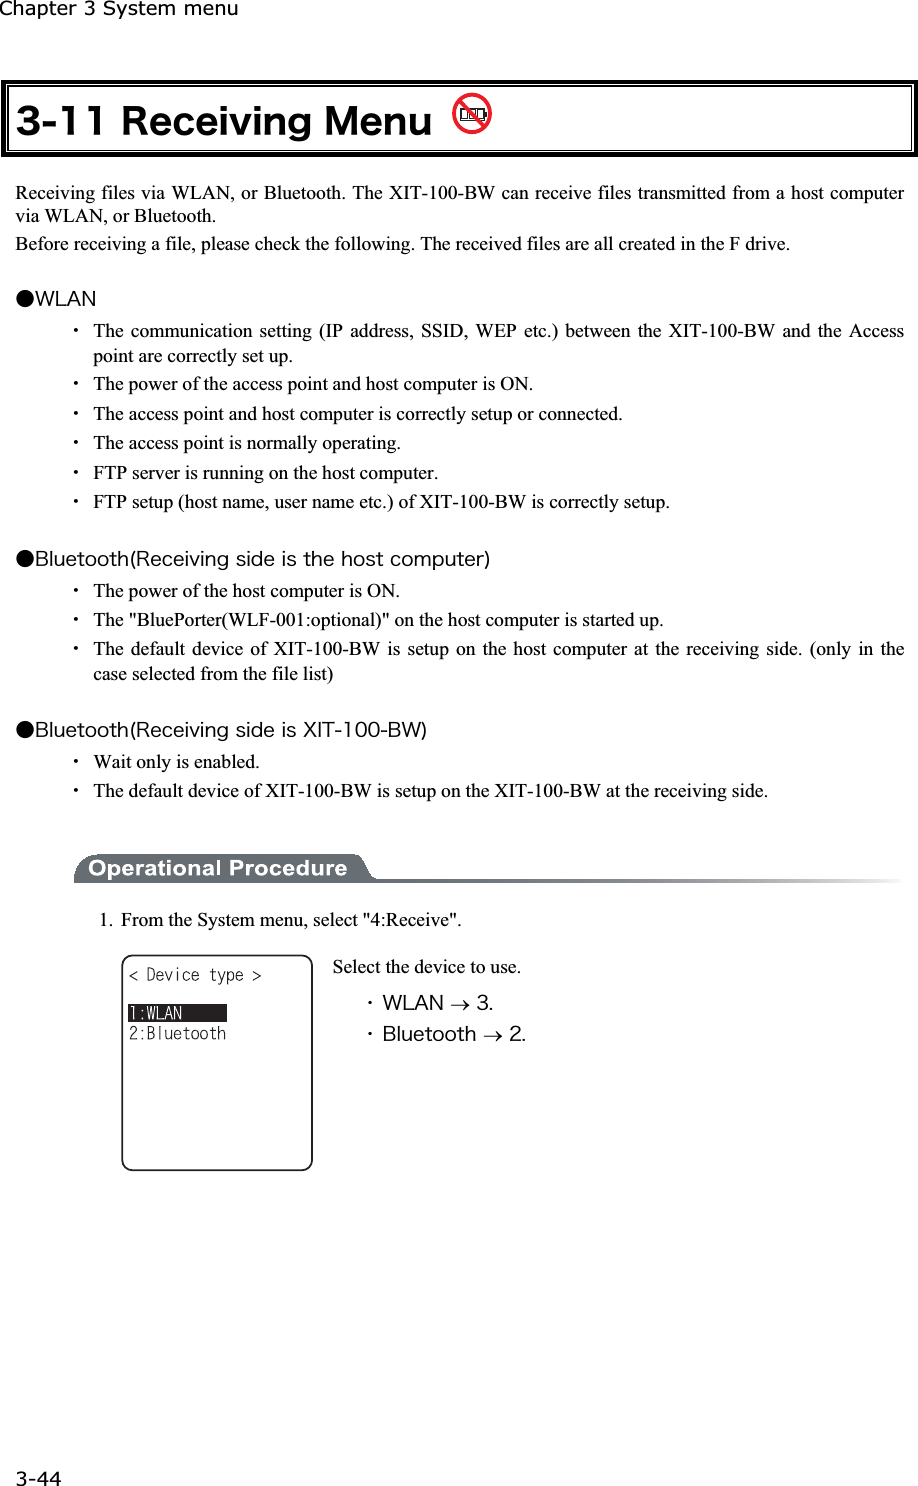
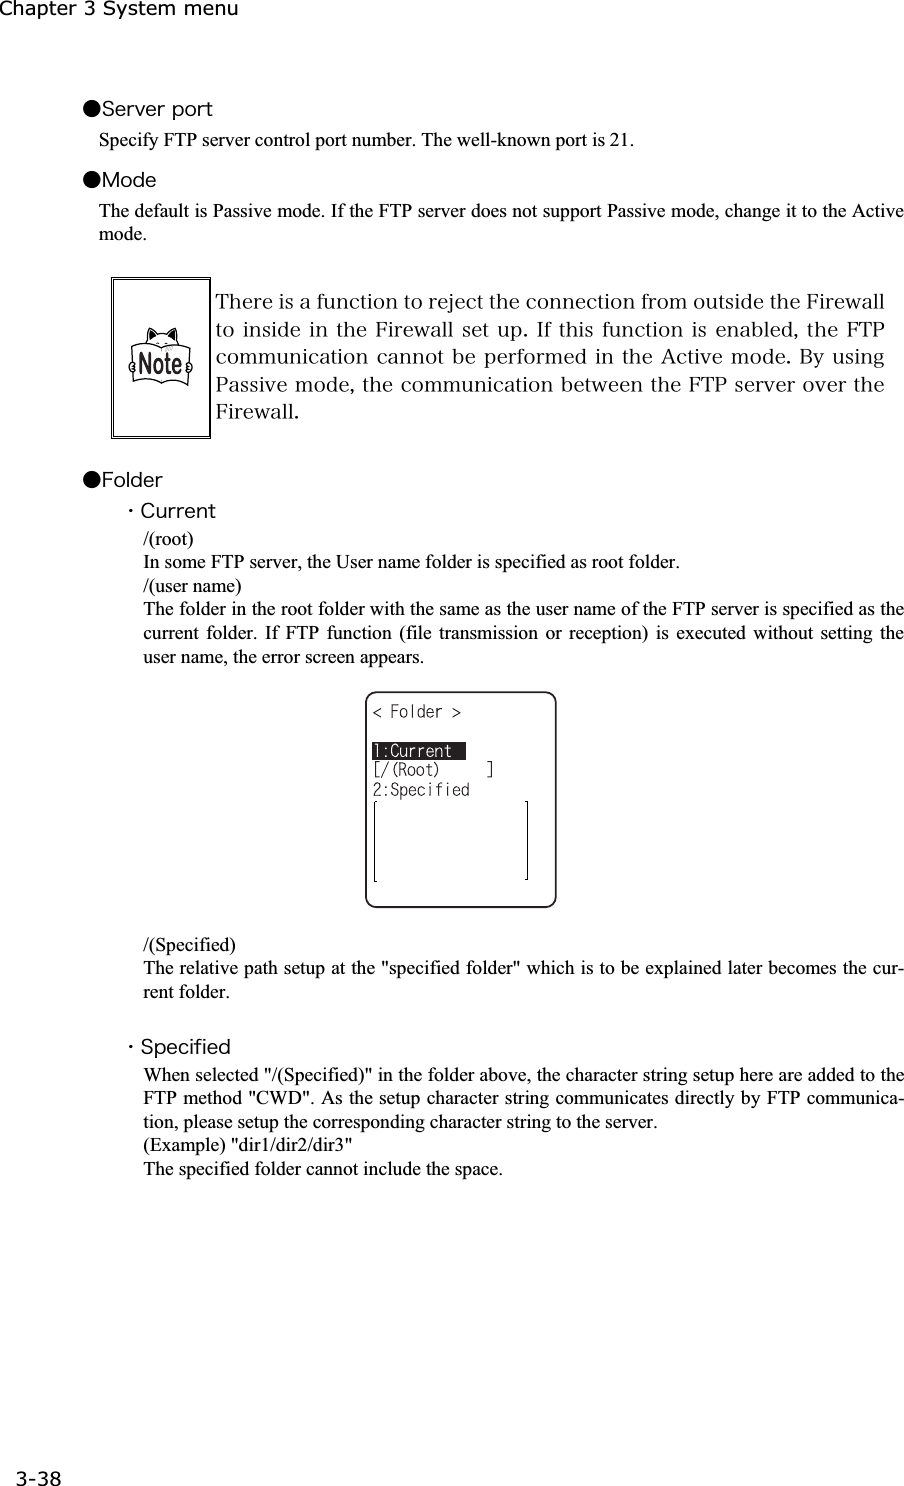
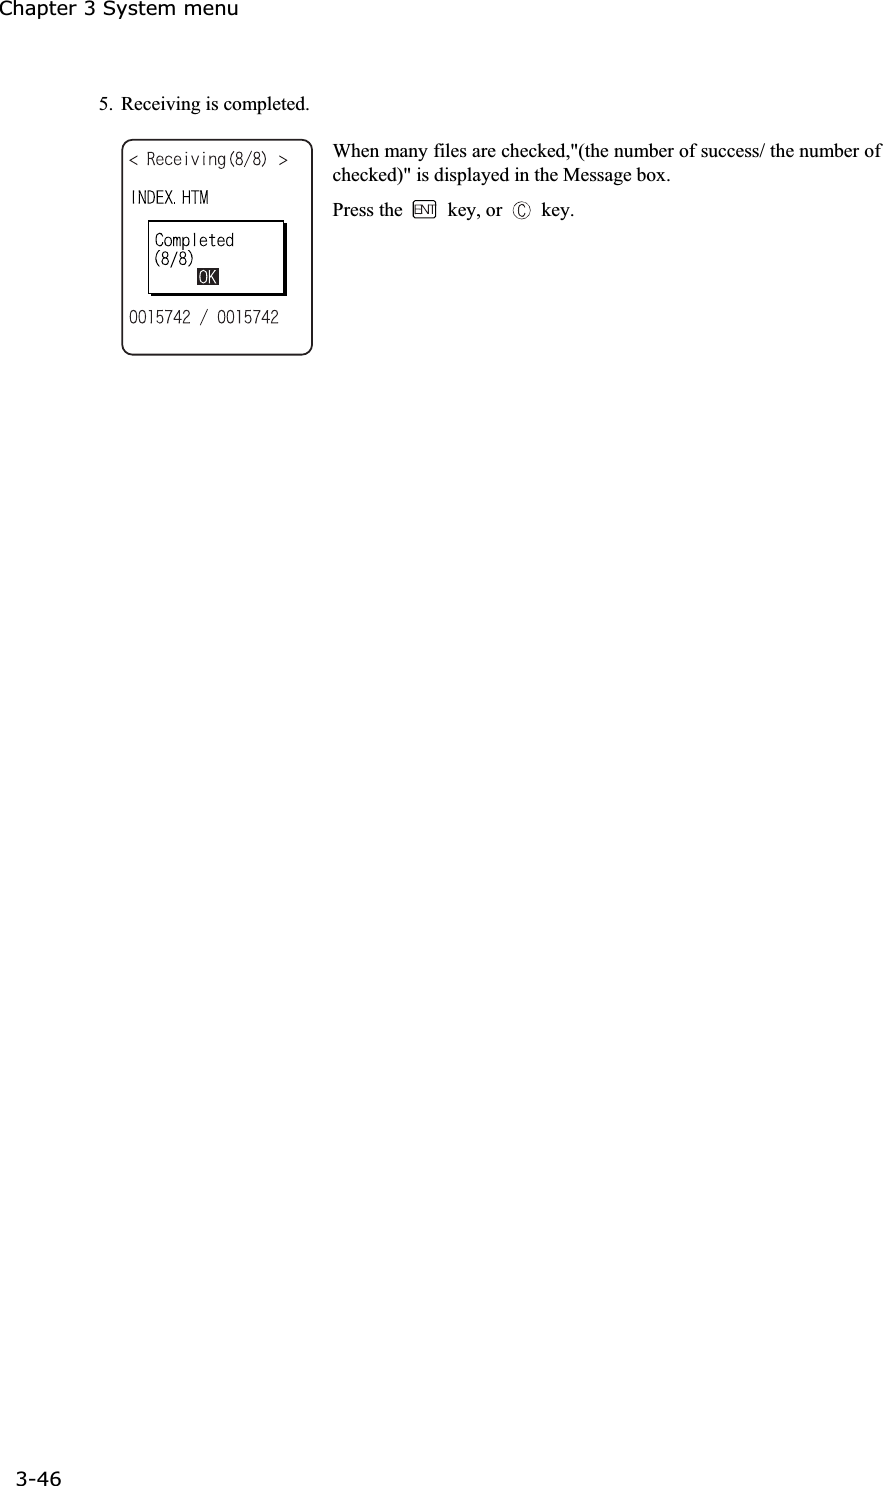
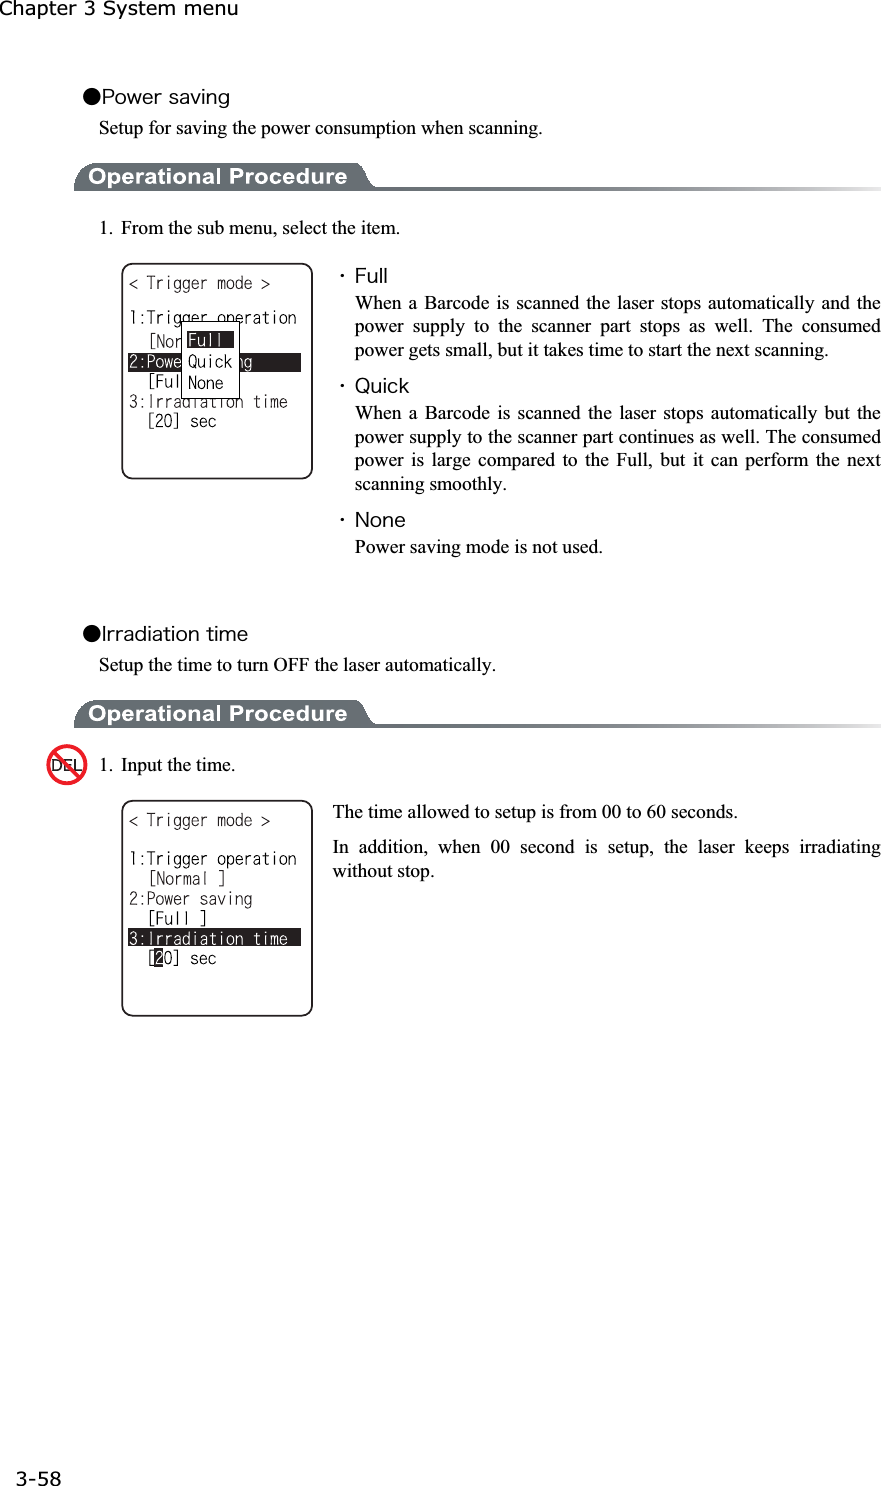
![3-11 Receiving Menu 3-45ġ2. Selecting receiving method. Select "1: Select from list " to obtain the file list from the transmis-sion side. The receiver side can select the file to receive from the list.Select "2:Wait(PC)" or "3:Wait(XIT)”, then get into receiving wait-ing status immediately. If it is the transmission from the host com-puter select "2:Wait(PC)", when it is from XIT, Select "3:Wait(XIT)". The receiving file depends on the transmission side. ˁ±ᴷÓåìåãôæòïíôèåæéìåìéóôo³ˁ²ᴷ×áéô¨Ð鬳ᴷ×áéô¨ØÉÔ©o´®3. Acquire the file list, and select receiving file. Apply checks to the check box of the receiving file. Press the key, and Receiving Confirmation dialog is displayed. In this case, if there is no file that the check is applied, Selected file is received. Select from[Yes][No]. In addition, Press the key, and [No] is selected. Press the key, and Sub menu to operate the file lists displayed. ˁ¢Æõììîáíå¢Selected file name is displayed. ˁ¢Áììãèåãëóáððìéåä¢Apply checks to all the check boxes of the file list. ˁ¢Áììãèåãëóòåíïöåä¢Remove checks from all the check boxes of the file list. 4. Receiving start. Receiving status is displayed. When there is a same file name as that of receiving file, overwriting confirmation dialog is displayed. Select[Yes]or [No]. In addition, press the key, and [No] is selected.](https://usermanual.wiki/Welcat/XIT100BW.User-Manual-2-of-2/User-Guide-613366-Page-13.png)
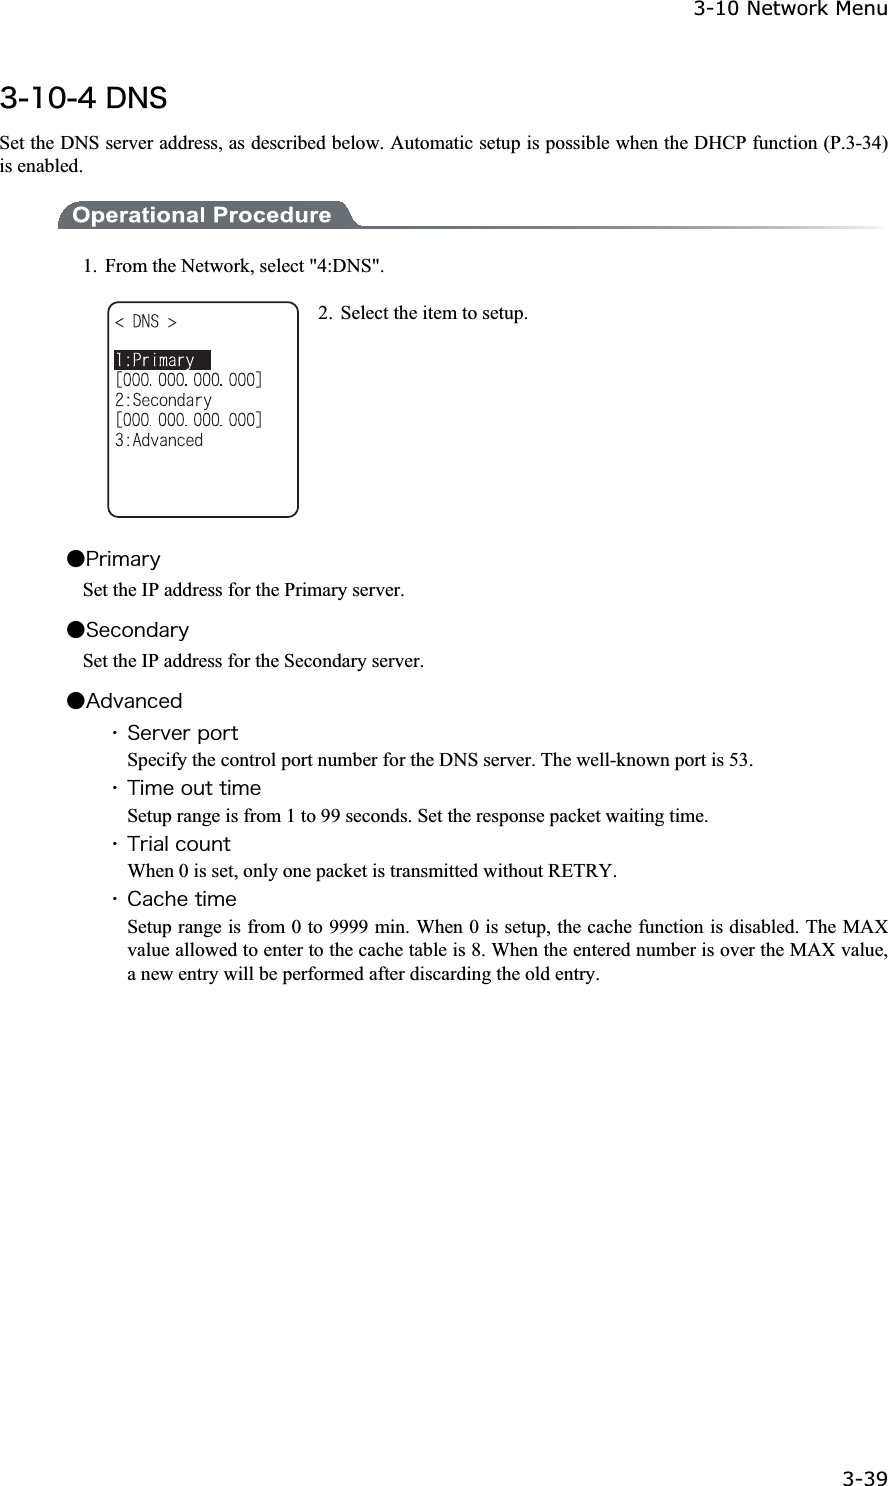
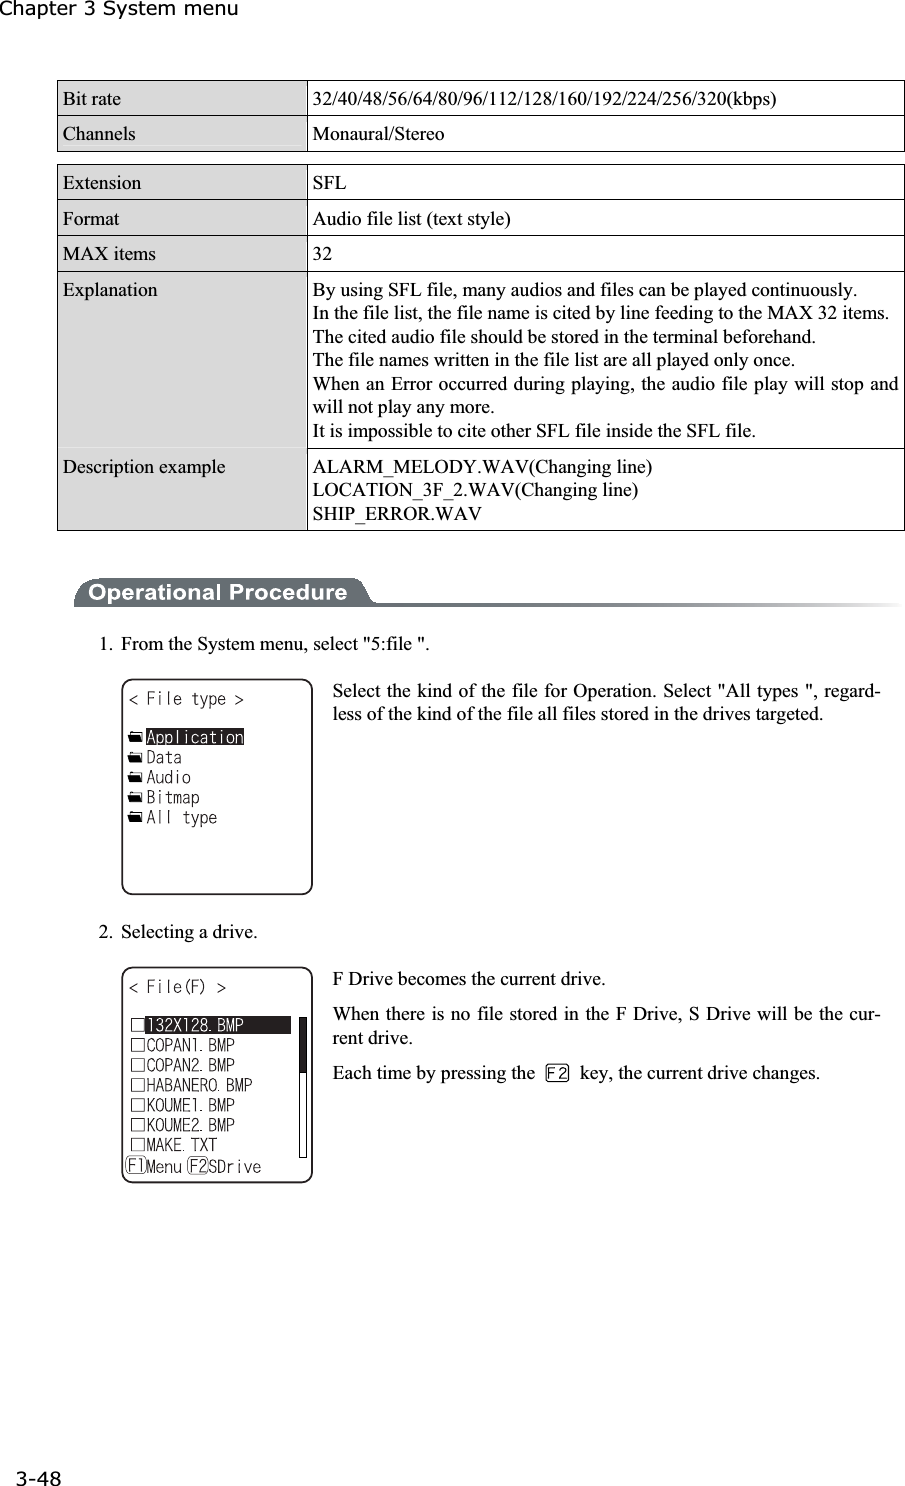
![3-12 File Menu 3-47ġ³±²ÆéìåÍåîõBy searching the targeted file, varieties of operations such as transmission and Deletion are performed. Select the file for operation from the classified file list in each drive. The files are recognized by the extensions (3 characters following after the period of the file name), and classi-fied as below. Åøôåîóéïî ËéîäïæáæéìåOUT Application WAV, MP3, SFL Audio BMP Bitmap Others Data Operation is that can be executed are as follows. There are operations that are related to some specific files and the operation enabled in all files. Ïðåòáôéïî ÁâïõôExecute*1 Starting up the application. Only the application files can be operated. Play*1*3 Play audio file. Only audio files can be operated. Viewer*2 Bitmap images displayed. Only bitmap files can be operated. Properties Various kind of properties related to the file are displayed. Upload Uploading a file. Delete Deleting a file. Test Check if a file is broken or not. All checks applied. Apply checks on all check boxes in the file list. All checks removed Remove all checks of the check box in the list. *1 The file in the S drive Operation is disabled. *2 Supported Bitmap file is as follows. Format Windows Bitmap monochrome image Size 132×128 pixel fixed*3 Supported audio file is as follows. Extension WAV Format Windows Standard WAVE Format Audio sampling rate 8000/11025/16000/22050/44100/48000[Hz] Channels Monaural Audio samples size 16bit Audio style PCMExtension MP3 Format MPEG-1 Audio Layer-3 Audio sampling rate 44100/48000[Hz]](https://usermanual.wiki/Welcat/XIT100BW.User-Manual-2-of-2/User-Guide-613366-Page-15.png)
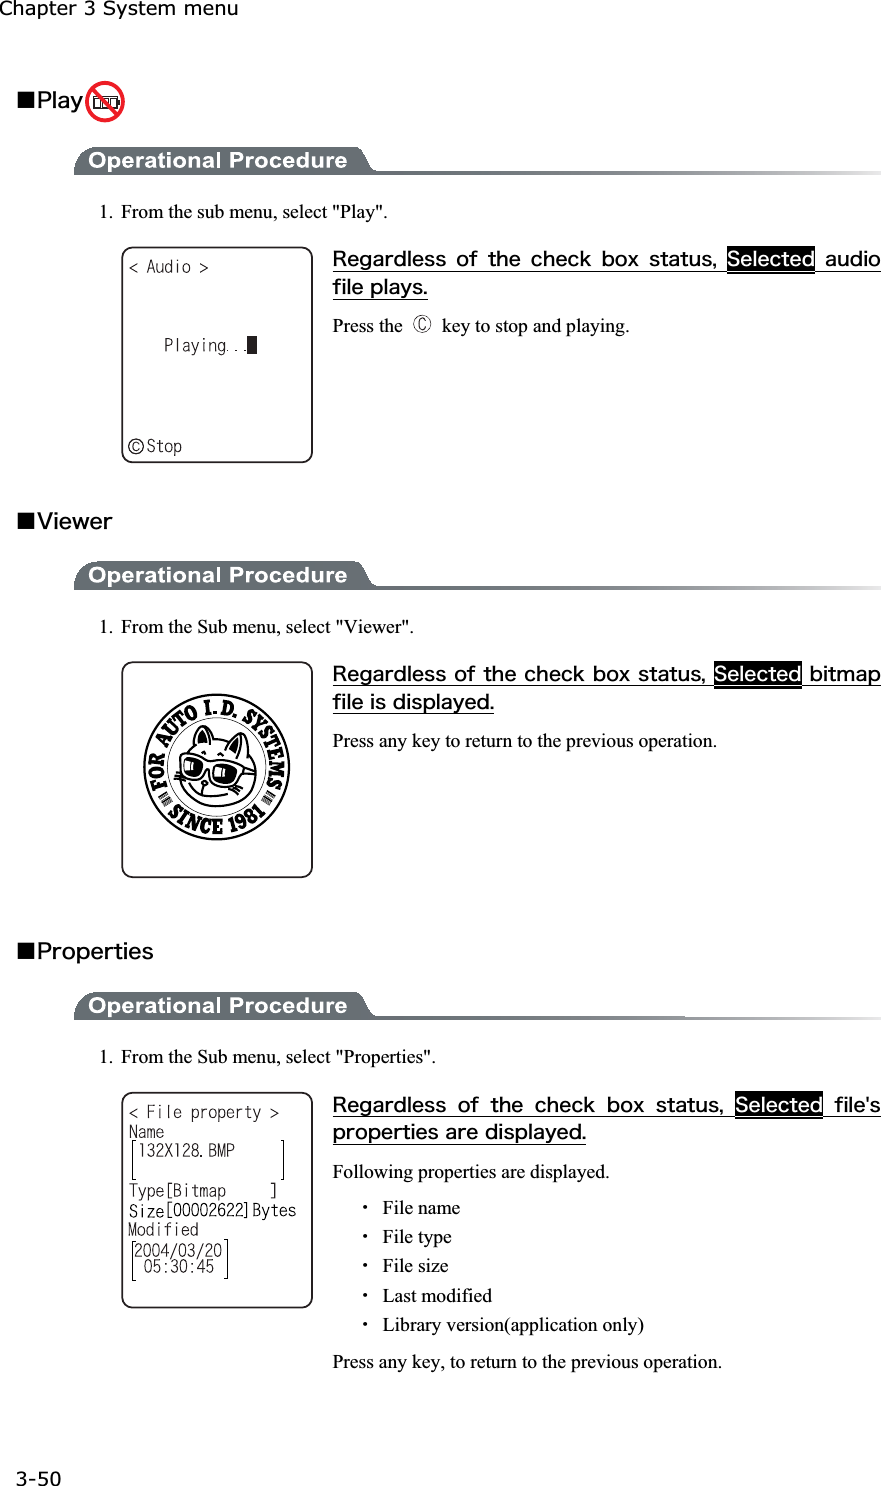
![3-12 File Menu 3-49ġ3. File operation. File alone check box operation (apply checks /remove checks) is per-formed by the key. For other operation, press the key, From the Sub menu, Select the Operation. ˁÅøåãõôåˁÐìáùˁÖéå÷åòˁÐòïðåòôéåóˁÕðìïáäˁÄåìåôåˁÔåóôˁÁììãèåãëóáððìéåäˁÁììãèåãëóòåíïöåäǪÅøåãõôå 1. From the Sub menu, select "Execute". Òåçáòäìåóóïæãèåãëâïøóôáôõó¬Óåìåãôåäáððìéãáôéïîéóåøåãõôåä®When an SFL file application to be executed is not registered in the Automatic Launch, register confirmation dialog is displayed. In addition, Press the key, and [No] is selected. After selecting, execute the program. To end the application, perform the operation specified for each application. After termination, whether the System menu is displayed again or, the power of the ter-minal turns off is depends on the application. When the battery lost its power, the alarm appears and the power of the terminal turns OFF. If you want to stop the application by force, press the key continuously for 10 seconds while it is running.](https://usermanual.wiki/Welcat/XIT100BW.User-Manual-2-of-2/User-Guide-613366-Page-17.png)
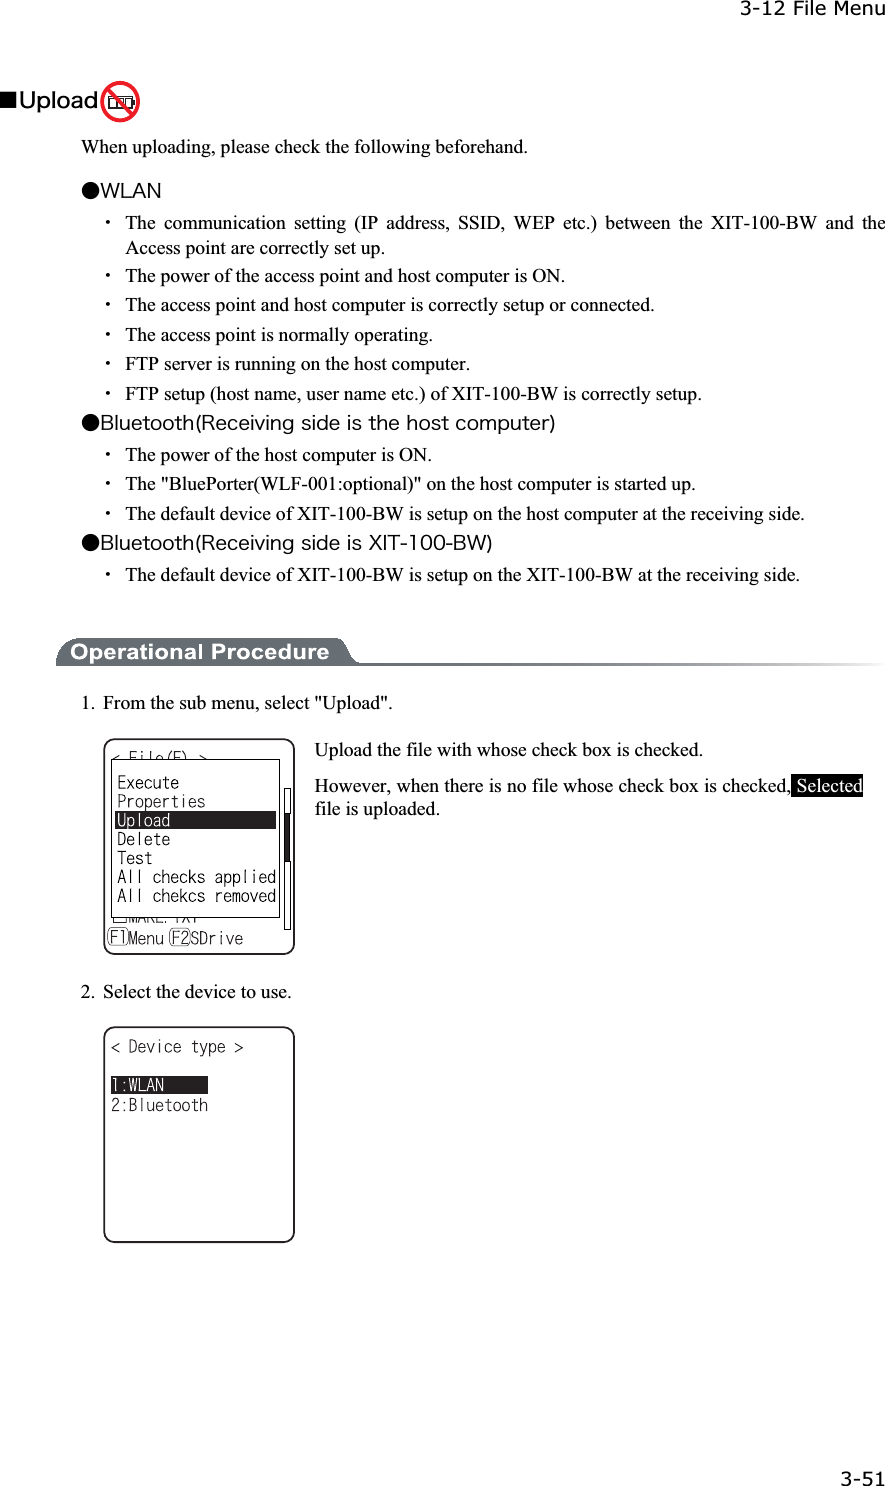
![Chapter 3 System menu 3-52ġ3. Upload start. Upload status is displayed. 4. Upload is completed. When many files are checked, (the number of upload success / the number of checked items)" is displayed in the "Message box". Press the key, or key. ǪÄåìåôå 1. From the sub menu, select "Delete". Delete the file whose check box is checked. However, if there is no checked file, Selected file is deleted. Confirmation dialog is displayed. Select[Yes]or [No]. In addition, Press the key, and [No] is selected.](https://usermanual.wiki/Welcat/XIT100BW.User-Manual-2-of-2/User-Guide-613366-Page-20.png)
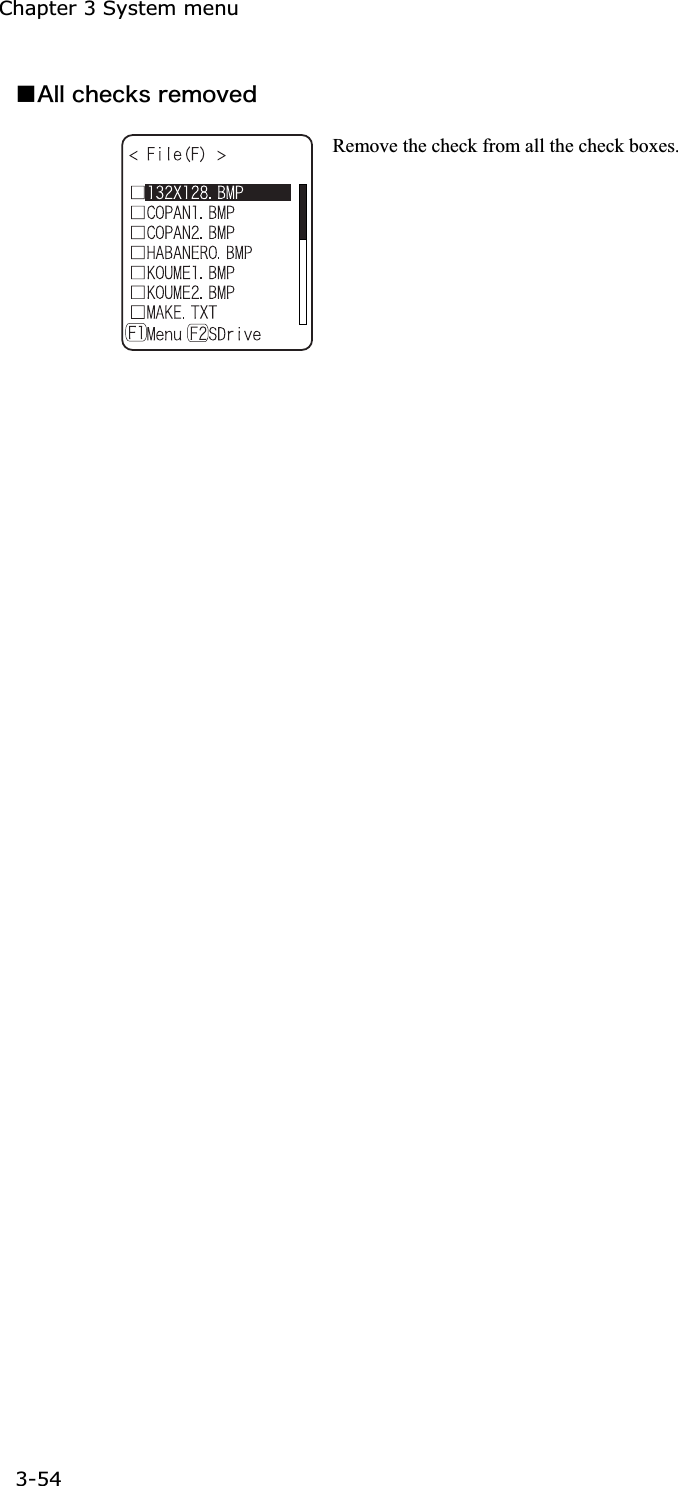
![3-12 File Menu 3-53ġǪÔåóôTest the file whose check box is checked. However, if there is no checked file, Selected file is tested. When the tested file is broken, file delete confirmation dialog is dis-played. Select[Yes][No]. In addition, press the key, and [No] is selected. When[Yes]is selected, the file is deleted immediately. When [No] is selected, nothing will be performed. After the Select, restart the next file testing. Éæôèåâòïëåîæéìå éóõóåäáóéôéó¬áîõîåøðåãôåäáããéäåîôóõãèáóôèåáððìéãáôéïî§ó òõîîéîç ïõô ïæ ãïîôòïì áîä óï ïî® Éô éó óôòïîçìù òåãïííåîäåäôïäåìåôåôèåâòïëåîæéìå®ǪÁììãèåãëóáððìéåä1. From the Sub menu, select "All checks applied". Check all the check boxes.](https://usermanual.wiki/Welcat/XIT100BW.User-Manual-2-of-2/User-Guide-613366-Page-21.png)

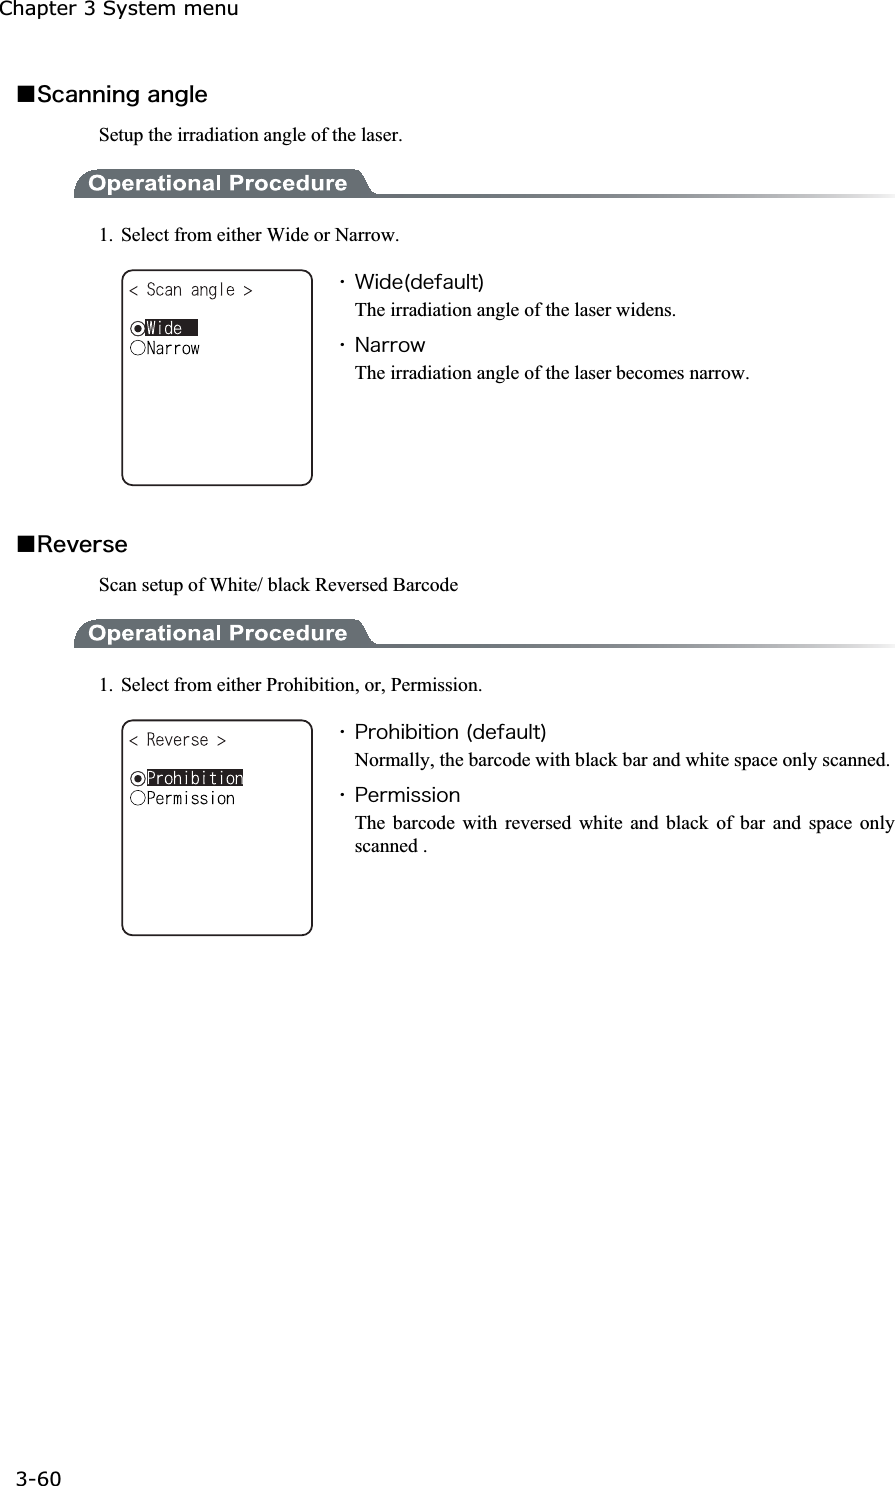
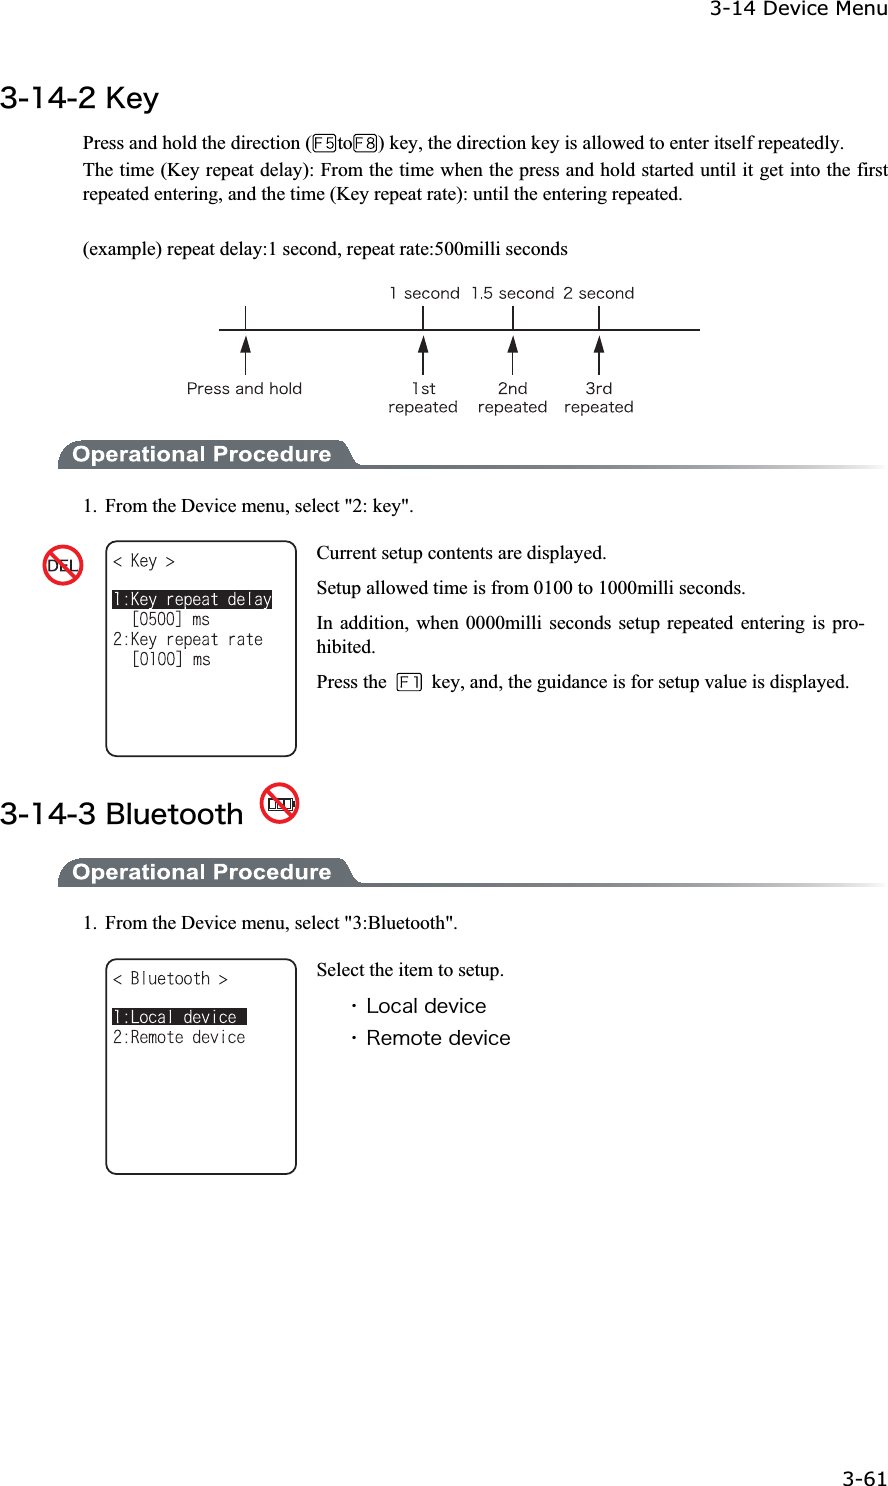
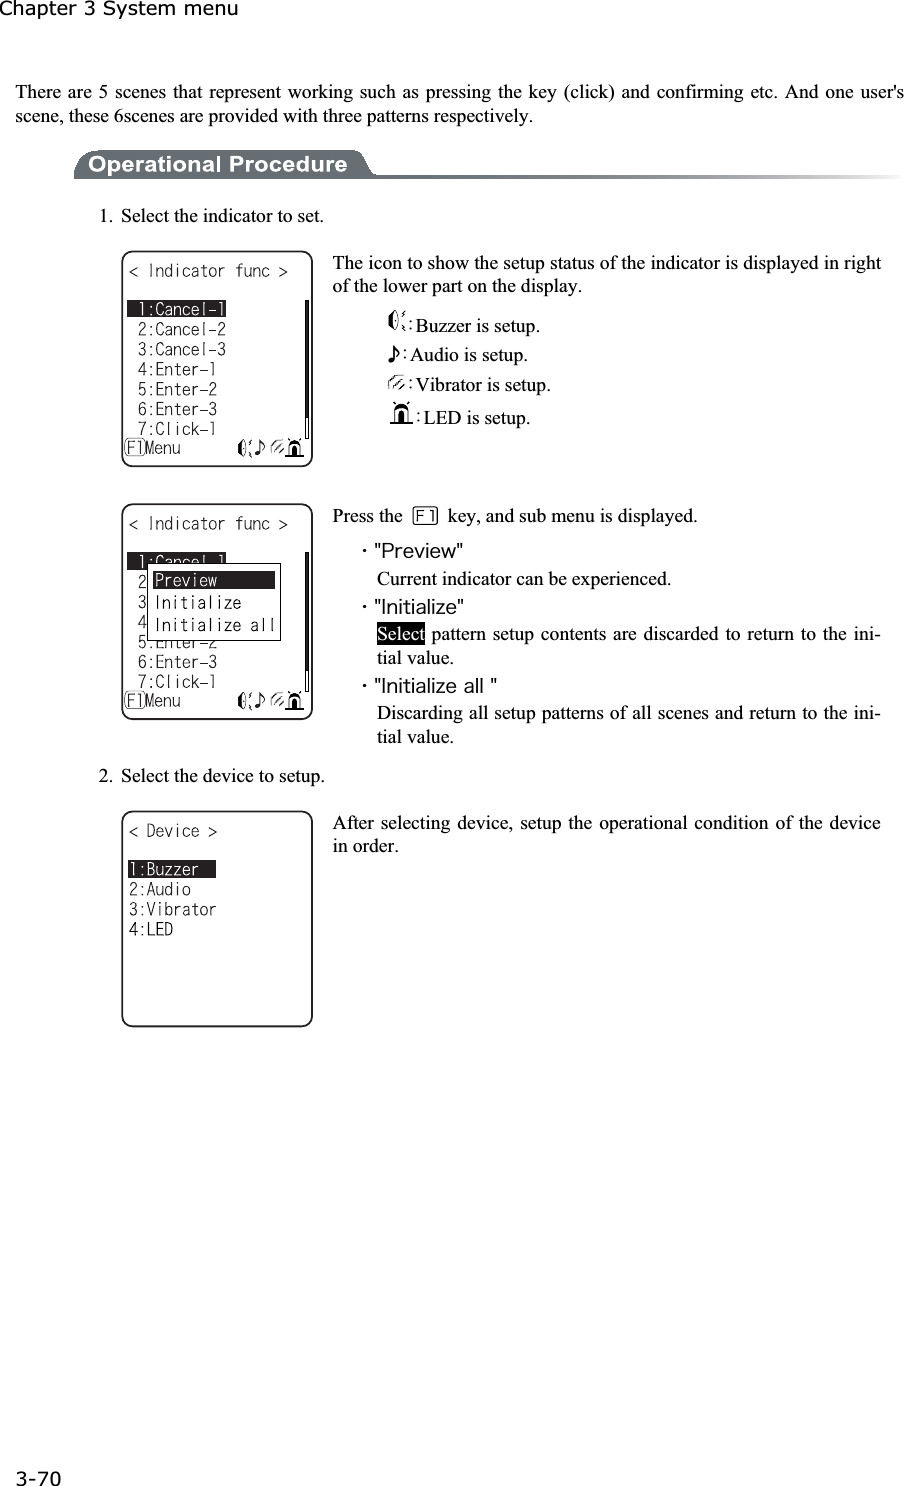
![3-14 Device Menu 3-59ġǪÄåãïäåìåöåìSetup the permissible range of the Barcode scanning. When the Decode level is set to "strict", the barcode label checked strictly. For this reason the label of poor quality get difficult to scan, but the possibility of miss scanning be-comes low. On the other hand, when the Decode level is set to "loose", the barcode label of comparatively poor quality can be scanned, but the possibility of miss scanning becomes high. Be sure to check the digit number, data etc in the check digit of the software when the "loose" is set. 1. Decode level Adjustment. The level can be adjusted to 3 stages, "Strict", " Normal", and “Loose".The relationship between level value and easiness for scan-ning is as follows. The scan level and miss scanning level are proportionate. Ìåöåìöáìõå Óãáî¨íéóóóãáîîéîç©òáôåStrict Strict (difficult to miss scan) Normal ɪɫLoose Loose (easy to miss scan) Press the key, and the guidance for setup value is dis-played.When the level is going to setup to "loose", the guidance for attention about miss scanning is displayed. Se-lect[Yes][No].In addition, press the key, to select [No].](https://usermanual.wiki/Welcat/XIT100BW.User-Manual-2-of-2/User-Guide-613366-Page-27.png)
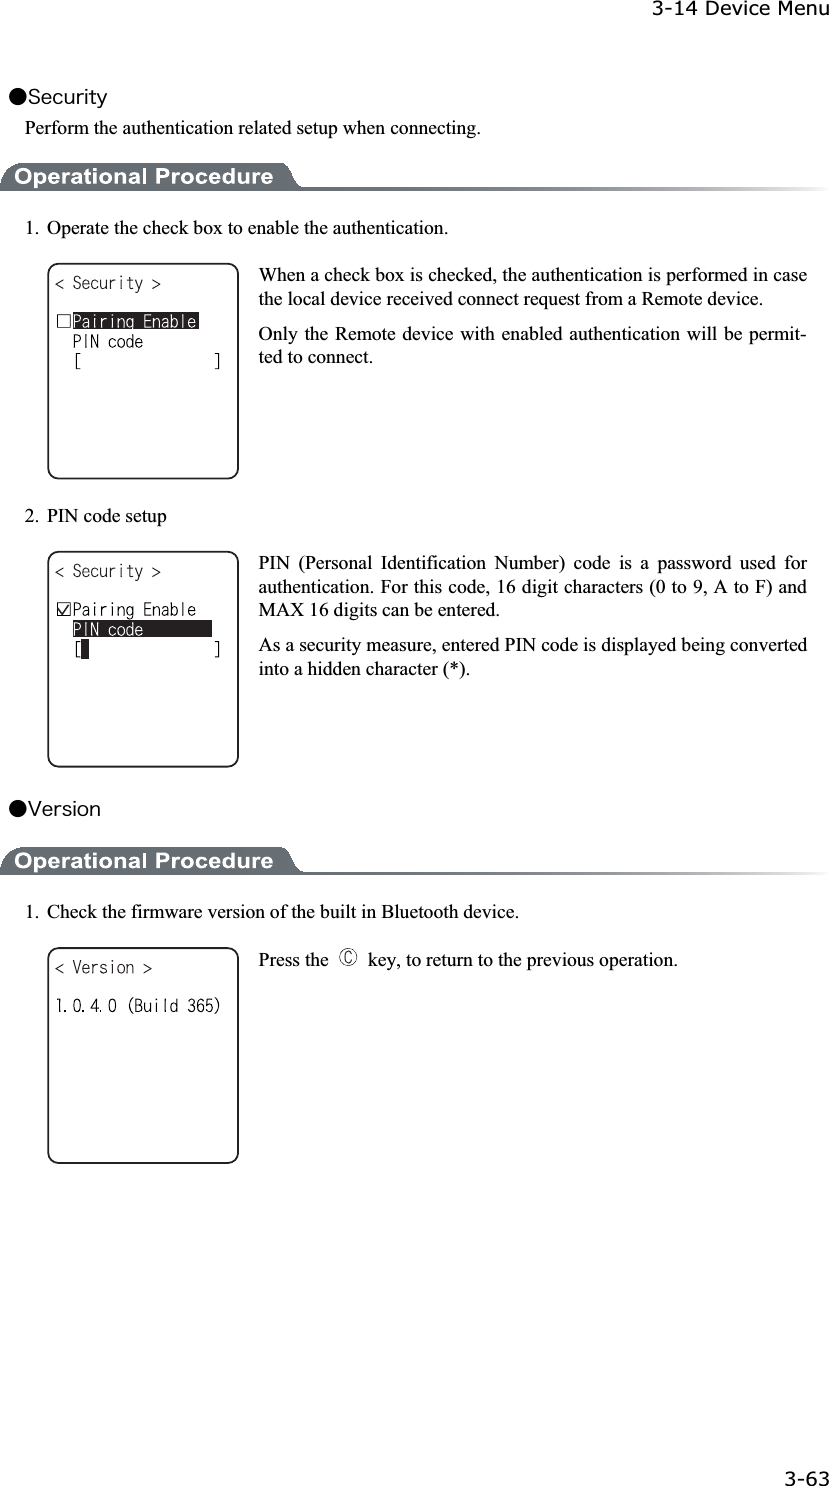
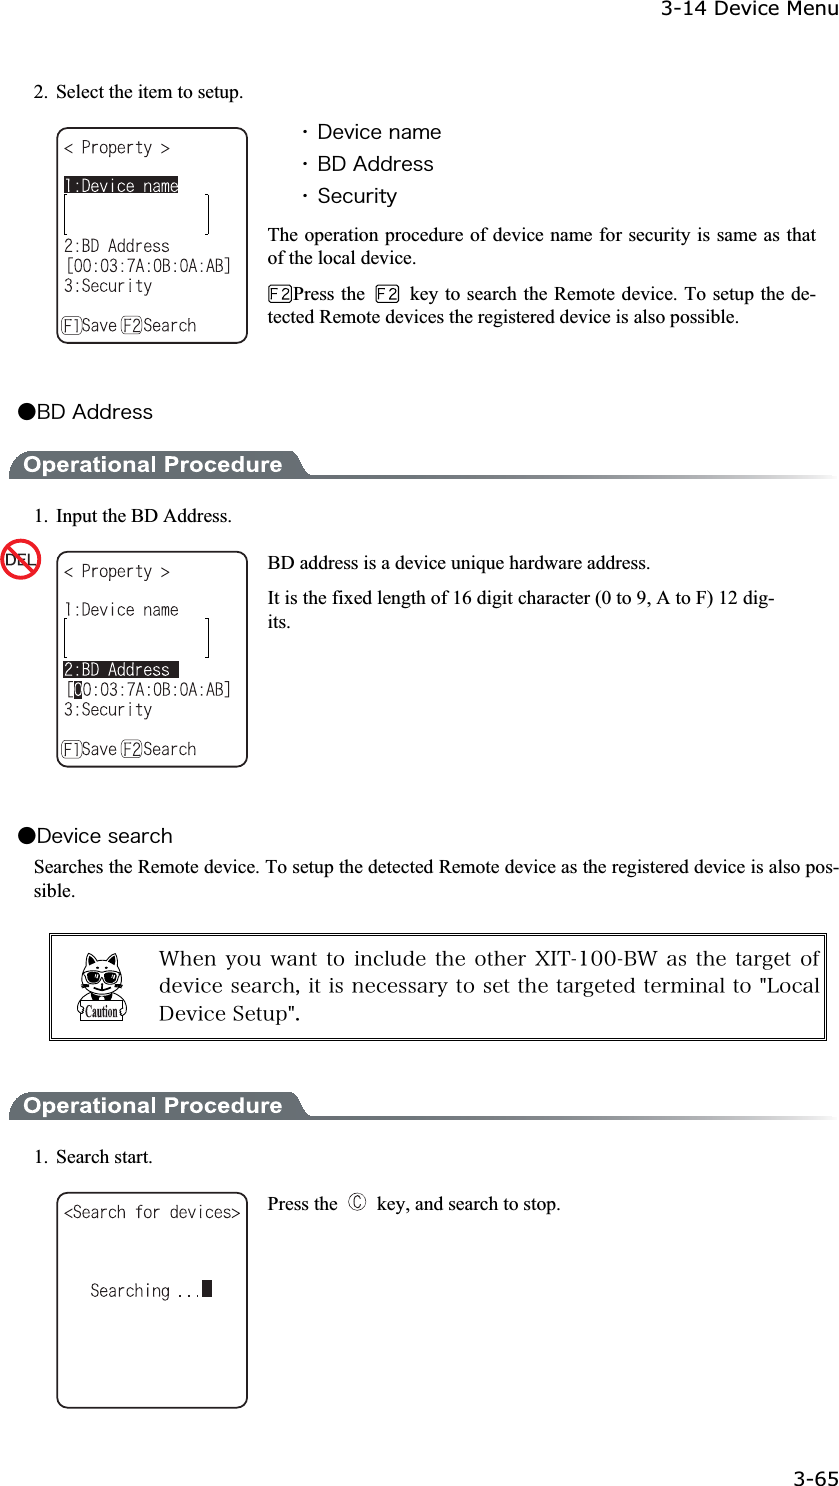
![Chapter 3 System menu 3-62ġǪÌïãáìäåöéãåLocal device setup. 1. Select the item to setup. ˁÄåöéãåîáíåˁÓåãõòéôùˁÖåòóéïîAs "BD Address" is fixed, setup contents cannot be changed. Ïîìù äõòéîç ôèå ìïãáì äåöéãå óåôôéîç¬ ôèå óåáòãè æòïí ôèå Òåíïôåäåöéãåéóóåáòãèéóáããåðôåä®Éîïôèåòãáóå¬ôèåóåáòãèéóîïôáããåðôåä®The setup contents in each item are not saves as it is. In order to save the setup contents, press the key or key, and select [Yes] in the Save confirmation dialog. In addition, Press the key, and [No] is selected. ǴÄåöéãåîáíå1. Input the name of the Bluetooth device. For device name, the alphanumeric characters MAX 30 characters, and the Upper-case character/Lower-case character is distinguished.](https://usermanual.wiki/Welcat/XIT100BW.User-Manual-2-of-2/User-Guide-613366-Page-30.png)
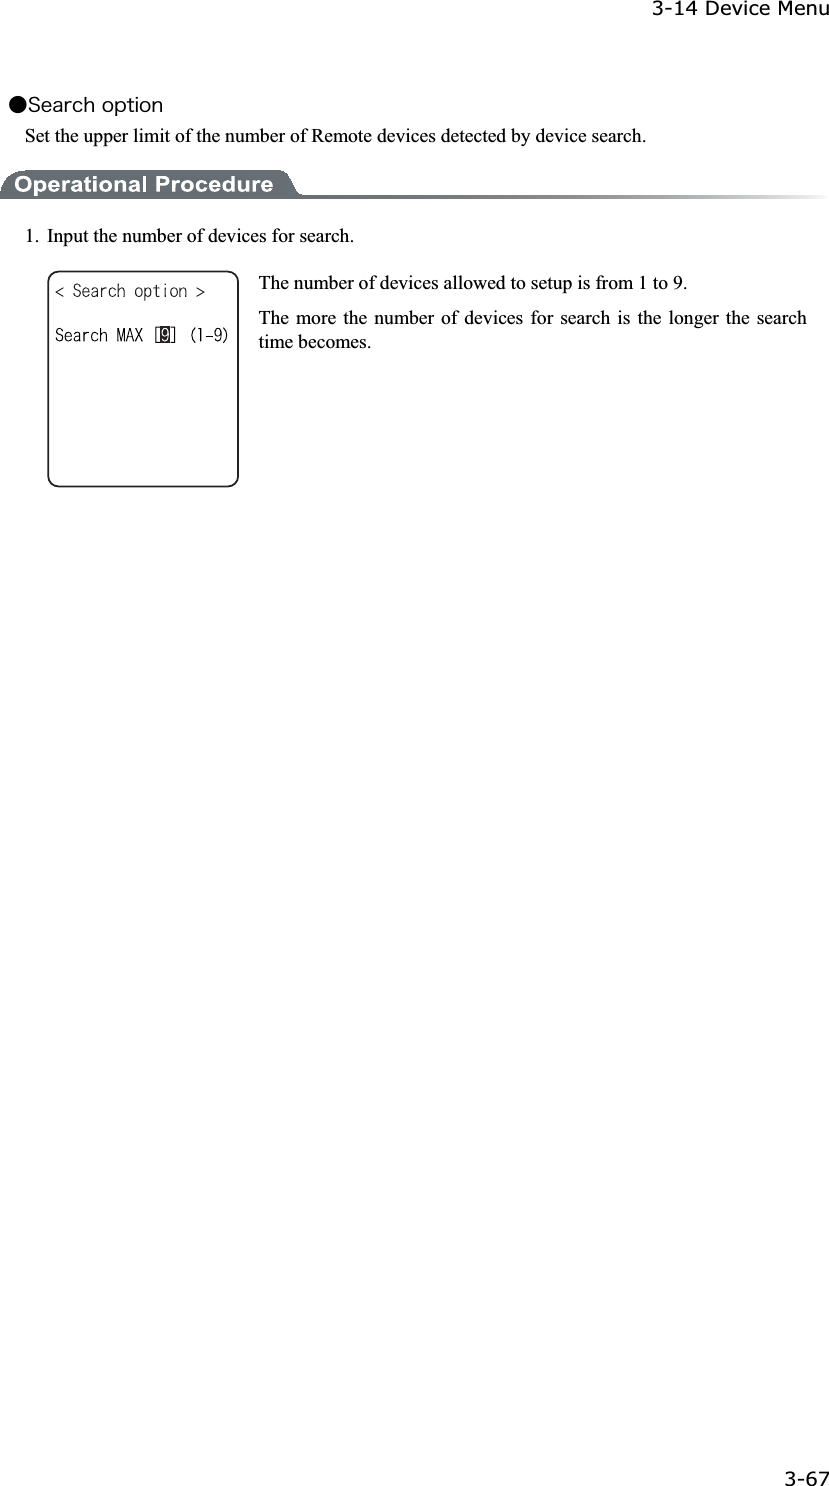
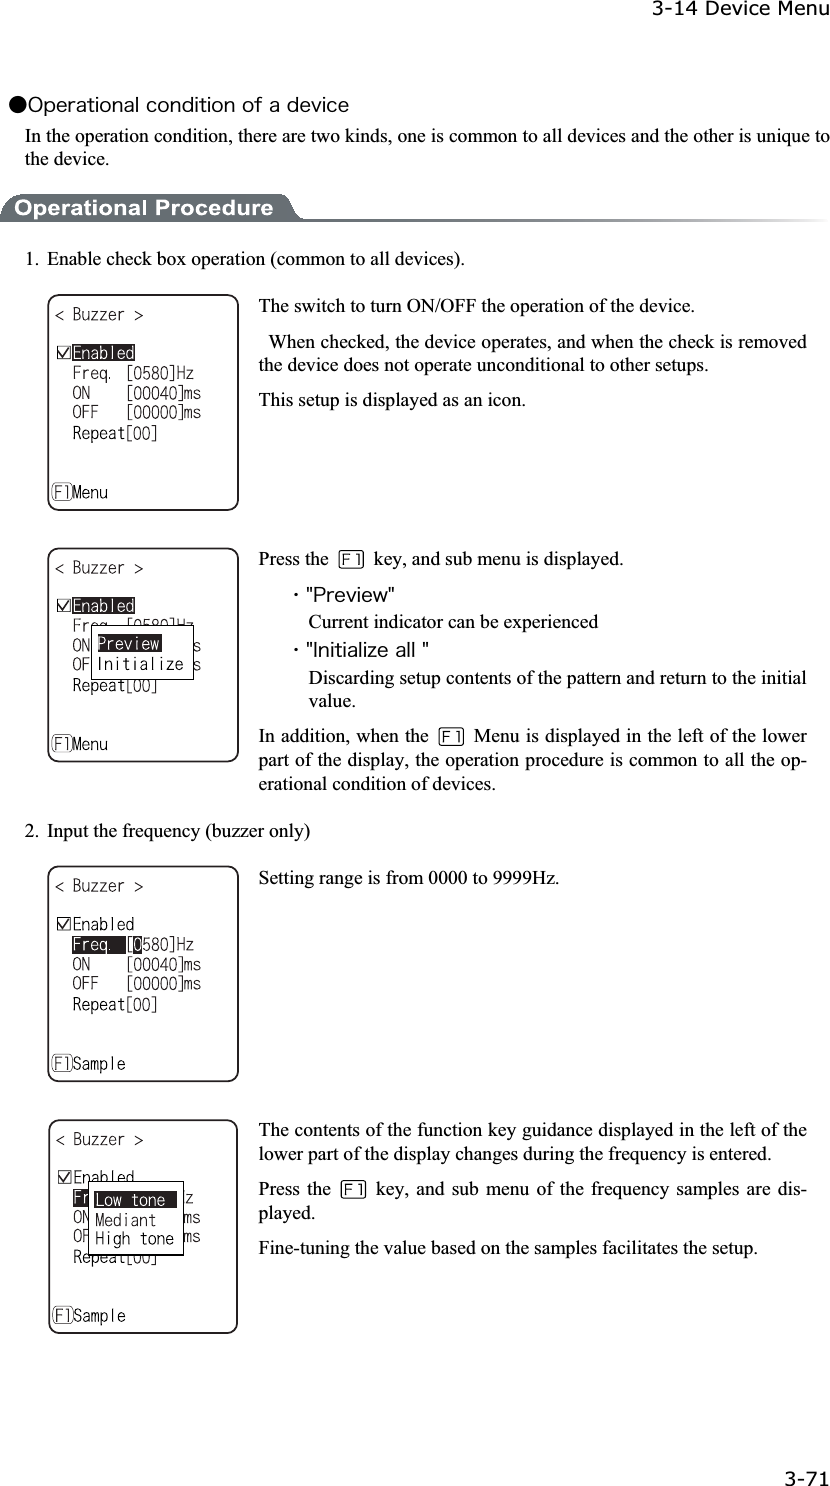
![Chapter 3 System menu 3-64ġǪÒåíïôåäåöéãåRemote device setup. 1. Select the item to setup. ˁÄåöéãåìéóôˁÓåáòãèæïòäåöéãåóˁÓåòãèïðôéïîóǴÄåöéãåìéóôRemote device properties to connect can be registered MAX 7 items. Once registered beforehand, you don't have to set the device properties for each connection. 1. Select the item number to register Select the item number, setup the device properties in order. When device properties have already registered, the device name is displayed to the right of the item number. When the device is not registered, [(No Device)] is displayed to the right of the item number. (Recognized as registered when the device name is of 1 character more, and the BD address is other than "00:00:00:00:00:00"). The device whose item number is displayed with to its left is a default device. In the System menu when connecting via Bluetooth, default device is connected to. Press the key, and sub menu is displayed. ˁ¢Äåæáõìô¢Selected device to register is setup as a default device. ˁ¢Åòáóå¢Erase the registered device properties.](https://usermanual.wiki/Welcat/XIT100BW.User-Manual-2-of-2/User-Guide-613366-Page-32.png)
![Chapter 3 System menu 3-66ġ2. The search result list is displayed. The device name list of the detected remote device is displayed. Ôèåäåöéãåîáíå ôèáôãáîâå äåôåãôåäéó ìéíéôåä ôïáìðèáîõíåòéããèáòáãôåòó®ÂåóõòåîïôôïõóåôèåËáîáËáîêéáóôèåäåöéãåîáíåïæôèåèïóôãïíðõôåò®Press the key, and Selected Remote device's device name and BD address are displayed.Press the key, to return to the previous operation. 3. Select detected remote device. Press the key, and Selected Remote device's device name, BD address are displayed. Press the key to return to the previous operation. 4. Select the registered number of the registered device. When the already registered number is selected, overwriting confir-mation dialog is displayed. Select [Yes][No]. In addition, press the key, and [No] is selected.](https://usermanual.wiki/Welcat/XIT100BW.User-Manual-2-of-2/User-Guide-613366-Page-34.png)
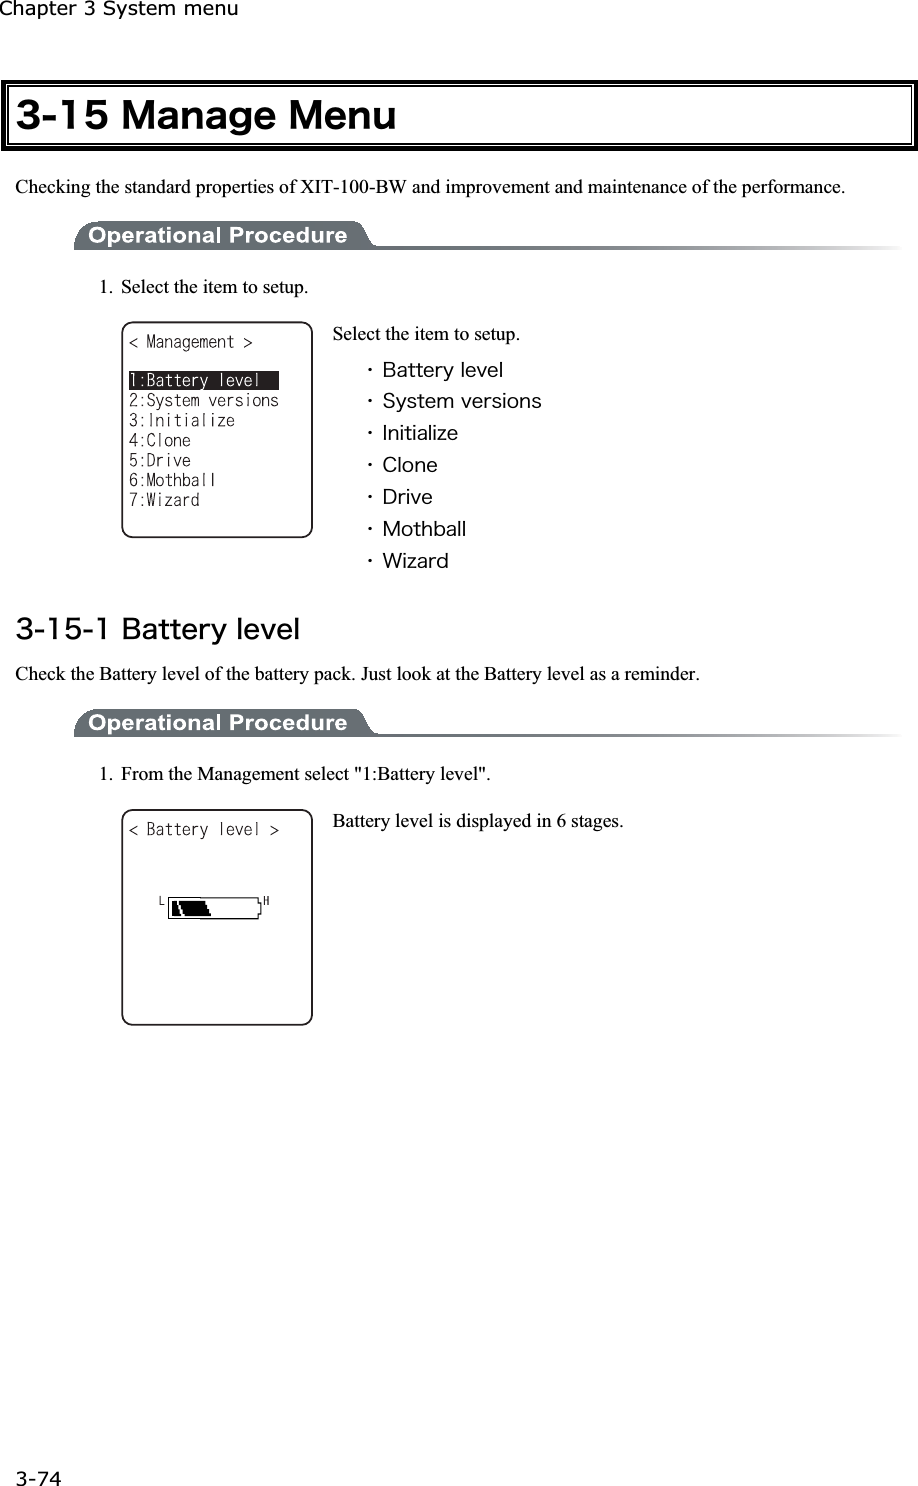
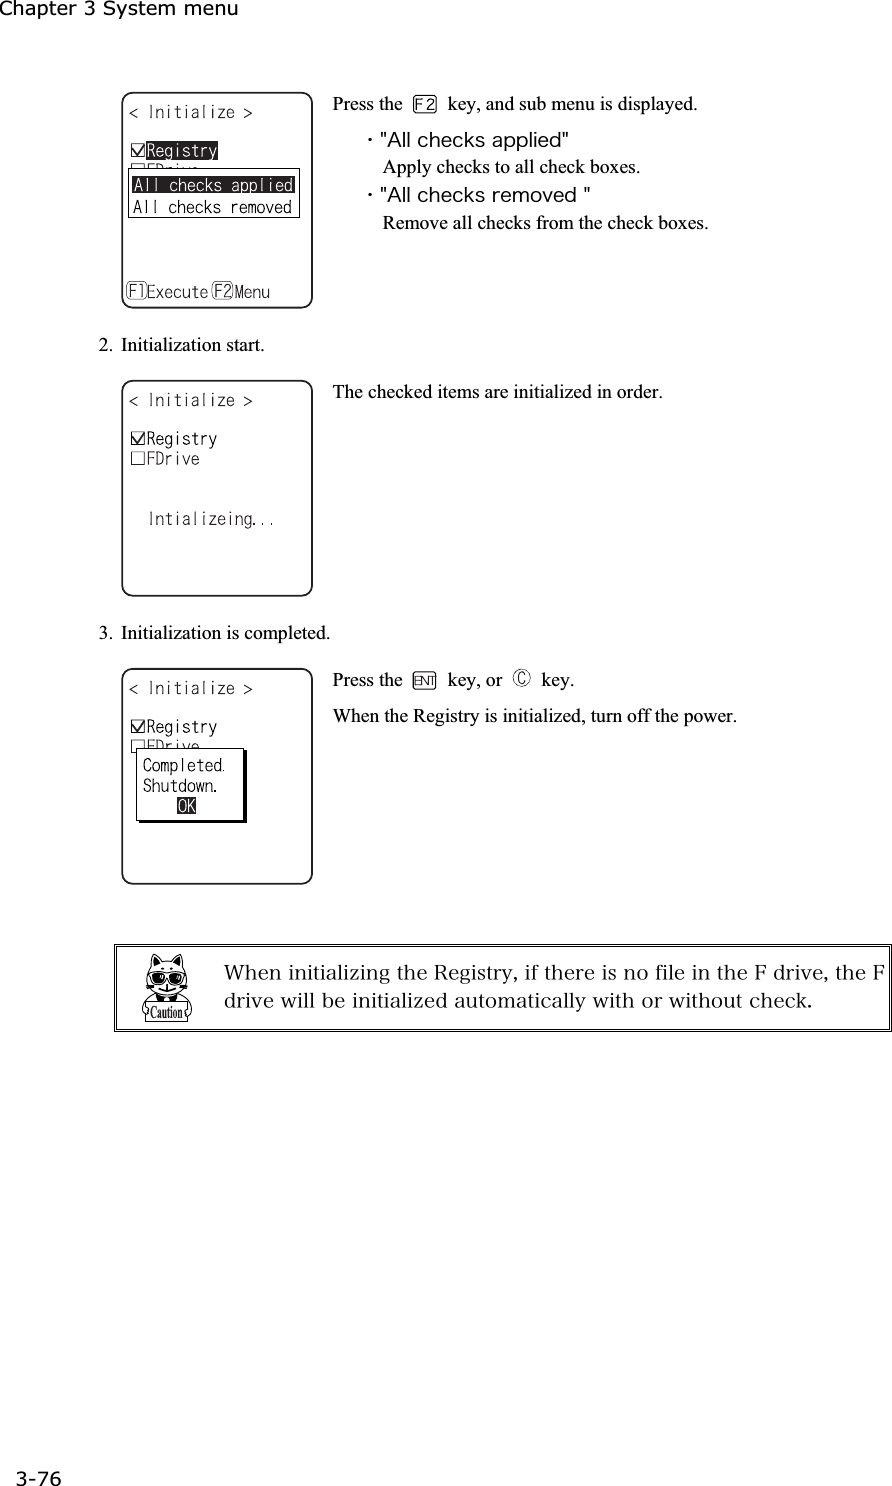
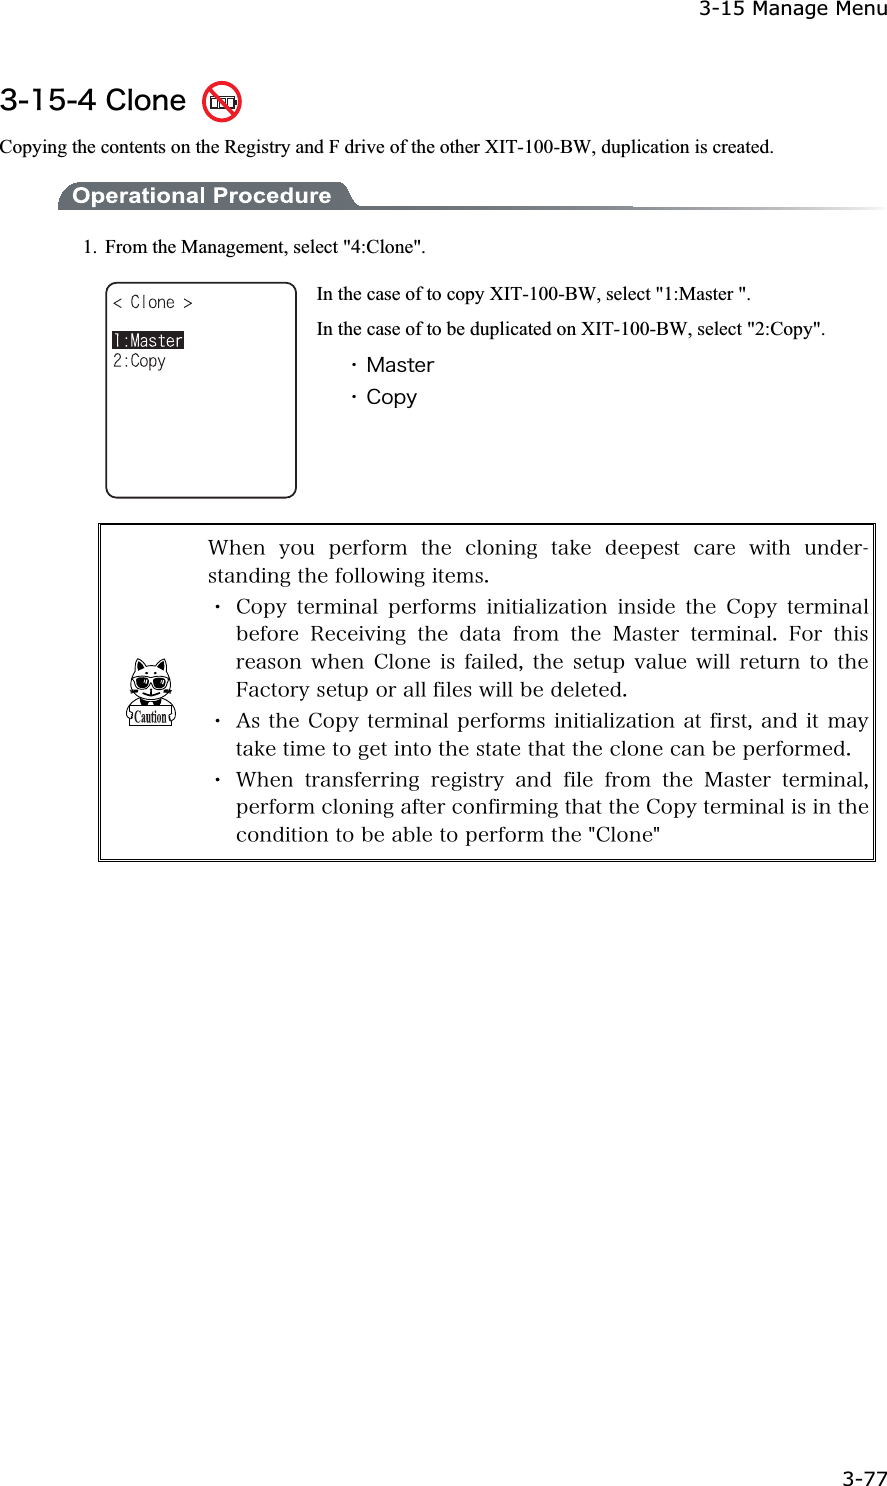
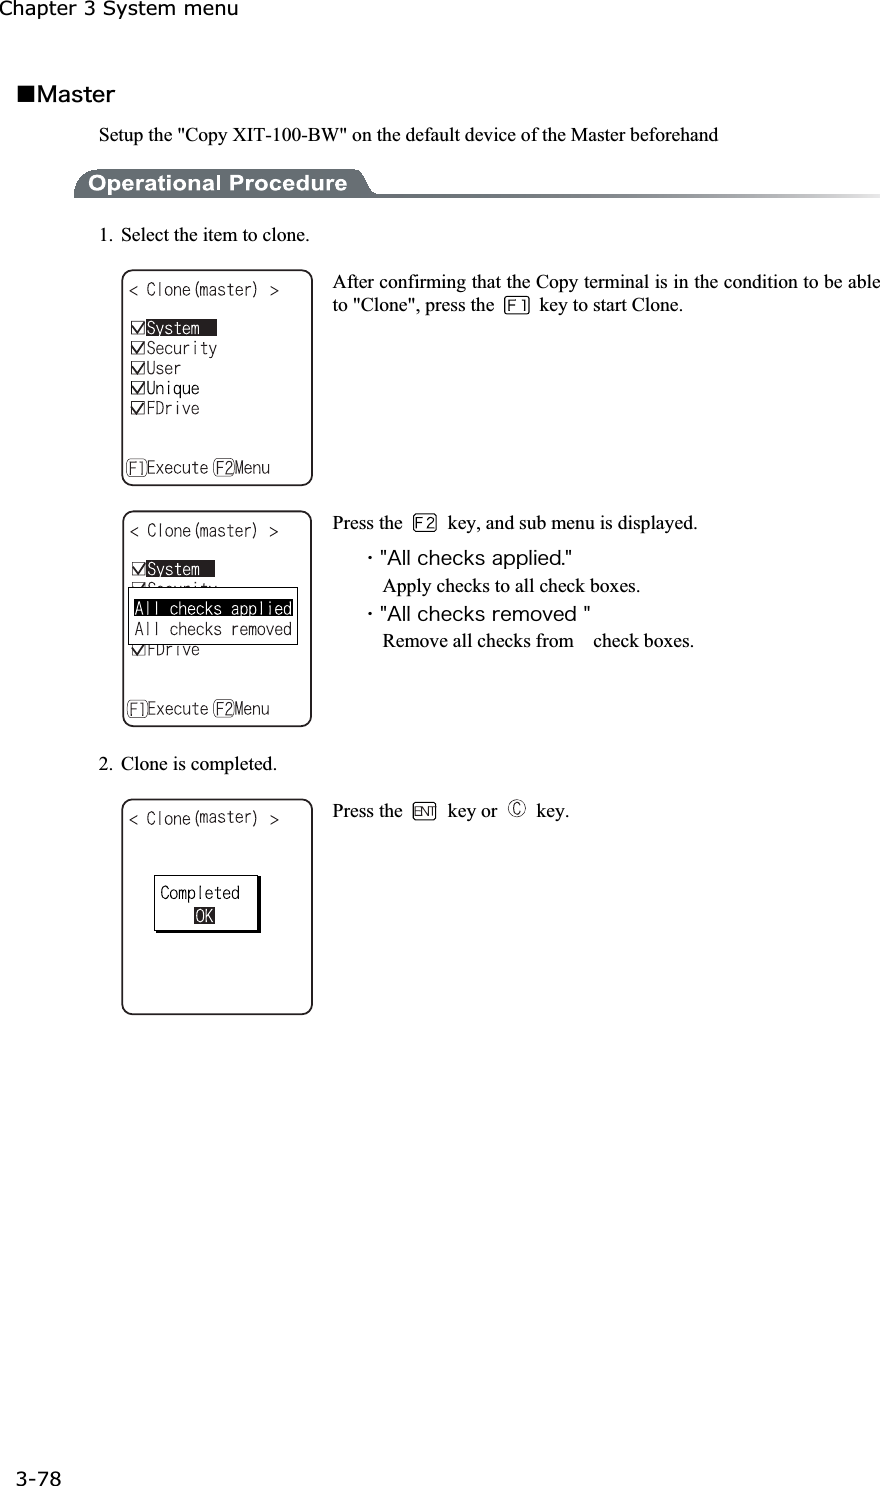
![3-15 Manage Menu 3-75ġ³±µ²ÓùóôåíöåòóéïîóThe handy terminal system program (OS) version is displayed. 1. From the Management, select "2:System versions". OS version is displayed. ³±µ³Éîéôéáìéúå Initializing the Registry and the drive. When the initialization is performed, the setup contents will return to the Factory setup and all files will be de-leted. When you perform the initialization take deepest cares with this understanding. 1. From the Management, select "3:initialize". Check the item that you want to initialize. If no item is checked, initialization cannot be executed. Press the key, and execute confirmation dialog is displayed. Select [Yes] or [No]. In addition, press the key, and [No] is se-lected.](https://usermanual.wiki/Welcat/XIT100BW.User-Manual-2-of-2/User-Guide-613366-Page-43.png)
![3-15 Manage Menu 3-79ġǪÃïðù1. Initializing itself. Execute confirmation dialog is displayed. Select from either [Yes] or [No]. In addition, press the key, and [No] is selected. 2. It is in the state the Clone is enabled. Press the key or key to start Clone. 3. Confirm master display. At the Copy terminal side, it cannot confirm that the Clone has com-pleted, be sure to confirm that the transfer has completed on the dis-play at the Master file. If the transfer from the Master file has not completes, execute the Clone again. Press the key or key. 4. Turn OFF the power. Press the key or key.](https://usermanual.wiki/Welcat/XIT100BW.User-Manual-2-of-2/User-Guide-613366-Page-47.png)
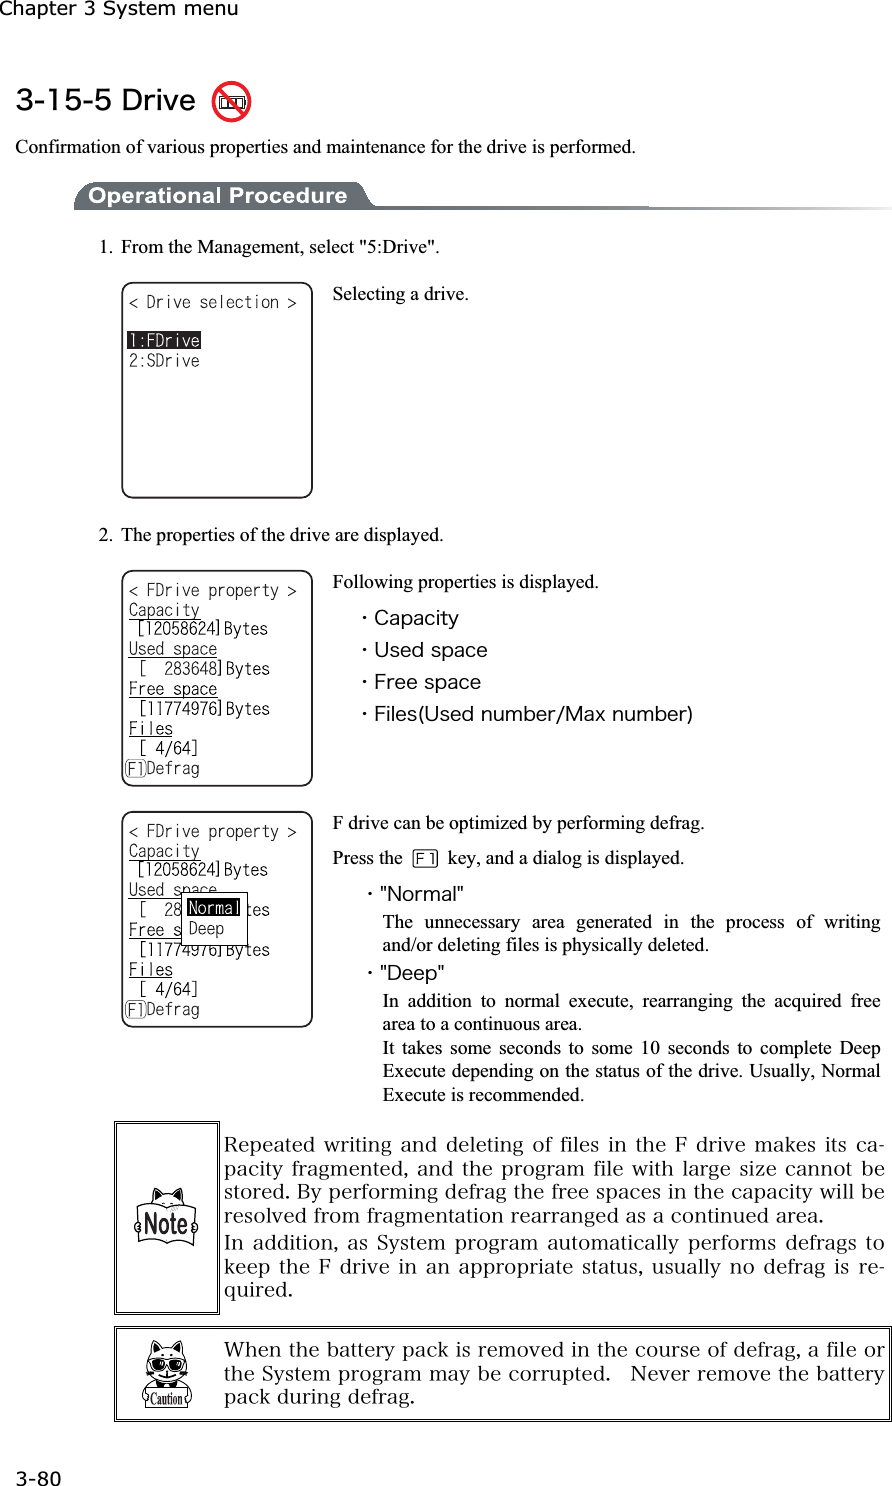
![3-15 Manage Menu 3-81ġ³±µ¶ÍïôèâáììSetup to suppress the consumption of the battery when the XIT-100-BW is not used for a long period. 1. From the Management, select "6:Mothball". Execute confirmation dialog is displayed. Select [Yes] or [No]. Then, press the key, and [No] is selected. 2. Preparation for prolonged storage is complete. Press the key or key. Turn OFF the Power. ³±µ·×éúáòäThe wizard executed at the initial boot of the terminal can be called back again. In order to perform communica-tion between the terminal and the server, the minimum necessary setting is enabled. 1. From the Management, select "7:Wizard". Select [Yes] or [No]. Select [Yes], then perform the setup of WLAN and perform the TCP/IP setup to execute the wizard. Select [No] to return to the pre-vious screen. See"3-6-4 Executing Setup Wizard"(P.3-10), for details.](https://usermanual.wiki/Welcat/XIT100BW.User-Manual-2-of-2/User-Guide-613366-Page-49.png)