Yotascope Technologies H-918AW HD IP Camera User Manual

Yotascope Technologies Co., Ltd. HD IP Camera

User manual

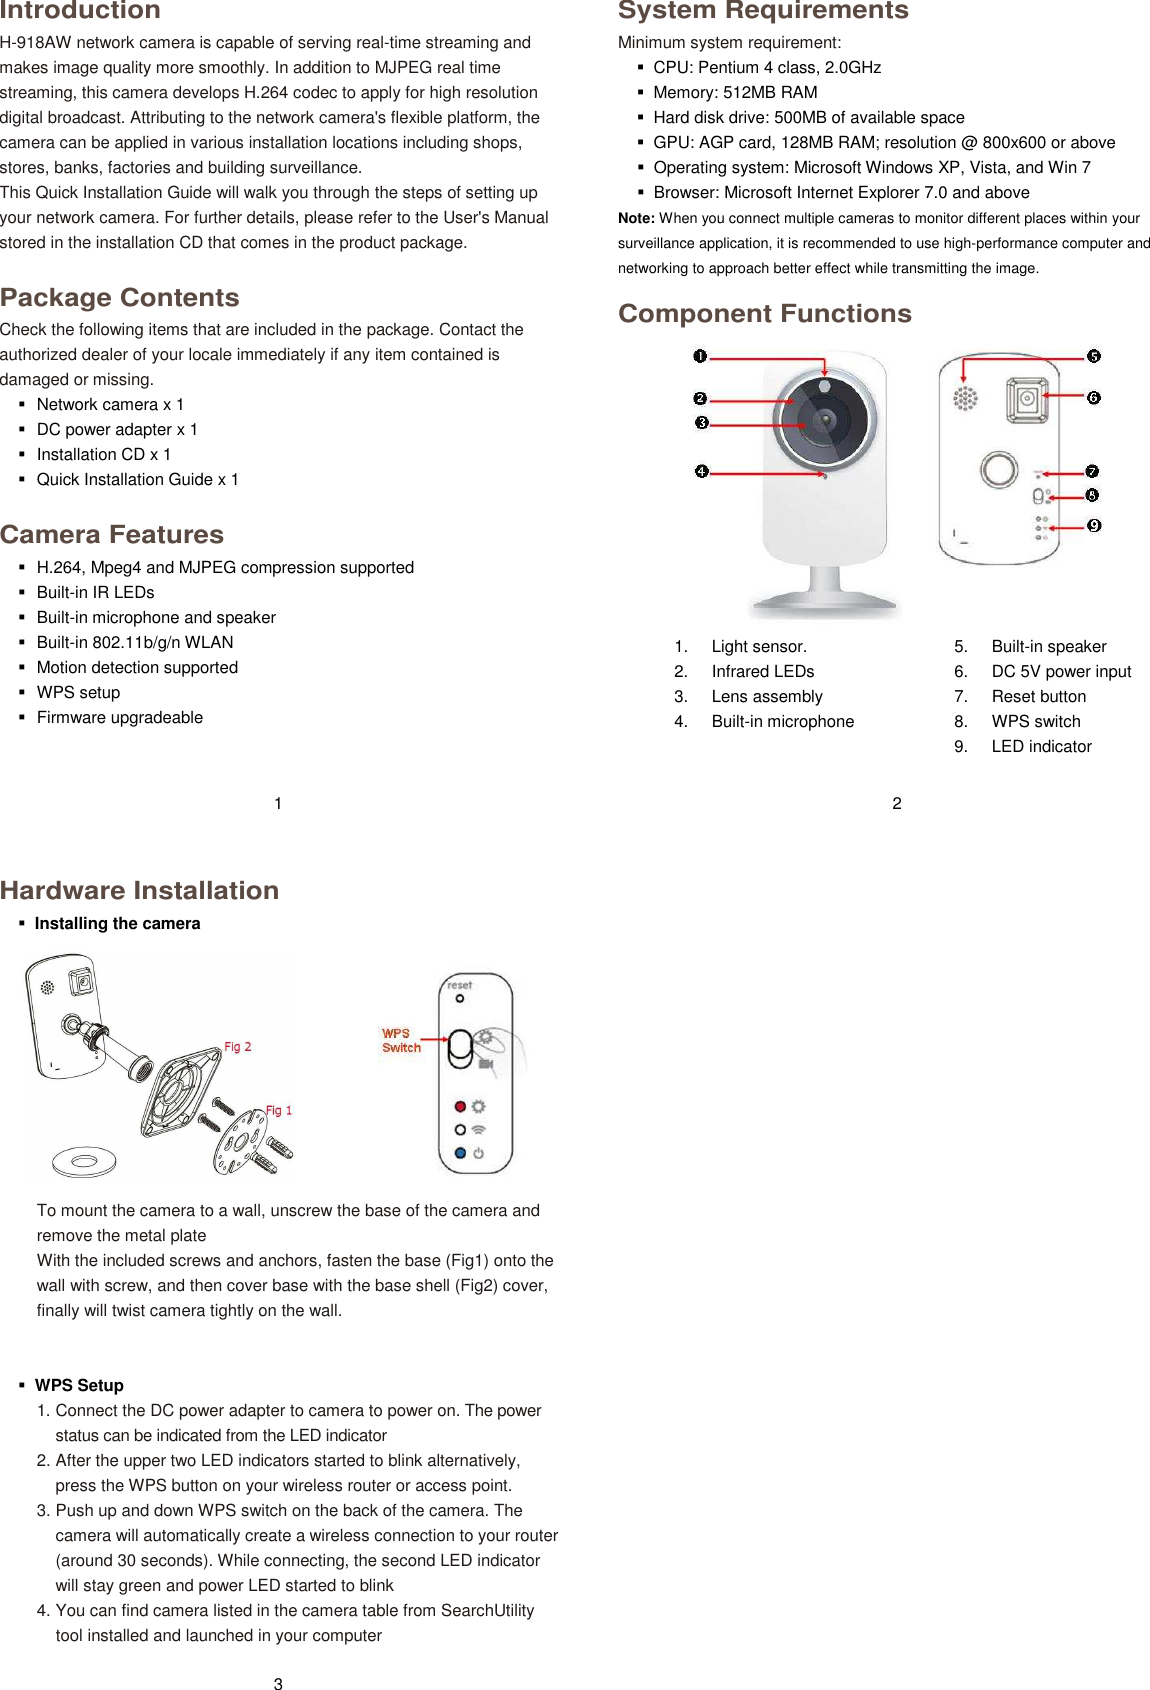
Hardware Installation  Installing the camera           To mount the camera to a wall, unscrew the base of the camera and remove the metal plate With the included screws and anchors, fasten the base (Fig1) onto the wall with screw, and then cover base with the base shell (Fig2) cover, finally will twist camera tightly on the wall.    WPS Setup 1. Connect the DC power adapter to camera to power on. The power status can be indicated from the LED indicator 2. After the upper two LED indicators started to blink alternatively, press the WPS button on your wireless router or access point.   3. Push up and down WPS switch on the back of the camera. The camera will automatically create a wireless connection to your router (around 30 seconds). While connecting, the second LED indicator will stay green and power LED started to blink 4. You can find camera listed in the camera table from SearchUtility tool installed and launched in your computer  Introduction H-918AW network camera is capable of serving real-time streaming and makes image quality more smoothly. In addition to MJPEG real time streaming, this camera develops H.264 codec to apply for high resolution digital broadcast. Attributing to the network camera's flexible platform, the camera can be applied in various installation locations including shops, stores, banks, factories and building surveillance. This Quick Installation Guide will walk you through the steps of setting up your network camera. For further details, please refer to the User's Manual stored in the installation CD that comes in the product package.  Package Contents Check the following items that are included in the package. Contact the authorized dealer of your locale immediately if any item contained is damaged or missing.   Network camera x 1   DC power adapter x 1   Installation CD x 1   Quick Installation Guide x 1  Camera Features   H.264, Mpeg4 and MJPEG compression supported   Built-in IR LEDs   Built-in microphone and speaker     Built-in 802.11b/g/n WLAN     Motion detection supported   WPS setup   Firmware upgradeable   1 System Requirements Minimum system requirement:   CPU: Pentium 4 class, 2.0GHz   Memory: 512MB RAM   Hard disk drive: 500MB of available space   GPU: AGP card, 128MB RAM; resolution @ 800x600 or above   Operating system: Microsoft Windows XP, Vista, and Win 7   Browser: Microsoft Internet Explorer 7.0 and above Note: When you connect multiple cameras to monitor different places within your surveillance application, it is recommended to use high-performance computer and networking to approach better effect while transmitting the image.  Component Functions  1.  Light sensor. 2.  Infrared LEDs 3.  Lens assembly 4.  Built-in microphone  5.  Built-in speaker 6.  DC 5V power input 7.  Reset button 8.  WPS switch 9.  LED indicator  2 3
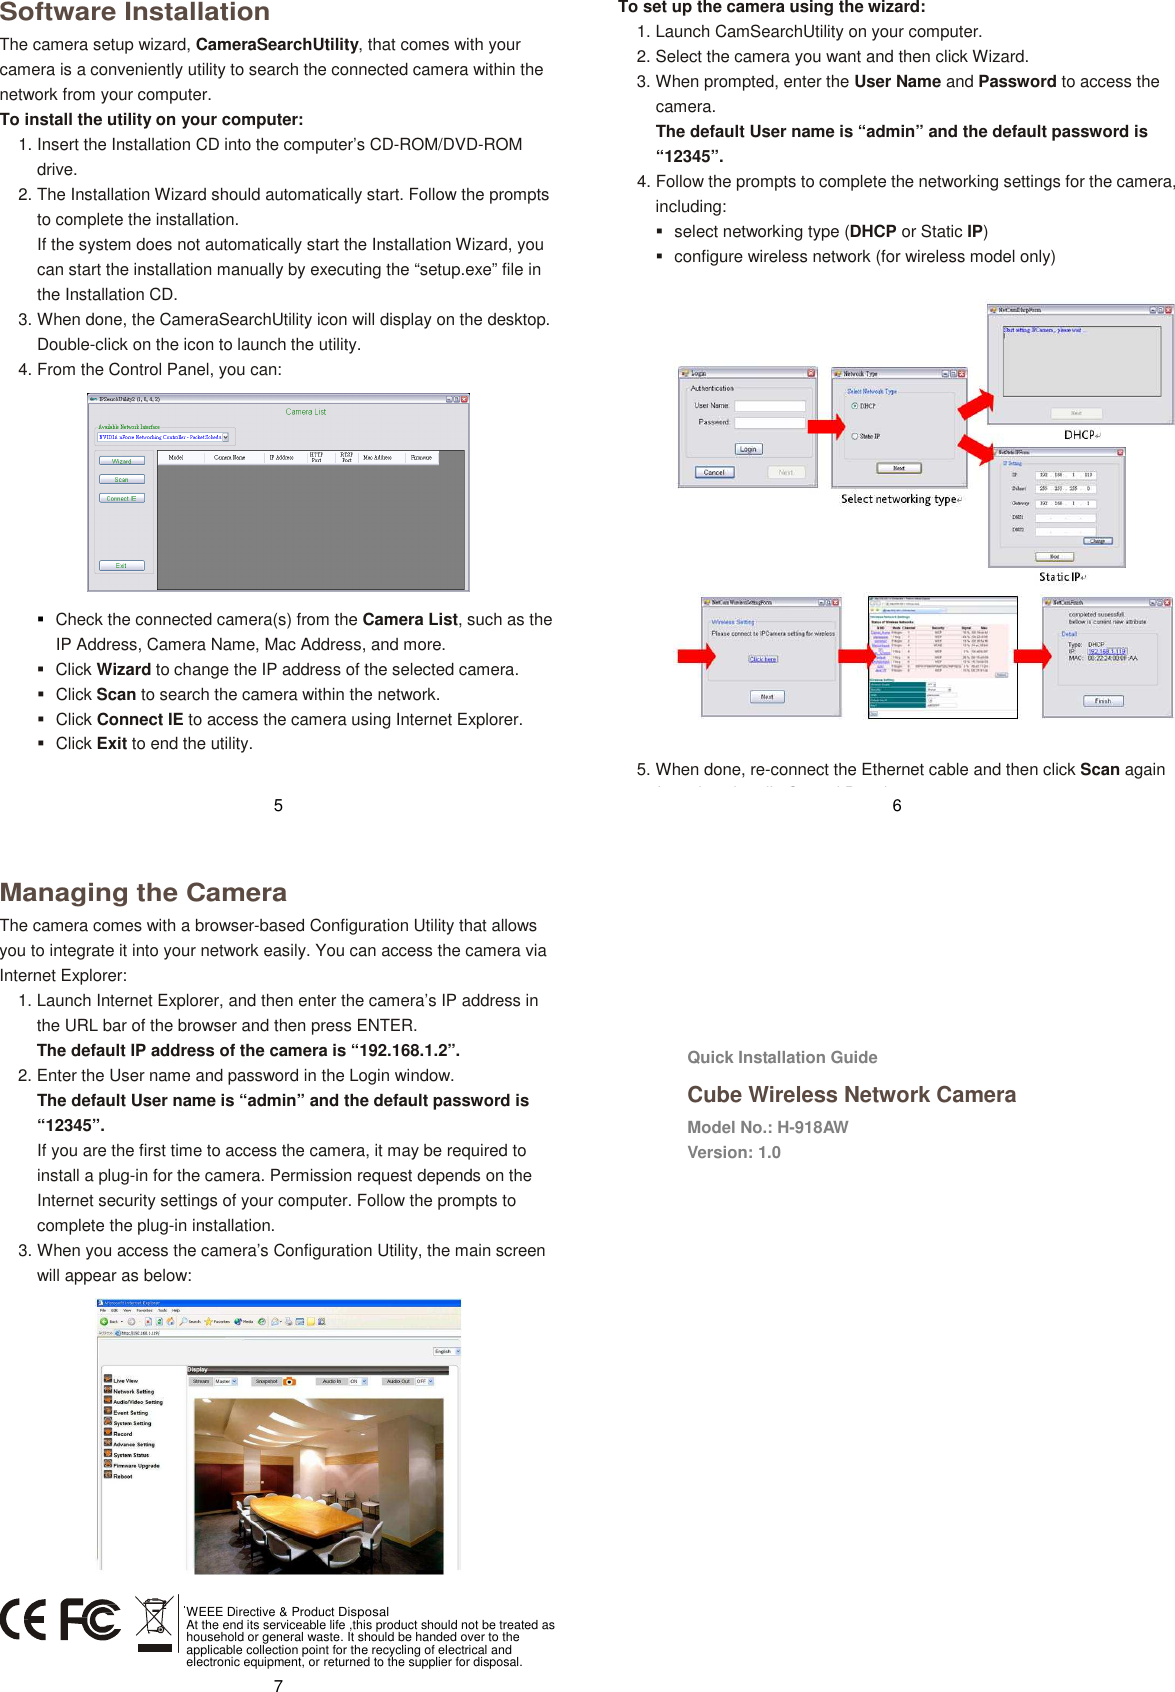
 Software Installation The camera setup wizard, CameraSearchUtility, that comes with your camera is a conveniently utility to search the connected camera within the network from your computer. To install the utility on your computer: 1. Insert the Installation CD into the computer’s CD-ROM/DVD-ROM drive. 2. The Installation Wizard should automatically start. Follow the prompts to complete the installation. If the system does not automatically start the Installation Wizard, you can start the installation manually by executing the “setup.exe” file in the Installation CD. 3. When done, the CameraSearchUtility icon will display on the desktop. Double-click on the icon to launch the utility. 4. From the Control Panel, you can:   Check the connected camera(s) from the Camera List, such as the IP Address, Camera Name, Mac Address, and more.   Click Wizard to change the IP address of the selected camera.   Click Scan to search the camera within the network.   Click Connect IE to access the camera using Internet Explorer.   Click Exit to end the utility. 5 To set up the camera using the wizard: 1. Launch CamSearchUtility on your computer. 2. Select the camera you want and then click Wizard. 3. When prompted, enter the User Name and Password to access the camera. The default User name is “admin” and the default password is “12345”. 4. Follow the prompts to complete the networking settings for the camera, including:   select networking type (DHCP or Static IP)   configure wireless network (for wireless model only)  5. When done, re-connect the Ethernet cable and then click Scan again from the wizard’s Control Panel. 6 Managing the Camera The camera comes with a browser-based Configuration Utility that allows you to integrate it into your network easily. You can access the camera via Internet Explorer: 1. Launch Internet Explorer, and then enter the camera’s IP address in the URL bar of the browser and then press ENTER. The default IP address of the camera is “192.168.1.2”. 2. Enter the User name and password in the Login window.  The default User name is “admin” and the default password is “12345”.   If you are the first time to access the camera, it may be required to install a plug-in for the camera. Permission request depends on the Internet security settings of your computer. Follow the prompts to complete the plug-in installation. 3. When you access the camera’s Configuration Utility, the main screen will appear as below:        7 Quick Installation Guide Cube Wireless Network Camera Model No.: H-918AW   Version: 1.0 WEEE Directive & Product Disposal At the end its serviceable life ,this product should not be treated as household or general waste. It should be handed over to the applicable collection point for the recycling of electrical and electronic equipment, or returned to the supplier for disposal.
 Federal Communication Commission Interference Statement This equipment has been tested and found to comply with the limits for a Class B digitaldevice, pursuant to Part 15 of the FCC Rules. These limits are designed to provide Thisreasonable protection against harmful interference in a residential installation.equipment generates, uses and can radiate radio frequency energy and, if not installed andused in accordance with the instructions, may cause harmful interference to radiocommunications. However, there is no guarantee that interference will not occur in aIf this equipment does cause harmful interference to radio or particular installation. television reception, which can be determined by turning the equipment off and on, the useris encouraged to try to correct the interference by one of the following measures:Reorient or relocate the receiving antenna.Increase the separation between the equipment and receiver.Connect the equipment into an outlet on a circuit different from that to which thereceiver is connected. Consult the dealer or an experienced radio/TV technician for help.FCC Caution: Any changes or modifications not expressly approved by the party responsible for compliance could void the user's authority to operate this equipment.This device complies with Part 15 of the FCC Rules. Operation is subject to the following two conditions: (1) This device may not cause harmful interference, and (2) this device mustaccept any interference received, including interference that may cause undesiredoperation. IMPORTANT NOTE: .This equipment complies with FCC radiation exposure limits set forth for an uncontrolled environment. This equipment should be installed and operated with minimum distance 20cm between the radiator & your body.  .

Navigation menu