ZIONCOM ELECTRONICS IP04103 Wireless Router User Manual X7DIP04103 rev1
ZIONCOM ELECTRONICS (SHENZHEN) LTD. Wireless Router X7DIP04103 rev1
UserManual.wiki
>
ZIONCOM ELECTRONICS
>
IP04103 User Manual
X7DIP04103_User manual_rev1
Navigation menu
Upload a User Manual
Namespaces
Wiki Guide
HTML
PDF
Info
Views
User Manual
Discussion / Help
Navigation


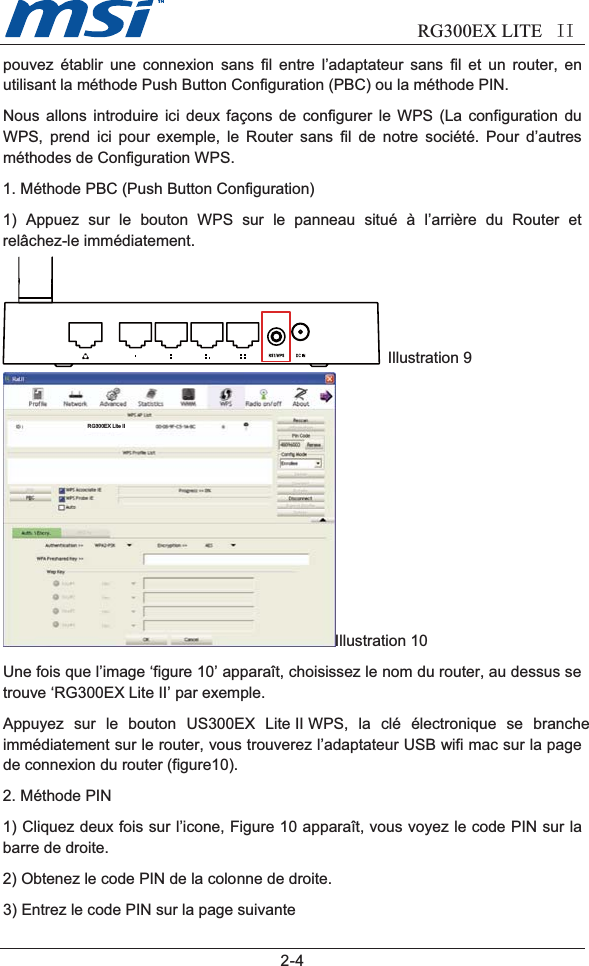
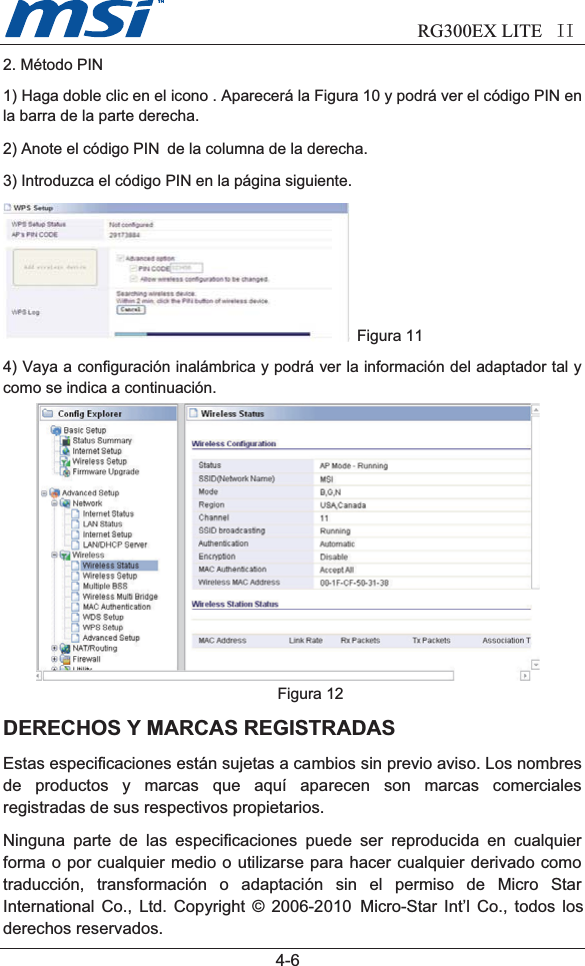
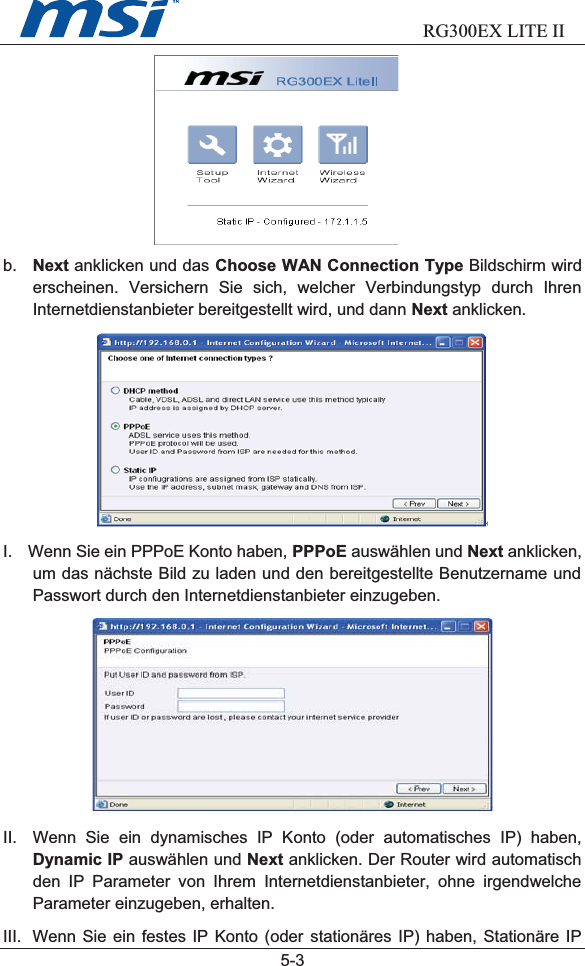
![RG300EX LITE II2-2¾ Voyant LED:allumé ¾ LED système: clignote ¾ LEDs de liaison / action (WAN&LAN): allumé ¾ LED WLAN : clignote 2. Connexion au routeur par mot de passe (login) Pour vous connecter au routeur, passez le protocole TCP/IP en mode “ Obtain an IP address automatically"[obtenir une adresse IP automatiquement ]sur votre/ vos PC. Si vous souhaitez avoir des instructions précises, veuillez vous référer à l’appendix B du guide-utilisateur figurant dans le CD d’accompagnement.a. Pour accéder à l'utilitaire de configuration, ouvrez un navigateur Web et tapez l'adresse par défaut http://192.168.0.1 dans le champ d'adresse du navigateur.b. En quelques secondes, un masque de saisie apparaît. Saisissez admin, tant pour le nom de l’utilisateur que le mot de passe, chacun en lettres minuscules. Validez ensuite par OK ou appuyez sur Enter.3. Connexion à l’internet a. Lorsque les nom de l’utilisateur et mot de passe sont exacts, il vous est possible de configurer le routeur en utilisant le navigateur web. Cliquez sur le lien Quick Setup [configuration rapide] à gauche du menu principal et l’écran Quick Setup apparaît.](https://usermanual.wiki/ZIONCOM-ELECTRONICS/IP04103/User-Guide-1272568-Page-15.png)
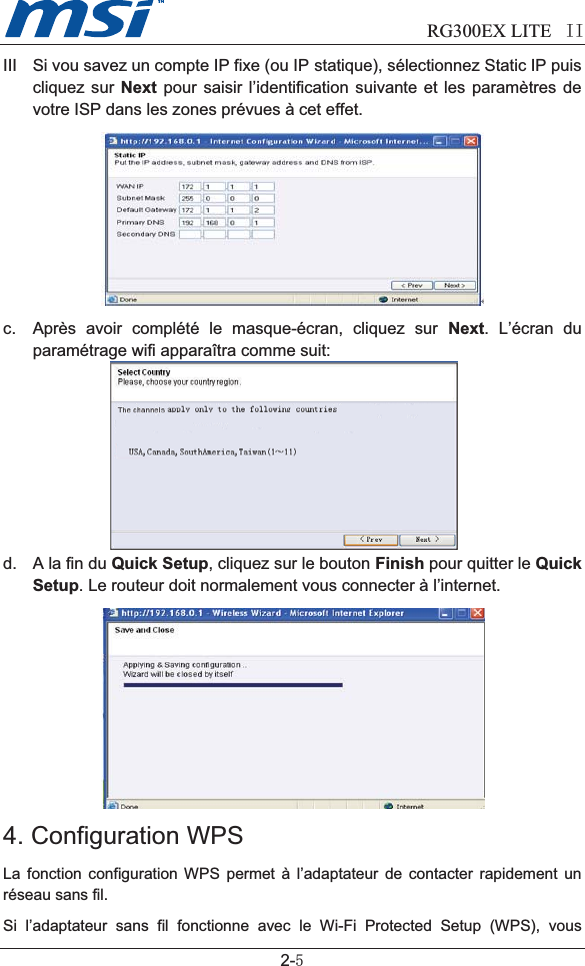
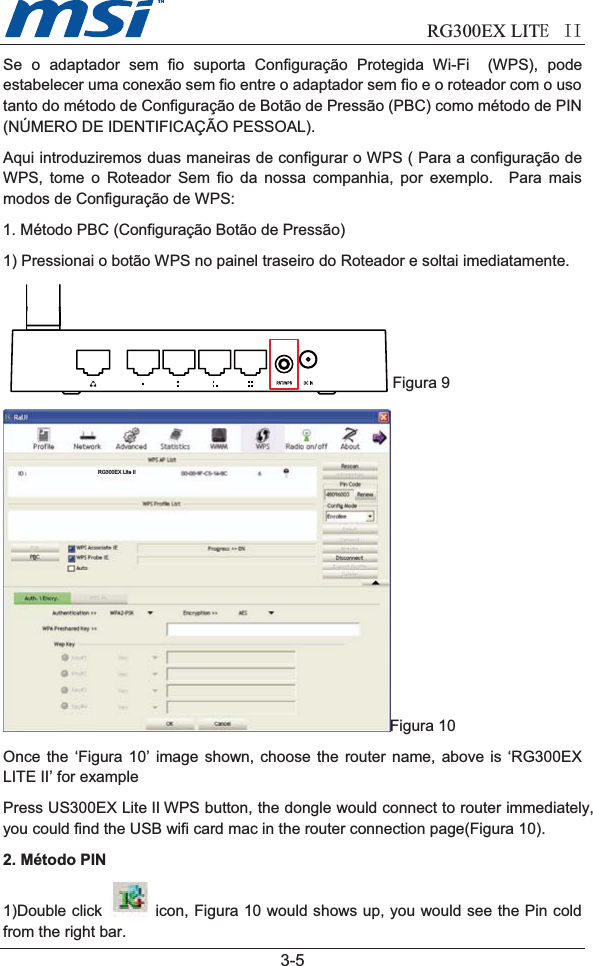
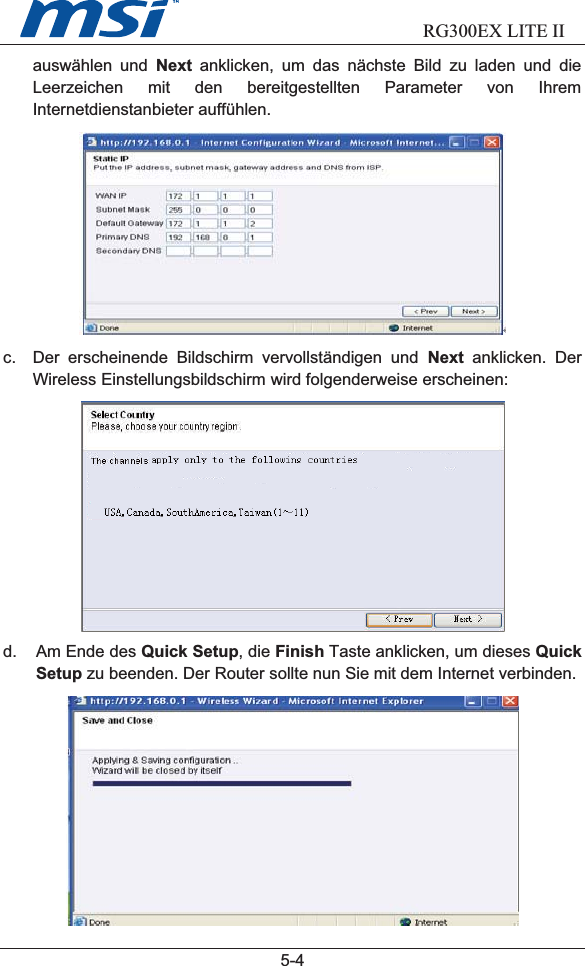
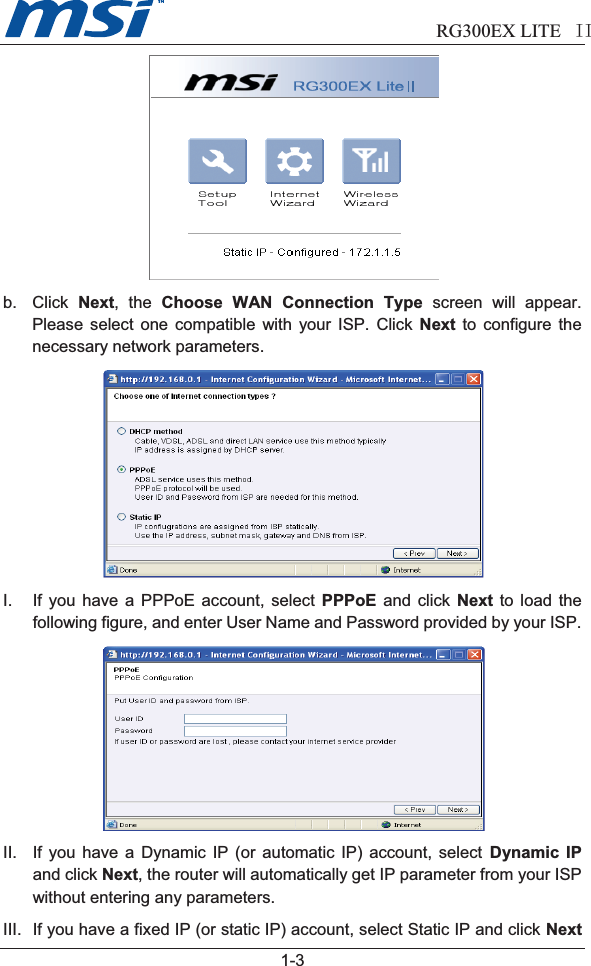
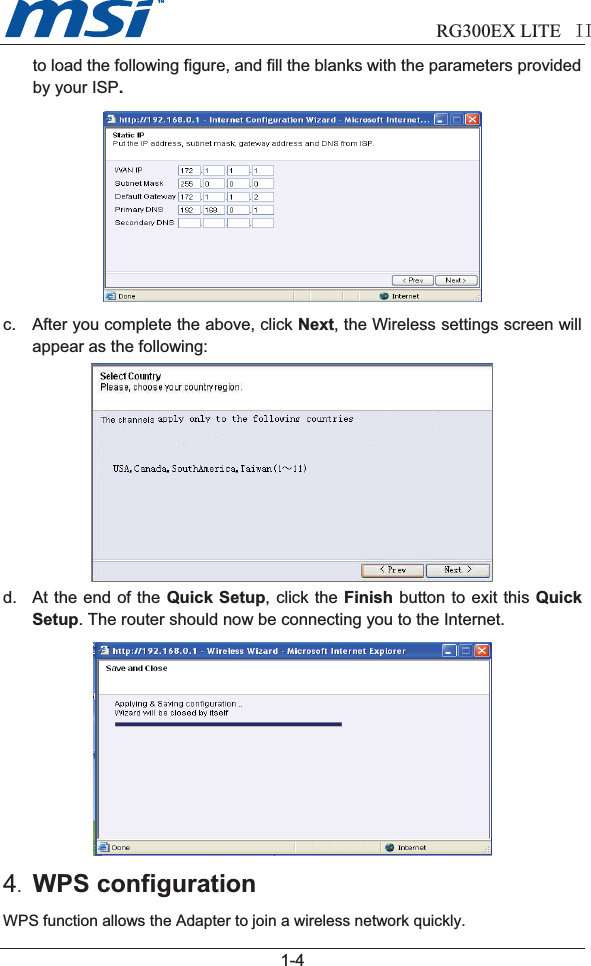
![RG300EX LITE II 2-3b. Cliquez sur Next, l’écran "Choose WAN Connection Type" [choisir une connexion WAN] apparaît. Vérifiez quel type de connexion a été défini par votre ISP, sélectionnez-le puis cliquez sur Next.I. Si vous avez un compte PPPoE, sélectionnez PPPoE puis cliquez surNext pour saisir l’identification suivante, le nom de l’utilisateur et le mot depasse figurant dans votre ISP. II. Si vous avez un compte IP dynamique (ou IP automatique), sélectionnezDynamic IP puis cliquez sur Next, le routeur récupérera alorsautomatiquement le paramètre IP de votre ISP sans qu’il soit nécessairede saisir des paramètres supplémentaires.](https://usermanual.wiki/ZIONCOM-ELECTRONICS/IP04103/User-Guide-1272568-Page-16.png)