ZONDA HOBBY TECHNOLOGIES ELECTRONIC HK0004 Transmitter User Manual 11
ZONDA HOBBY TECHNOLOGIES ELECTRONIC LIMITED Transmitter 11
UserManual.wiki
>
ZONDA HOBBY TECHNOLOGIES ELECTRONIC
>
HK0004 User Manual
Users manual
Navigation menu
Upload a User Manual
Namespaces
Wiki Guide
HTML
PDF
Info
Views
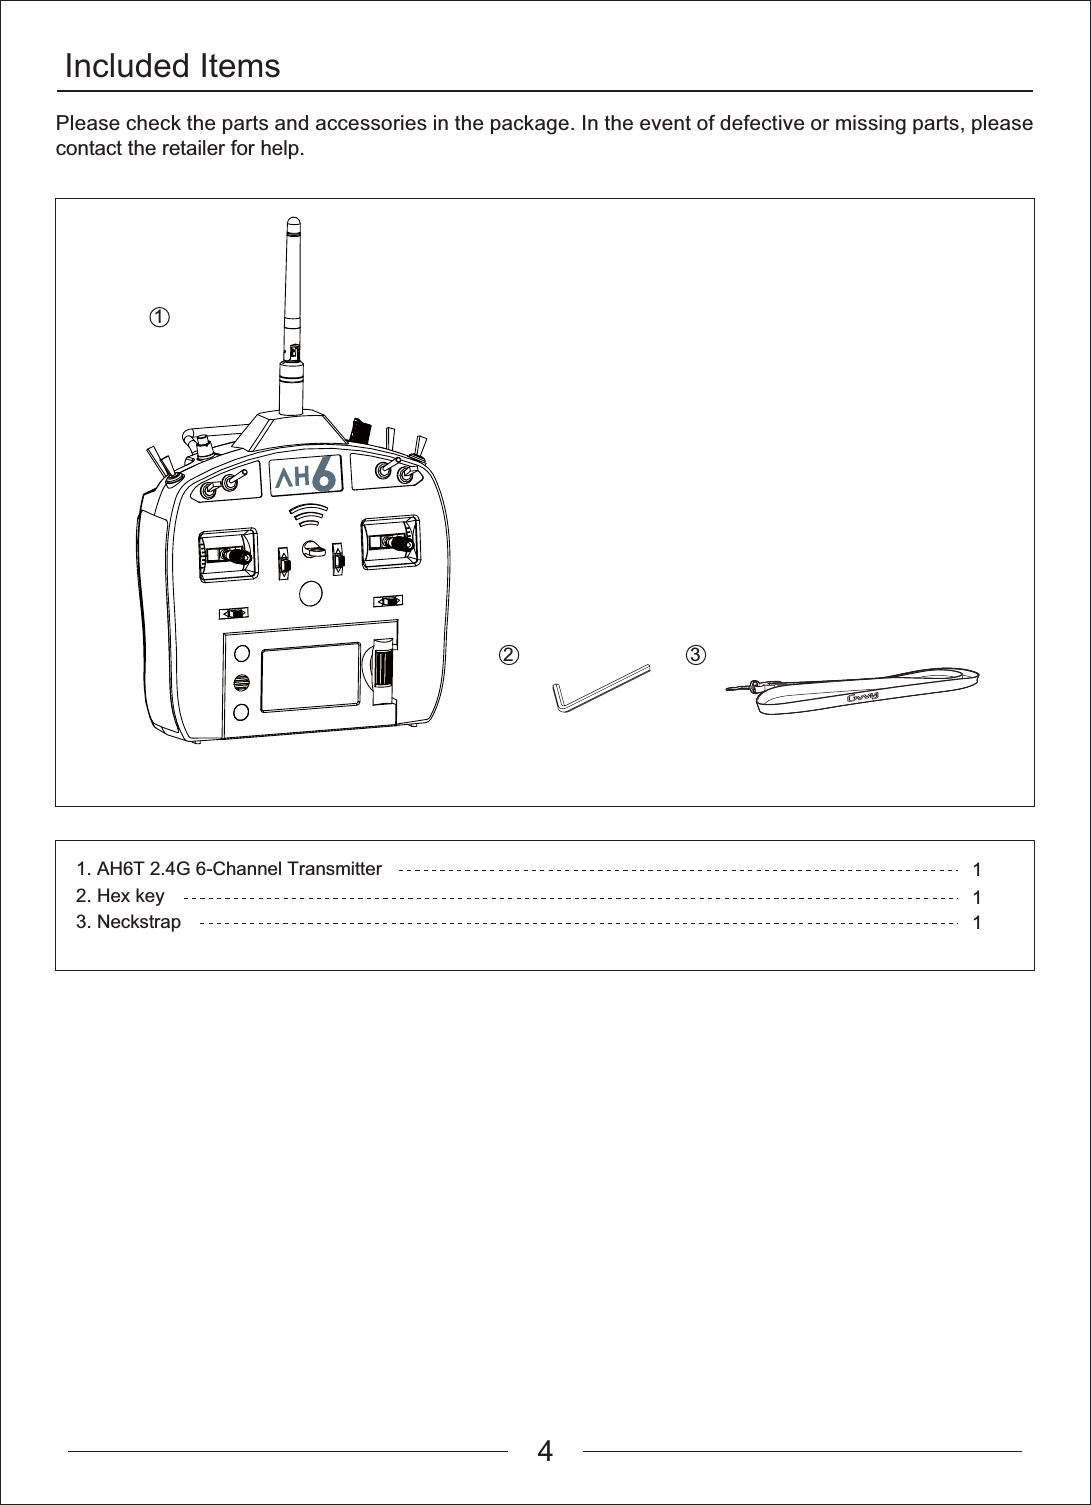
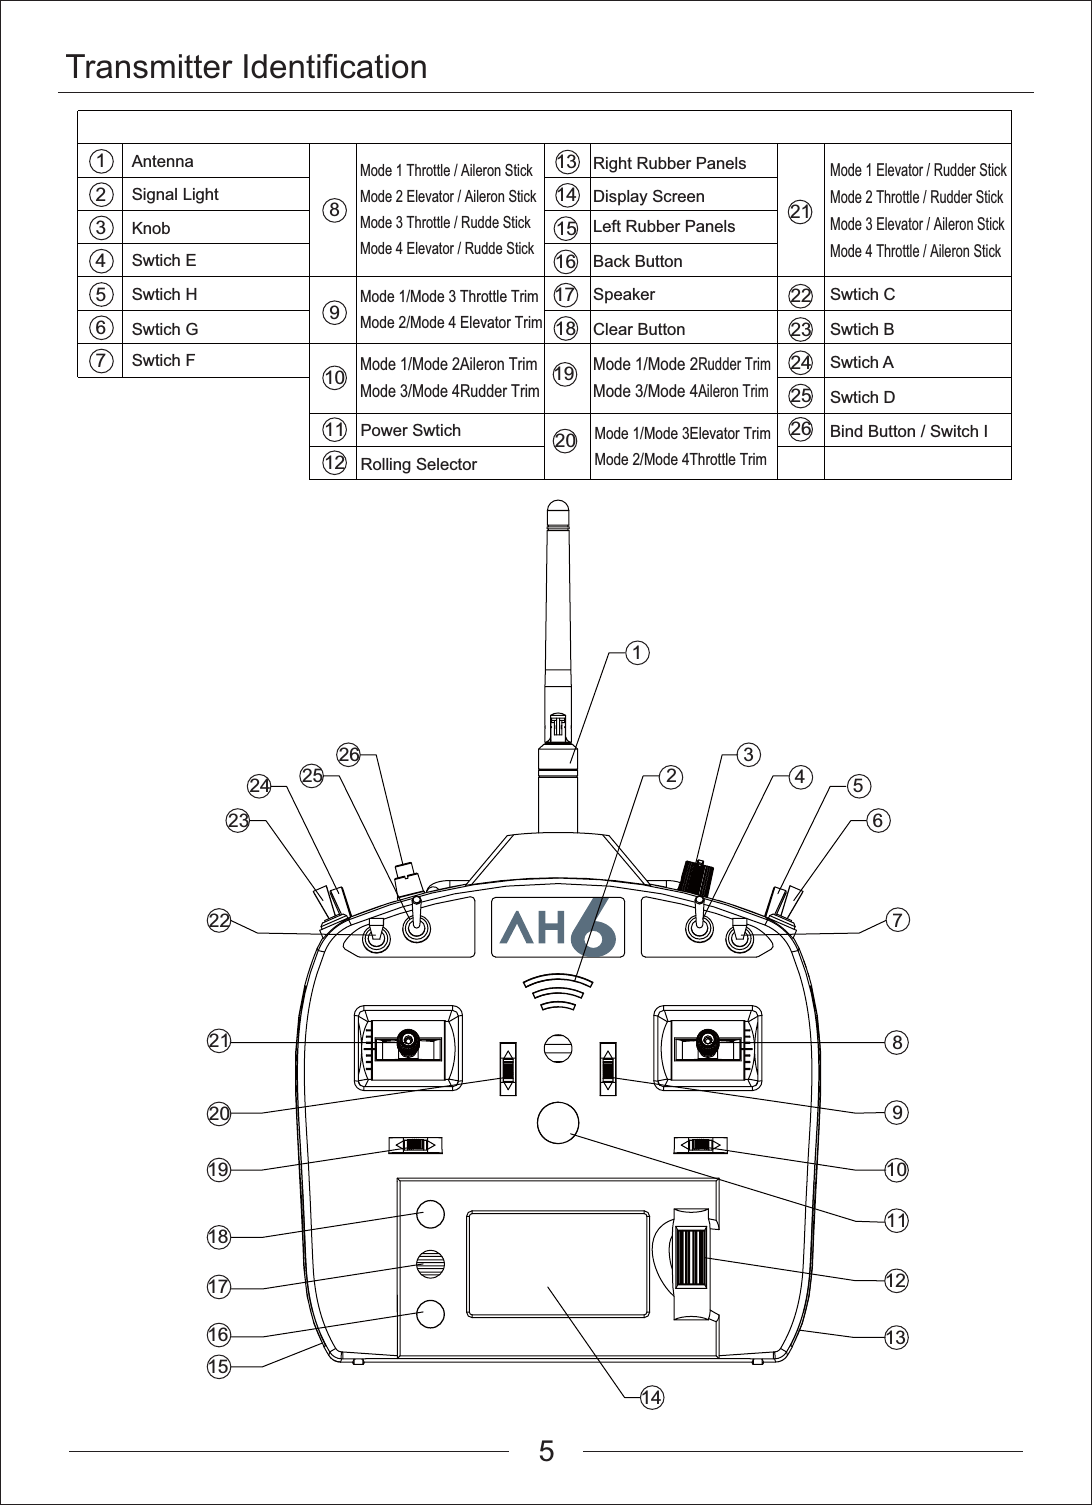
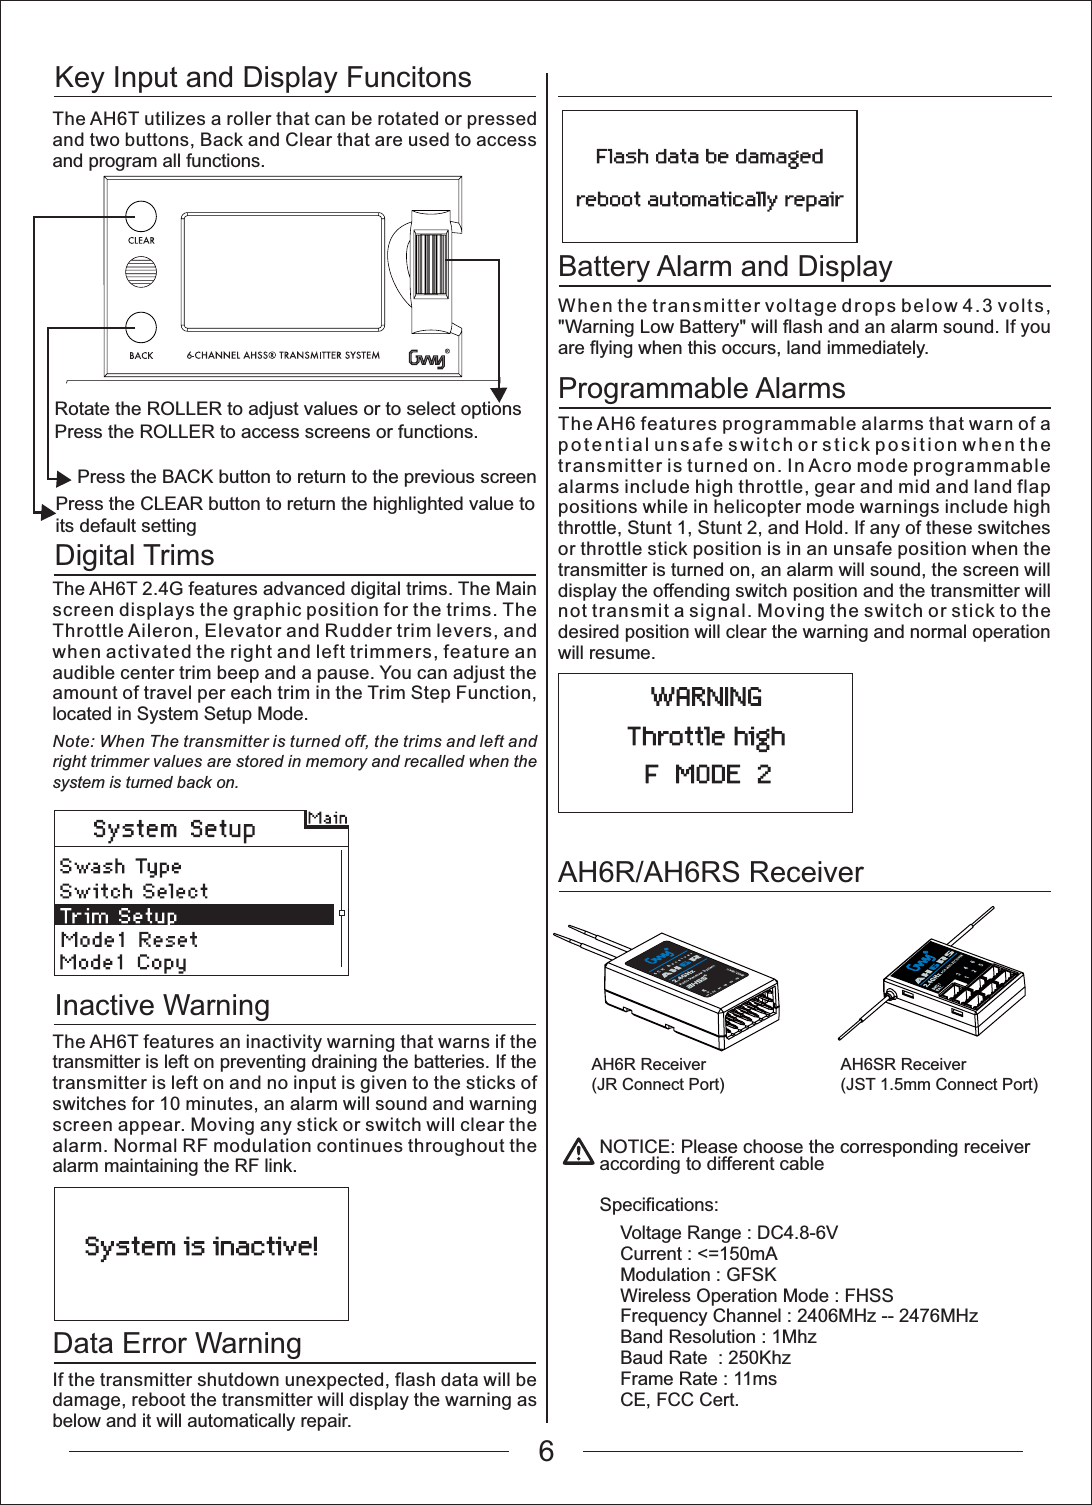
User Manual
Discussion / Help
Navigation
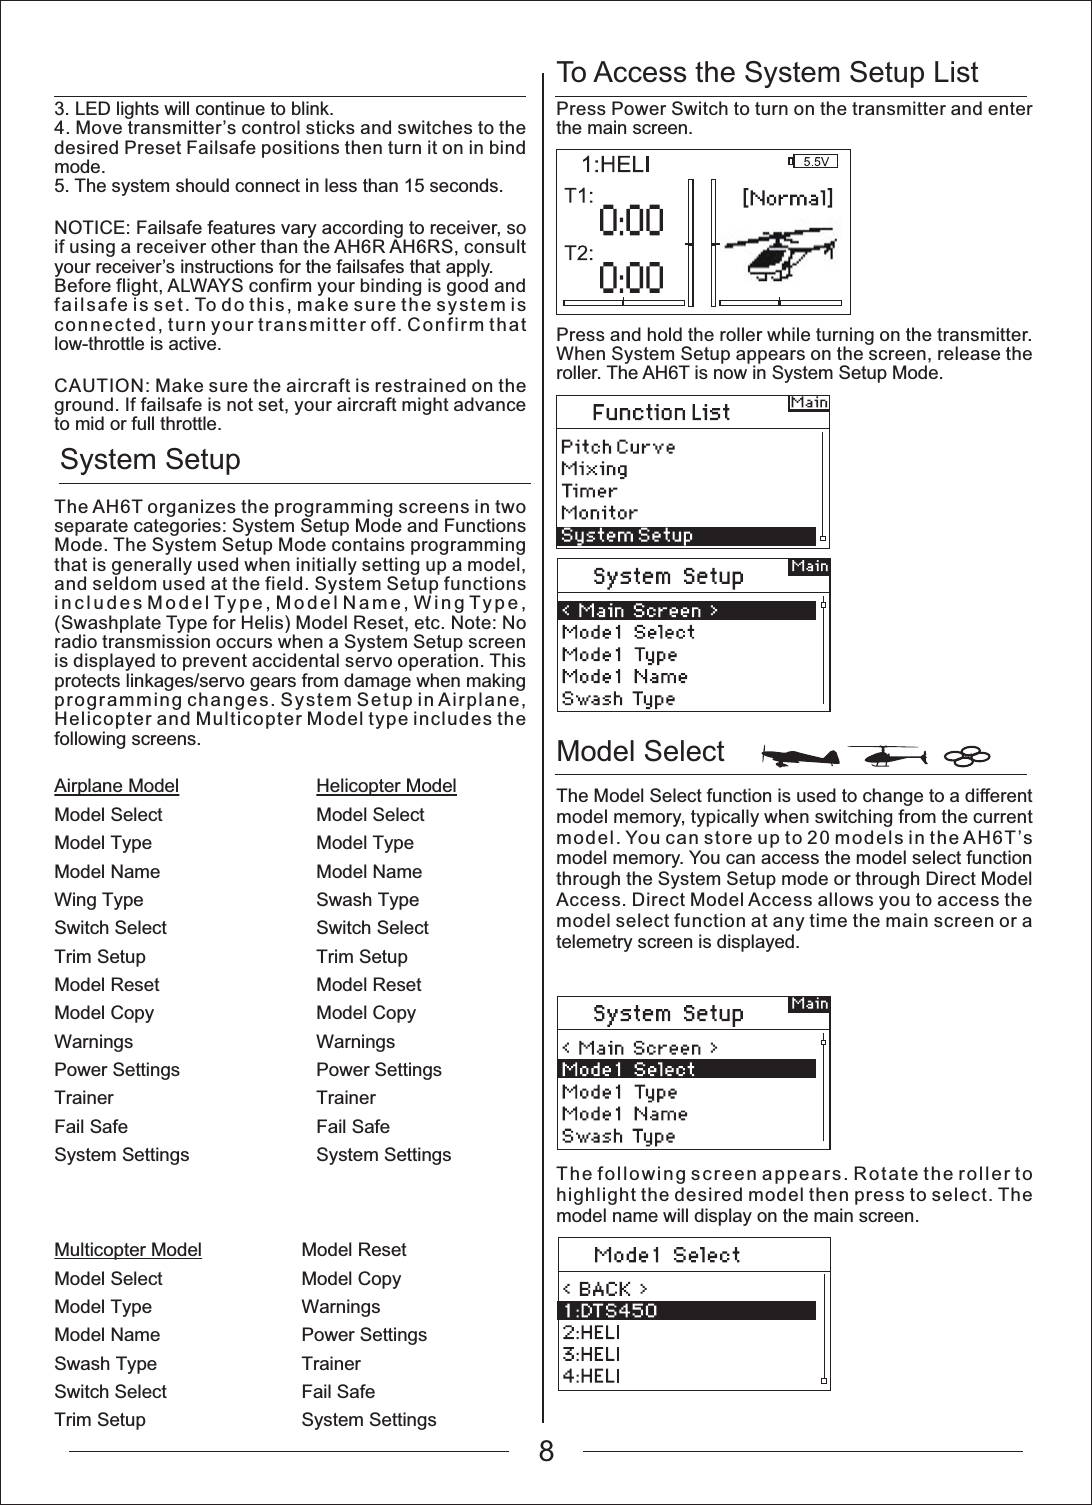


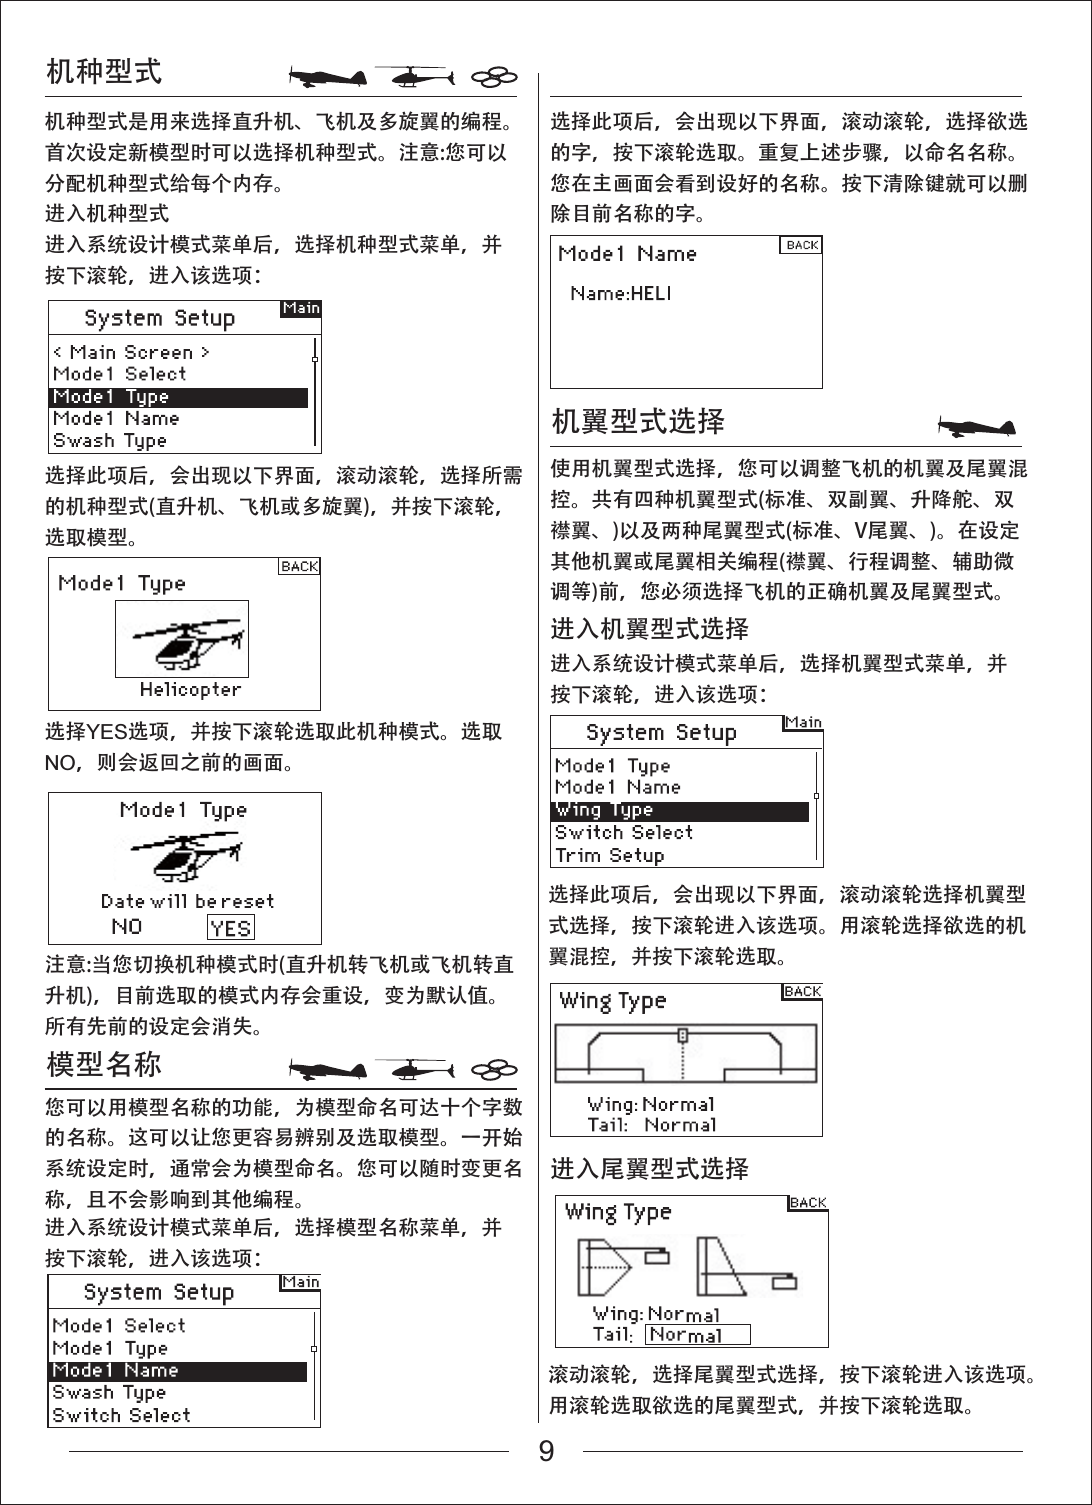
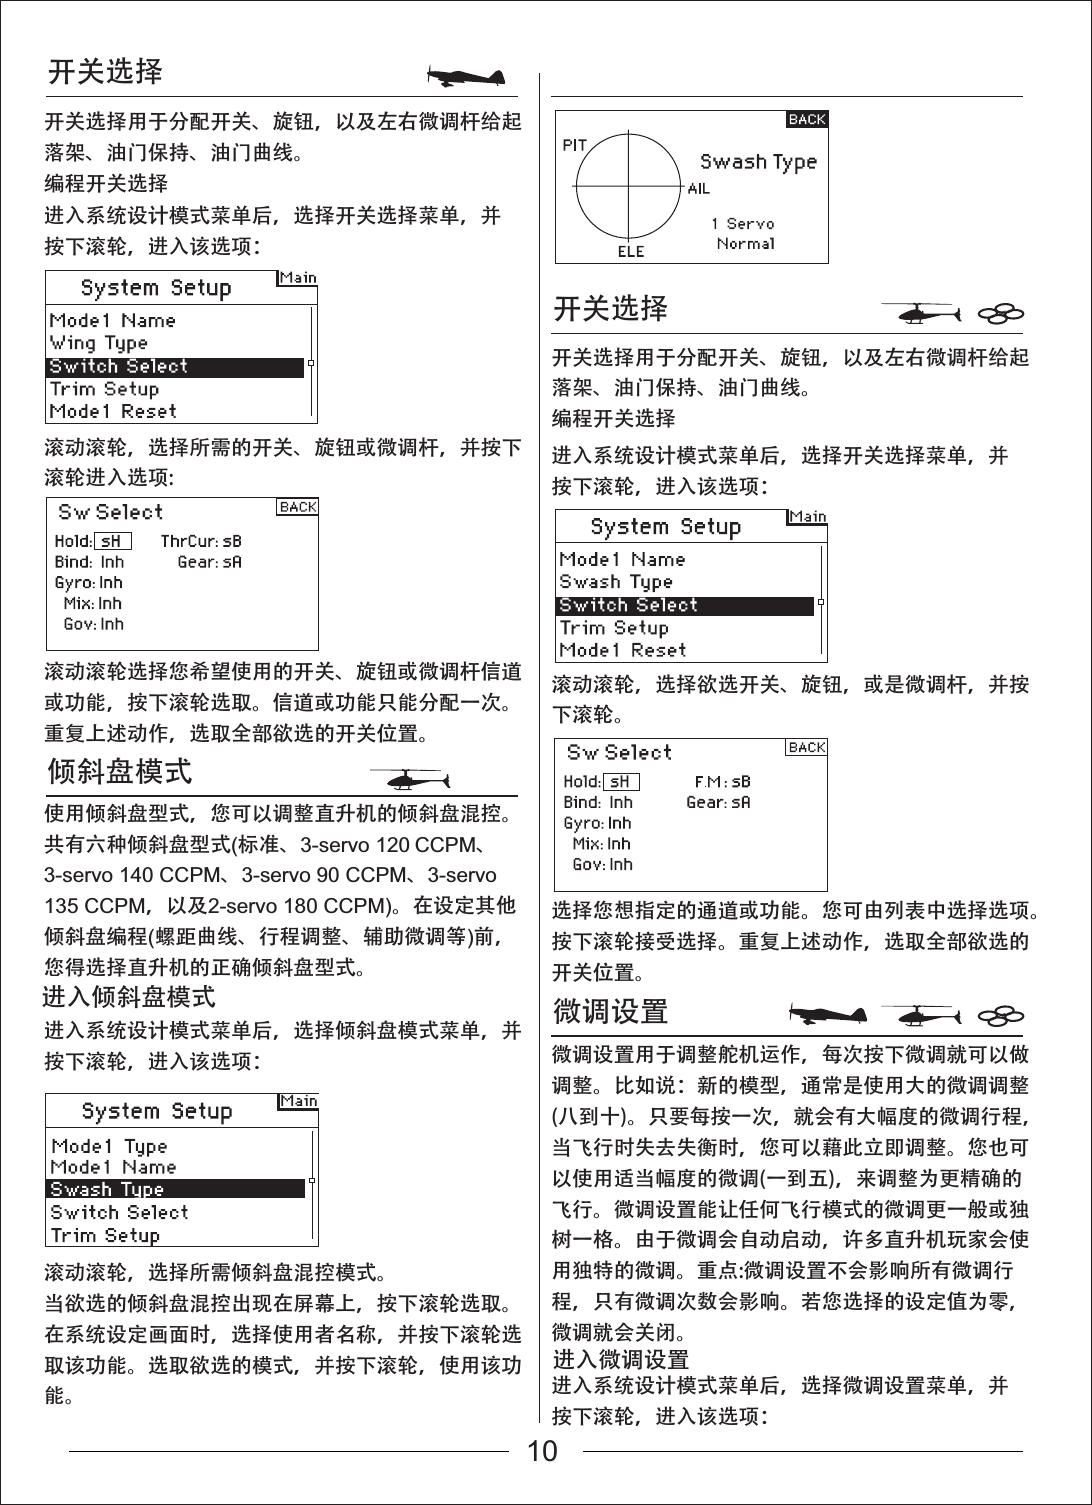
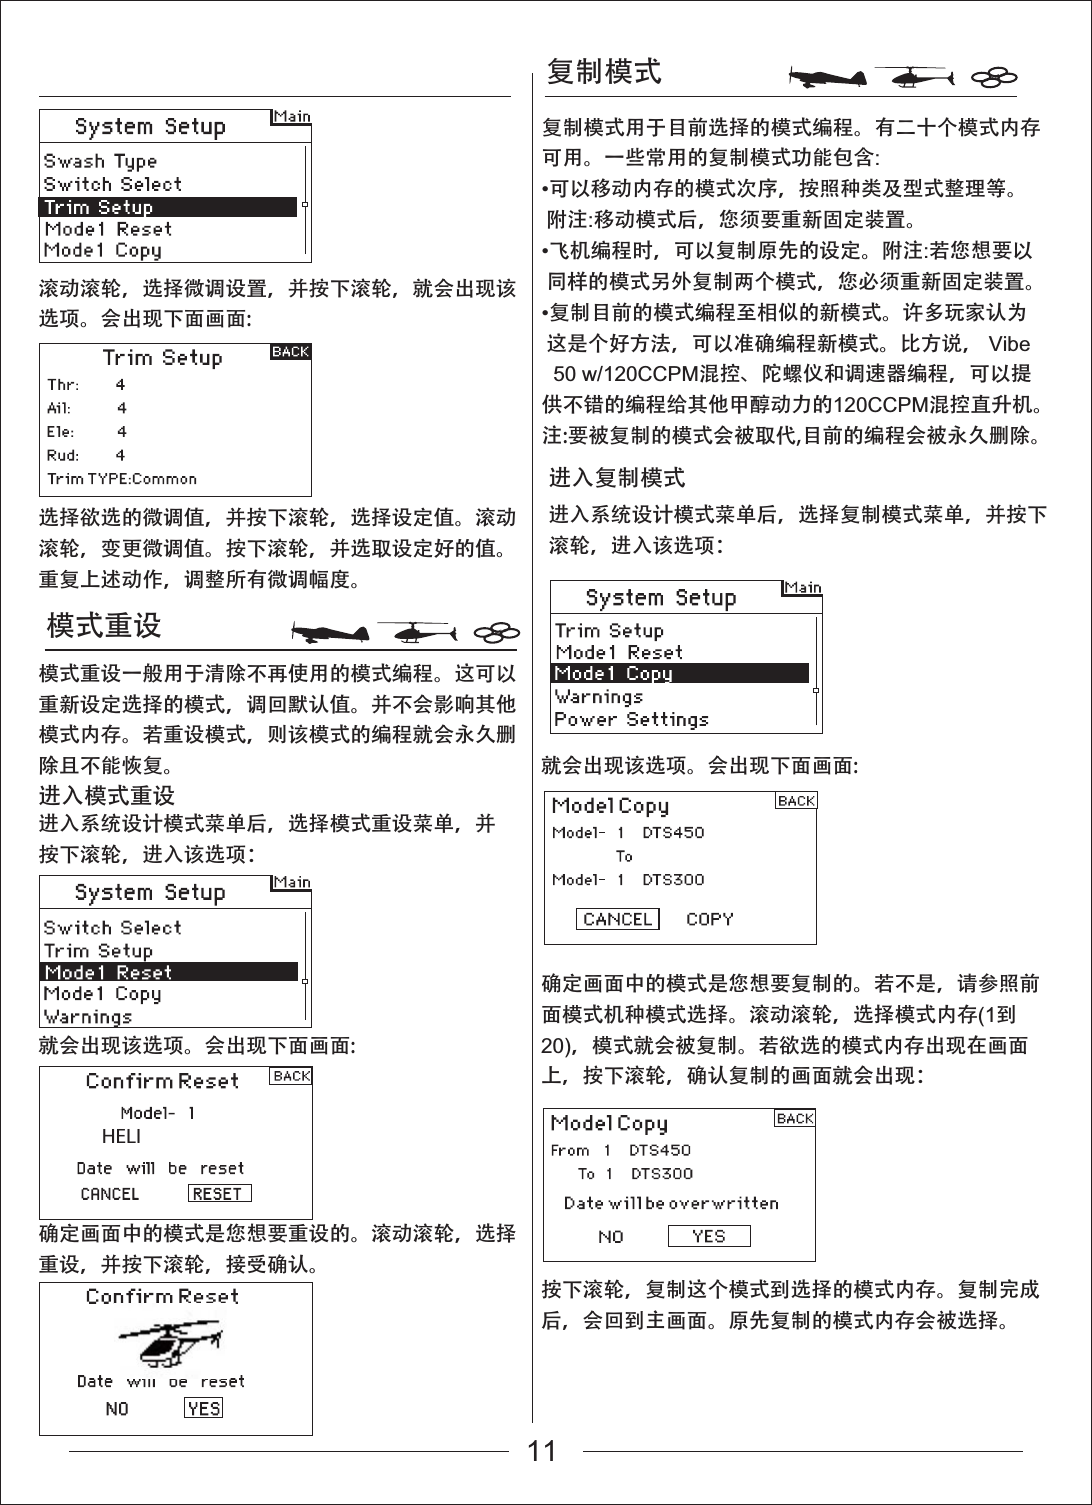
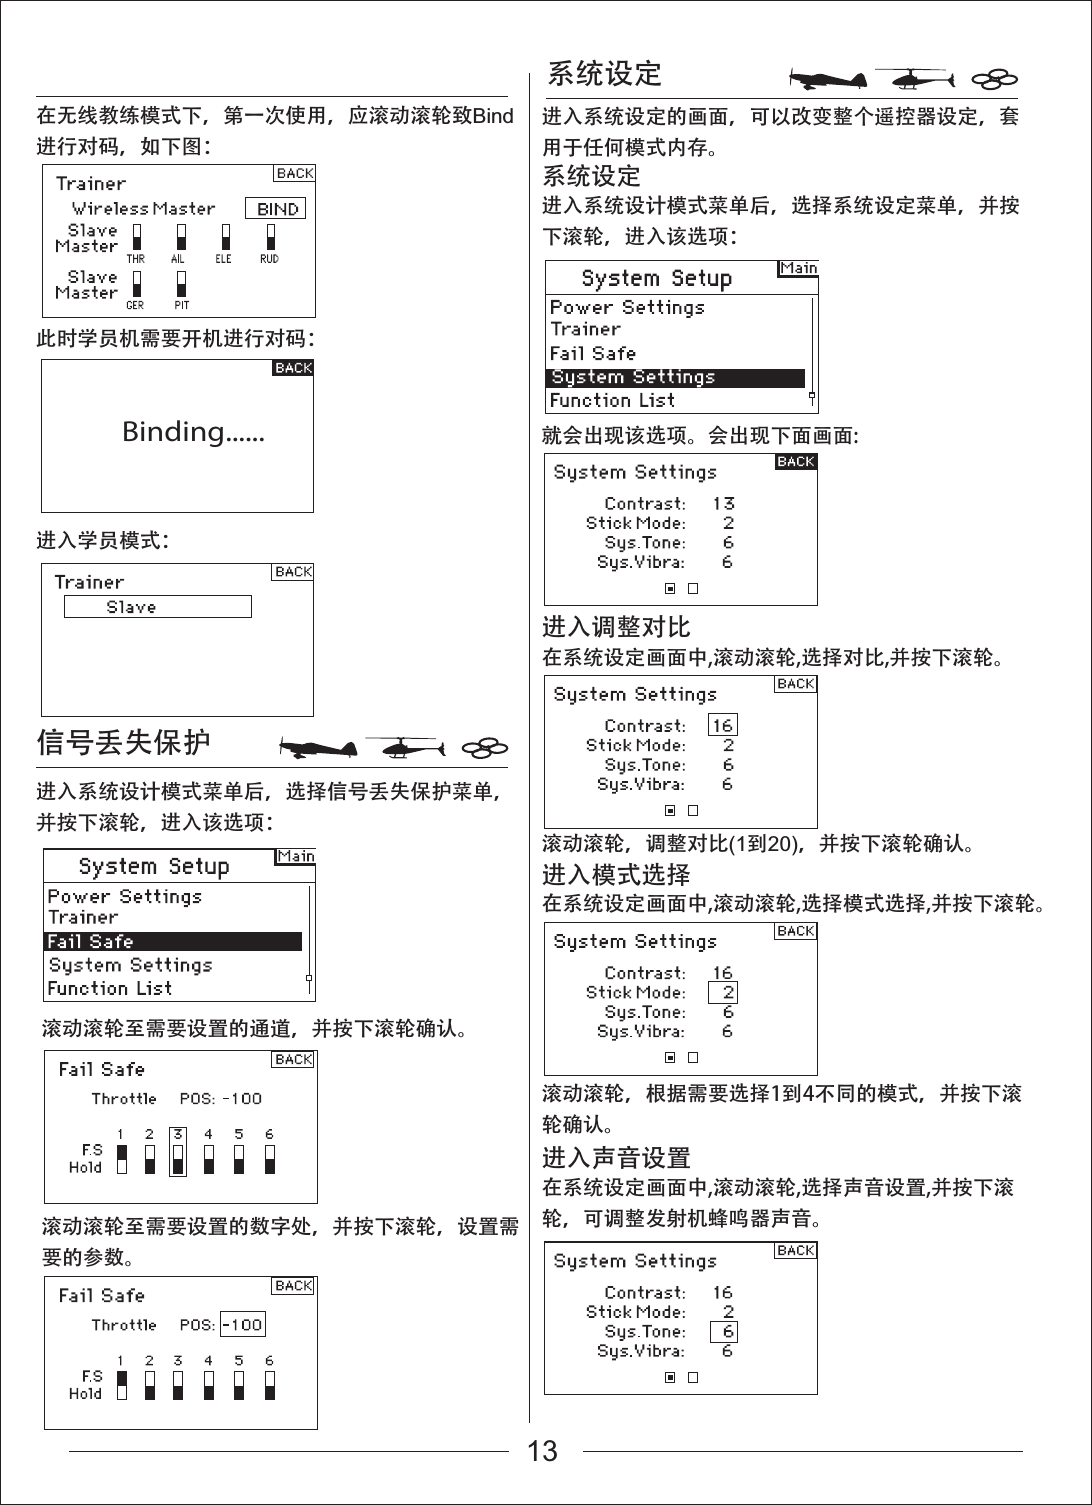
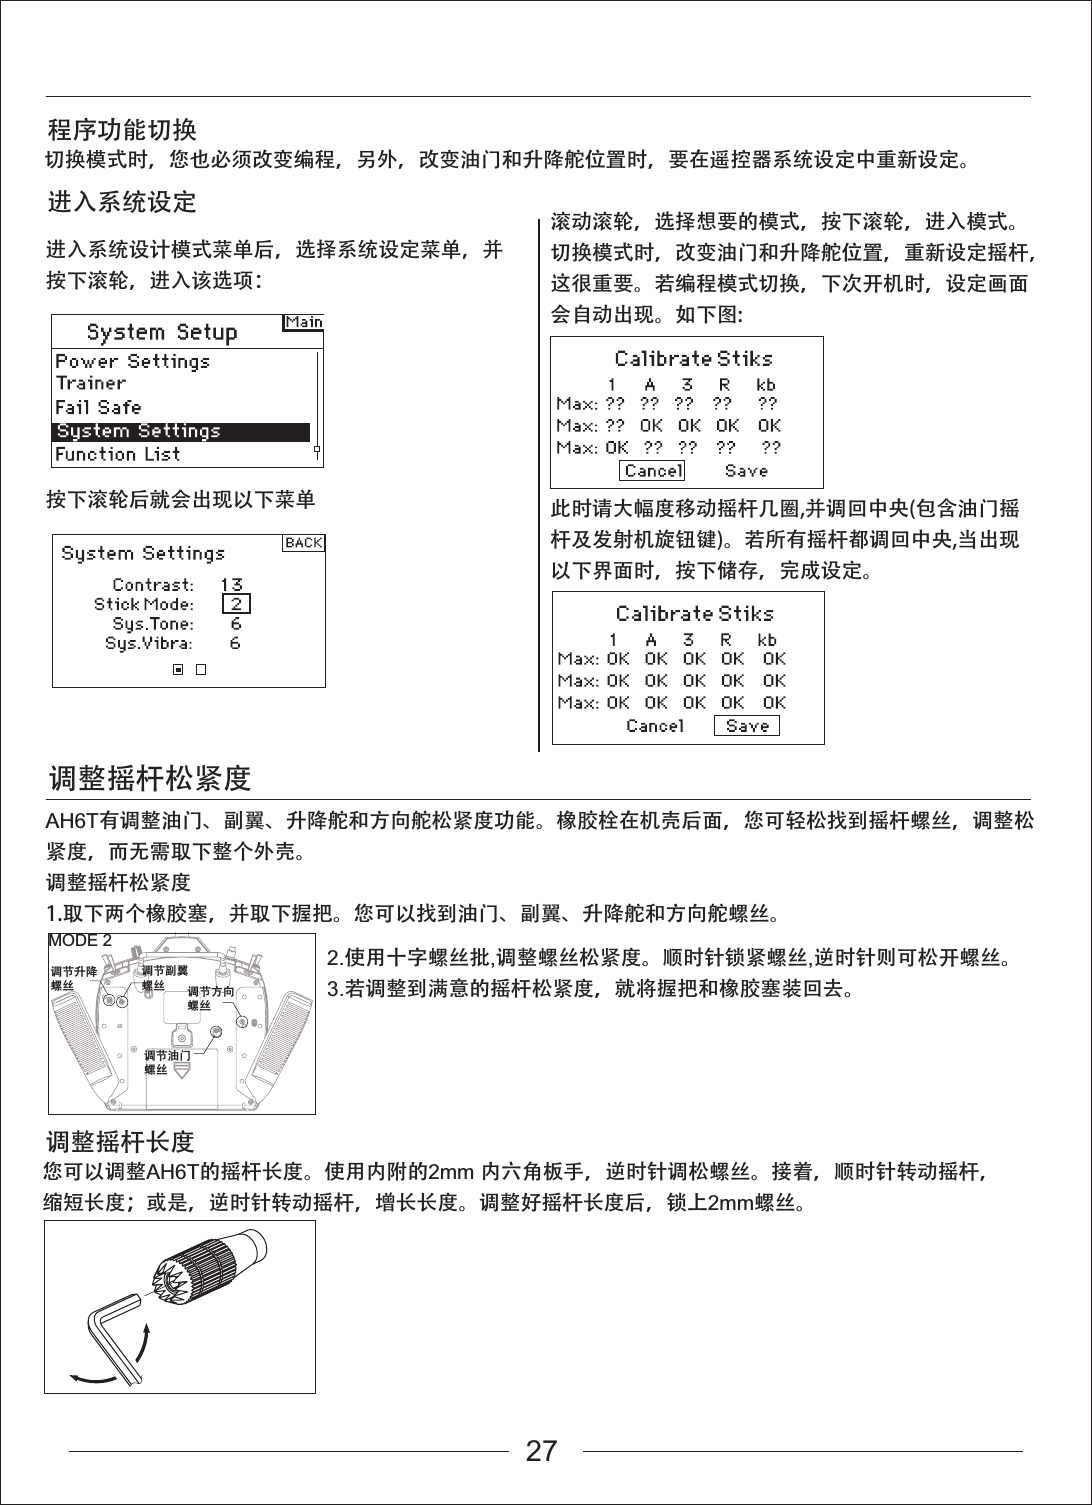
![进入系统设定菜单机种模式选择 系统设定[Normal]0:003.LED灯会持续闪烁。4.将遥控器的摇杆及按键设为理想的默认安全回复位置,并将之调成固定模式。5.系统链接时间应少于15秒。注意:任何接收机有所不同,安全回复也不大一样,若使用AH6R或AH6RS以外的接收机,请参照接收机手册。飞行前,随时确认接收机固定是否正确以及安全回复是否设定。您可以确认您的系统是否链接,关掉遥控器。确认是否为低油门位置。特别注意:请确认您的飞机是在地上。若安全回复没有设定,飞机的油门位置可能会变成中段或全满。AH6T有两个编程分类:系统设定模式及功能模式。系统设定模式的编程通常用于设定机种。其中包含:机种型式、模式名称、机翼型式选择、(直升机倾斜盘型式),机种重设等。注意:于系统设定模式时,会没有无线电传输,以防止舵机意外运作。在编程变换时,这可以让舵机起落架不会损害。飞机、直升机和多旋翼的系统设定模式如下:飞机系统设定模式Model SelectModel TypeModel NameWing TypeSwitch SelectTrim SetupModel ResetModel CopyWarningsPower SettingsTrainerFail SafeSystem Settings多旋翼系统设定模式Model SelectModel TypeModel NameSwash TypeSwitch SelectTrim SetupModel ResetModel CopyWarningsPower SettingsTrainerFail SafeSystem Settings直升机系统设定模式Model SelectModel TypeModel NameSwash TypeSwitch SelectTrim SetupModel ResetModel CopyWarningsPower SettingsTrainerFail SafeSystem Settings按一下发射机电源开关,打开发射机,进入发射机主界面。按一下滚轮键,进入功能模式菜单,通过滚轮键选择菜单“System Setup”,选择“YES”进入系统设计模式菜单。机种模式选择可用来改变不同模式记忆,从目前的模式变成另一个。AH6T可以储存高达20个模式记忆。进入系统设计模式菜单后,选择机种模式菜单,并按下滚轮,进入该选项:出现下面画面。滚动滚轮,以选择所需模式,并按下滚轮,选取模式。机种模式的名称会出现在主屏幕中。1:HELI 5.5VT1:0:00T2:8](https://usermanual.wiki/ZONDA-HOBBY-TECHNOLOGIES-ELECTRONIC/HK0004/User-Guide-3120019-Page-35.png)